30/10/2022
Celeste(Hanwen) Hu
Professor Gottfried
Project: Back-to-future Music Box
1. Prework:
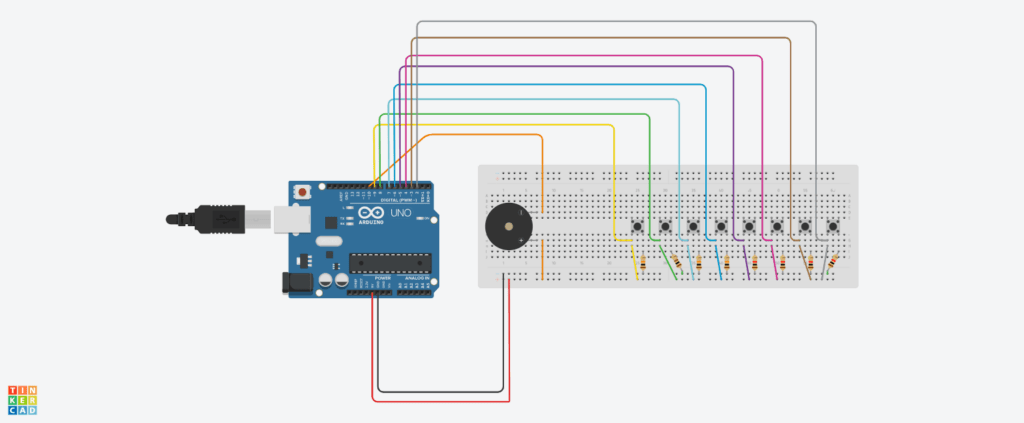
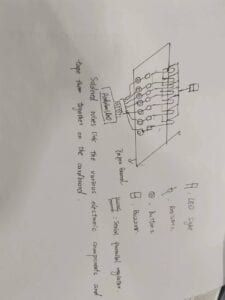
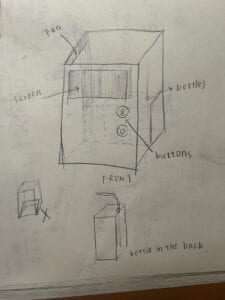
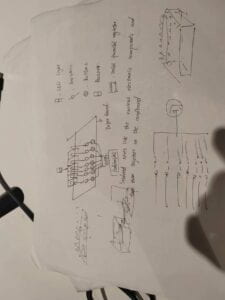
Based on the related procedures of Tonemelody and LED control learned before, our group came up with the idea of making a music box. Users can play the music they want by pressing the buttons, and each button corresponds to a tone and LED light. When a key is pressed, the corresponding tone and LED light will be triggered together. We hope to allow users to perform their favorite performances in this form. In that case, I writed the code and drawed the draft.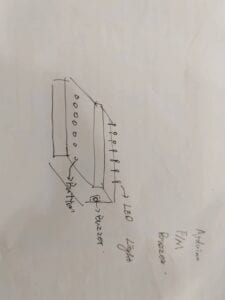
int tonePin = 6; //用6号接口

//控制七个LED灯的排列组合来模拟七个音阶
byte LED1s = 0b11111110;
byte LED2s = 0b11111101;
byte LED3s = 0b11111011;
byte LED4s = 0b11110111;
byte LED5s = 0b11101111;
byte LED6s = 0b11011111;
byte LED7s = 0b10111111;
byte LED0s = 0b11111111;

void setup() {
Serial.begin(9600);
pinMode(tonePin, OUTPUT);
pinMode(latchPin,OUTPUT);
pinMode(dataPin,OUTPUT);
pinMode(clockPin,OUTPUT);
length2 = sizeof(tune2)/sizeof(tune2[0]); //计算长度
}

void Detect_button()
{
analogVal = analogRead(A0); //read the analog voltag on pin A0

if (analogVal < 500)
button = 7;

if (analogVal < 450)
button = 6;

if (analogVal < 400)
button = 5;

if (analogVal < 300)
button = 4;

if (analogVal < 250)
button = 3;

if (analogVal < 150)
button = 2;

if (analogVal < 100)
button = 1;

if (analogVal > 1000)
button = 0;

void loop() {

for (int x = 0; x<length2; x++){
tone(tonePin, tune2[x]);
delay(300*durt2[x]);

digitalWrite(latchPin, LOW);
shiftOut(dataPin,clockPin,LSBFIRST,LED0s);
digitalWrite(latchPin,HIGH);

if(tune2[x] == NTE0){
digitalWrite(latchPin, LOW);
shiftOut(dataPin,clockPin,LSBFIRST,LED0s);
digitalWrite(latchPin,HIGH);
Serial.println(0);
delay(200*durt2[x]);
}
if(tune2[x] == NTE1){
digitalWrite(latchPin, LOW);
shiftOut(dataPin,clockPin,LSBFIRST,LED1s);
digitalWrite(latchPin,HIGH);
Serial.println(1);
delay(200*durt2[x]);
}
if(|tune2[x] == NTE2){
digitalWrite(latchPin, LOW);
shiftOut(dataPin,clockPin,LSBFIRST,LED2s);
digitalWrite(latchPin,HIGH);
Serial.println(2);
delay(200*durt2[x]);
}
if(tune2[x] == NTE3){
digitalWrite(latchPin, LOW);
shiftOut(dataPin,clockPin,LSBFIRST,LED3s);
digitalWrite(latchPin,HIGH);
Serial.println(3);
delay(200*durt2[x]);
}
if(tune2[x] == NTE4){
digitalWrite(latchPin, LOW);
shiftOut(dataPin,clockPin,LSBFIRST,LED4s);
digitalWrite(latchPin,HIGH);
Serial.println(4);
delay(200*durt2[x]);
}
if(tune2[x] == NTE5){
digitalWrite(latchPin, LOW);
shiftOut(dataPin,clockPin,LSBFIRST,LED5s);
digitalWrite(latchPin,HIGH);
Serial.println(5);
delay(200*durt2[x]);
}
if(tune2[x] == NTE6){
digitalWrite(latchPin, LOW);
shiftOut(dataPin,clockPin,LSBFIRST,LED6s);
digitalWrite(latchPin,HIGH);
Serial.println(6);
delay(200*durt2[x]);
}
if(tune2[x] == NTE7){
digitalWrite(latchPin, LOW);
shiftOut(dataPin,clockPin,LSBFIRST,LED7s);
digitalWrite(latchPin,HIGH);
Serial.println(7);
delay(200*durt2[x]);
}

noTone(tonePin);
}
delay (2000);
}
2. CONCEPTION AND DESIGN:
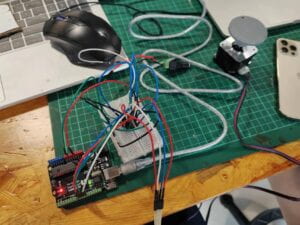
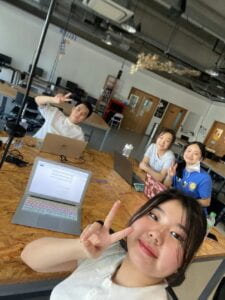
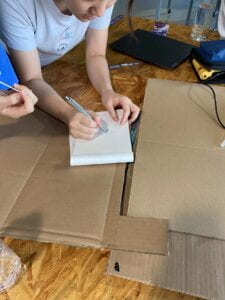
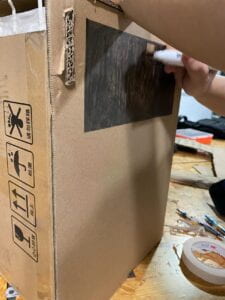
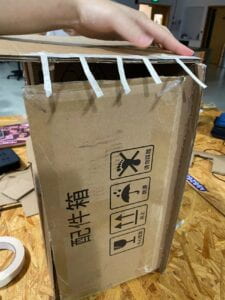
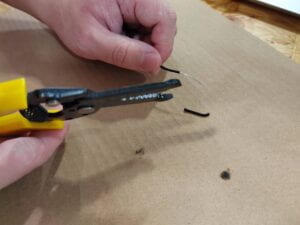
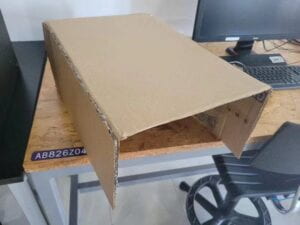
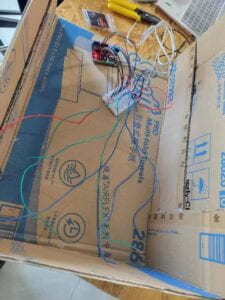
After sketching, we got to work, Frida made the rough shell out of cardboard while I was programming, and then we built the circuit together. After that, we punched two rows of holes on the top of the shell, one for the buttons and one for the LED lights, then we soldered the buttons and wires, and then installed the buzzer on the outside. At this time, we thought that the buzzer on the outside could give users the most intuitive feeling. At the same time, we also considered using Motor to control the movement of the LED lights, but due to the complicated operation and the suspicion of superfluous, we finally gave up this idea. After few hour’s work, we basically finish out build.
3.First try in user test:
During the user test, our project had a serious problem – some solder legs were disconnected from the buttons while others were shorted during the second half of the test. The result is that some buttons are completely disabled, while other tones and LED lights are always activated. After listening to our thoughts and questions, the professor reminded us that the root of the problem was that the button welding we used was not reliable, and another kind of button could be used. Afterwards, it was suggested that we communicate with another group doing music-themed projects.
4.Our second chance:
In addition, the professor alo suggested that we add some other functions, and improve the existing functions – such as labeling the corresponding notes on the seven keys, so as not to cause confusion. This user test also gave us a lot of inspiration. We decided to redo as suggested, despite not knowing if there would be enough time left. First of all, it is still up to me to program, and Frida is responsible for the main body decoration and production. I thought of a tutorial about the Arduino music box that I had read before, so I decided to add a code that can play music randomly, controlled by the new eighth button, Frida Supported the idea and thought it would be interesting. And in the end we decided to use a bluetooth speaker to amplify our music and move the part from the outside to the inside of the main body.
Here is the class I learned on the internet:
https://gist.github.com/vMakerTaiwan/ef60cba1ffd90623b19224edc21ef95f
Here is my new code and our new work:
void setup() {

  Serial.begin(9600);

  pinMode(2, INPUT);  //do
  pinMode(3, INPUT);  //re
  pinMode(4, INPUT);  //mi
  pinMode(5, INPUT);  //fa
  pinMode(6, INPUT);  //sol
  pinMode(7, INPUT);  //la
  pinMode(8, INPUT);  //si
  pinMode(9, INPUT);
  pinMode(10, OUTPUT);

 randomSeed(analogRead(A0));

}

void loop() {

  noTone(10);

  if (digitalRead(2) == HIGH) tone(10, 523);
  else if (digitalRead(3) == HIGH) tone(10, 587);
  else if (digitalRead(4) == HIGH) tone(10, 659);
  else if (digitalRead(5) == HIGH) tone(10, 698);
  else if (digitalRead(6) == HIGH) tone(10, 784);
  else if (digitalRead(7) == HIGH) tone(10, 880);
  else if (digitalRead(8) == HIGH) tone(10, 988);

  delay(100);

  if (digitalRead(9) == HIGH) {
    int i = random(0, 9);
    Serial.println(i);


    if (i == 1) {
      littleStar();
    } else if (i == 2) {
      lonely();
    } else if (i == 3) {
      DoReMiFaSoLaTi();
    } else if (i == 4) {
      TheSantifiedMind();
    } else if (i == 5) {
      SuperMario();
    } else if (i == 6) {
      DreamAria();
    } else if (i == 7) {
      TruE();
    } else if (i == 8) {
      RickRoll();
    }
  }
}

void play(char melody, float duration) {

  char names[] = { 'd', 'r', 'm', 'f', 's', 'l', 'e', '1', '2', '3', '4',
                   '5', '6', '7', 'D', 'R', 'M', 'F', 'S', 'L', 'E' };

  int tones[] = { 262, 294, 330, 349, 392, 440, 494, 524, 588, 660, 698,
                  784, 880, 988, 1048, 1176, 1320, 1396, 1568, 1760, 1976 };

  for (int q = 0; q < 21; q++) {
    if (names[q] == melody) {
      tone(10, tones[q]);
      delay(duration);
      noTone(10);
    }
  }
}

void littleStar() {
  char melody[] = "ddssllsffmmrrdssffmmrssffmmrddssllsffmmrrd ";
  float beats[] = { 1, 1, 1, 1, 1, 1, 2, 1, 1, 1, 1, 1, 1, 2, 1, 1, 1, 1, 1, 1, 2, 1, 1, 1, 1, 1, 1, 2, 1, 1, 1, 1, 1, 1, 2, 1, 1, 1, 1, 1, 1, 2, 4 };
  dismantle(melody, beats, sizeof(melody), 300);
}

void lonely() {
  char melody[] = "5DRRMD7637DDR7652677DD3456567 ";
  float beats[] = { 0.5, 0.5, 0.5, 0.5, 0.5, 0.5, 0.25, 1, 0.25, 0.25, 0.5, 0.75, 0.5, 0.5, 0.25, 1, 0.25, 0.25, 0.5, 0.75, 0.5, 0.5, 0.5, 1, 0.5, 0.5, 1.5, 0.25, 0.75, 4 };

  dismantle(melody, beats, sizeof(melody), 600);
}

void DoReMiFaSoLaTi() {
  char melody[] = "drmdmdmrmfffmrfmfsmsmsfsllsflsdrmfsllrmfsleemfsle1eelfes1smr";
  float beats[] = {
    1, 0.5, 0.5, 0.5, 0.5, 1, 2, 1, 0.5, 0.5, 0.5, 0.5, 0.5, 1, 1, 0.5, 1, 0.5, 1, 1, 1, 1, 0.5, 0.5, 0.5, 0.5,
    0.25, 1, 1, 0.5, 0.25, 0.5, 0.5, 0.25, 1, 1, 0.5, 0.25, 0.5, 0.5, 0.25, 1, 1, 0.5, 0.25, 0.5, 0.5, 0.25, 1, 0.5, 0.5, 1, 1, 1, 1, 1, 1, 1, 1, 4
  };
  dismantle(melody, beats, sizeof(melody), 400);
}

void TheSantifiedMind() {
  char melody[] = "drrr rmmm drrr21drrr rmmm rmmm sfff drrr rmmm rmmm sfff";
  float beats[] = {
    1, 1, 1, 1, 1, 1, 1, 1, 1, 1, 1, 1, 1, 1, 0.5, 0.5, 1, 1, 1, 1, 1, 1, 1, 1, 1, 1, 1, 1, 1, 1, 1, 1, 1, 1, 1, 1, 1, 1, 1, 1, 1, 1, 1, 1, 1, 1, 1, 1, 1, 1, 1, 1, 1, 1, 1, 1
  };

  dismantle(melody, beats, sizeof(melody), 400);
}
void SuperMario() {
  char melody[] = "333135s1smlells35645312e";
  float beats[] = {
    0.5, 1, 0.5, 0.5, 0.5, 0.5, 0.5, 1, 1, 0.5, 0.5, 0.5, 0.5, 0.5, 0.25, 1, 0.5, 0.5, 0.5, 0.5, 0.25, 0.25, 0.25, 0.5, 1, 4
  };
  dismantle(melody, beats, sizeof(melody), 400);
}
void DreamAria() {
  char melody[] = "145677656545244533212l";
  float beats[] = {
    1, 2, 1, 1, 2, 2, 1, 1, 2, 1, 1, 1, 2, 2, 2, 1, 2, 1, 1, 1, 2, 1, 4
  };
  dismantle(melody, beats, sizeof(melody), 400);
}

void TruE() {
  char melody[] = "321elslls13233s43212232113431s12122l23233";
  float beats[] = { 2, 2, 0.5, 0.5, 0.5, 0.5, 0.5, 0.5, 0.5, 0.5, 0.5, 0.5, 0.5, 0.25, 0.25, 0.5, 0.5, 0.5, 0.5, 0.5, 1, 0.5, 0.5, 0.5, 2, 2, 0.5, 0.5, 1, 0.5, 0.5, 0.5, 0.5, 0.5, 1, 0.5, 0.5, 0.5, 0.5, 0.5, 2, 4 };
  dismantle(melody, beats, sizeof(melody), 400);
}
void RickRoll() {
  char melody[] = "12s23543112sssssl1l112s23543112ss";
  float beats[] = { 2, 1, 1, 2, 1, 0.25, 0.25, 0.25, 0.25, 1, 1, 1, 2, 0.5, 0.25, 0.25, 0.25, 0.25, 0.25, 0.25, 1, 1, 1, 1, 1, 0.25, 0.25, 0.25, 0.25, 1, 1, 1, 2, 0.5, 4 };
  dismantle(melody, beats, sizeof(melody), 400);
}

void dismantle(char* melody, float* beats, int length, int pause) {
  for (int q = 0; q < length; q++)
    if (melody[q] == ' ') {
      delay(beats[q] * pause);
    } else {
      play(melody[q], beats[q] * pause);
    }
}
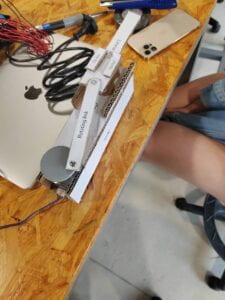
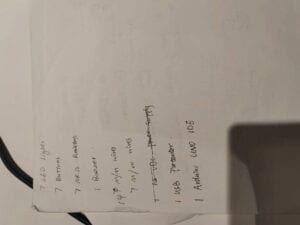
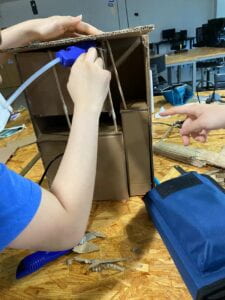
Here is our new materials:
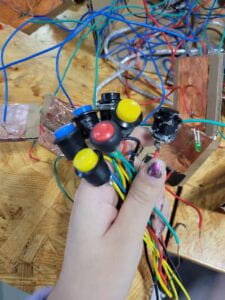
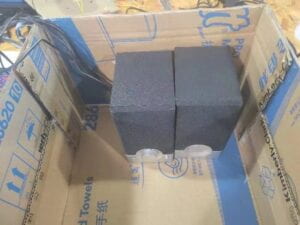
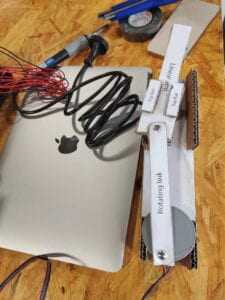
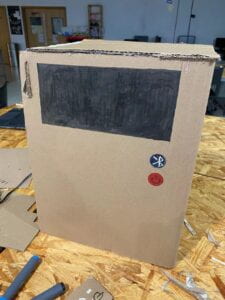
And here is our final shape:
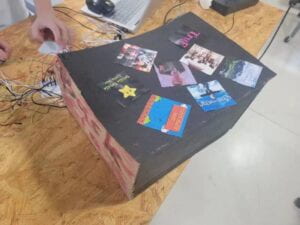
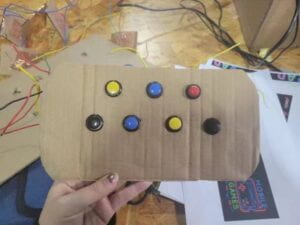
With the help of the professor and our efforts, the program runs well, and the working state of the project is also stable. At the same time, when I set the delay, I found that a specific delay will make the speaker emit cyberlike music, so we named it back-to-future music box, in order to show the particularity of its sound.
5.Conclusion:
Overall, I think this project means a lot to me. Unlike the previous Recitation, this is the first time I have made a project from the design stage without a guideline. Of course, this project still has its imperfections. For example, it does not have enough Interactive Parts. After the random music and key playing are triggered, the user does not know what to do next. We also thought of using the arrangement and combination of Led lights to indicate the tone to be played, and the position of the Led lights is controlled by the mechanism to change the playing requirements (similar to a music tour), but due to the limitation of global variables, the program could not be realized. Of course, this is also due to our inexperience. If we do it again, I believe we can deliver better works.
Finally, this Midterm Project is a major exercise for me, from which my programming practice ability has made great progress, and more importantly, my understanding of Interactive is deeper, which also makes me glad that I can choose IMA as a major. Because it really improved me in all aspects, which I felt less in other classes.
Appendix:
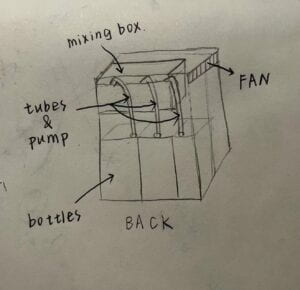
This is my sketch:
