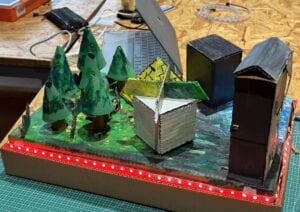
Green Distance – Bruce & Kelvin – Prof.Margaret Minskey
Part 1: Research & Scratch
Before I started to build the midterm project, I’ve looked backed to my previous experiences of being an intern in Bister Shanghai Village where store managers inside the outlet are busily checking the problems of saving energy and being ESG. Thus, I related that experience to the university life where securities in Qiantan Campus might busily checking the energy waste between different classrooms. Therefore, I began my initial proposal with a building light checker which is a parallel device to aline that with the arduino to sense the whether the light of that classroom is turned on/off to save energy.
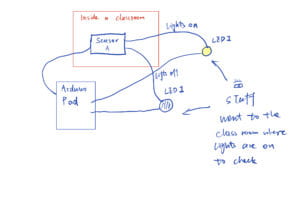
After meeting with my teammate Kelvin and discussed about our research results, I found that his idea of building an interactive user-friendly game in finding a “perfect” distance between human and nature is more promising and ideal to my personal intuition of “Interaction” as: a story that the creator built, but to every individual, such a story can have different interpretations through the audience’s emotional, physical, verbal, or digital reactions.
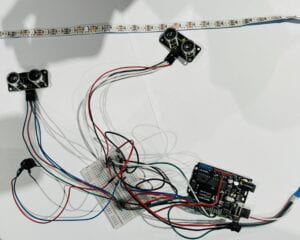
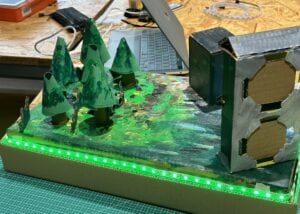
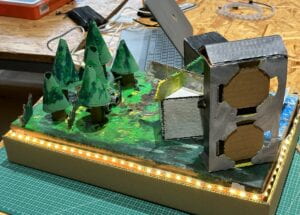
Therefore, we generated “Green Distance”: It consists of two parts: “urbanization” and “nature”, separated by an “alert line”. The player can place modern buildings in the urbanization part, while the nature part has a distance sensor, buzzer, and LED lights. The distance sensor creates an alert line, and if the buildings are placed too close to the nature part, the LED lights will turn red and the buzzer will sound. The project aims to raise awareness about the impact of urbanization on nature and encourages people to maintain a “green distance” between humans and nature.
Part 2: Crafting and Coloring
Once we had finalized the design for our project, we began the building process by dividing it into two main sections: cardboard crafting and coloring. We chose cardboard as our primary material due to its accessibility, ease of crafting with knives and scissors, and eco-friendliness. To create the project, we needed to make three main parts out of cardboard: the base, trees, and buildings.

To ensure the stability of the base, we opted for thick cardboard. For the trees, we used scrolled cardboard to make the trunks and thin green cardboard for the leaves. We also created various types of buildings out of cardboard, including tall residential buildings and a pyramid-shaped structure. We’ve recycled some of the cardboards and to make it as decorations and the details of the buildings. For example, we used the bubble tea base in the waimai and fabricated with cardboard leftovers and ultimately turned it into a applicable residential building!
After completing the cardboard part, we planned to color it to make it look more appealing and intuitive. I drew the landscape with different colors in order to make it more diverse with grass, tundra, lakes and soil. In that way the base are more intuitive and player-friendly. Also, painted the buildings with colors to make it intuitive as well.
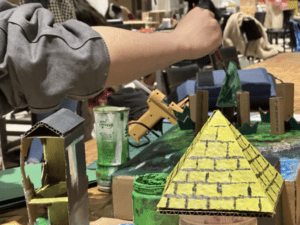
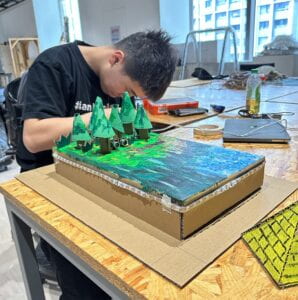
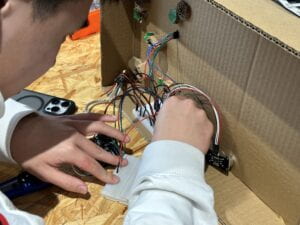
During the crafting process, we faced a challenge with fixing the trees onto the base. Initially, we directly stuck the trees onto the base using a glue gun, but we soon realized that the trees were not stable enough and would easily fall. To overcome this, Kelvin dug holes into the base according to the size of the trees and placed the trees into the holes, which increased their stability and made it easier to “hide” the electronic components (buzzers) from below.
Overall, the crafting process was efficient which took about 2 days, and we had a clear division of work by a clear driven plan. Our project made use of cardboard, an accessible and eco-friendly material, and we made sure to overcome any challenges that arose during the crafting process.
Part 3: Coding and Debugging
Before, we started everything we had a meeting with Margaret in discussing how to solve the most critical question: How to measure the actual “expansion” of the city? She proposed several applicable ideas:
- Building a circuit underneath the base and apply the aluminum tape underneath each building, when the building is placed on to the base, it creates a circuit. In that way, the arduino board might be able to detect the circuit and make a response with the led lights.
- Using sensors. We can apply the ultrasonic sensor into the woods to detect the distance from the building to the forest. Also, we may figure out how to detect the height of the building in avoiding the expansion is “too high” but “too deep”.
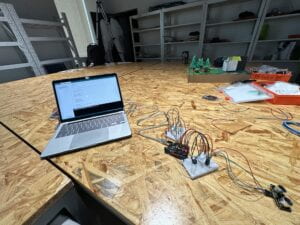
After the discussion and tryings, we chose to use the ultra sonic sensors and the primary codes are as follows.
int buzzer = 3, ledRed = 6, ledYellow = 9, ledGreen = 10;

int triggerPin = 4;

int echoPin = 2;

long readTime(int triggerPin, int echoPin) {

 // In order for the sensor to send out a pulse the trigger needs to be set low for 2us

 // Then set HIGH for 10us

 pinMode(triggerPin, OUTPUT);

 digitalWrite(triggerPin, LOW);

 delayMicroseconds(2);

 digitalWrite(triggerPin, HIGH);

 delayMicroseconds(10);

 digitalWrite(triggerPin, LOW);

 pinMode(echoPin, INPUT);

 return pulseIn(echoPin, HIGH);

}

void setup() {

 Serial.begin(9600);

 pinMode(buzzer, OUTPUT);

 pinMode(ledRed, OUTPUT);

 pinMode(ledYellow, OUTPUT);

 pinMode(ledGreen, OUTPUT);

}

void loop() {

 int distance;

 distance = 0.01715 * readTime(triggerPin, echoPin);  // From calculation above Distance = 0.0343 / 2 * readTime

 Serial.print("distance: ");

 Serial.print(distance);

 Serial.println("cm");

 if (distance < 10) {

   digitalWrite(ledRed, HIGH);

   digitalWrite(buzzer, HIGH);

   delay(500);

   digitalWrite(buzzer, LOW);

   delay(500);

 }

 if (distance >= 10 && distance <= 30) {

   digitalWrite(ledYellow, HIGH);

   digitalWrite(ledRed, LOW);

   digitalWrite(ledGreen, LOW);

 }

 if (distance > 30) {

   digitalWrite(ledGreen, HIGH);

   digitalWrite(ledRed, LOW);

   digitalWrite(ledYellow, LOW);

 }

}
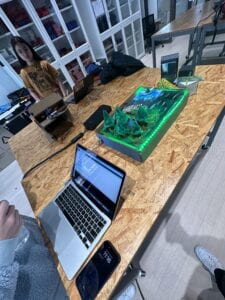
This is the codes that we used in the primary stage where, it only functions when the building the placed in the detected range of the ultrasonic. The LEDs can be turned on in the set distance so we proceed to the user testing.
// Define the pins for the components

int buzzer = 3;

// int ledRed = 6;

// int ledYellow = 9;

// int ledGreen = 10;

int triggerPin = 4;

int echoPin = 2;

// Include the NeoPixel library

#include <Adafruit_NeoPixel.h>

// Define the NeoPixel parameters

#define LED_PIN 12

#define LED_COUNT 60

// Create a NeoPixel object

Adafruit_NeoPixel pixels(LED_COUNT, LED_PIN, NEO_GRB + NEO_KHZ800);

// Function to calculate the distance using the ultrasonic sensor

long readTime(int triggerPin, int echoPin) {

pinMode(triggerPin, OUTPUT);

digitalWrite(triggerPin, LOW);

delayMicroseconds(2);

digitalWrite(triggerPin, HIGH);

delayMicroseconds(10);

digitalWrite(triggerPin, LOW);

pinMode(echoPin, INPUT);

returnpulseIn(echoPin, HIGH);

}

void setup() {

// Start the serial communication

Serial.begin(9600);

// Initialize the NeoPixel object

pixels.begin();

// Set the pin modes for the components

pinMode(buzzer, OUTPUT);

// pinMode(ledRed, OUTPUT);

// pinMode(ledYellow, OUTPUT);

// pinMode(ledGreen, OUTPUT);

}

void loop() {

// Calculate the distance using the ultrasonic sensor

int distance = 0.01715 * readTime(triggerPin, echoPin);

// Print the distance to the serial monitor

Serial.print("Distance: ");

Serial.print(distance);

Serial.println(" cm");

// Set the colors of the NeoPixel based on the distance

if(distance < 12.5){

pixels.fill(pixels.Color(255, 0, 0), 0, 60); // Red color

pixels.show();

tone(buzzer, 440, 500);

delay(200);

noTone(buzzer);

tone(buzzer, 330, 500);

delay(200);

noTone(buzzer);

tone(buzzer, 220, 500);

delay(200);

noTone(buzzer);

delay(500);

// digitalWrite(ledRed, HIGH);

// digitalWrite(ledYellow, LOW);

// digitalWrite(ledGreen, LOW);

}

elseif(distance >= 12.5 && distance <= 20){

pixels.fill(pixels.Color(255, 255, 0), 0, 60); // Yellow color

pixels.show();

// digitalWrite(ledYellow, HIGH);

// digitalWrite(ledRed, LOW);

// digitalWrite(ledGreen, LOW);

}

else{

pixels.fill(pixels.Color(0, 255, 0), 0, 60); // Green color

pixels.show();

// digitalWrite(ledGreen, HIGH);

// digitalWrite(ledRed, LOW);

// digitalWrite(ledYellow, LOW);

}

}
Part 4: Conclusion
“Green Distance” is a perfect example of interactive design, as it involves active participation from users and provides feedback in various ways. Users can proactively interact with the project by placing modern buildings on the urbanization side, which triggers the distance sensor to draw the alert line between urbanization and nature. If the buildings are placed too close to the nature part, the LED lights attached to the trees turn from green to red, and a buzzer makes a siren sound.
During the crafting and coding process, we encountered several challenges and received feedback from users, which helped us to refine and improve the project. Moreover, we also learned how to “debug” the system based on users’ comments. For example, when the LED lights were not stable, we realized that the pre-programmed distance was incorrect, or even the 5v ardunio board cannot take the current. This experience taught us the importance of listening to users’ feedback and making changes accordingly.
If we had more time, we would have added more electronic components to the project to make it even more interactive. For instance, we could have added a stepper motor beneath the base, which could be triggered when the buildings approached nature too closely. The stepper motor would create an “earthquake” effect, providing users with a more immersive and engaging experience. Or, we can even add some music while the player is playing the game, to make the experience better. : )
Part 5: Annex
