Recitation 2 Documentation–Blog 4
Circuits built in class
Circuit 1: Fading
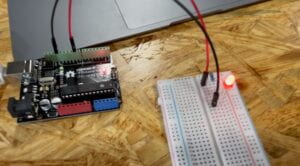
This circuit is more simple than the circuits that I built in the last recitation since it only needs two cables, one resistor and an LED light. The only thing different from last week is that we started to use Arduino to control the circuit and I think it is very interesting. Also, since I have practiced some times during class time, I success to build the circuit quickly.
Code:
Fading
This example shows how to fade an LED using the analogWrite() function.
The circuit:
– LED attached from digital pin 9 to ground through 220 ohm resistor.
created 1 Nov 2008
by David A. Mellis
modified 30 Aug 2011
by Tom Igoe
This example code is in the public domain.
https://www.arduino.cc/en/Tutorial/BuiltInExamples/Fading
*/
int ledPin = 9; // LED connected to digital pin 9
void setup() {
// nothing happens in setup
}
void loop() {
// fade in from min to max in increments of 5 points:
for (int fadeValue = 0 ; fadeValue <= 255; fadeValue += 5) {
// sets the value (range from 0 to 255):
analogWrite(ledPin, fadeValue);
// wait for 30 milliseconds to see the dimming effect
delay(30);
}
// fade out from max to min in increments of 5 points:
for (int fadeValue = 255 ; fadeValue >= 0; fadeValue -= 5) {
// sets the value (range from 0 to 255):
analogWrite(ledPin, fadeValue);
// wait for 30 milliseconds to see the dimming effect
delay(30);
}
}

Circuit 2: toneMelody
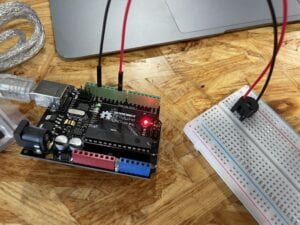
This circuit is even more simple than the first one since it needs less parts. So I quickly switch the circuit and connect it to the computer. However, I don’t success in the first time. When I try to find out the problem, my partner tells me that I should connect to the “8” access instead of nine because the coding in the computer was set to be connecting “8”.
Code:
Melody
Plays a melody
circuit:
– 8 ohm speaker on digital pin 8
created 21 Jan 2010
modified 30 Aug 2011
by Tom Igoe
This example code is in the public domain.
https://www.arduino.cc/en/Tutorial/BuiltInExamples/toneMelody
*/
#include “pitches.h”
// notes in the melody:
int melody[] = {
NOTE_C4, NOTE_G3, NOTE_G3, NOTE_A3, NOTE_G3, 0, NOTE_B3, NOTE_C4
};
// note durations: 4 = quarter note, 8 = eighth note, etc.:
int noteDurations[] = {
4, 8, 8, 4, 4, 4, 4, 4
};
void setup() {
// iterate over the notes of the melody:
for (int thisNote = 0; thisNote < 8; thisNote++) {
// to calculate the note duration, take one second divided by the note type.
//e.g. quarter note = 1000 / 4, eighth note = 1000/8, etc.
int noteDuration = 1000 / noteDurations[thisNote];
tone(8, melody[thisNote], noteDuration);
// to distinguish the notes, set a minimum time between them.
// the note’s duration + 30% seems to work well:
int pauseBetweenNotes = noteDuration * 1.30;
delay(pauseBetweenNotes);
// stop the tone playing:
noTone(8);
}
}
void loop() {
// no need to repeat the melody.
}

Circuit 3: Speed Game
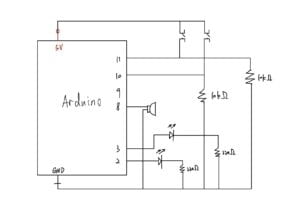
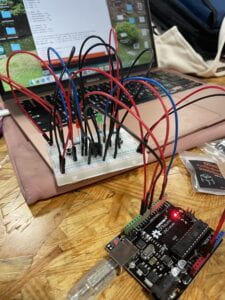
Since we have the correct circuit diagram, it is supposed to be easy for us to build this circuit. However, since this circuits needs a lot of wires and small parts, it’s hard for me and my partner to check whether we connect all the parts together correctly. We count the number of wires several times to make sure that we connect the circuit correctly. After downloading the codes, we started to play this speed game.


Questions
Q1: After reading the introduction part of the book “Physical Computing”, I figure out an idea that can make the speed game more interesting and interactive. Instead of competing the speed we can compete by comparing the time to press the button. Before we start the competition, they can set a time in the computer which might be one minute or 10 seconds. Among the competitors, whoever presses the button closest to the set time will win. Then the creative button that we need in this game will be a button that can count how long do competitors press on it. I am inspired by the “digital and analog” idea in the book. Since the original speed game is using the digital format which is about “whether or not”, my game is more about the analog format, which is about “long and short”, “faster or shorter”.
Q2: According to the website, when we build the circuit and connect it to the computer, we might face the floating pin problem, the problem will lead to short circuits. As a result, we need to use pull-down resistors that are 10K resistors to protect the circuits by avoiding excessive voltage.
