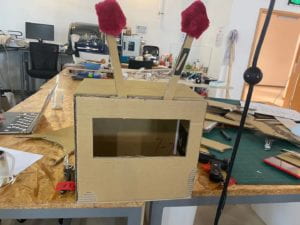
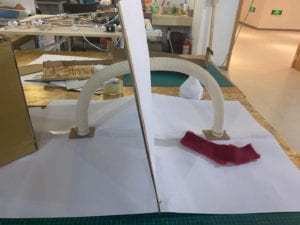
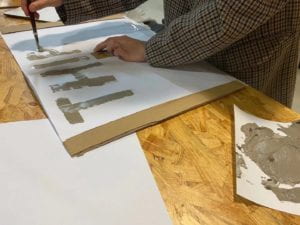
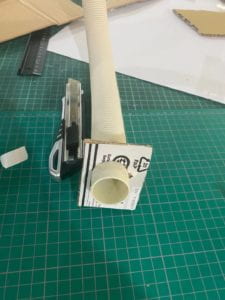
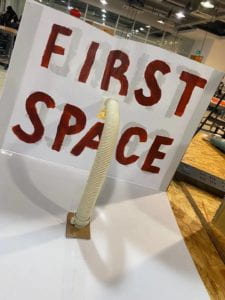
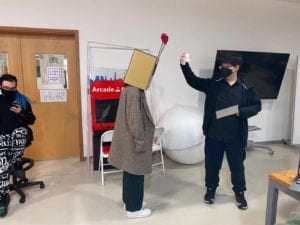
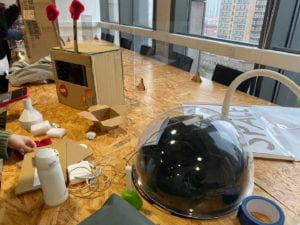
A poster of our project in the beginning:
A. Process of making our project
1. Determine what we want to do
We got our inspiration from a “paper, scissors and stone” device which could play paper scissors and stone game with the one who put his/her hands in front of the machine. And we also think about the little crocodile we played in our childhood. That is a toy that when the user put their hand into the mouth of the crocodile and push its tough, the crocodile would bite his/her fingers. But that device is mechanically driven, not electronically driven. Then we come up with a biting skull that if the user put their hand into its mouth, he/she would get bitten. And in our original expectation, this would be detected by a light sensor.
2. Print out 3D model of a skull
There are two parts of the skull model: the lower jaw and the rest (including upper jaw). We found the original skull stl file in thingiverse (https://www.thingiverse.com/thing:518109).
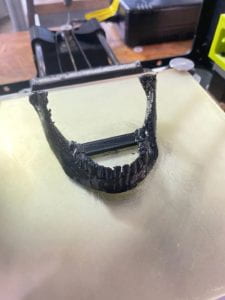
Here are some pictures/videos when we printed the lower jaw. For this part, we didn’t have much difficulties. But we learned how to use the 3D printer outside the fabrication lab. It is quite different from the small one in 826.
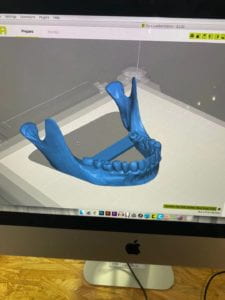
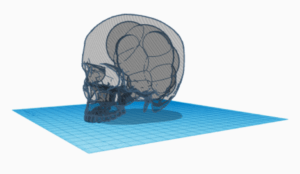
For the upper part, it was more complex. As we wanted to leave some spaces to put the elements like servo motor, LEDs in this part, we used tinkercad to “dig” some spheres in the skull as the original model is solid.
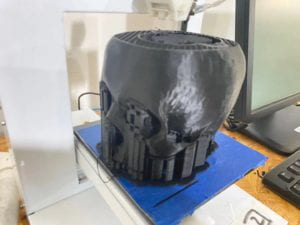
Then we used 3D printer in 826 to print this out. This is such a big model that it took about 24 hours to print this. We started this printing on Monday morning and when we went to see it on Tuesday morning, we were desperate to find that the printer ran out of material and our project hadn’t finished yet (as you can see in the pictures below). We asked Andy about this and decided to adjust our model and reprint the upper part later but we found later that this unfinished printing actually brought us much convenience. With holes on both side of the skull, it was much easier for us to dismantle the support and put elements in to the skull.
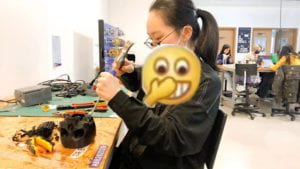
3. Build the basic structure of the circuit.
I was in creative coding lab last semester so that I had relevant experience of coding. So this part was mainly my responsibility. I firstly wrote an outline for our circuit and made some experiment and used analogRead to get all the statistics I need.
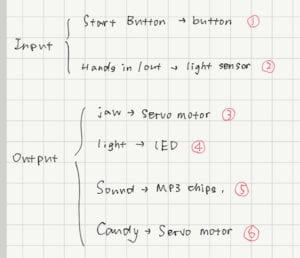
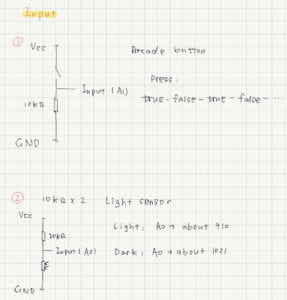
Then without putting all the things into the model, I built the basic circuit that could realize our expectation.
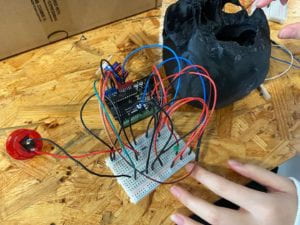
For the LED part I would just skip and I would like to talk something about DY player chips. With the reference from Rudi (https://github.com/ima-nyush/interaction-lab/tree/main/DYplayer), we made it to play out music. But we found that even though we follow the instruction to change the format of the mp3 file, some files could still not be played and we haven’t figured out why is it yet.
About how we put all the components into out 3D model, I would talk about this in the next part. In this part, I would just show our final code here.
#include <Servo.h>

#include <Arduino.h>
#include "DYPlayerArduino.h"
#include <SoftwareSerial.h>

SoftwareSerial SoftSerial(11, 12);
DY::Player player(&SoftSerial);
int count = 0;

Servo myservo;
int lightSensor;
int jawVal;
int startButton,state;
int pre_state = 0;
boolean Check = false;
int a = 0, b = 0;
int timesA = 1, timesB = 5;
boolean checkCase = false;
int ran;

void setup() {
  Serial.begin(9600);
   myservo.attach(9);
   pinMode(13,OUTPUT);
   pinMode(8,OUTPUT);
   ran = random(0,2);
   Serial.println("Starting the Player...");

   player.begin();
   player.setPlayingDevice(DY::Device::Sd);
   player.setVolume(30);
}

void loop() {
  lightSensor = analogRead(A0);
  startButton = analogRead(A1);
  check();
  Serial.println(lightSensor);
//  player.play();
//  Serial.println(startButton);
//  delay(1);
//  jawVal=map(lightSensor,900,1023,0,90);
//  myservo.write(jawVal);

  if (Check == true){
    if (timesA == 1){
      myservo.write(60);
    }
   if (lightSensor >= 1010){
    if (ran <= 1){
      digitalWrite(8,LOW);
//      fade();
      jawClose();
      if (count == 0) {
          player.play();
          count = 1;
        }
    }
   }
  }

  if (Check == false){
    count = 0;
    ran = random(0,3);
    if(timesA == 1){
     myservo.write(35);
    }else{
     myservo.write(60);
    }
    blink();
  }
  //Serial.println(b);
}

void jawOpen() {
  myservo.write(60);
}

void jawClose(){
  myservo.write(35);
}

void check(){
  startButton = analogRead(A1);
  if (startButton>1000){
    state = 1;
  }else{
    state = 0;
  }

  if (state == 1 && !state == pre_state){
    Check = !Check;
  }

  pre_state=state;
  //Serial.println(Check);
}

void blink(){
    timer();
    if(timesA == 1){
      analogWrite(6,255);
    }else{
      analogWrite(6,0);
    }
}

void timer(){
  a = a + 1*timesA;
  if (a>=250){
    timesA = -1;
  }else if (a<=0){
    timesA = 1;
  }
}

void fade(){
  analogWrite(6,b);
  b = b + timesB;
  if (b <= 0 || b >= 255){
    timesB = -timesB;
  }
  delay(100);
  //Serial.println(b);
}
4. Put everything together
We made some efforts and tried several position and ways to connect servo motor and lower jaw. I would talk about this specifically in the challenge part and this is the final structure of it. We didn’t have any reference when building this structure. This was come up by ourselves.
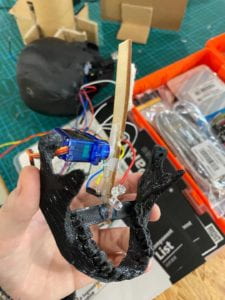
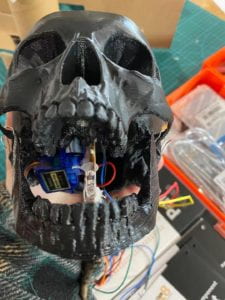
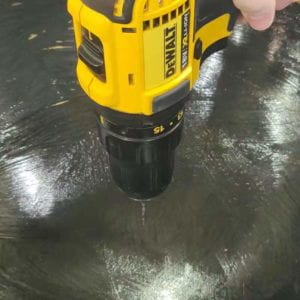
For the places to put LED and light sensor, I drilled 3 holes to plug them in.
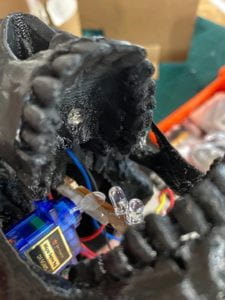
To connect the lower jaw with the rest part of the skull, we drilled two holes on the “bone” at the cheek and used iron wire to connect.
During circuit test, we used flashlight from our phone and find that this input is very unstable as even a little move of either phone or the skull would cause the light from the flashlight could not directly illuminate on the light sensor. So we decided to install LED in the mouth (tips from Eric) to make sure that the light won’t be block out. Originally we only used one LED but found that as long as the light was not directly illuminate on the light sensor, the input would change. And the LED attached on the jaw would move as the jaw changes its angle so that I added another LED to make sure that whether the jaw is open or closed, there would be a direct light that illuminate on the light sensor.

5. Final beautification
We made some final beautification like hiding the wire, building the background board, hanging the “head”, etc.
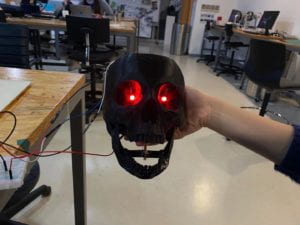
This is what our final project look like.
B.Context and significance
My definition of interaction is a process when a person/device(I call it A) do something and is detected by another people/device(I call it B), B could react and A is able to know that reaction. Or this can be concluded as a mutual input and output process. It’s like communication between two items. So I think this project could reach my definition of interaction. I put my hand into its mouth and it reacts with movement, light and sound and this could be received by the users. This project is mainly designed for kids and could be used during Halloween and some other festivals or could be put in the haunted house.
In this project, I was mainly responsible for building the circuit and code and design some connecting/stabilizing structure. I learned some knowledge about structure during high school theoretically so this was a chance for me to apply theory into practice. And I am also more familiar with all the functions and how the code works after writing the code. For building the circuit, I think this is less challenging compared to other two.
C. Conception and design
We mainly used the words written on the background board to let the users know how to use our device and use the background color, horrible appearance, red paint and sound effect to create the atmosphere.
We used PLA material to print the 3D model and iron wire to connect. And we use a wooden stick to connect the servo motor and the jaw. The background board we used are a cardboard from laser cutting and we used acrylic paint to paint.The glue we mainly used is hot glue.
We didn’t have other confusion about the choice of material except for the glue. We originally afraid that the hot glue would be hard to separate after presentation. But later we found that hot glue is easy to use, good to stable and easy to split as well.
D. Fabrication and production
The most challenging thing we find during the making process is to connect to servo motor and jaw and let the jaw move naturally.
We decided to use a wooden stick to attach the servo motor to we cut on our 3D model.
Originally we were afraid that the hot glue would be hard to teat apart so that our servo motor would be damaged, so we only use tape to stick motor and stick together and found that it was not stable. Later we decided to use hot glue.
And the first position we found for the servo motor was not very suitable and the motor was not attached to the skull so that the movement of the jaw was very random (Sometimes it would move a little bit and sometimes it wouldn’t move and the movement is very small. And the jaw even got dislocated.)
Then after user testing, we changed the position of the servo motor to keep it on the center of rotation and use hot glue to stick it to the skull. So the movement become very stable later on.
Besides, here are some tips we got from user testing/in class that help us get our project advanced.
- Eric thought that we must give the user a motivation to put their hand into the mouth as no one would like to put their hand into an unknown horrible skull. So we put a candy in his mouth and ask the user to get the candy in our instruction.
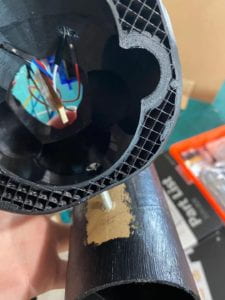
- Rudi and Andy advised that we’s better put our skull on a stand so that its eyes could look directly into the users eye to create a much more horrible atmosphere. So we abandoned the original plan of using a box to support. Instead, we found a cylinder to hang the skull and use some right angled cardboard to support the cylinder.
- Almost everyone advised us to glue the servo motor to the skull to make the movement of jaw more stable and we just did so.
- During our presentation, we got some advice from our classmate that we could add more sound effect to make this project more interesting and less confusing.
E. Conclusions
I think this project is basically consistent with my definition of interaction. Through this process, I am more familiar with how to create a useful thing from none. I should get everything planned in the beginning or there would be much trouble. Like I didn’t have spaces for servo motor when building the 3D model so that we took a lot more time to think about how to attach servo motor to the jaw. And I also learned that we should consider the use of final project and its value. These are all the thing I should take into account in the very beginning and I’m sure this would be helpful to my final project.
