Deer
—- by Alan Guo, Instructor: Oliver Steele & Andy Garica
Inspiration and Design
This project intends to make a deer head using only wood. The initial inspiration is out of my personal interest, as I like the sculpture of deer horn a lot. For this project, as I could have the opportunity to make something with wood, I chose to make one deer head as one sculptural decoration. For using the real deer horns as decoration are cruel and inhumane. Using wood as substitution conveys the signal of animal protection and appeals for the attention to profitable animal killing.
More detail information about the inspiration could be found in the previous blog post of “initial plan for final project”.
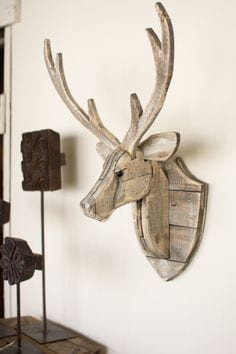
After doing research on the Internet about the design, I decided to use wood boards for the fabrication. I was inspired a lot from one art piece from Kalalou, I referenced his idea about the assembling and designing.
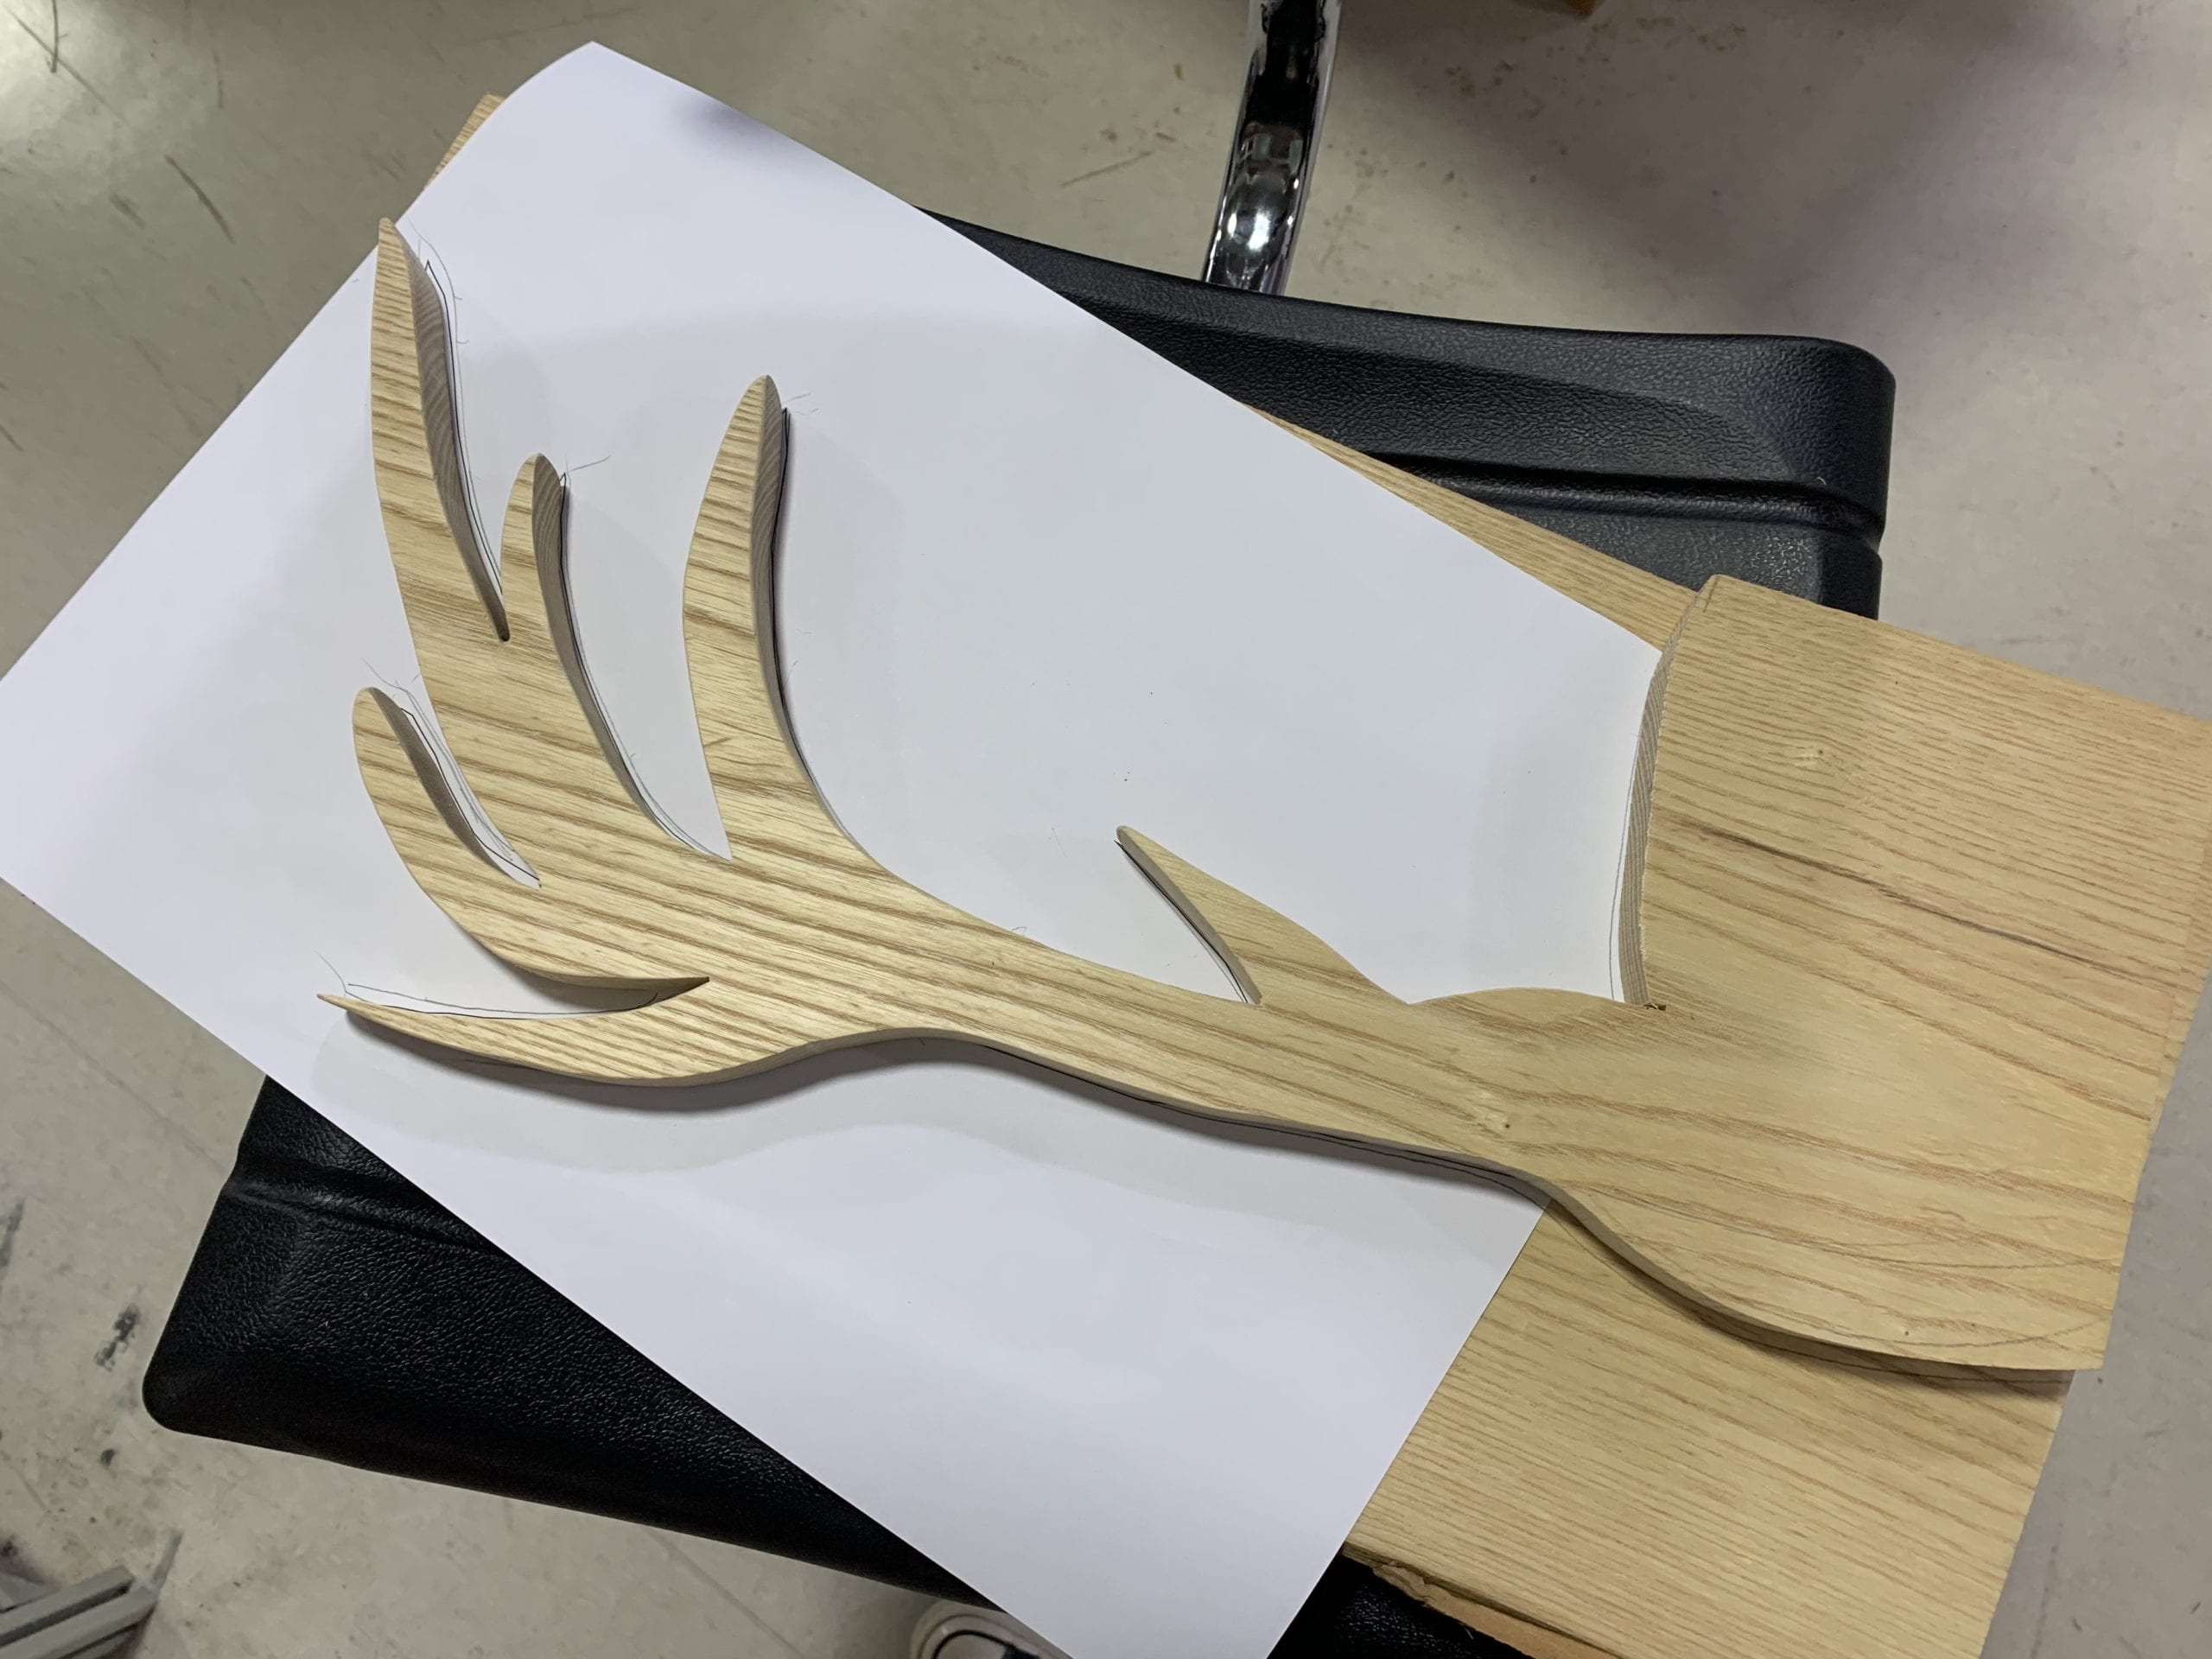
The first thing to do is to find out how would the whole piece be constructed. As the project would be made of wood boards, I did some sketch to design how should each board be used, and the outline shape of each piece.
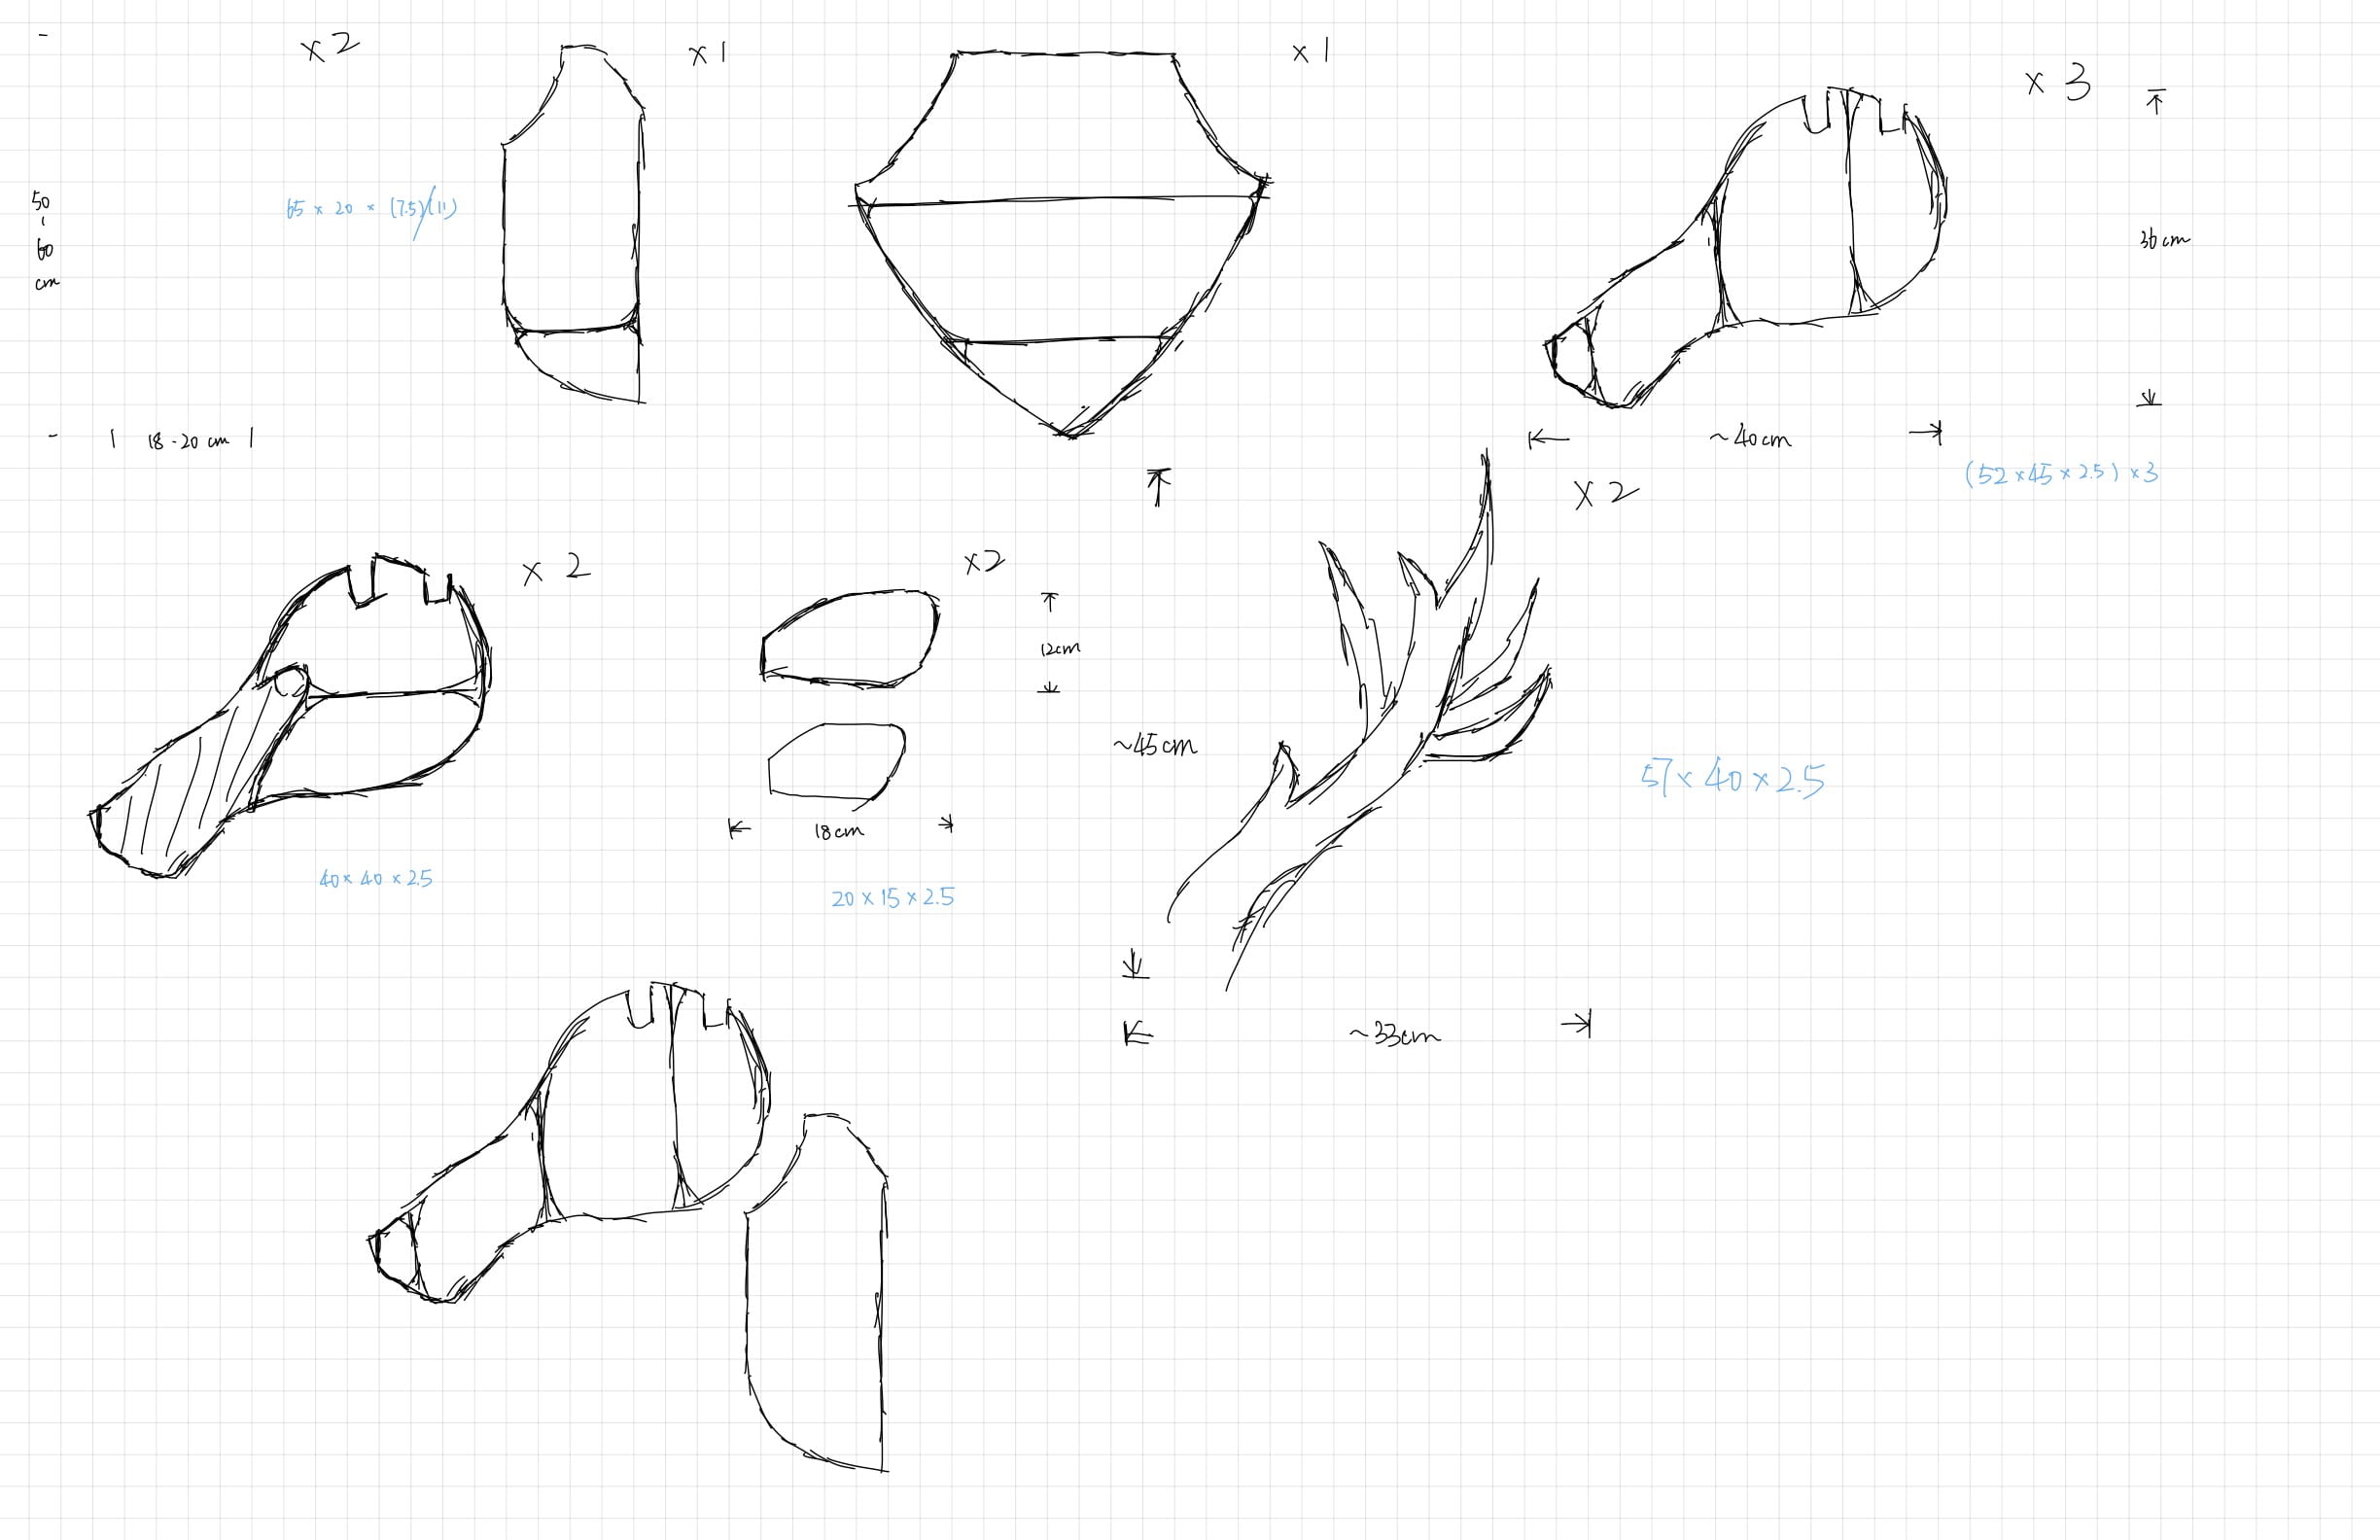
As shown in the sketch, I separate the project into several parts. Face, neck, cheek, ear and horn are all make separately and joined together later on.
After deciding the outline, I started designing and drawing shapes for each part. I found some photos of deer from different angles on the Internet, and used Adobe Illustrator to trace the shape.
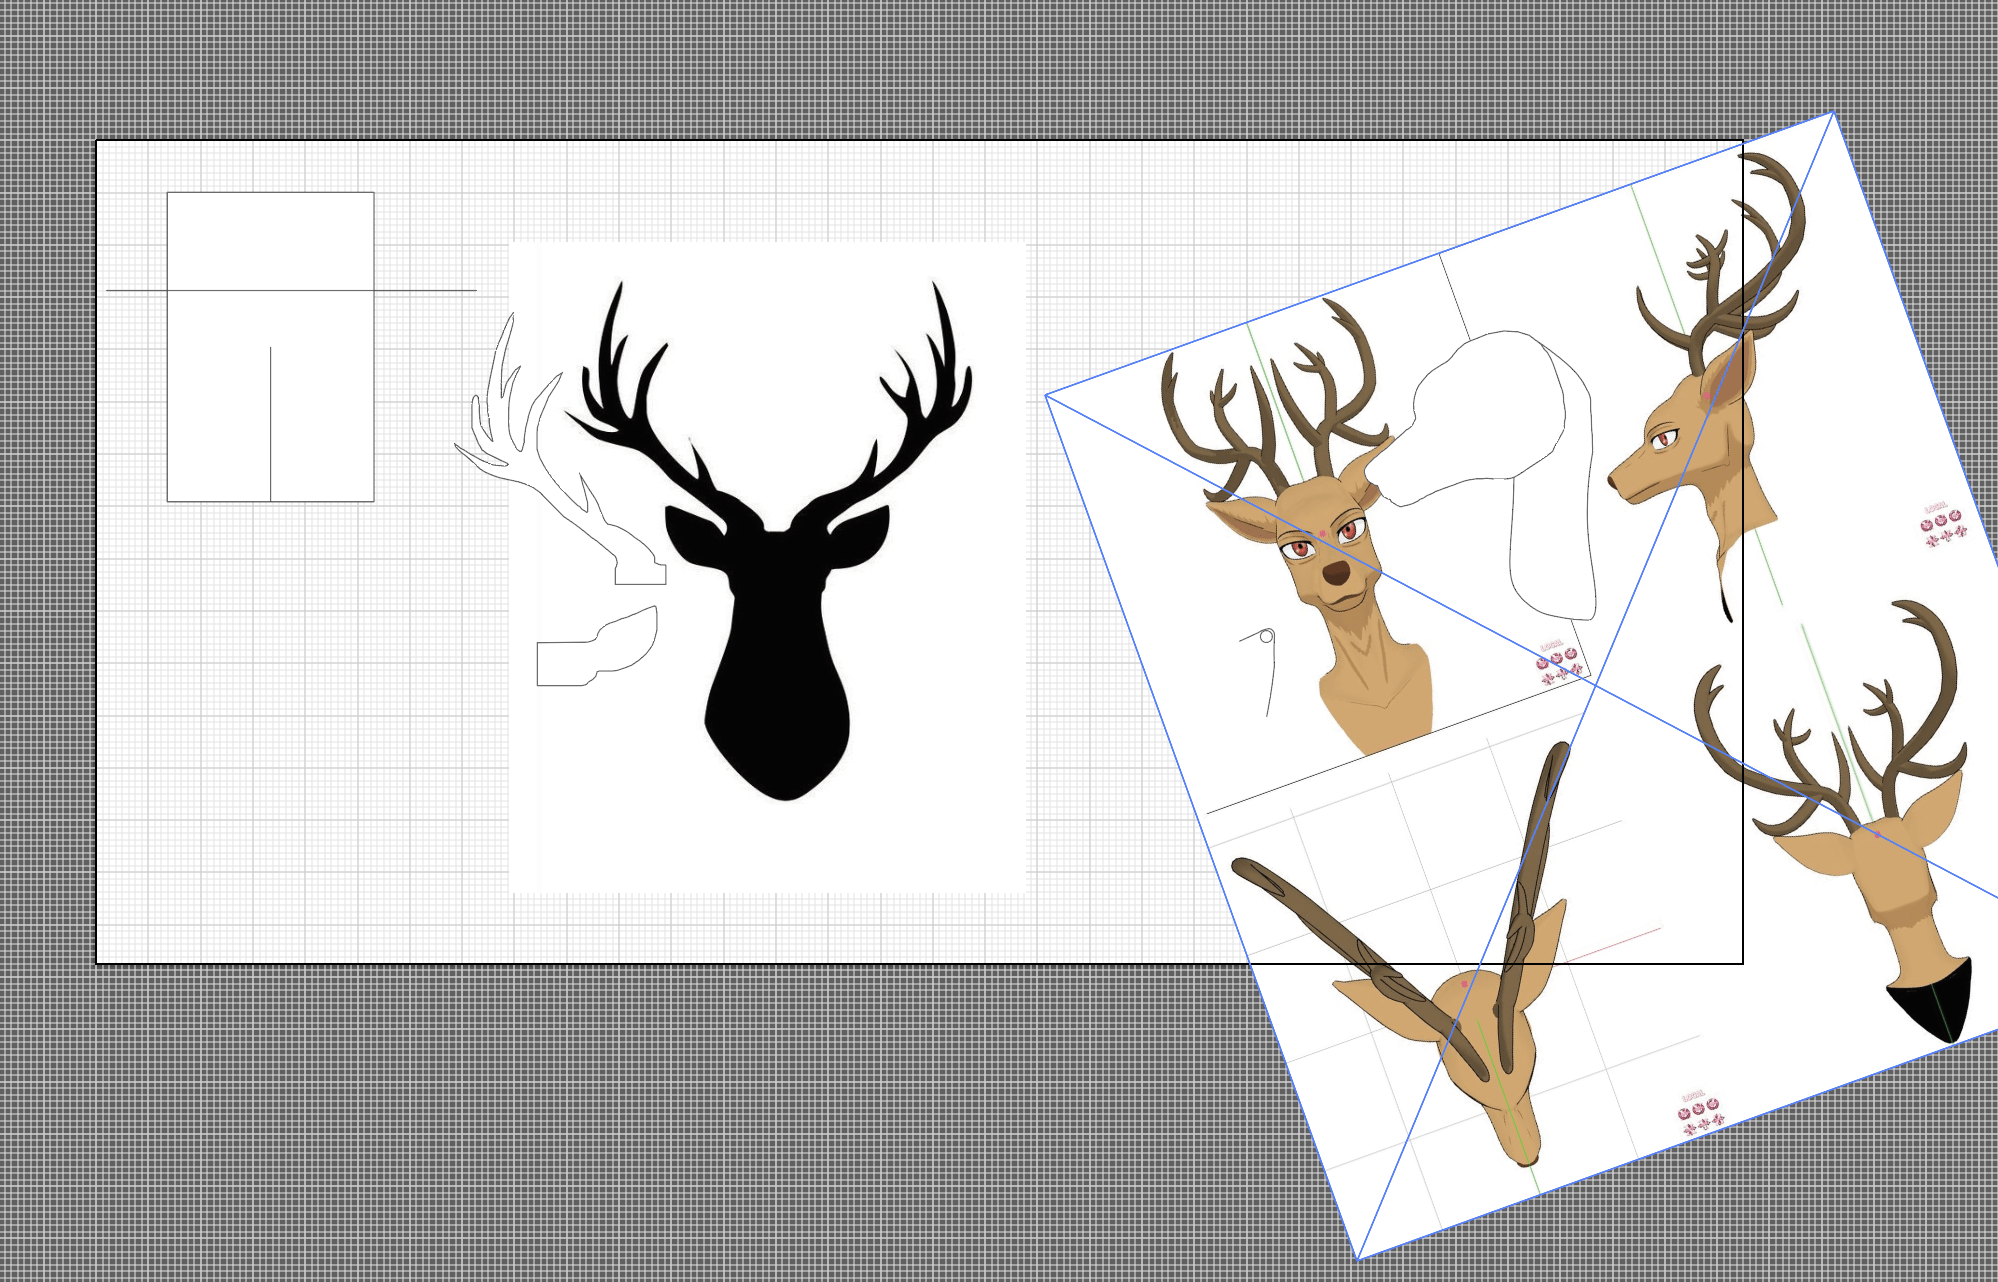
With each shape drawn, I then 3D modeled the whole sculpture using the stretch from illustrator. The process of 3D modeling is really important for the whole project as this is where I shall figure out how big each piece should be and how could different pieces be assembled together.
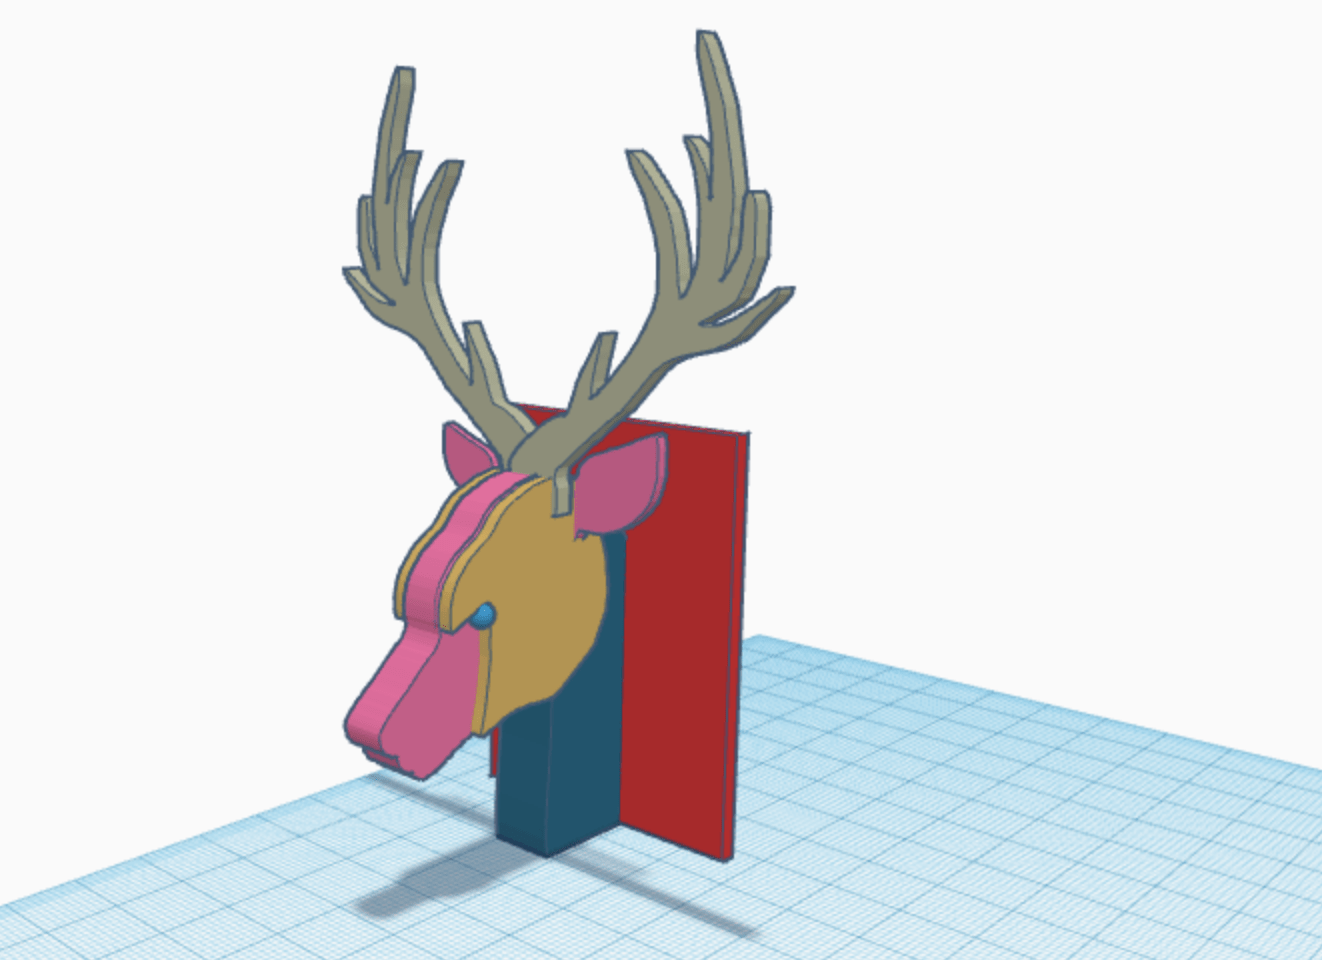
I used tinkercad for this step, however it turned out that tinkered wasn’t the best option for woodworking model. Tinkercad is easy to use, but with limited functions. With other modeling applications, I might could try with different texture, joints and so on. Luckily, the most important goal for the modeling is to find out the proportion of each part. And Tinkercad gave me an rough idea about how big each part should be.
Wood Choosing
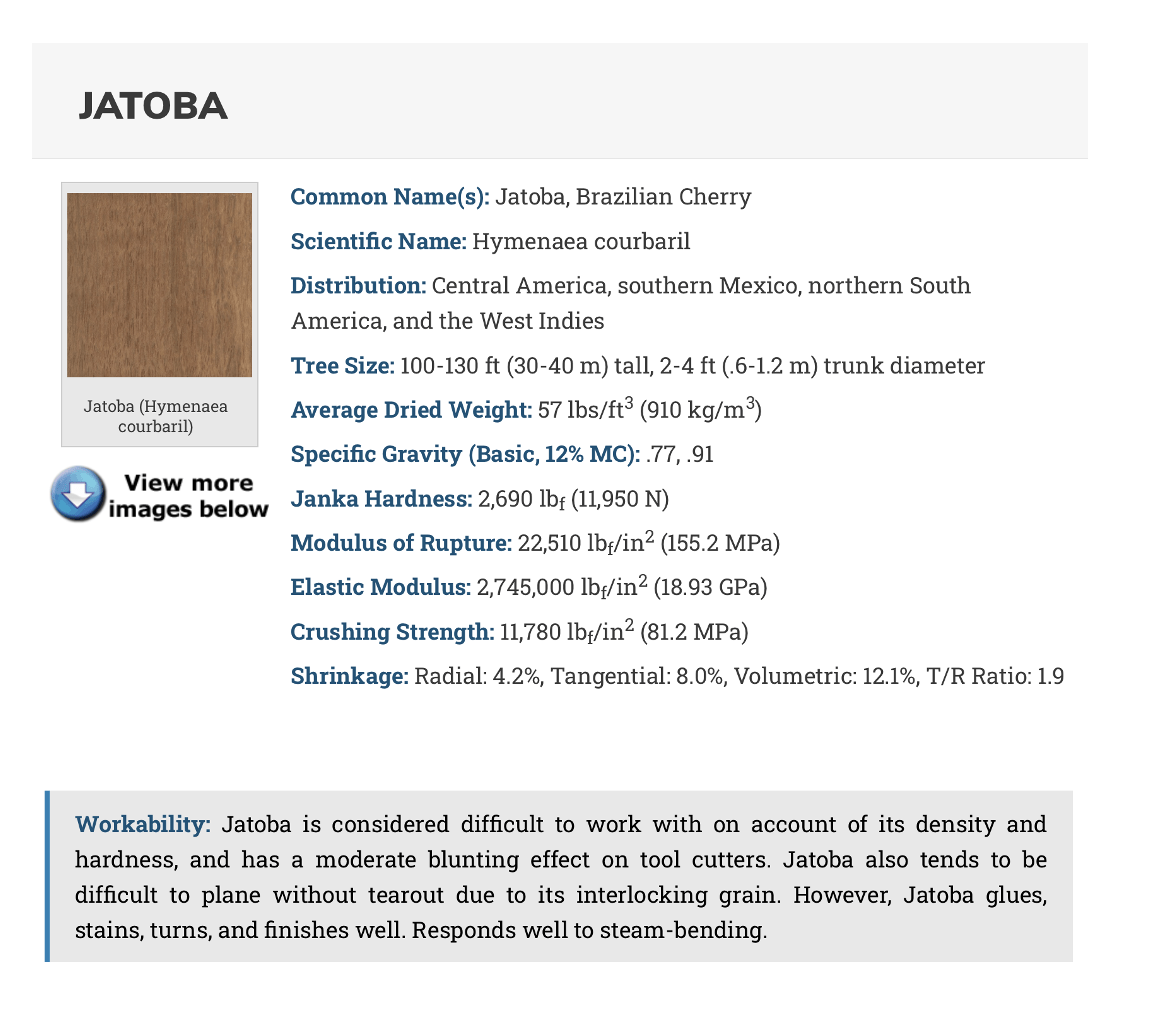
After the initial design, the next step is to choose the right kind of wood for the sculpture. My plan was to find some wood board with width of 20 – 25 centimeter and thickness of 2 – 3 centimeter in light color. I reached out to one lumber yard that we once paid a visit to. The manager there said that the size I wanted isn’t so popular, so there might not be wood that could match all my requirements. He then recommended me with one wood called Jatoba, which satisfies my size requirement. However, after consulting with professor Steele, he told me that Jatoba might be too hard for this project, based on what we found in the wood database.
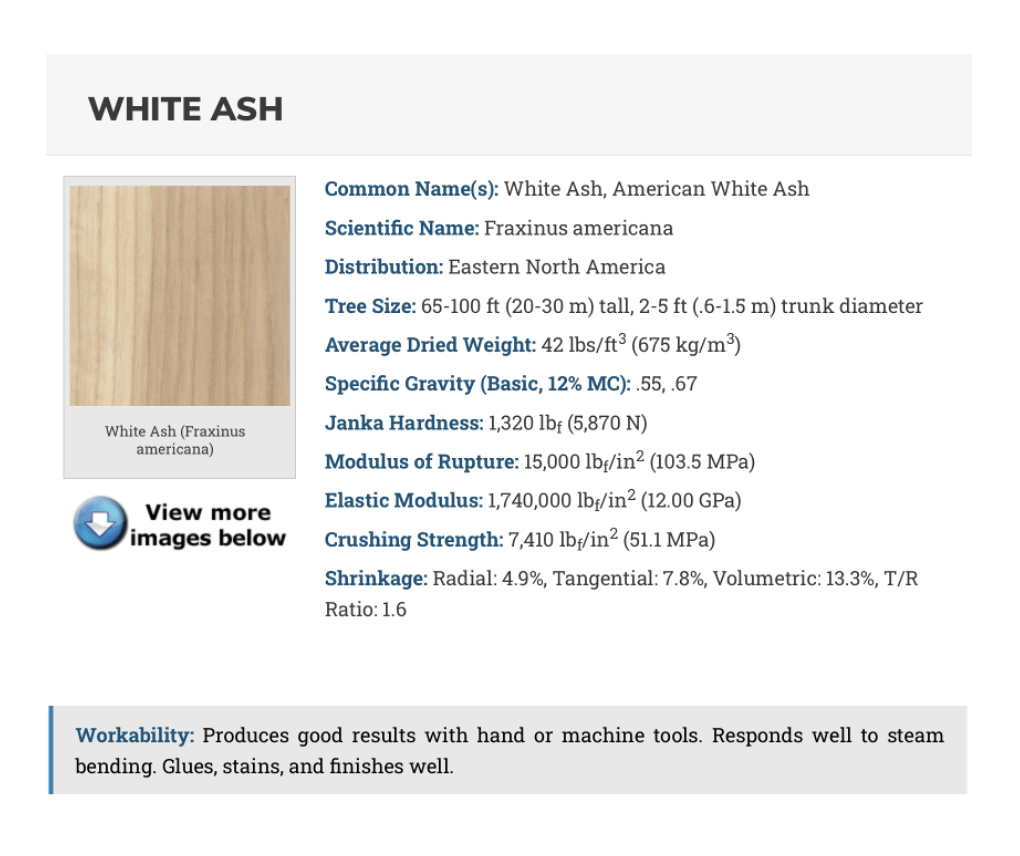
Professor recommended me with some other kinds of wood, including teak, ash and beech. After finding out that teak is much more expensive than other wood, I turned to white ash, as the lumber yard had some white ash boards that meets my size requirement.
I asked the lumber yard to send one sample piece of white ash to test first.
The test piece wasn’t so big, but I did many tests on it, including most of the process I would work with, cutting with band saw, table saw, sanding with different grids and also finishing.
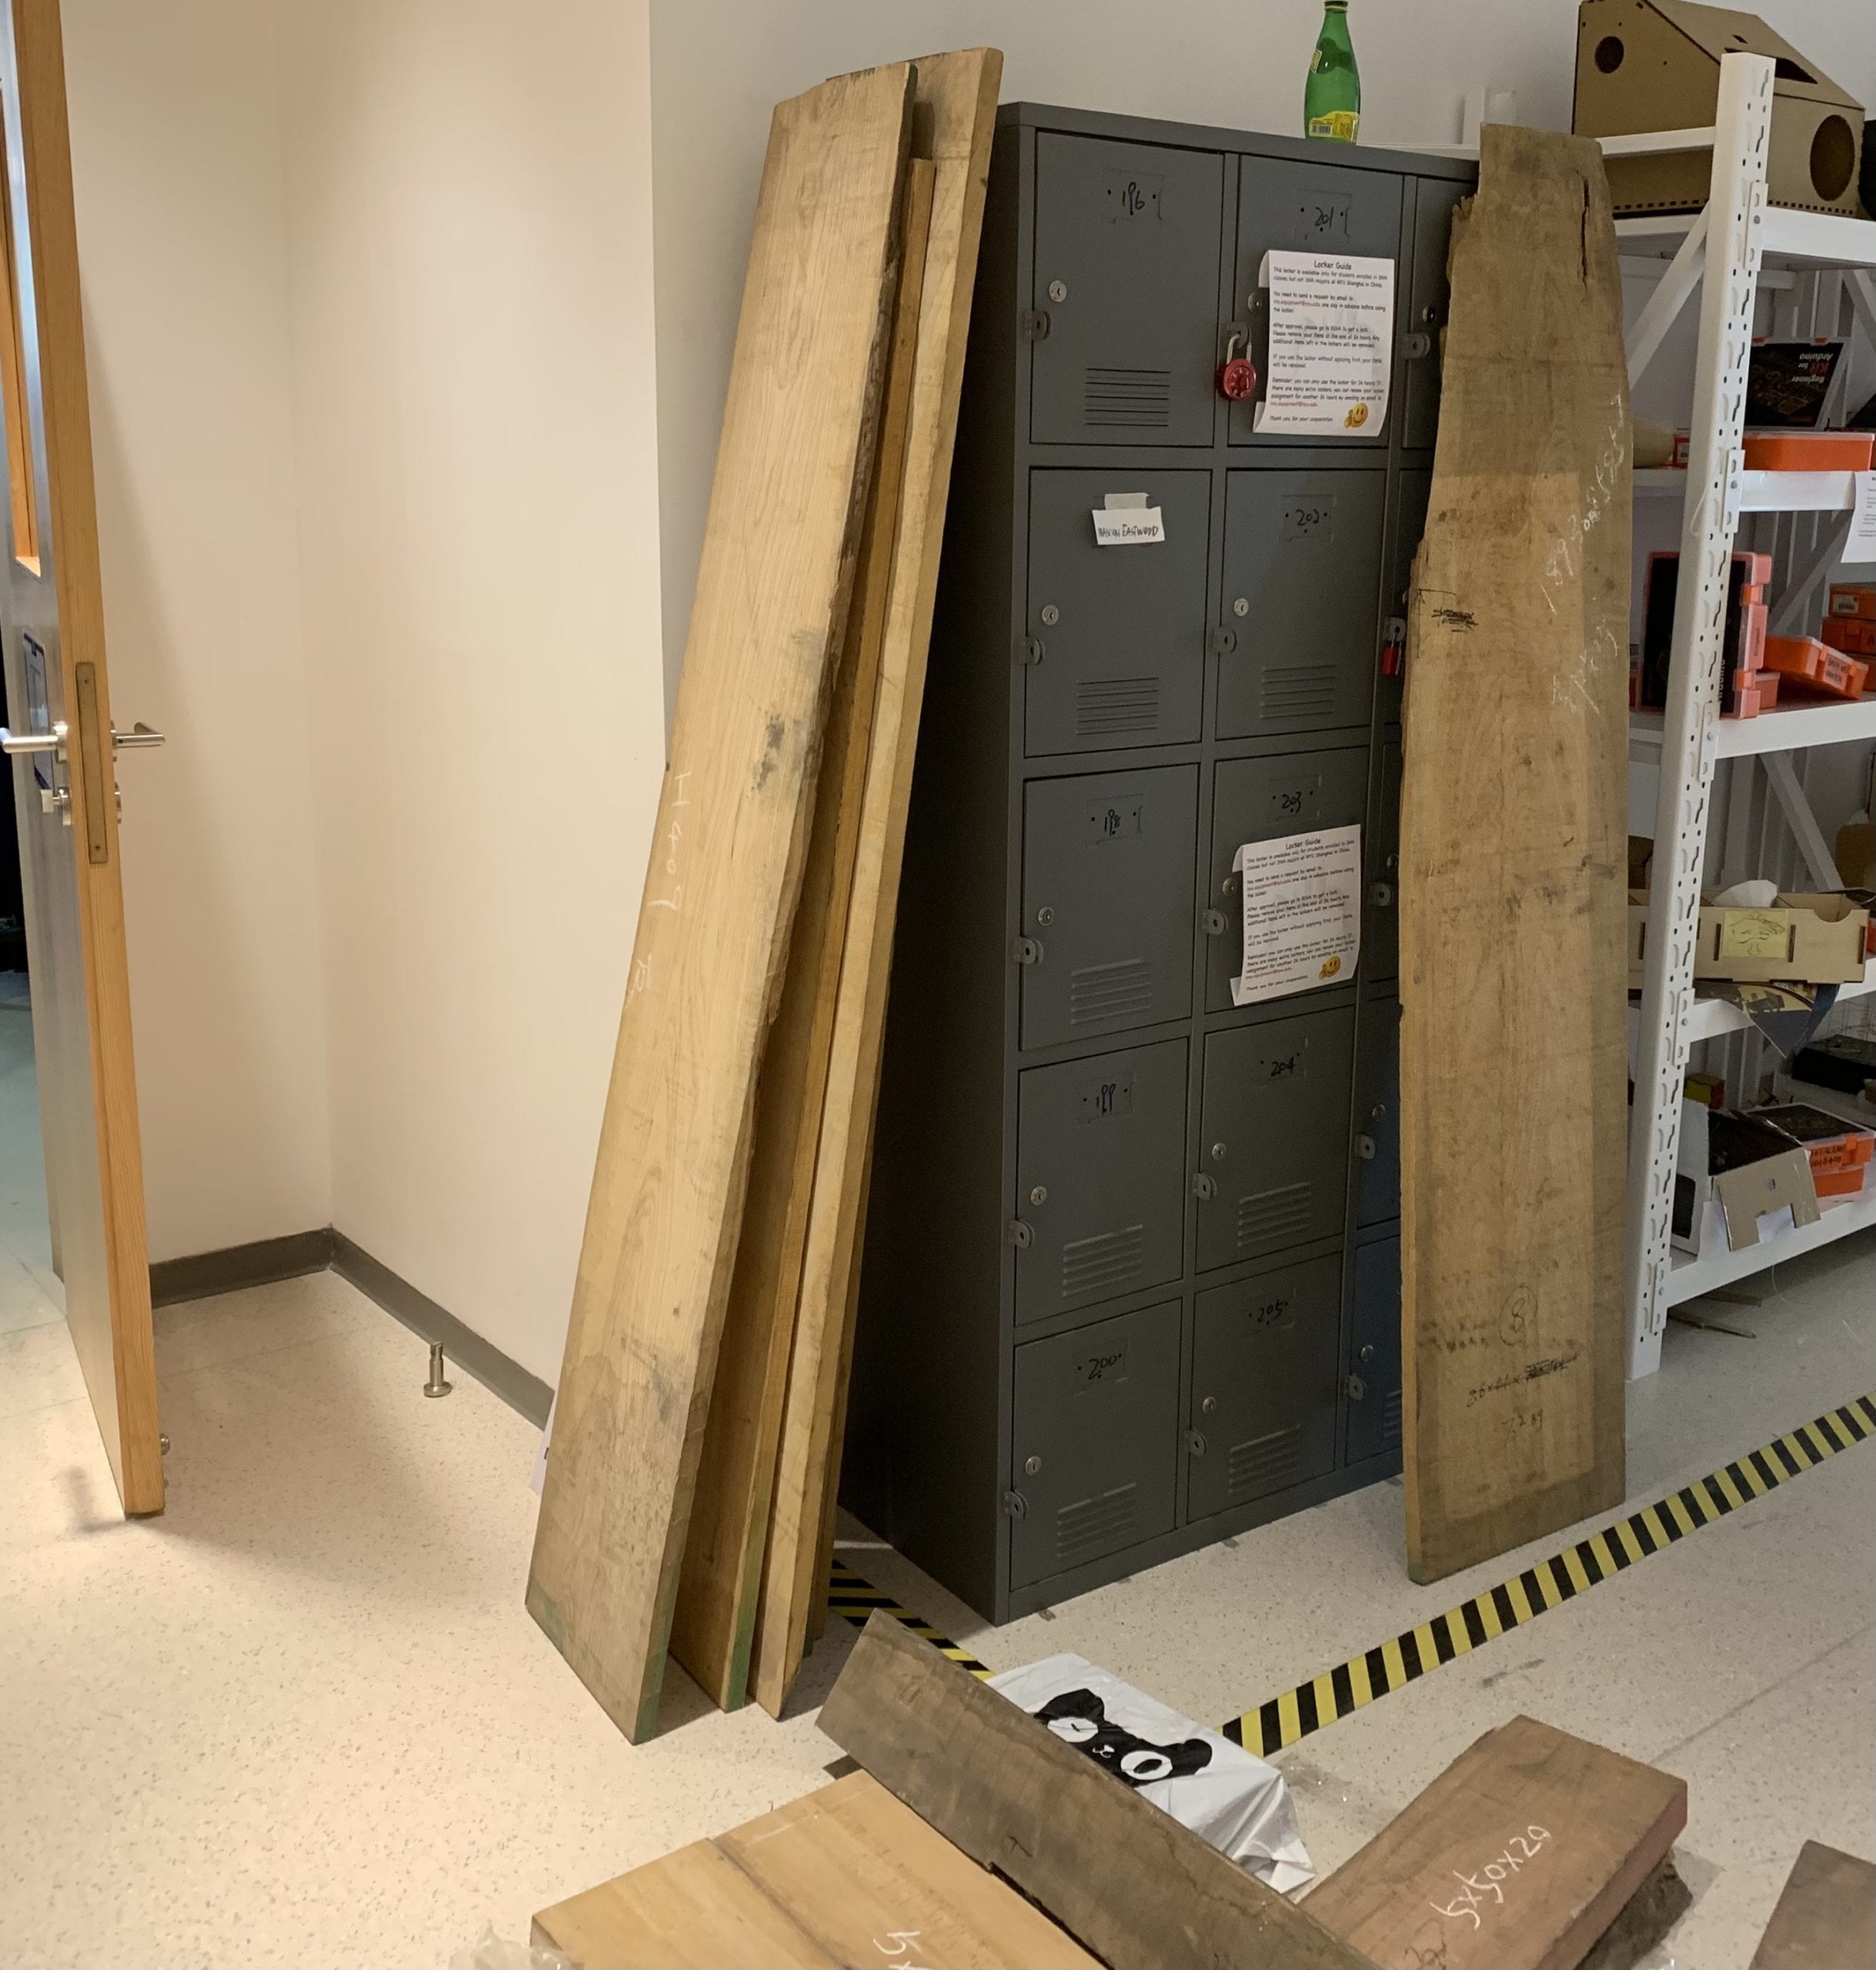
After the whole test, I found out white ash is easy to work with, it is not to hard for cutting and sanding, and not as soft as pine wood. Thus, I ordered all my wood for this project. The manager sent me seven pieces of wood board, their size varies a bit, but larger than I expected.
Fabrication
Preprocessing Wood
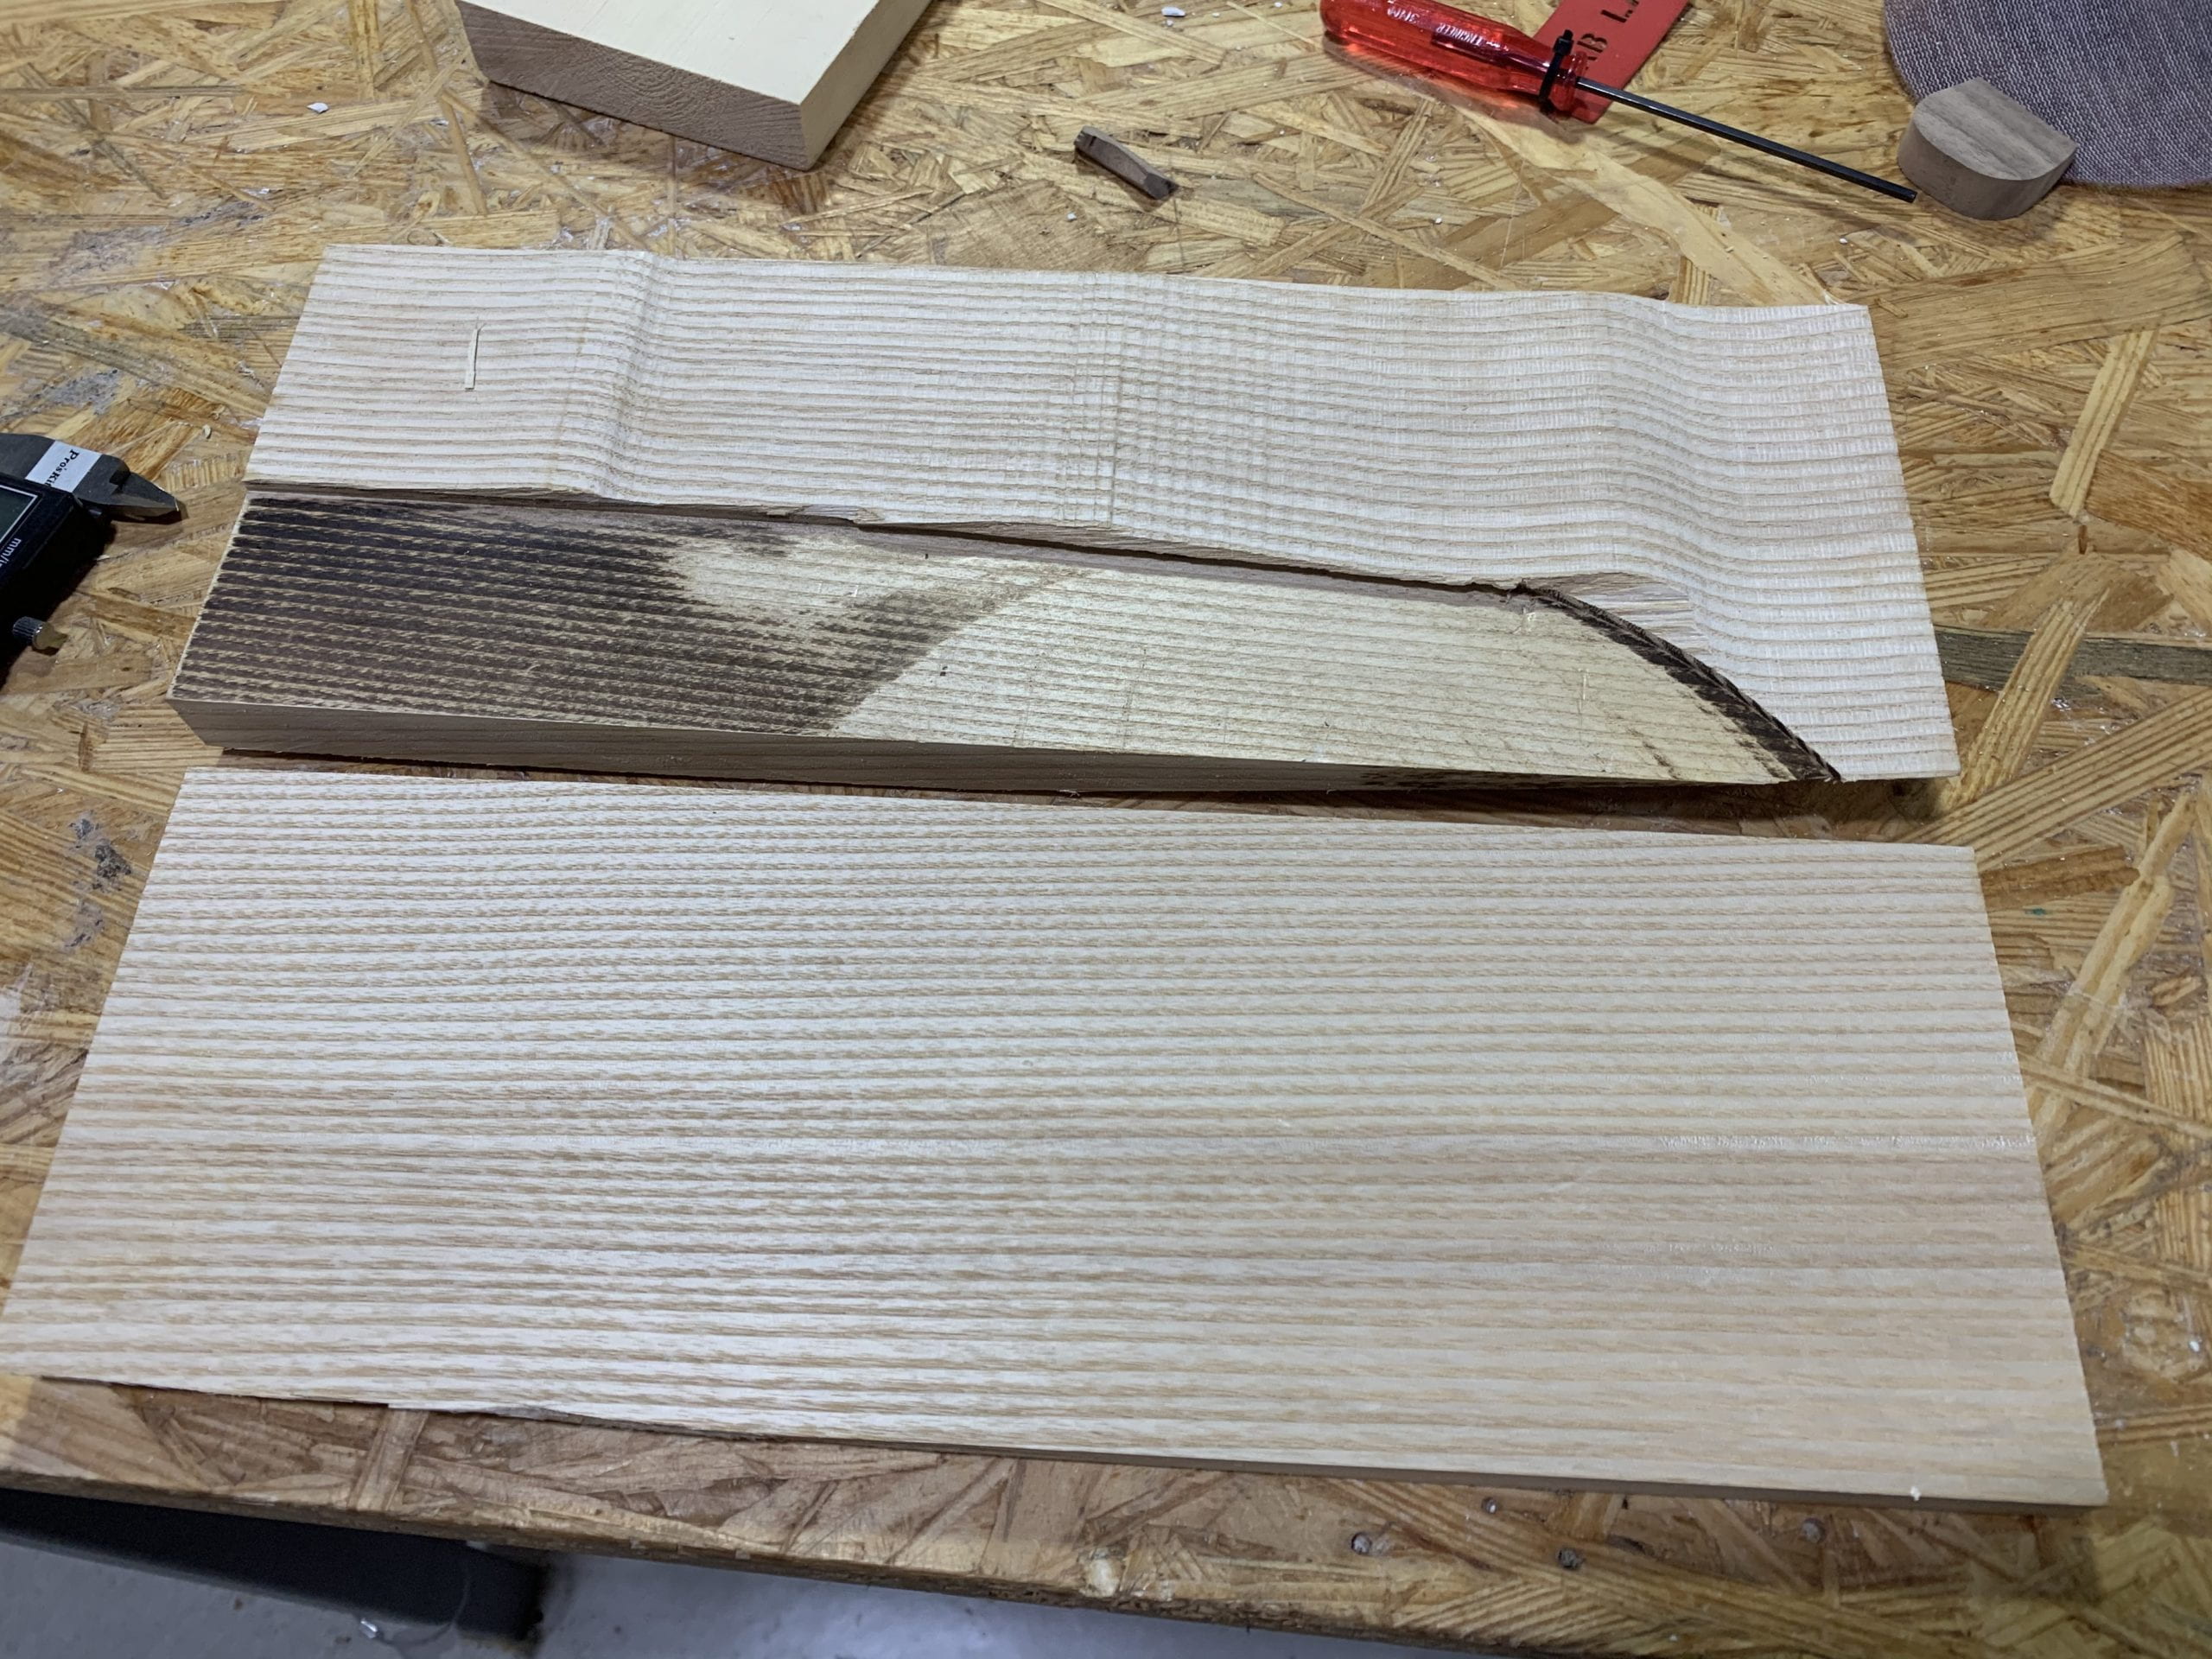
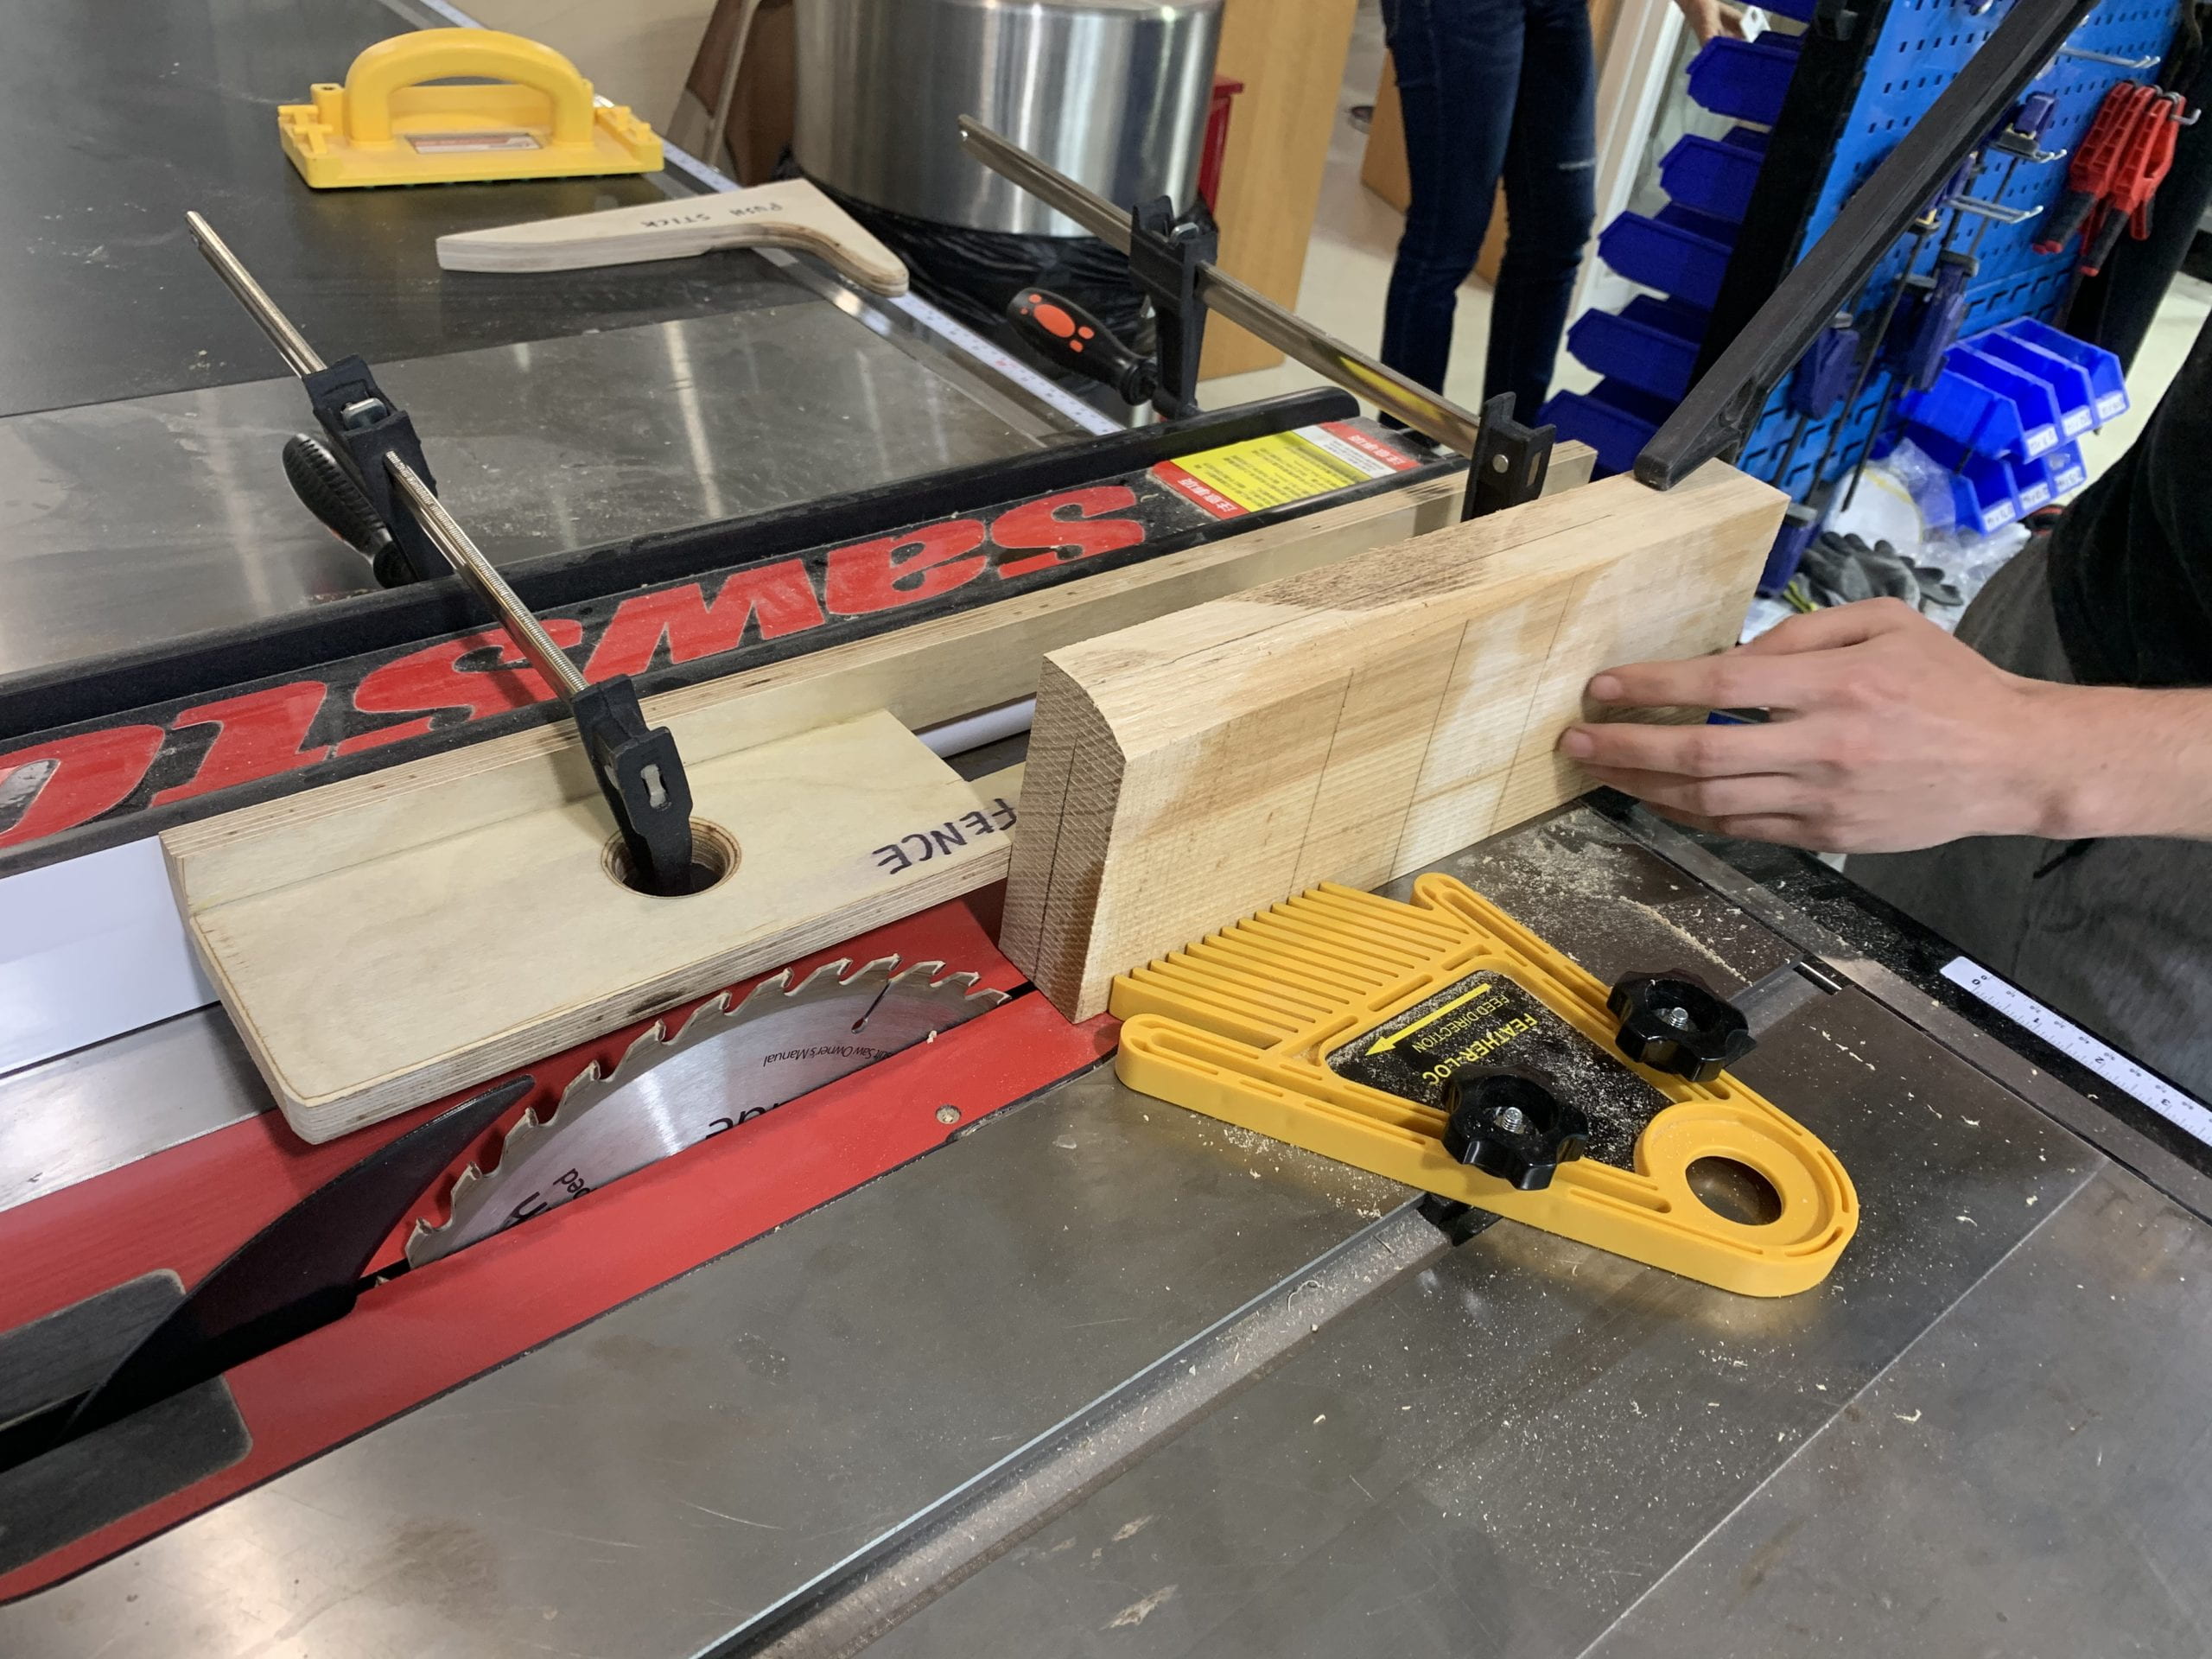
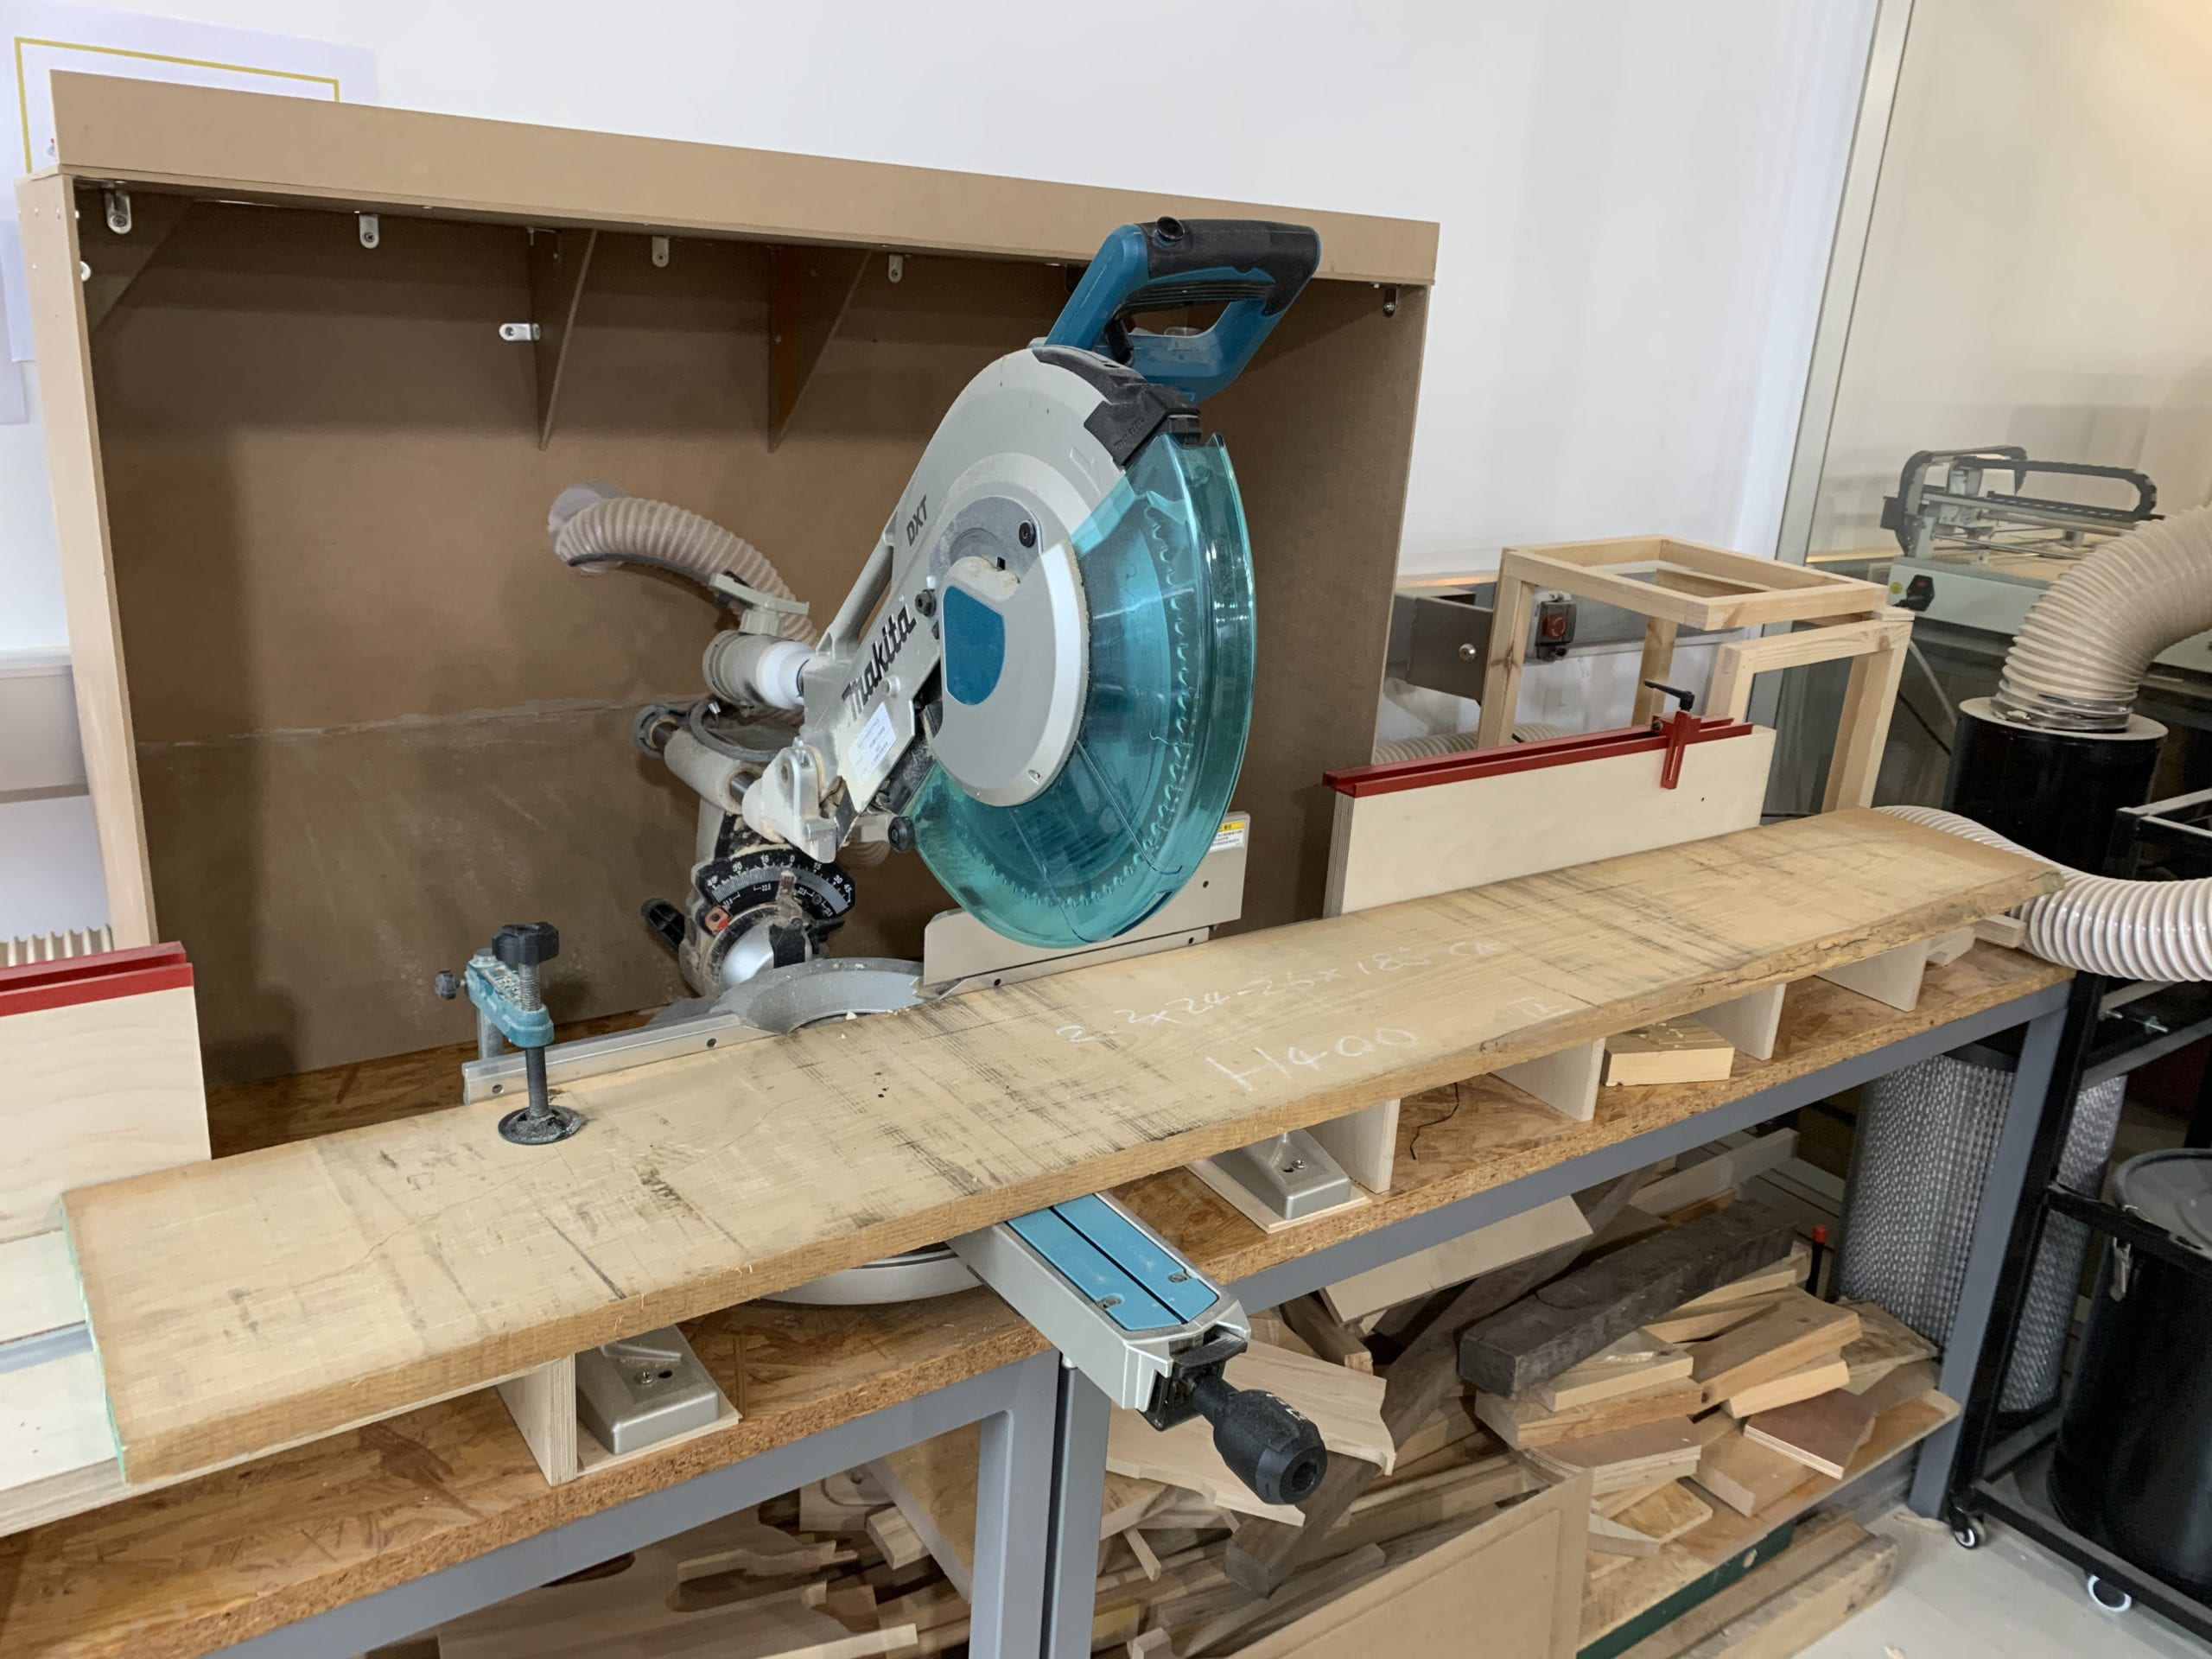
I used the miter saw, power planer and table saw to preprocess the wood. The wood I got from the lumber yard were around 1.5 meter to 2 meter long, which is definitely too long for any process. So I first used the miter saw to cut down pieces, then the power planer to plane smaller pieces. Miter saw and table saw might be used again after plane to cut exact length that I want since pieces too short can’t go through the power plane.

Redesign I
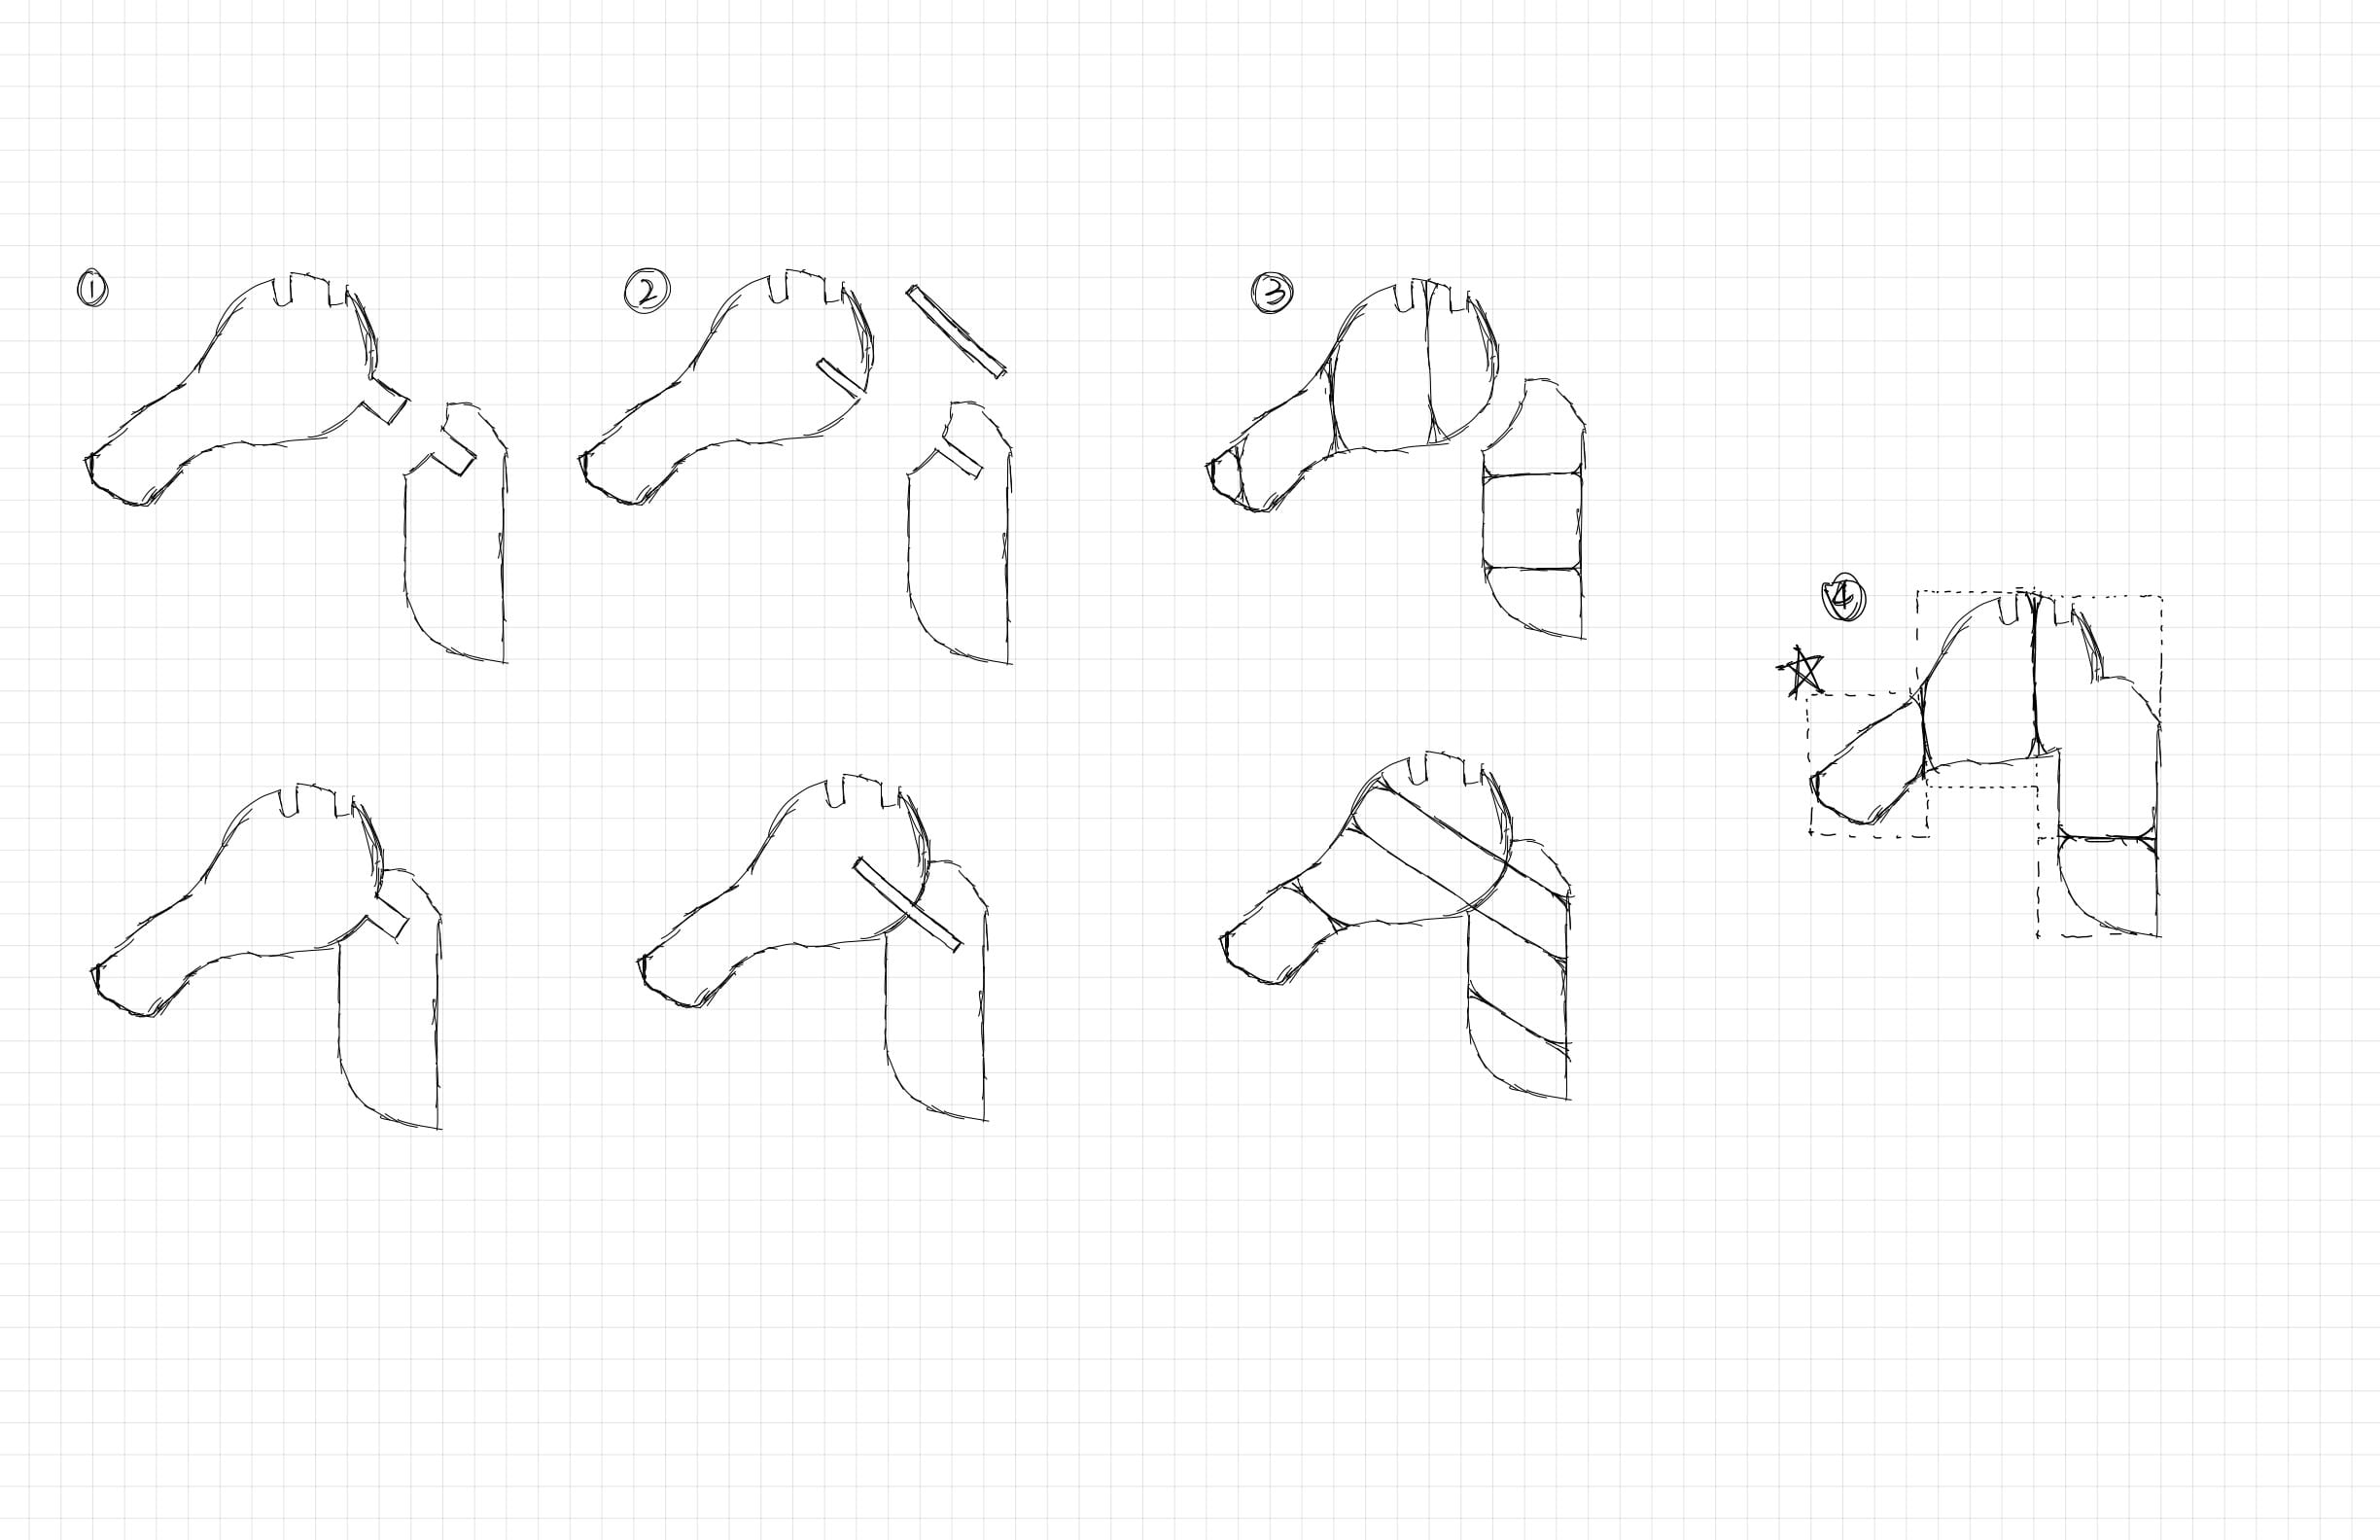
In previous designs, I calculated the width as 25 centimeter, thus I planed different ways to join the head with the neck together (options 1 – 3), since the contact surface between two parts are not straight, the joinery would be very difficult.
However, after receiving the wood, I found that there are several pieces have width of 35 – 40. Thus, I redesigned the joinery of head and neck so that I don’t actually need to join the two pieces together as I made it one piece at the first place (option 4). Thanks to the lumber yard, the wider wood saved my day from difficult joineries.
Gluing
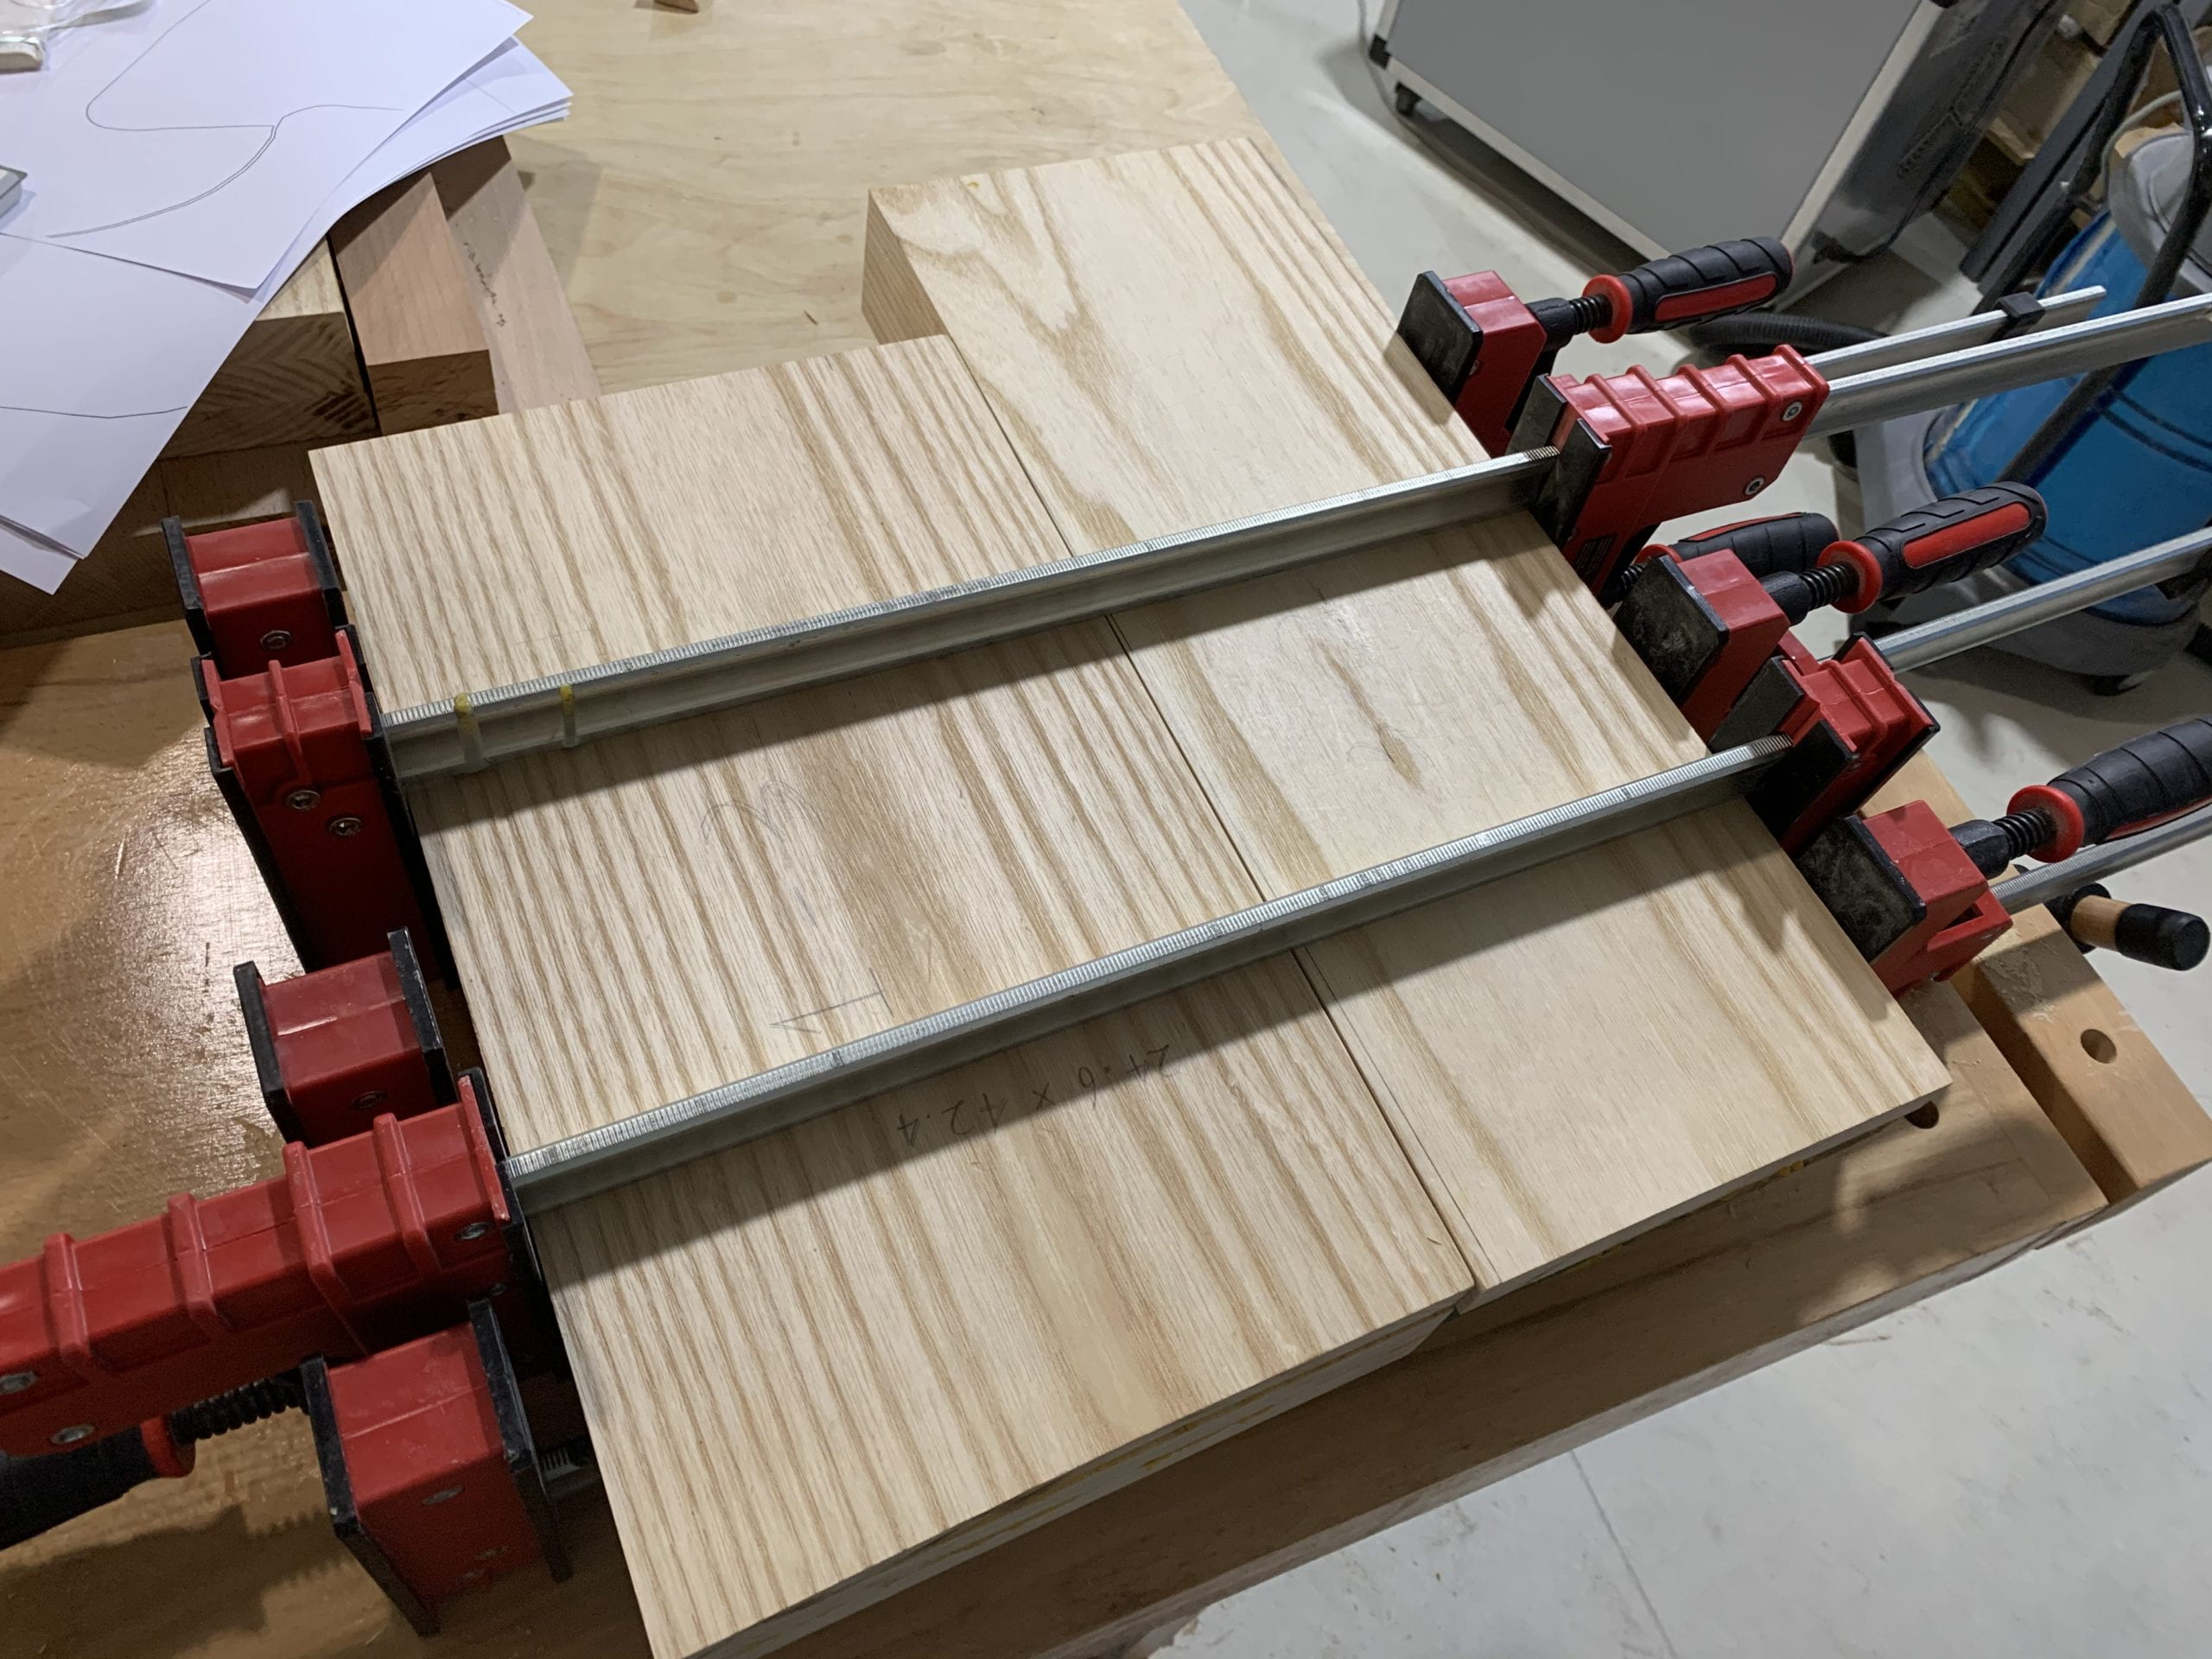
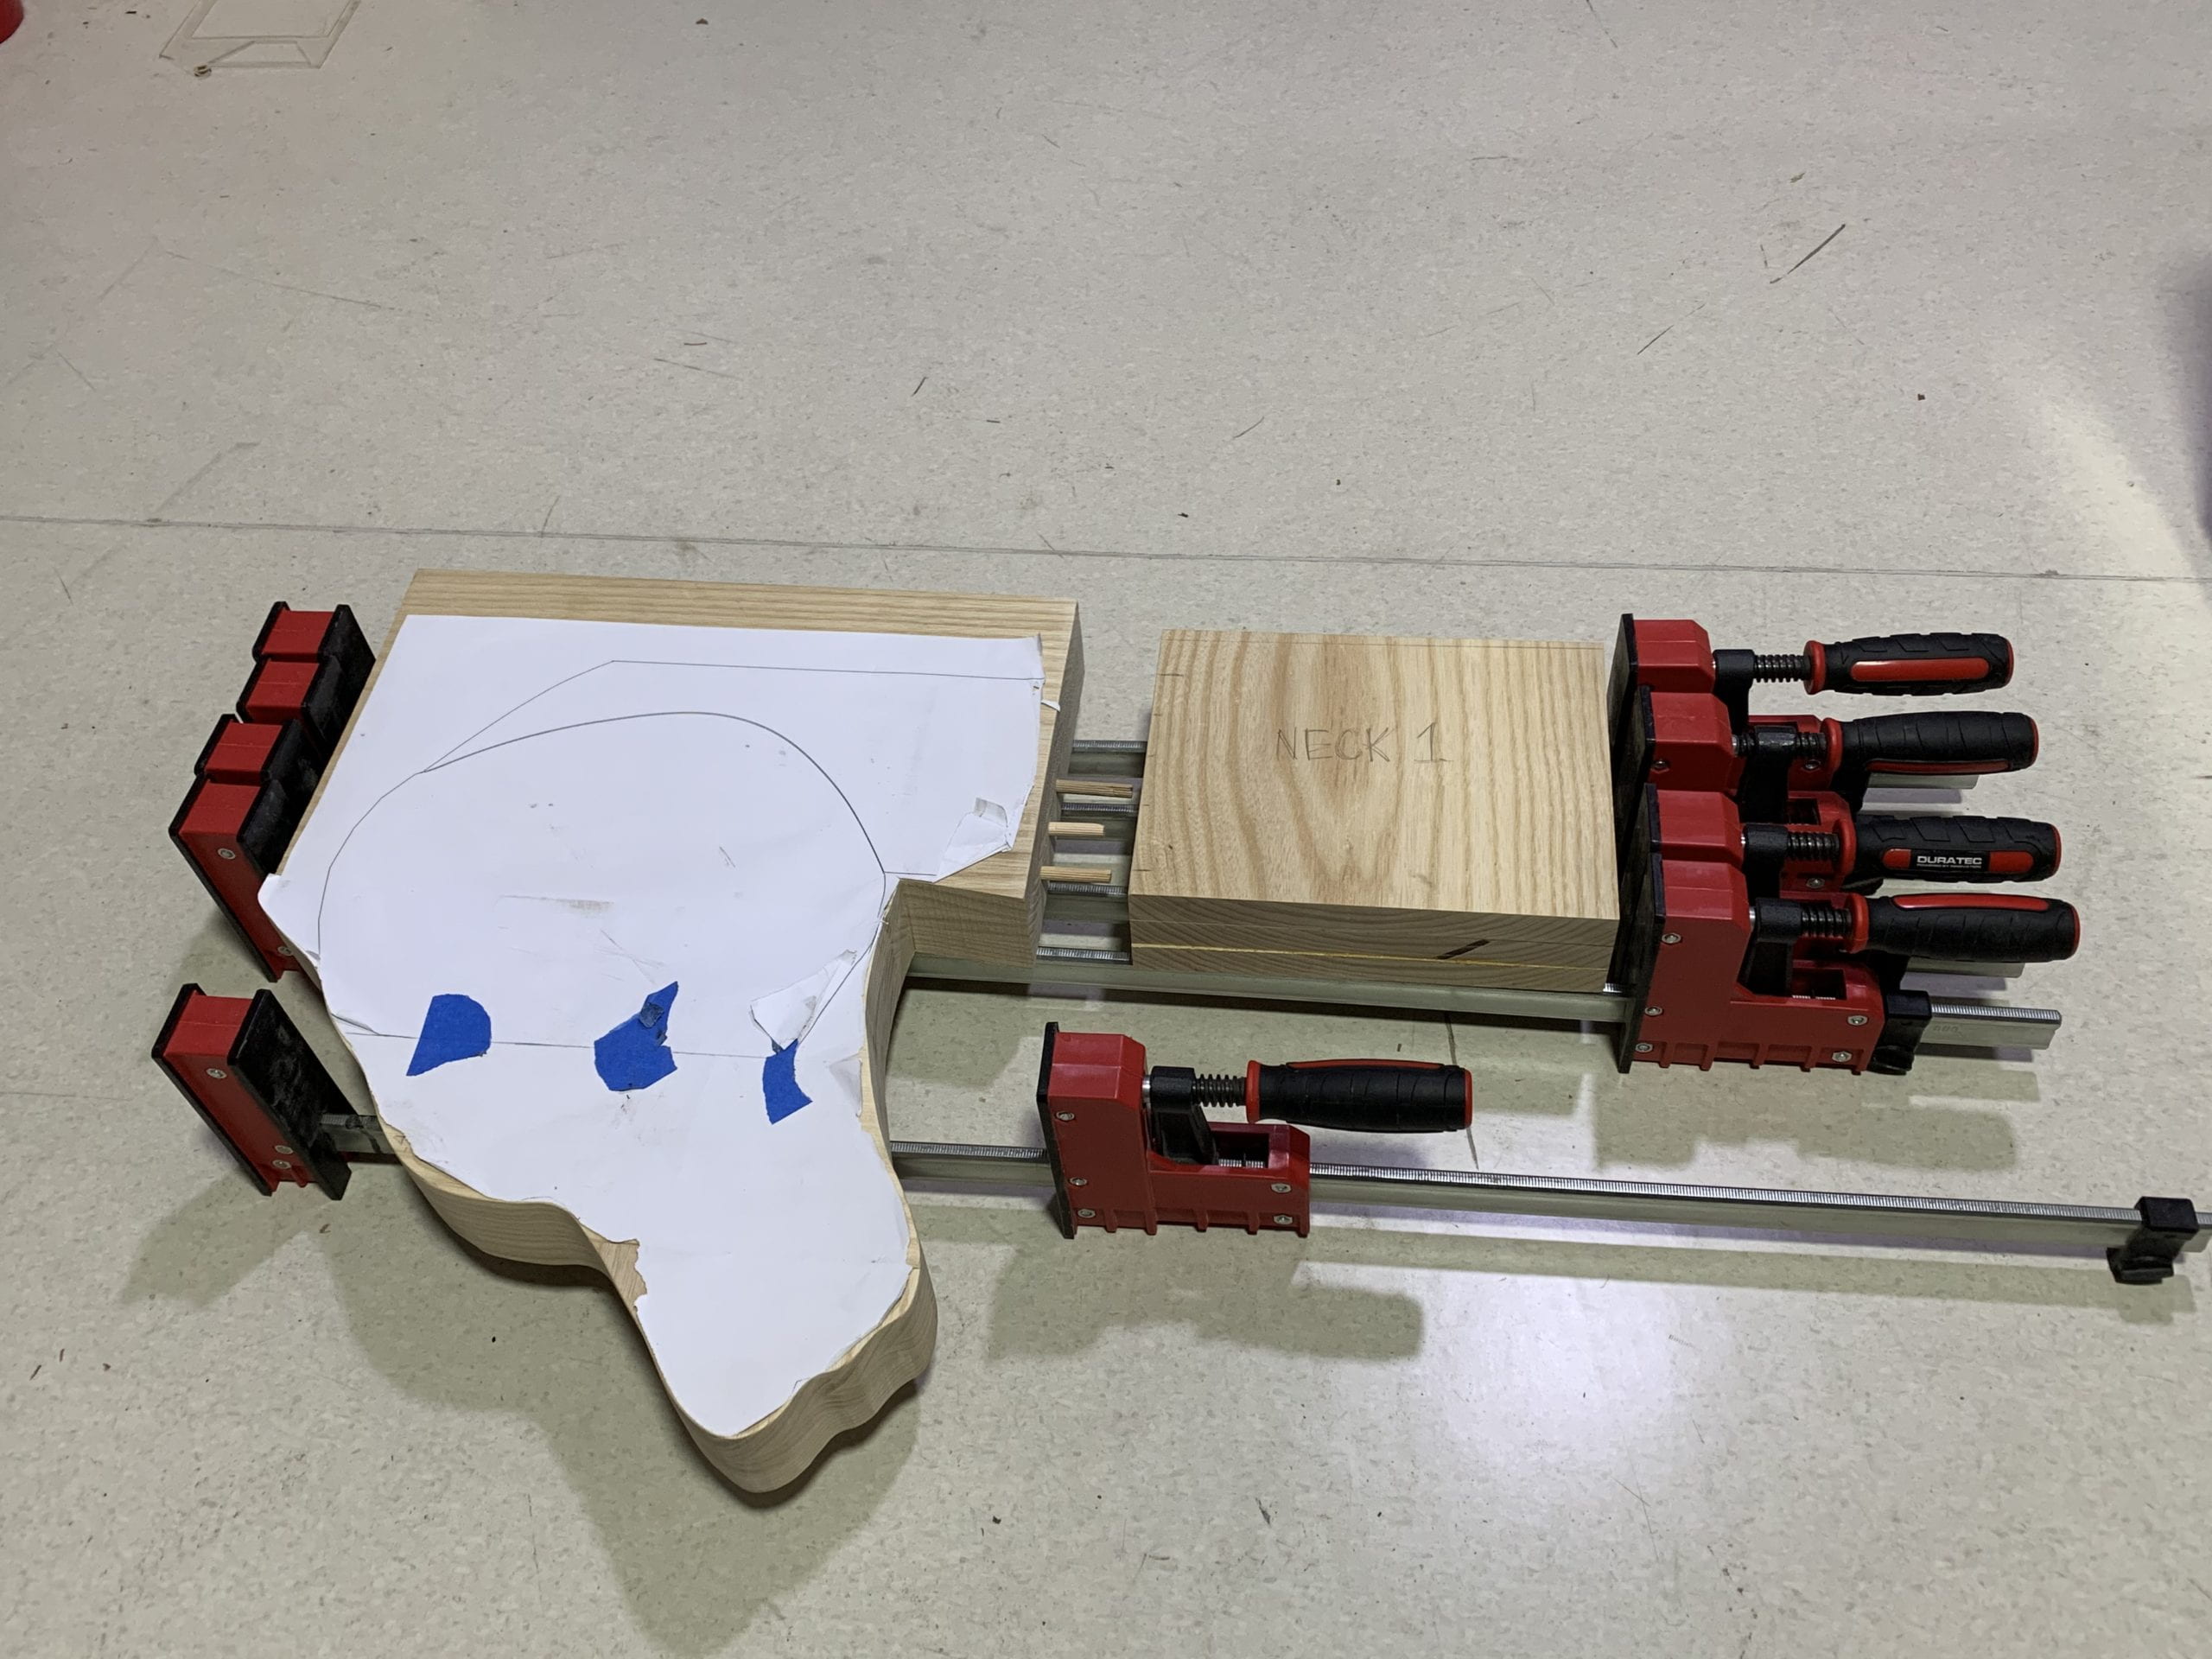
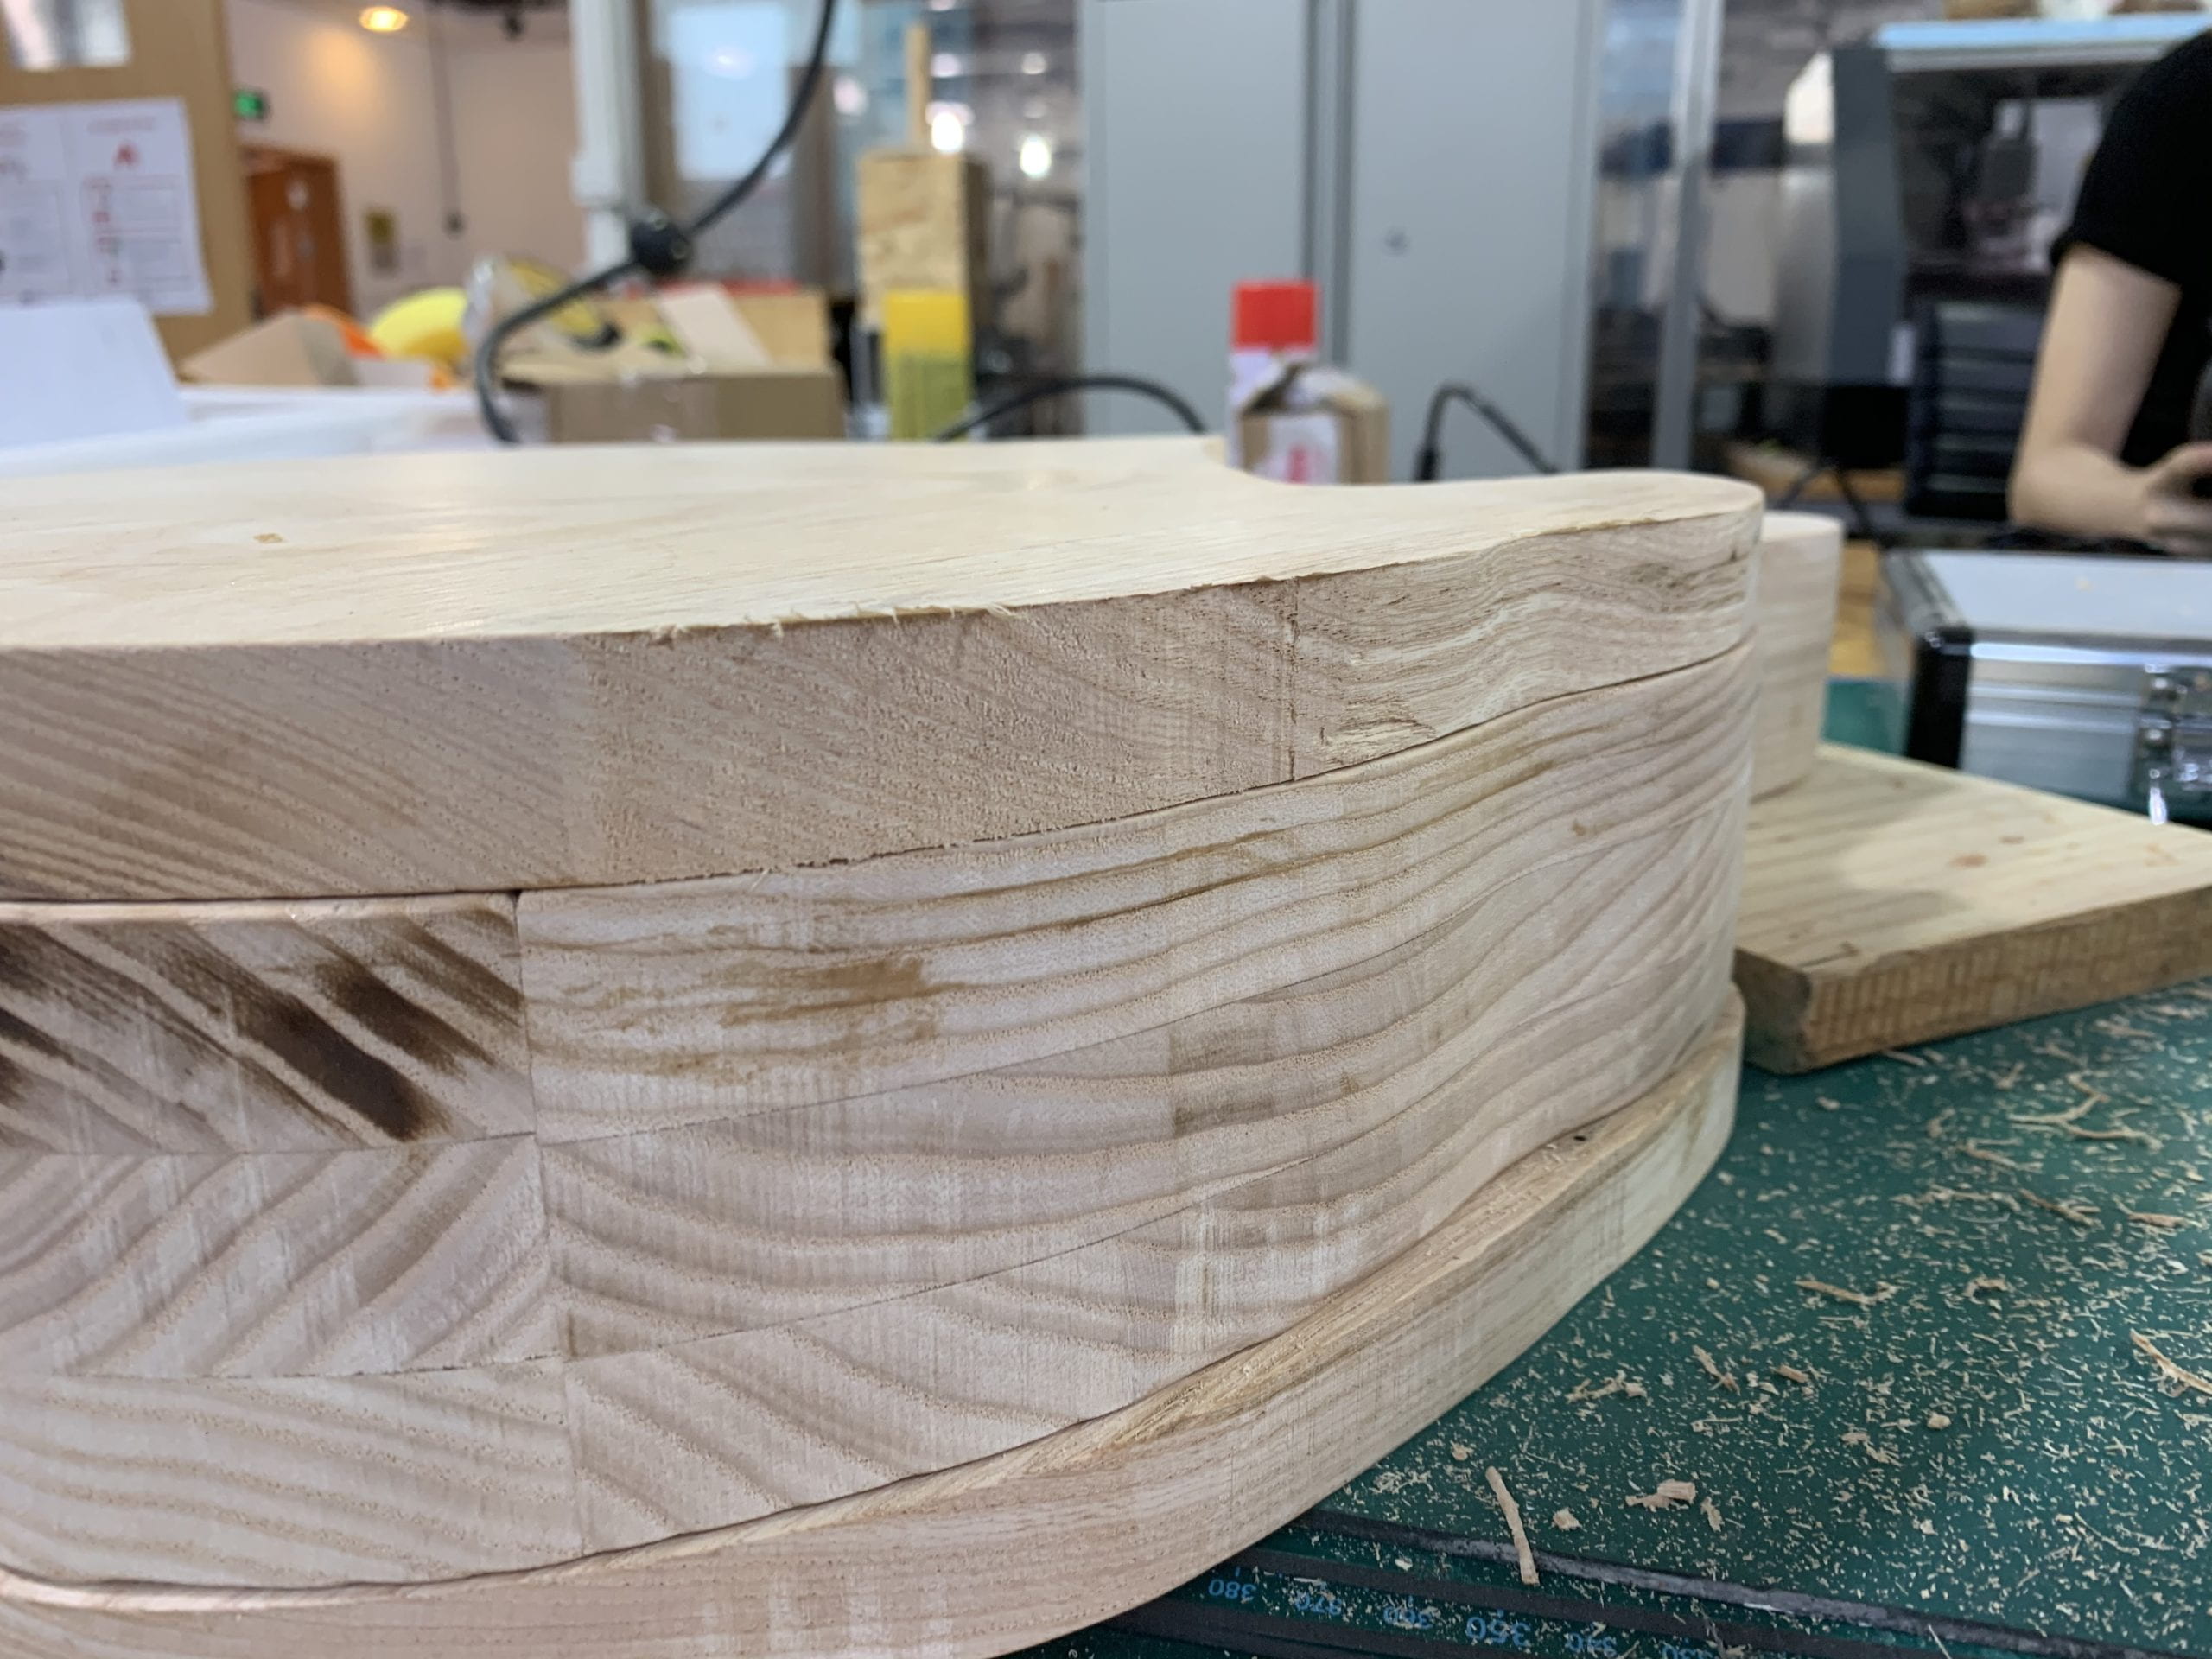
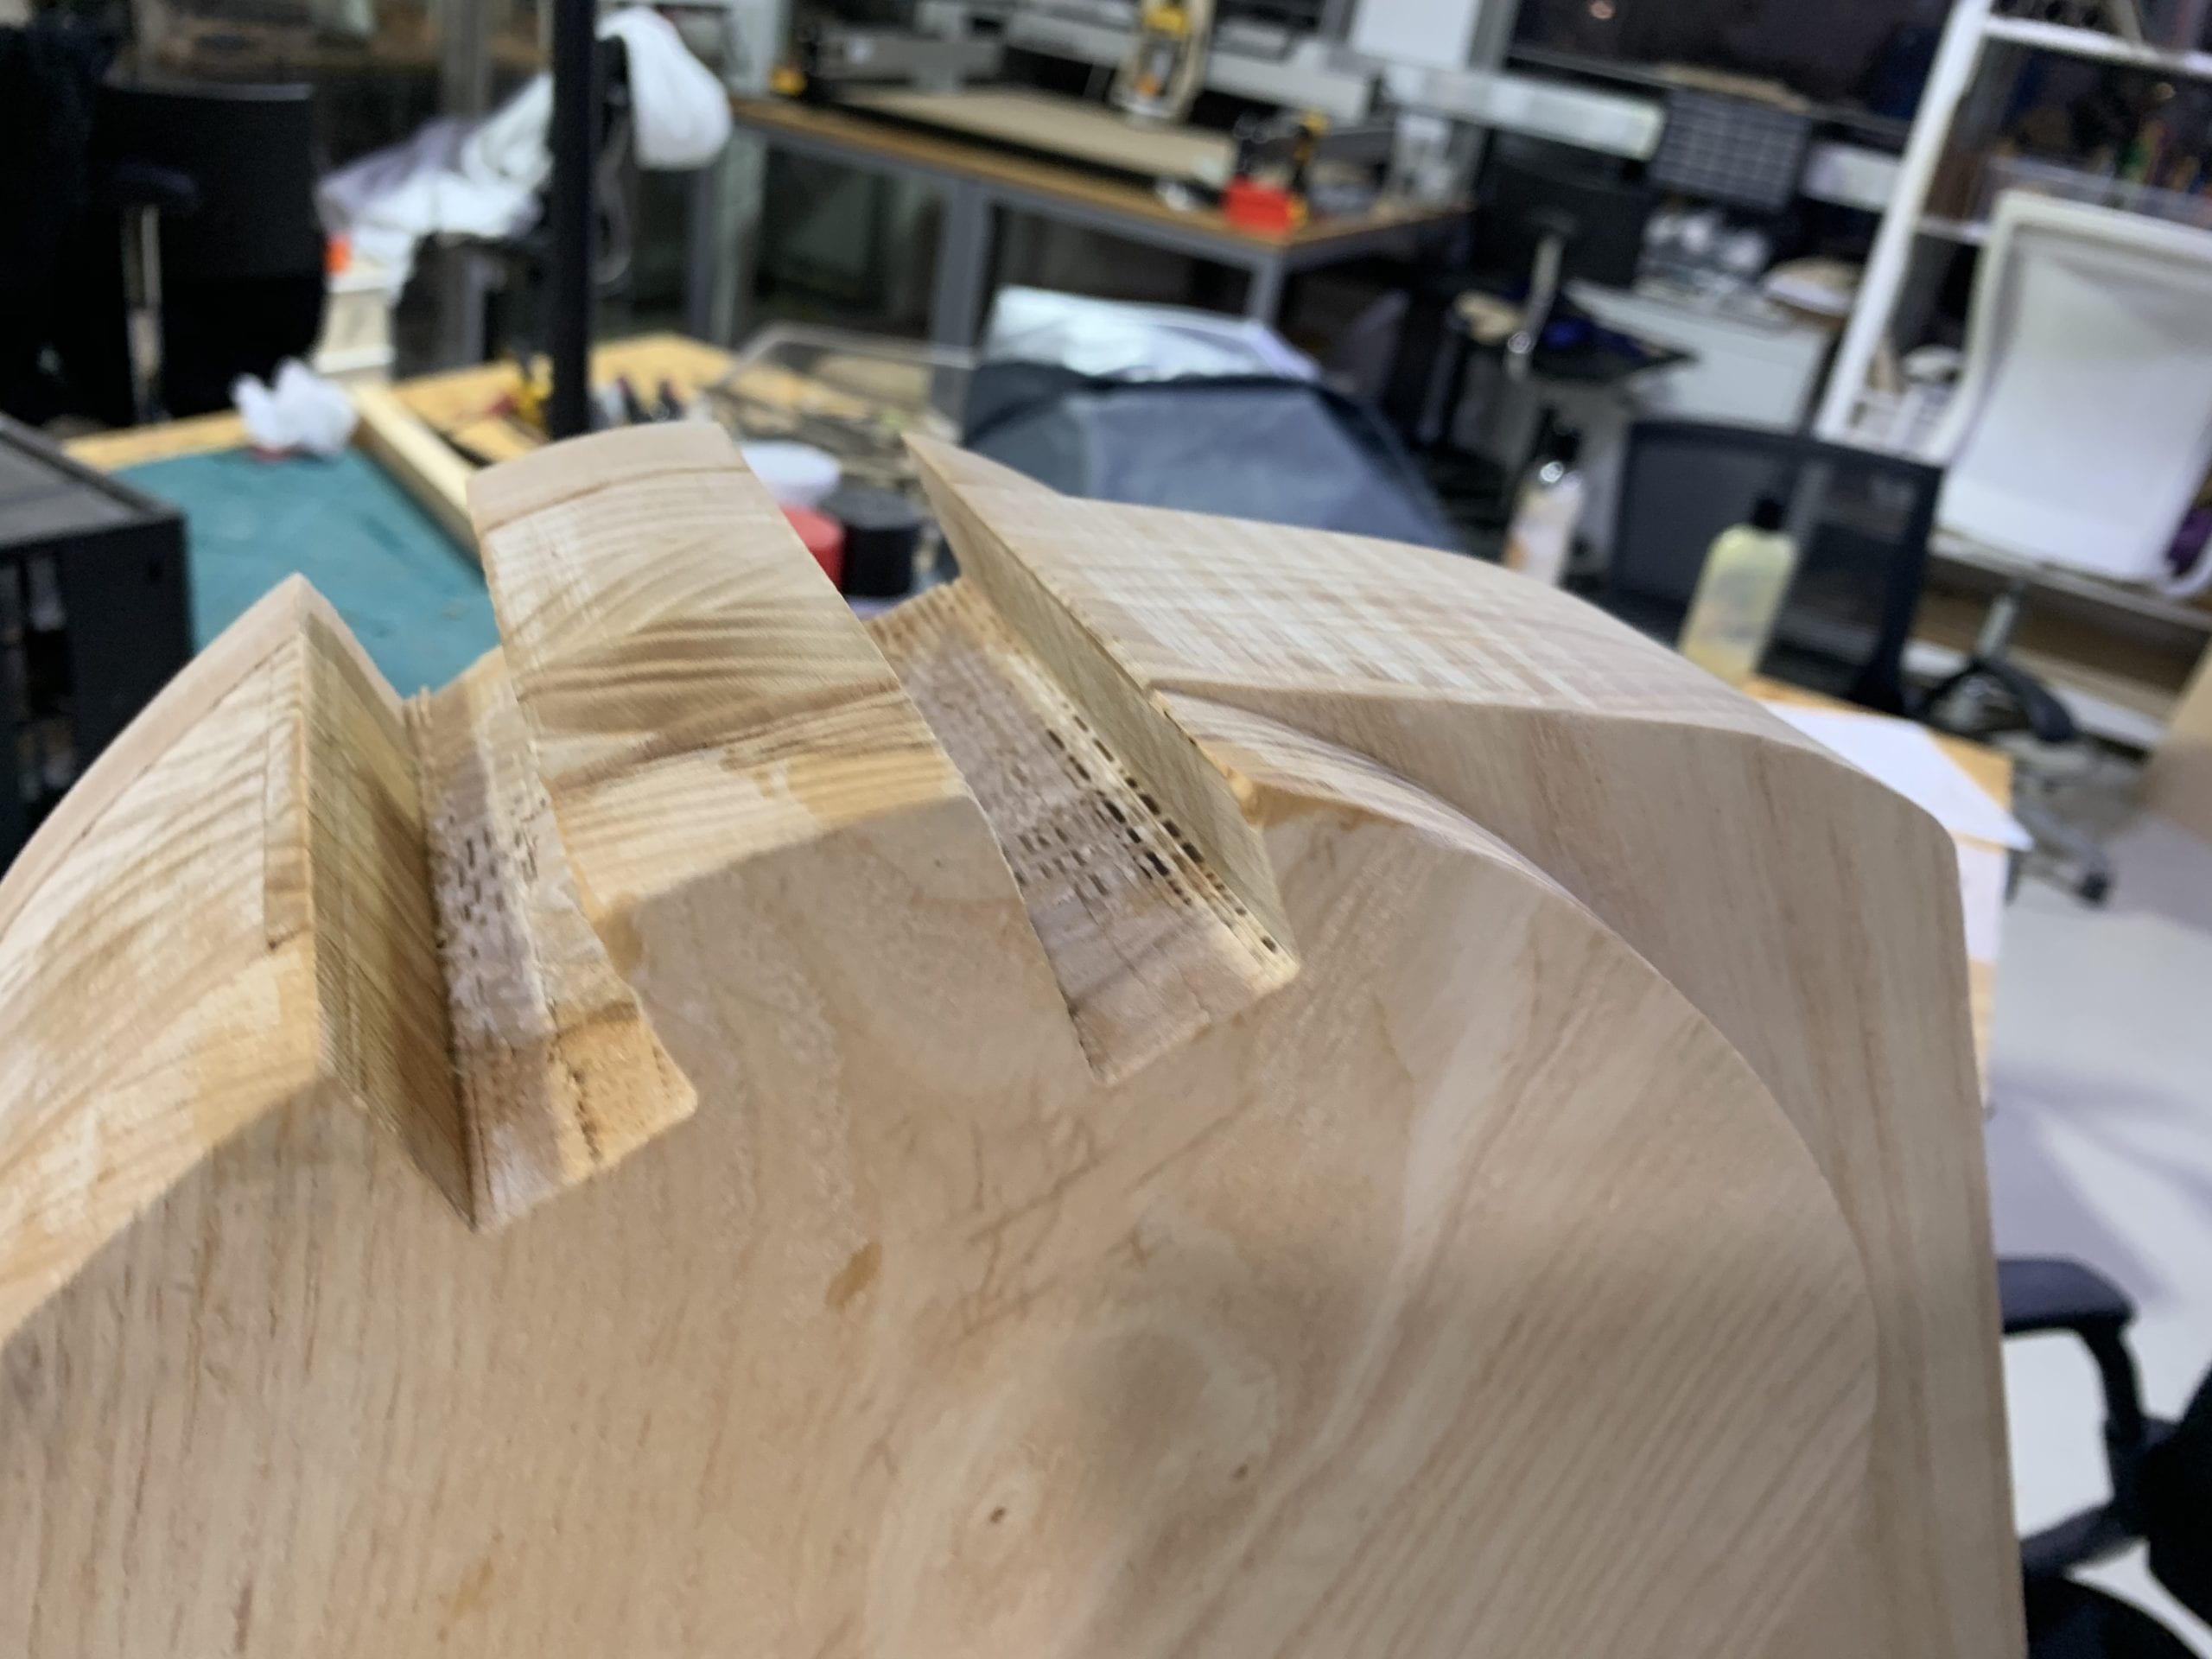
Gluing is really one big part of this project. I designed the head and neck to have three layers of wood board, thus the head along has nine pieces of small boards, and all of them have to be glued together. I first glue the three layers together as the surface is big, then the side face with three board would be thick enough for another gluing.
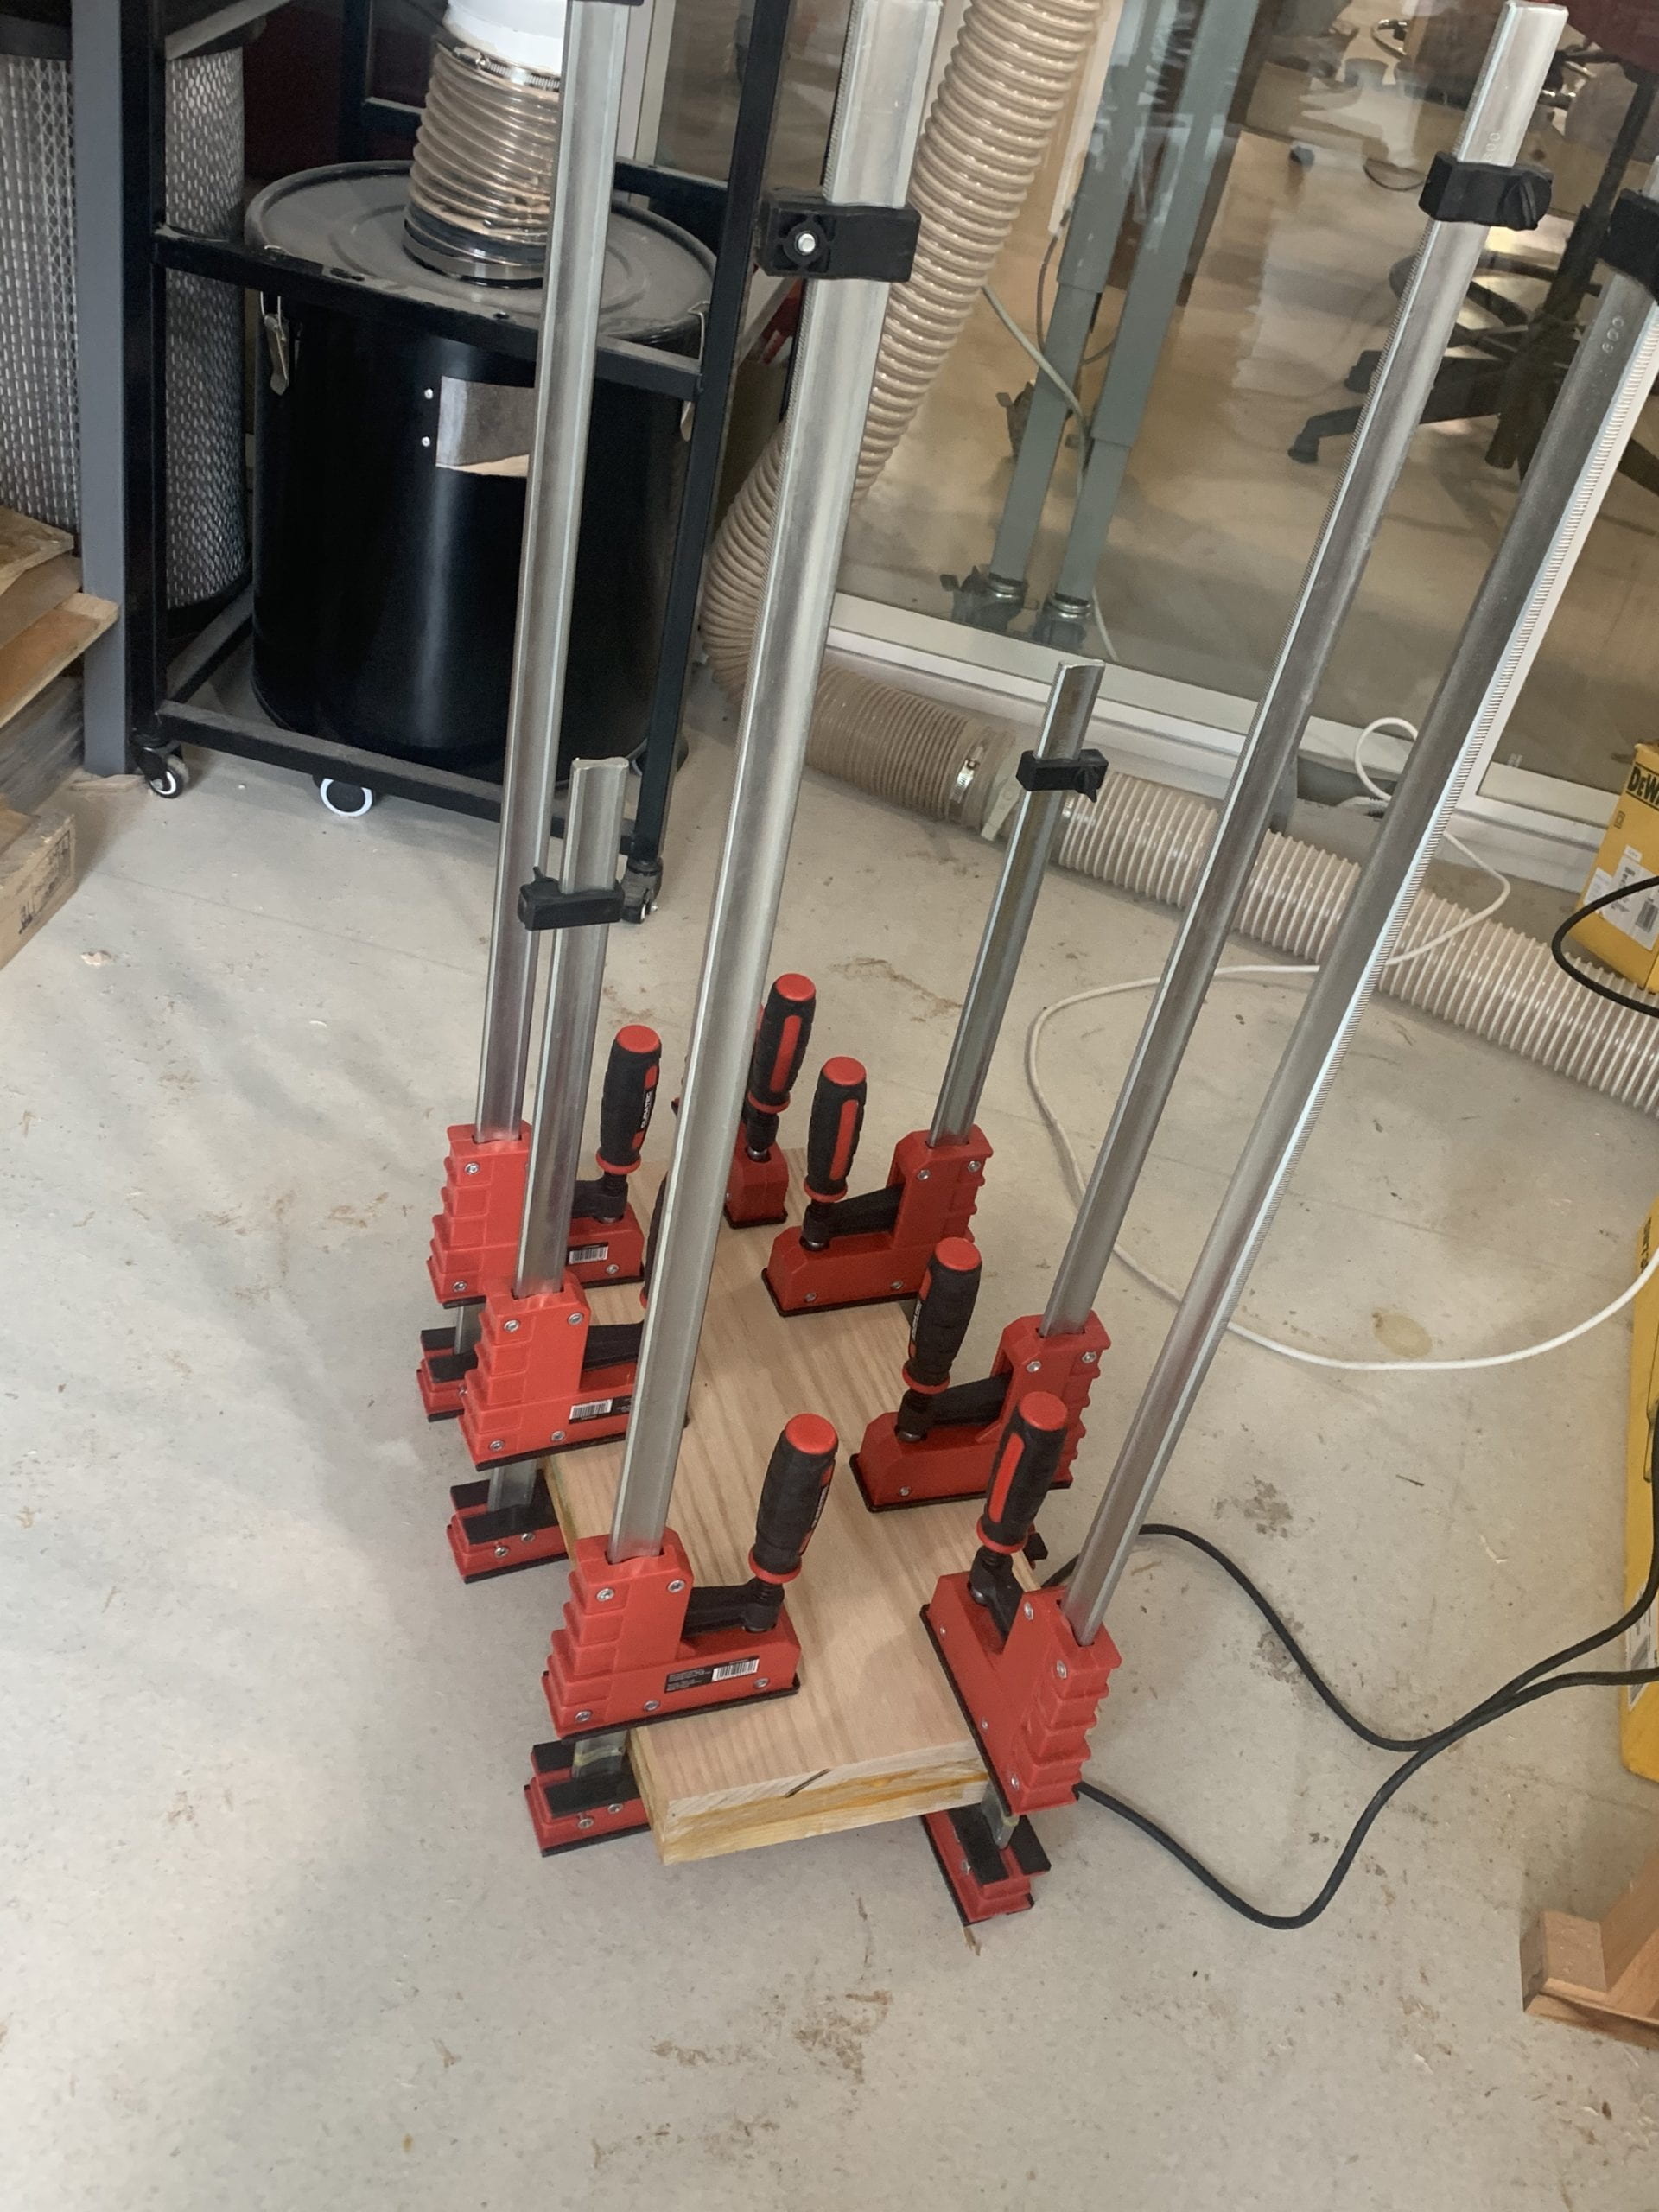
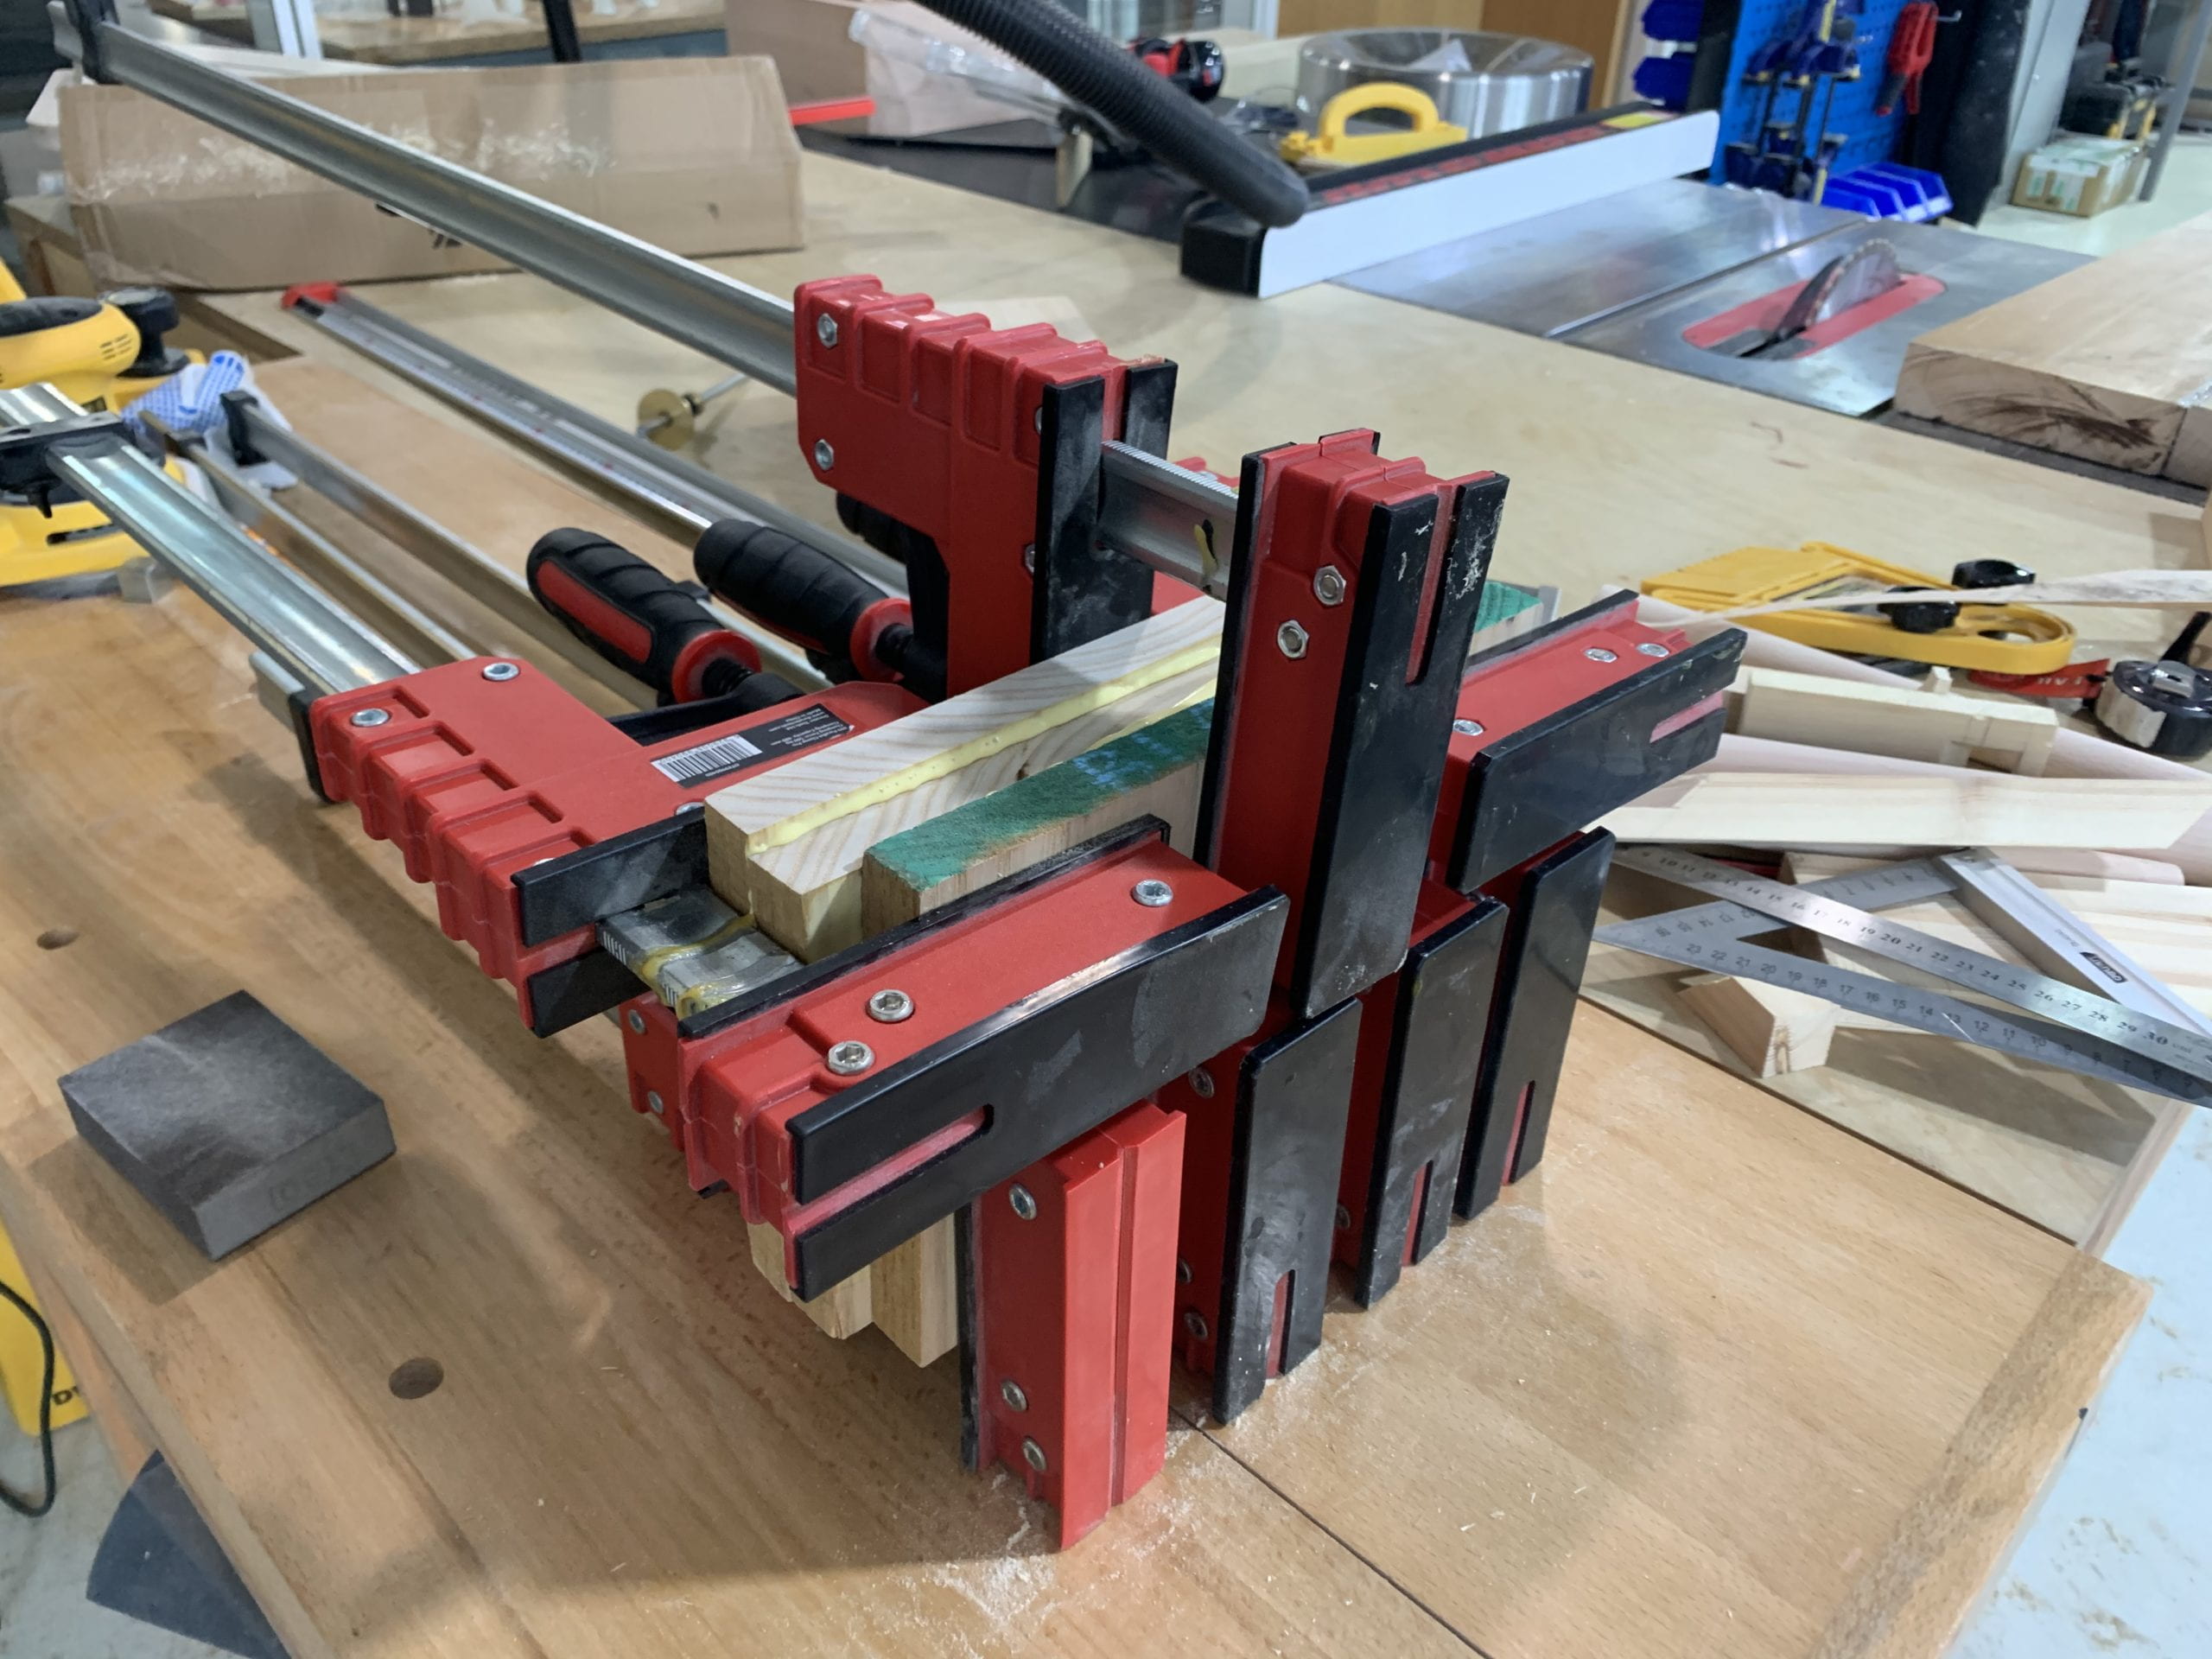
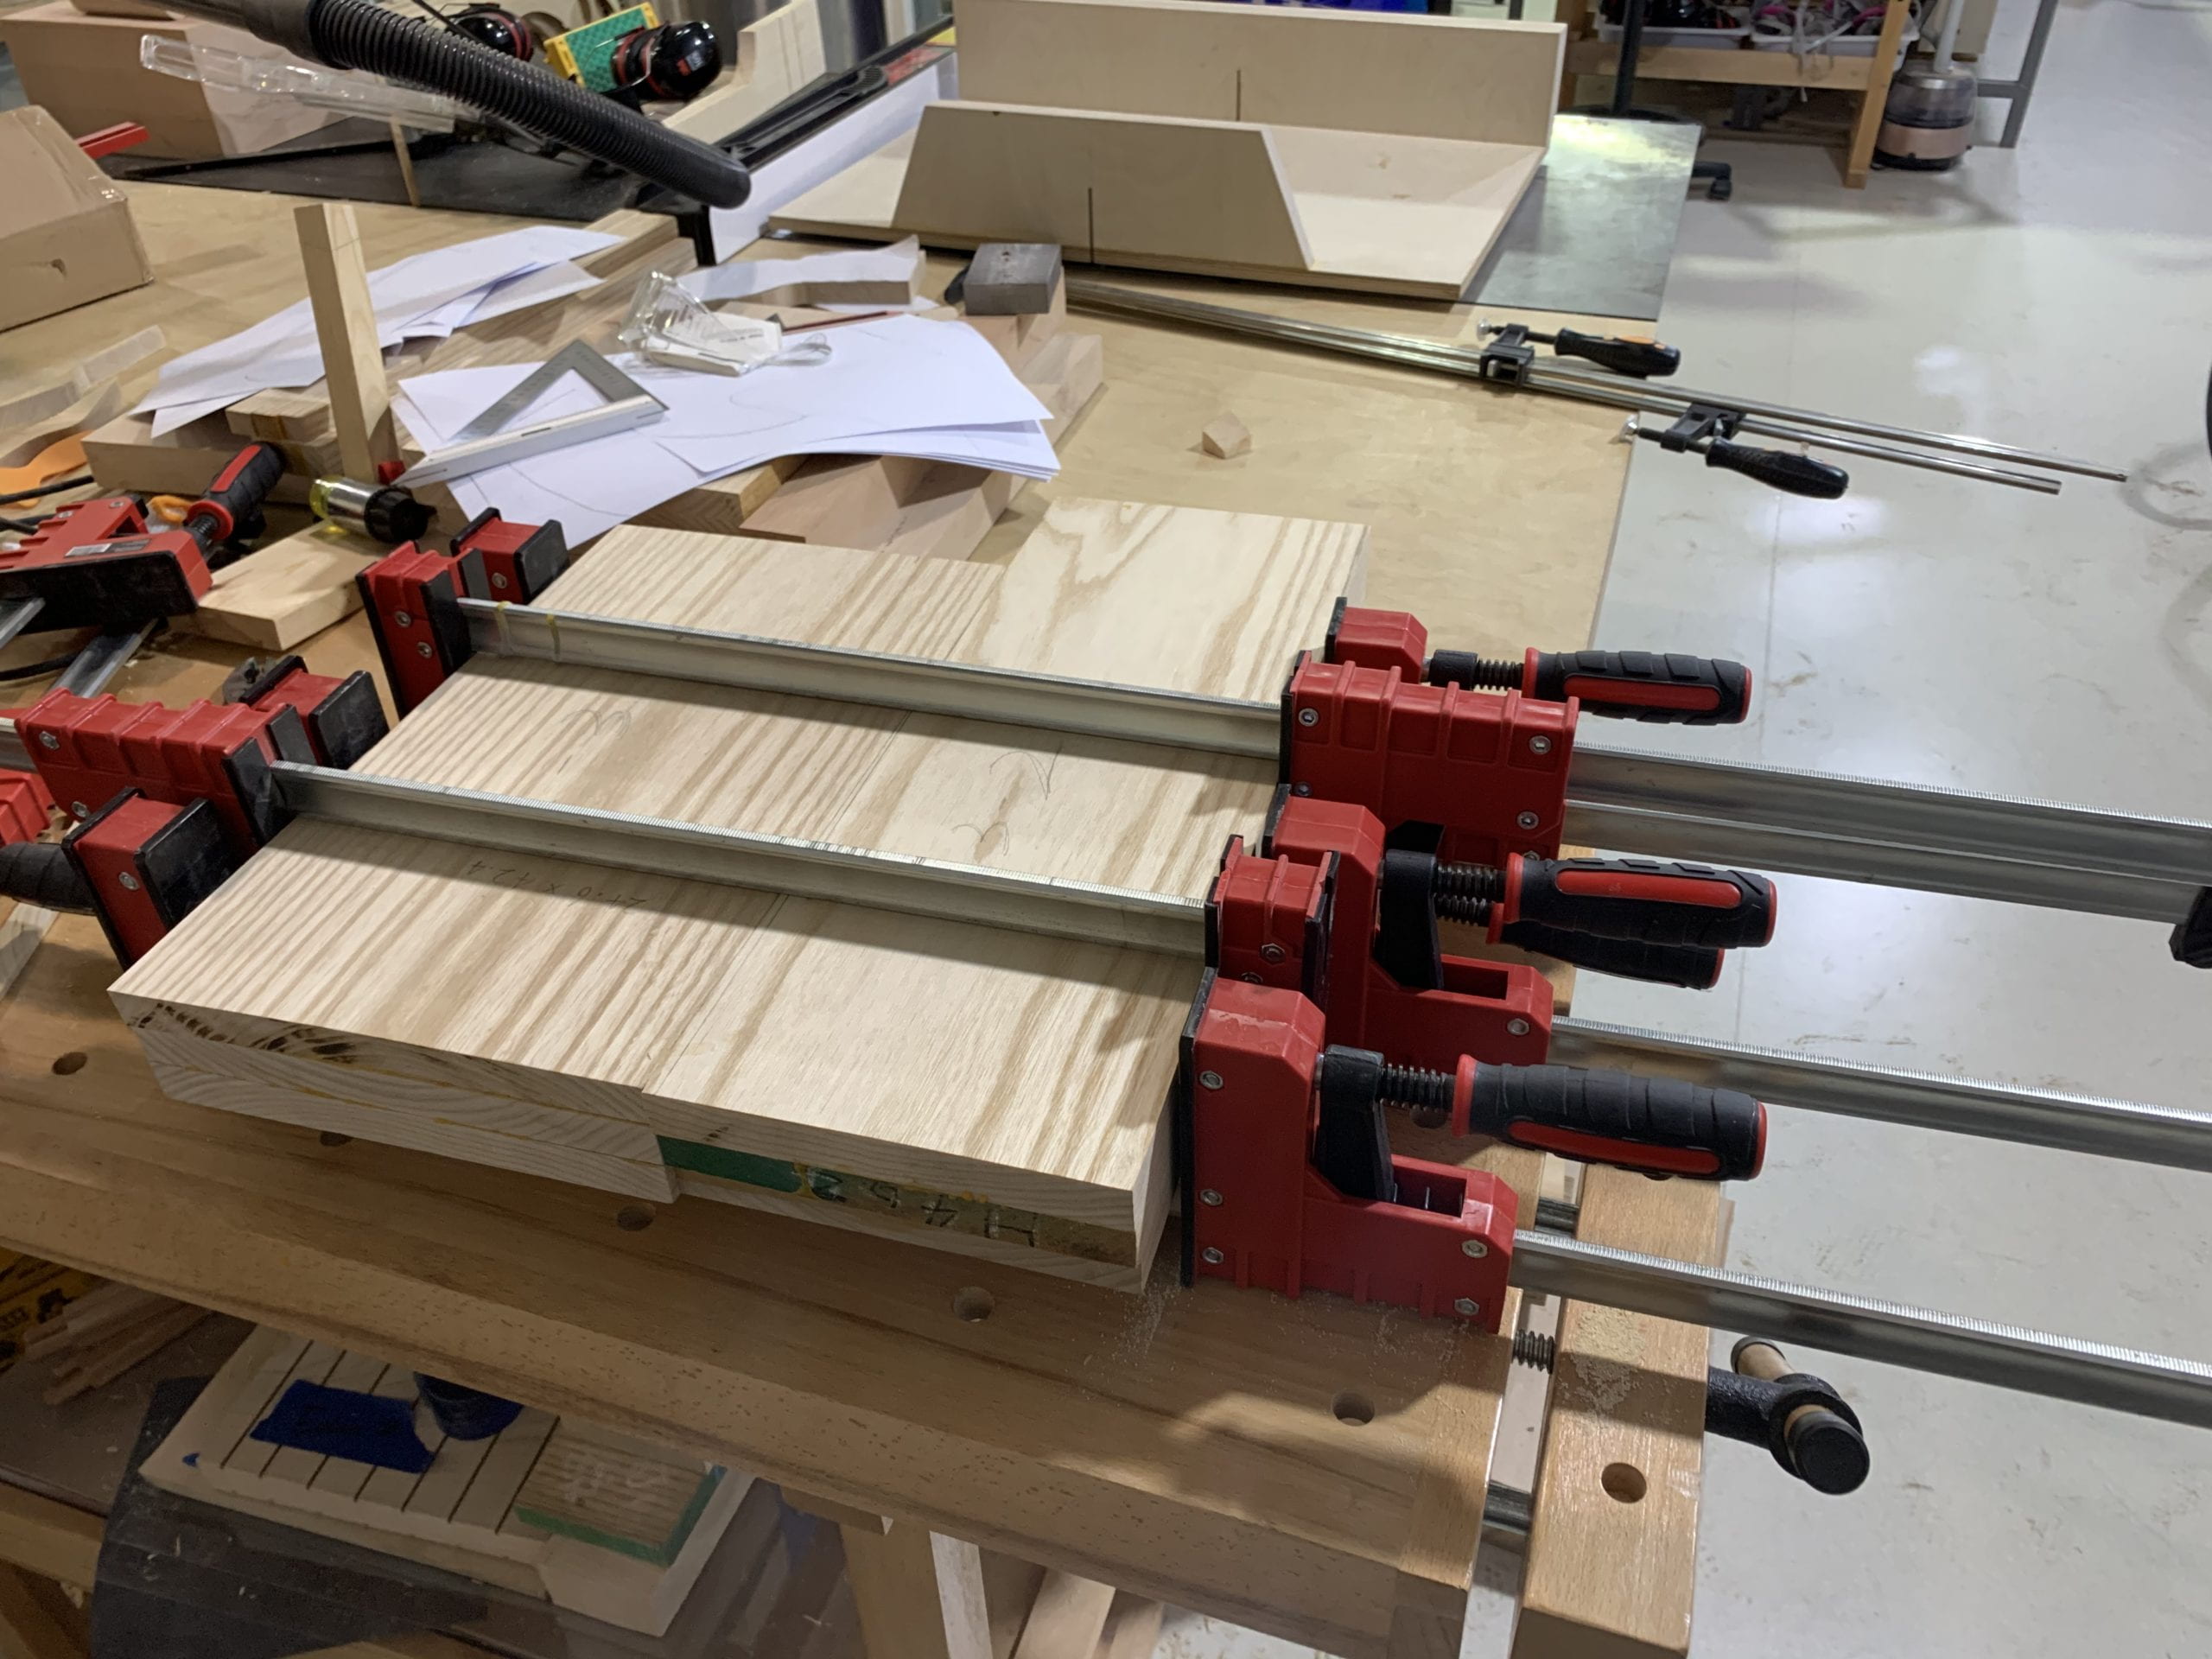
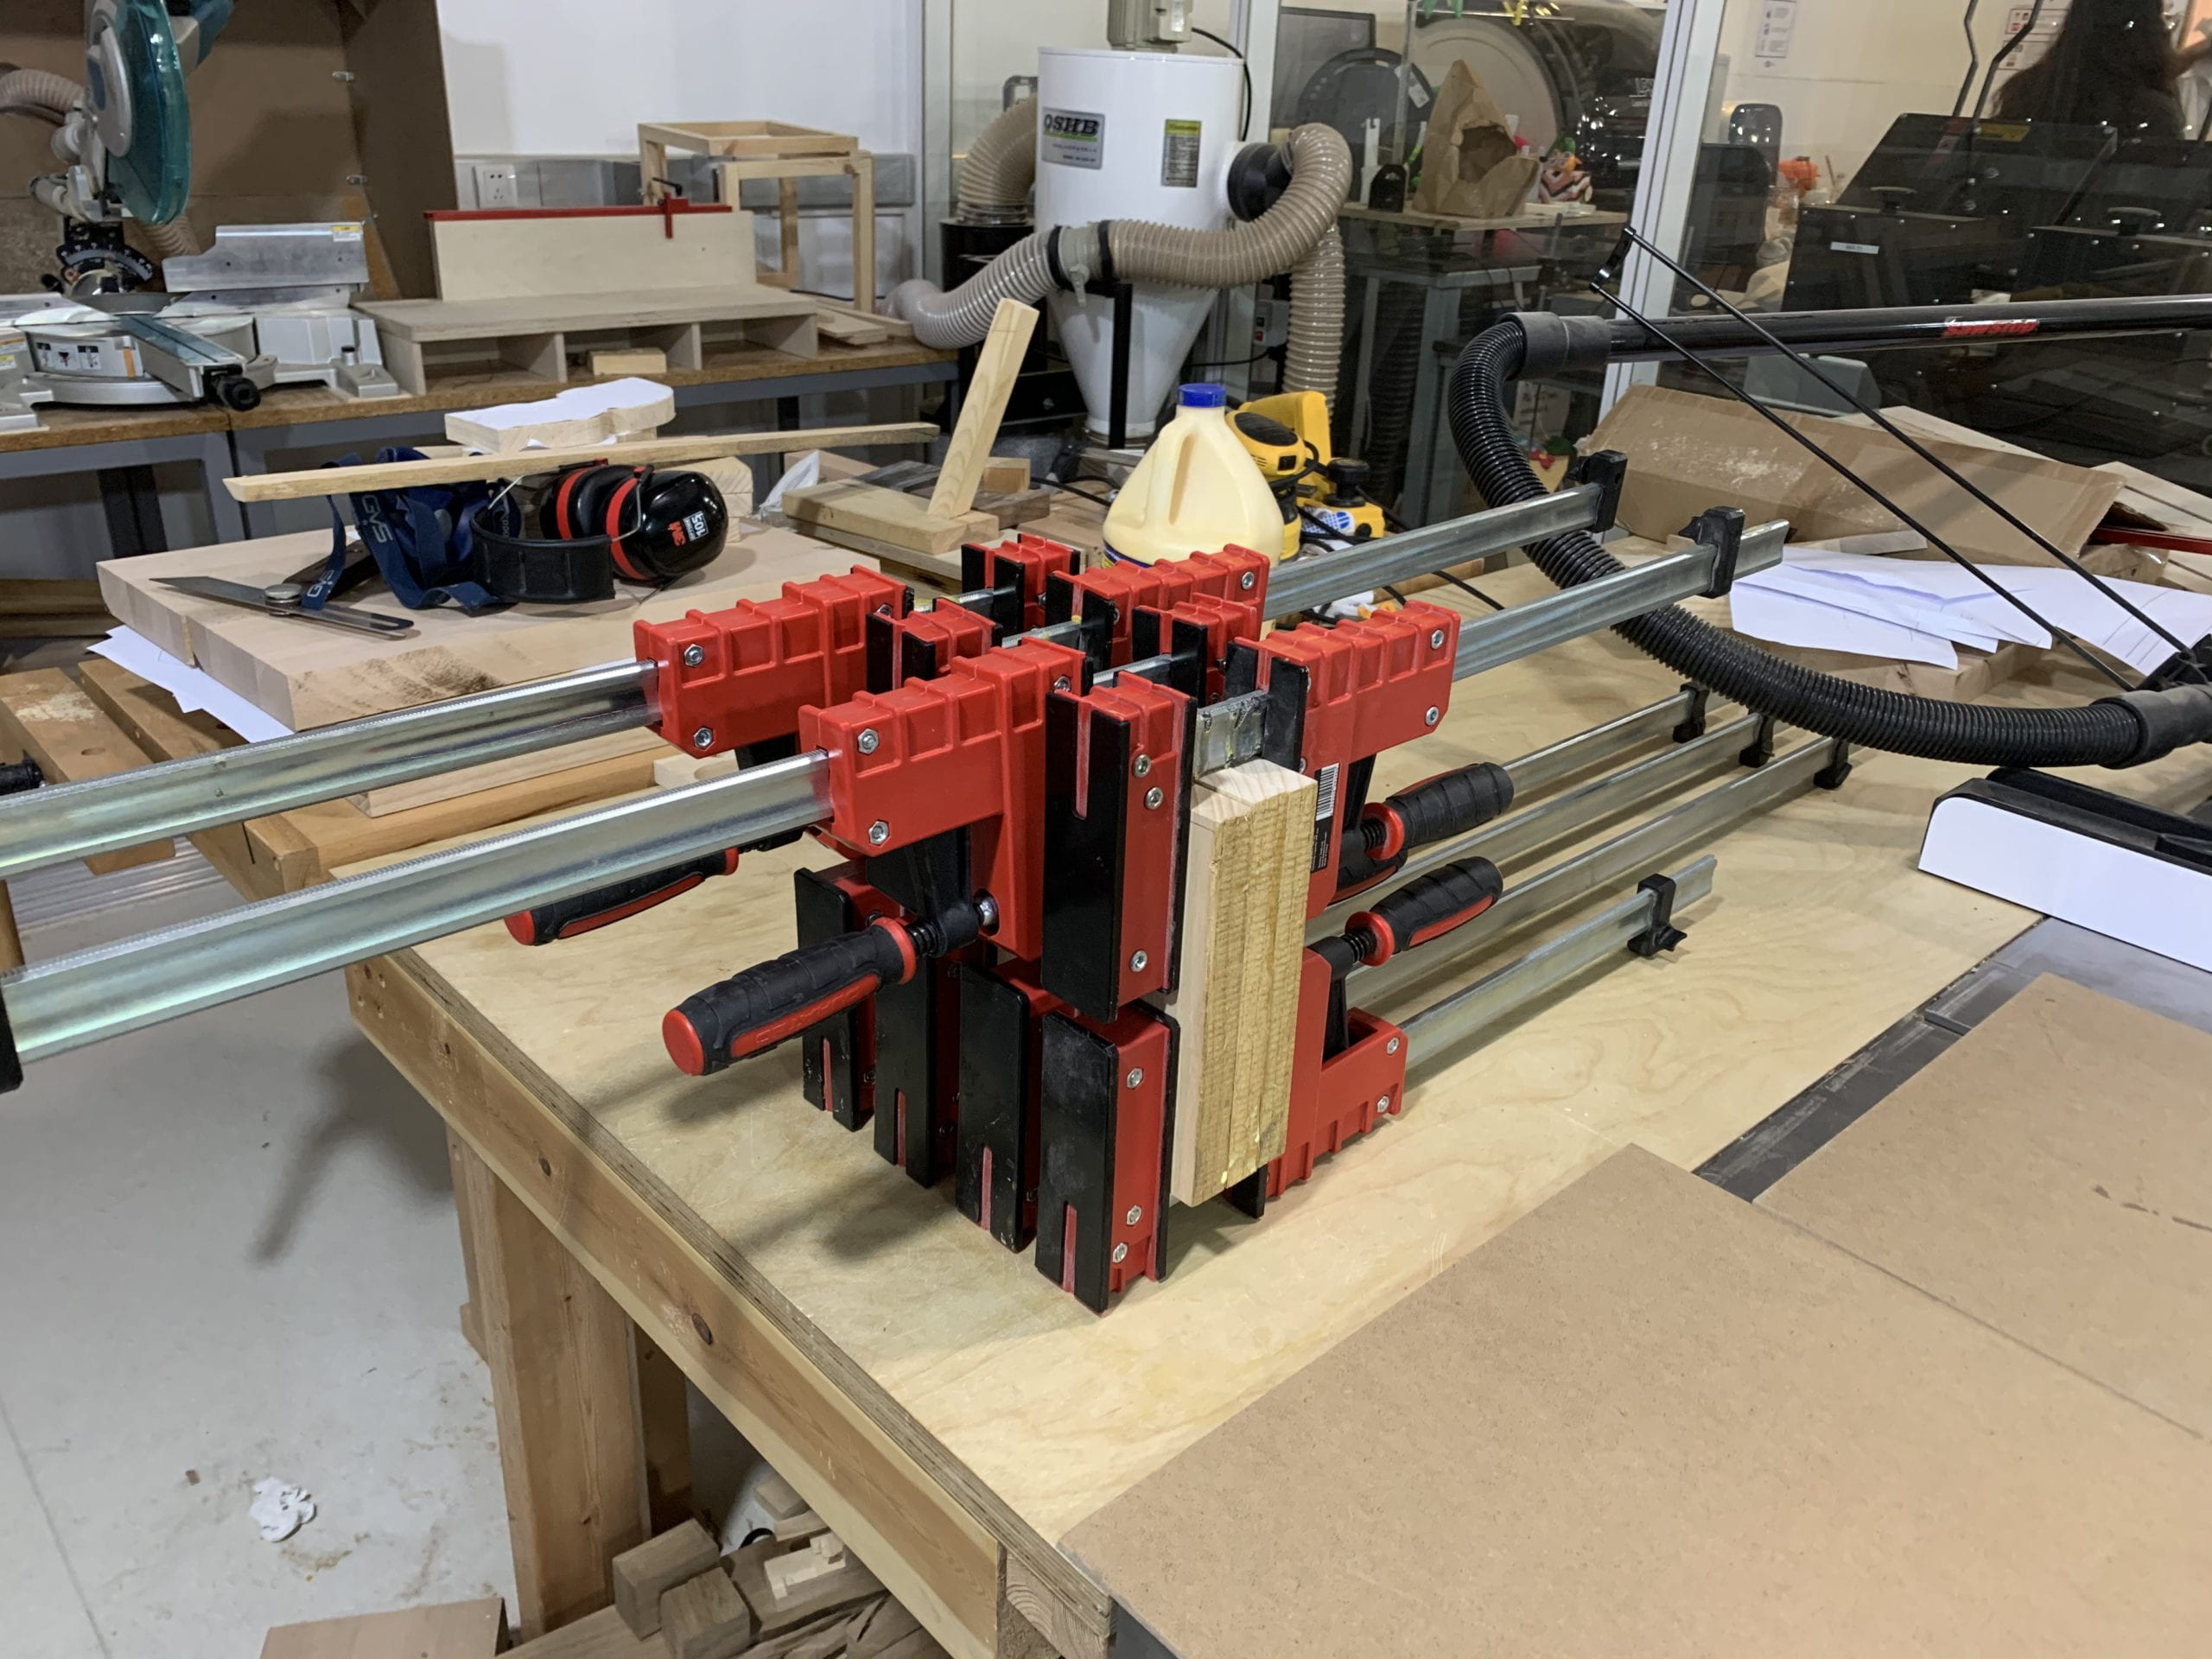
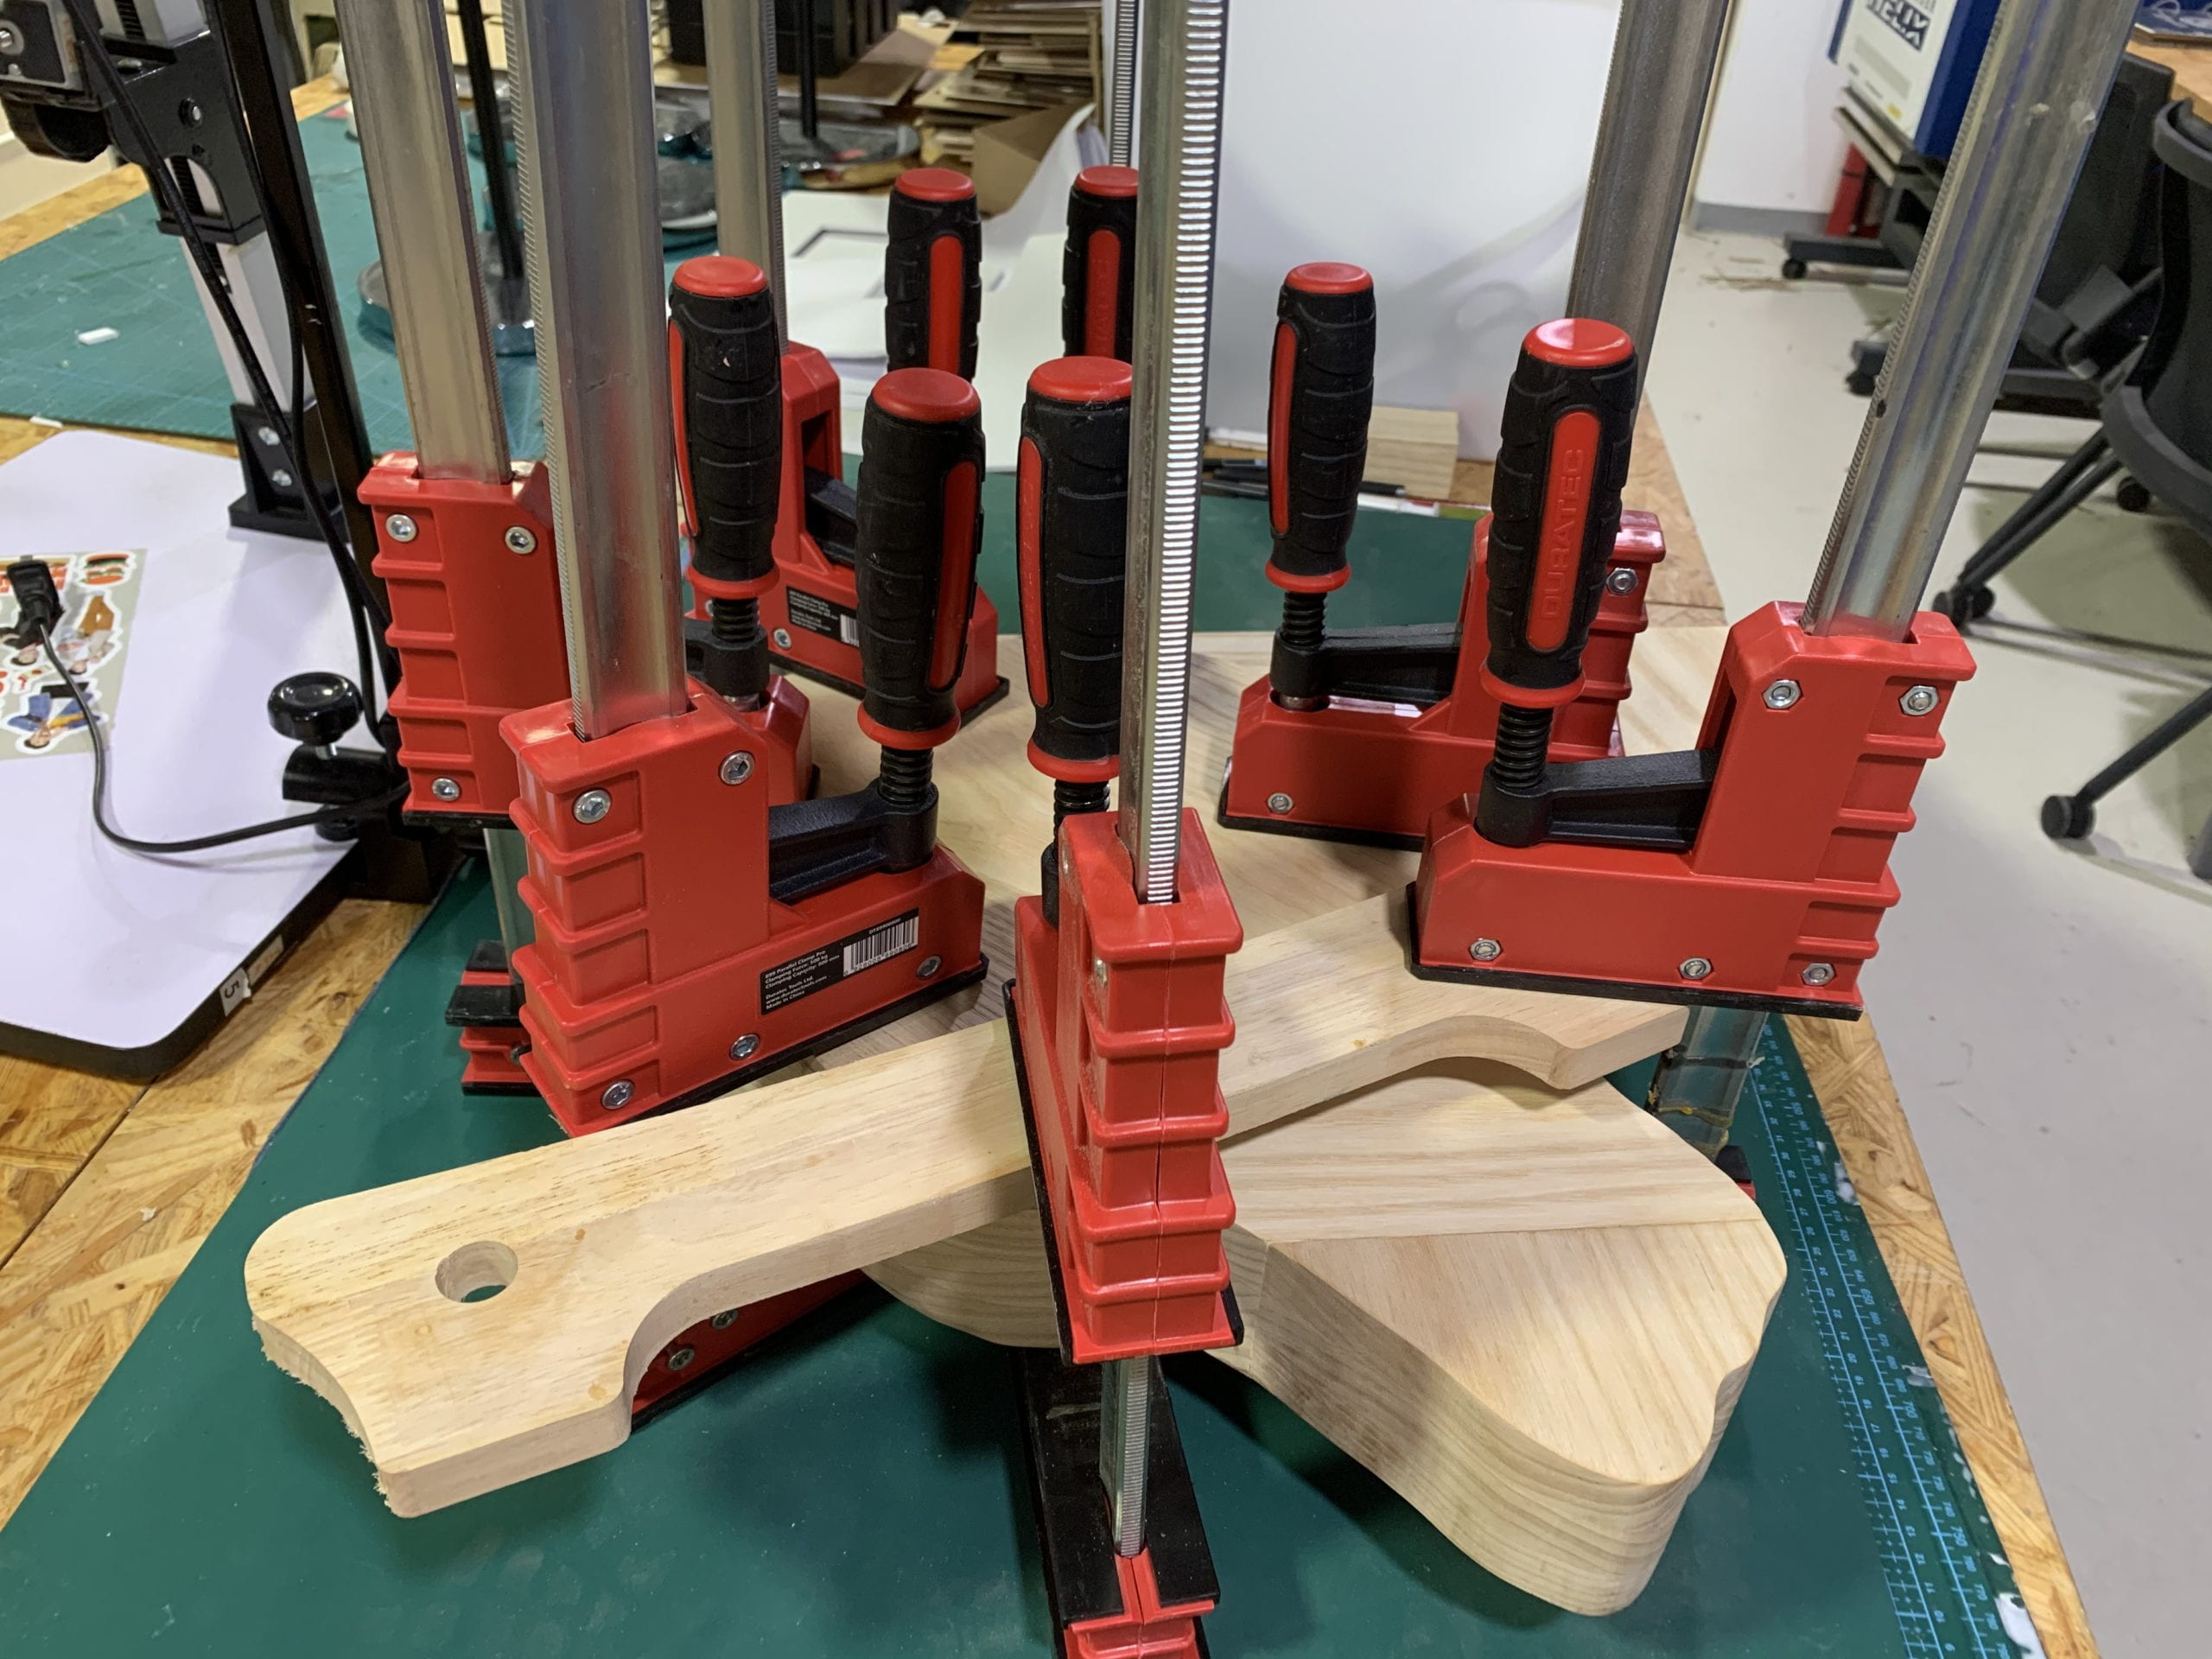
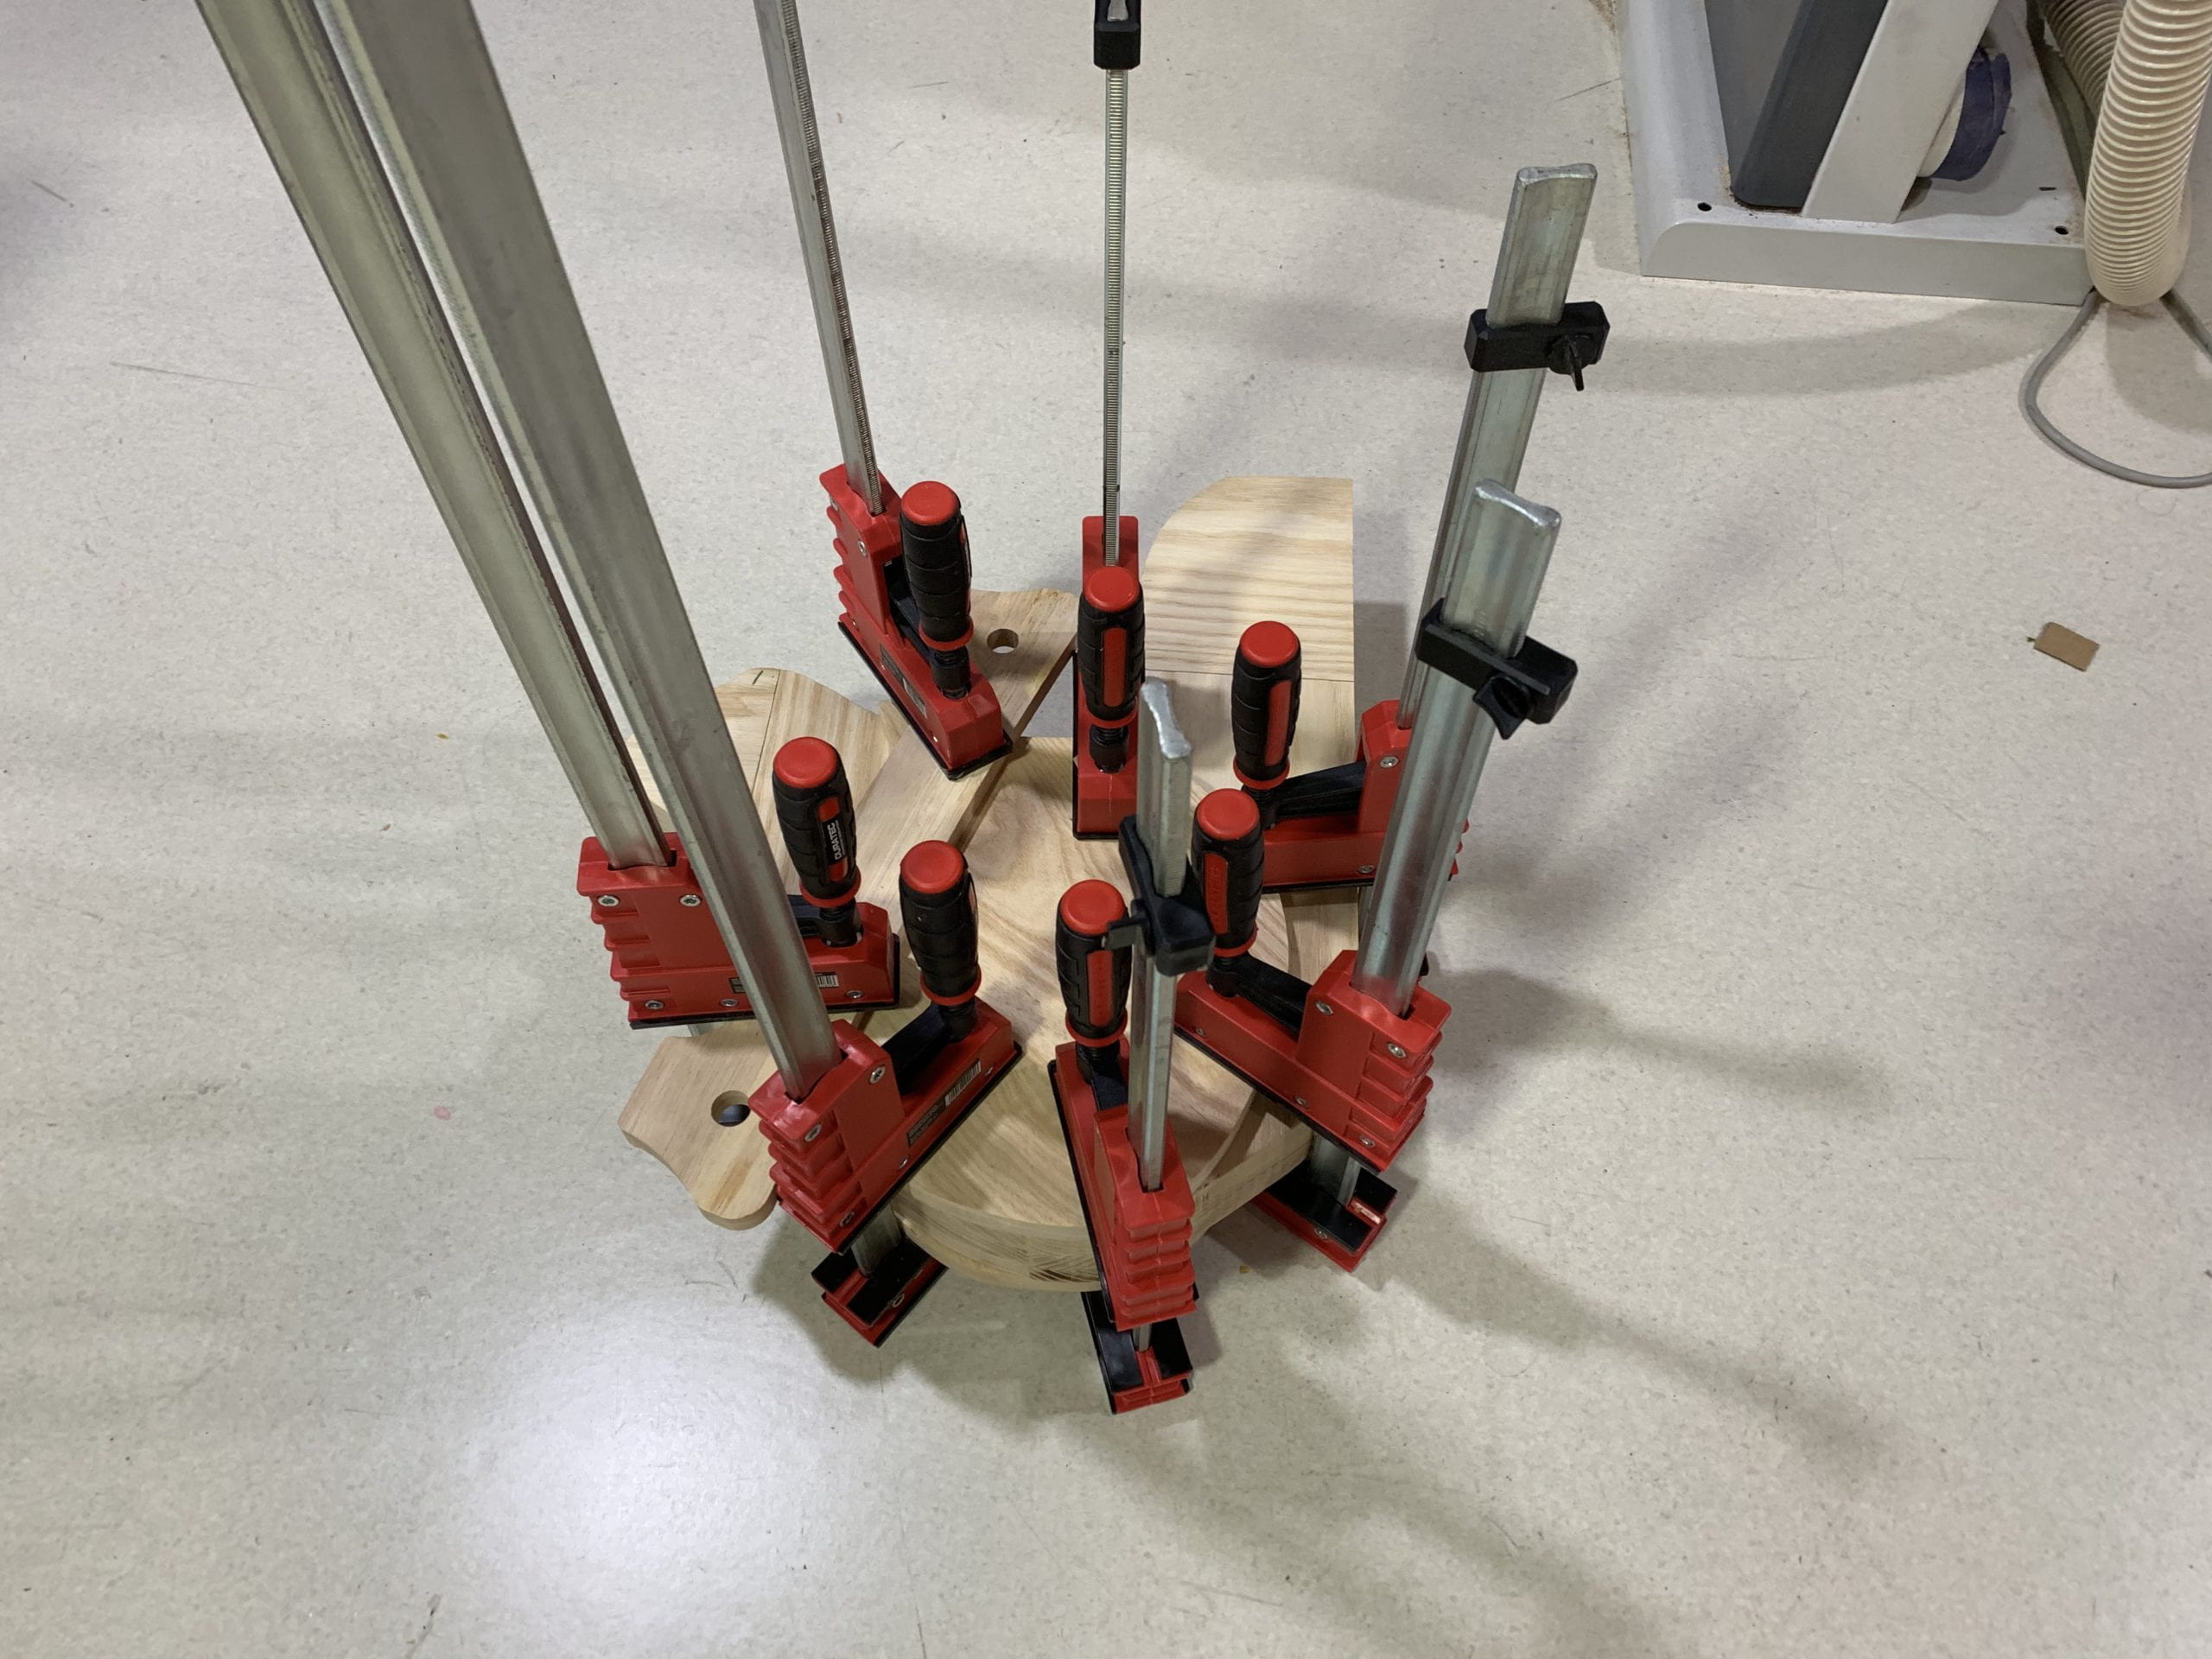
I practiced and learned a lot during the whole gluing process. I practiced about how to do a dry test that clamp everything together without applying glue to see how could everything work best, I learned how to clamp for best force and use other wood to help spreading the force. Also that since the gluing process would take up to twenty-four hours to dry completely, planing what to do everyday becomes so important cause I need to leave the night for glue to dry out.
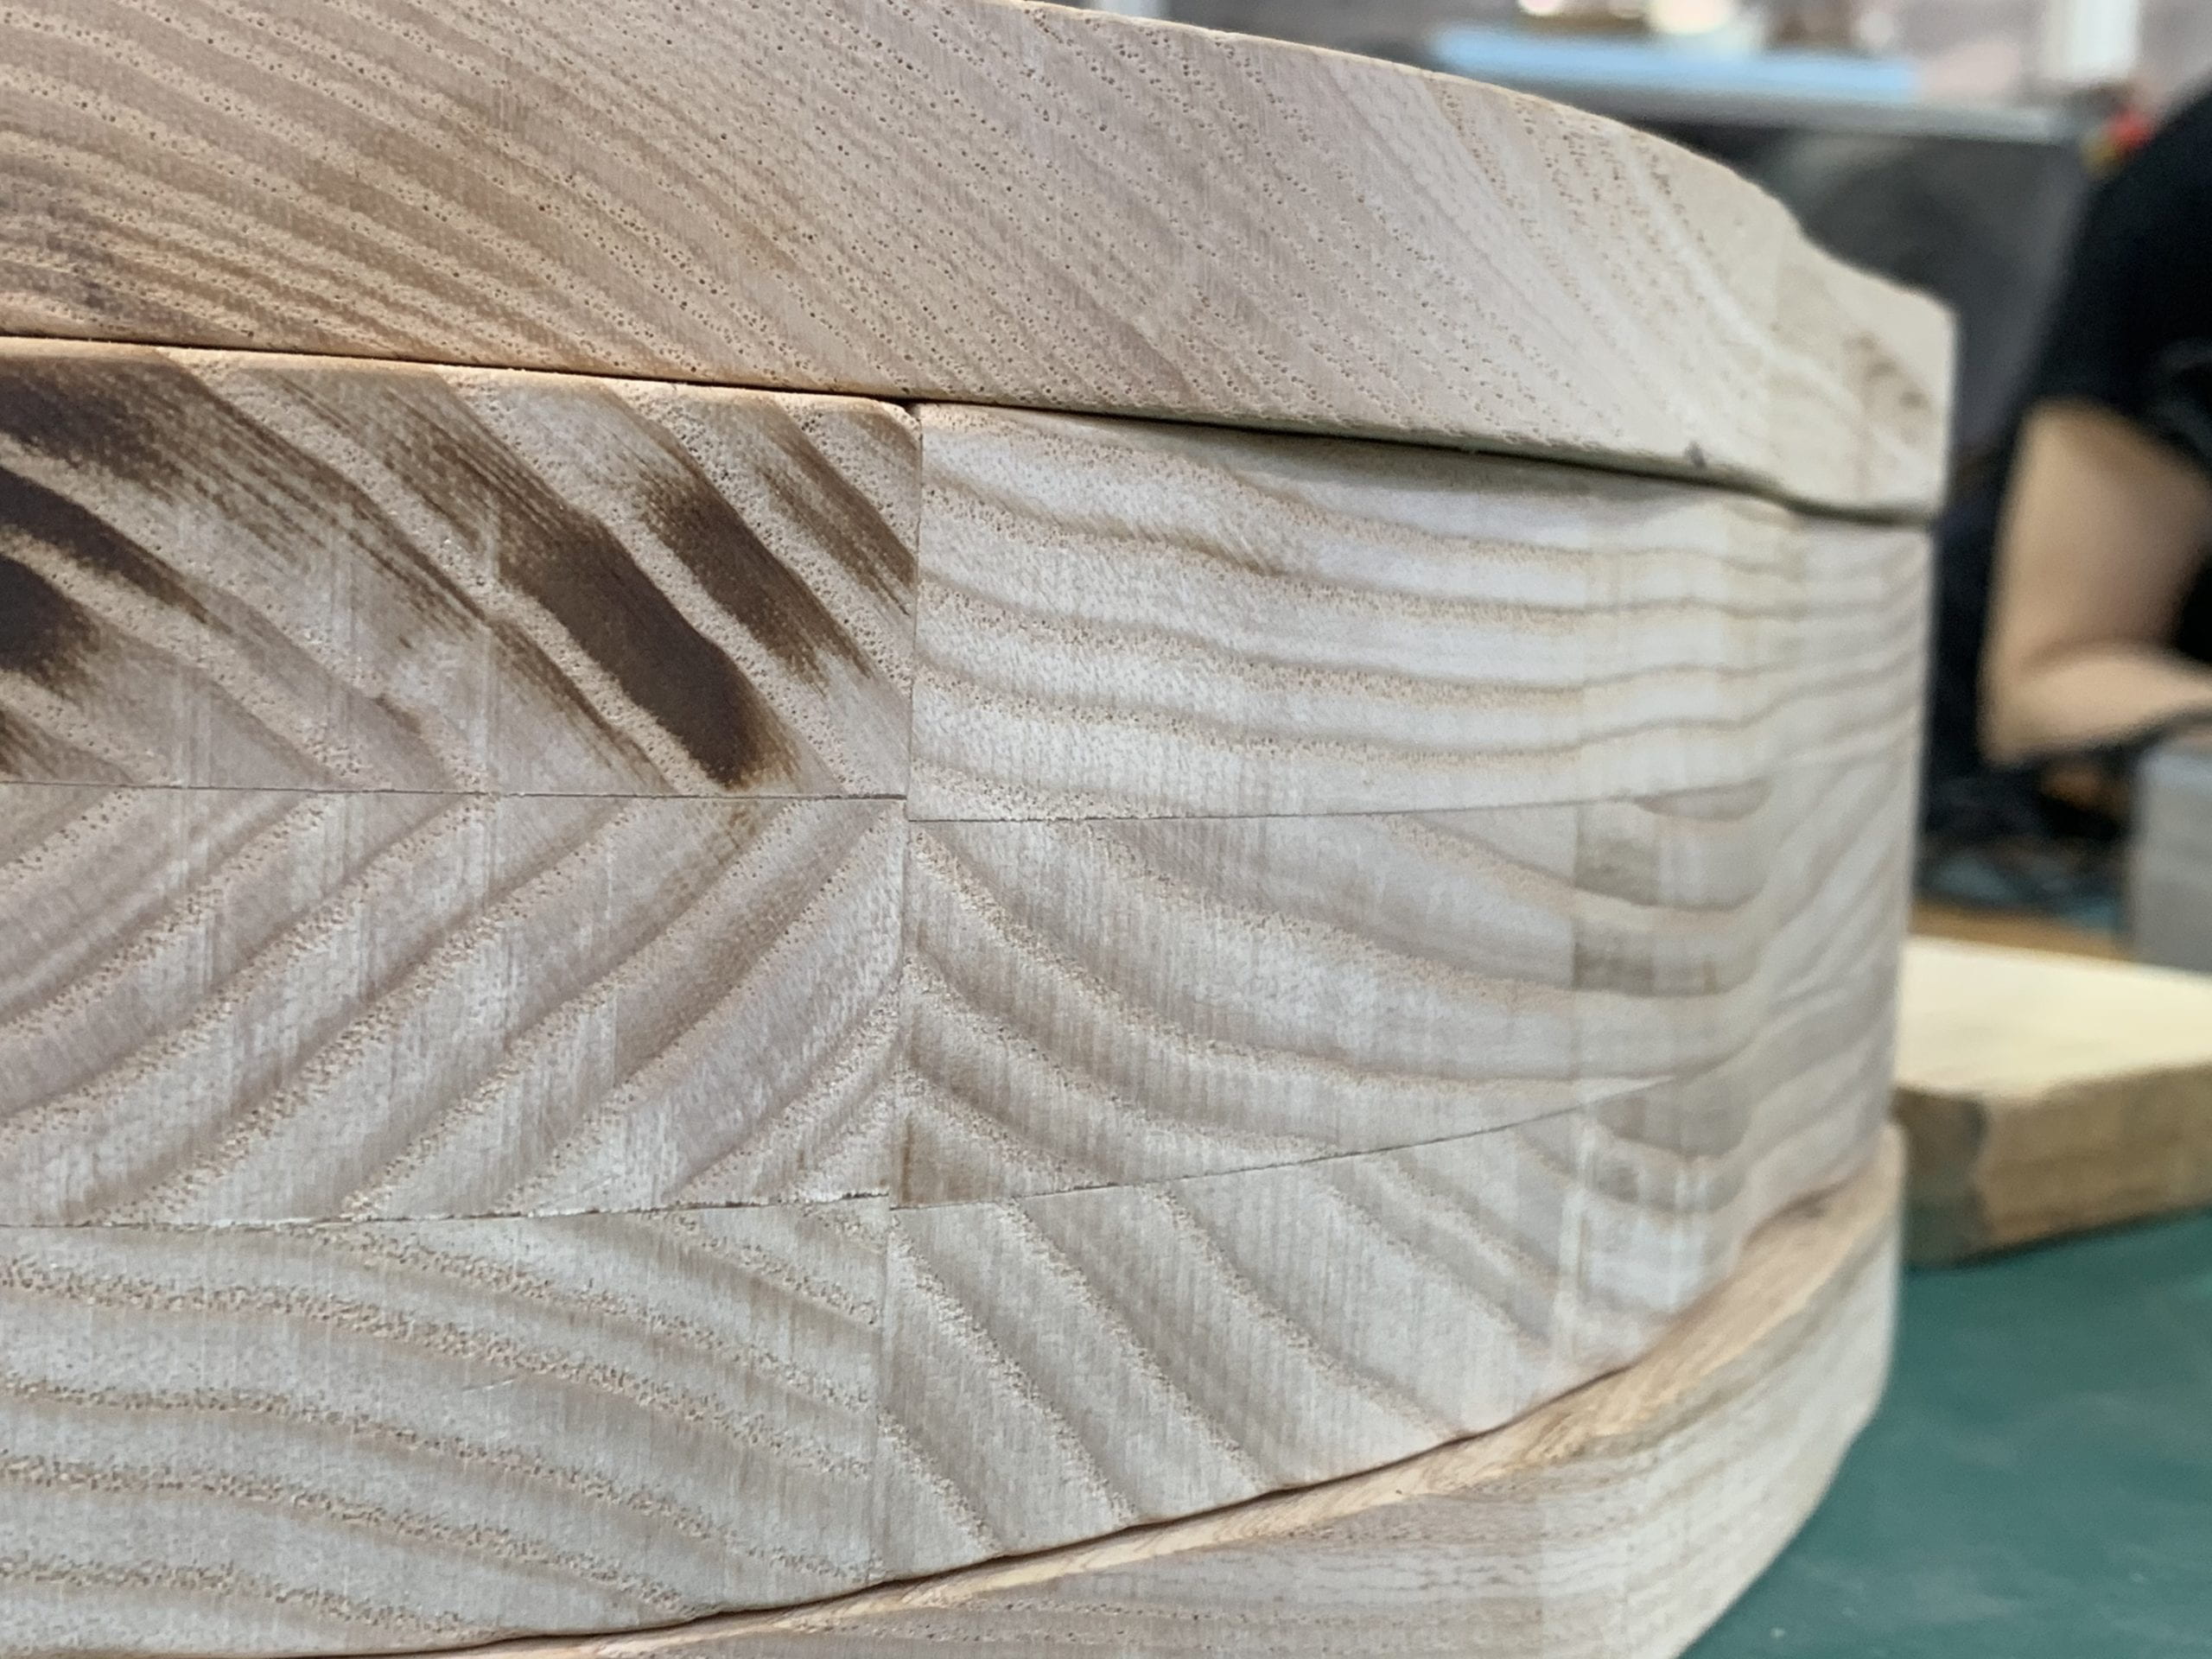
I also did some testing about the gluing. If pieces are well glued, then one can’t really see the trace of glue from the cut surface. So I was wondering whether there is a way to actually show the audience that these two wood are glued together as part of my design.
I tried to sand the edges of each piece before gluing them. This method works well through I still have to clean up the glue squeezed out from the edges. And during the process, I found out the most easy way to show two glued pieces, by not matching the wood grain.
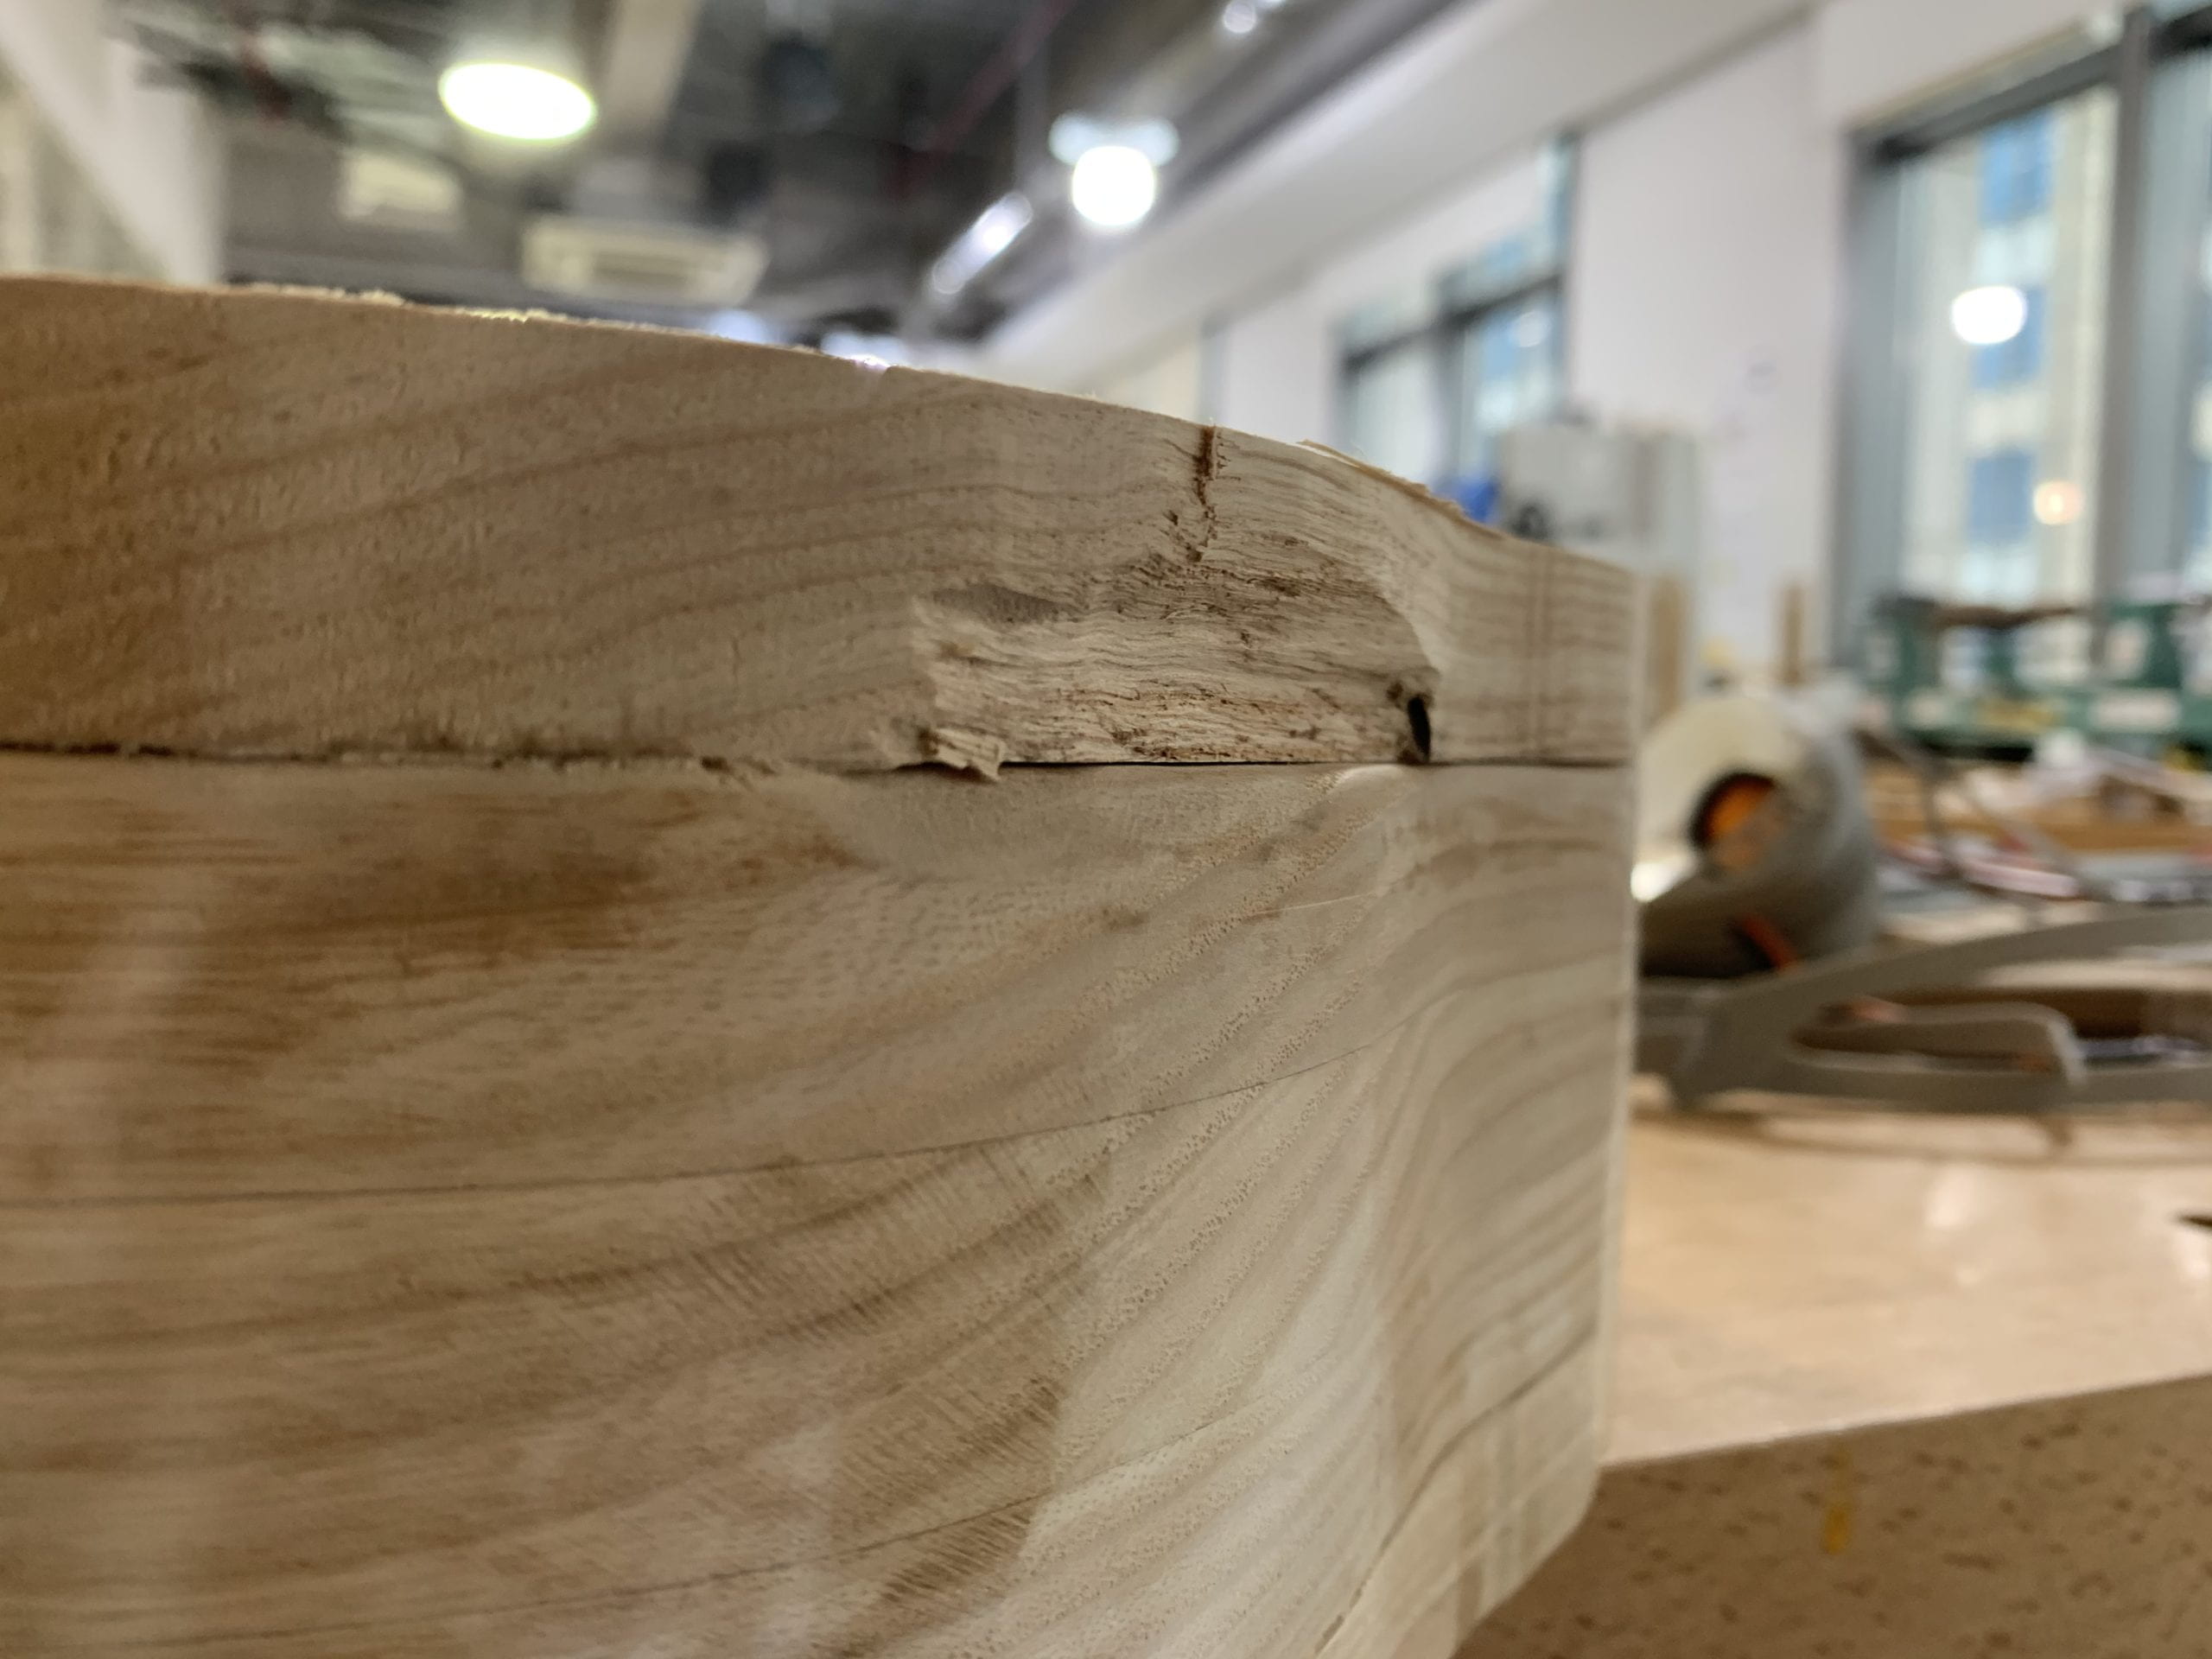
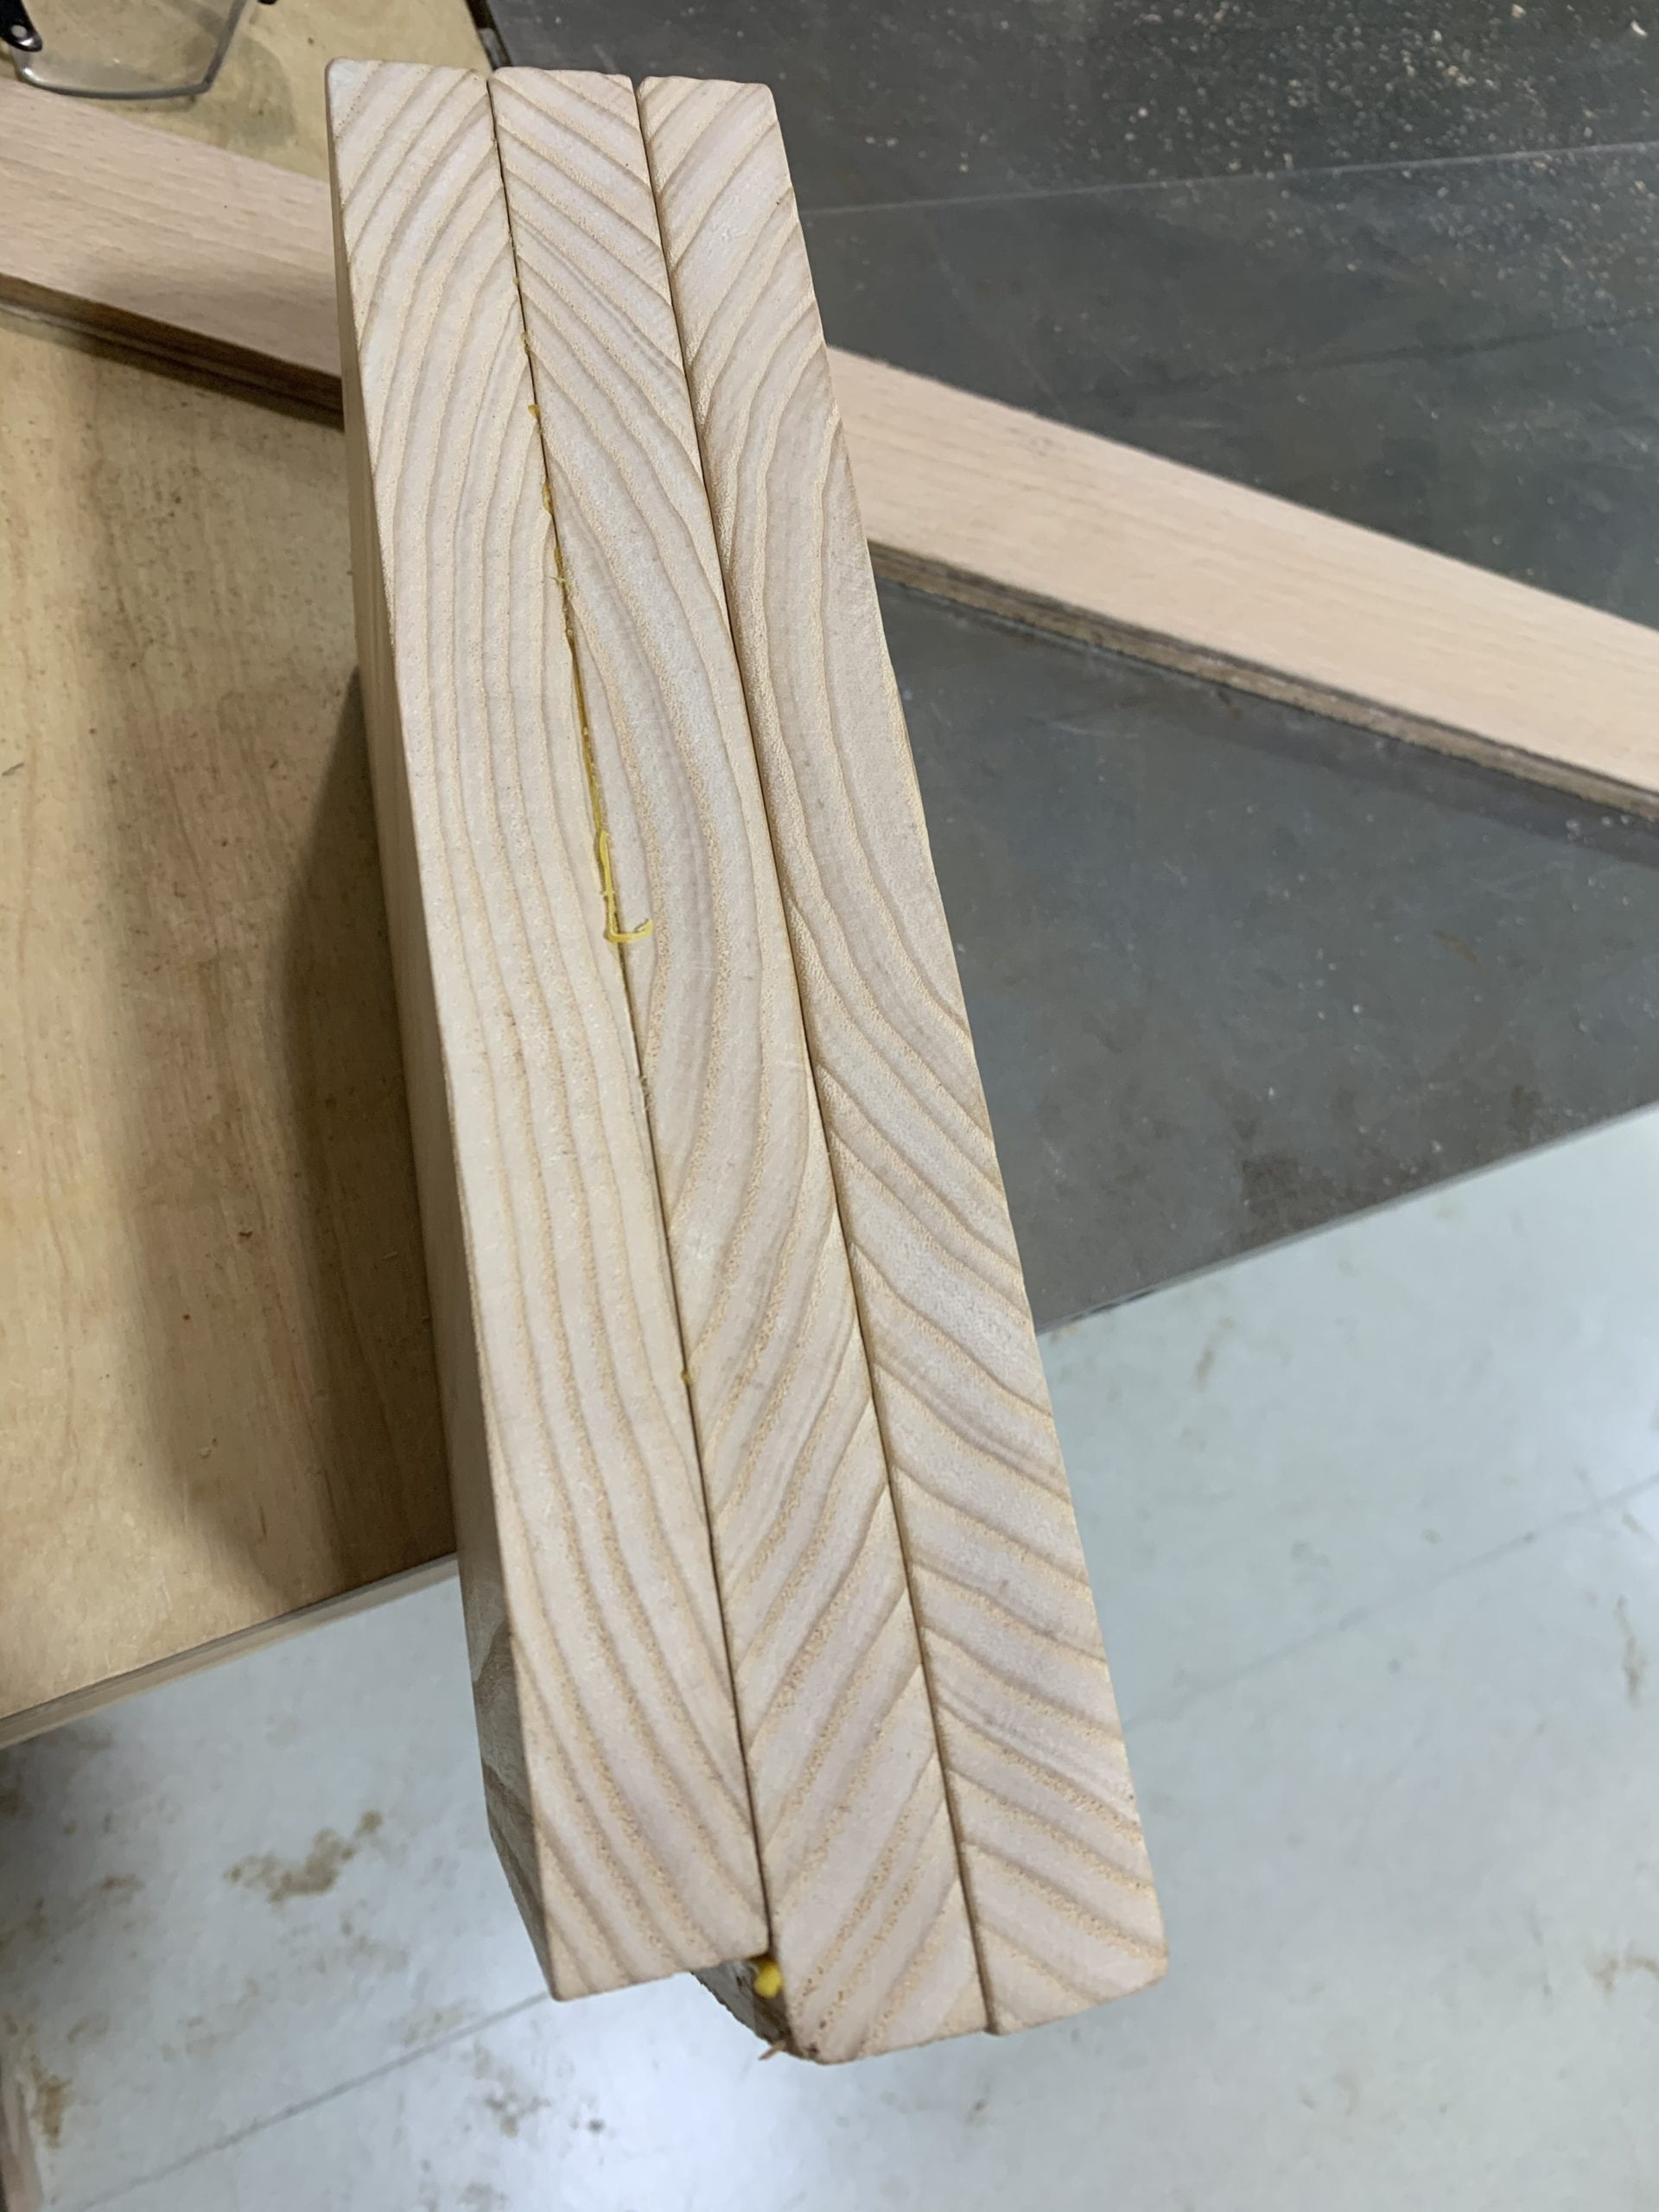
 sand the edges grain not matching
Redesign II
In the process of gluing the “nose” to the head, professor Steele told me that the side surface used for gluing is the end grain, which would not perform well in the gluing process, and it might fall apart later. So, other joineries has to be applied for these wood pieces.
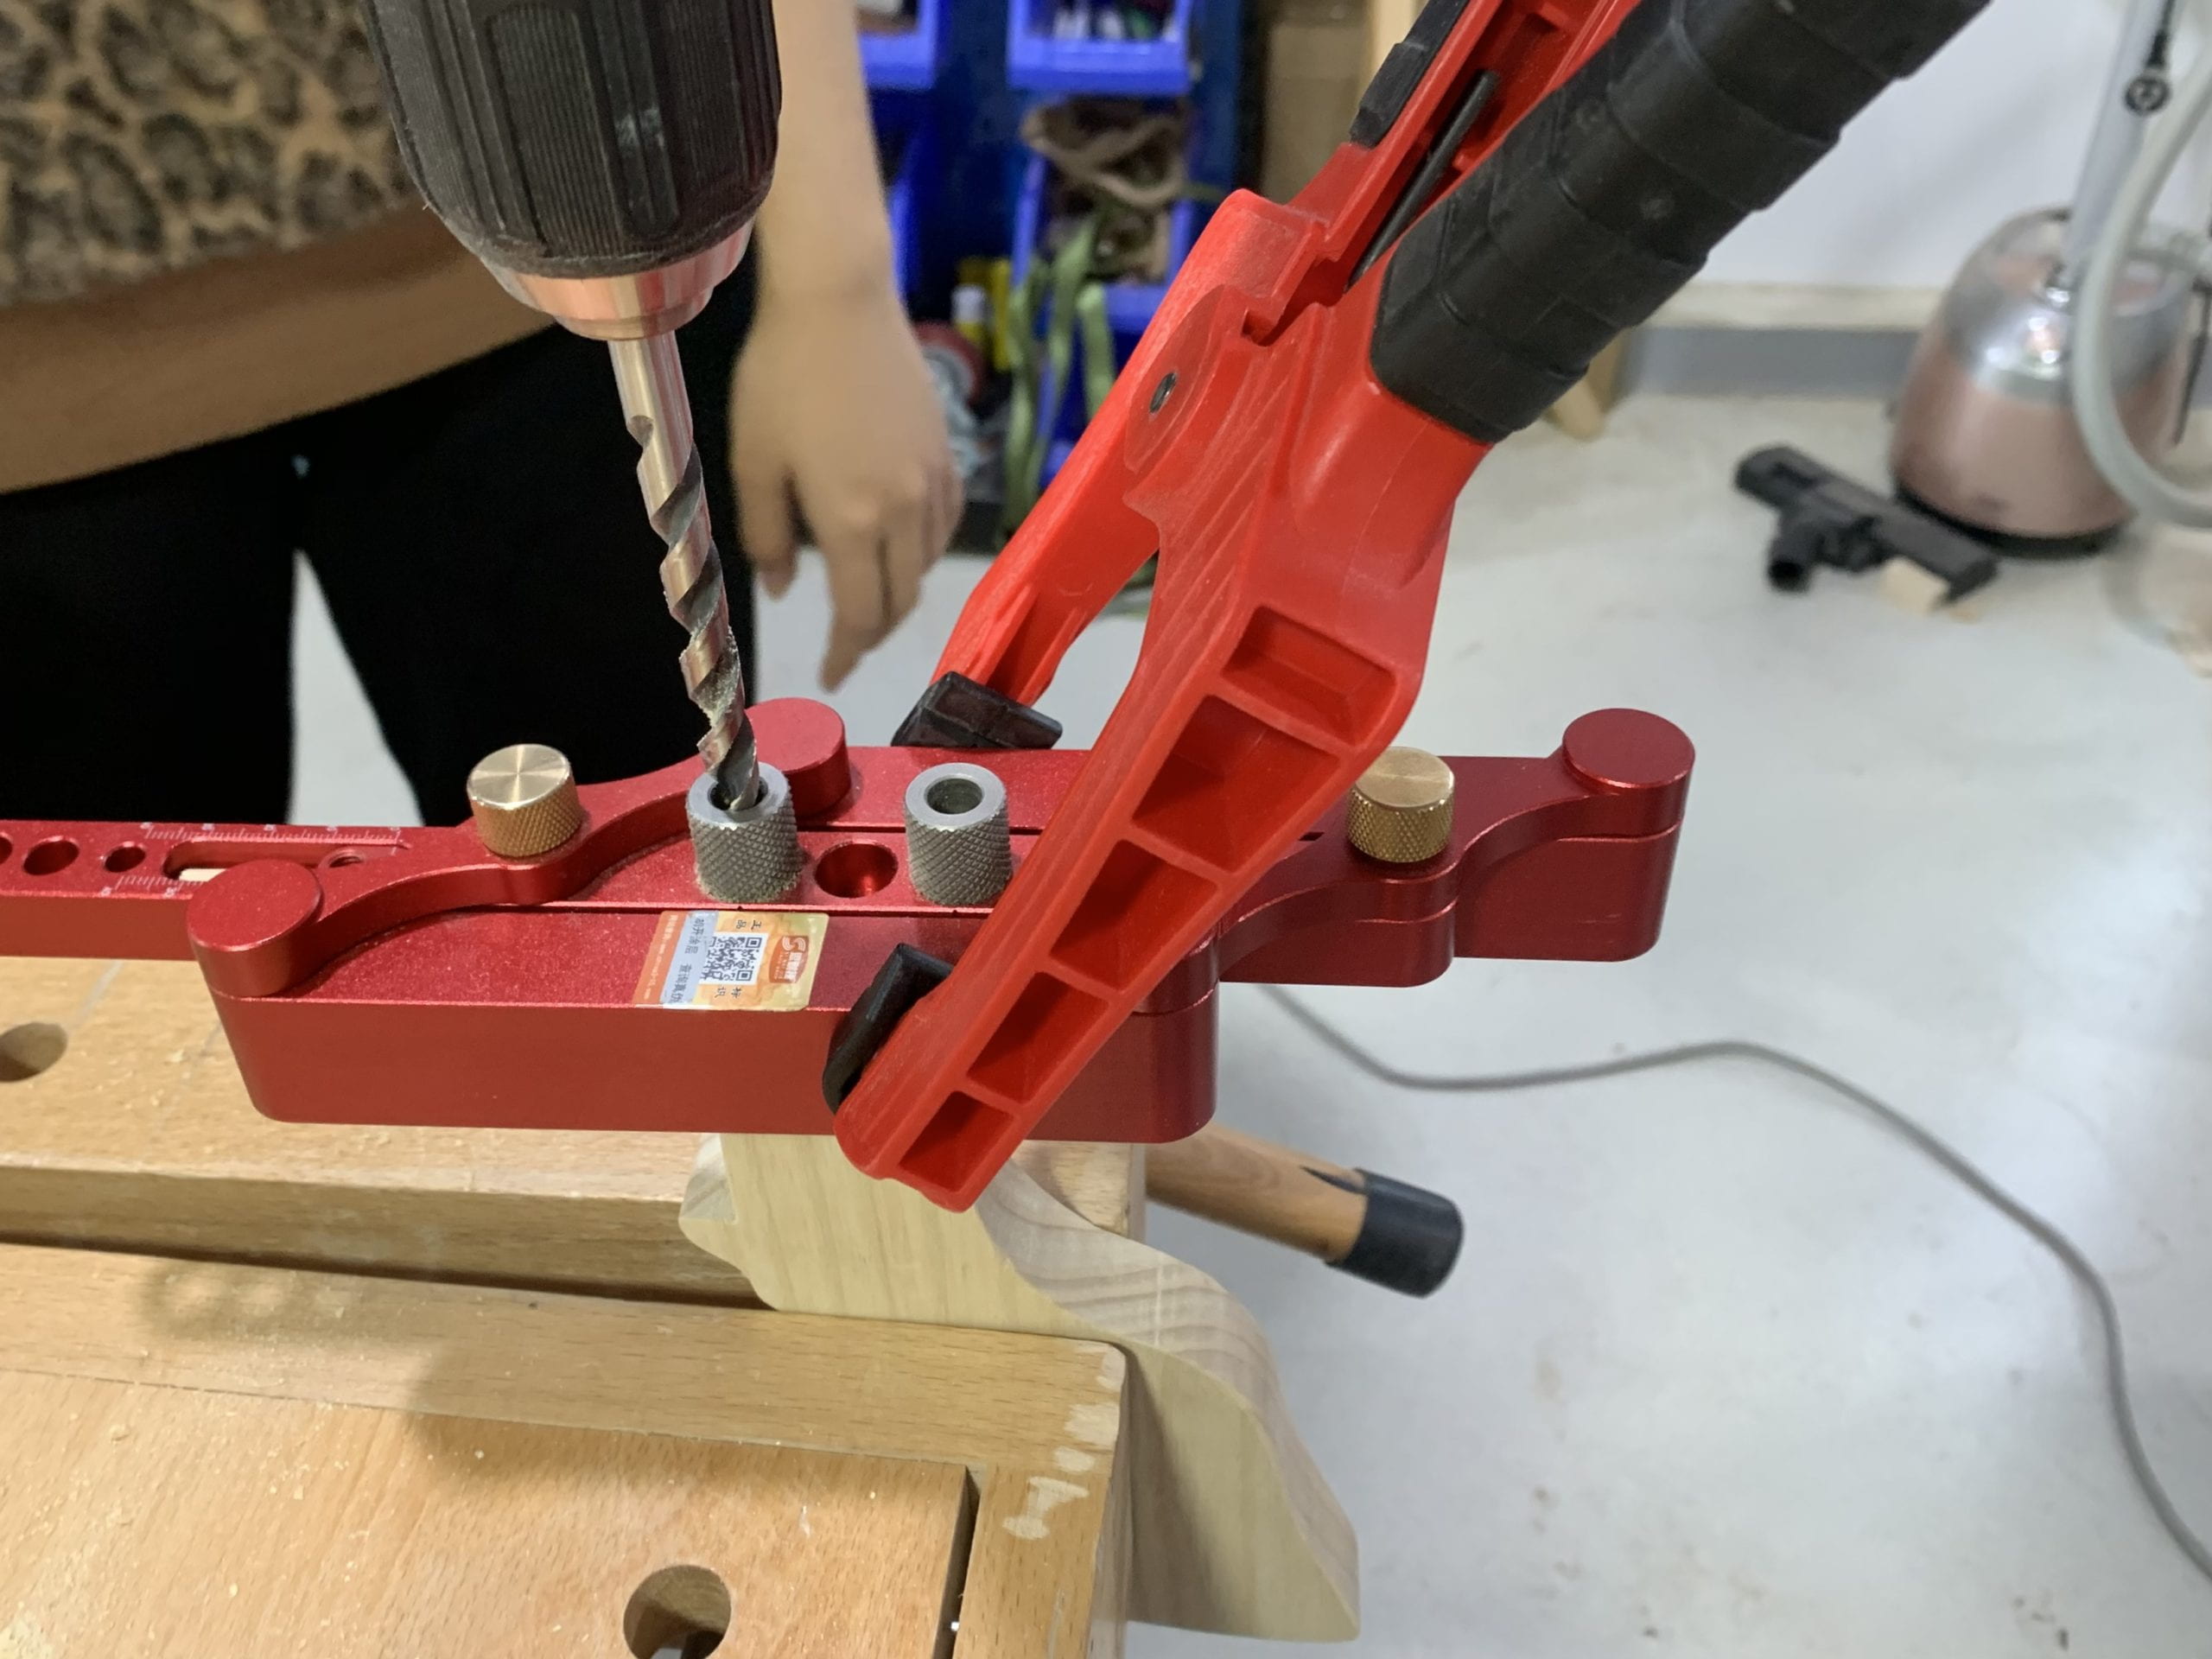
I chose the dowels for the joinery, which is one wooden stick inserted into the holes made in each piece of wood. The difficulties of this joint is to match the holes in exact position so that the wood could fit together, also holes need to be straightly vertical or the two pieces wouldn’t be at the same surface after joining.
There is one jig for dowels, but it didn’t fit my pieces so well, I then reassembled it in a way that could work on my wood board. The jig helps to make parallel holes on both pieces of wood to match. The Drill press is used to make holes.
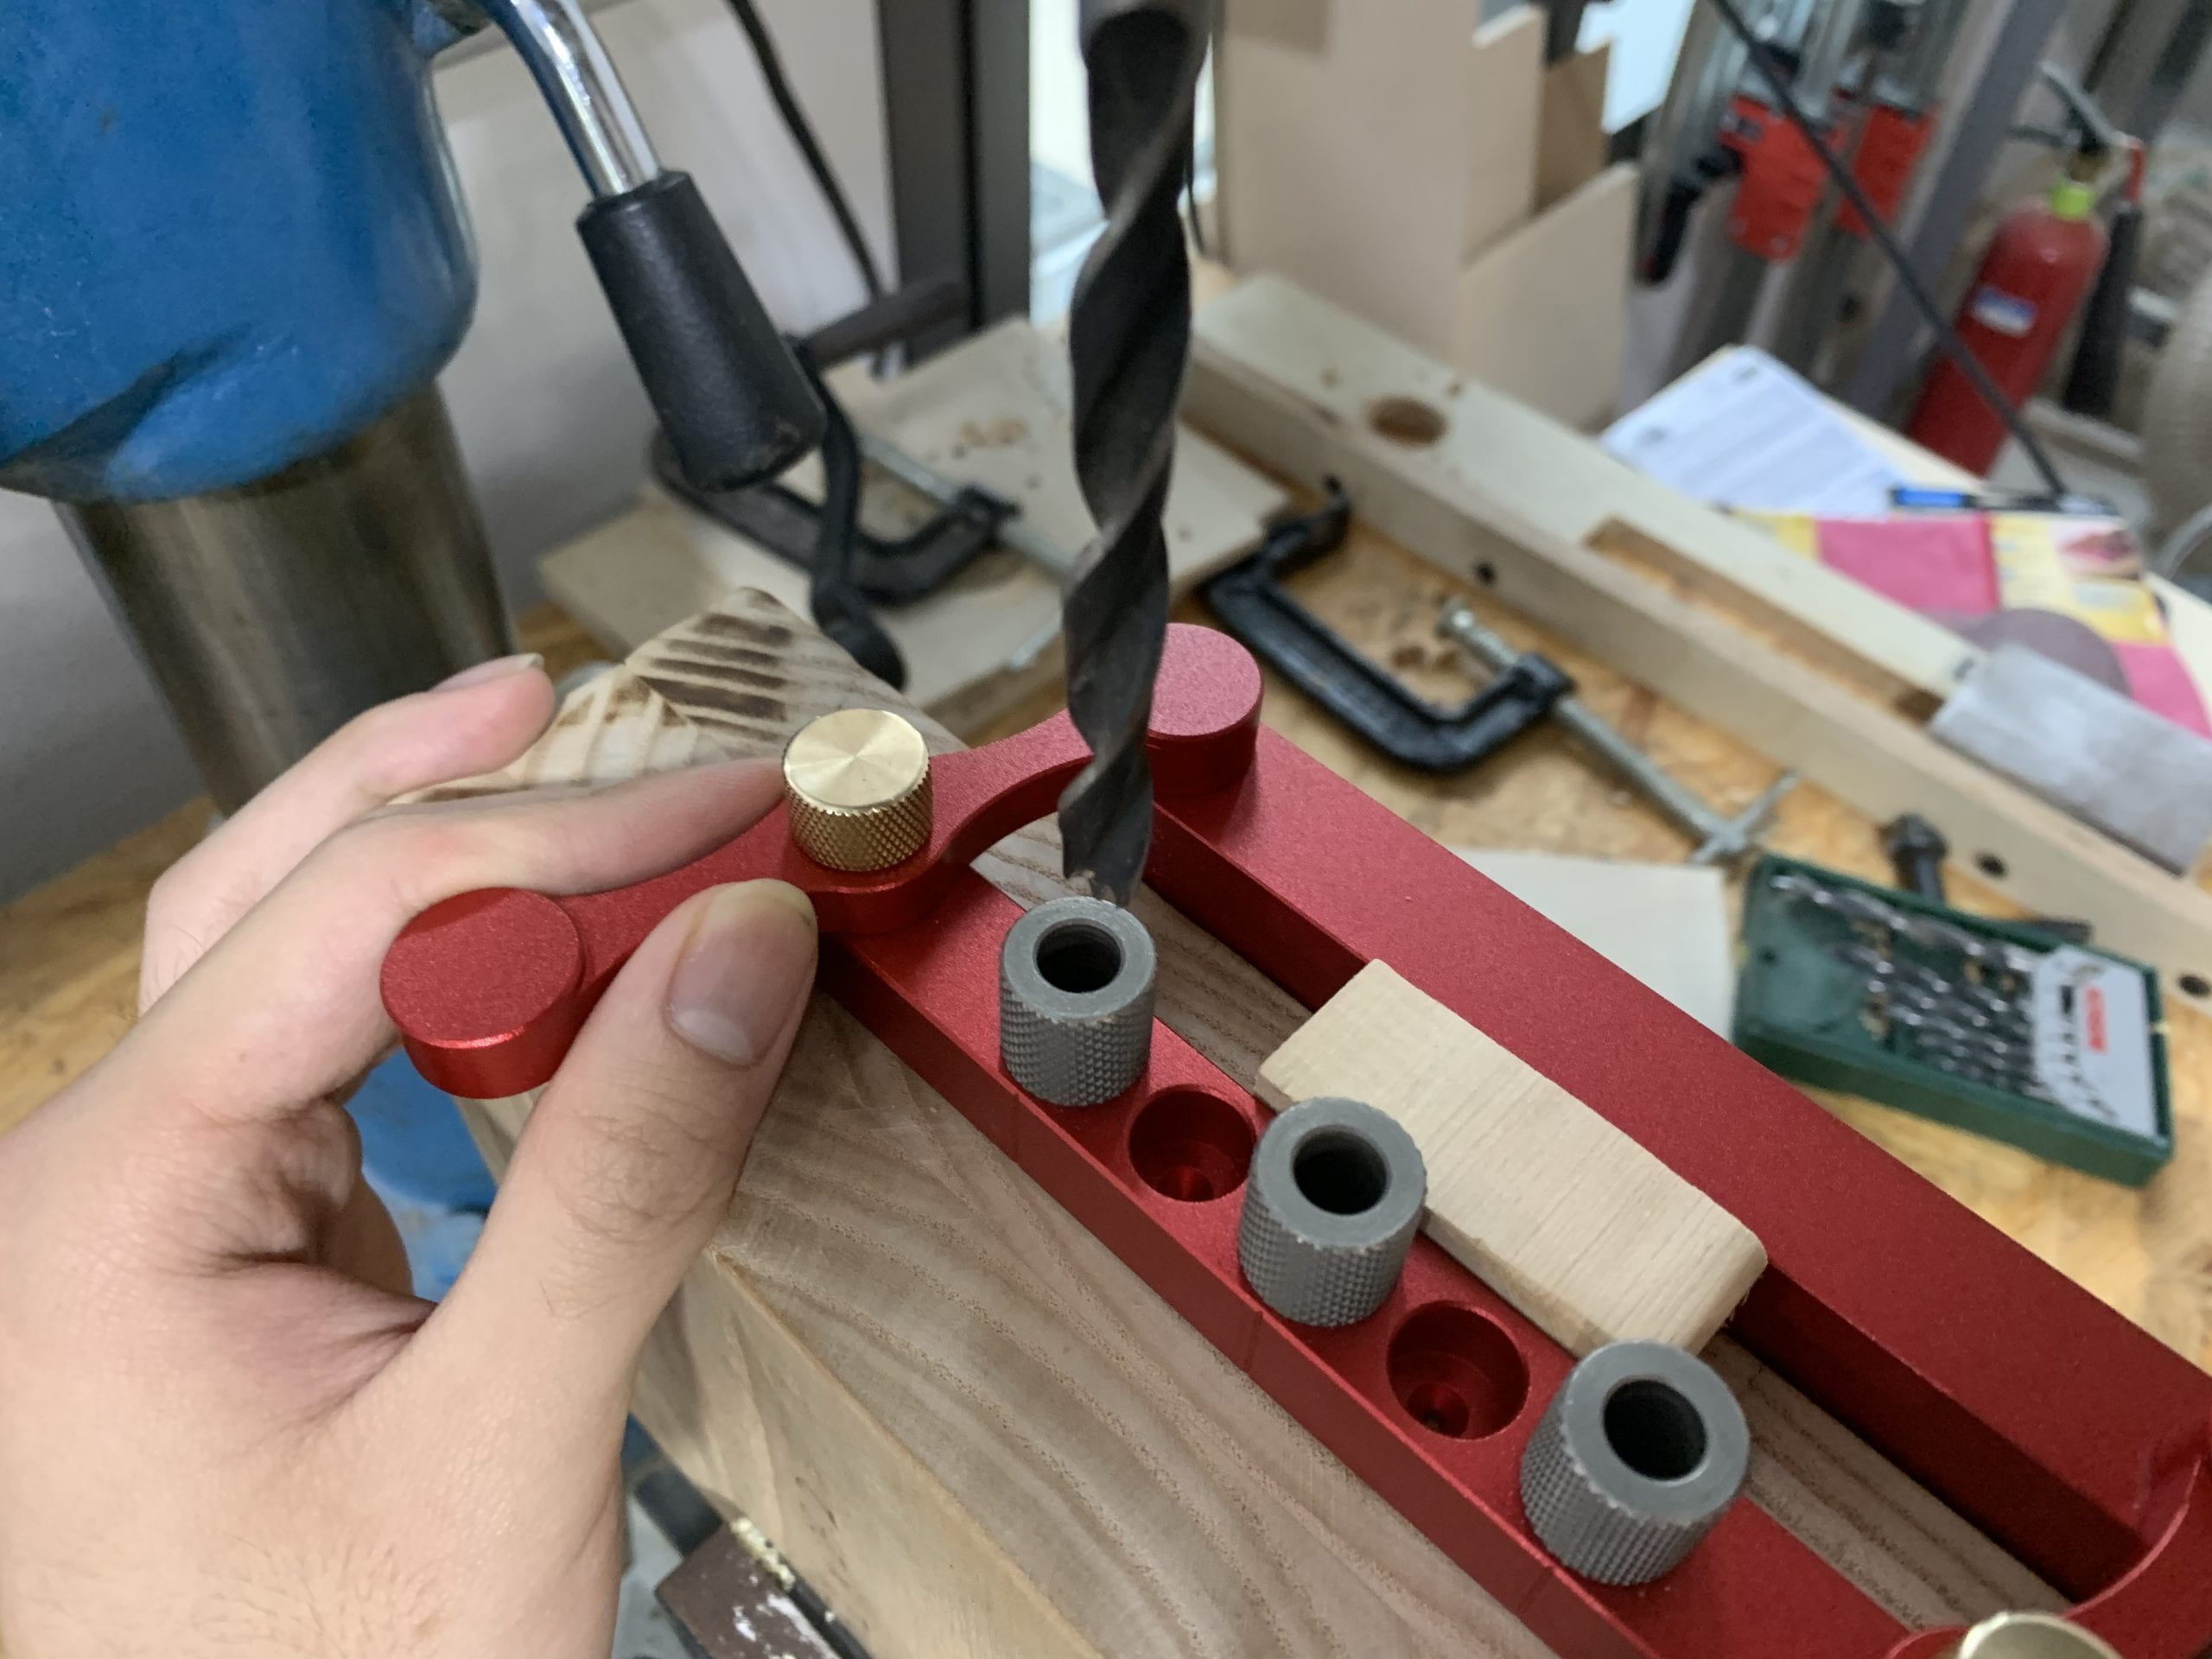
 jig for dowels
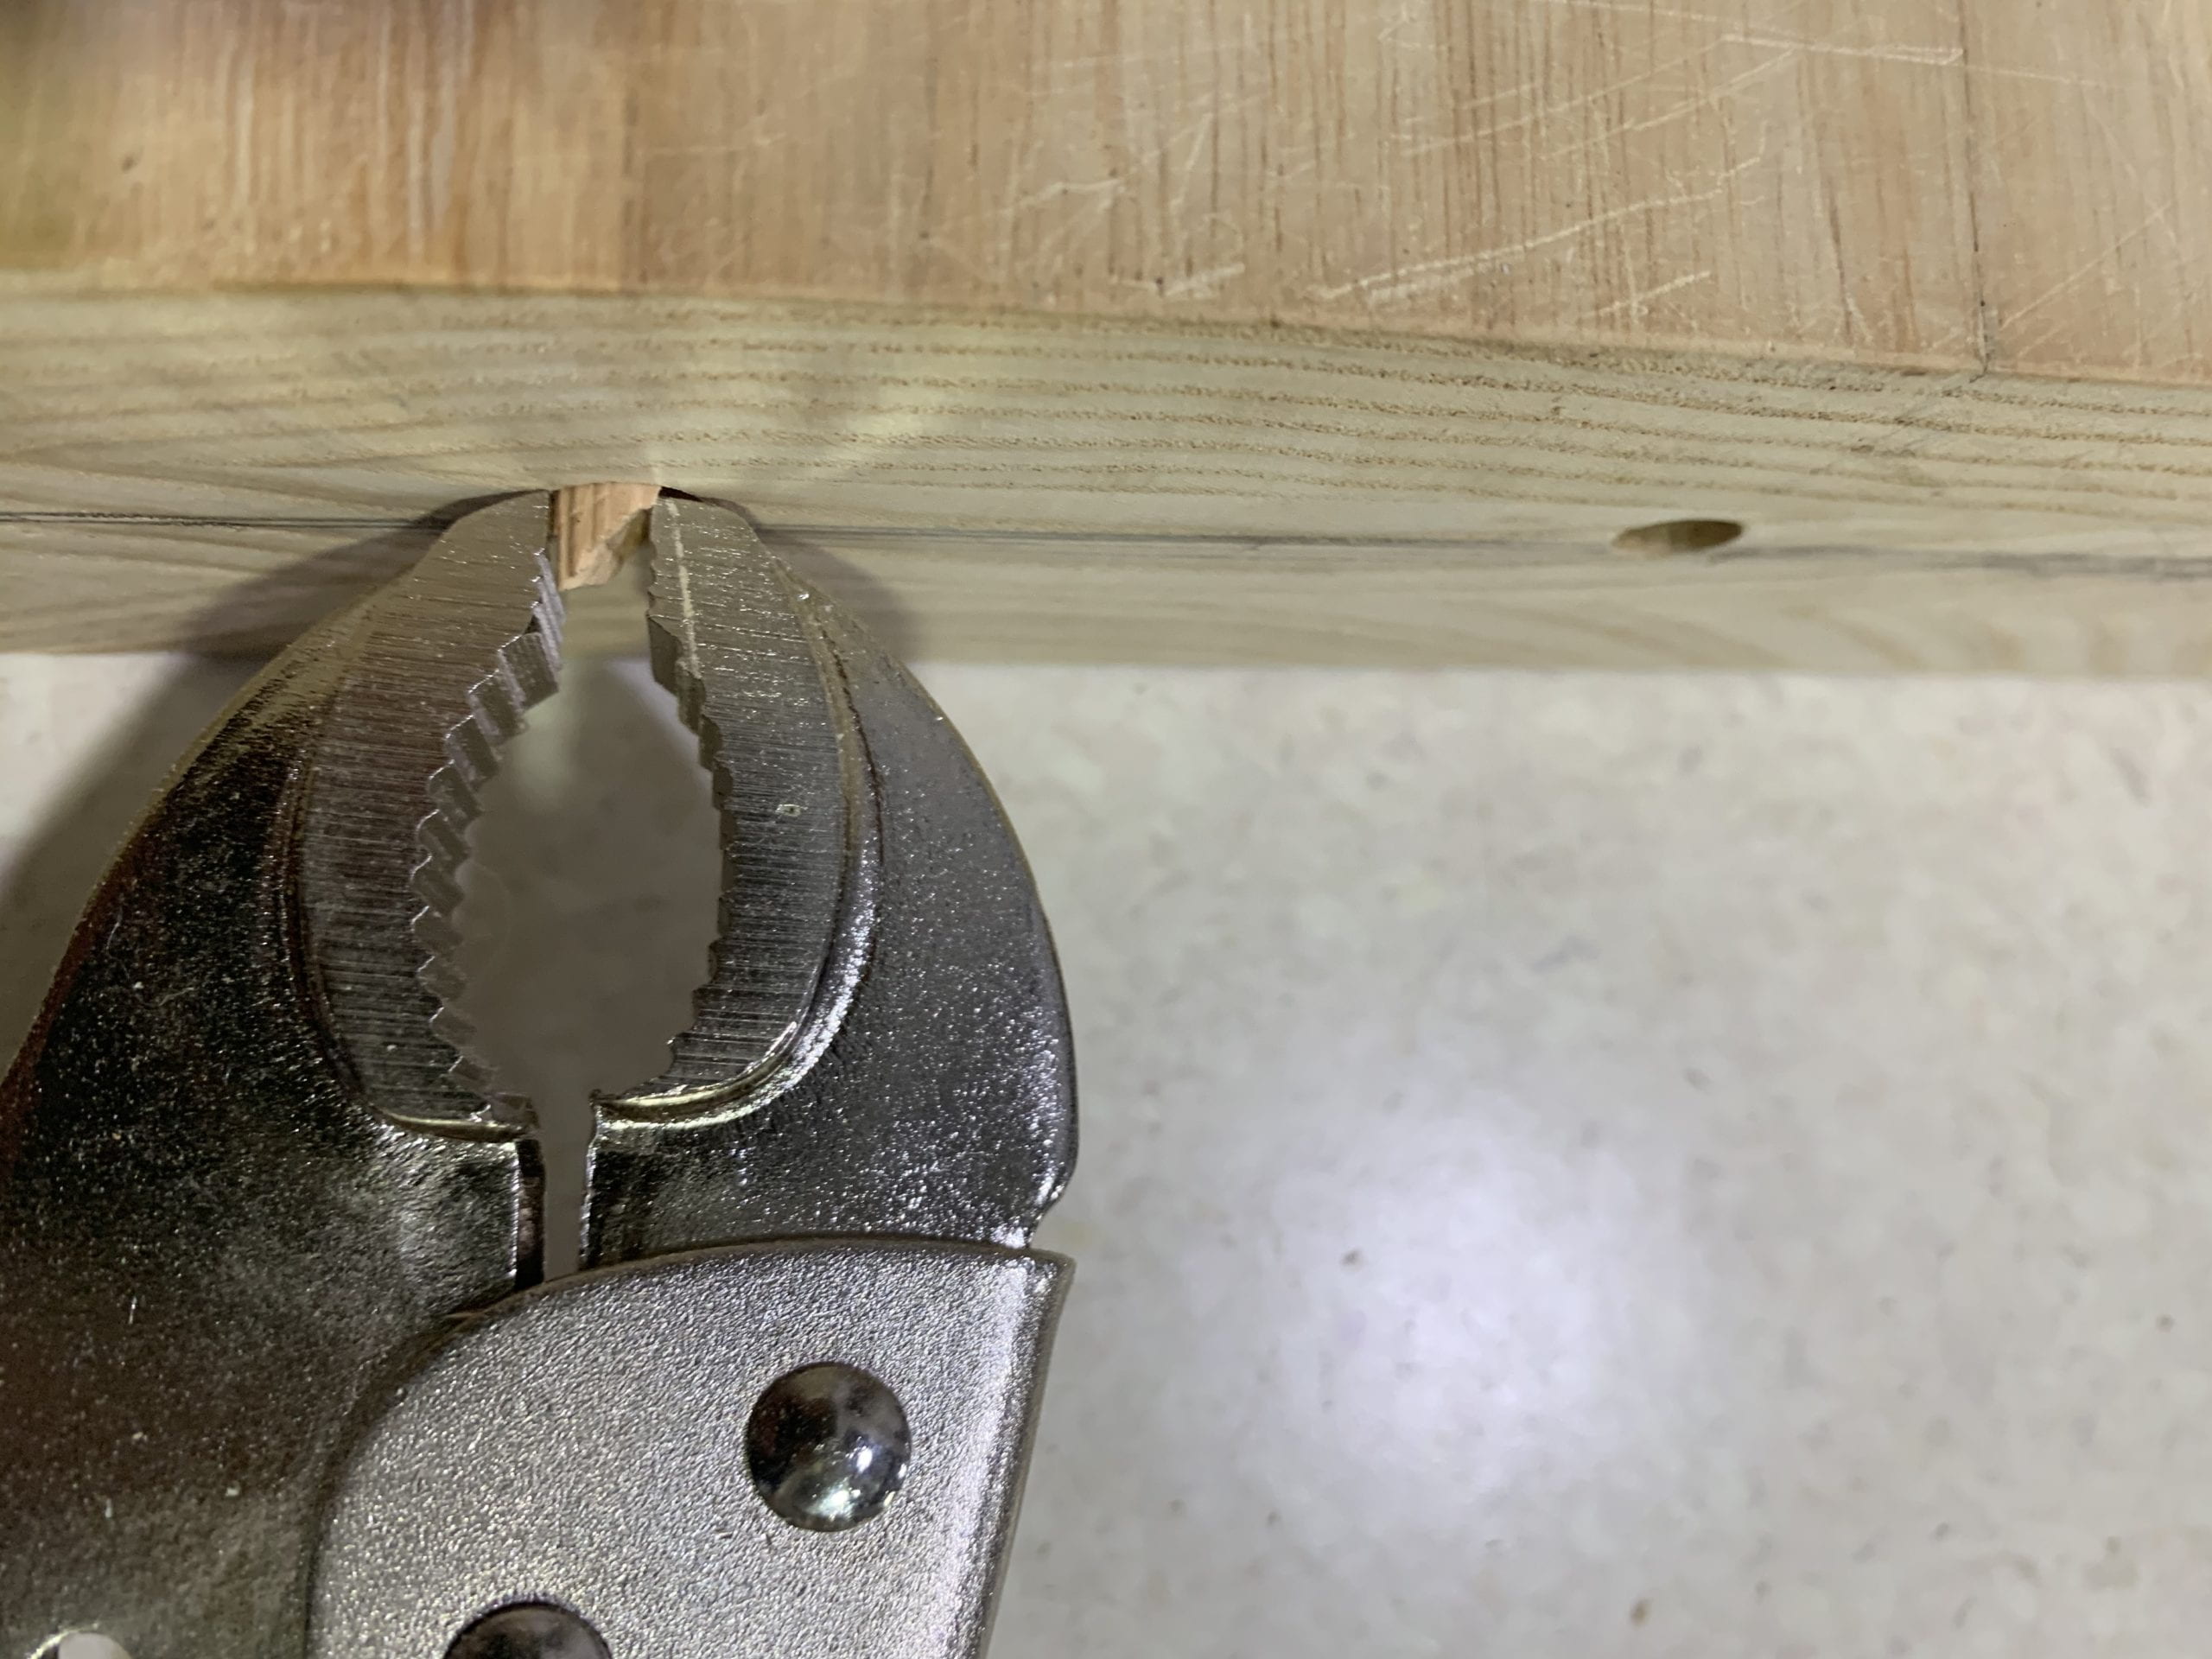
However, just before I clamped and glued the pieces with dowels, the wood fall down accidentally, and the wooden sticks broke inside the wood. Luckily, the plier helped to take out the dowels so I don’t need to drill holes all over again.
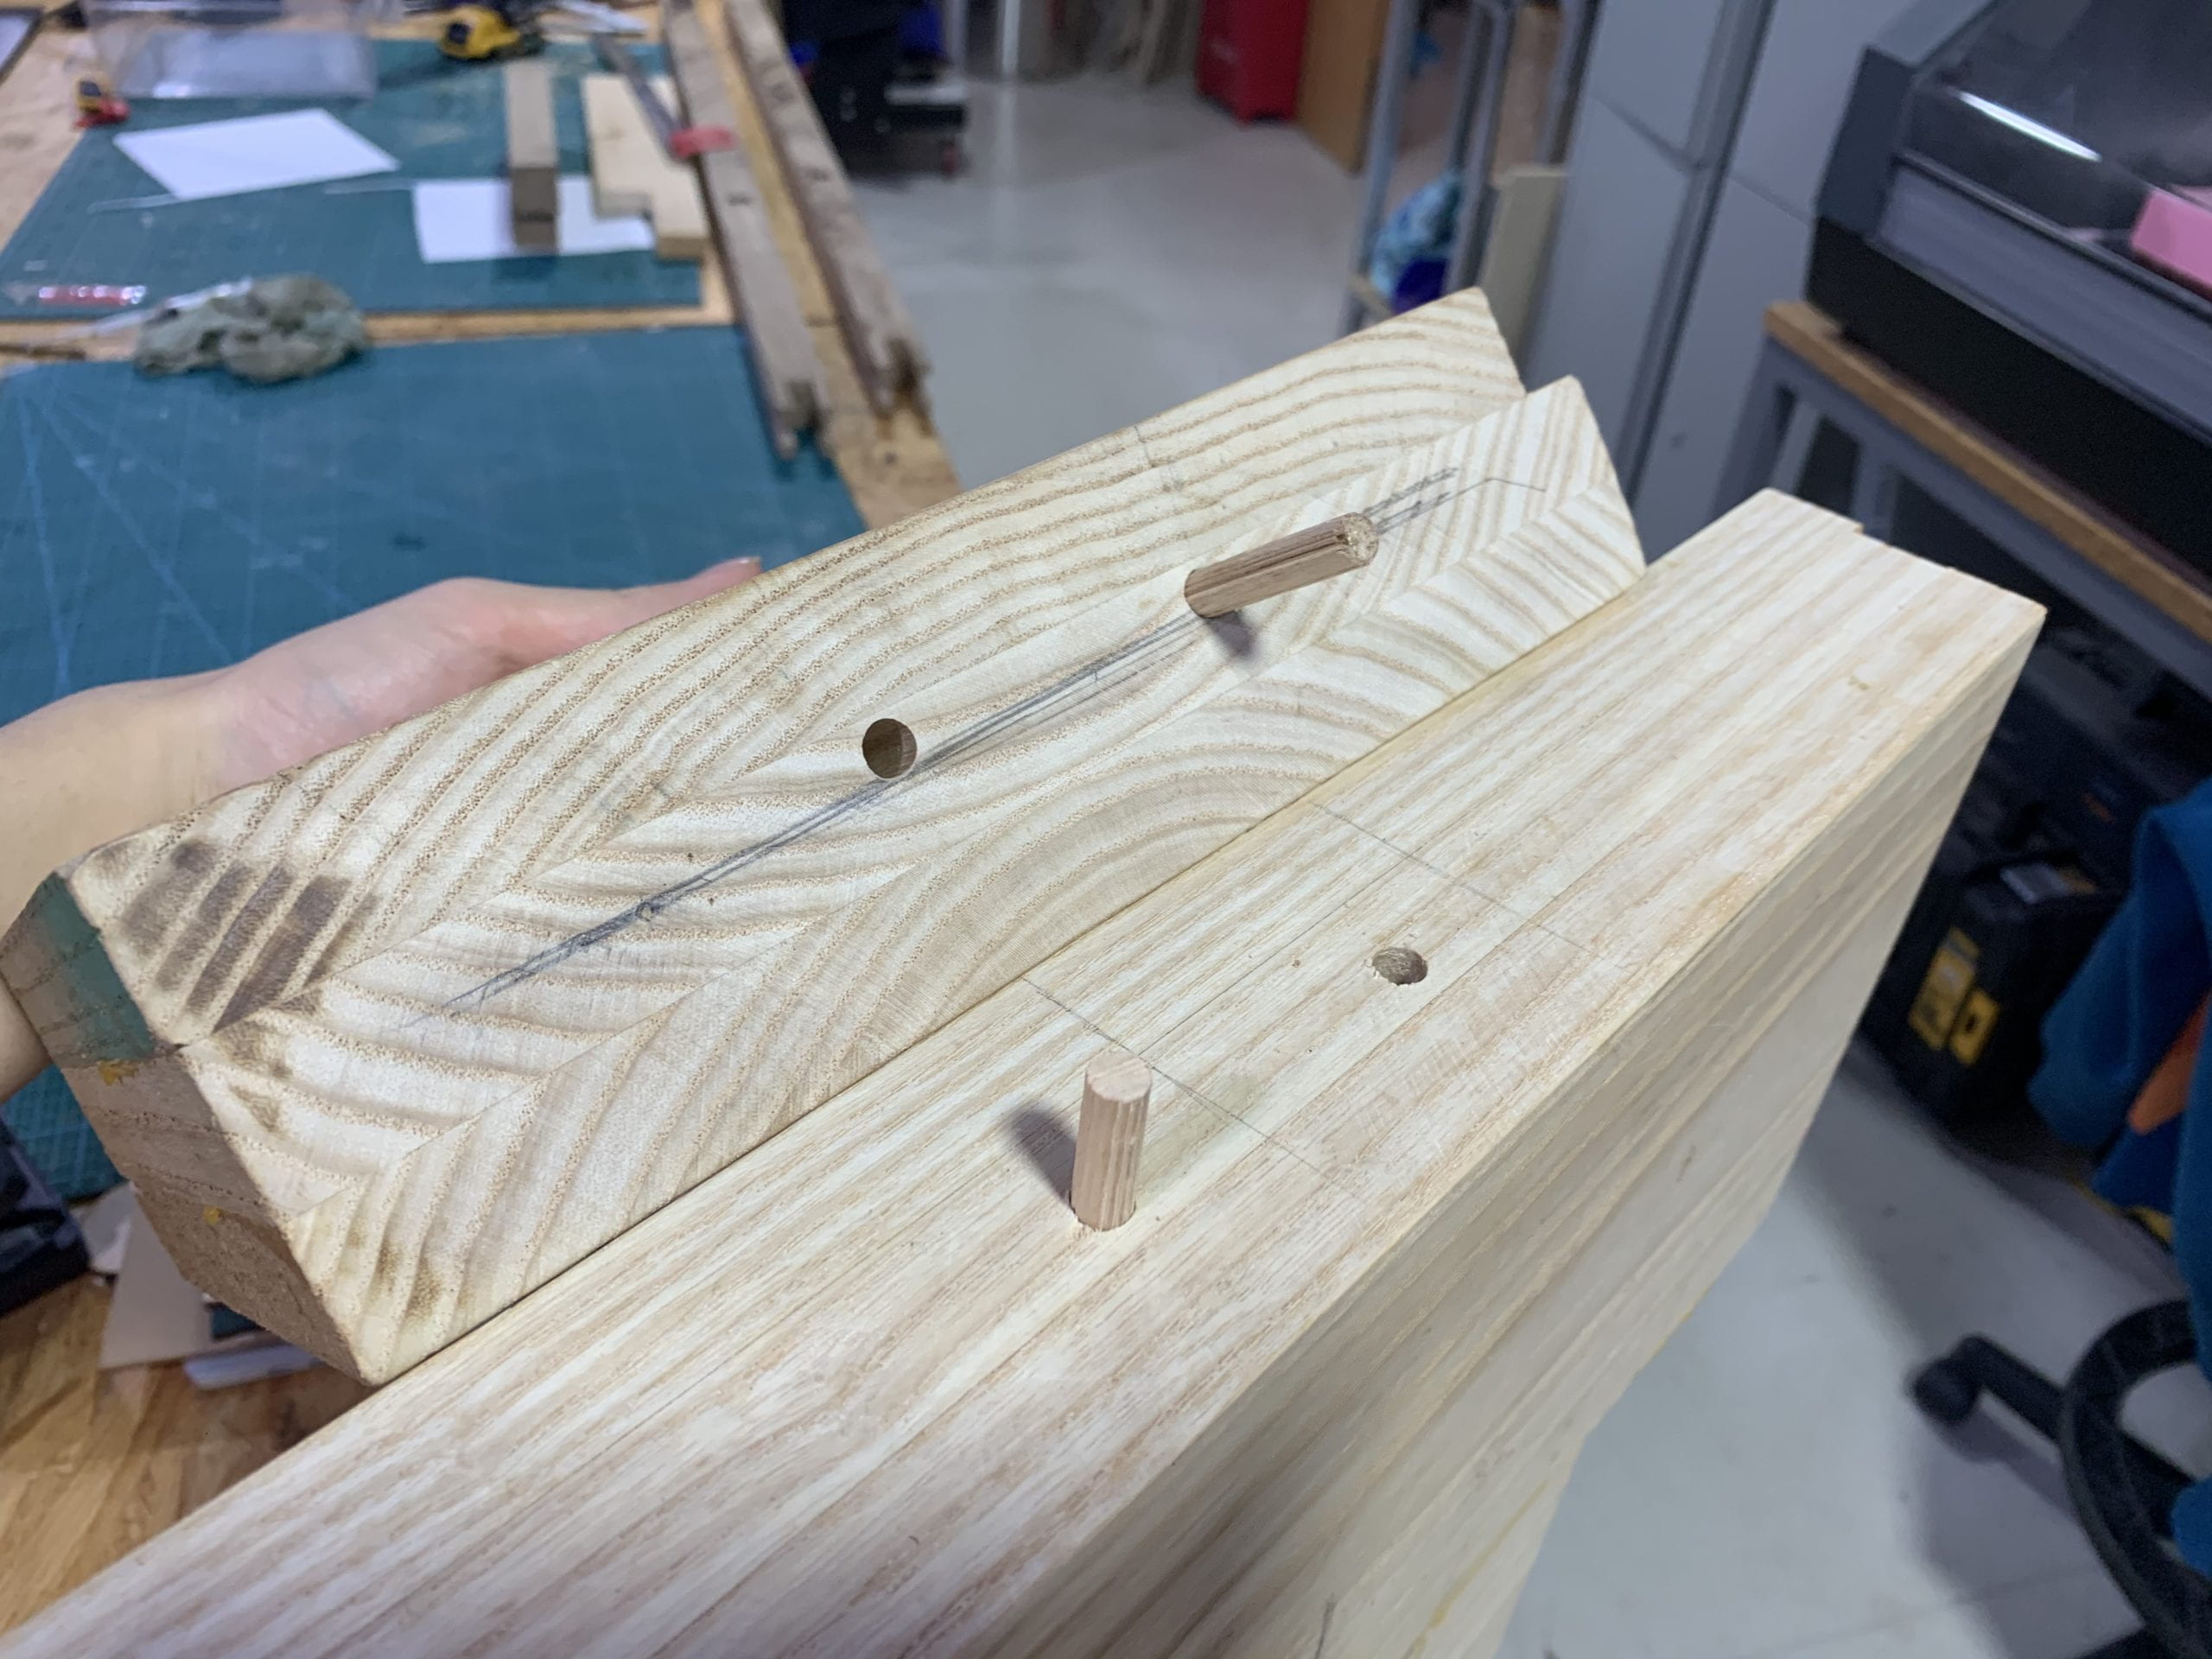
The similar technique is also used when joining the neck to the head part.
Redesign III
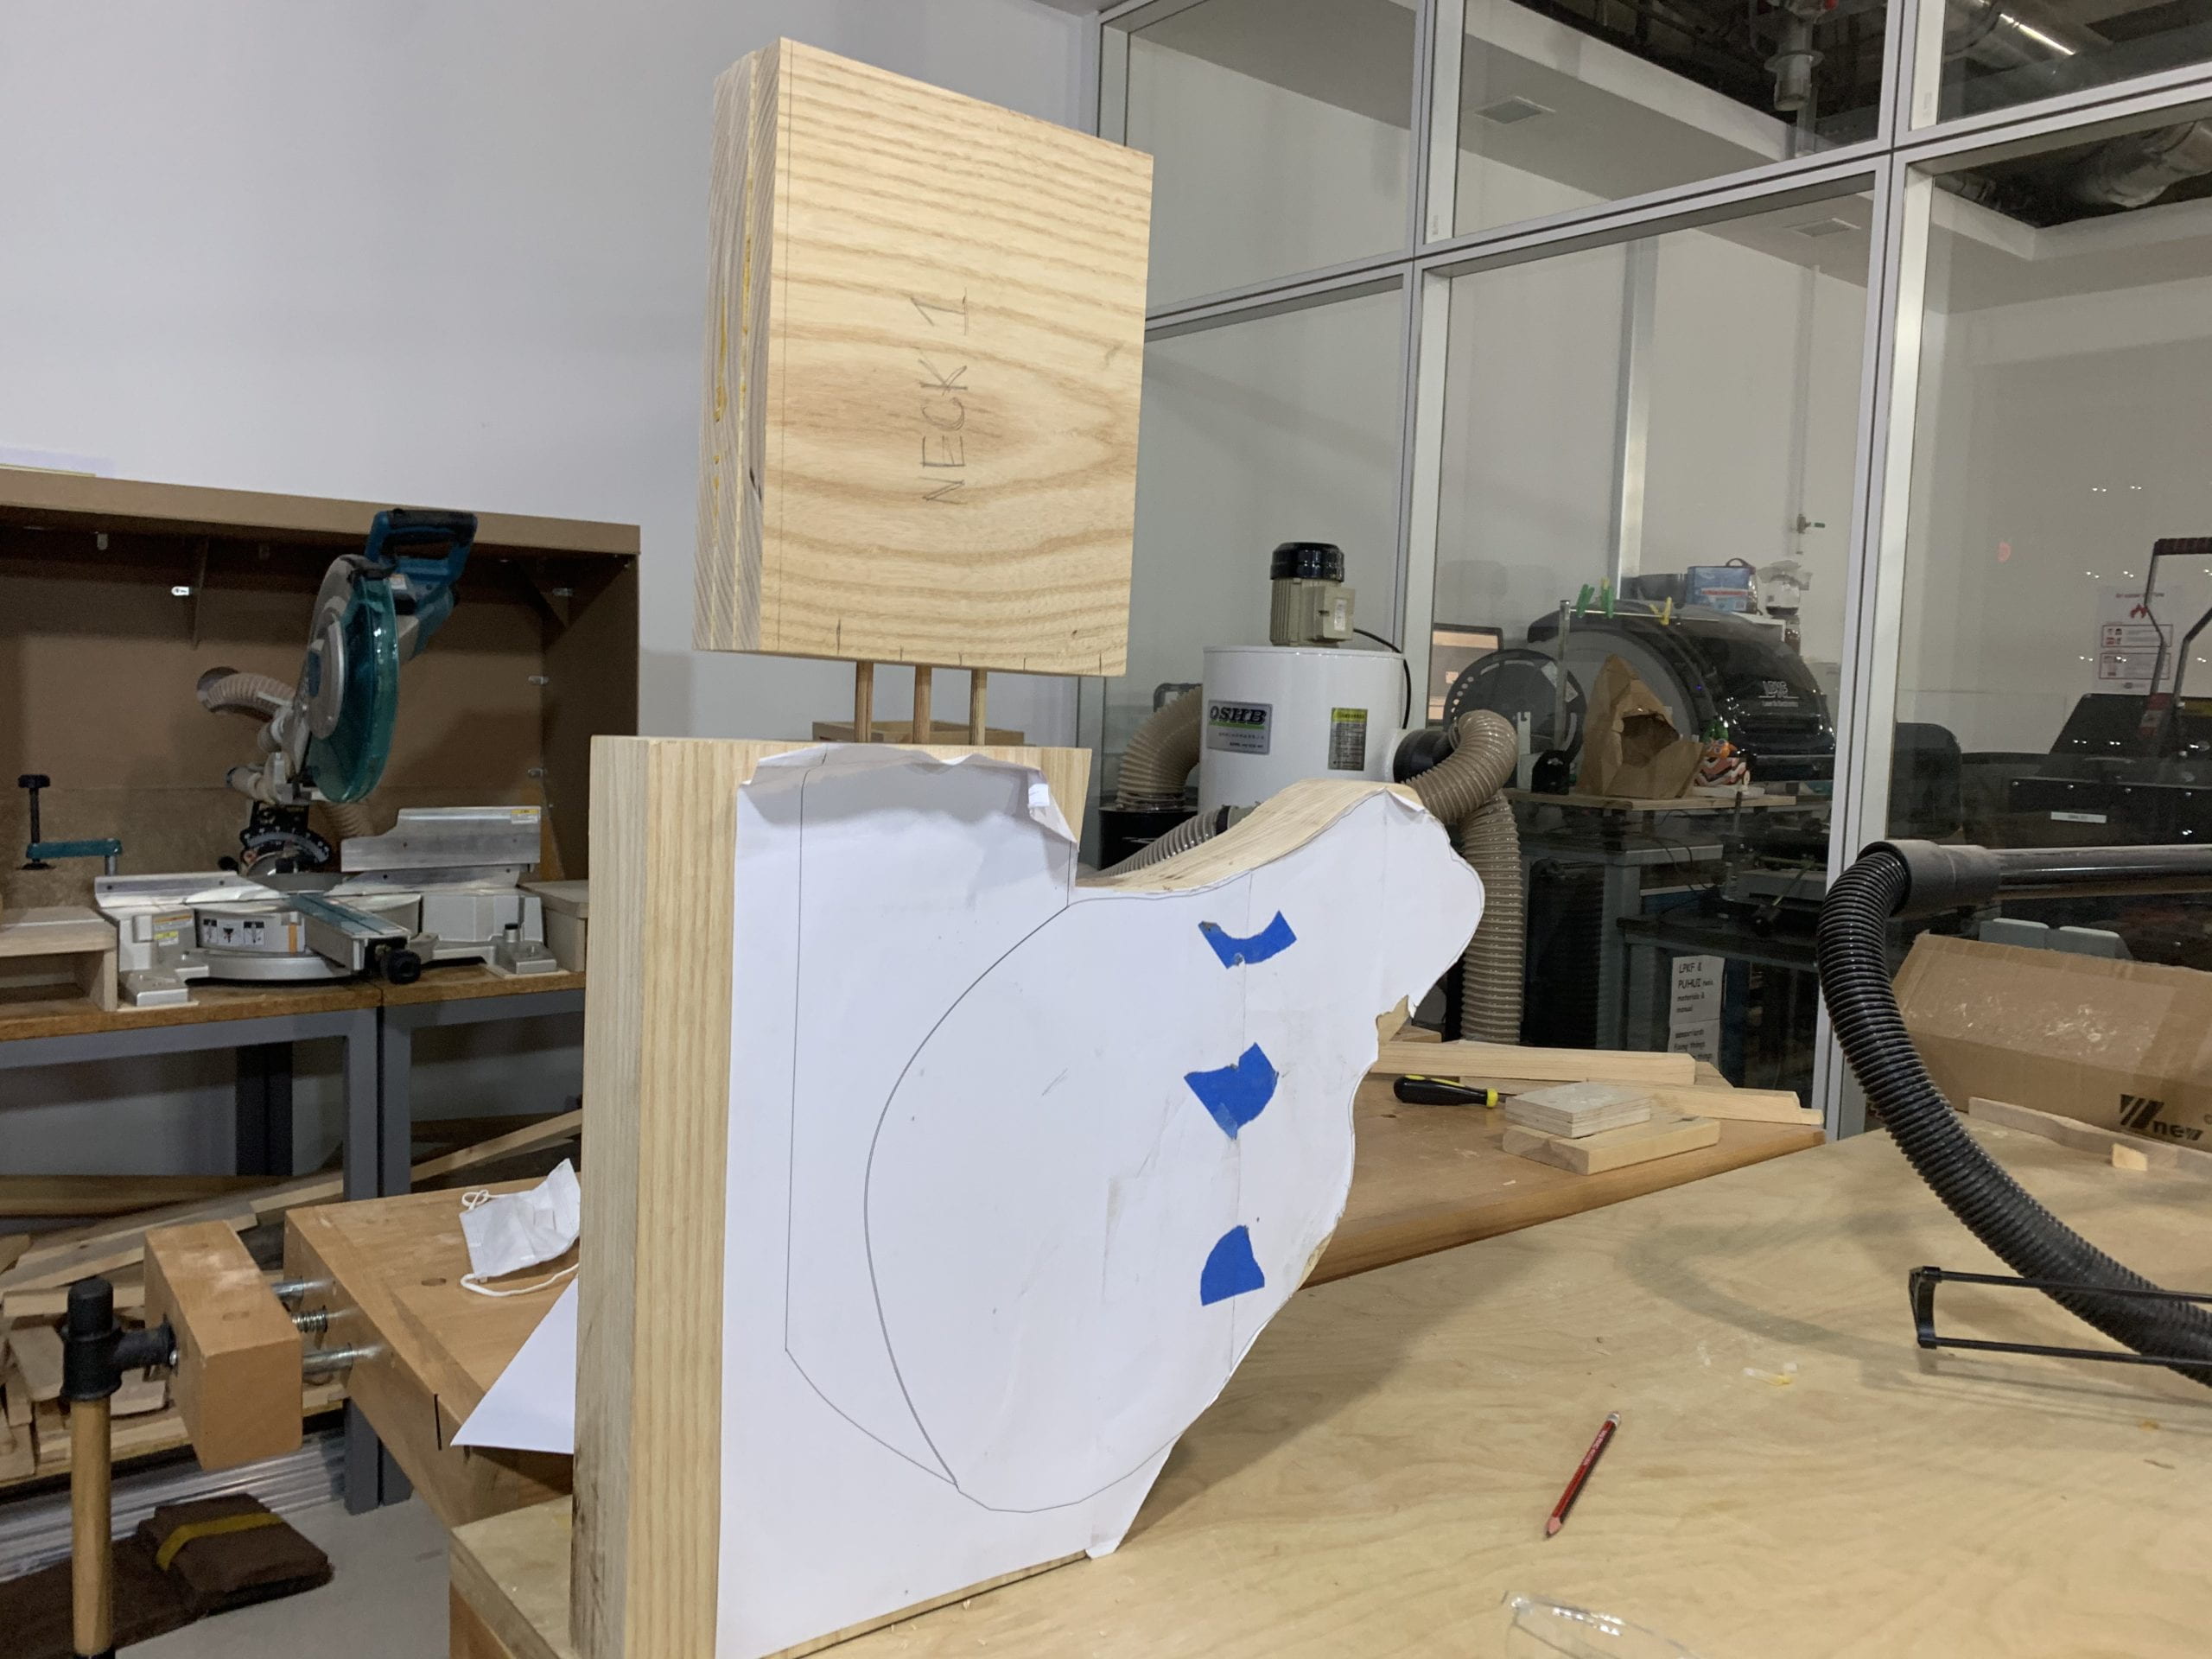
Right after I glued everything together, I found out that my piece too big and heavy. I followed the size in my previous design, but only when having the real piece of wood in front of myself I could figure out how big the sculpture really is. Thus, I reduced the whole design for about one-third to one-fourth, though it turned out later that this reduced size is still too big for a deer and myself.
Band Saw Cutting
Almost all shapes for this project are cut by the band saw. Using a wider blade, the three layers of wood could be cut through easier, though smaller curves are more difficult.
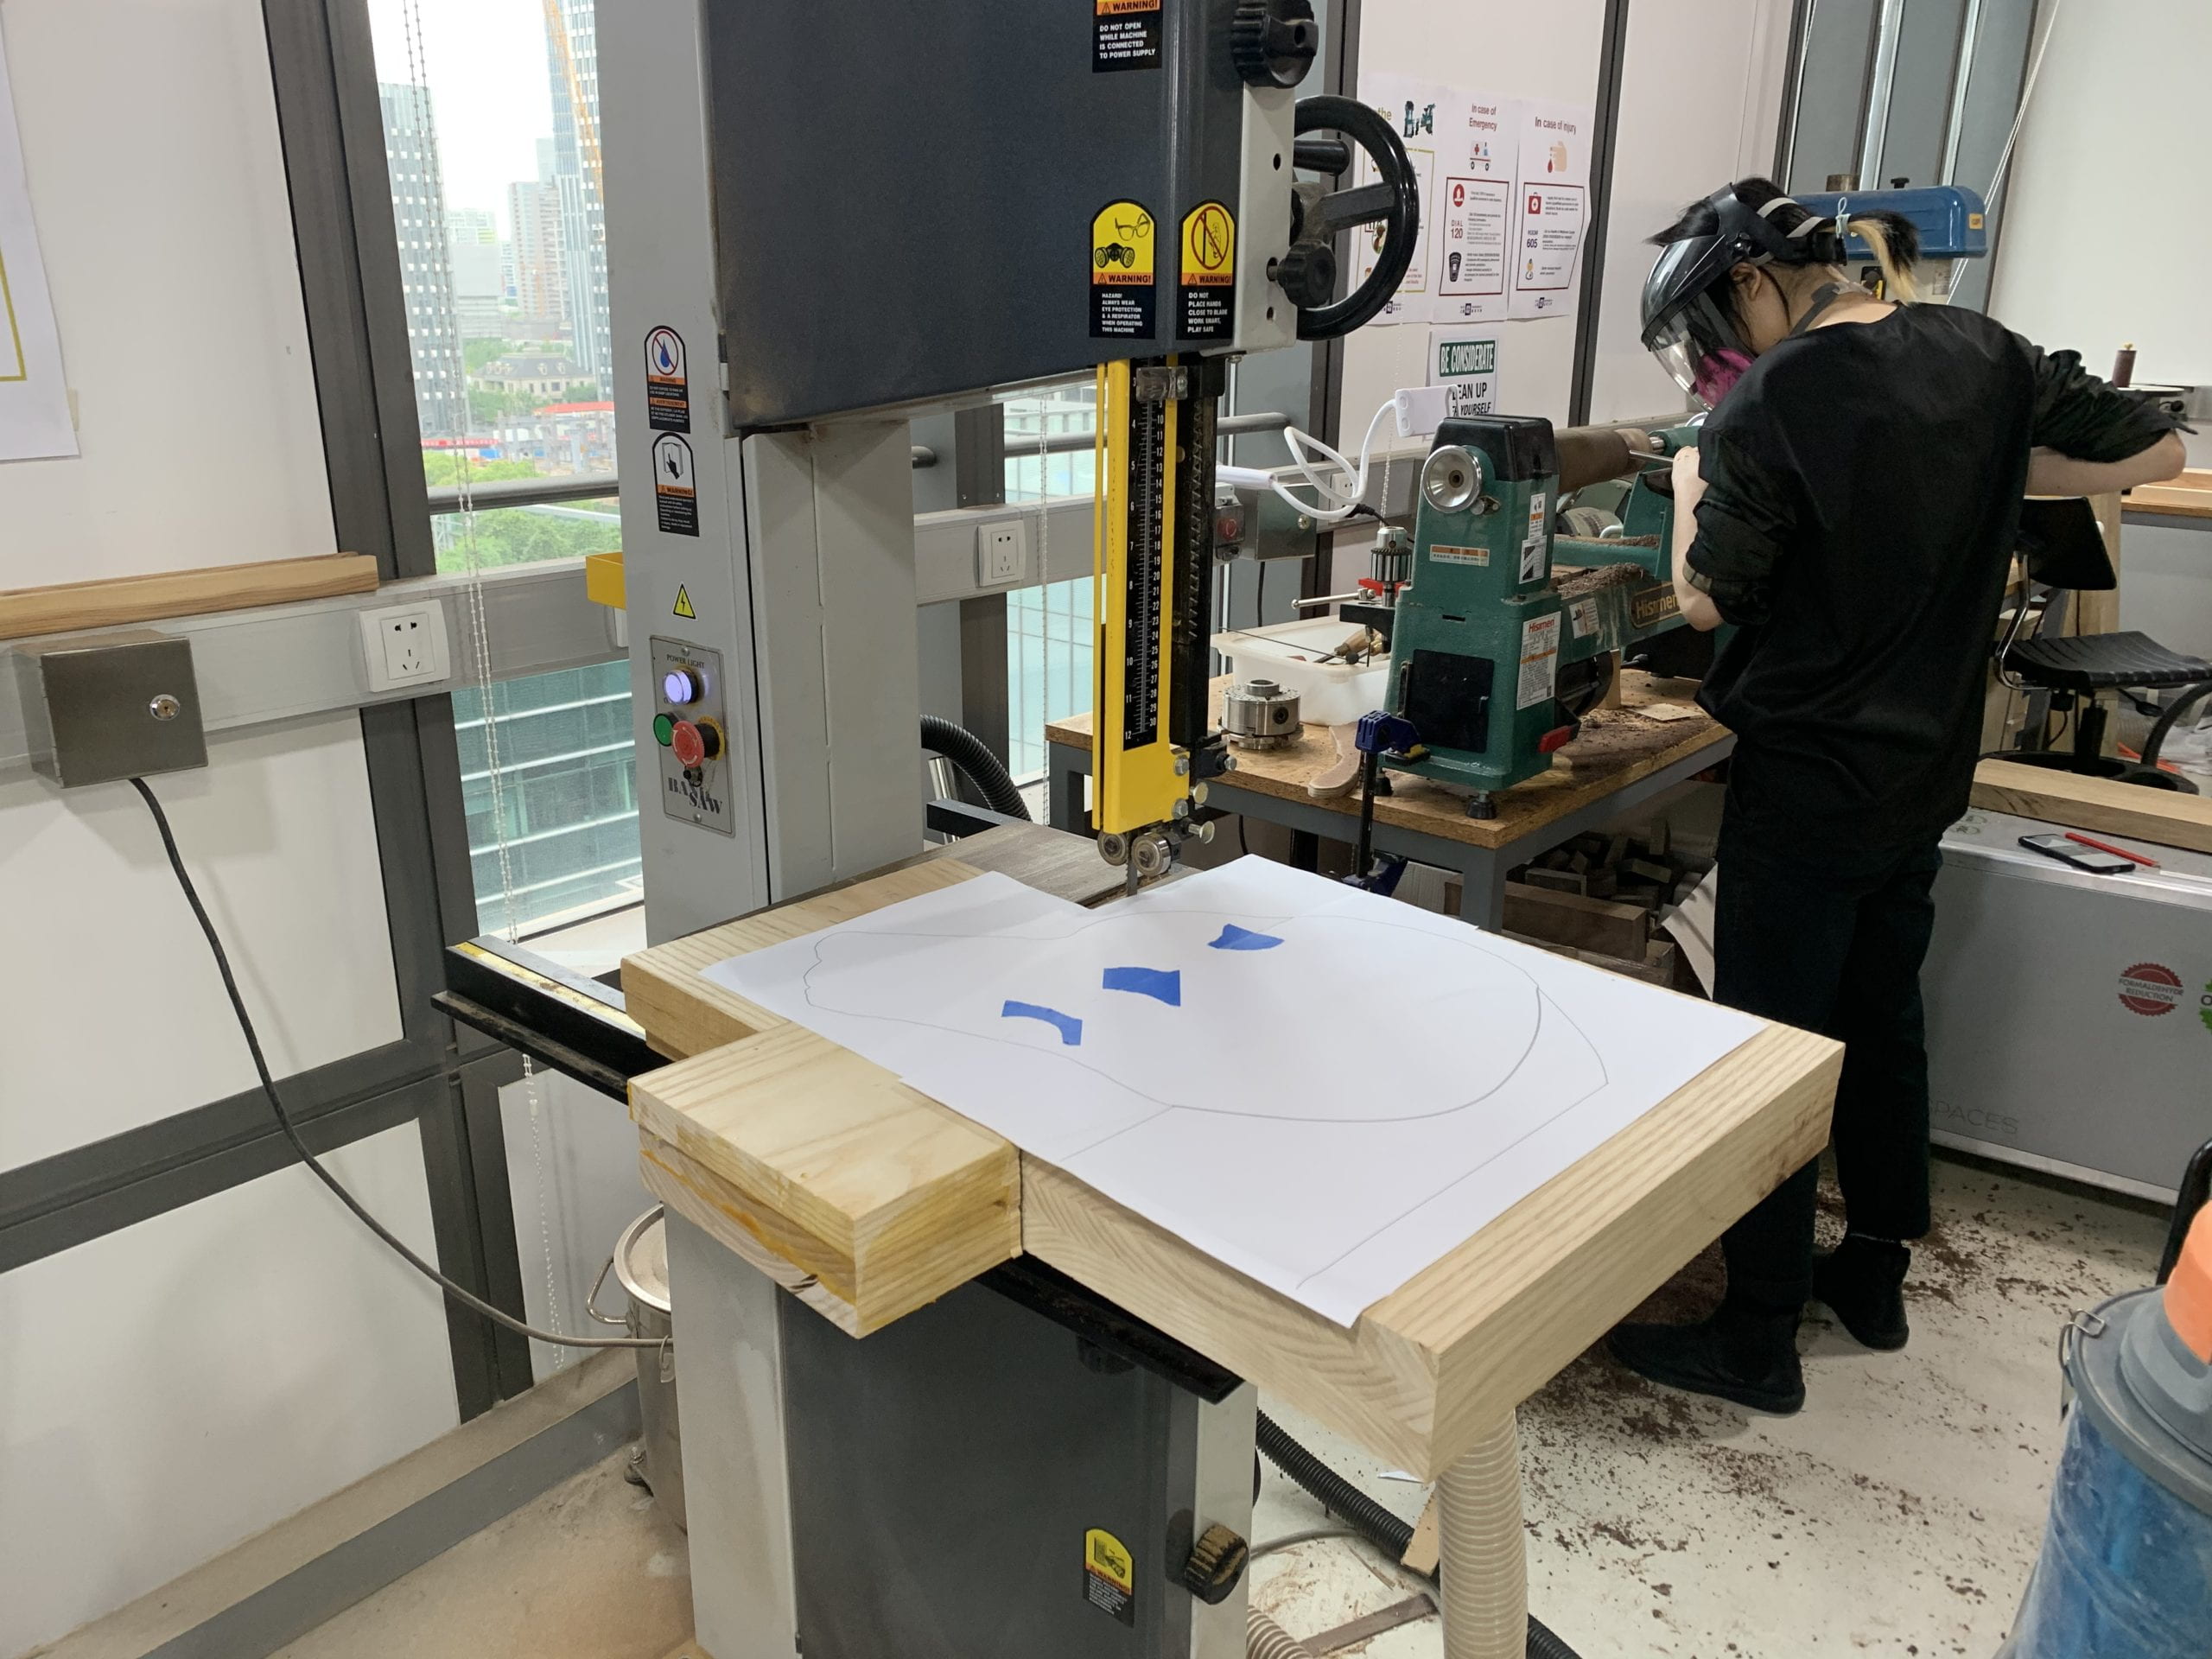
One major problem I met when using the band saw was that my piece was too big, even bigger than the band saw platform. And the wood is too heavy for one person to hold and cut curves at the same time. For some tricky cuts, I asked friends to help me lift the wood a bit.

Since this project is about the deer head sculpture, the face should be symmetric at least to some extent. After trying to sand them into the same shape, I found out the better way is to cut one first, then follow the exact trace of the first one to produce the second part.
Router for edge cutting
Since the cheeks has different shape with the head, they can’t be cut at the same time but to glue later. The edges wouldn’t match perfectly after the gluing process, so professor Steele suggested me to use the router to get a flat side face.
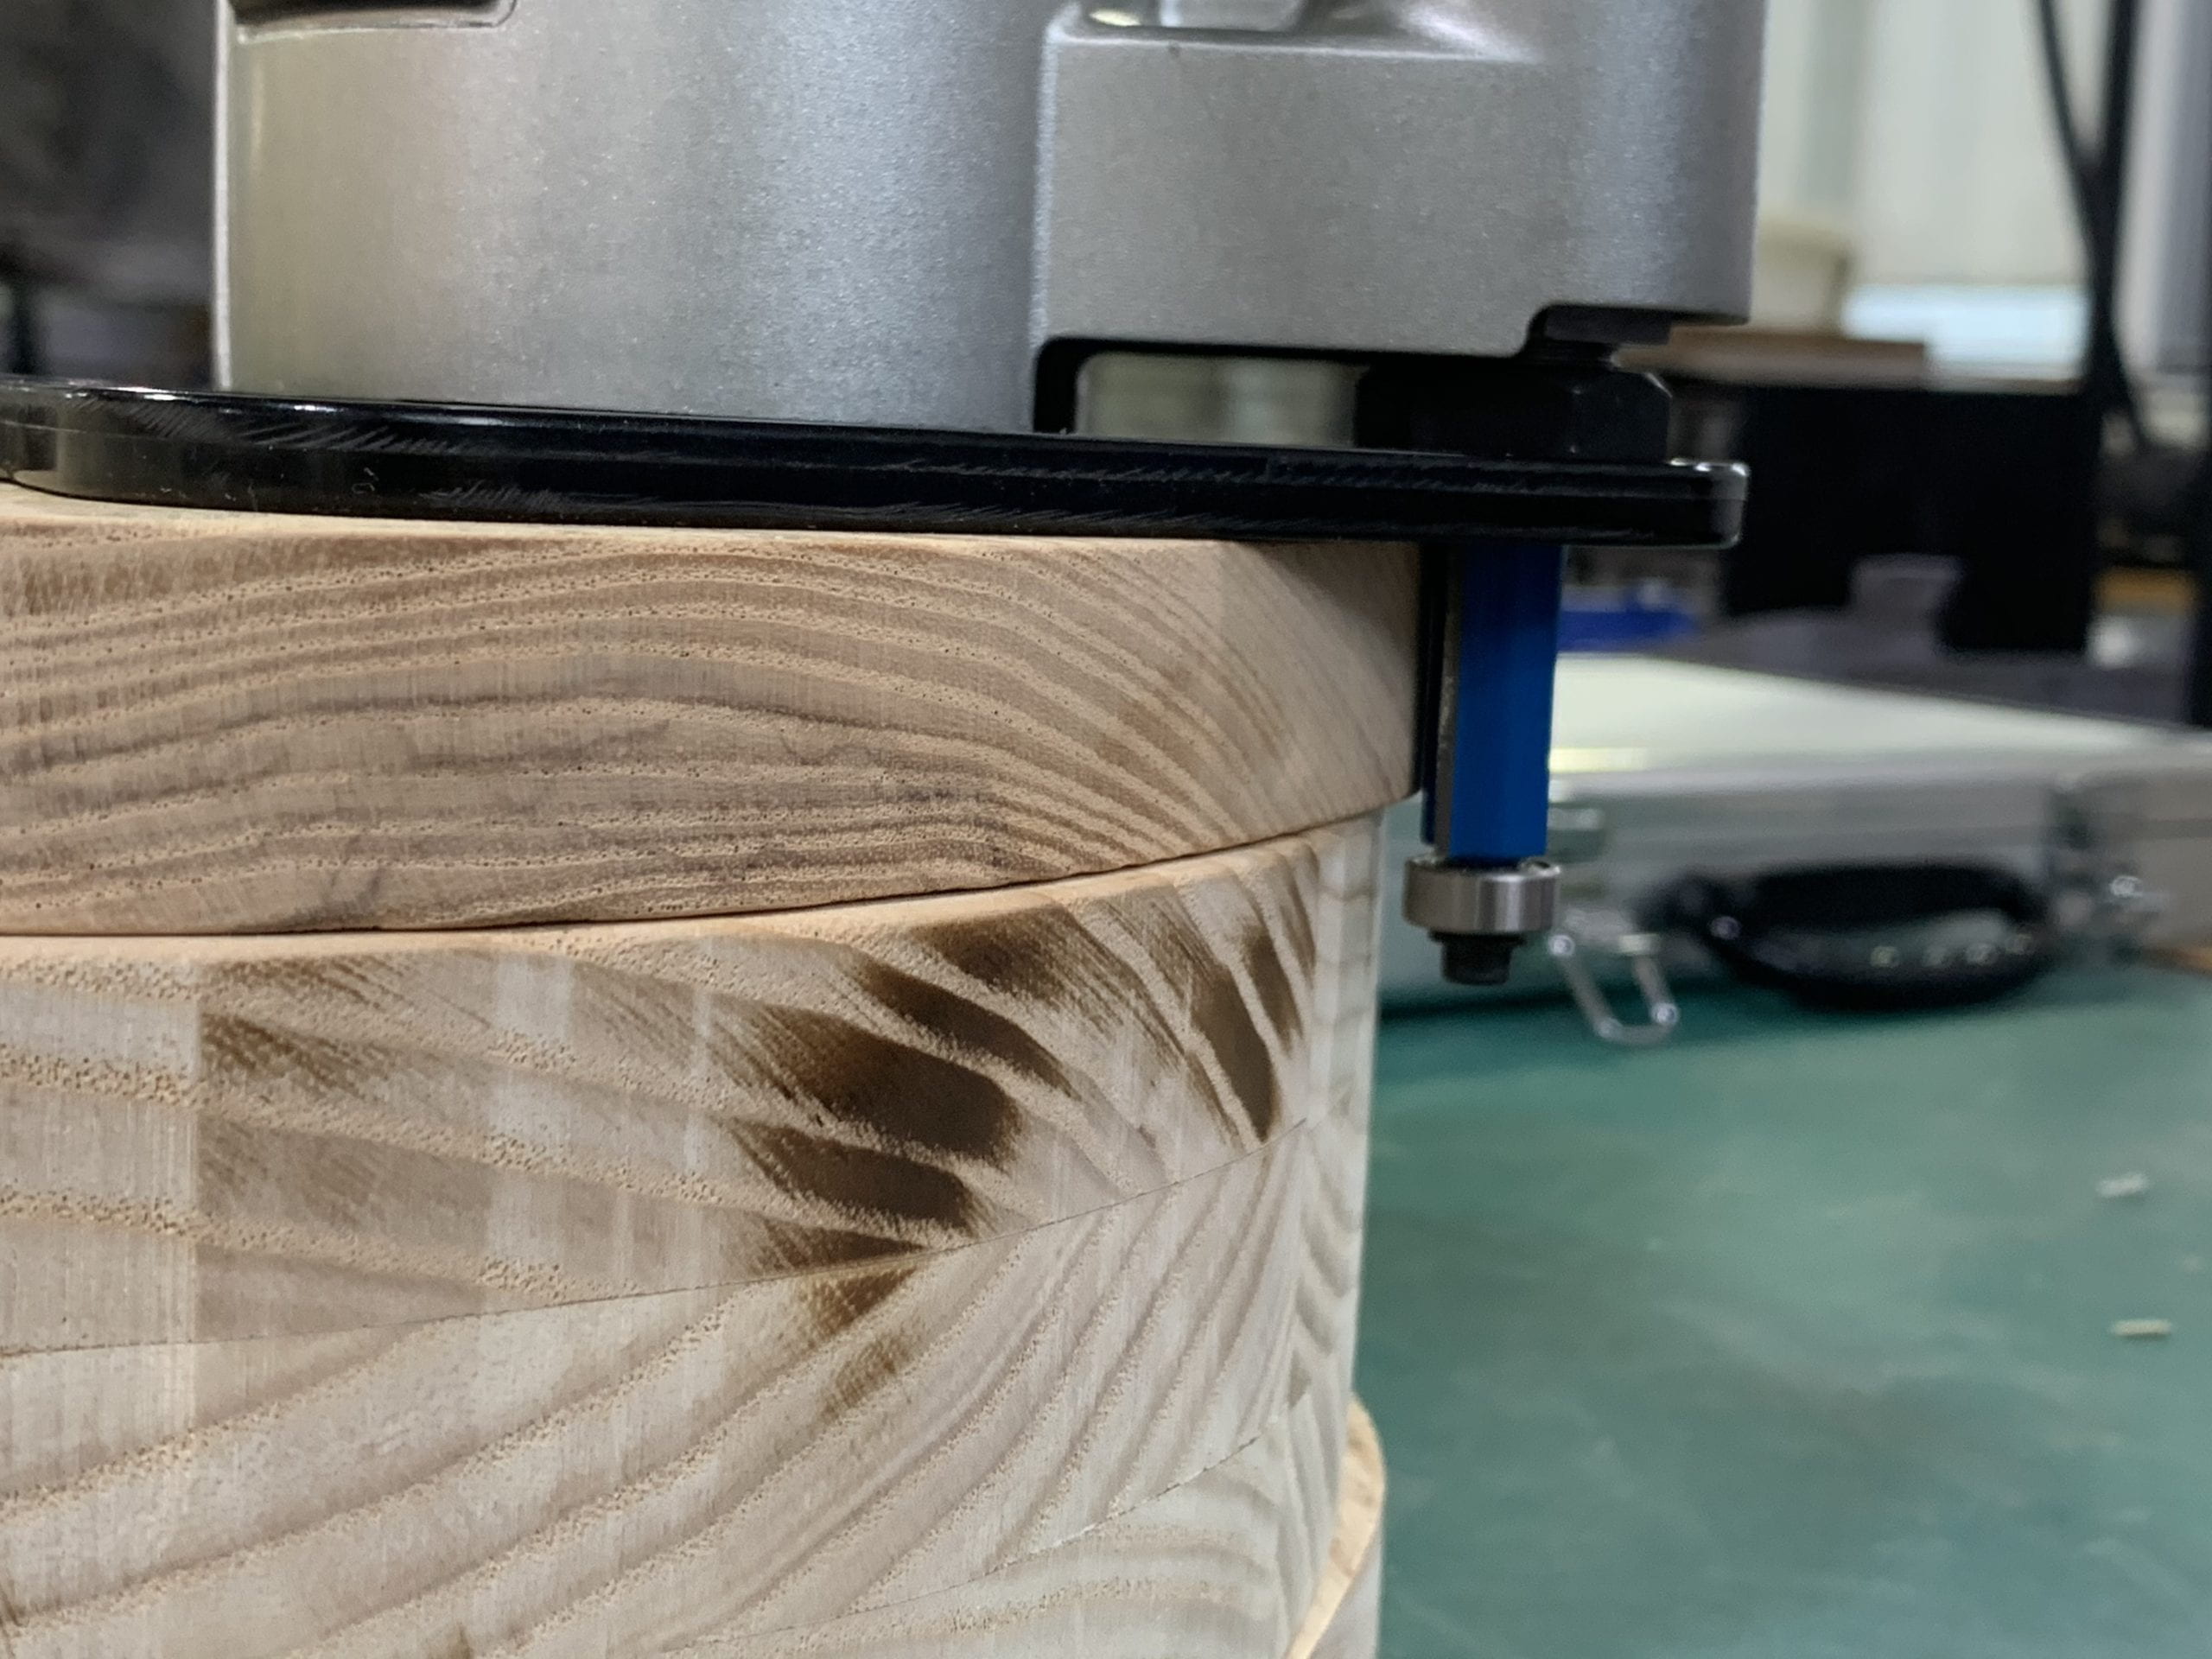
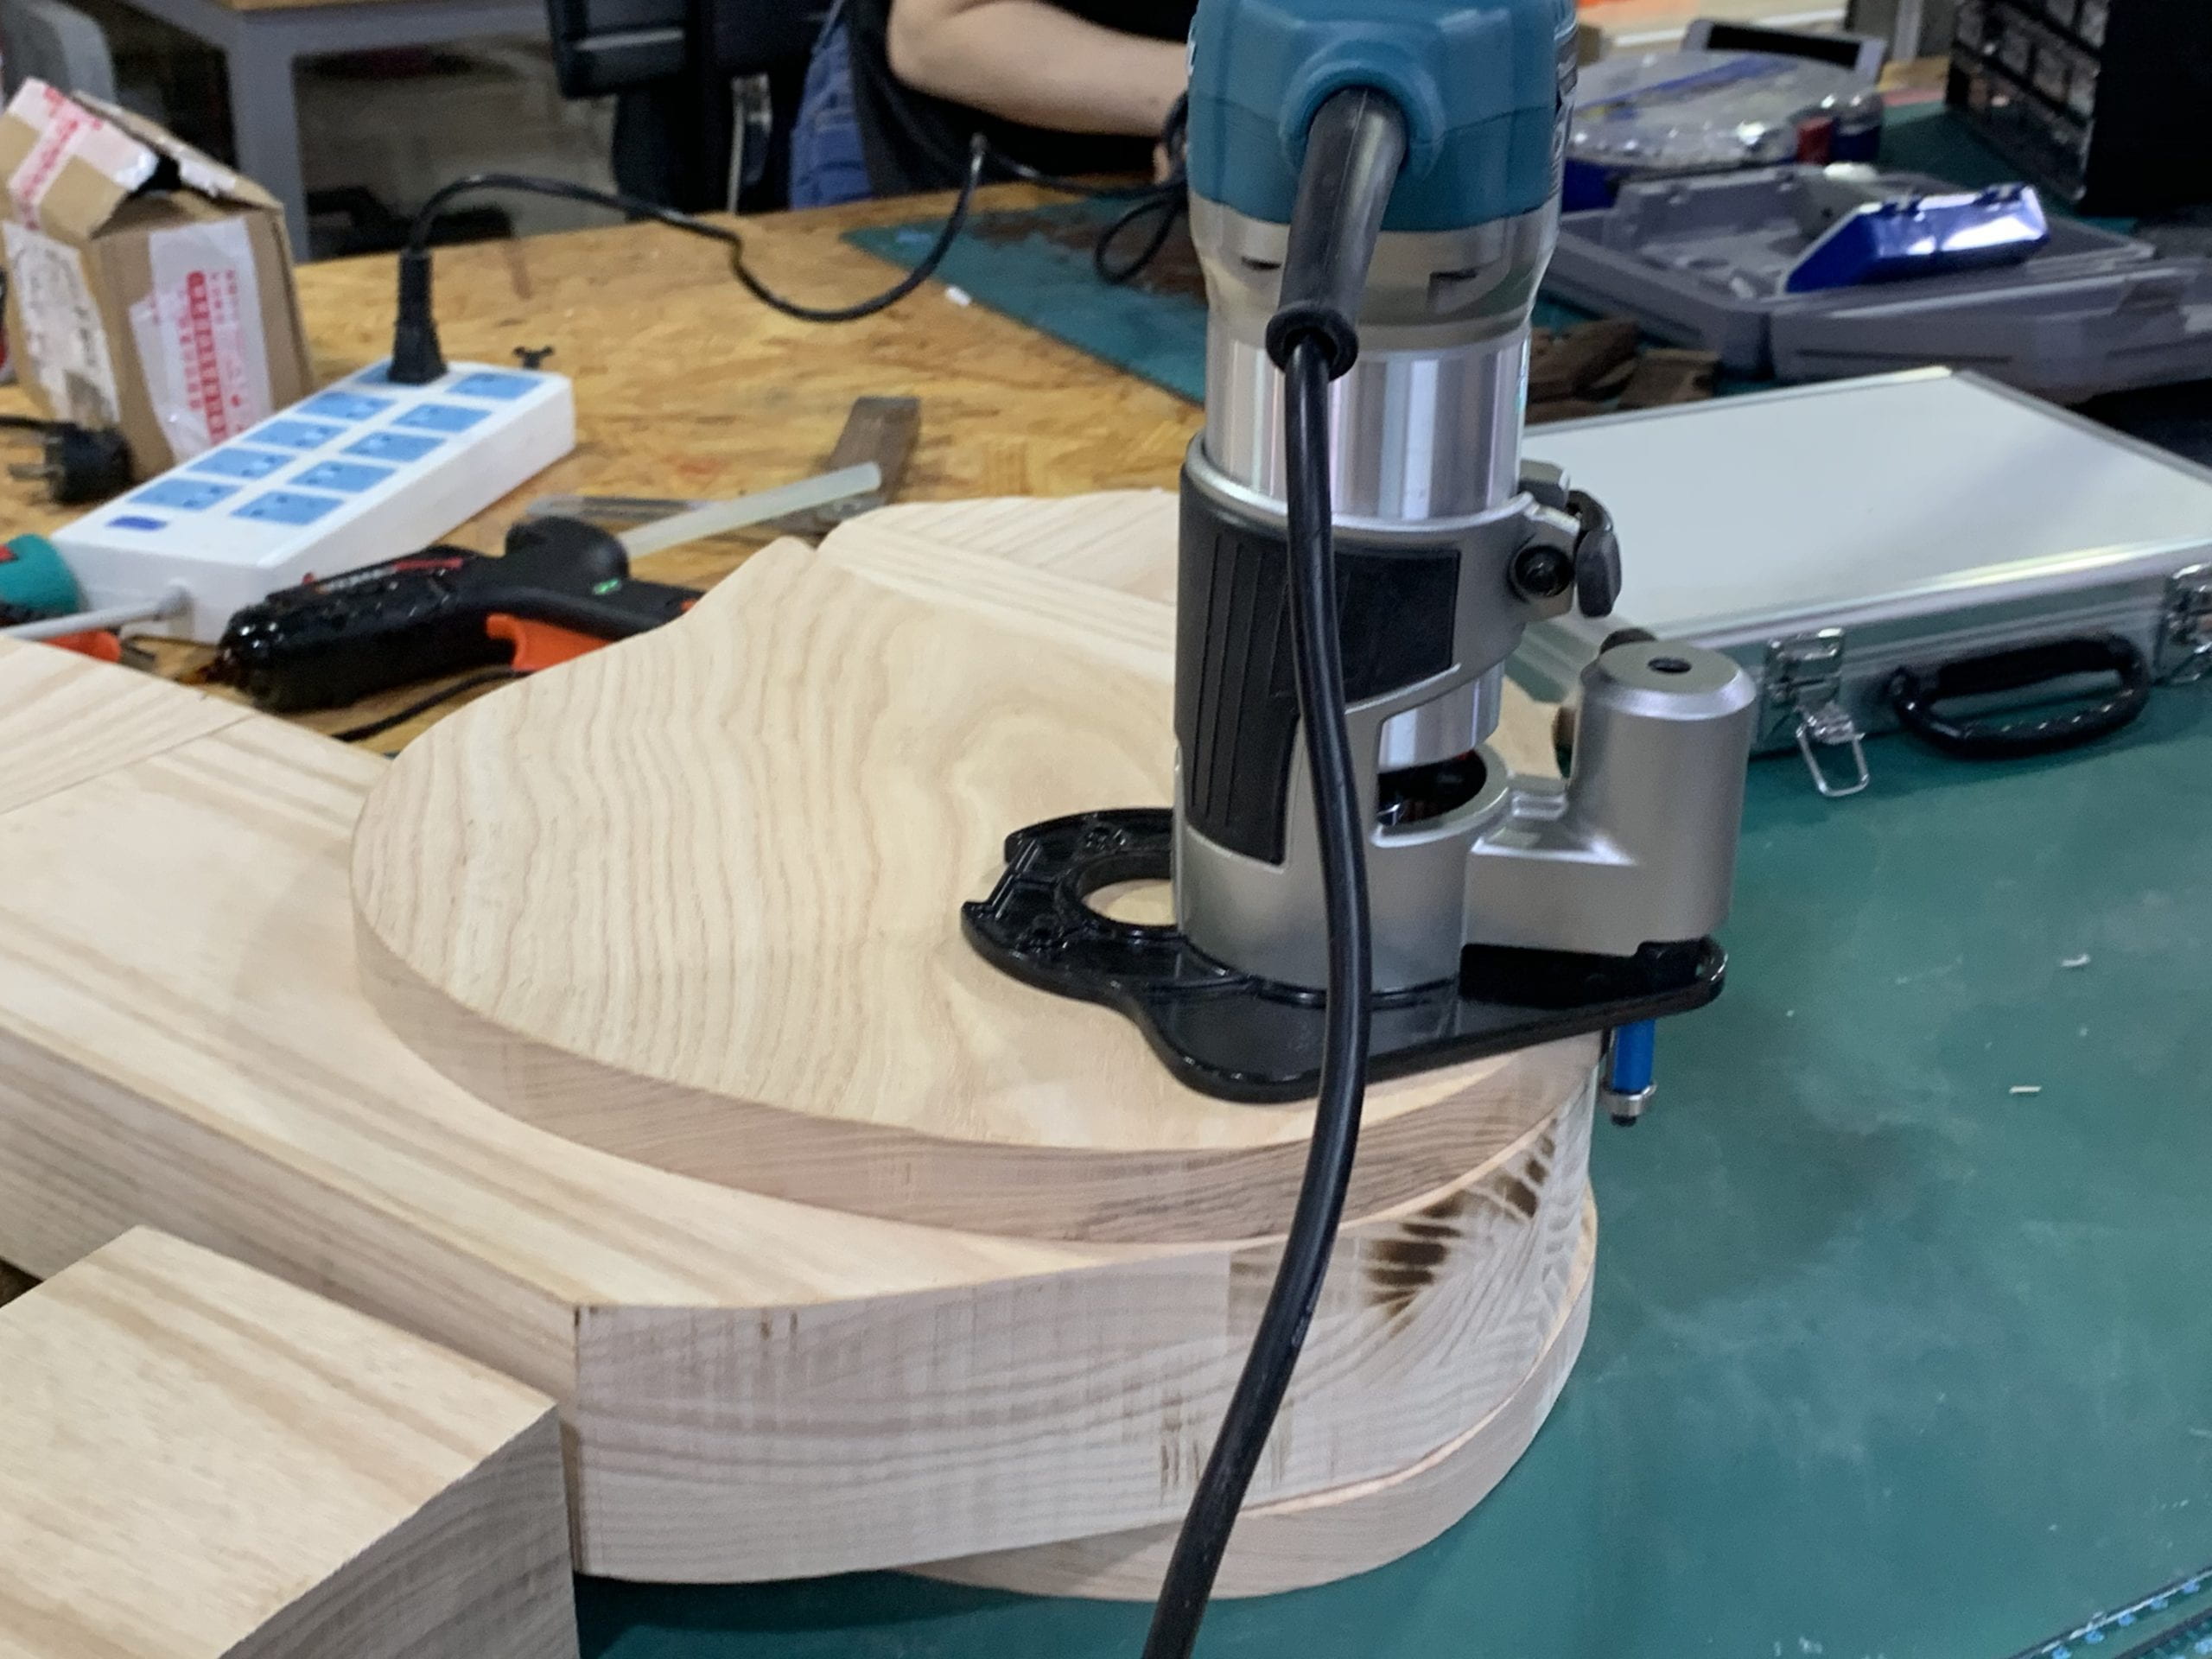
The router isn’t one that is easy and pleasant to use. After setting up for more than one hour, professor Steele and I figured out one way for the router to have more reference surface so that the machine could be more stable. Though hard to use, the router removed the extra wood efficiently, leaving one flat side face.
 before router after router
The only unpleasant thing with router this time was that it teared out one small piece at a large curve. But I think I could only live with it. My deer is now a wounded one.
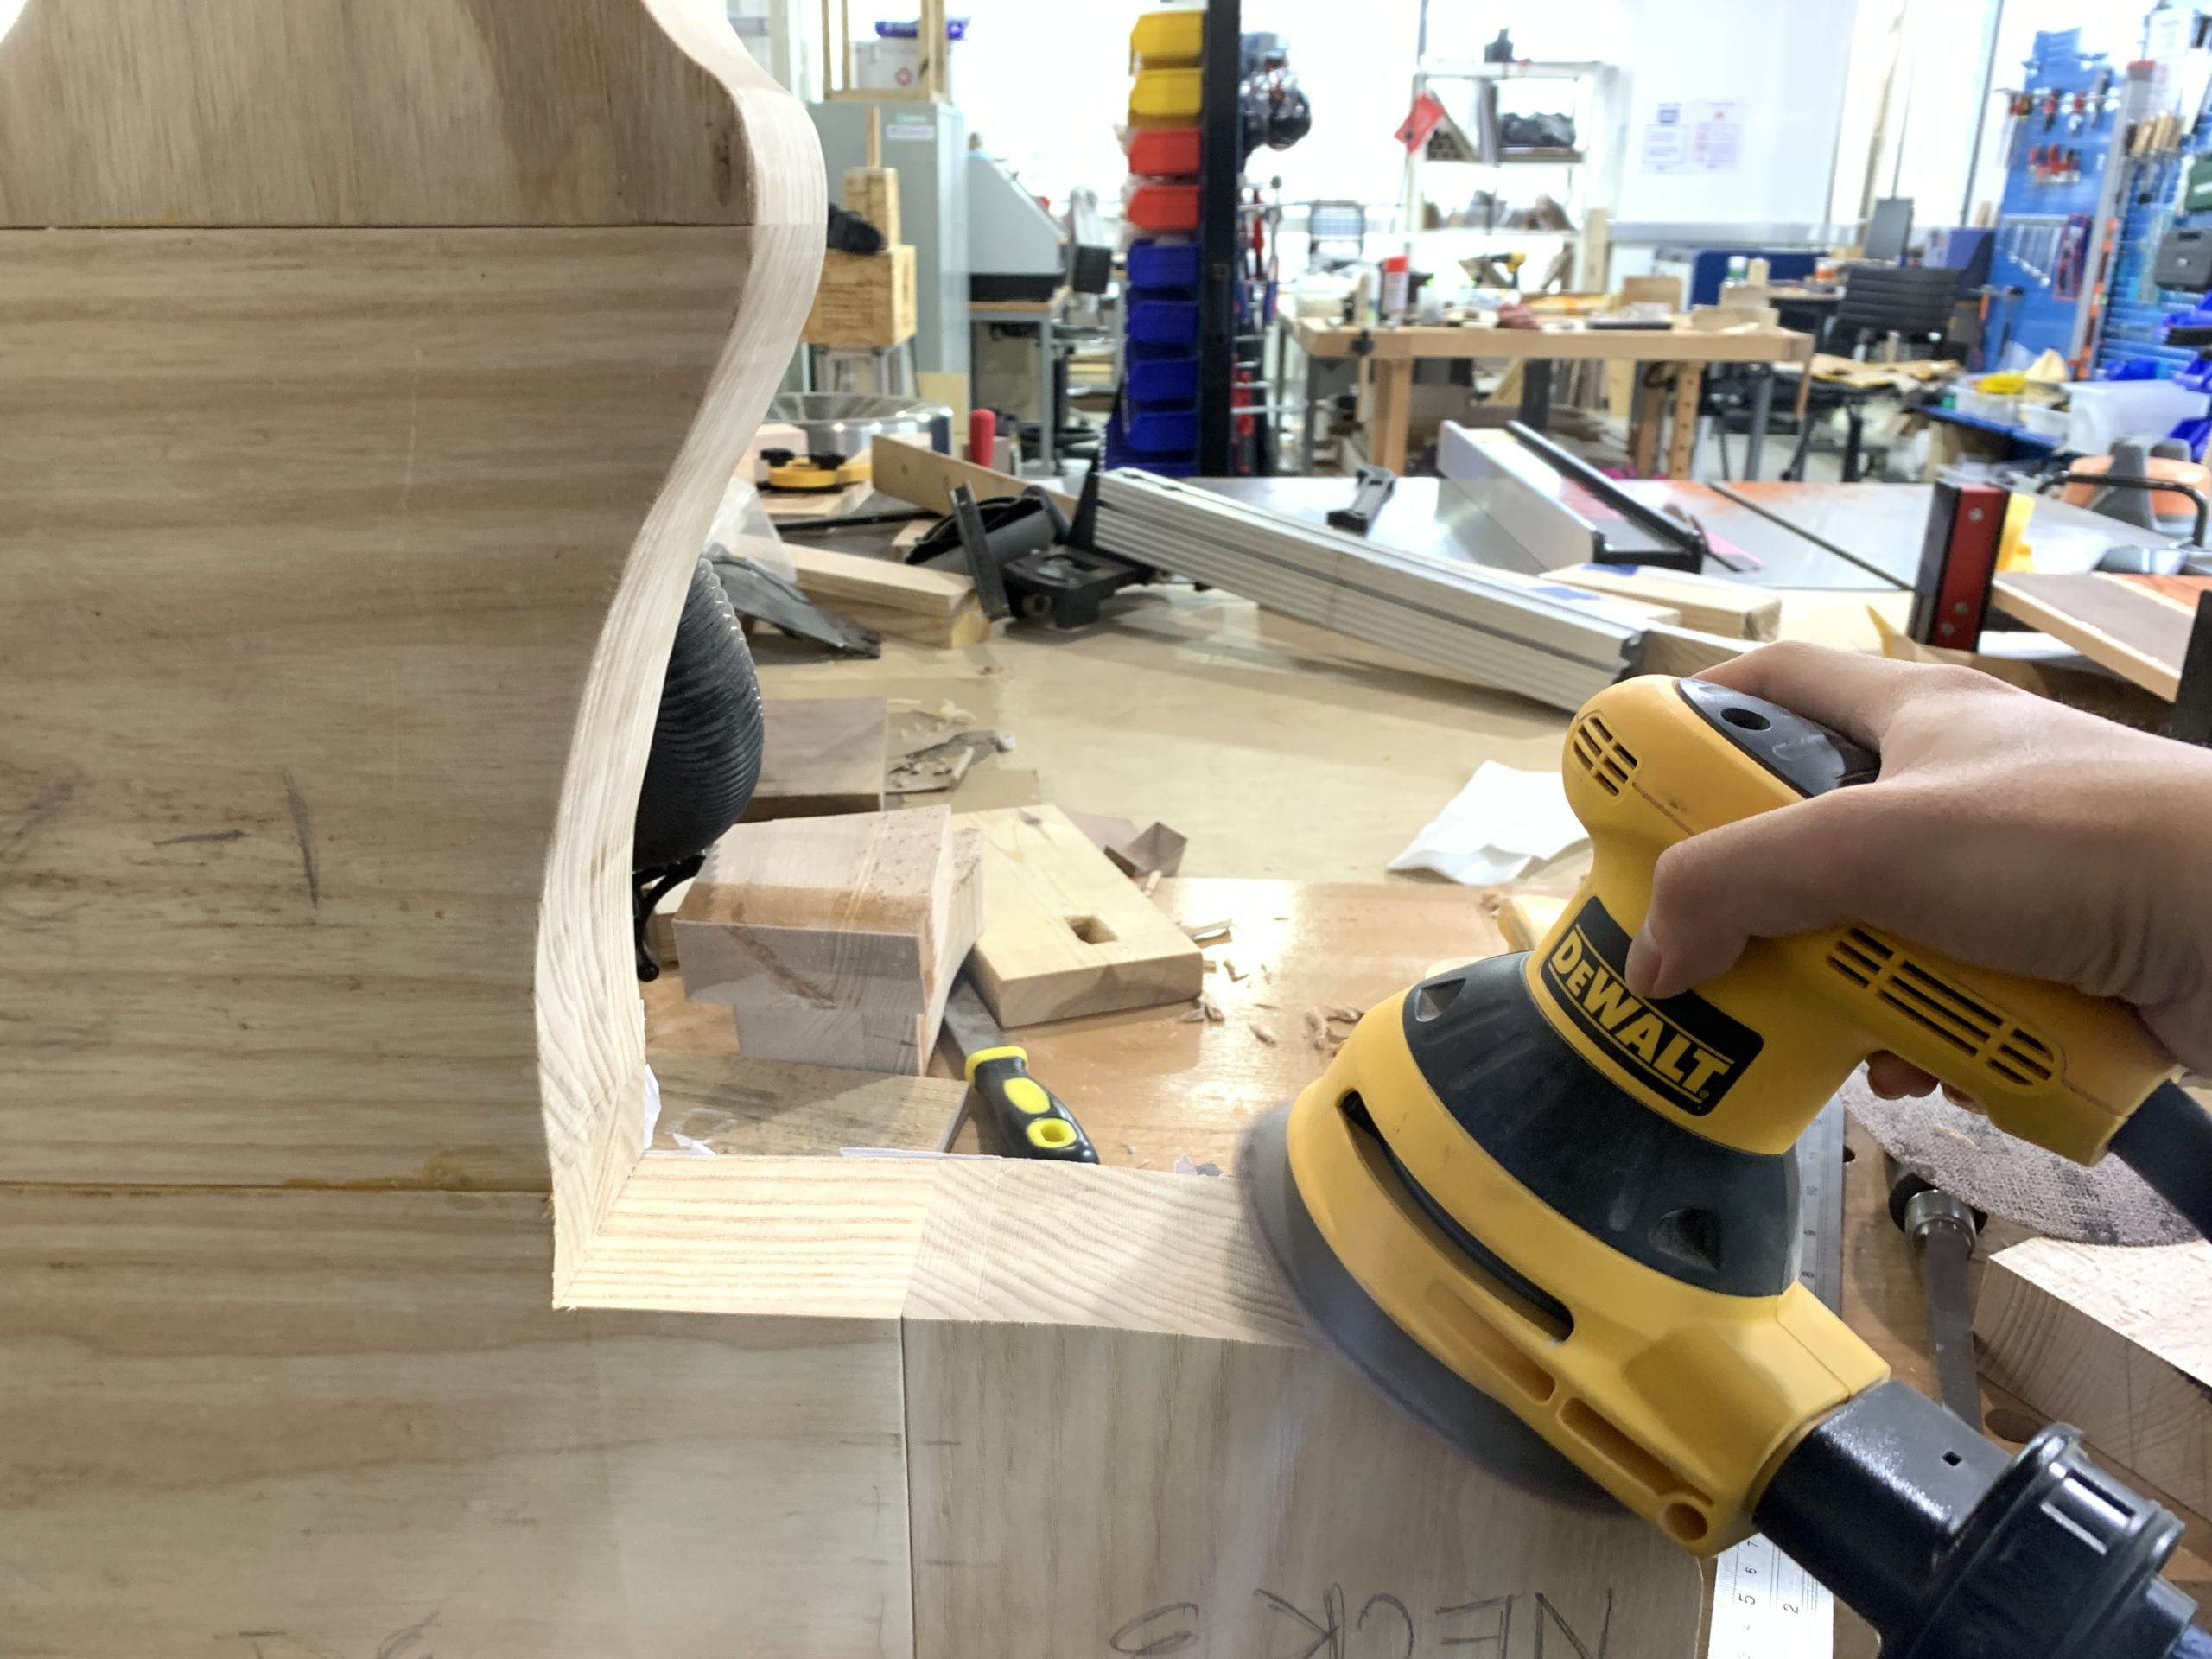
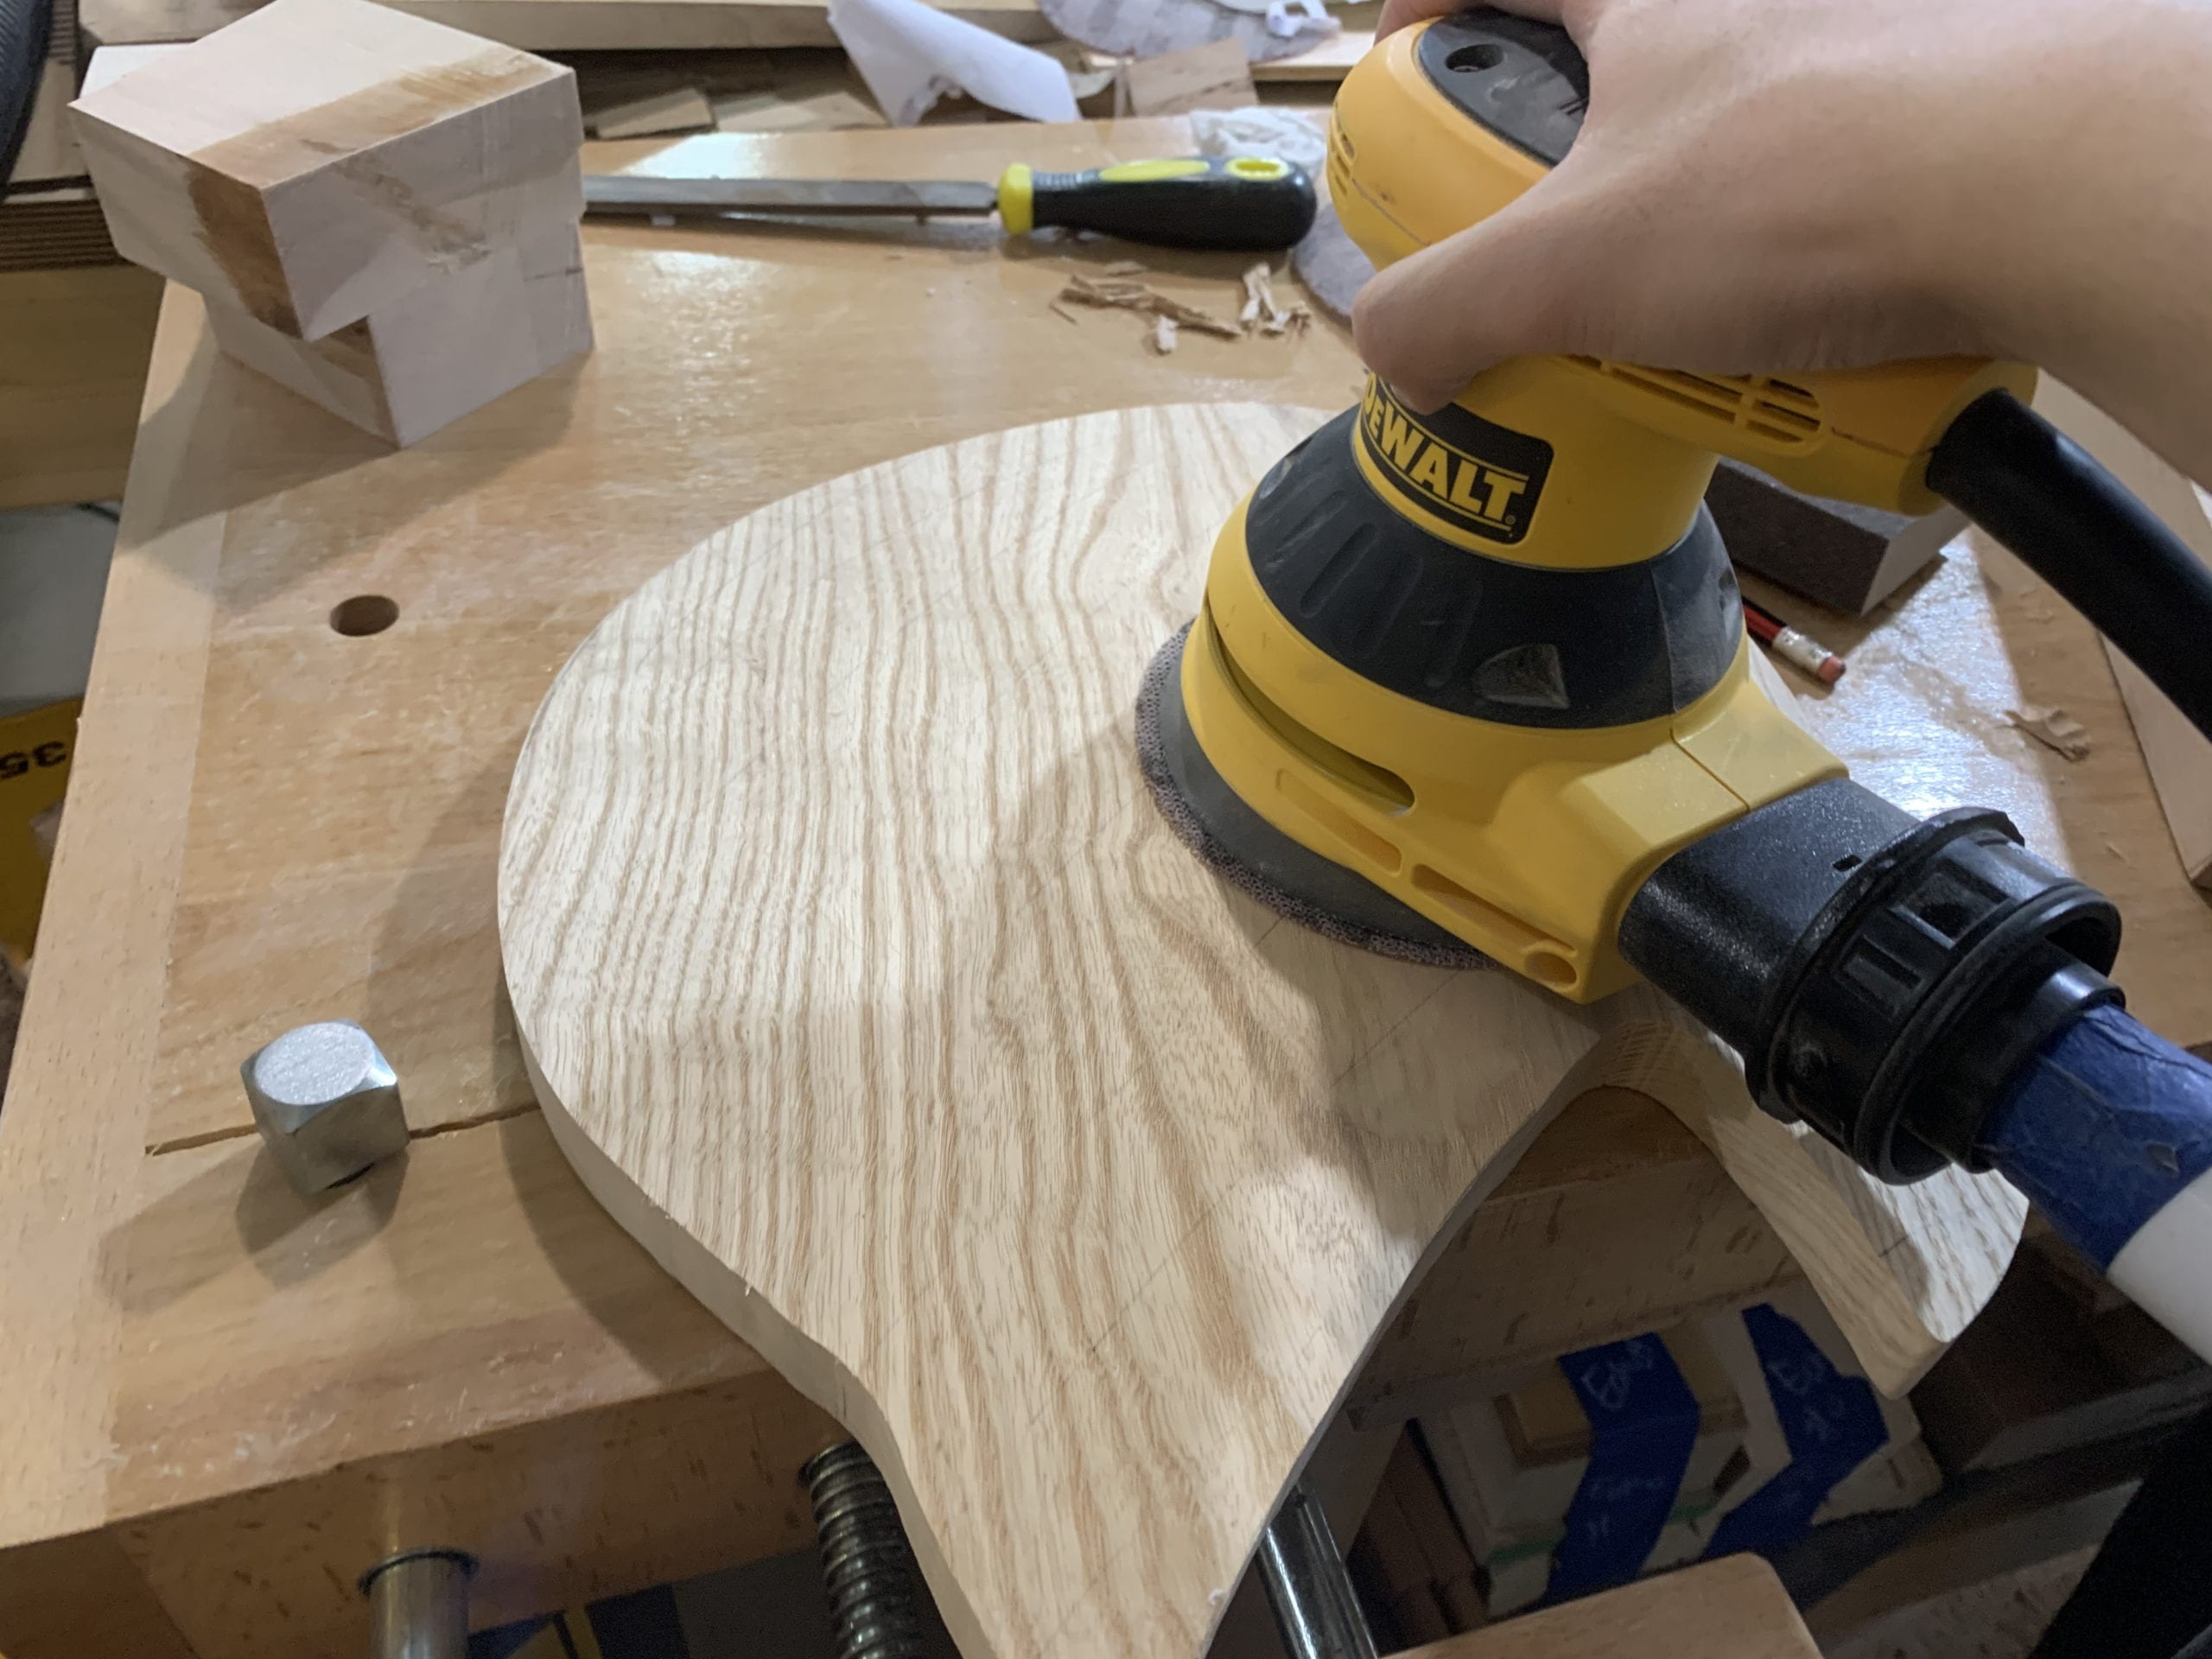
Sanding
Sanding is one of the most time consuming process for the wood project. I used nearly all the sanding tools in the wood shop for the sculpture. The one I used most is the random orbital sander, it helped me for the surfaces. Sanding blocks, papers and disc sander are also used for side face and edges.

In order to prepare for finishing, I also applied water to my project in order to raise the grain and then sand it again, though it turned out that the piece is still rough after the finishing.
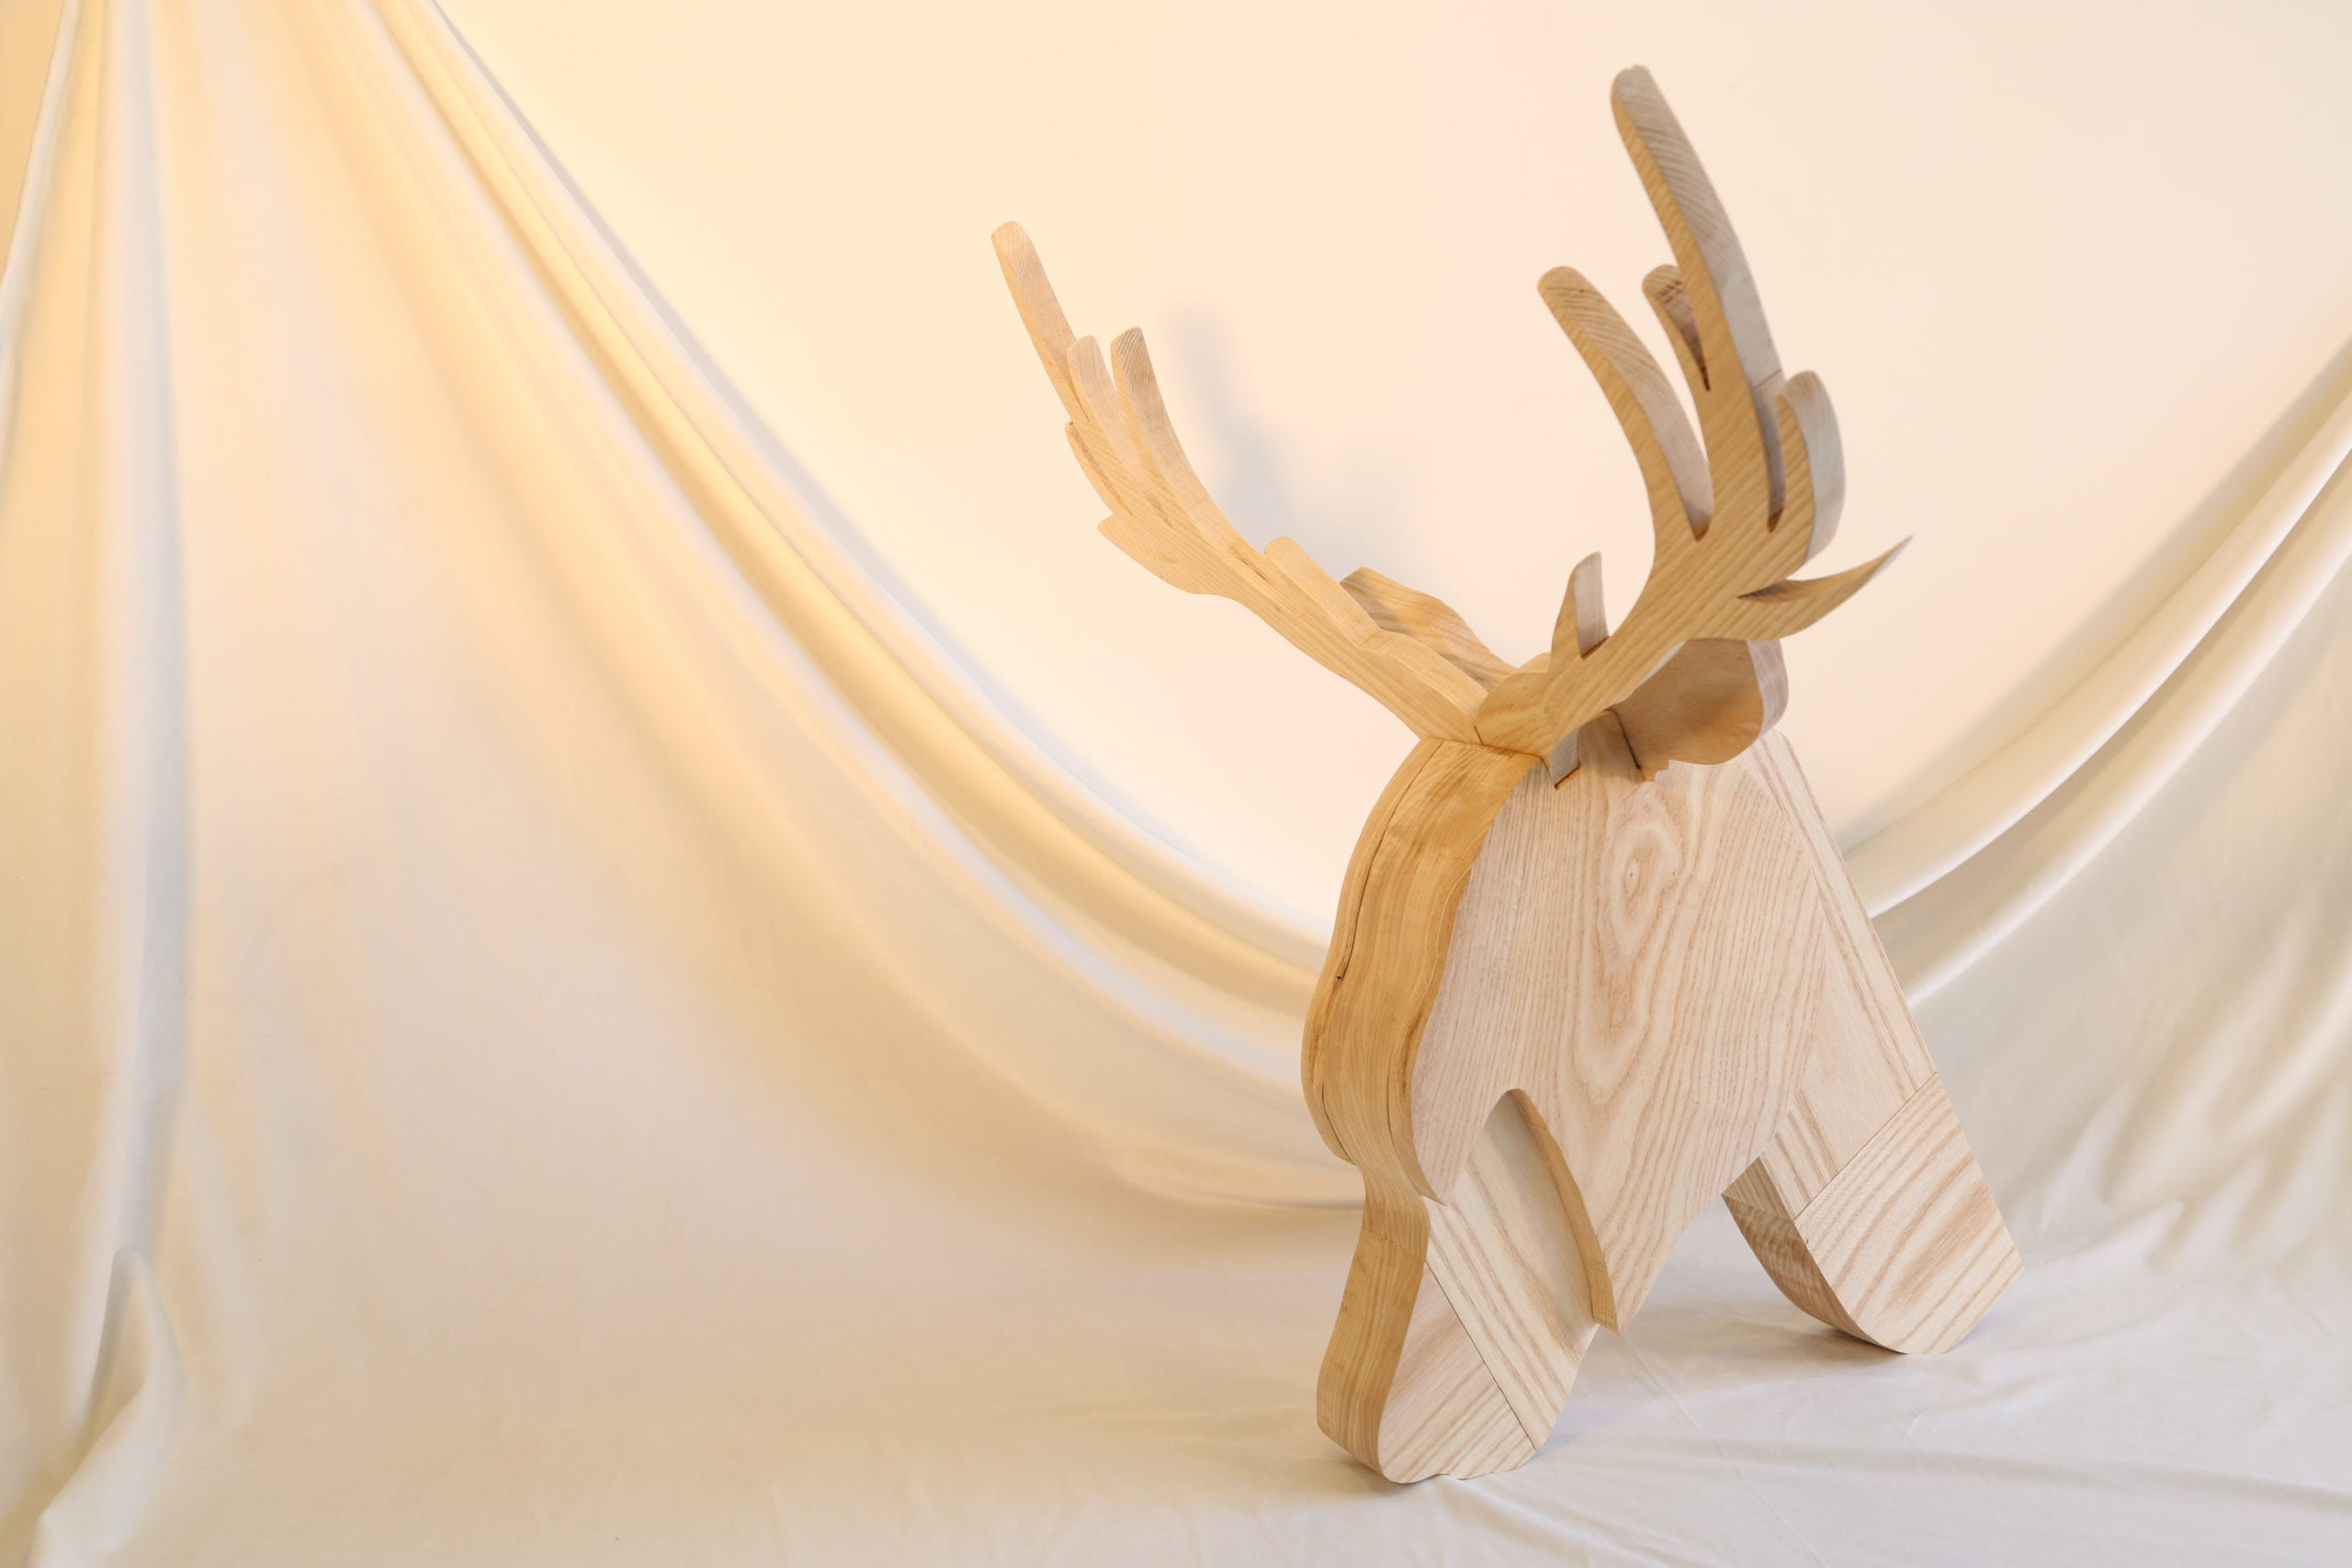
Redesign IV
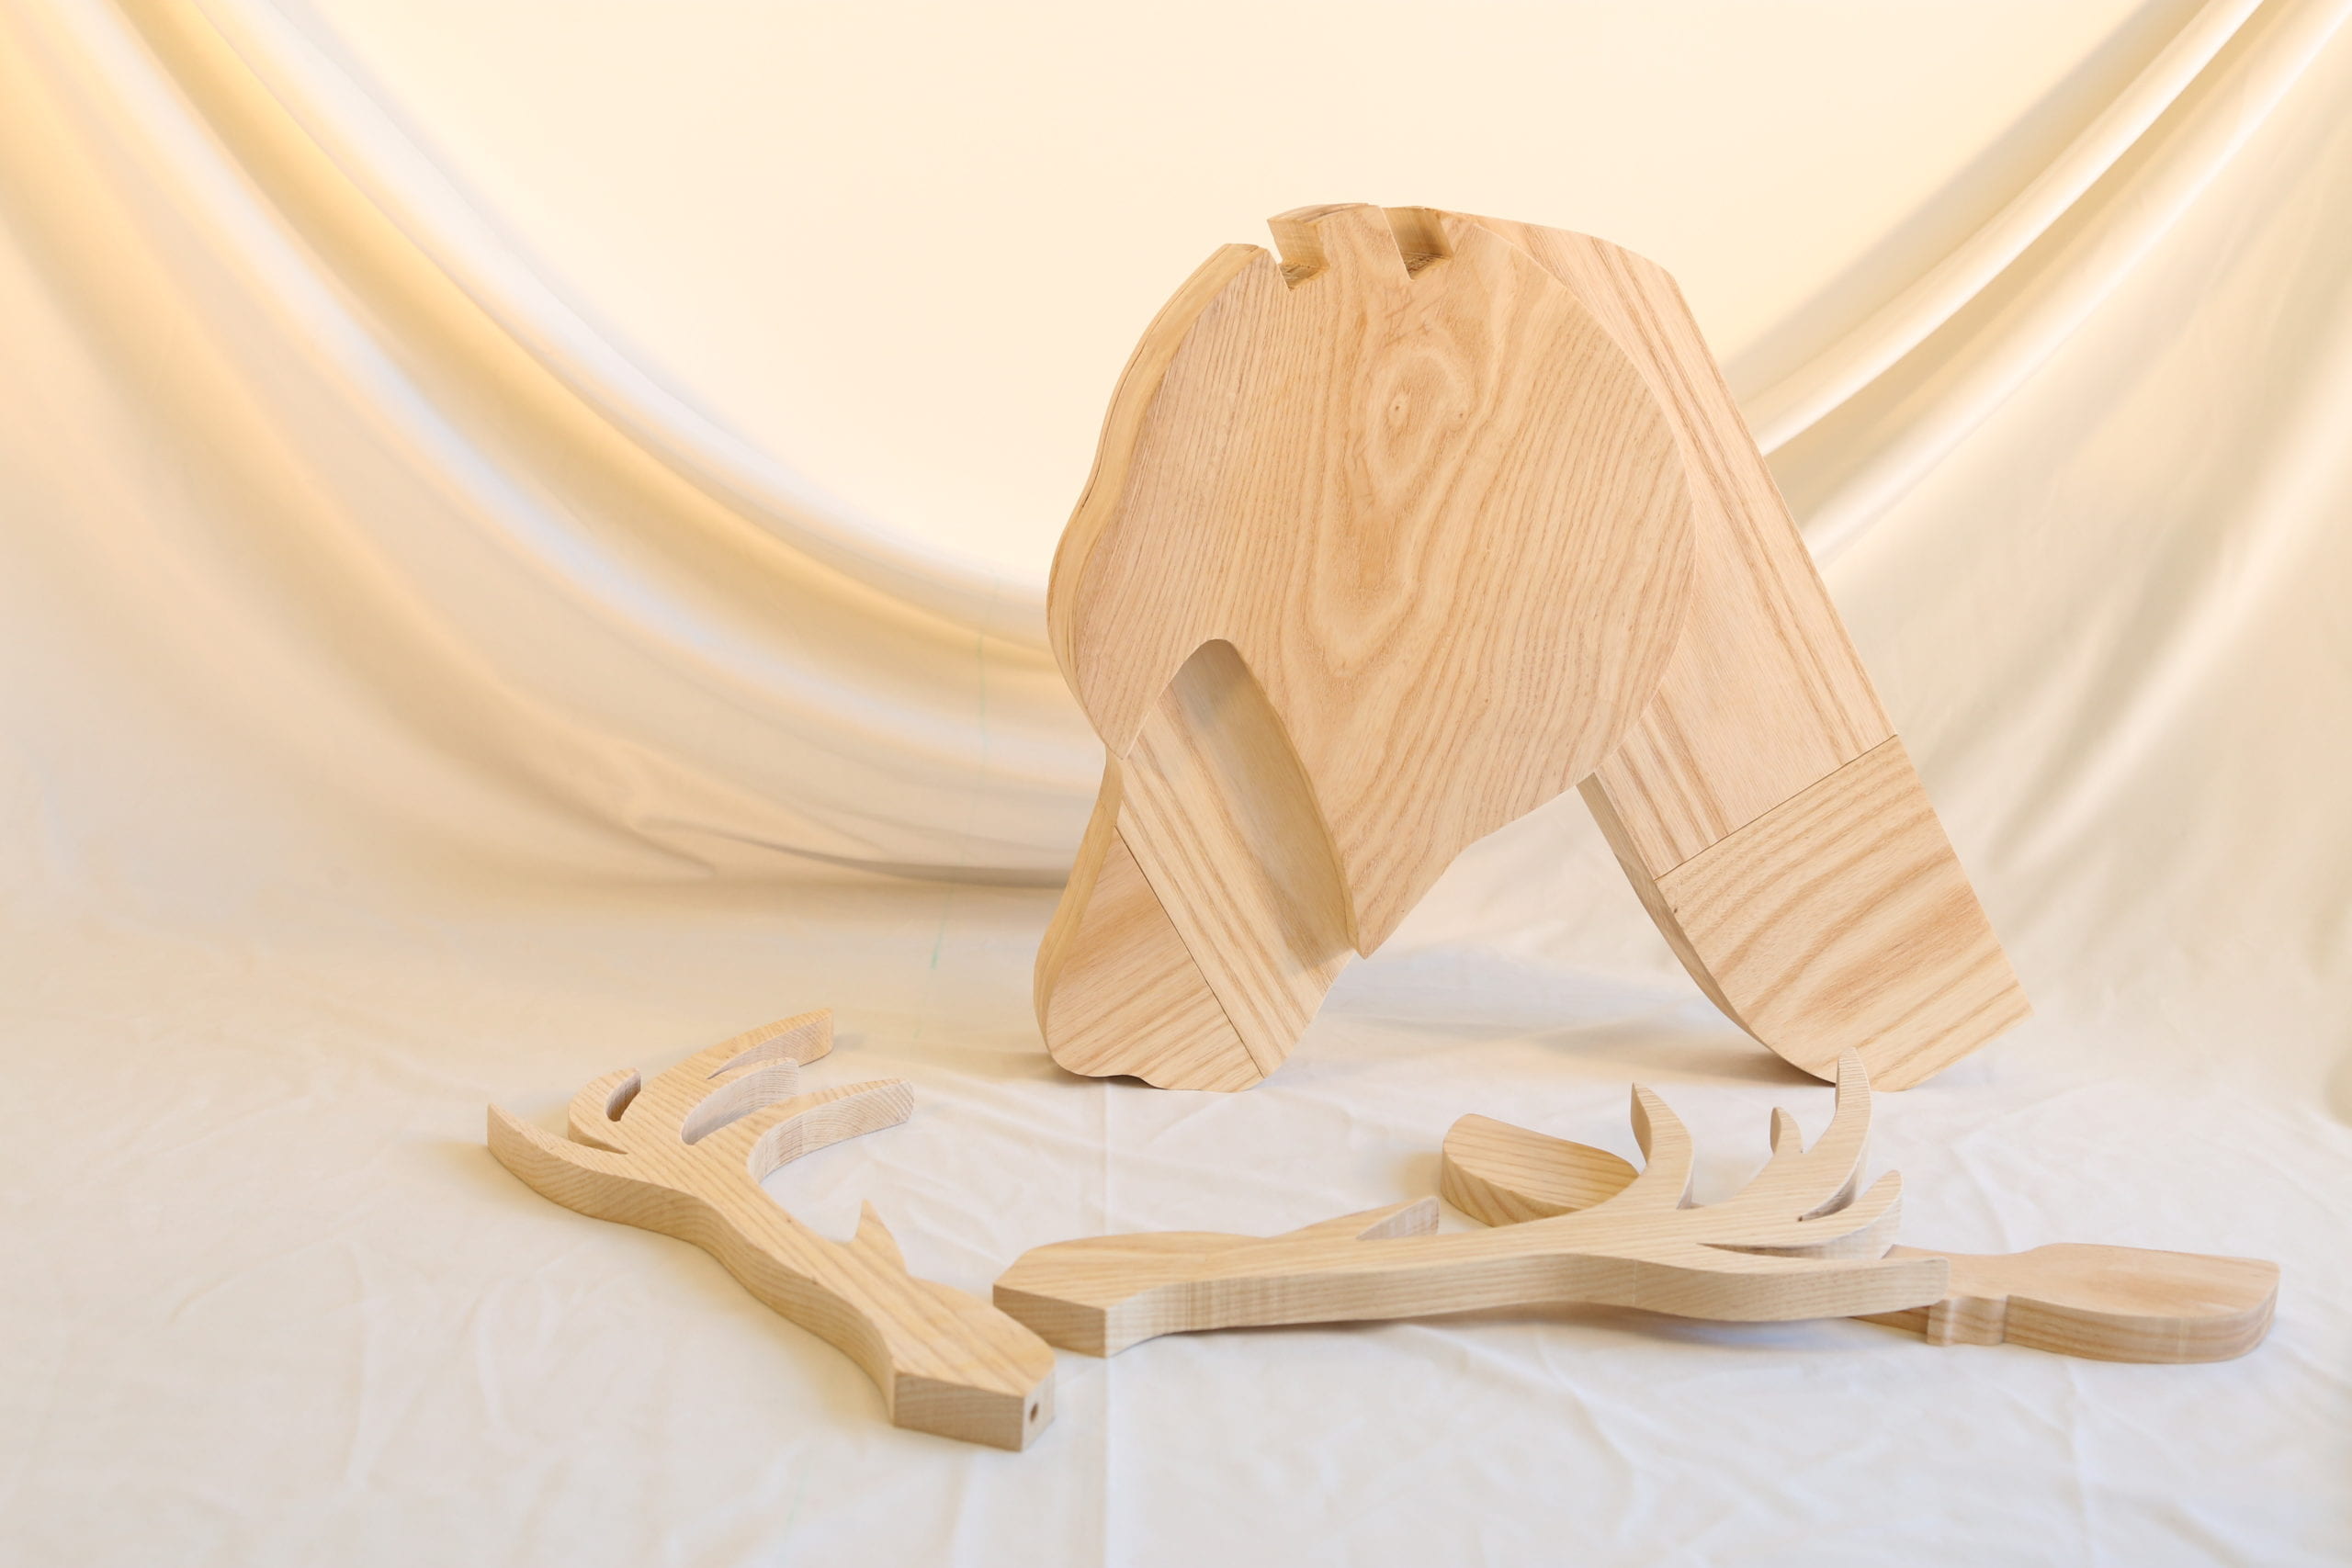
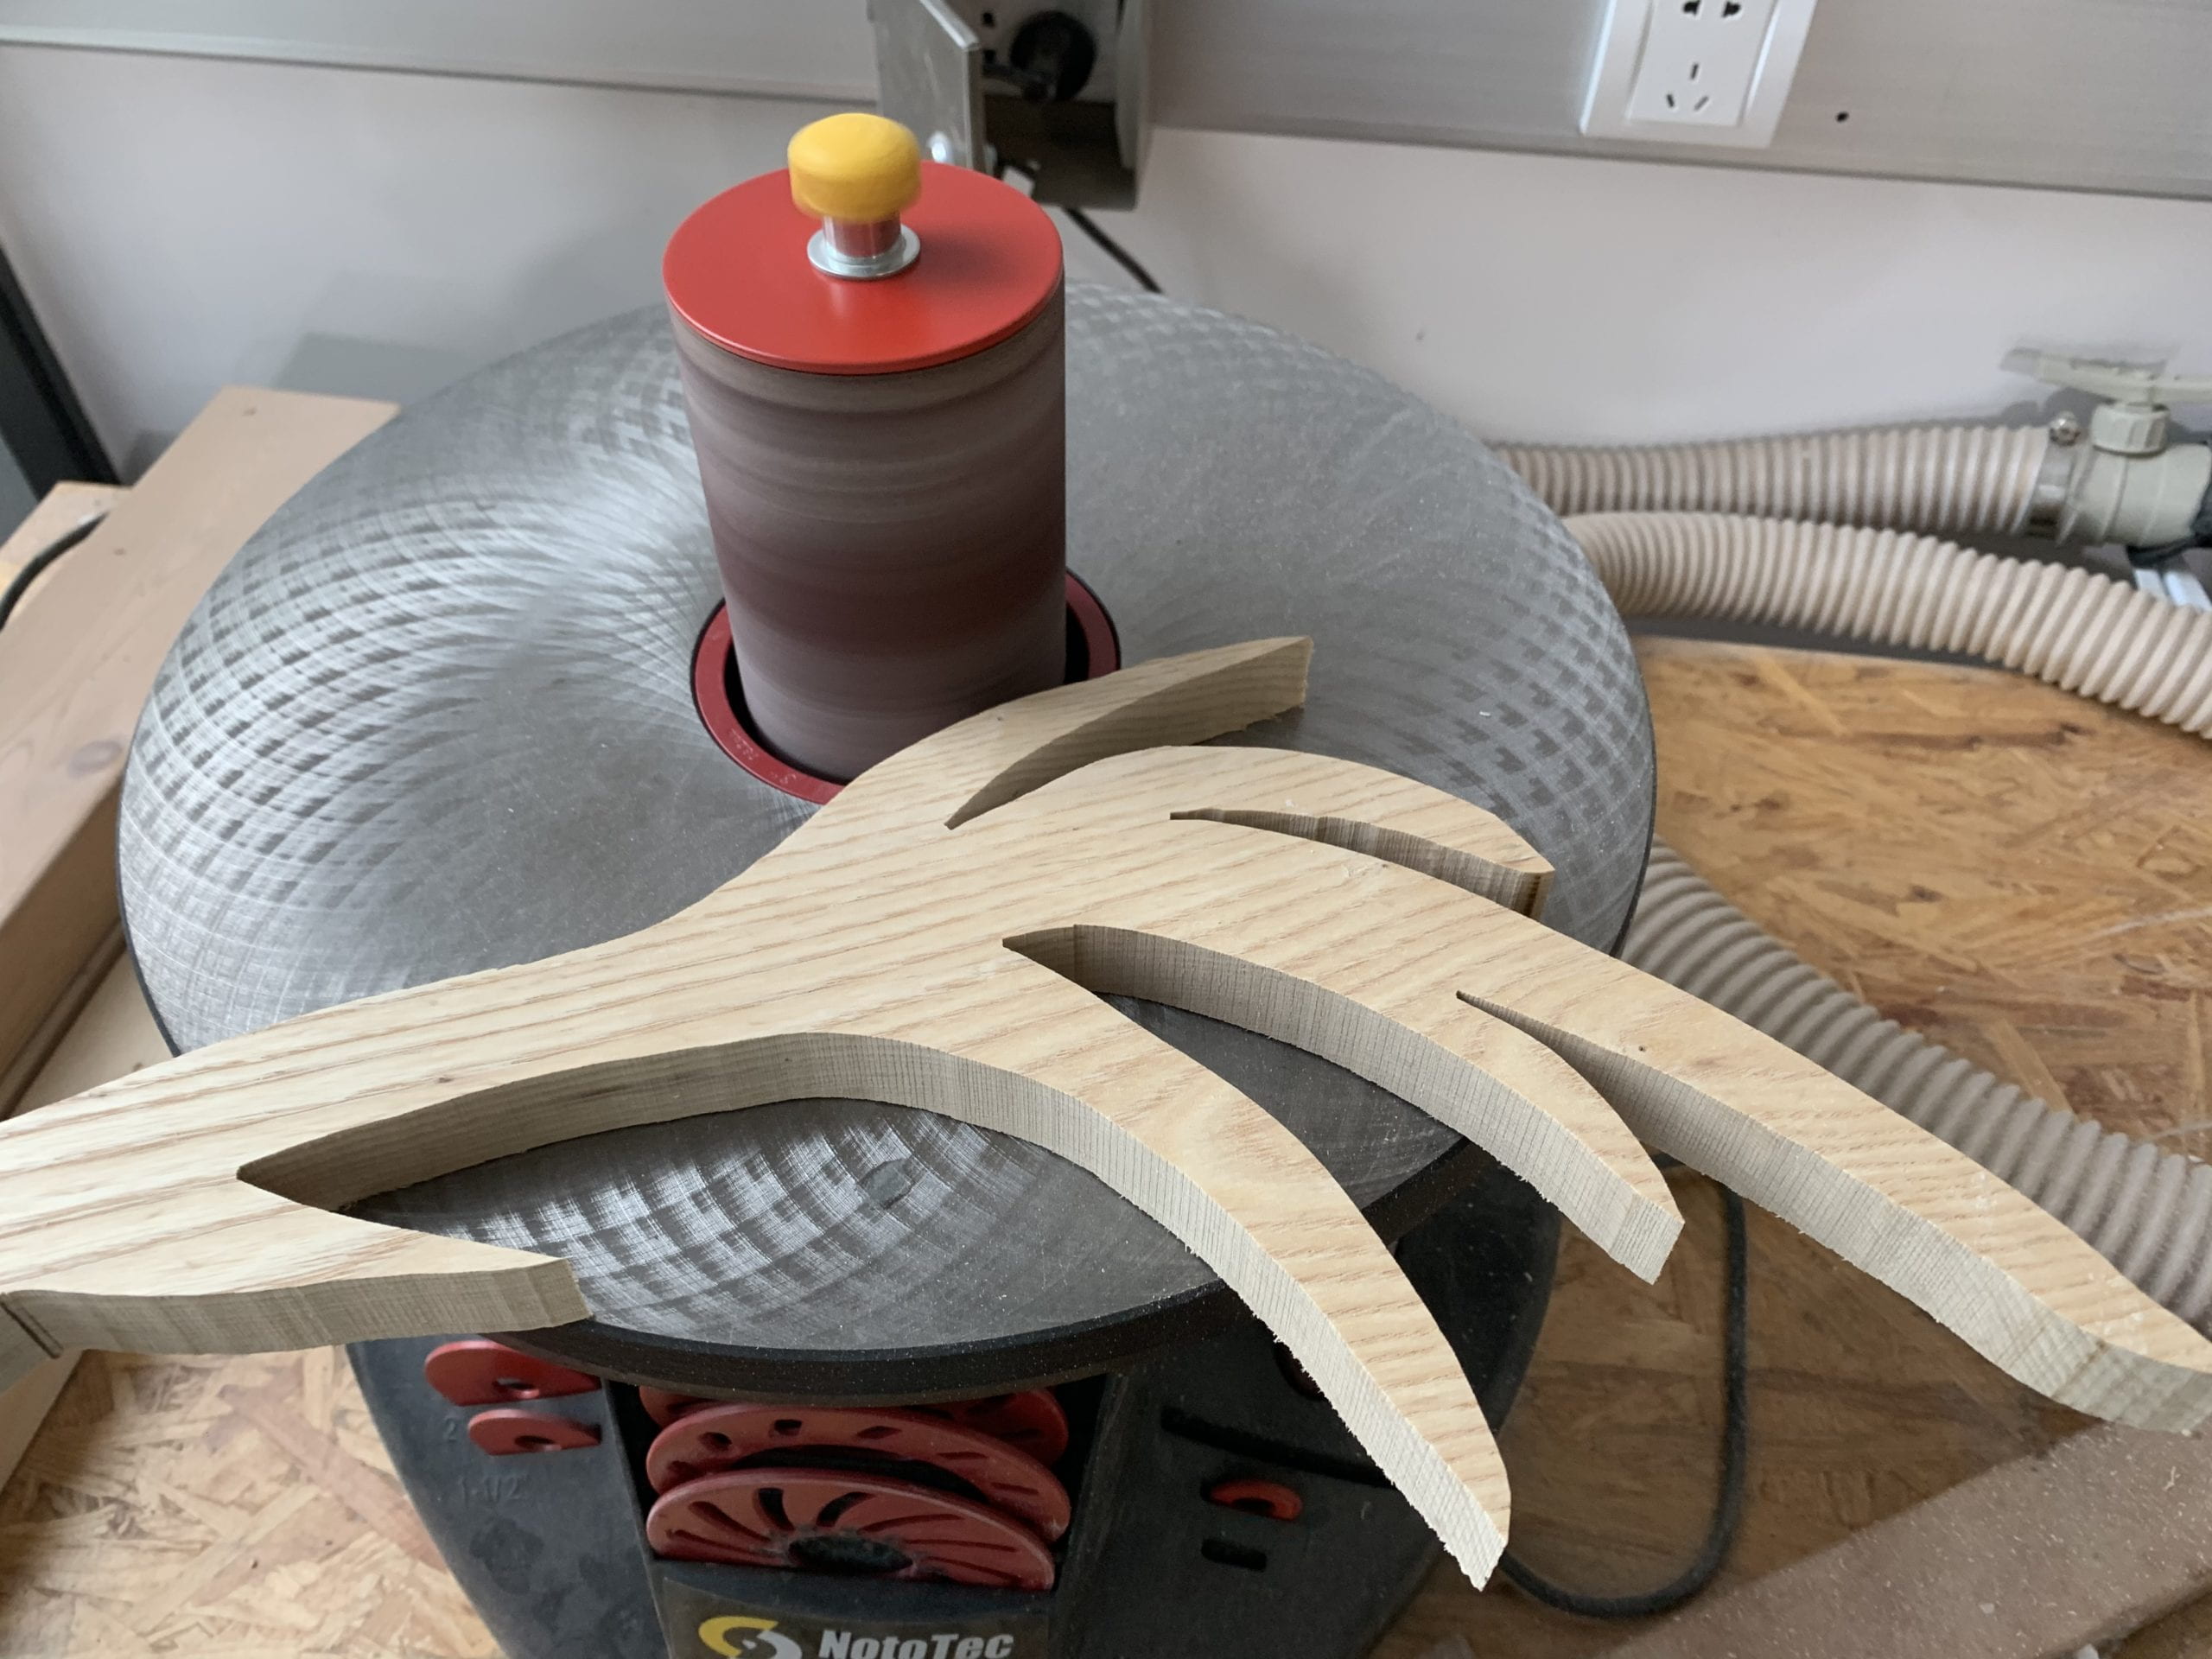
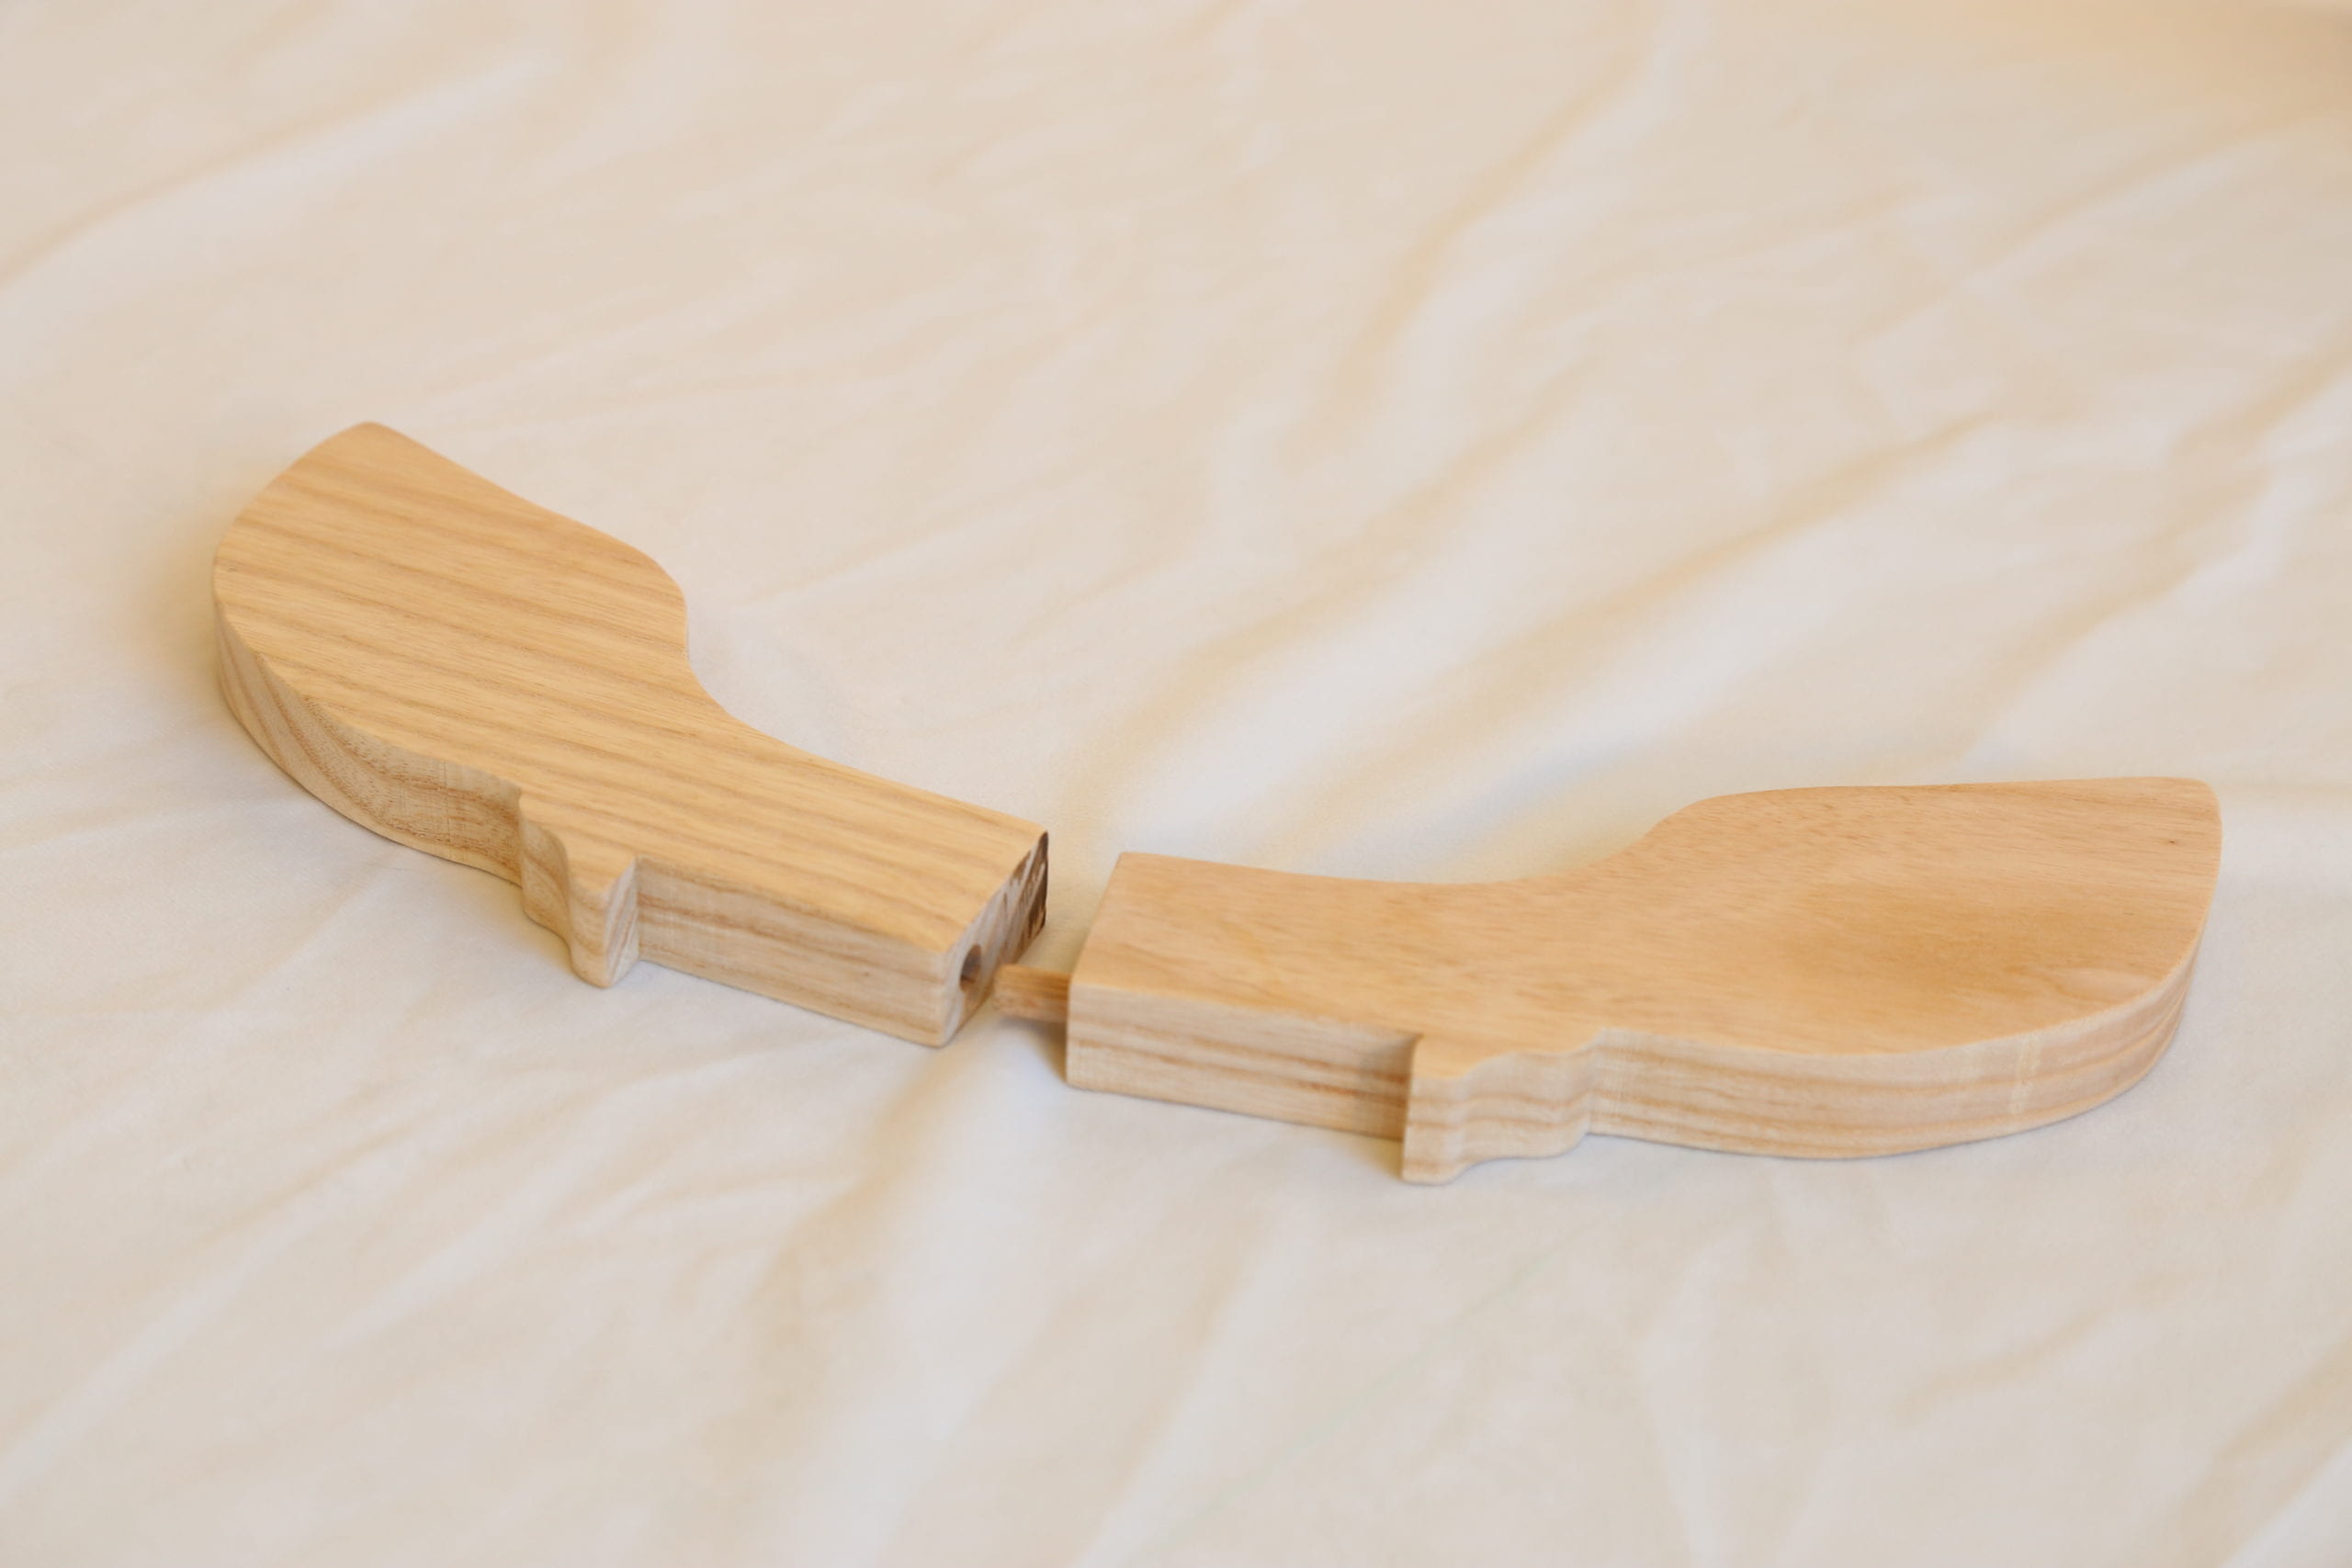
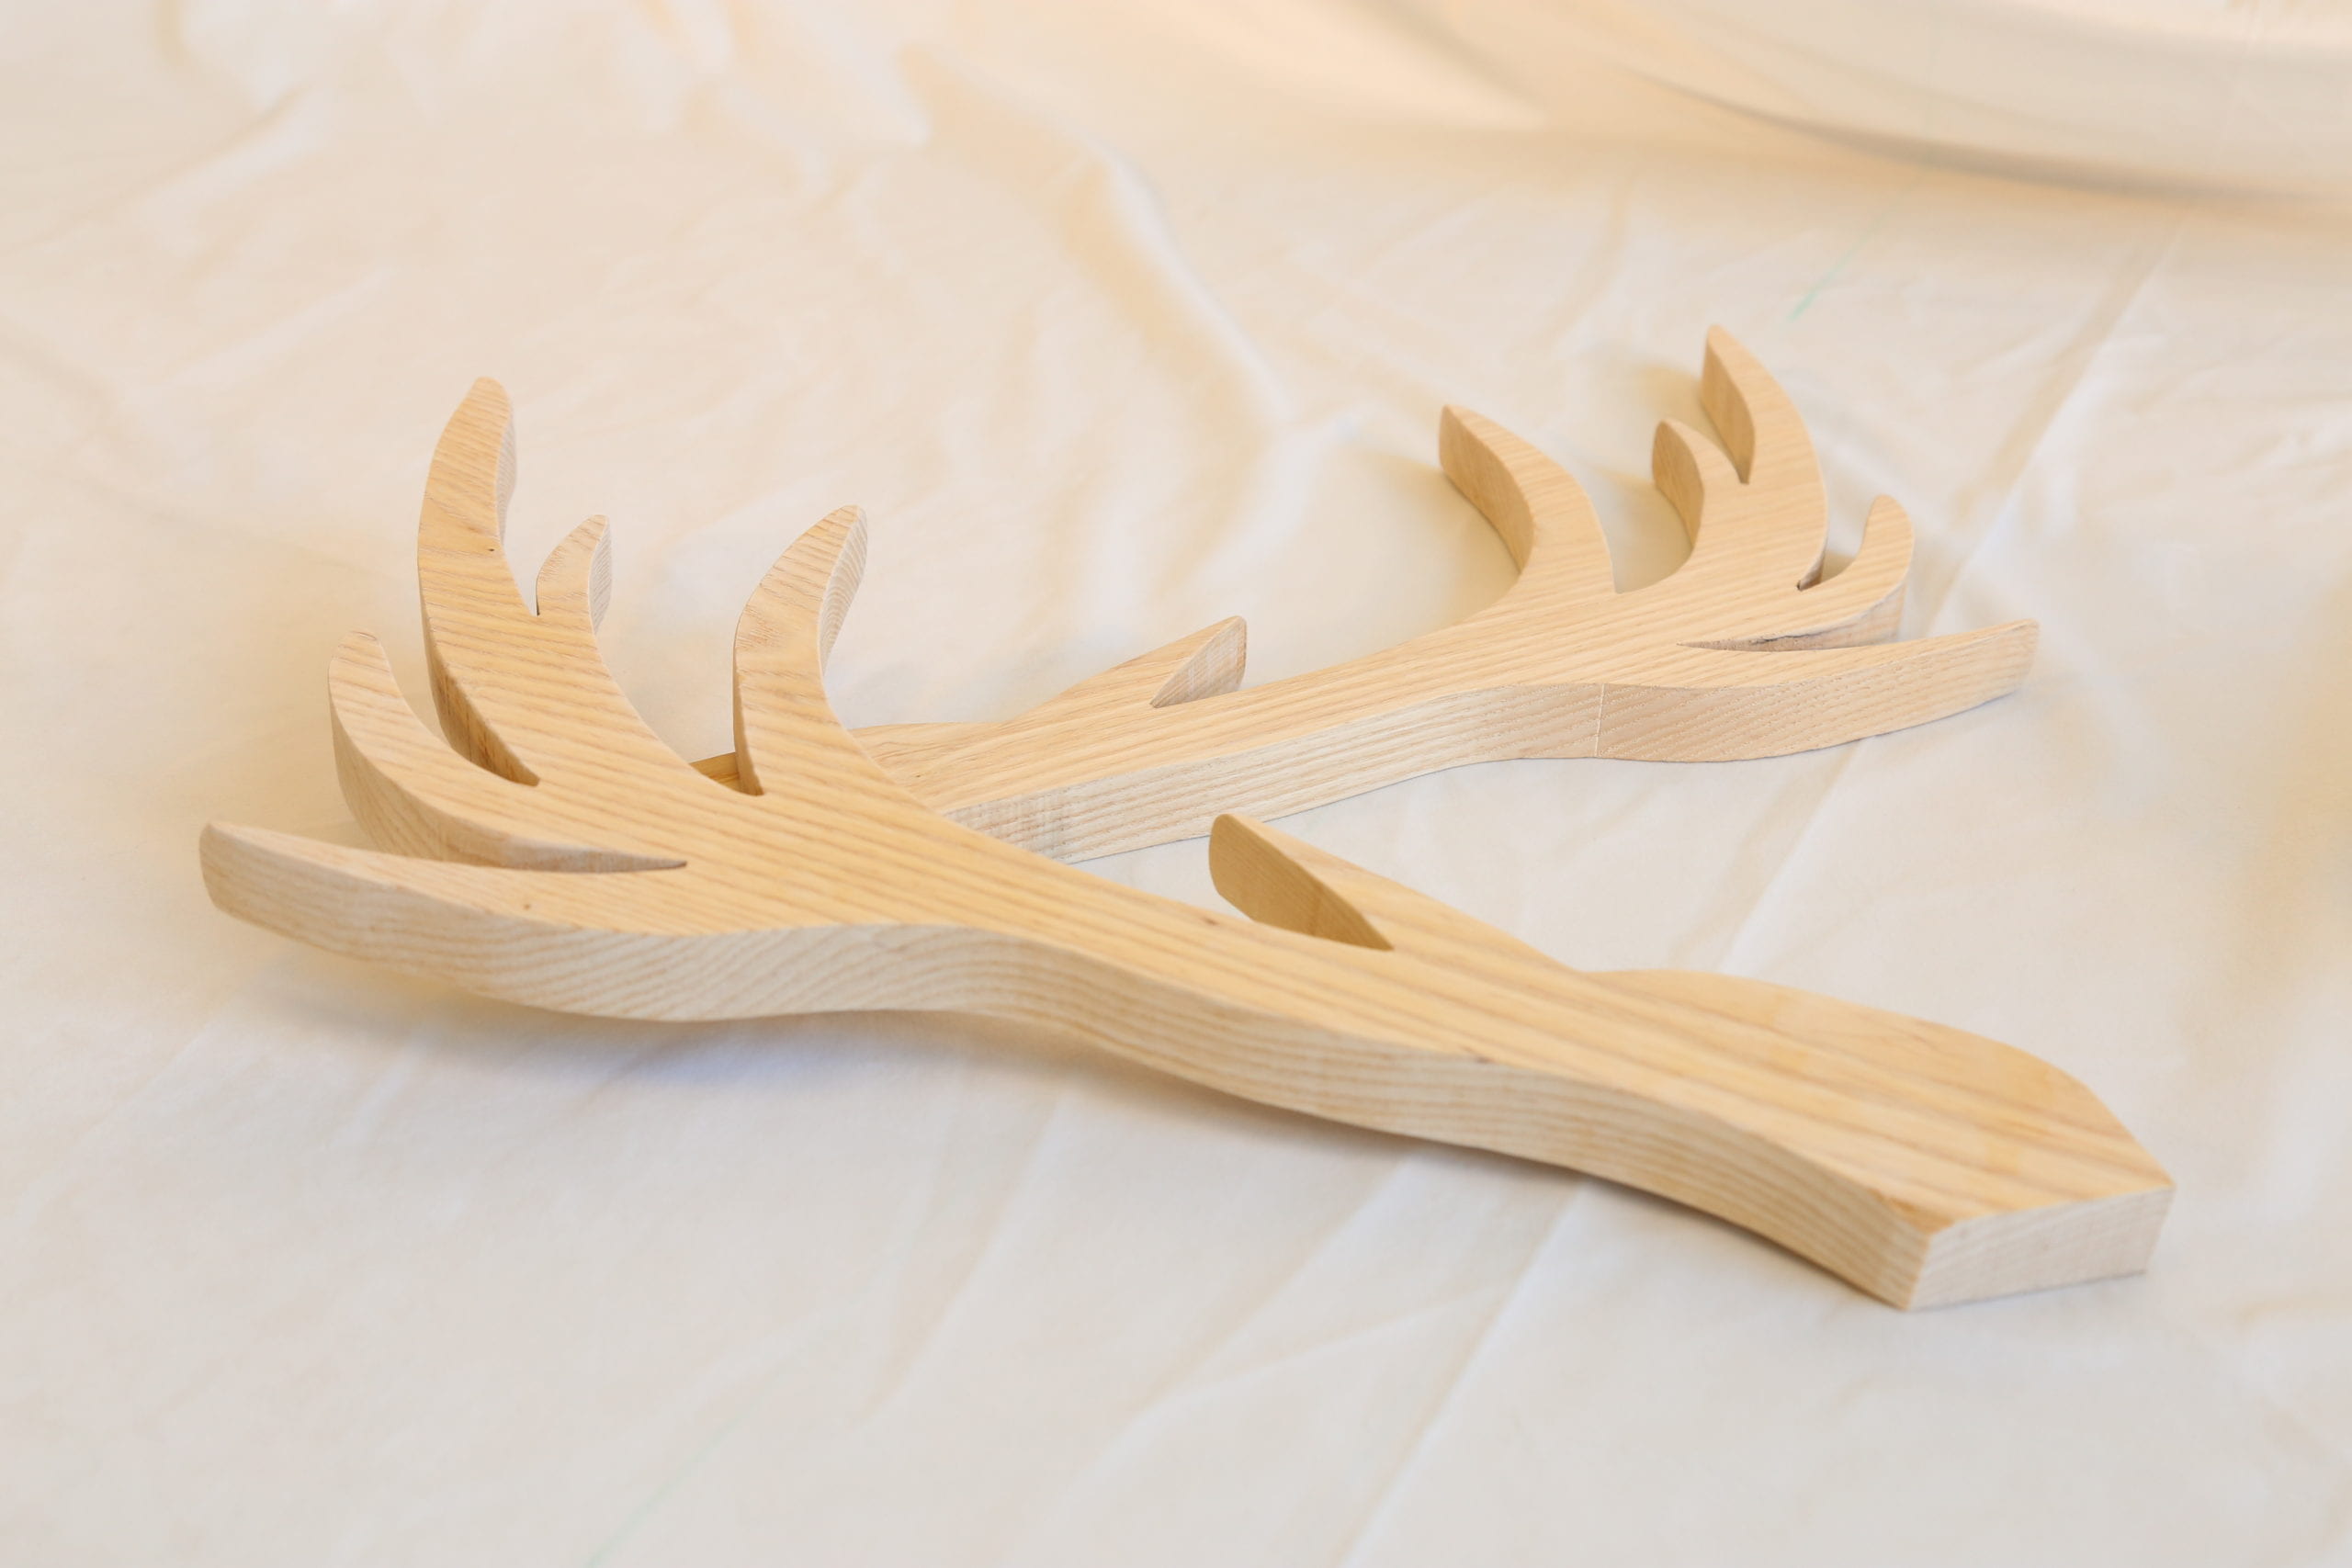
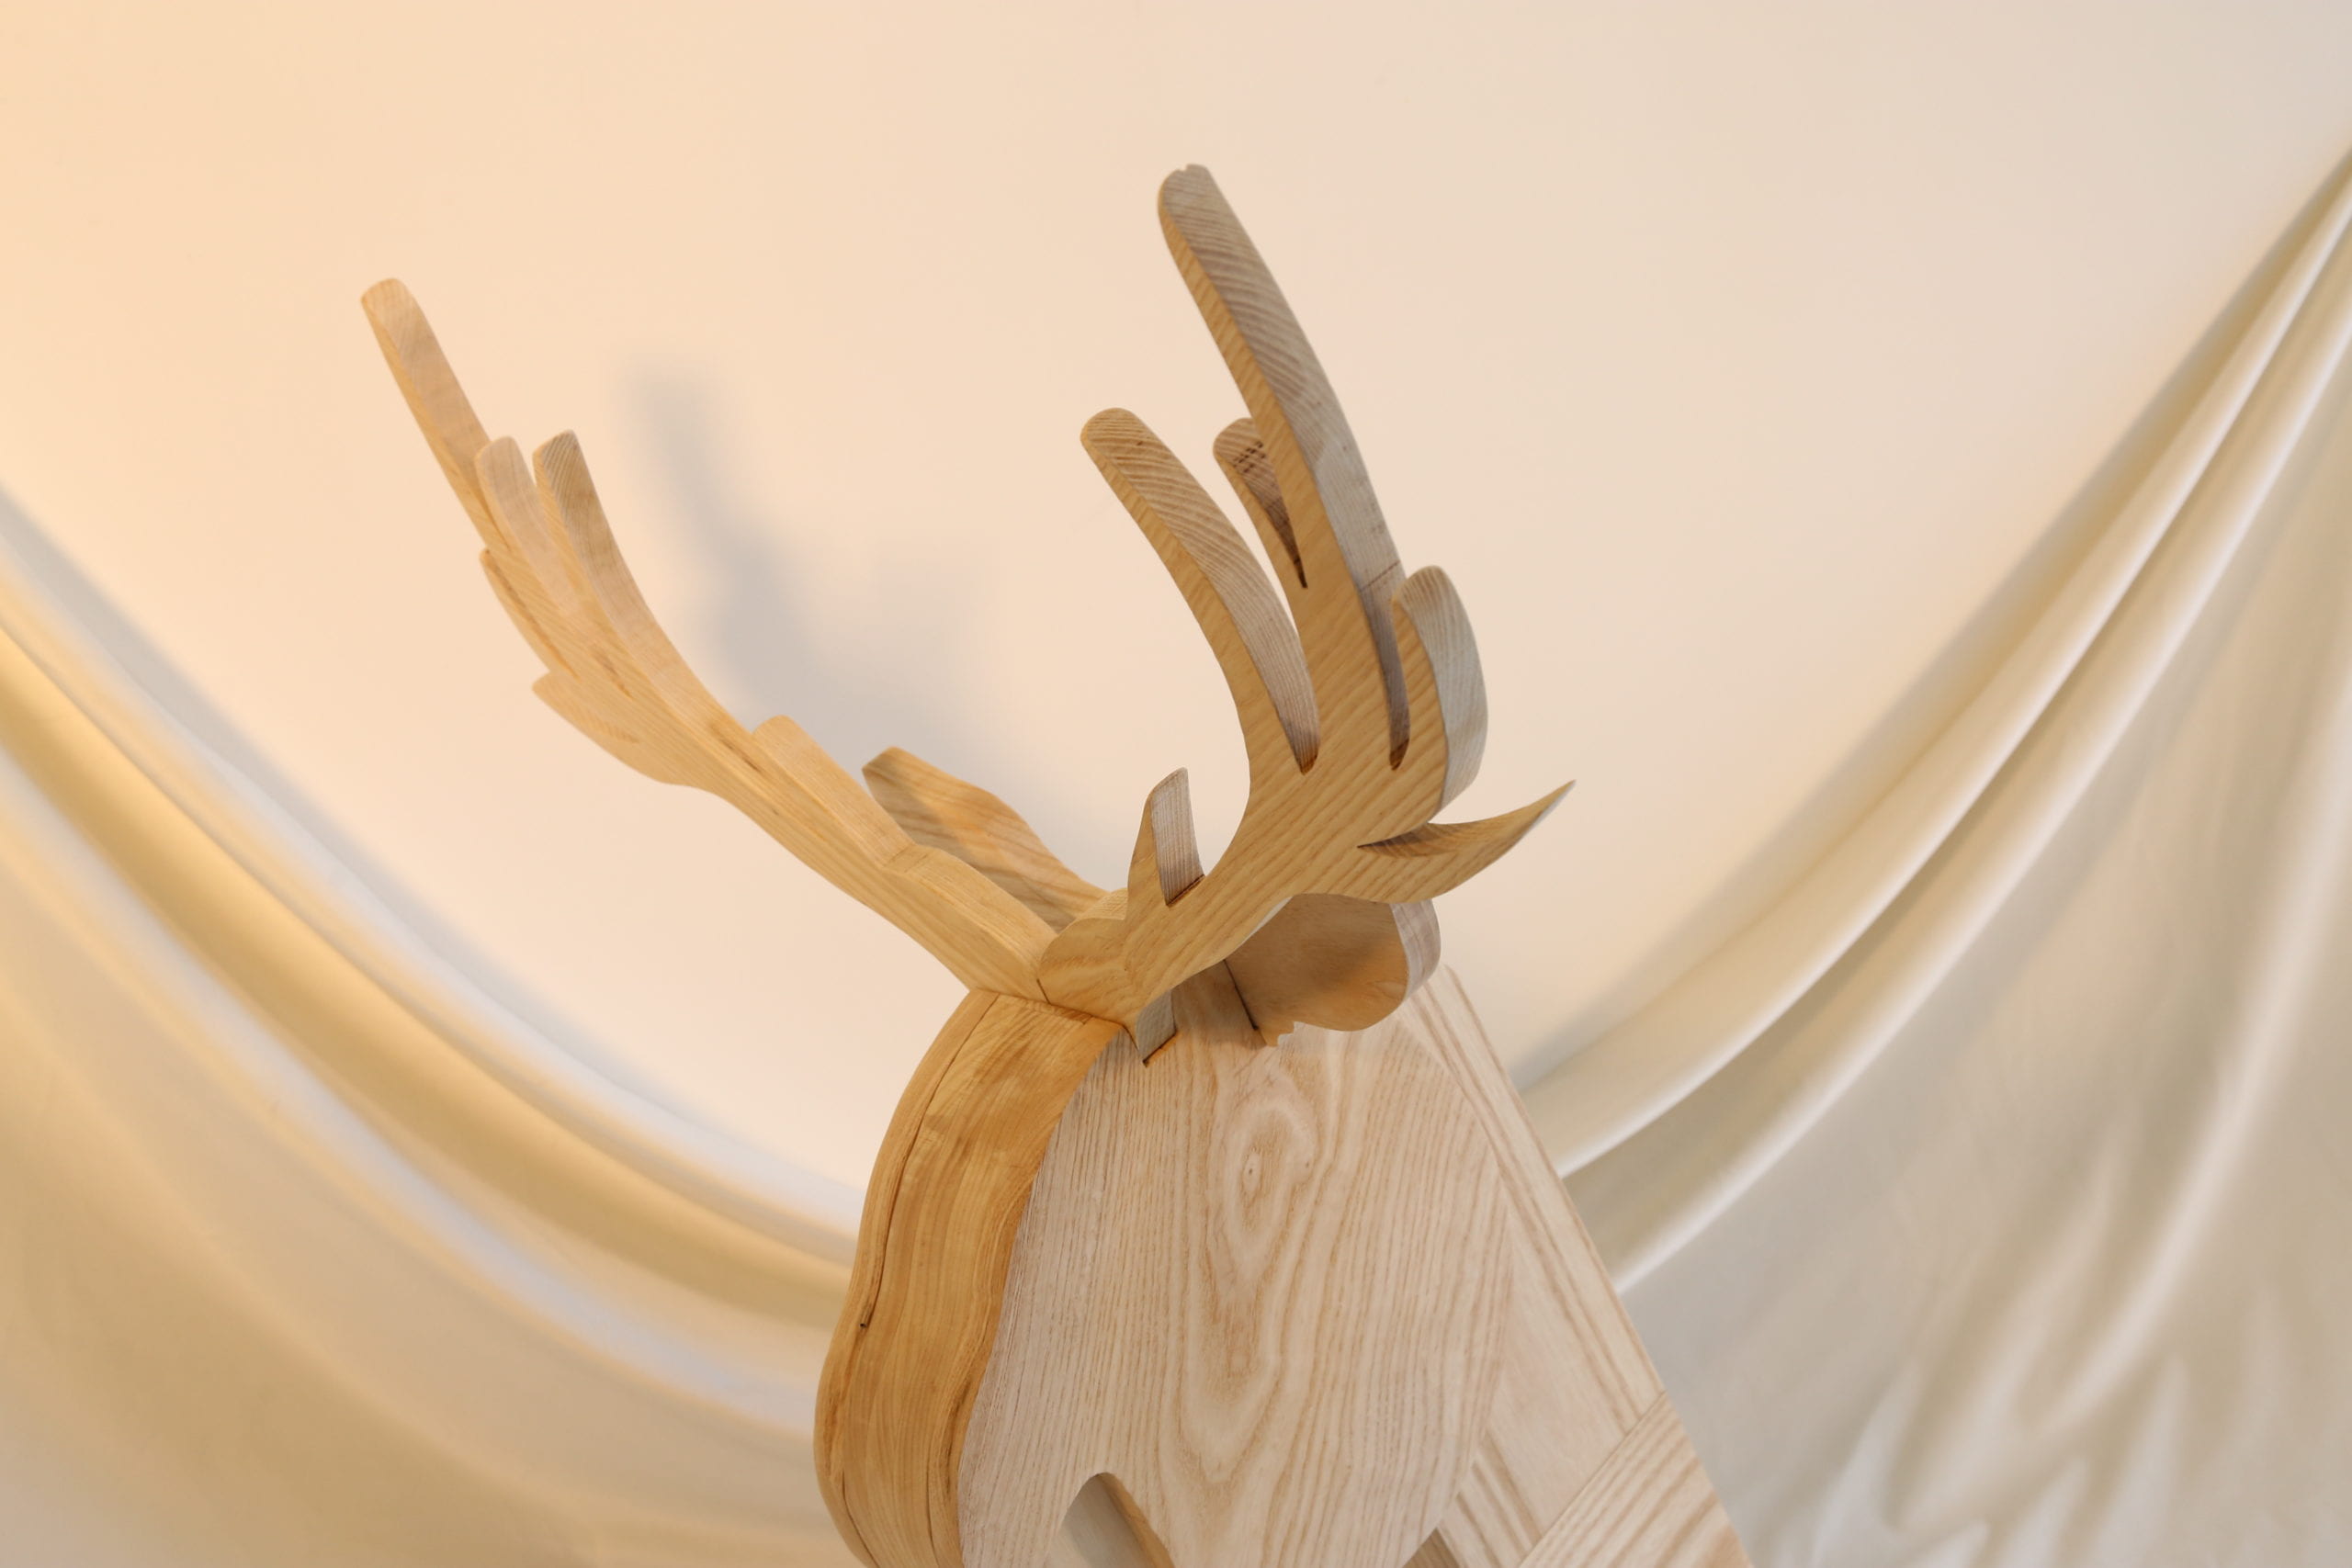
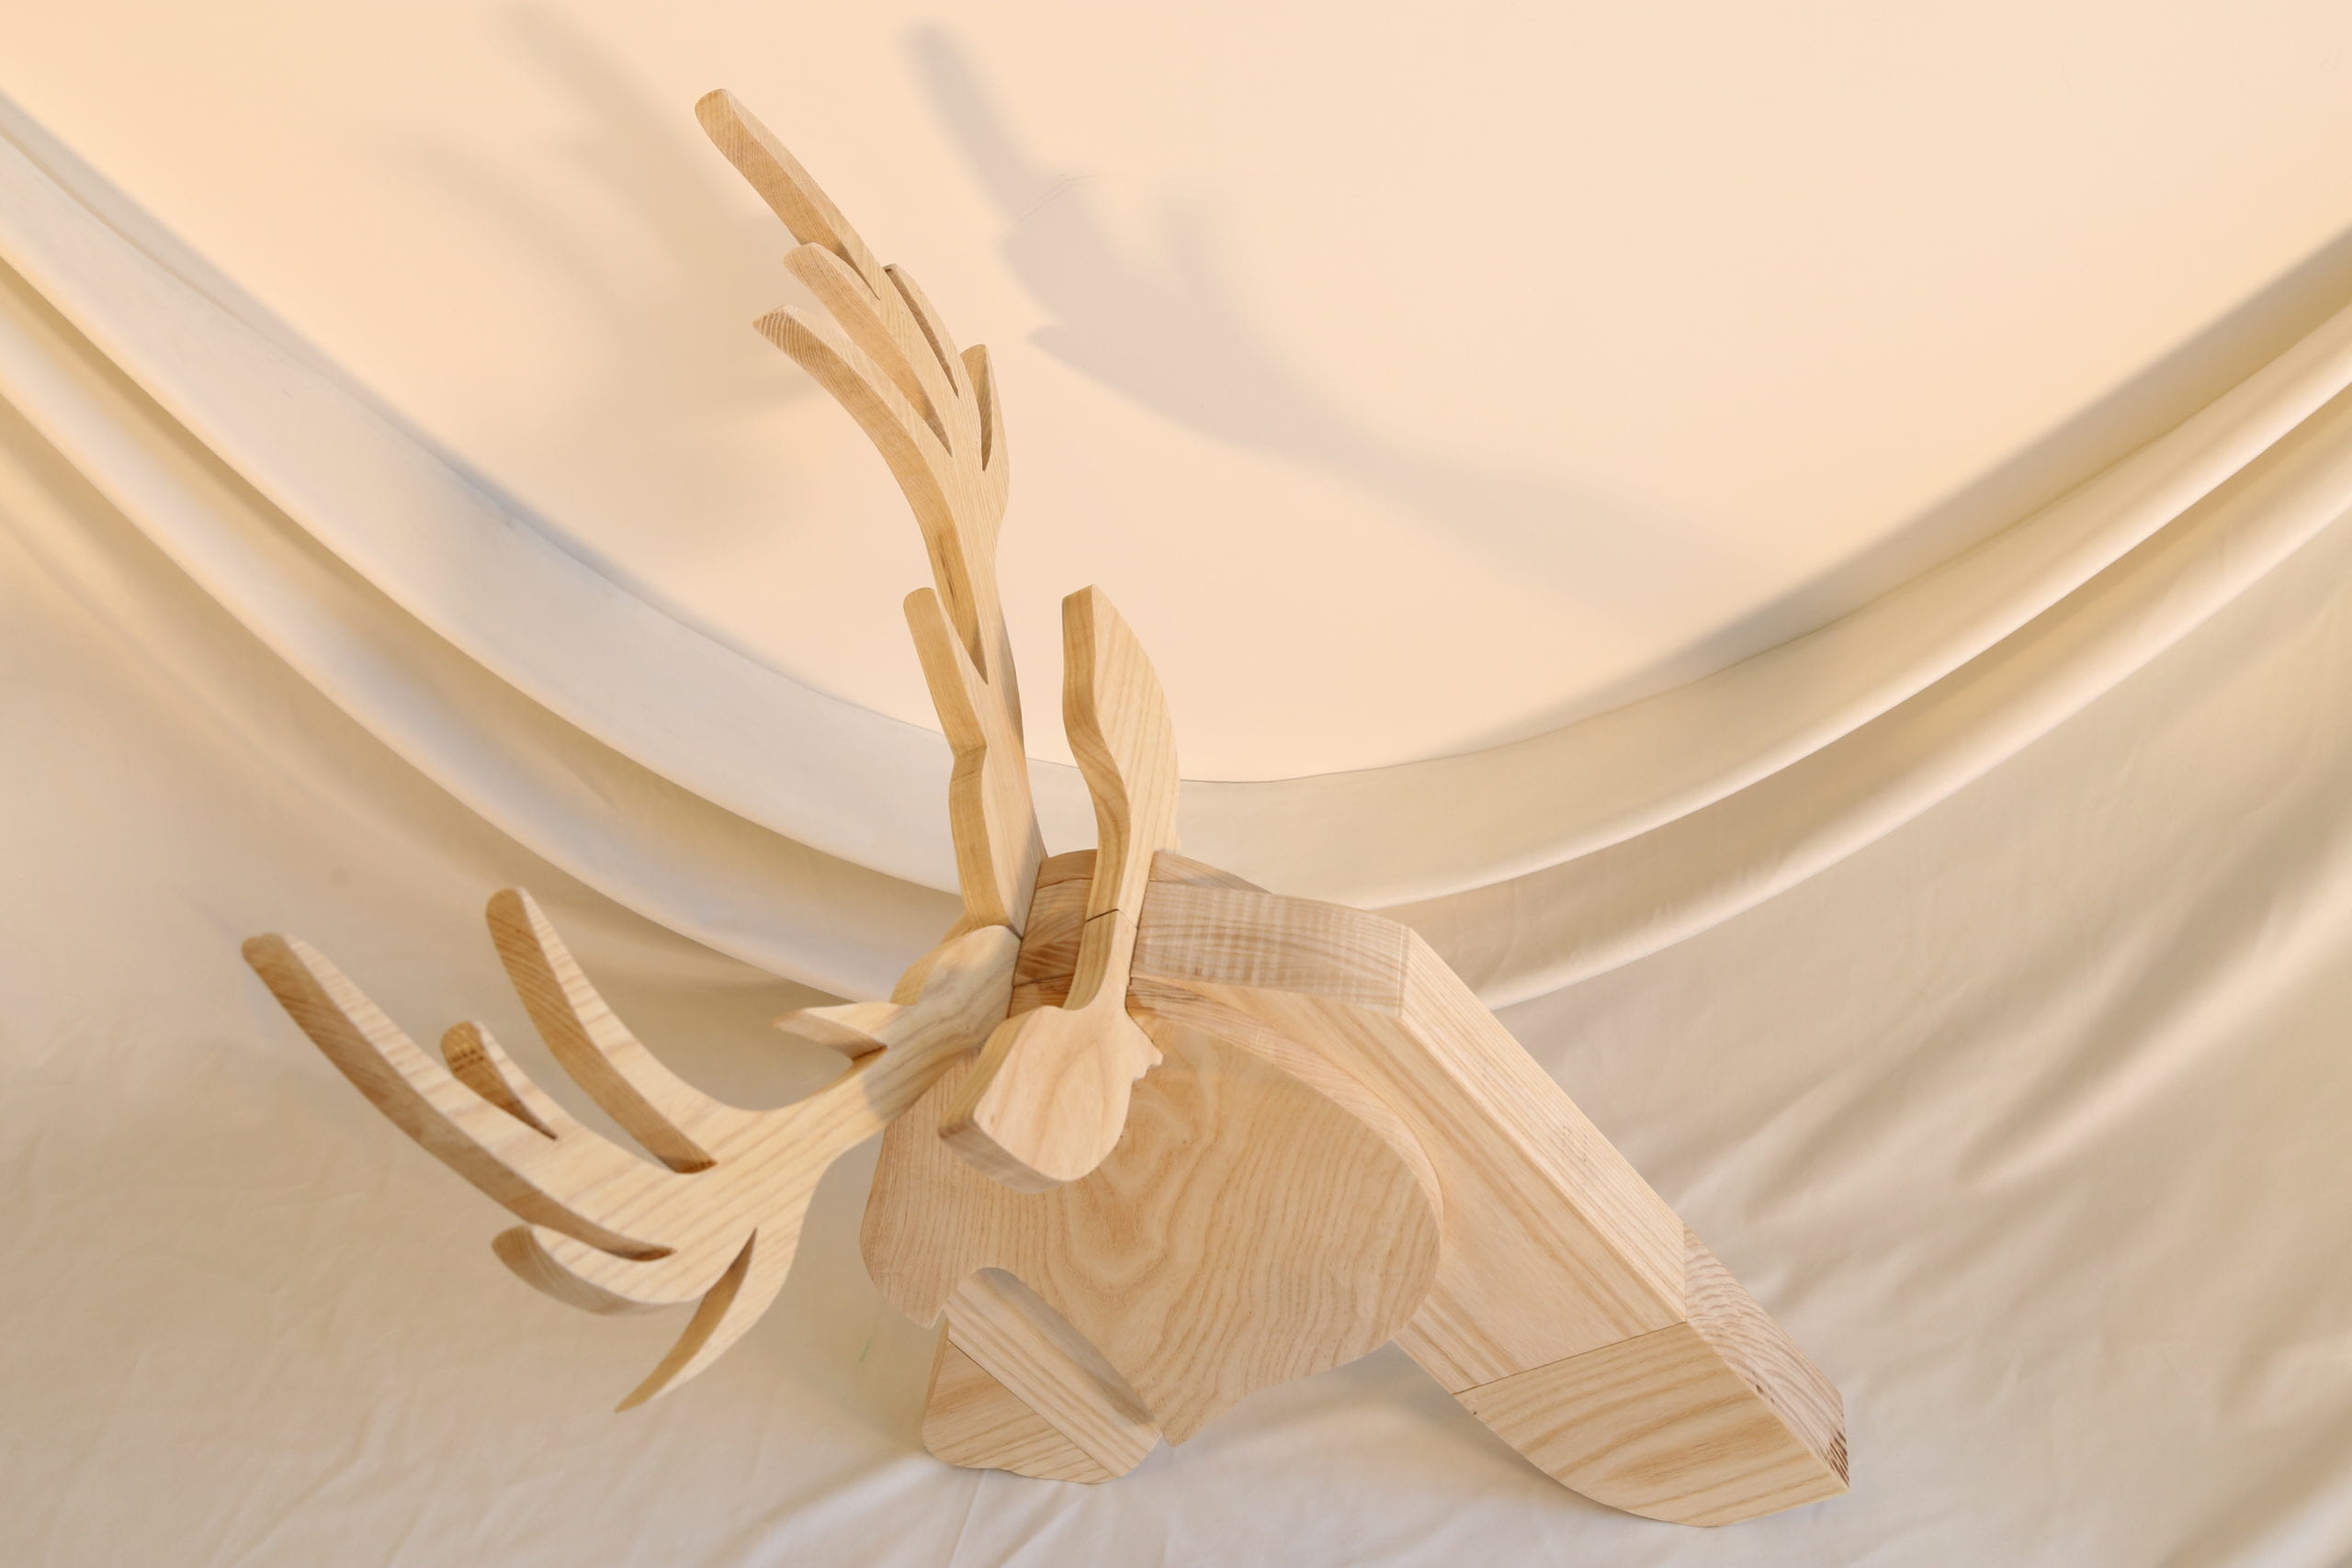
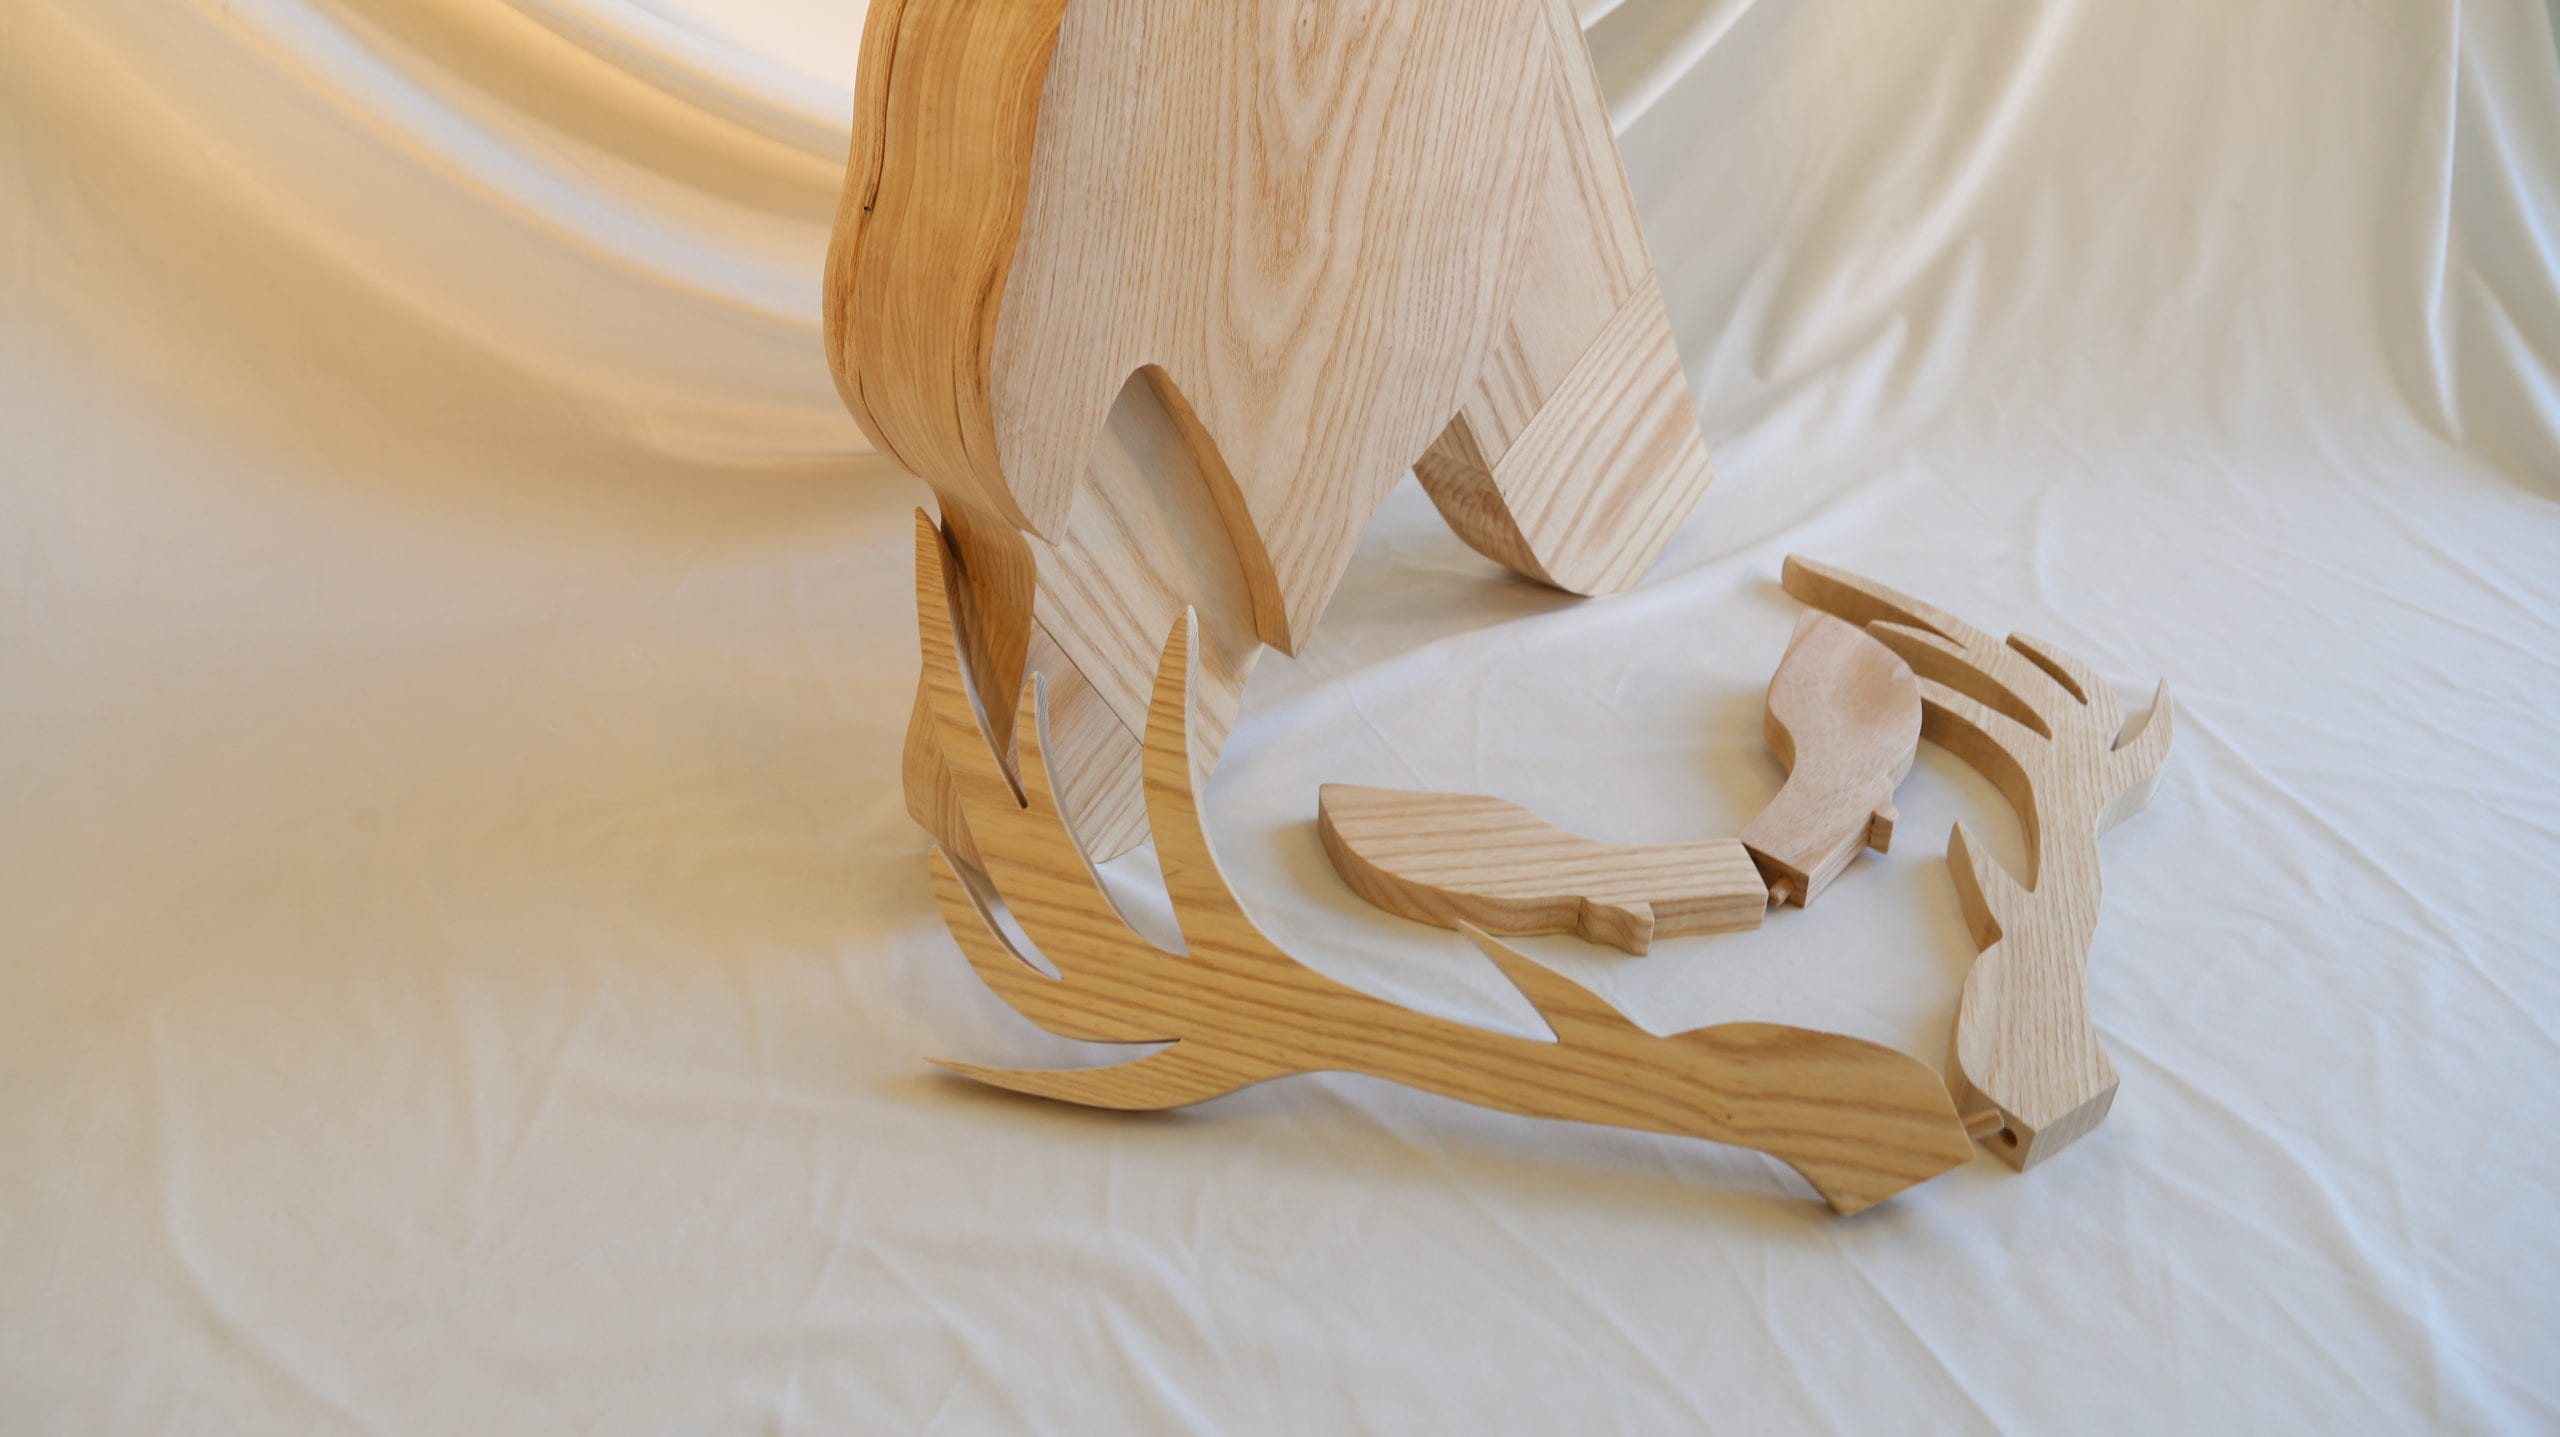
In my initial plan for horns and ears, they could just insert into the gap on the head or use wood glue for joints. However, I made the slot a bit wider than the horns, so that it’s not tight enough for insert and even wood glue. And I also thought about making the horns and ears removable, since having those parts on the head would occupy a much larger space and difficult to carry or store. Professor suggested me to make dowels on the horns and the head, so that I could just insert horns and ears into the head.
However, after trying to measure everything and testing, I found it too hard to get exact position for both pieces of wood given that they are all in very curved shape that is hard to work on.
I then decided to make dowels joining not the head, but the two horns together, since the dowels could prevent the force pulling down the horns and ears from the head. Making holes on the horns are much easier than having them on the huge head piece. As I practiced the dowels before, making these joineries on the horns and ears didn’t take a too long time.
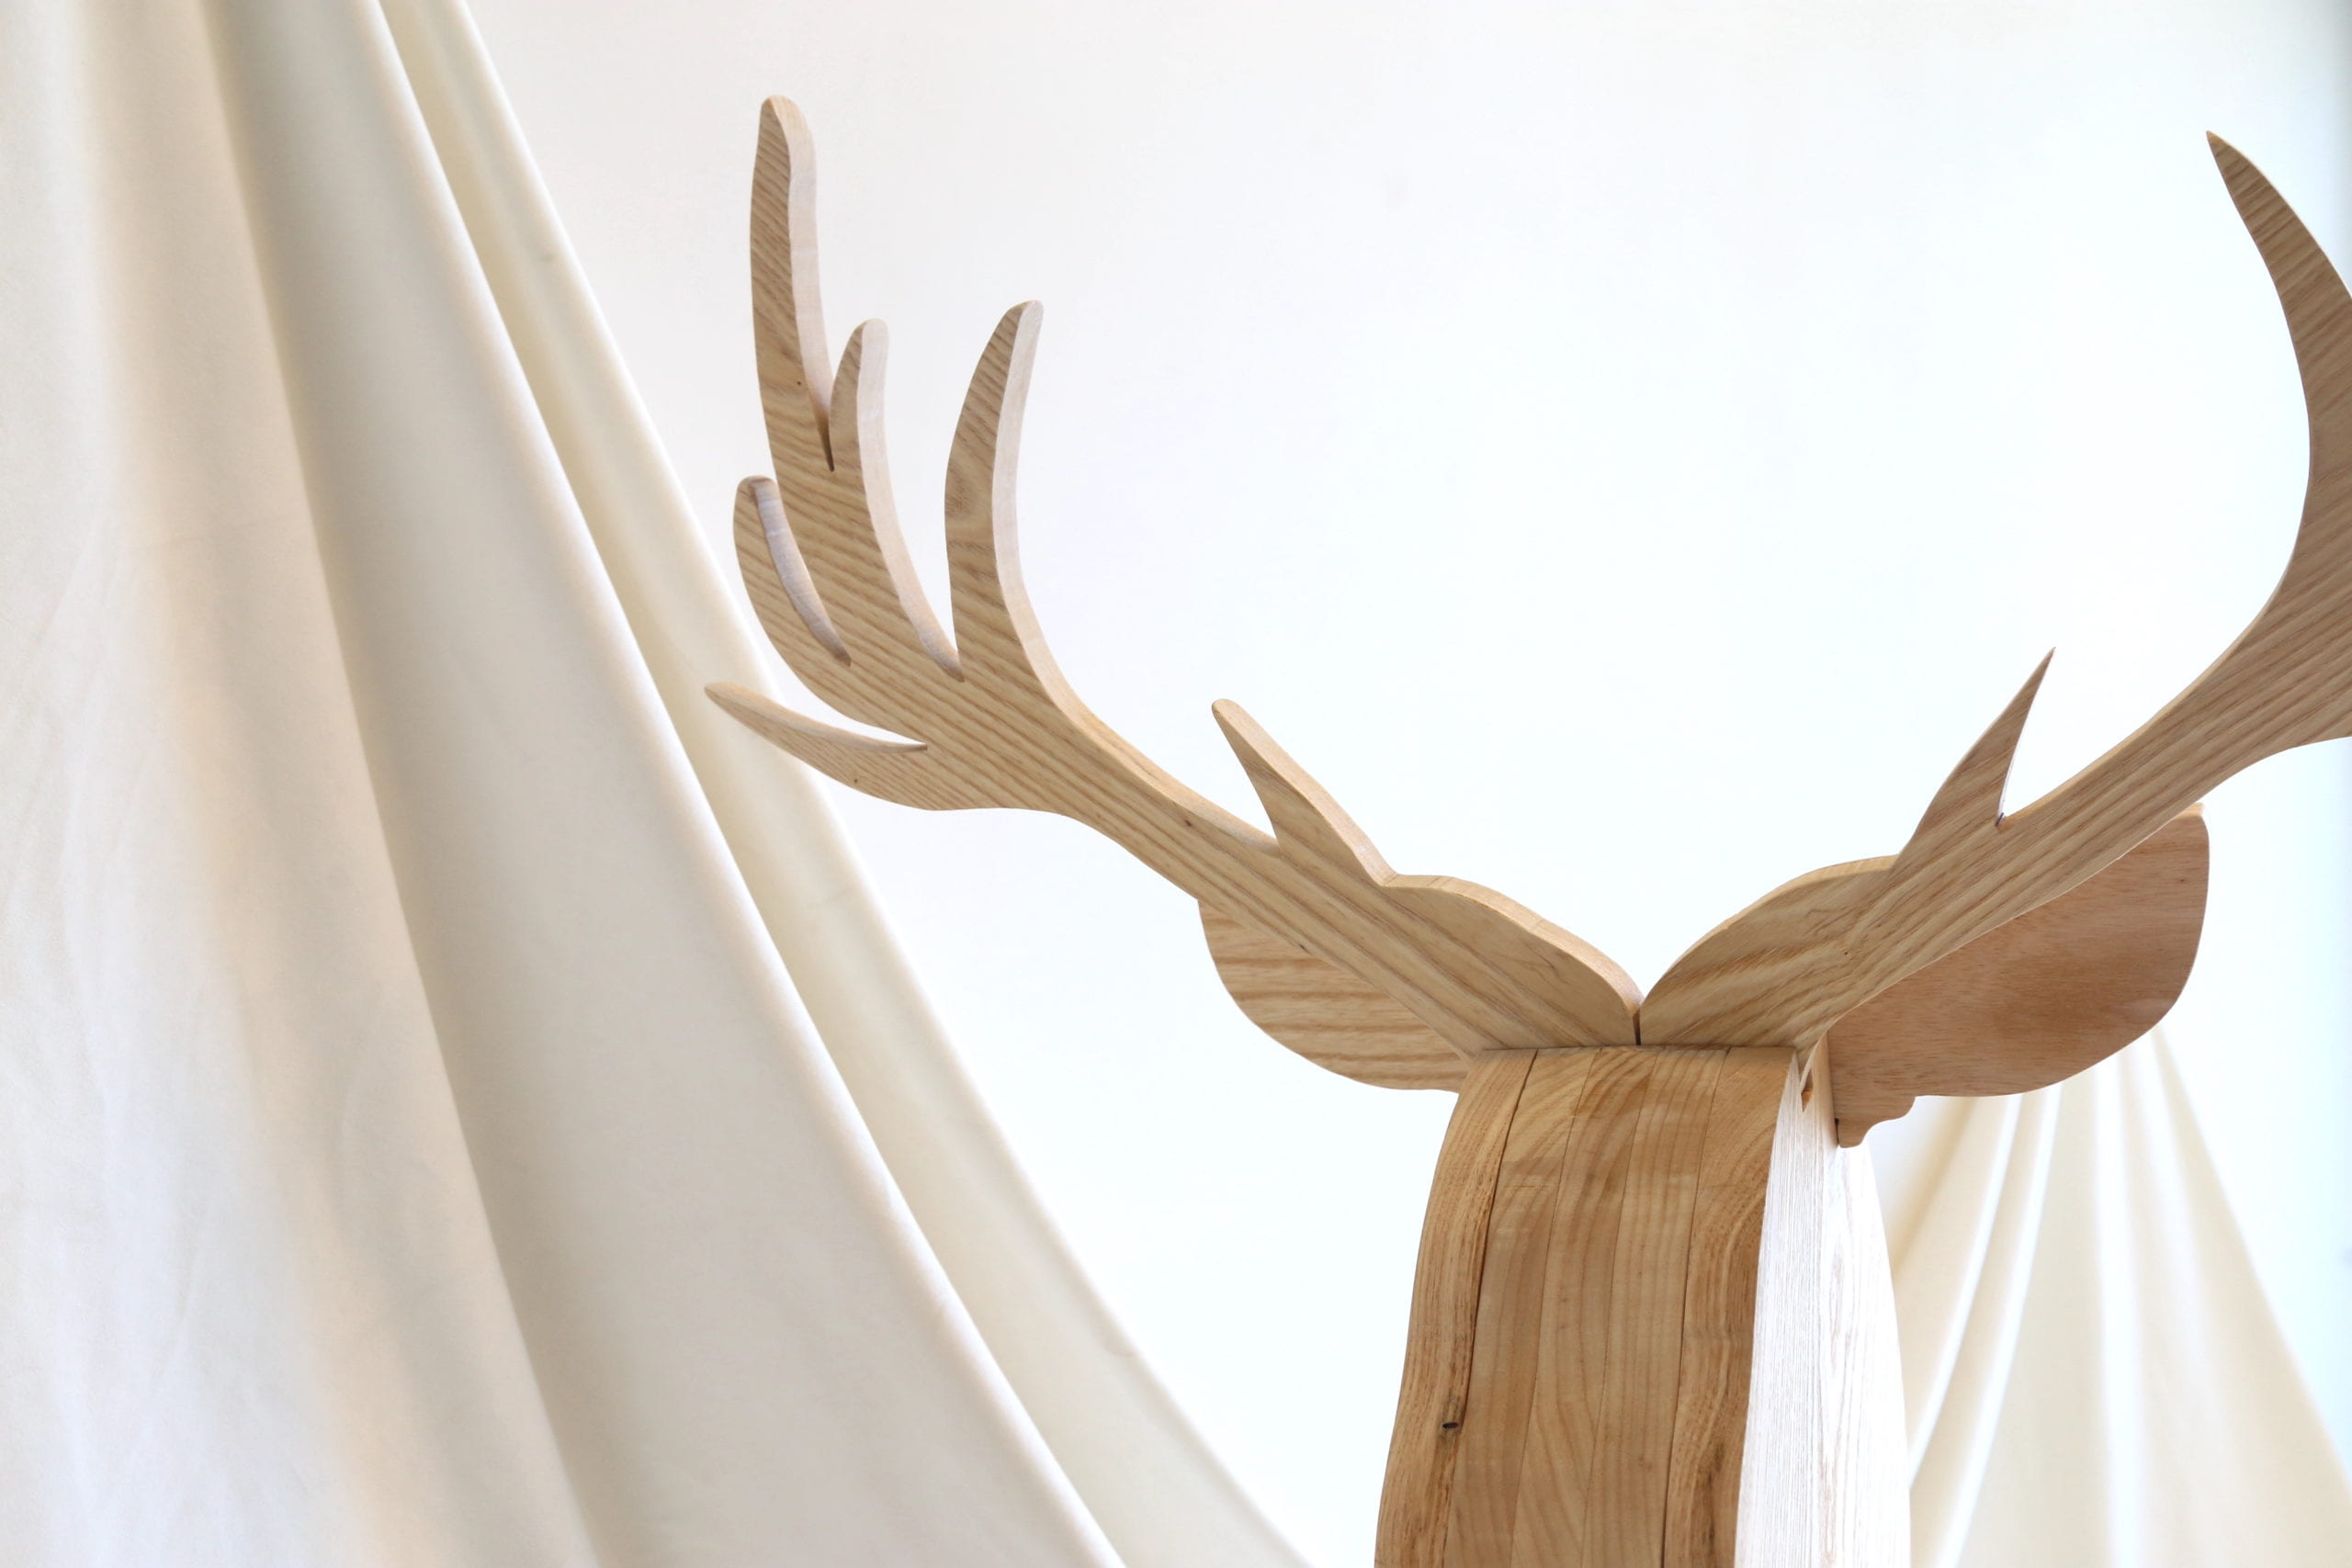
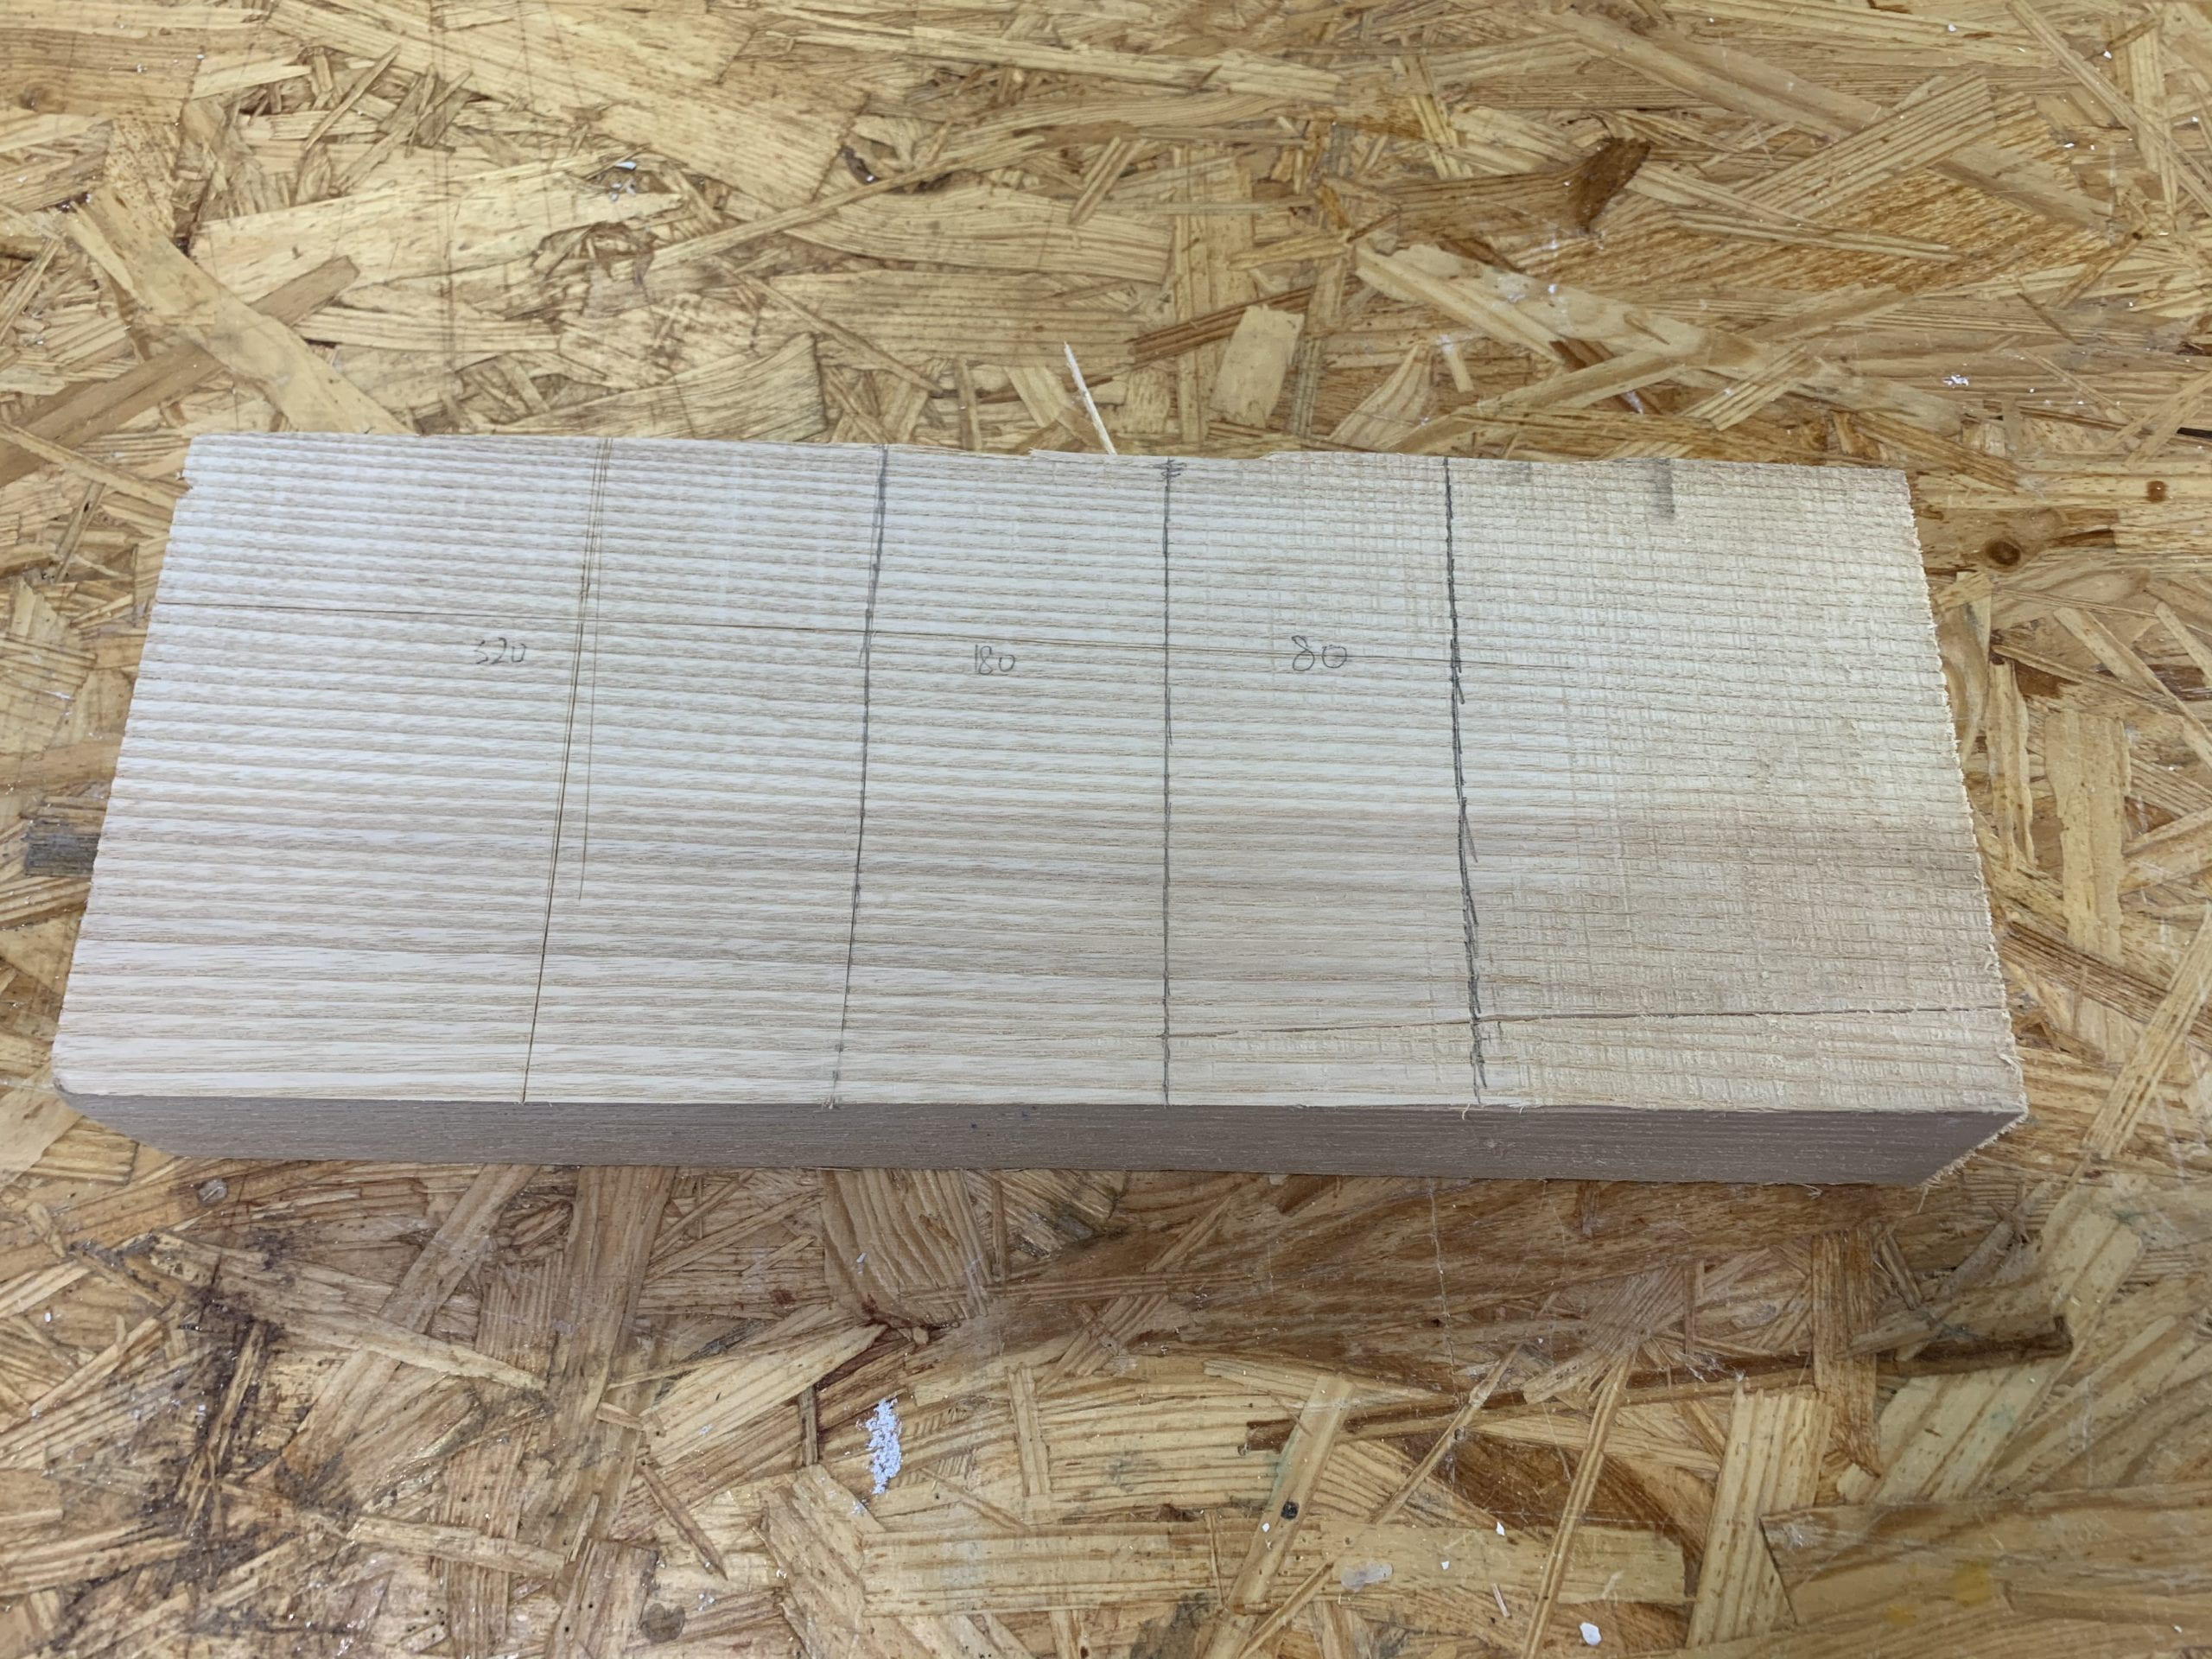
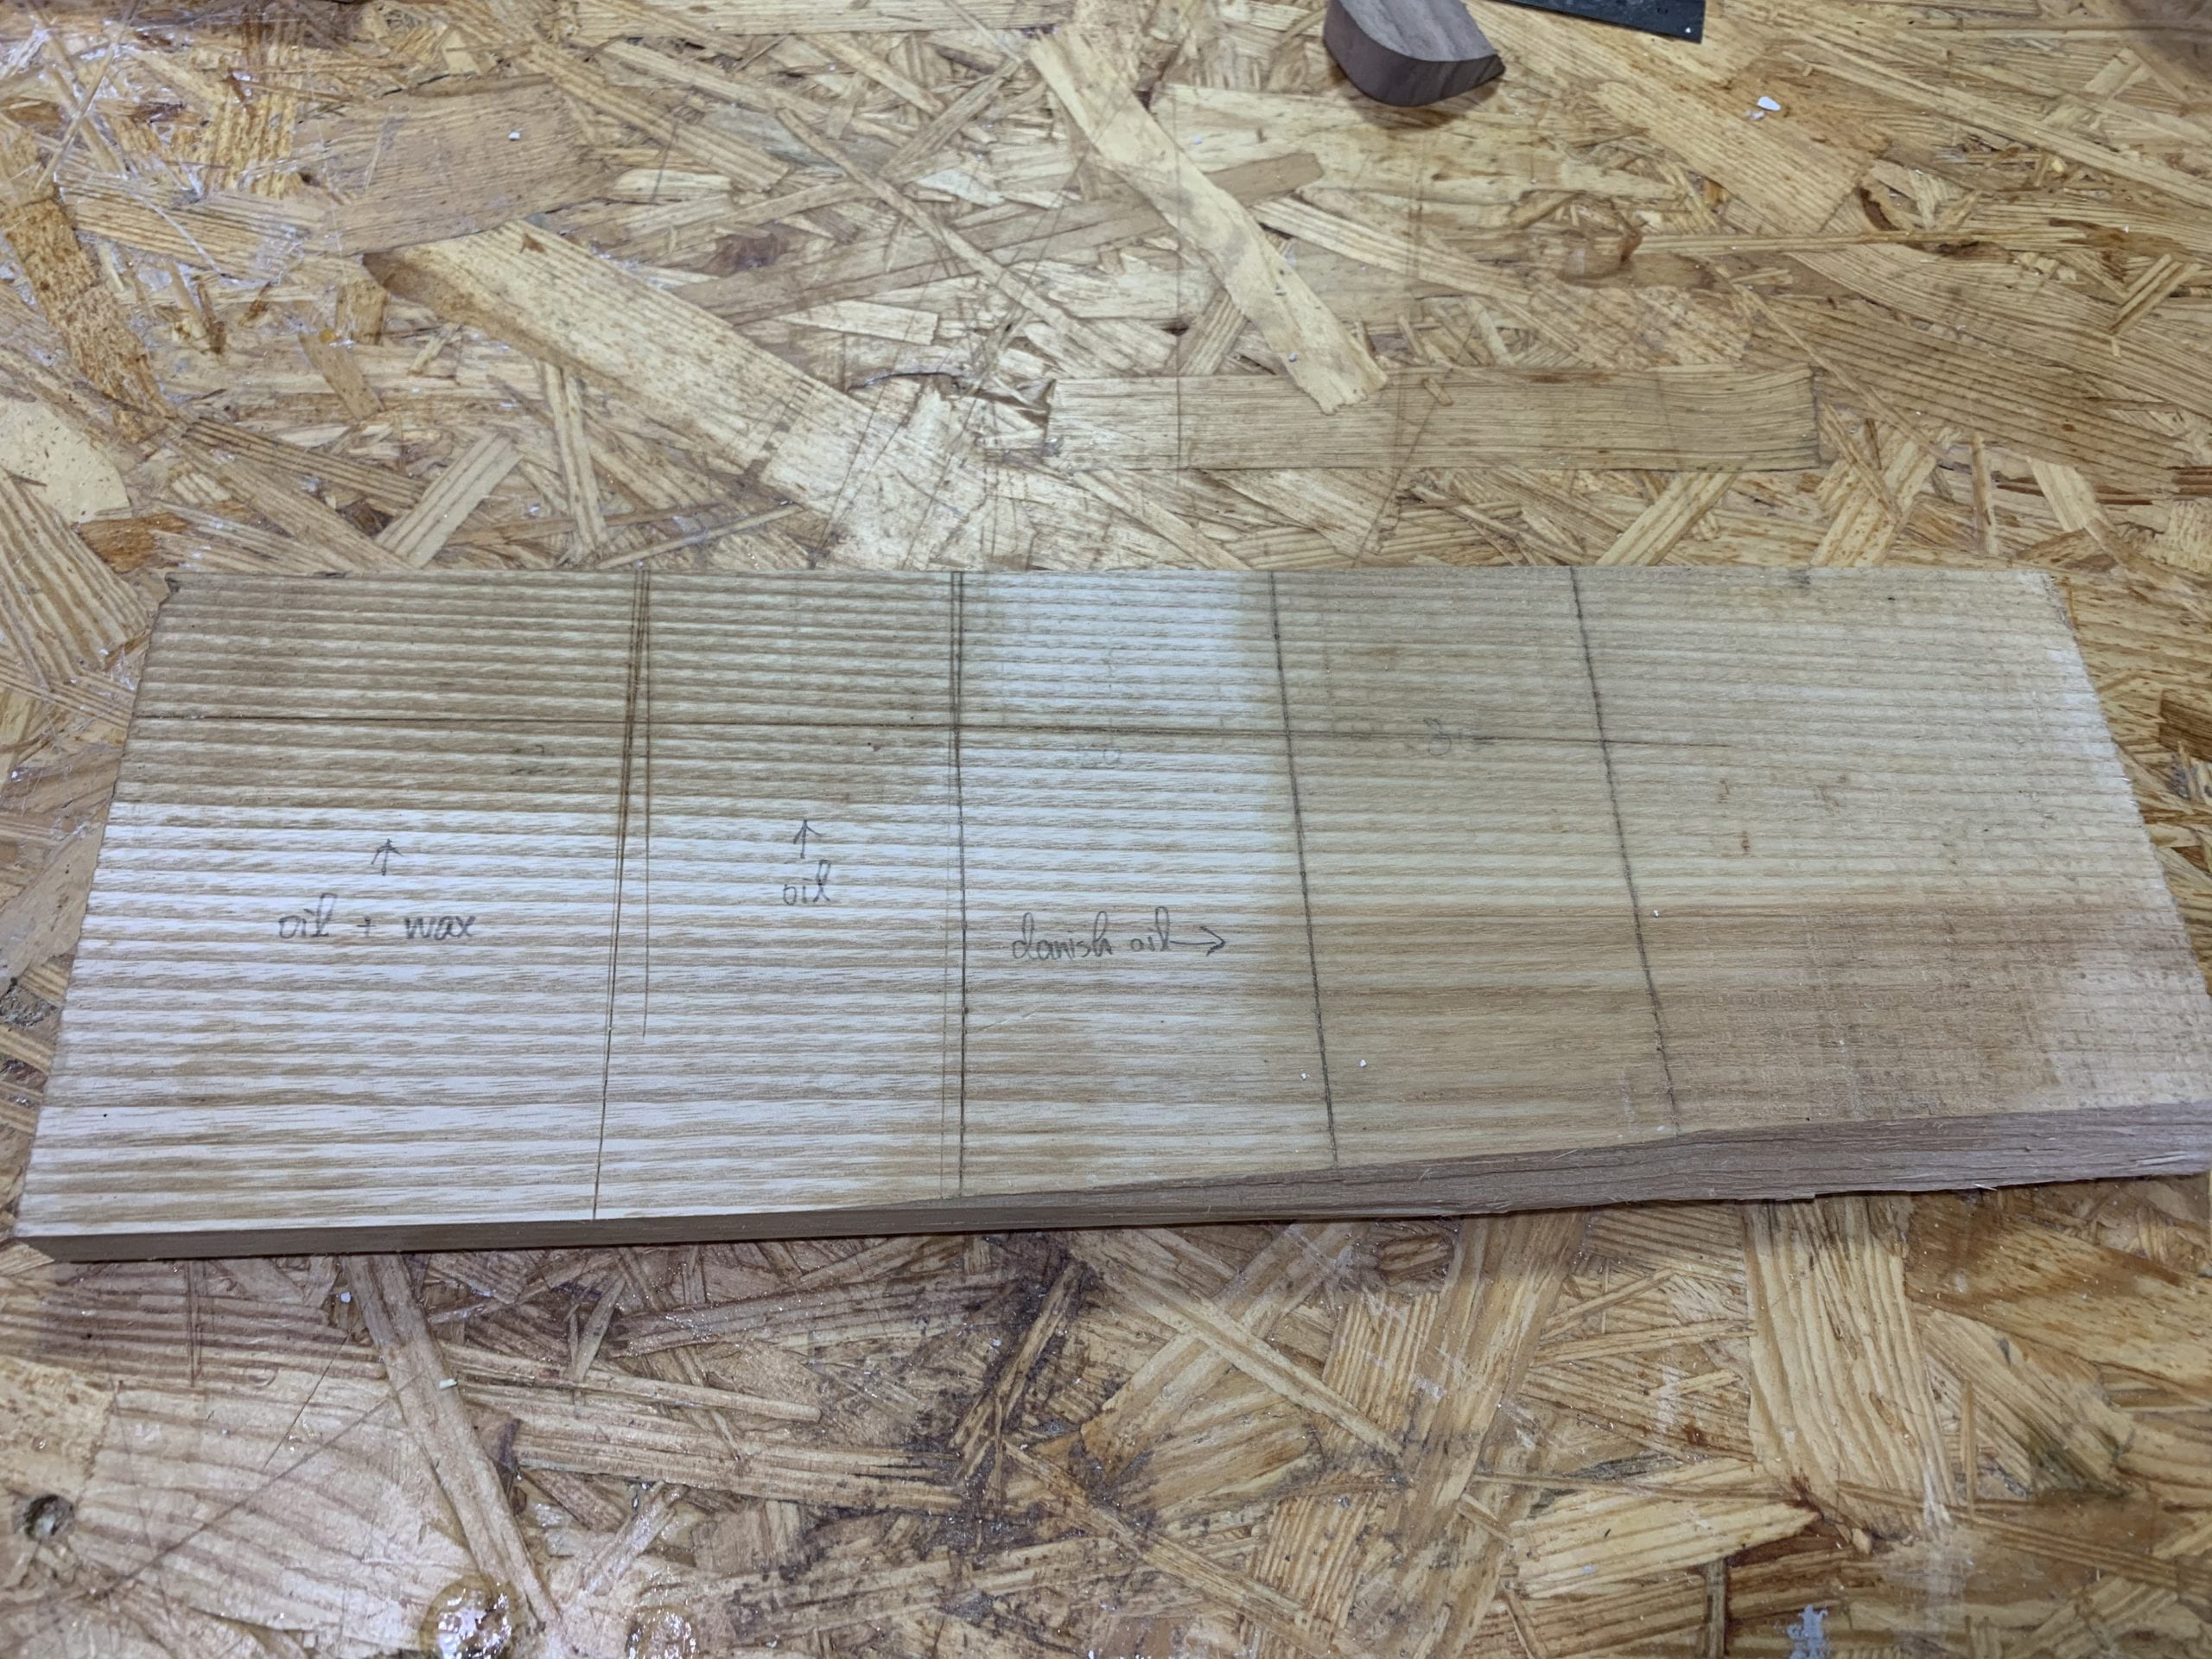
Finishing with Shellac
After trying and testing different types of finishing on white ash, I finally decided to use the light color shellac. The shellac makes no color different after applying to the wood. When I tested it on the offcuts, the shellac worked very well. But when having it on the final piece, surfaces become much more rough than I expected, even after I sanded again with water.
The process of applying finishing itself is quite easy, as always. The only thing I worried about is whether I was wasting too much shellac since I applied a lot worrying about that I might miss some part.
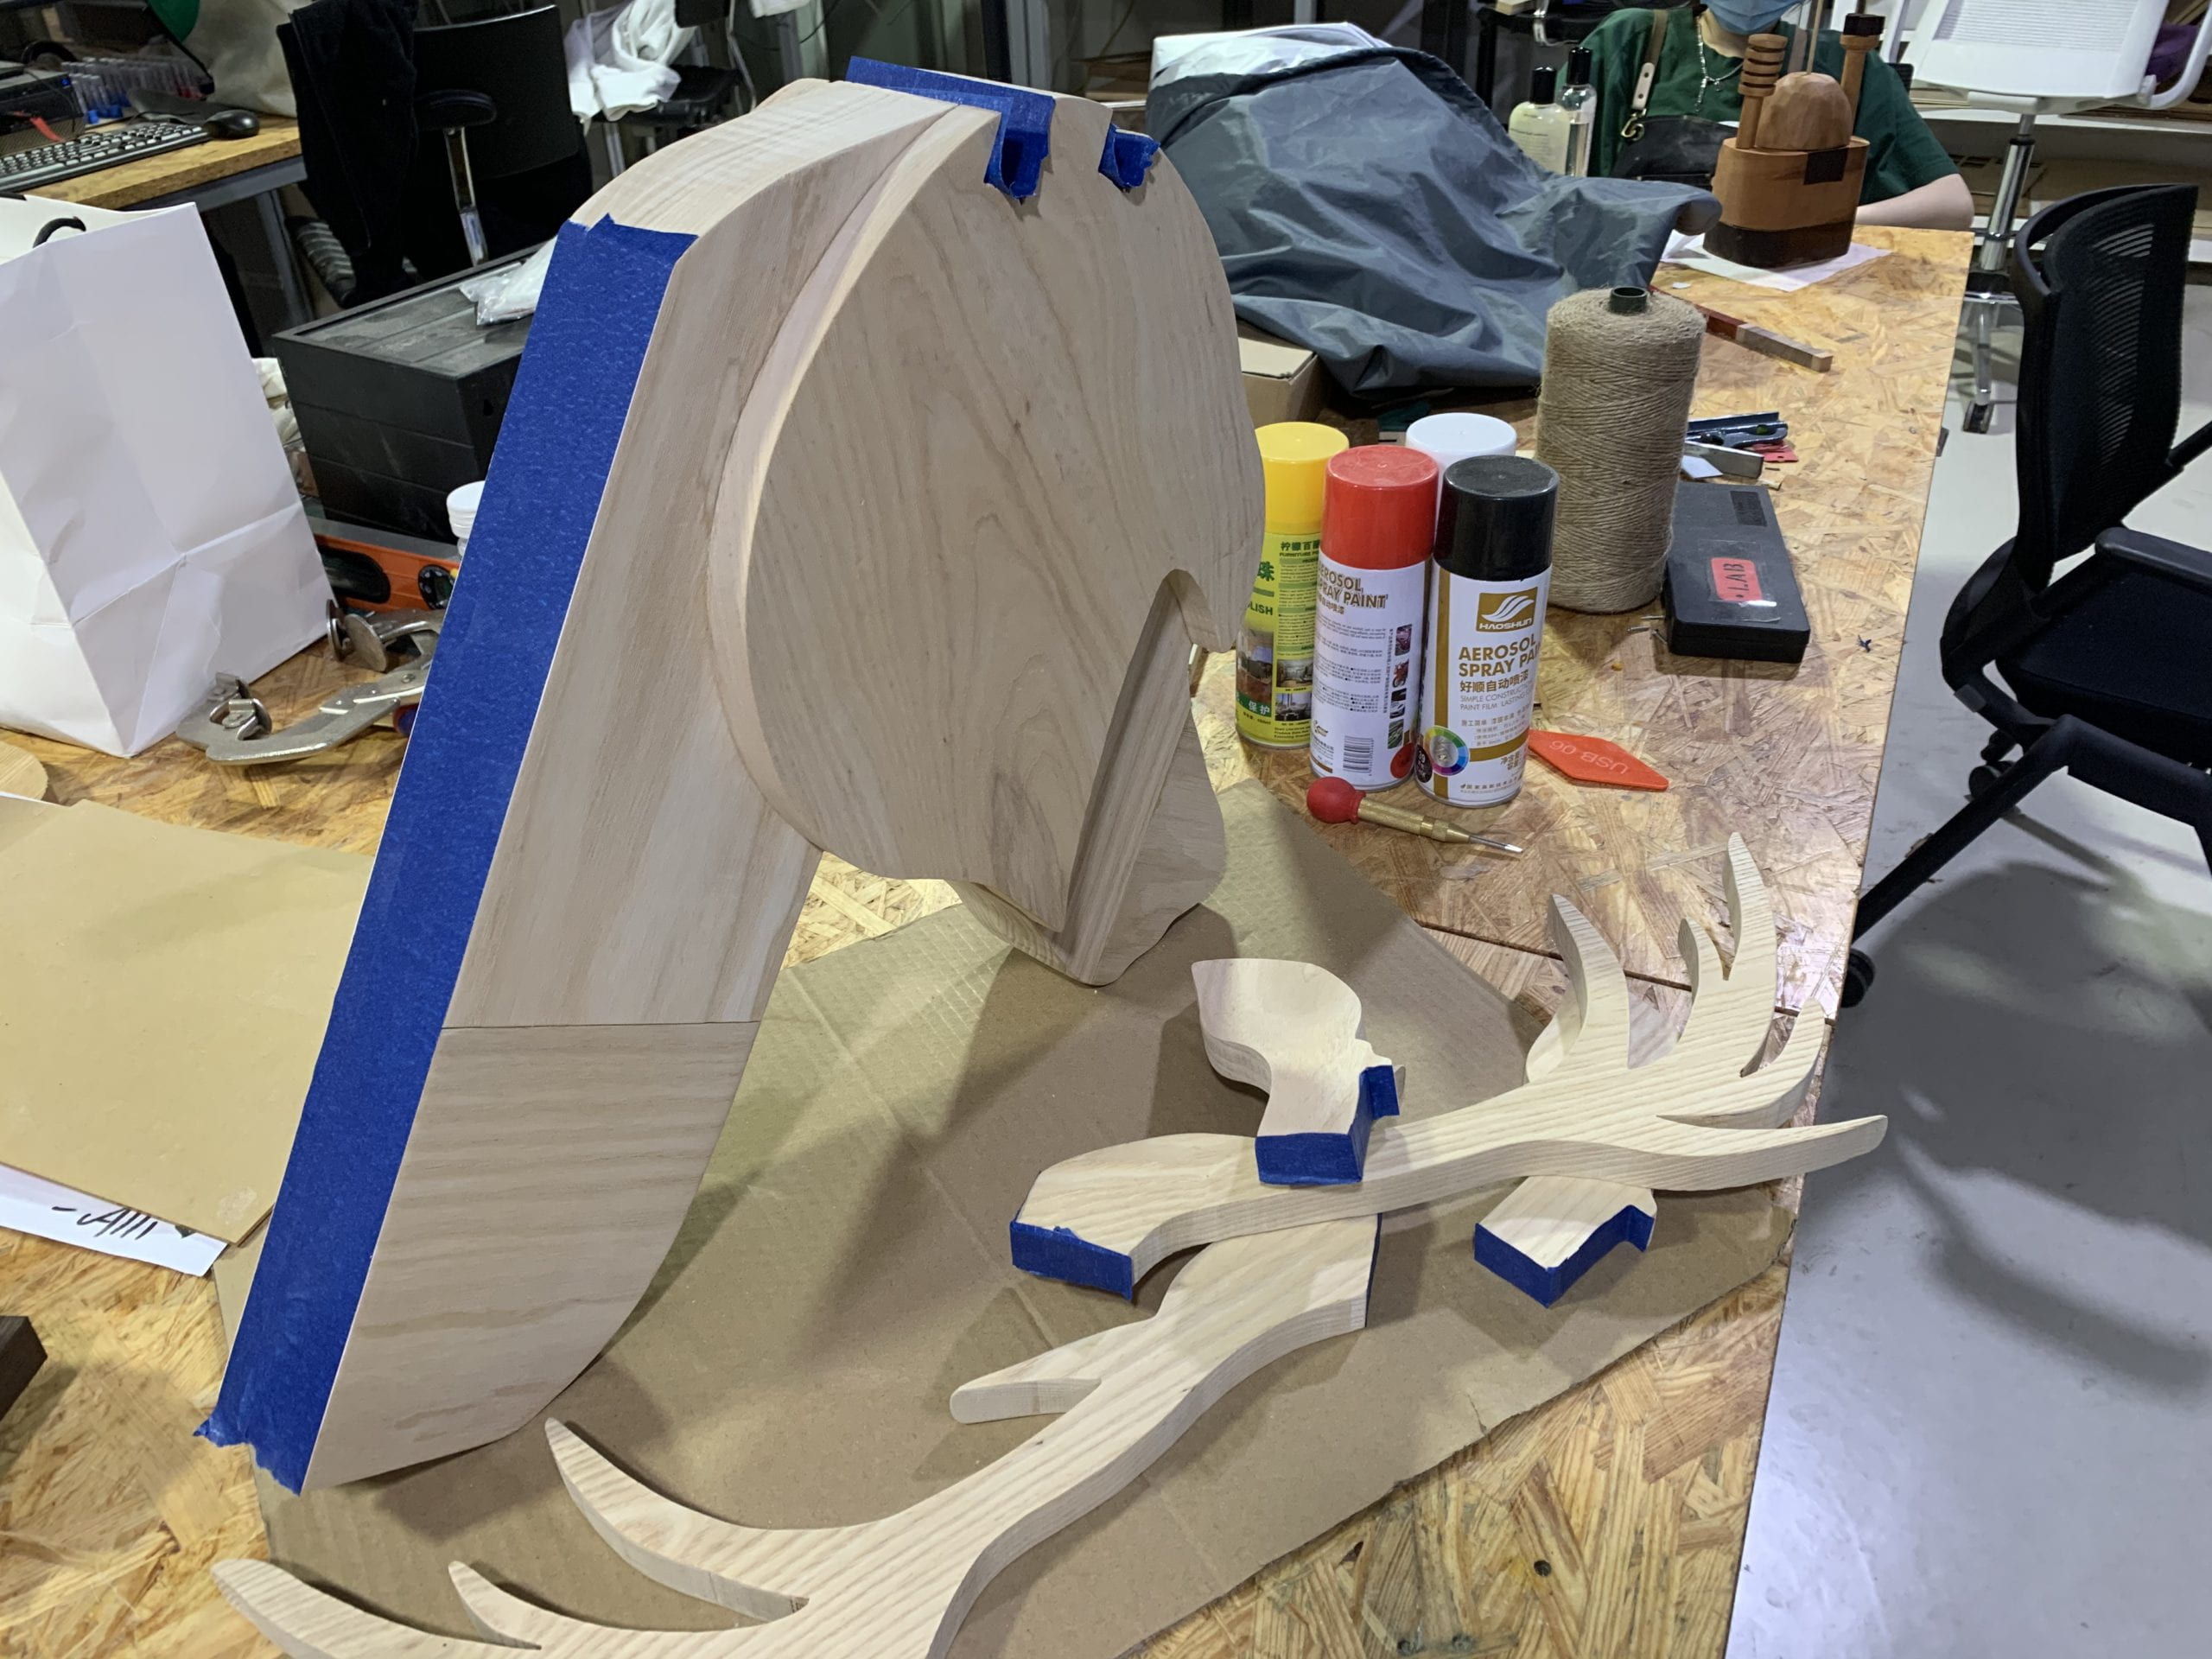
Also, since the finish would make it harder for wood glue to work, I covered some parts that I might later use glue when having further improvements with blue tapes. But some shellac still got inside the tape, I might need to sand those parts again if glue is to be applied.
Reflections and Improvements
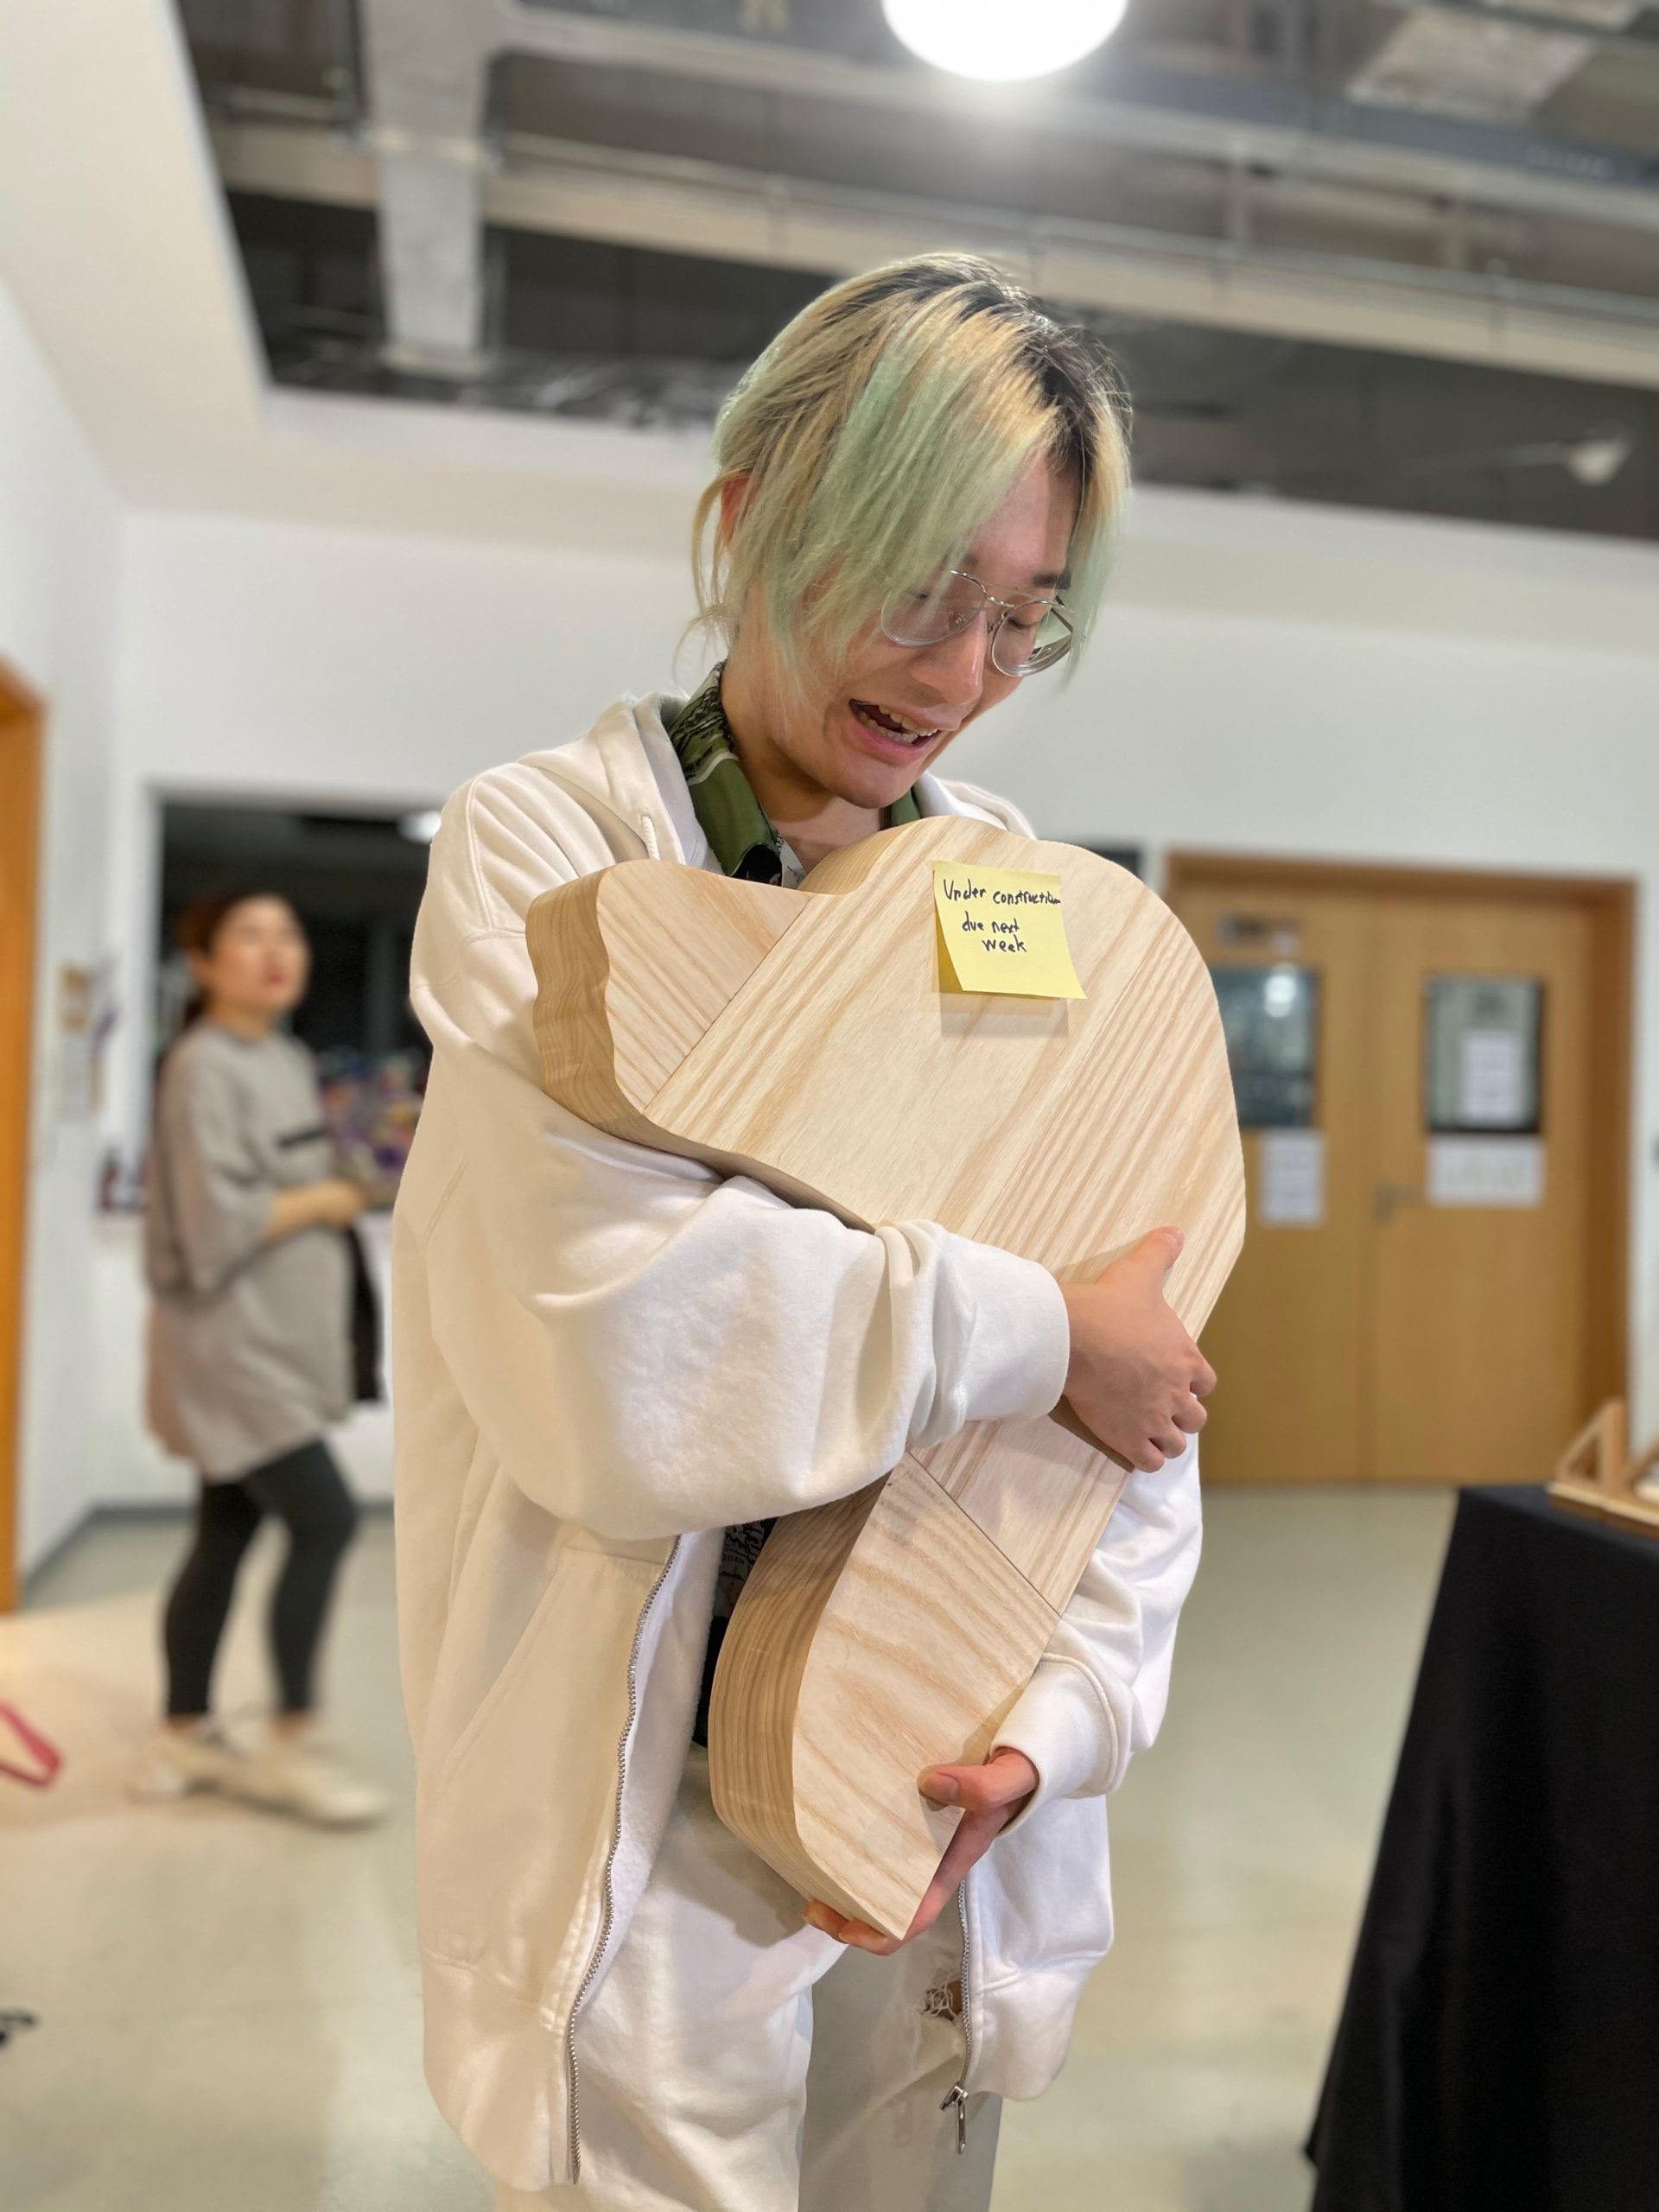
reflections at current stage
For the whole project, I met two major problems. The first is that the wood piece is too heavy. Though I followed the exact size as I designed on illustrator and tinkercad, I didn’t expect the piece being such a big one, and only after trying to lift and hold it myself I found out how heavy the wood is.
The size and weight made many operations difficult, since the piece is larger than the band saw and other sanding machines. Cutting and sanding are much difficult. The weight also makes the piece hard to carry around. According to one classmate, the too large size even makes the deer head looks more like a bear than a deer if without the horns.
However, I figured out this problem too late and there wasn’t enough time for me to turn everything over again and remake it.
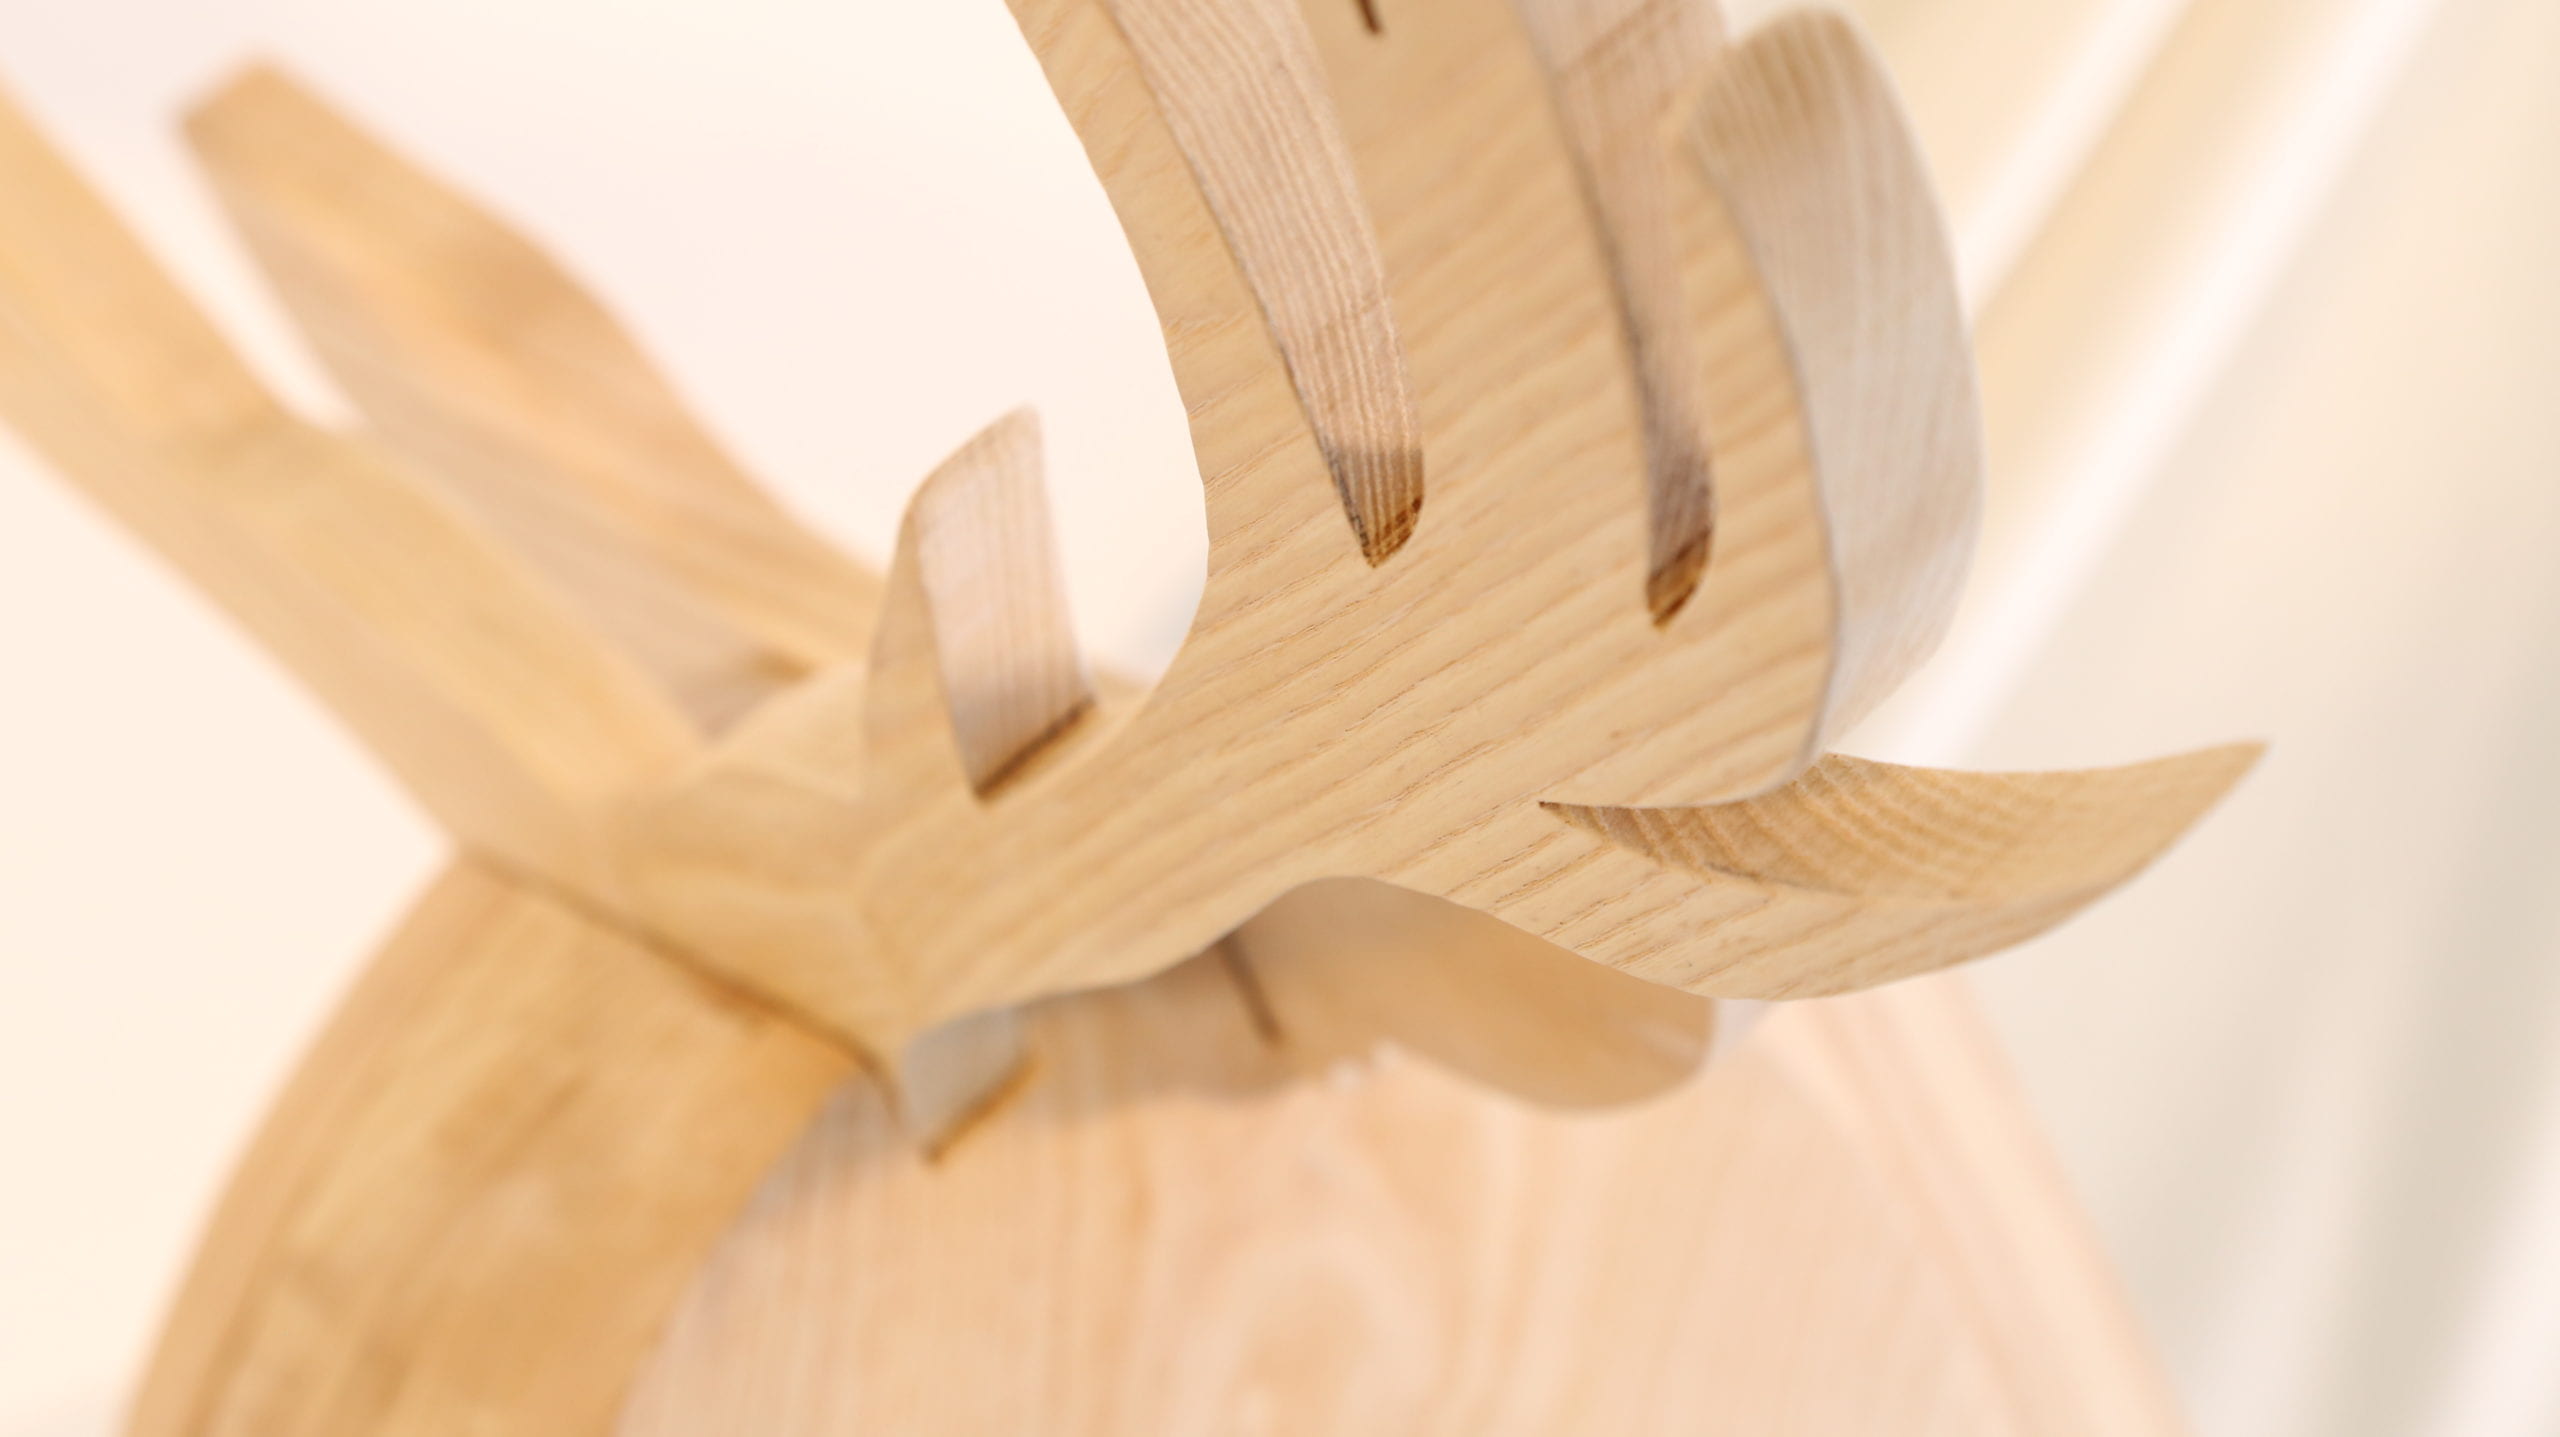
The second problem is with the wood choose. I chose white ash as the color matches, the wood board has the right size and it is easy to cut with. After working on this wood for weeks, I found that white ash is a little bit too soft and loose. As I put the piece on some not entirely flat surface, the wood could easily get markers and pits. For some delicate shape like the horns, I’m afraid of breaking it as the wood isn’t that tight.
But if I got some other kind of tighter wood, it would also make my piece even heavier than what I get now. So neither these two problems would be easy to solve.
1. Knowing what you know now, if you were to start over again, would you make any changes to your original design design? What is advice that you would send to your former self?
I would definitely tell my former self to make the sculpture smaller, and maybe choose another type of wood if possible. As these are the problems that troubled me the most during the fabrication process.
Also that in the fabrication, I had made quite a few redesign decisions. Though the final product looked really similar to the initial design, these redesigns really changed my project a lot. As I substituted the joints between head and neck with one larger piece of wood, used dowels for some joints, all these changes makes my piece stronger and more stable.
Thus, if to start over again, I could have knowledge about all these changes before starting, saving me a lot of time struggling with different plans and trying to figure out which could fit my project the best.
2. If you were to build a similar project, what would you keep the same from this project? What would be different?
I think I really learned a lot about many woodworking skills in this project, such as gluing and joints, also the experience about handling large size and cutting symmetric shapes.
If to build a similar project, I could still use these knowledge as I’m satisfied with the way of gluing multiple wood pieces together for larger ones, I would also use dowels for tricky joints. And I find out that shellac is really great when I don’t what to change the color of wood itself.
For differences, I would probably try different kind of woods. And I also want to practice some real sculpture skills. Since I’m using only boards for this project, I could have everything cut with band saw and table saw. However, things would change a lot if I have one large piece of wood at the beginning, and I definitely want to try that out.
Improvements for Future
This project is only partial done due to the time limit, there still remains many parts I could improve on.
First, after applying the shellac finishing, the wood becomes rough again, especially on the side face. As suggested by professor Steele, I could sand off the finishing and applying it again. Or I can use higher grid sanding tools to only sand off the top layer of the raised grains without getting rid of all the finishings.
Also, the project now has a straight back cut with table saw and left unfinished, and it can’t really stand on the ground or hang on the wall. I can make one backboard and attach to the straight back of the project now. Maybe using screws to join the backboard and head tightly together, I can really hang this deer head on the wall, letting it become a real “wall mounted” sculpture decoration.
Finally and Most importantly, I should give one pair of beautiful eyes to my dear deer. 🙂
Thanks for reading ^
Reference
twitter.com/komena_mmd/status/1226164161828114432?