Inter Lab | Final Project Essay

A Rainy Night in Spring

Statement and Purpose:

In this project of A Rainy Night in Spring, Music can be visualized, and the metaphor and the scene from an ancient musical piece can be reimagined using modern technologies. This project intends to redefine the concept of musical instruments, revolutionize the way of making and appreciating music, and modernize the ancient traditional Chinese music culture by adding modern elements. As well as foster the awareness of protecting culture, arise the pride of our history and culture.

The targeted audience of our project are those who wants to expand their senses to appreciate music. Cultural lovers, anti-war supporters, culture protectors, people who are interested in music, digital heritage, and design are all welcomed by this project.

Project Plans:

Laser-cutting: We want to laser cut a wood panel to represent the concept of pipa, or as a metaphor of the Chinese musical instruments, or even the lost Chinese cultural heritage at all.

Sensors and Inputs: We would add sensors on the “instrument”, they would be the light resistors, detecting whether or not the laser is pointing at it. Laser lines would be used to represent the strings of the instrument. The sensors would be triggered when the user holds the pipa on their lap and plays it.

Processing and Outputs: When playing the instruments, different patterns will be projected on the panel. The very patterns are those from ancient instruments and drawings with the concept and meaning of ancient Chinese culture that are not being well reserved these days.

We would finish building the real instrument in the next week, figuring out how  could the input and output work. And we would continue working on the patterns and music presented by the processing in the week after, to make our project more complete and convey the very idea we want.

Context and Significance:

Due to wars and the cultural revolution of China, China’s precious cultural relics have been plundered and destroyed. Now if we want to see the most glorious historical remains of the great Tang dynasty, we have to go to Japan. It is sadly true that Japanese people see and know more about pipa than Chinese. It is time to use some technology to bring our culture back.

春江花月夜[ A Rainy Night in Spring] is one of the oldest and most famous Pipa pieces. It pictures a poetic and Zen atmosphere on a spring night, combining metaphors like flowers, warm river water, and the moonlight. Together it creates a beautiful soundscape.  Although many people find this musical piece pleasant to listen to, people who are not familiar with traditional Chinese culture can hardly understand it culturally, losing the most important part. 

This project intends to visualize the music piece for audiences to better feel the atmosphere of the music and to spread the traditional Chinese culture by making it modernized and readable to all. 
Inter Lab | Recitation 8

Processing Documentations

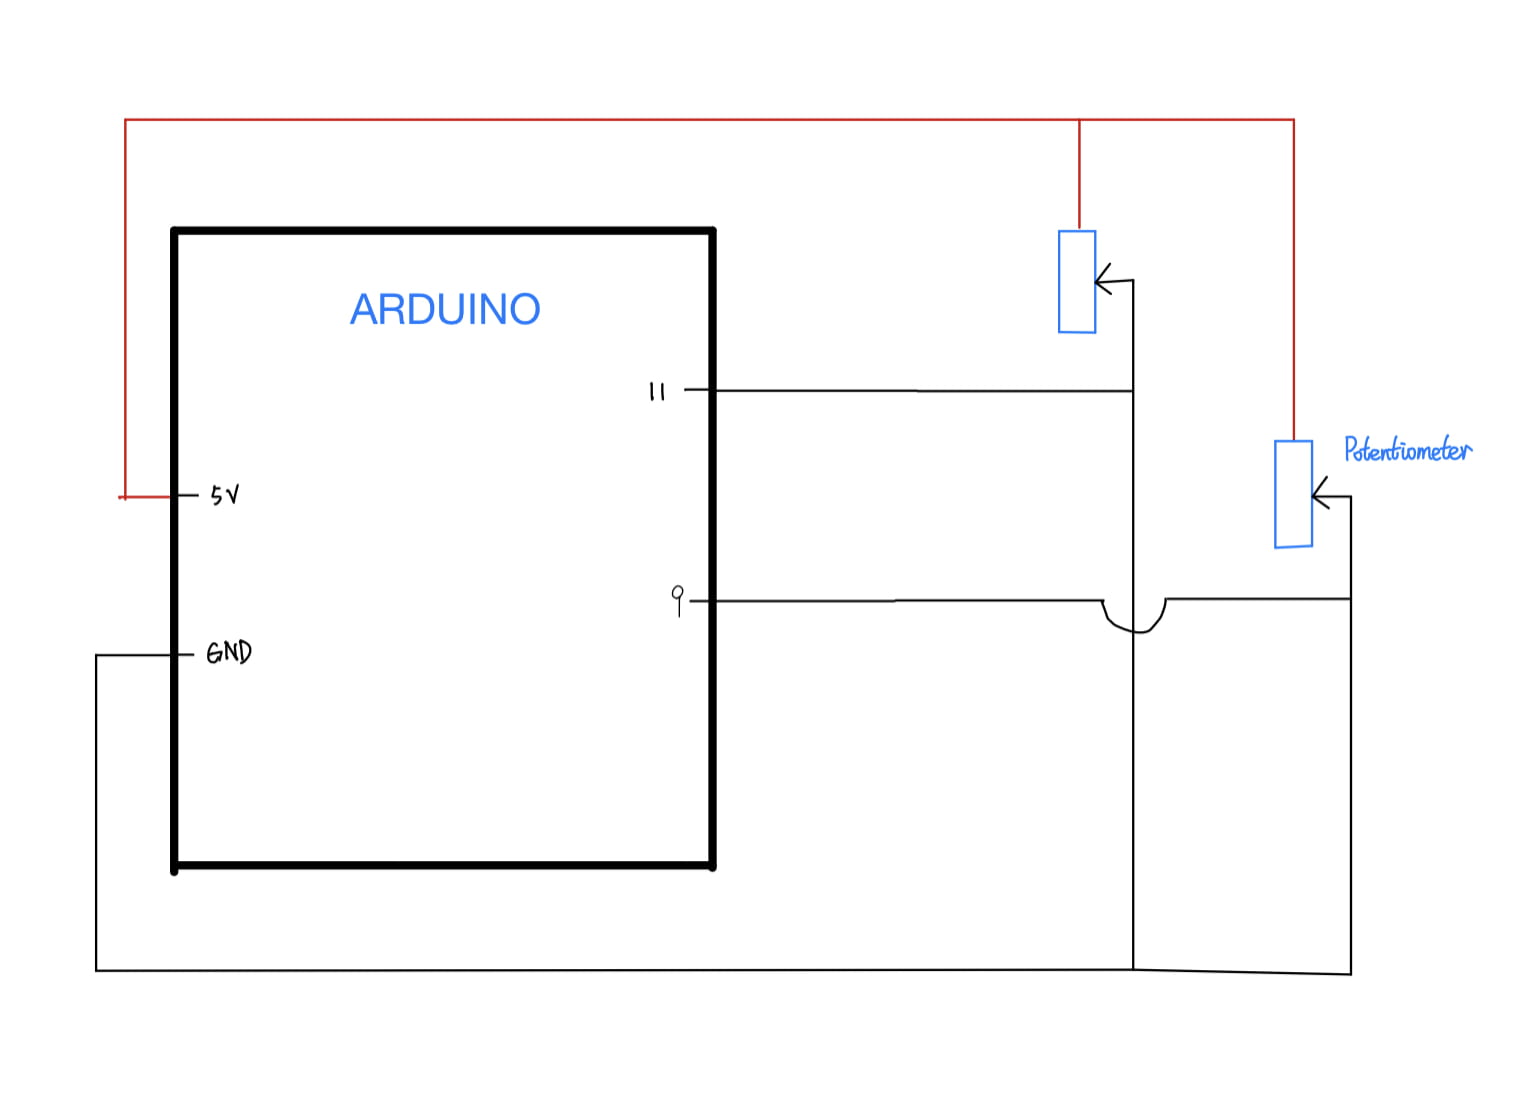
Exercise 1: Make a Processing Etch A Sketch

For this exercise, I used two potentiometers to control the position of the pen on processing. The Arduino could read the data from potentiometers and send them to the processing.

The interaction in this exercise is pretty intuitive that the user can interact and control the pen by switching the potentiometers.


Exercise 2: Make a musical instrument with Arduino

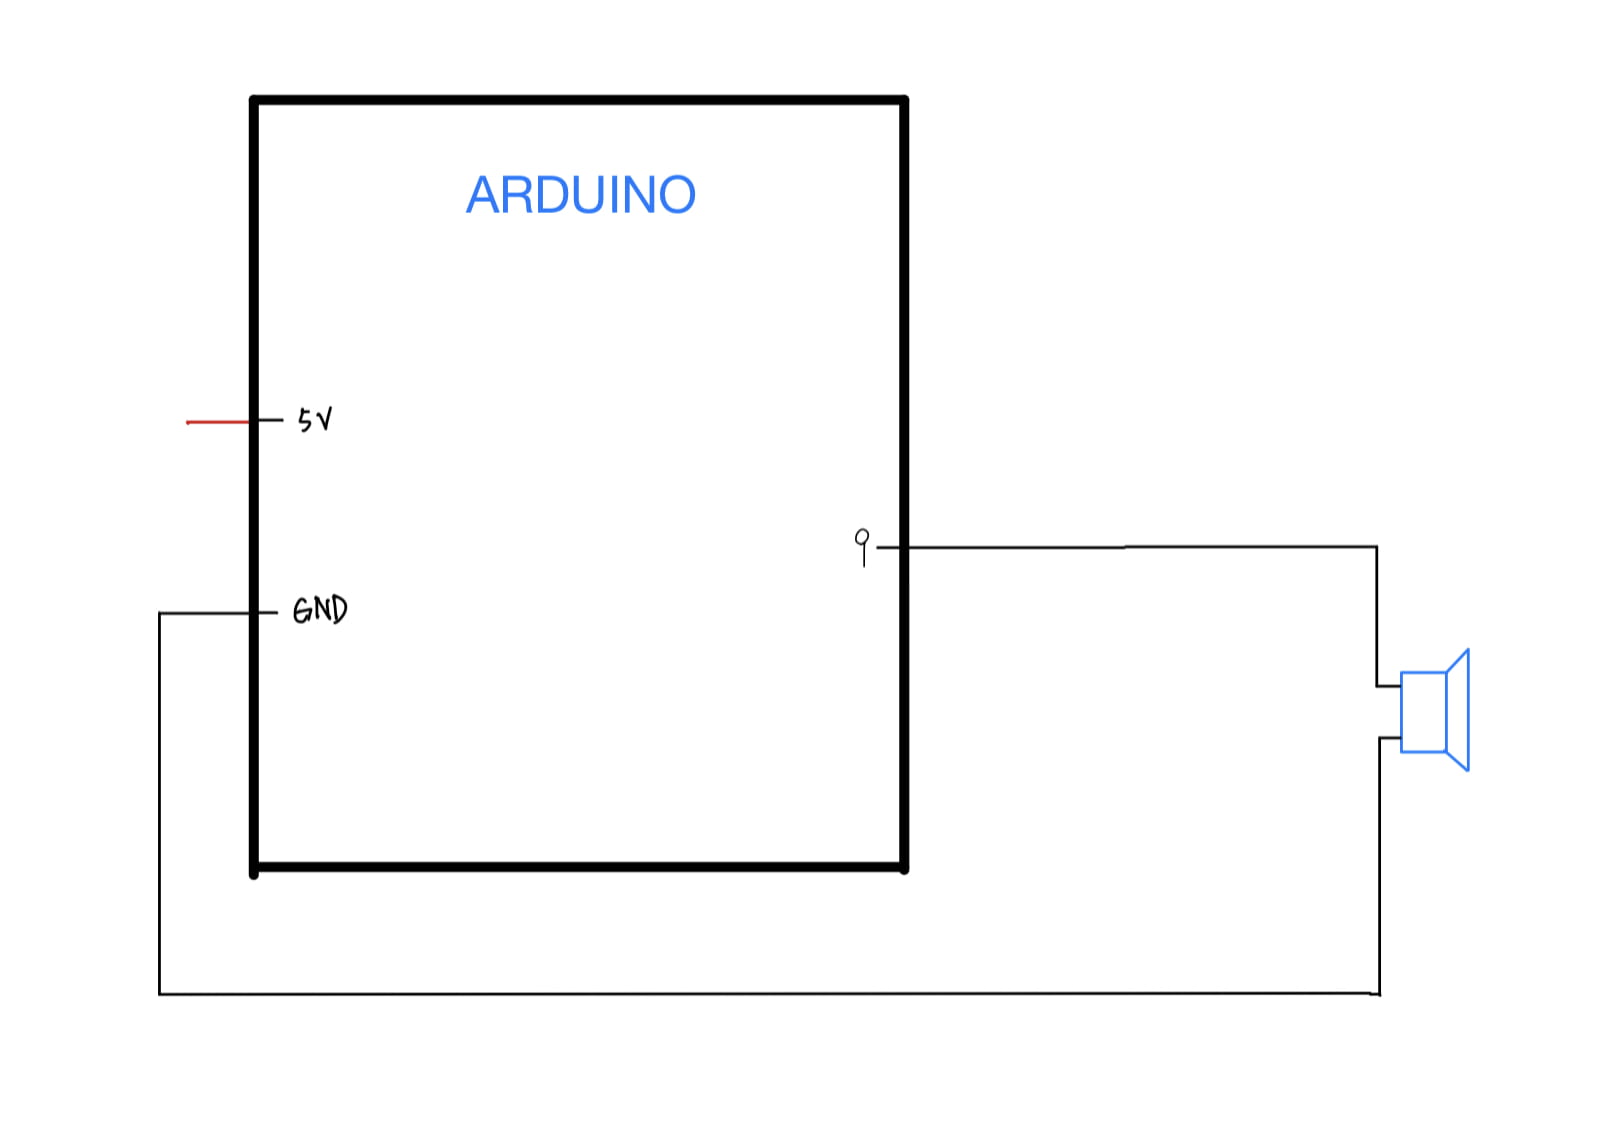
In this exercise, the buzzer is controlled by the position of the mouse in the processing. The circuit building part isn’t that hard, all I have to do is to connect the buzzer to the Arduino. For the coding part, I struggled sometime trying to figure out how the duration variable of the buzzer works. Finally, I found out one way that only when pressing the mouse would the buzzer work, in this way, the buzzer can show both the frequency and the duration. So, I passed the third  variable to the Arduino to show whether the mouse is pressed.

The interaction in this exercise is similar to exercise 1, that user’s interaction is directed showed by the sound of the buzzer.

Homework  Documentations

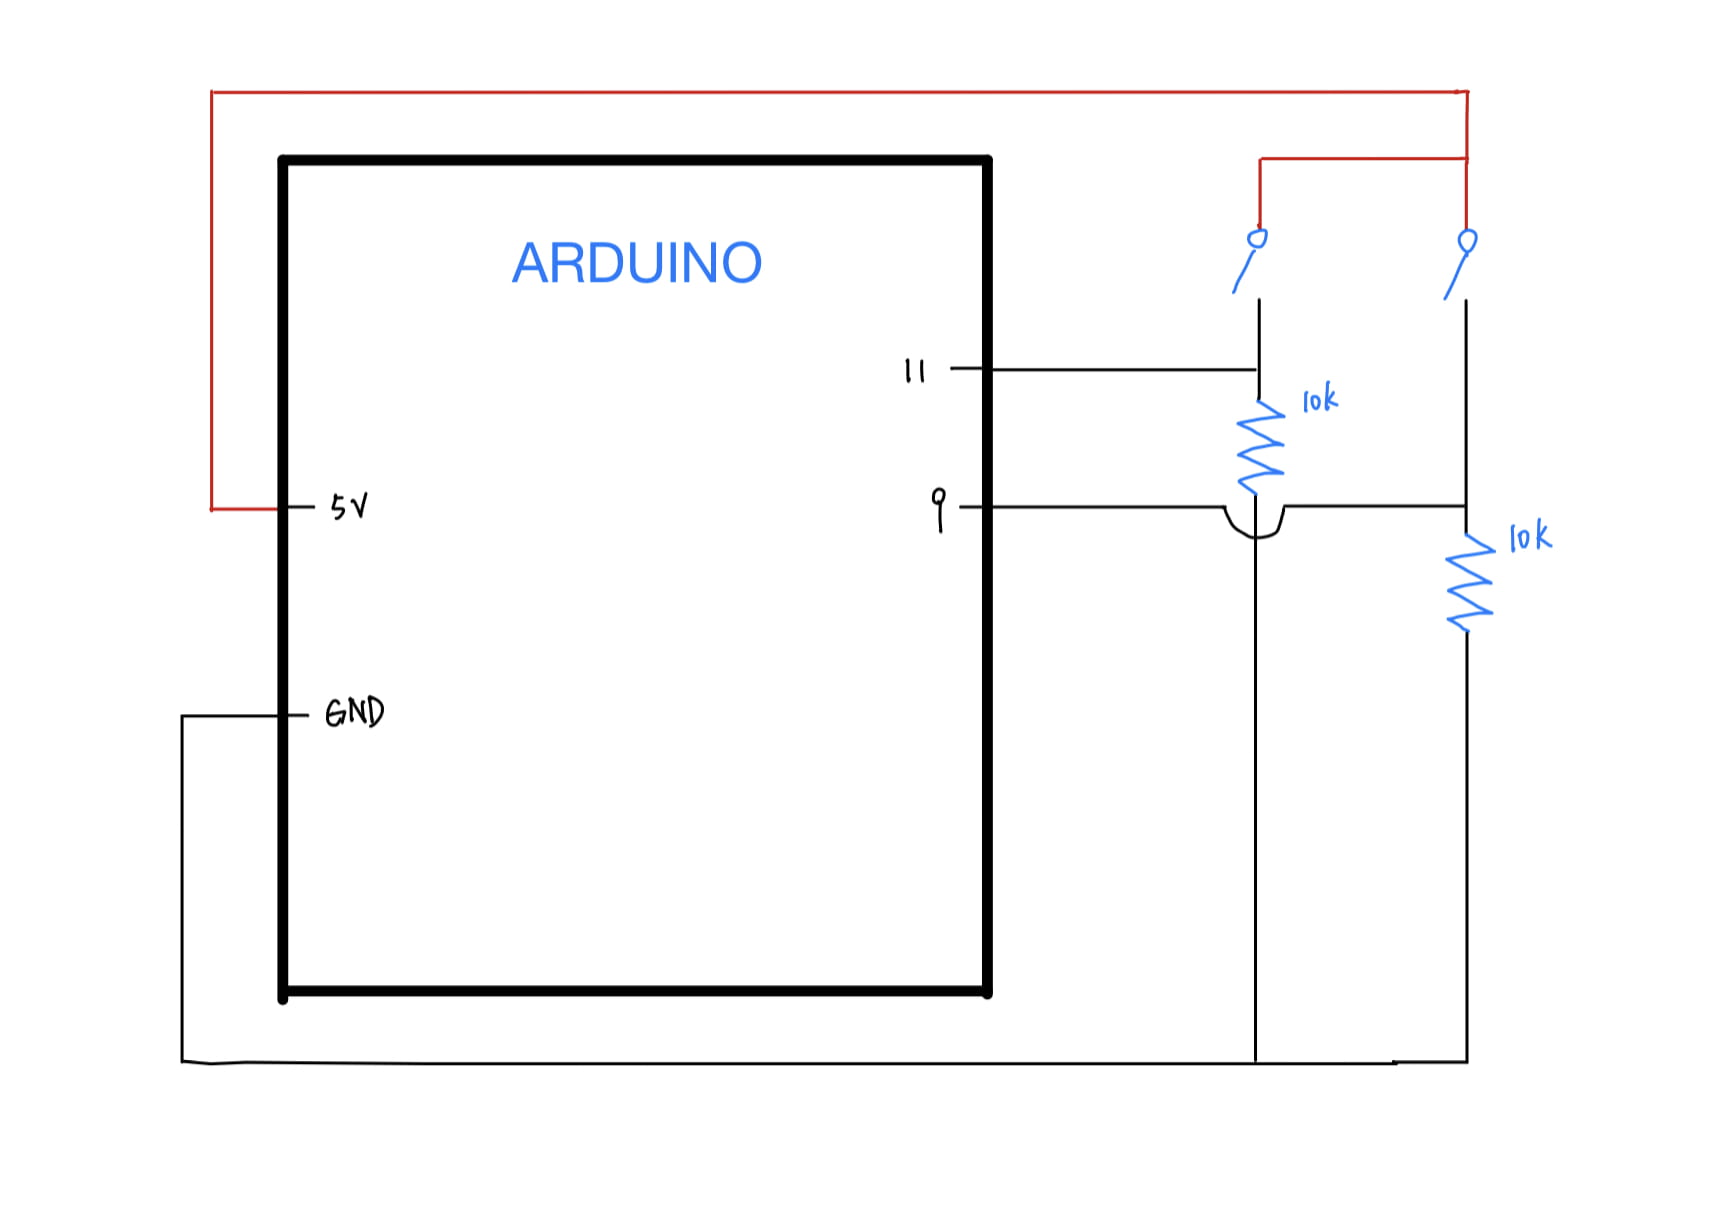
For the homework, since the codes for the star shape as well as the rotating codes are given to us, the processing part code isn’t that hard. For the Arduino part, the difficult part is to detect whether the button is pressed, and how should the press of button operation being illustrated in integer variables. I used HIGH and several if statements to accomplish that. Also, one difficulty I met was how to connect the buttons to the Arduino, I checked the documentations before to help me build the circuits of buttons and resistors.

For the Interaction, by pressing the button, the star would show up or disappear. The interaction here is pretty simple and easy.

Below are the long codes:

Exercise 1:

void setup() {
  Serial.begin(9600);
}

void loop() {
  int sensor1 = analogRead(A0);
  int sensor2 = analogRead(A1);

  Serial.print(sensor1);
  Serial.print(",");
  Serial.print(sensor2);
  Serial.println();

  delay(100);
}

import processing.serial.*;

float x;
float y;
float px;
float py;

String myString = null;
Serial myPort;

int NUM_OF_VALUES = 2;
int[] sensorValues; 

void setup() {
  size(600, 600);
  background(255);
  setupSerial();
}

void draw() {
  px = sensorValues[0];
  py = sensorValues[1];
  updateSerial();
  x = sensorValues[0];
  y = sensorValues[1];
  printArray(sensorValues);
  
  line(px, py, x, y);
}

void setupSerial() {
  printArray(Serial.list());
  myPort = new Serial(this, Serial.list()[1], 9600);
  myPort.clear();
  myString = myPort.readStringUntil( 10 );
  myString = null;
  sensorValues = new int[NUM_OF_VALUES];
}

void updateSerial() {
  while (myPort.available() > 0) {
    myString = myPort.readStringUntil( 10 );
    if (myString != null) {
      String[] serialInArray = split(trim(myString), ",");
      if (serialInArray.length == NUM_OF_VALUES) {
        for (int i=0; i<serialInArray.length; i++) {
          sensorValues[i] = int(serialInArray[i]);
        }
      }
    }
  }
}

Exercise 2:

#define NUM_OF_VALUES 3

int tempValue = 0;
int valueIndex = 0;
float fre ;
float dur ;
int pin = 9;

int values[NUM_OF_VALUES];


void setup(){
  Serial.begin(9600);
  pinMode(pin, OUTPUT);
}

void loop() {
  getSerialData();
  fre = map (values[0], 0, 500, 0, 3000);
   
  if (values[2] == 1){
     tone(pin, fre, values[1]);
   }
}
    

void getSerialData() {
  if (Serial.available()) {
    char c = Serial.read();
    switch (c) {
      case '0'...'9':
        tempValue = tempValue * 10 + c - '0';
        break;
      case ',':
        values[valueIndex] = tempValue;
        tempValue = 0;
        valueIndex++;
        break;
      case 'n':
        values[valueIndex] = tempValue;
        tempValue = 0;
        valueIndex = 0;
        break;
        for (int i = 0; i < NUM_OF_VALUES; i++) {
          Serial.print(values[i]);
          if (i < NUM_OF_VALUES - 1) {
            Serial.print(',');
          }
          else {
            Serial.println();
          }
        }
        break;
    }
  }
}

import processing.serial.*;

int NUM_OF_VALUES = 3;

Serial myPort;
String myString;

int values[] = new int[NUM_OF_VALUES];

void setup() {
  size(500, 500);
  background(255);

  printArray(Serial.list());
  myPort = new Serial(this, Serial.list()[1], 9600);
  myPort.clear();
  myString = myPort.readStringUntil( 10 );
  myString = null;
}

void draw() {
  background(255);

  values[0] = mouseX;
  values[1] = mouseY;
  if (mousePressed) {
    values[2] = 1;
  }else{
    values[2] = 0;
  }
  line(pmouseX, pmouseY, mouseX, mouseY);

  sendSerialData();
  println(values);
}

void sendSerialData() {
  String data = "";
  for (int i=0; i<values.length; i++) {
    data += values[i];
    if (i < values.length-1) {
      data += ",";
    } 
    else {
      data += "n";
    }
  }
  myPort.write(data);
}


void echoSerialData(int frequency) {
  if (frameCount % frequency == 0) myPort.write('e');

  String incomingBytes = "";
  while (myPort.available() > 0) {
    incomingBytes += char(myPort.read());
  }
  print( incomingBytes );
}

Homework:

int button1;
int button2;
int prebutton1 = LOW;
int prebutton2 = LOW;
int values1;
int values2;

void setup() {
  Serial.begin(9600);
  pinMode(9, INPUT);
  pinMode(11, INPUT);
}

void loop() {
  int button1 = digitalRead(9);
  int button2 = digitalRead(11);
  if (button1 == HIGH) {
    if (button1 != prebutton1){
      if (values1 == 1){
        values1 = 0;
      }else{
        values1 = 1;
      }
     }
    }
    prebutton1 = button1;
    
    if (button2 == HIGH) {
    if (button2 != prebutton2){
      if (values2 == 1){
        values2 = 0;
      }else{
        values2 = 1;
      }
     }
    }
  prebutton2 = button2;
    
  Serial.print(values1);
  Serial.print(",");
  Serial.print(values2);
  Serial.println();

  delay(100);
}

import processing.serial.*;

float x;
float y;

String myString = null;
Serial myPort;


int NUM_OF_VALUES = 2;
int[] sensorValues;


void setup() {
  size(600, 600);
  background(0);
  setupSerial();
}

void draw() {
  updateSerial();
  printArray(sensorValues);

  background(0);
  showImage();
}

void setupSerial() {
  printArray(Serial.list());
  myPort = new Serial(this, Serial.list()[1], 9600);
  myPort.clear();
  myString = myPort.readStringUntil( 10 );
  myString = null;
  sensorValues = new int[NUM_OF_VALUES];
}

void updateSerial() {
  while (myPort.available() > 0) {
    myString = myPort.readStringUntil( 10 );
    if (myString != null) {
      String[] serialInArray = split(trim(myString), ",");
      if (serialInArray.length == NUM_OF_VALUES) {
        for (int i=0; i<serialInArray.length; i++) {
          sensorValues[i] = int(serialInArray[i]);
        }
      }
    }
  }
}

void star(float x, float y, float radius1, float radius2, int npoints) {
  float angle = TWO_PI / npoints;
  float halfAngle = angle/2.0;
  beginShape();
  for (float a = 0; a < TWO_PI; a += angle) {
    float sx = x + cos(a) * radius2;
    float sy = y + sin(a) * radius2;
    vertex(sx, sy);
    sx = x + cos(a+halfAngle) * radius1;
    sy = y + sin(a+halfAngle) * radius1;
    vertex(sx, sy);
  }
  endShape(CLOSE);
}

void showImage(){
  if (sensorValues[0] == 1){
    pushMatrix();
    translate(width*0.3, height*0.3);
    rotate(frameCount / 200.0);
    star(0, 0, 30, 70, 5); 
    popMatrix();
  }
  
  if (sensorValues[1] == 1){
    pushMatrix();
    translate(width*0.7, height*0.7);
    rotate(frameCount / 100.0);
    star(0, 0, 80, 100, 40); 
    popMatrix();
  }
}

Inter Lab | Final Project Proposal

1. Noice Map

To continue my midterm project that focuses on the noise pollution, one serious problem in nowadays modern cities, processing can deal with the noise pollution in many ways. This noise map project intends to raise people’s intention of the noise pollution problem by alerting the audience the noise around them.

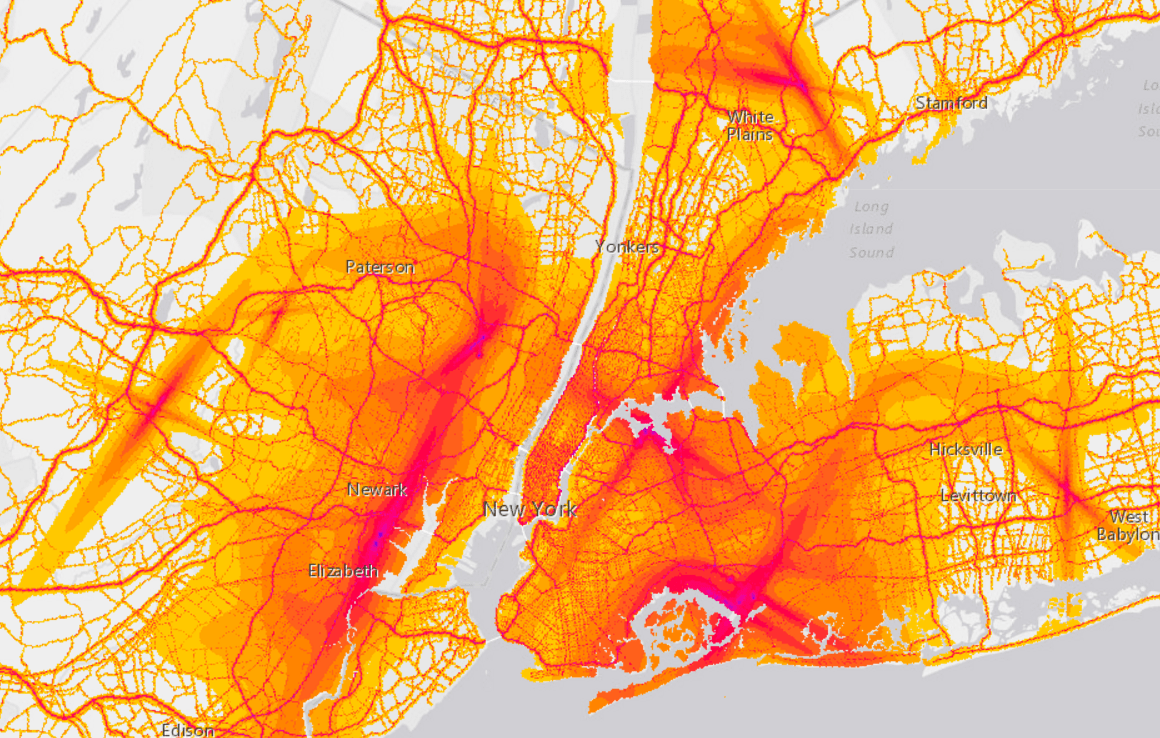
The noise map is a graphic representation of the sound level distribution in a certain area.

Bureau of Transportation Statistics/Screenshot by NPR                   

With processing, the noice map can be something more than a simple map with different colors, more graphs and animations can be added to it. Using sensors like sound sensor or loudness sensor, the Arduino can detect the noise level in a certain area. In this way, with realtime data, the processing can produce one type of new noise map with animations showing the realtime changes of the noise level. 

Potential Audience: People who are suffering from the noise pollution and whoever is concerned with this serious social problem.

Limits and Difficulties: To detect the noise level in one area, multiple sensors might be needed. And the project might can’t adapt to different environment easily since sensors need to be relocated and the map also needs to alter.

2. Dancing Song

This project is about combining people’s movements, music and image together. With the different movements of the user, such as waving hands, walking around, different patterns of sound would be played. As the user moves around one certain area, part of his image would be shown on the screen. The more user moves, the more parts of the full image would appear. To get the whole image, the user has to play a piece of music using his/her own body.

This project is inspired by the phenomenon that nowadays many students and office workers would sit at their desks all day long, with headphones on and not having exercise at all. The interaction of this project could tell users to enhance exercise. Only by having enough exercise, the user can enjoy the music, which is created and performed by themselves.

Potential Audience: Students, office workers and people who stay indoor without enough exercise.

Limits and Difficulties: It would be hard to detect the different movements of the user using the Arduino sensors, those sensors might can’t precisely detect the user’s acts. Also, the amounts of music pieces, like sounds from different instruments are limited. The processing might use receive sounds from the outside in realtime. But the music produced with such might not be that fair-sounding.

3. Singing Weather

Inspired by the Weather Thingy by Adrien Kaeser (discussed in the final project research post). That is an interactive project which can produce with data come from realtime weather. The music would alter with the changing of the wind and rain. By shifting the input and output, here emerges a new interactive project that can detect the music and produce the corresponding weather. This project intends to alert people of the weather changes all around the world.

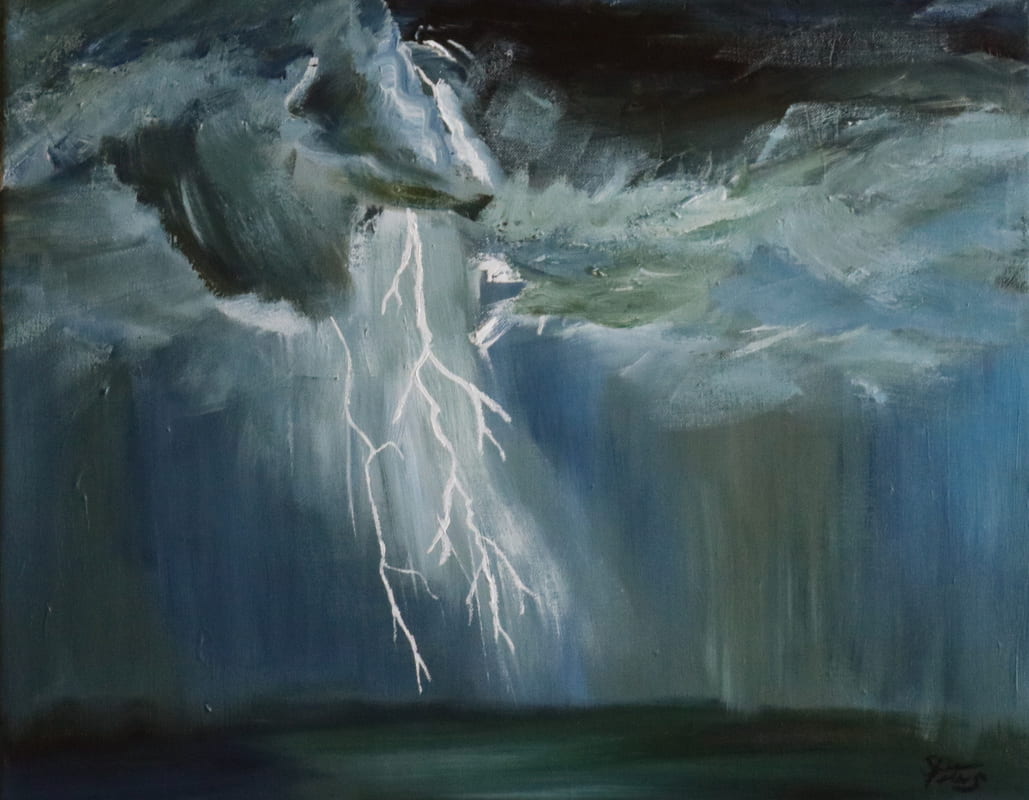
By detecting the beats, rhythm and other features of the music, the Arduino would input certain data to the processing, where the weather on the screen would alter according to changes in the music. With passionate music, there could have extreme weathers, and when the music is slow and quiet, the weather would also clam down to peace.

Nature’s symphony. Acrylic.

However, as the time goes on, the weather presented with be more severe even the music doesn’t change, indicating the weather changes now happening as more extreme weather takes place nowadays.

Potential Audience: People who concerns with the global weather changes as well as people who are fond of music and sound visualization.

Work Cited

Visnjic, Filip. “Weather Thingy – Real Time Climate Sound Controller”. Creativeapplications.Net, 2018, https://www.creativeapplications.net/sound/weather-thingy-real-time-climate-sound-controller/.

Inter Lab | Recitation 7

Processing Documentations

In this recitation, I created a hexagram, looks like a snowflake, as the basic graph.  According to the instructions, I used several different arrays to store positions, colors, speed and size. After displaying the 100 shapes on the screen, I added movements just like in the previous class, the snowflakes would move randomly and bounce back once they touch the bound. I also added two keyboard functions such that when pressing ‘c’, all the snowflakes would change color randomly. And when pressing UP and DOWN, the size of snowflakes would change within a certain range.

int n = 100;
float s3 = sqrt(3);
float x[] = new float [n];
float y[] = new float [n];
float xs[] = new float [n];
float ys[] = new float [n];
float s[] = new float [n];
color ct[] = new color [n];
color cc[] = new color [n];

void setup(){
  size(600, 600);
  background(255);
  for (int i = 0; i < 100; i ++){
    x[i] = random(width);
    y[i] = random(height);
    s[i] = 10;
    xs[i] = random(-1, 1);
    ys[i] = random(-1, 1);
    ct[i] = color(random(255), random(255), random(255), 50);
    cc[i] = color(random(255), random(255), random(255), 50);
  }
}

void draw(){
    background(255);
    for (int i = 0; i < 100; i ++){
      if (x[i] <= 0 || x[i] >= width){
        xs[i] *= -1;
      }
      if (y[i] <= 0 || y[i] >= width){
        ys[i] *= -1;
      }
     x[i] += xs[i];
     y[i] += ys[i];
    shape(i);
  }
}

void shape(int i){
  fill(ct[i]);
  triangle(x[i], y[i]-2*s3*s[i]/3, x[i]-s[i], y[i]+s3 * s[i] /3, x[i] + s[i], y[i] + s3 * s[i] /3);
  triangle(x[i] - s[i], y[i] - s3*s[i]/3, x[i] + s[i], y[i] - s3*s[i]/3, x[i], y[i] + 2*s3*s[i]/3);
  fill(cc[i]);
  circle(x[i] , y[i], 2*s[i]/s3);
}

void keyPressed(){
  if (key == 'c'){
    for (int i = 0; i < 100; i ++){
     ct[i] = color(random(255), random(255), random(255), 50);
     cc[i] = color(random(255), random(255), random(255), 50);
     }
  }
  if (key == CODED){
    if (keyCode == UP){
      for (int i = 0; i < 100; i ++){
        if (s[i] < 50){
          s[i] ++;
        }
      }
    }else if (keyCode == DOWN){
      for (int i = 0; i < 100; i ++){
        if (s[i] > 10){
          s[i] --;
        }
      }
    }
  }
}

For the additional homework, I first tried to code it by myself. I finished part of the homework as mapping the different dots and having them changing size and position. But it turns out that my code doesn’t present the animation in the exact way of the example, and the animation can’t deal with dots too close to the mouse. 

Thus, I attended the workshop for this homework. Im the workshop, I learned about the min, max function along with other codes that helped a lot in polishing the animation. I also used functions to rewrite the code provided in the workshop in my own style.

int row = 25;
int column = 25;
int total = row * column;
int padding = 140;
float[] R = new float [total];
float[] x = new float [total];
float[] y = new float [total];
float[] xs = new float [total];
float[] ys = new float [total];
float[] xn = new float [total];
float[] yn = new float [total];
float[] s = new float [total];

void setup(){
  size(800, 800);
  background(255);
  for (int j = 0; j < row; j++){
    for (int i = 0; i < column; i++){
      int index = i + j * column;
      x[index] = map(i, 0,  column - 1, padding, width - padding);
      y[index] = map(j, 0,  row - 1, padding, width - padding);
      xs[index] = map(i, 0,  column - 1, padding, width - padding);
      ys[index] = map(j, 0,  row - 1, padding, width - padding);
      s[index] = 1;
    }
  }
}

void draw(){
  background(255);
  for ( int i = 0; i < total; i ++){
    
    calculatePosition(i);
    
    //changePosition(i);
    
    changePositionWithLerp(i);
    
    changeSize(i);
    
    drawCircle(i);
  }
}

void drawCircle(int i){
  pushMatrix();
  pushStyle();
  translate(xs[i], ys[i]);
  scale(s[i]);
  fill(0);
  noStroke();
  circle(0, 0, 10);
  popMatrix();
  popStyle();
}

void calculatePosition(int i){
  R[i] = dist(mouseX, mouseY, x[i], y[i]);
  R[i] = max(R[i], 0,01);
}

void changeSize(int i){
  s[i] = 100 / R[i];
  s[i] = max(s[i], 0.4);
  s[i] = min(s[i], 2);
}

void changePosition(int i){
  xs[i] =x[i] - (35 / R[i]) * (mouseX - x[i]);
  ys[i] =y[i] - (35 / R[i]) * (mouseY - y[i]);
}

void changePositionWithLerp(int i){
  xn[i] =x[i] - (35 / R[i]) * (mouseX - x[i]);
  yn[i] =y[i] - (35 / R[i]) * (mouseY - y[i]);
  xs[i] = lerp(xs[i], xn[i], 0.05);
  ys[i] = lerp(ys[i], yn[i], 0.05); 
}

Answers to the Questions

1. In your own words, please explain the difference between having your for loop from Step 2 in setup() as opposed to in draw().

In the setup(), the code provides one image with 100 random snowflakes on the screen. It is because that code in the setup() would be processed only once.

While when putting the loop in the draw(), the code produces an animation with snowflakes appearing with different positions and colors all the time on the screen. Since the processing will run codes in the draw() all the time, the loop would assign different positions and colors to dots every time draw() is processed. So, the snowflakes are having random data all the time and shown as strange animations.

2.What is the benefit of using arrays? How might you use arrays in a potential project?

By using arrays in processing, I can deal with a large amount of data at same time without manually assign data to every variable. Arrays make it convenient to copy and present similar shapes with slight differences.

For the project, I might face the situation where I have to input a large amount of information or assign various of data to different variables for a visual presentation. In these cases, using arrays can greatly reduce my time in coding as well as  make the codes tidy and easy to read.

Inter Lab | Final Project Research

Two Interactive Projects

Weather Thingy

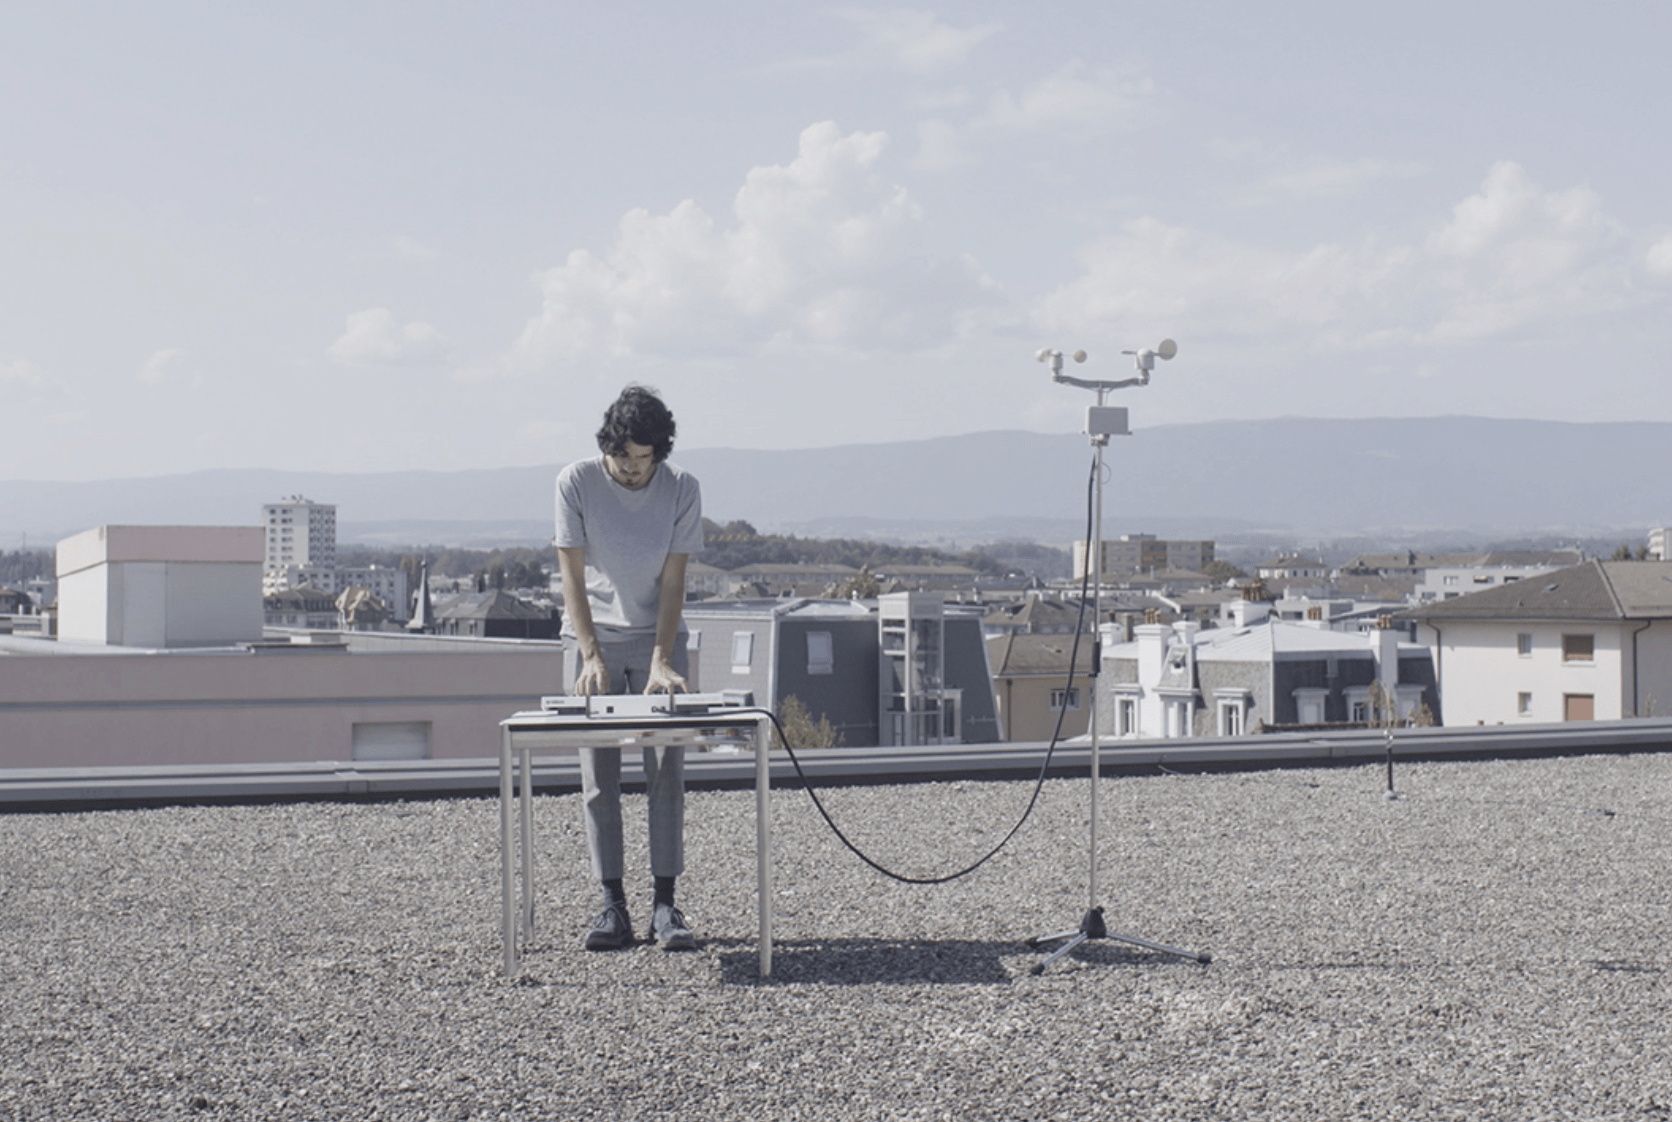
This interactive project by Adrien Kaeser is about playing music using real time climate-related events, the climate changes would modify the settings of musical instruments. This device contains a weather station that has a rain gauge, a wind vane and an anemometer. The user can control a brightness sensor as well as buttons to modify the value received from the different sensors.

I regard this as a great interactive project because it contains not only the interaction between the user and device, but also takes the climate surrounding in to consideration. According to Ernest Edmonds, this project contains “responding” and also “influencing”, which can be canned is “Dynamic-Interactive (Influencing) “. With the introduce of the climate, the project widens the range of interaction it provides. The Weather Thingy involves both the interaction between users and devices and the interaction between users and the whole environment.

Soundmachines

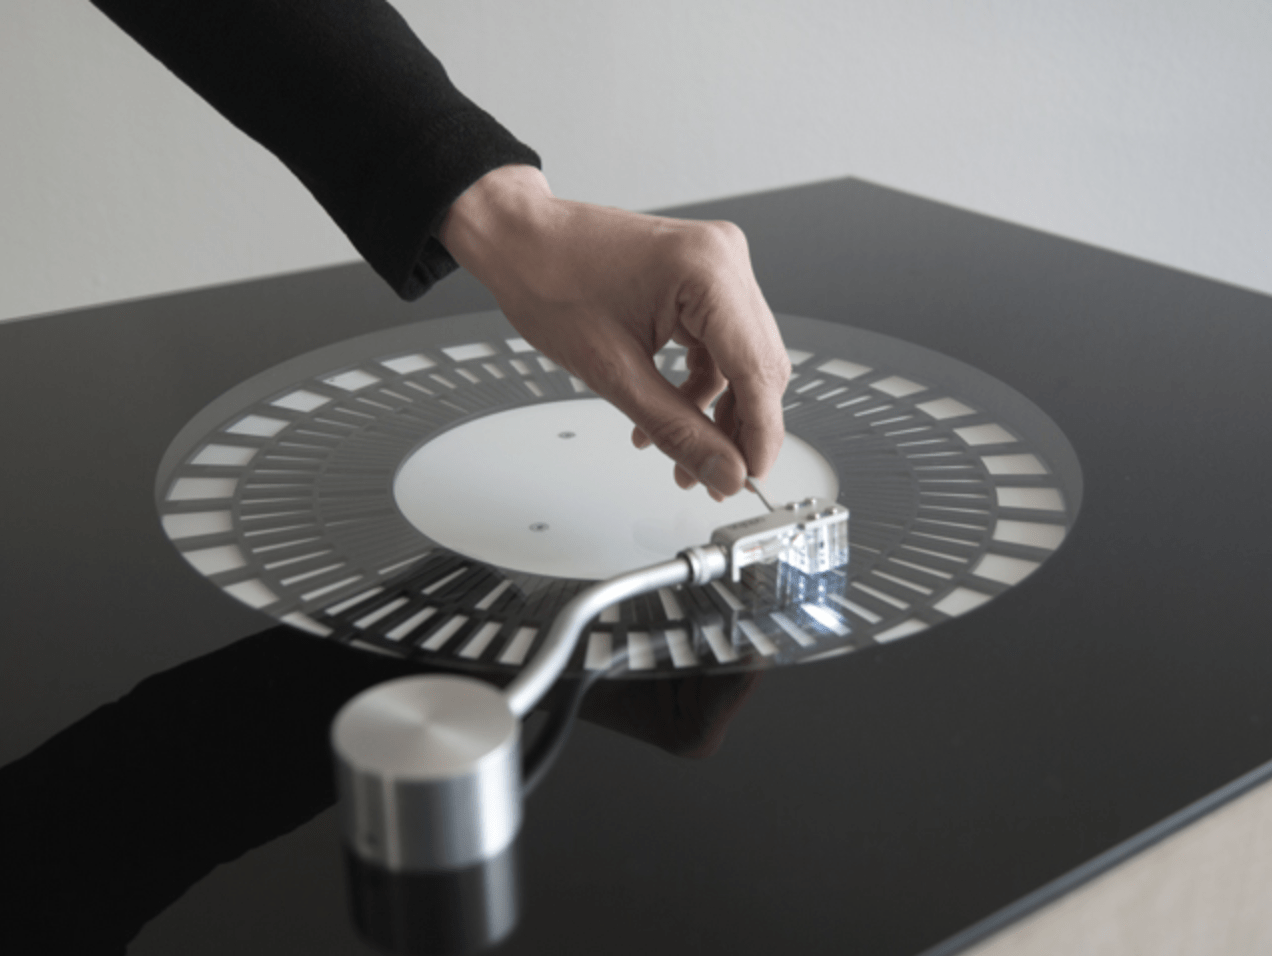
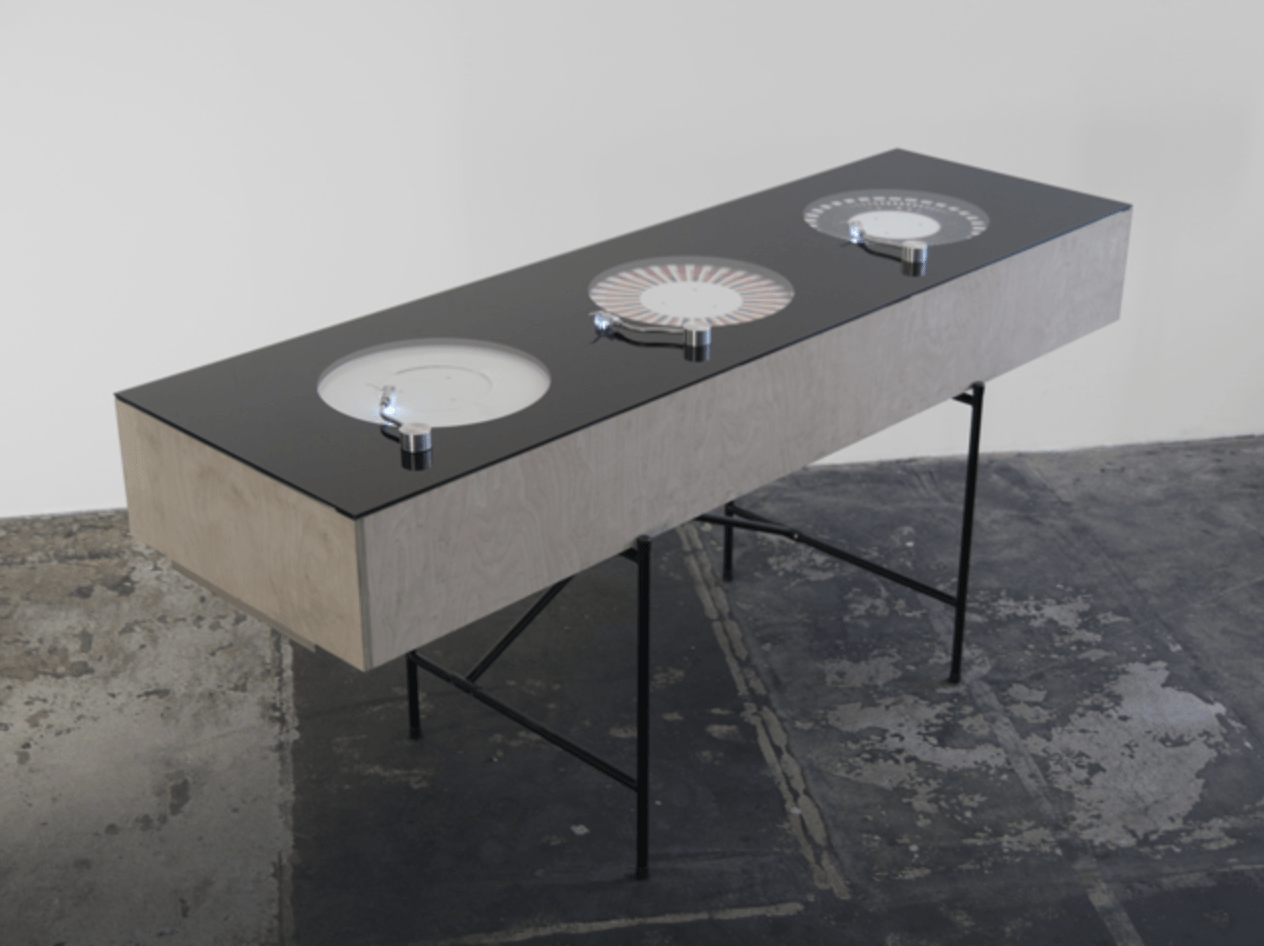
This Soundmachines is a custom-built instrument for performing electronic music by visual pattens on record-sized discs. By moving the pin into different pattens on the discs, music would changes its speed and rhythm. With several different discs at the same time, various music can be performed only by moving around the pin.

This project actually only has limit interaction with the users and audiences. Since the amount of discs and the pattens on them can’t change, the user have limited options when interacting with the device. But just as the producers said in their reflection, they intended to improve by using “easily changeable or even paintable discs”. Also they were thinking about using cameras to detect the audience and let the audience become part of the performs, too. By having such improvements, I think this Soundmachines can have further interactions with the users. If the users can make their own discs to play and the audience can involve in the music, this could also be a “Dynamic-Interactive (Influencing)” rather than only responding to the user in limited ways.

About “Interaction”

My own definition about “interaction” actually changed a lot since the beginning of the class. At first, after reading The Art of Interactive Design, my definition is about two objects having input, processing and output. But after having the group research project and the midterm project, I noticed that interaction can involve not only the user and the device, the outside environment can also be one crucial part of interaction.

This idea of having device, user and environment together goes further after I read  Art, Interaction and Engagement by Ernest Edmonds. As he mentioned different levels of interaction, from responding, varying, influencing to communicating. A lot of more are involved and taken into consideration besides the device and user. We can have the elements of time, environment and internal changes within the interaction. So now I would think interaction with a boarder range, not only the device and the user, everything else surrounding may be used as part of the interactive process.

I researched in the field of sound, since my midterm project is about sound pollution, I want to do some further research and find out whether my final project would continue focus on the sound and noice. The two projects above are both interactive, but I would think the Weather Thingy fits my definition of interaction more as it contains the environment as part of the interactive process. For the second one, the Soundmachines, this project also focuses on sound, but I would think it as restricted since the user own has limited options with the device and no surrounding element is involved. With the improvements that the producers said to make, I think this project would be more interactive and fits my definition of interaction more.

Work Cited

Crawford, Chris. The Art of Interactive Design. No Starch Press, 2002.

Edmonds, Ernest. “Art, Interaction And Engagement”. 2011 15Th International Conference On Information Visualisation, 2011. IEEE, doi:10.1109/iv.2011.73. Accessed 12 Nov 2020.

Scholz, Alexander. “Soundmachines [Arduino, Processing, Objects]”. Creativeapplications.Net, 2012, https://www.creativeapplications.net/processing/soundmachines-objects-sound/.

Visnjic, Filip. “Weather Thingy – Real Time Climate Sound Controller”. Creativeapplications.Net, 2018, https://www.creativeapplications.net/sound/weather-thingy-real-time-climate-sound-controller/.

Inter Lab | Recitation 6

Processing Documentations

In this recitation, I built on the work before, adding interactions to the work I did last recitation. With the keyboard and mouse functions learnt this week, I use these elements in the interactive animation.

 Wherever the mouse goes, rectangles with different size would appear around the mouse. And by pressing “c” on the keyboard, rectangles will have random colors. Also, the “b” can clear the whole canvas. Thus, this animation produces similar drawings as the work last week, but now users can interact and create their own drawing using mouse and keyboard.

color c;
float x;
float y;
float sx;
float sy;
void setup(){
  
  size(800, 800);
  background(255);
  rectMode(CENTER);
  noFill();
  strokeWeight(1);
}

void draw(){
  if (keyPressed && key == 'c'){
    c = color(random(255), random(255), random(255));
  }
  
  sx = (width / 100) * int(random(1, 11));
  sy = (height / 100) * int(random(1, 11));
  x = (width / 20) + (width / 10) * int(random(0, 10));
  y = (height / 20) + (height / 10) * int(random(0, 10));
  if (dist(mouseX, mouseY, x, y) <= width / 5){
    
  stroke(c);
  rect(x, y, sx, sx);
  }
}

void keyPressed(){
  if (key == 'b'){
    background(255);
  }
}

Homework Documentations

float R = width / 2.5;
float r = R / 2;
float x;
float c;
float y;
float X;
float Y;

void setup(){
  size(600, 600);
  background(255);
  strokeWeight(15);
  colorMode(HSB);
}

void draw(){
  
  background(255);
  if (R > width / 2){
    x = width / -300;
  }
  else if (R < width / 5){
    x = width / 300;
  }
  if (c >= 255){
    y = -1;
  }
  if (c <= 0){
    y = 1;
  }
  R += x;
  c += y;
  stroke(c, 255, 220);
  X = mouseX;
  Y = mouseY;
  r = R / 2;
  if (mouseX < r) {
     X = r;
  }else if ( mouseX > width - r) {
     X = width - r;
   }
  if (mouseY < r) {
     Y = r;
   }else if ( mouseY > height - r) {
     Y = height - r;
   }
   
  ellipse(X, Y, R, R);
}

In this recitation, I practiced a lot with the animation. Some functions I found especially interesting are:

mouseX  mouseY

ifkeyPressed && key == ‘c’ ){  }

colorModeHSB ),  stroke( c, 255, 220 )

Inter Lab | Recitation 5

Processing Documentations

In this recitation, I found one picture from the websites given to us.

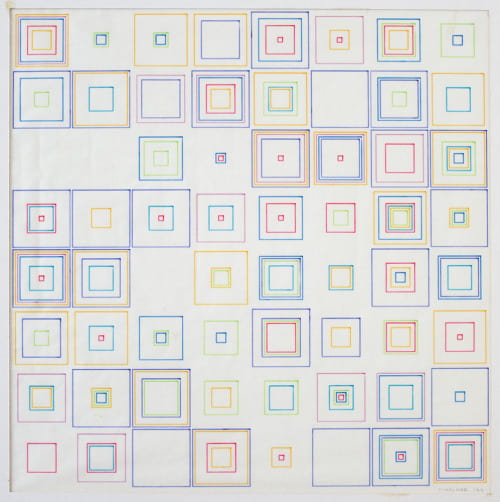
This is one picture created by Vera Molnar in 1973, using computer graphic and ink on paper. This artifact is now in Courtesy of Senior & Shopmaker Gallery in New York.

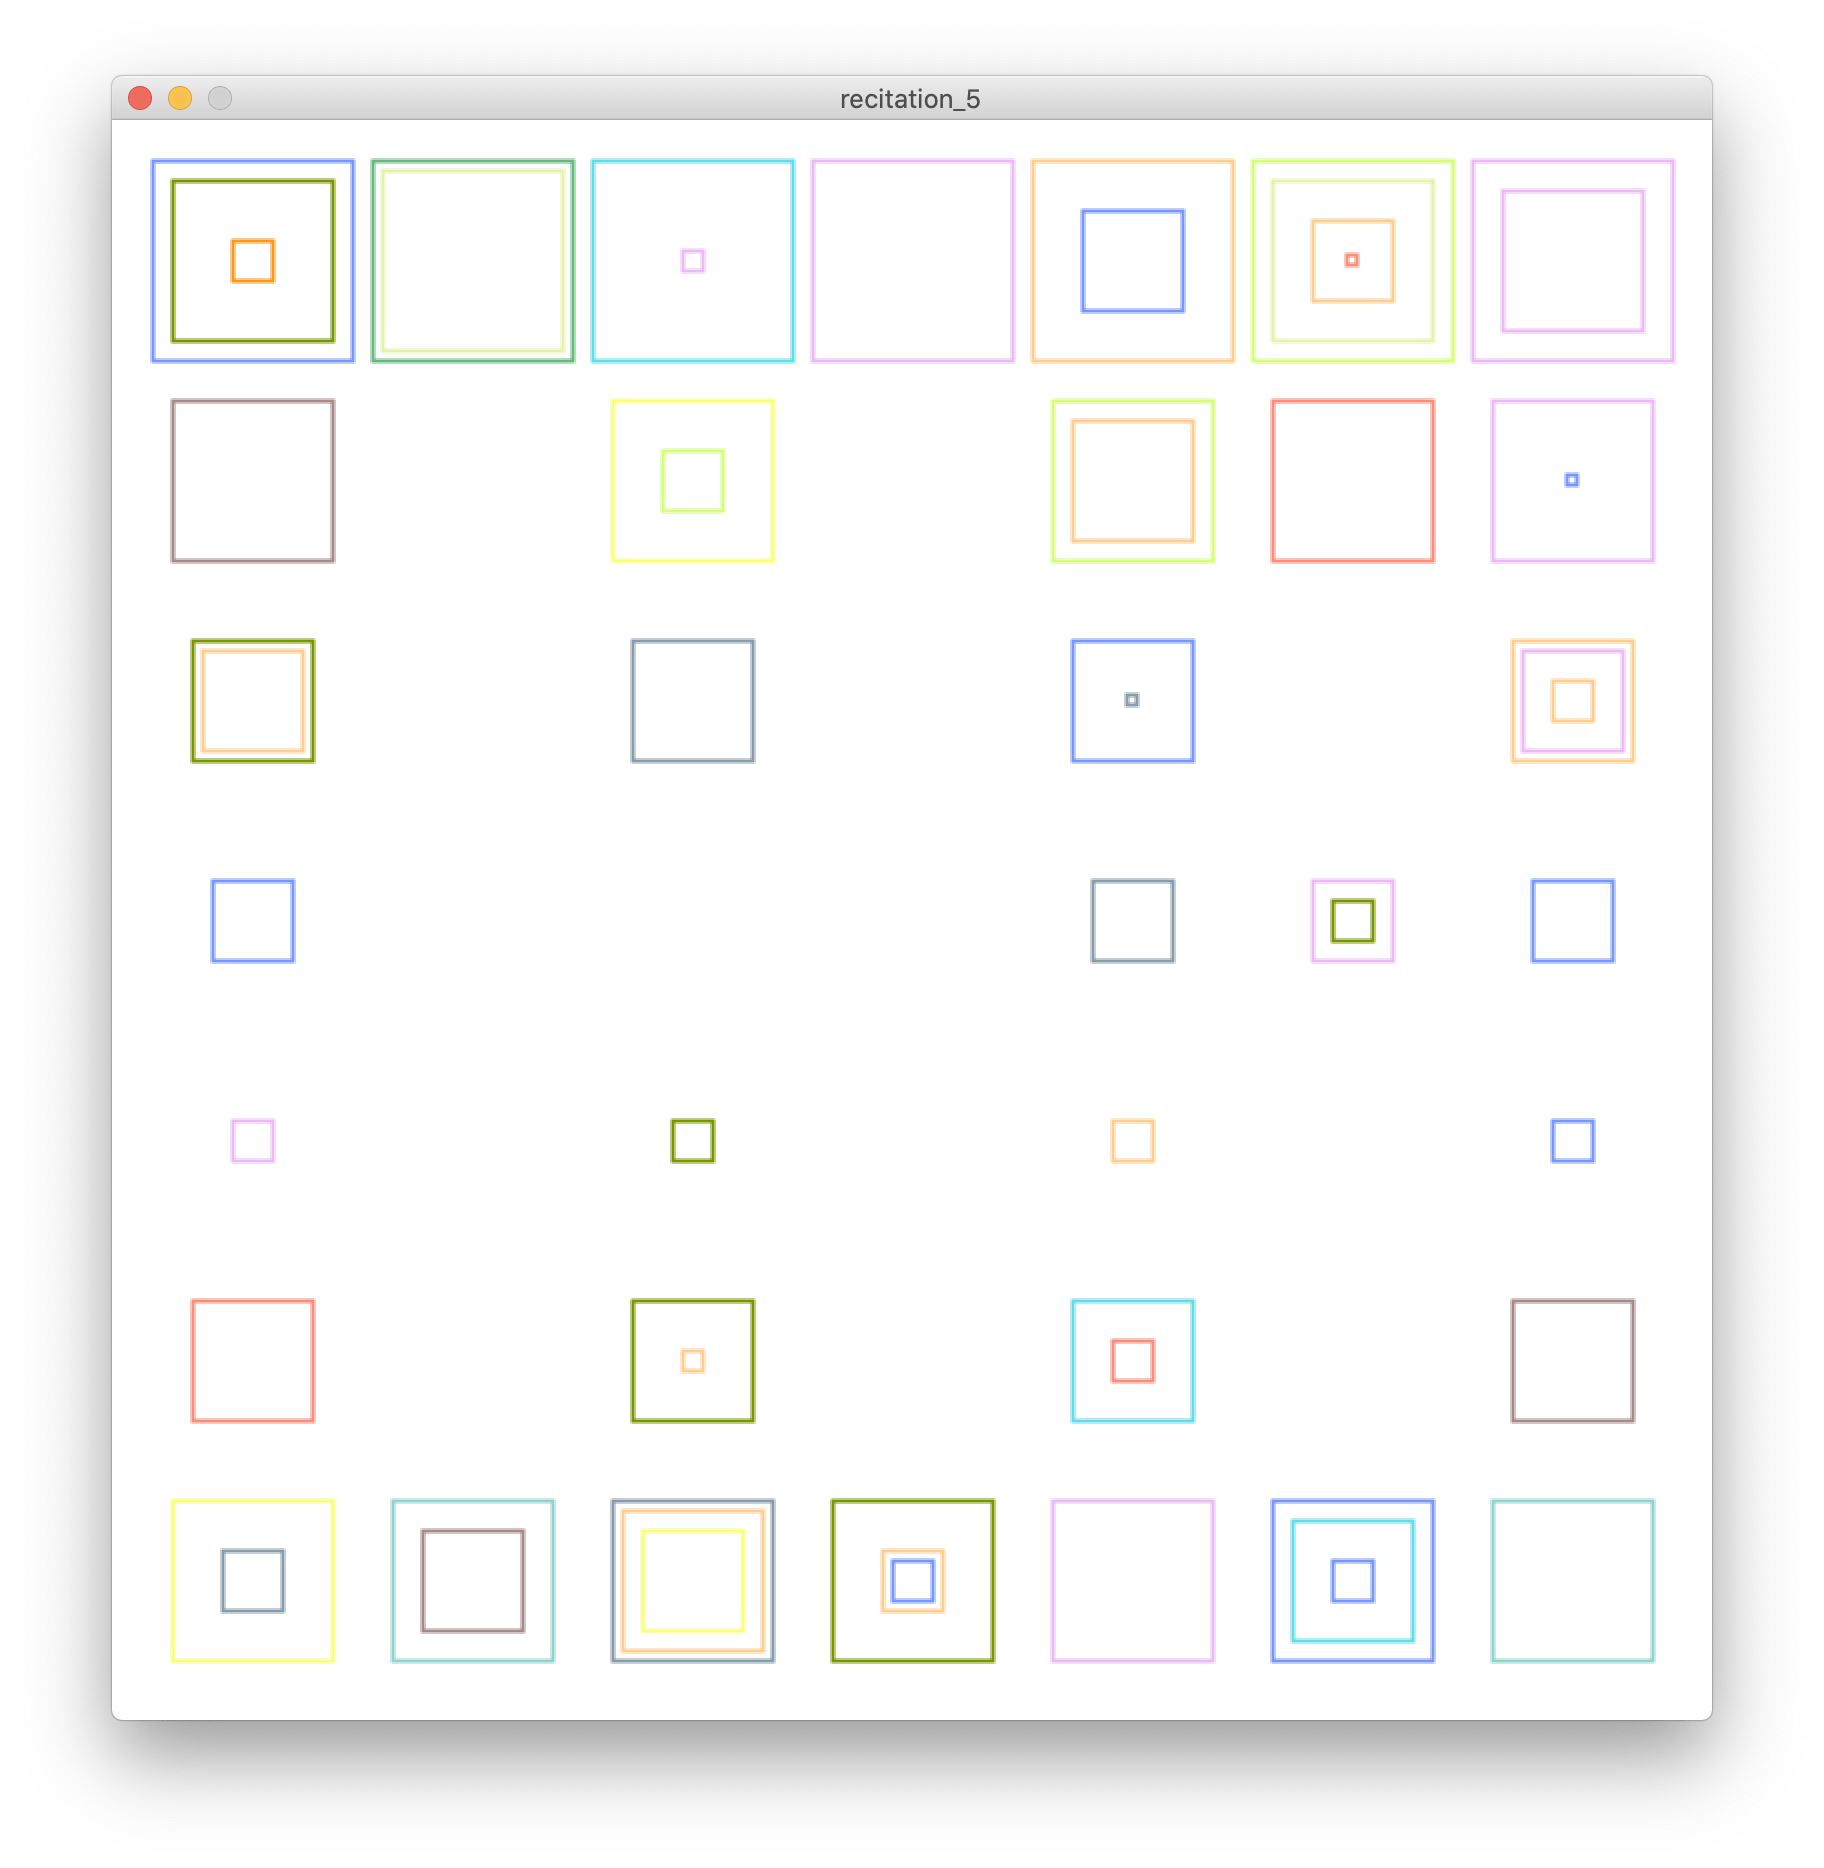
I choose this picture for it looks cool to me and I think processing is able to draw something similar. And it turns out to be an easy task but super time consuming. The code for this is too long, so I would attach it at the very bottom of this documentation.

This drawing looks similar to the original artifact, since it consists only rectangles, it’s not difficult to imitate it, however, creating the rectangles one by one has no fun at all. It took me a huge amount of time to copy each rectangles and made small changes to each of them.

So, after Tuesday’s class about the animation. I used the draw() loop to create this drawing again. Using draw() and random(), the code can do the repeating tasks for me. Only using several minutes, I wrote the new code that is a lot tidy and short, and more interesting.

Here is the code for the second drawing.

float x = 0;
float y = 0;
float size = 0;
color c;
void setup(){
  size(800, 800);
  background(255, 255, 255);
  rectMode(CENTER);
  strokeWeight(2);
  noFill();
}

void draw(){
  if (millis() > 5000) {
    noLoop();
  }
  c = color(random(0, 256), random(0, 256), random(0, 256));
  x = 70 + 110 * int(random(0, 7));
  y = 70 + 110 * int(random(0, 7));
  size = 10 * int(random(1, 11));
  stroke(c);
  rect(x, y, size, size);
}

Below is the long and boring code for the first drawing.

size(800, 800);
background(255, 255, 255);

rectMode(CENTER);
strokeWeight(2);
//1, 1
stroke(#7896FF);
rect(70, 70, 100, 100);
stroke(#789600);
rect(70, 70, 80, 80);
stroke(#FF9619);
rect(70, 70, 20, 20);
//1, 2
stroke(100, 185, 123);
rect(180, 70, 100, 100);
stroke(#E5F2AB);
rect(180, 70, 90, 90);
//1, 3
stroke(#62DCE8);
rect(290, 70, 100, 100);
stroke(#EBB9F5);
rect(290, 70, 10, 10);
//1, 4
rect(400, 70, 100, 100);
//1, 5
stroke(#FFCD90);
rect(510, 70, 100, 100);
stroke(#7896FF);
rect(510, 70, 50, 50);
//1, 6
stroke(#D4FF79);
rect(620, 70, 100, 100);
stroke(#E5F2AB);
rect(620, 70, 80, 80);
stroke(#FFCD90);
rect(620, 70, 40, 40);
stroke(#FF8B79);
rect(620, 70, 5, 5);
//1, 7
stroke(#EBB9F5);
rect(730, 70, 100, 100);
stroke(#EBB9F5);
rect(730, 70, 70, 70);

//2, 1
stroke(#A78989);
rect(70, 180, 80, 80);
//2, 3
stroke(#FAFF79);
rect(290, 180, 80, 80);
stroke(#D4FF79);
rect(290, 180, 30, 30);
//2, 5
rect(510, 180, 80, 80);
stroke(#FFCD90);
rect(510, 180, 60, 60);
//2, 6
stroke(#FF8B79);
rect(620, 180, 80, 80);
//2, 7
stroke(#EBB9F5);
rect(730, 180, 80, 80);
stroke(#7896FF);
rect(730, 180, 5, 5);

//3, 1
stroke(#789600);
rect(70, 290, 60, 60);
stroke(#FFCD90);
rect(70, 290, 50, 50);
//3, 3
stroke(#869CAA);
rect(290, 290, 60, 60);
//3, 5
stroke(#7896FF);
rect(510, 290, 60, 60);
stroke(#869CAA);
rect(510, 290, 5, 5);
//3, 7
stroke(#FFCD90);
rect(730, 290, 60, 60);
stroke(#EBB9F5);
rect(730, 290, 50, 50);
stroke(#FFCD90);
rect(730, 290, 20, 20);
//4, 1
stroke(#7896FF);
rect(70, 400, 40, 40);
//4, 5
stroke(#869CAA);
rect(510, 400, 40, 40);
//4, 6
stroke(#EBB9F5);
rect(620, 400, 40, 40);
stroke(#789600);
rect(620, 400, 20, 20);
//4, 7
stroke(#7896FF);
rect(730, 400, 40, 40);

//5, 1
stroke(#EBB9F5);
rect(70, 510, 20, 20);
//5, 3
stroke(#789600);
rect(290, 510, 20, 20);
//5, 5
stroke(#FFCD90);
rect(510, 510, 20, 20);
//5, 6
stroke(#7896FF);
rect(730, 510, 20, 20);

//6, 1
stroke(#FF8B79);
rect(70, 620, 60, 60);
//6, 3
stroke(#789600);
rect(290, 620, 60, 60);
stroke(#FFCD90);
rect(290, 620, 10, 10);
//6, 5
stroke(#62DCE8);
rect(510, 620, 60, 60);
stroke(#FF8B79);
rect(510, 620, 20, 20);
//6, 7
stroke(#A78989);
rect(730, 620, 60, 60);

//7, 1
stroke(#FAFF79);
rect(70, 730, 80, 80);
stroke(#869CAA);
rect(70, 730, 30, 30);
//7, 2
stroke(#8FD3CF);
rect(180, 730, 80, 80);
stroke(#A78989);
rect(180, 730, 50, 50);
//7, 3
stroke(#869CAA);
rect(290, 730, 80, 80);
stroke(#FFCD90);
rect(290, 730, 70, 70);
stroke(#FAFF79);
rect(290, 730, 50, 50);
//7, 4
stroke(#789600);
rect(400, 730, 80, 80);
stroke(#FFCD90);
rect(400, 730, 30, 30);
stroke(#7896FF);
rect(400, 730, 20, 20);
//7, 5
stroke(#EBB9F5);
rect(510, 730, 80, 80);
//7, 6
stroke(#7896FF);
rect(620, 730, 80, 80);
stroke(#62DCE8);
rect(620, 730, 60, 60);
stroke(#7896FF);
rect(620, 730, 20, 20);
//7, 7
stroke(#8FD3CF);
rect(730, 730, 80, 80);

Work Cited

Molnar, Vera. Carrés. 1973, https://the-adaa.tumblr.com/post/11778802063 6/vera-     molnar-early-pioneer-of-computer-art. Accessed 5 Nov 2020.

Inter Lab | Midterm Project

 Intelligent Ear Protector

—-By Alan Guo & Jieyi Wang, Instructor: Andy Garcia

Context and Significance

In the group research project, our team performed one mask that can record user’s five senses, and then project these senses to the other user so that the one can experience one period of time others had once been through. One key element I figured out during the group research project is about the concept of interaction. Previously I always think of interaction as what happens between the user and the device. But with the performance, I found out that there exists another form of interaction that the device is no longer the target, but only one tool for user to interact with the outside. With the five senses mask, the user is not only interacting with the mask he/she is on, but also the virtual environment and even the previous user that creates the certain environment.

So, for the midterm project, our term isn’t limited in the interaction only with the device itself. During our research and discussion, we found out one serious problem in our society, the sound pollution. Both Jieyi and I suffered a lot from the sound pollution, and after discussion with instructor Andy, we decided to make one product that illustrates this severe problem. Even under some circumstances our brain can help to neglect the noice around us, our ears are still exposed to the sound and being damaged.

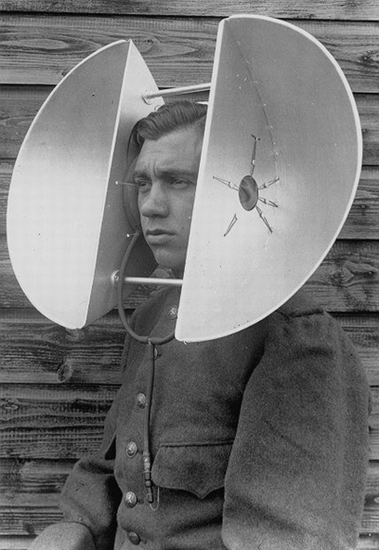
                From Reeko

We are inspired by this picture Andy showed to us. So, we decided to make something wearable that people can put on their head. Through this product, people could interact with the outside environment. We specify our target users to be those who suffer a lot from the sound pollution.

Conception and Design

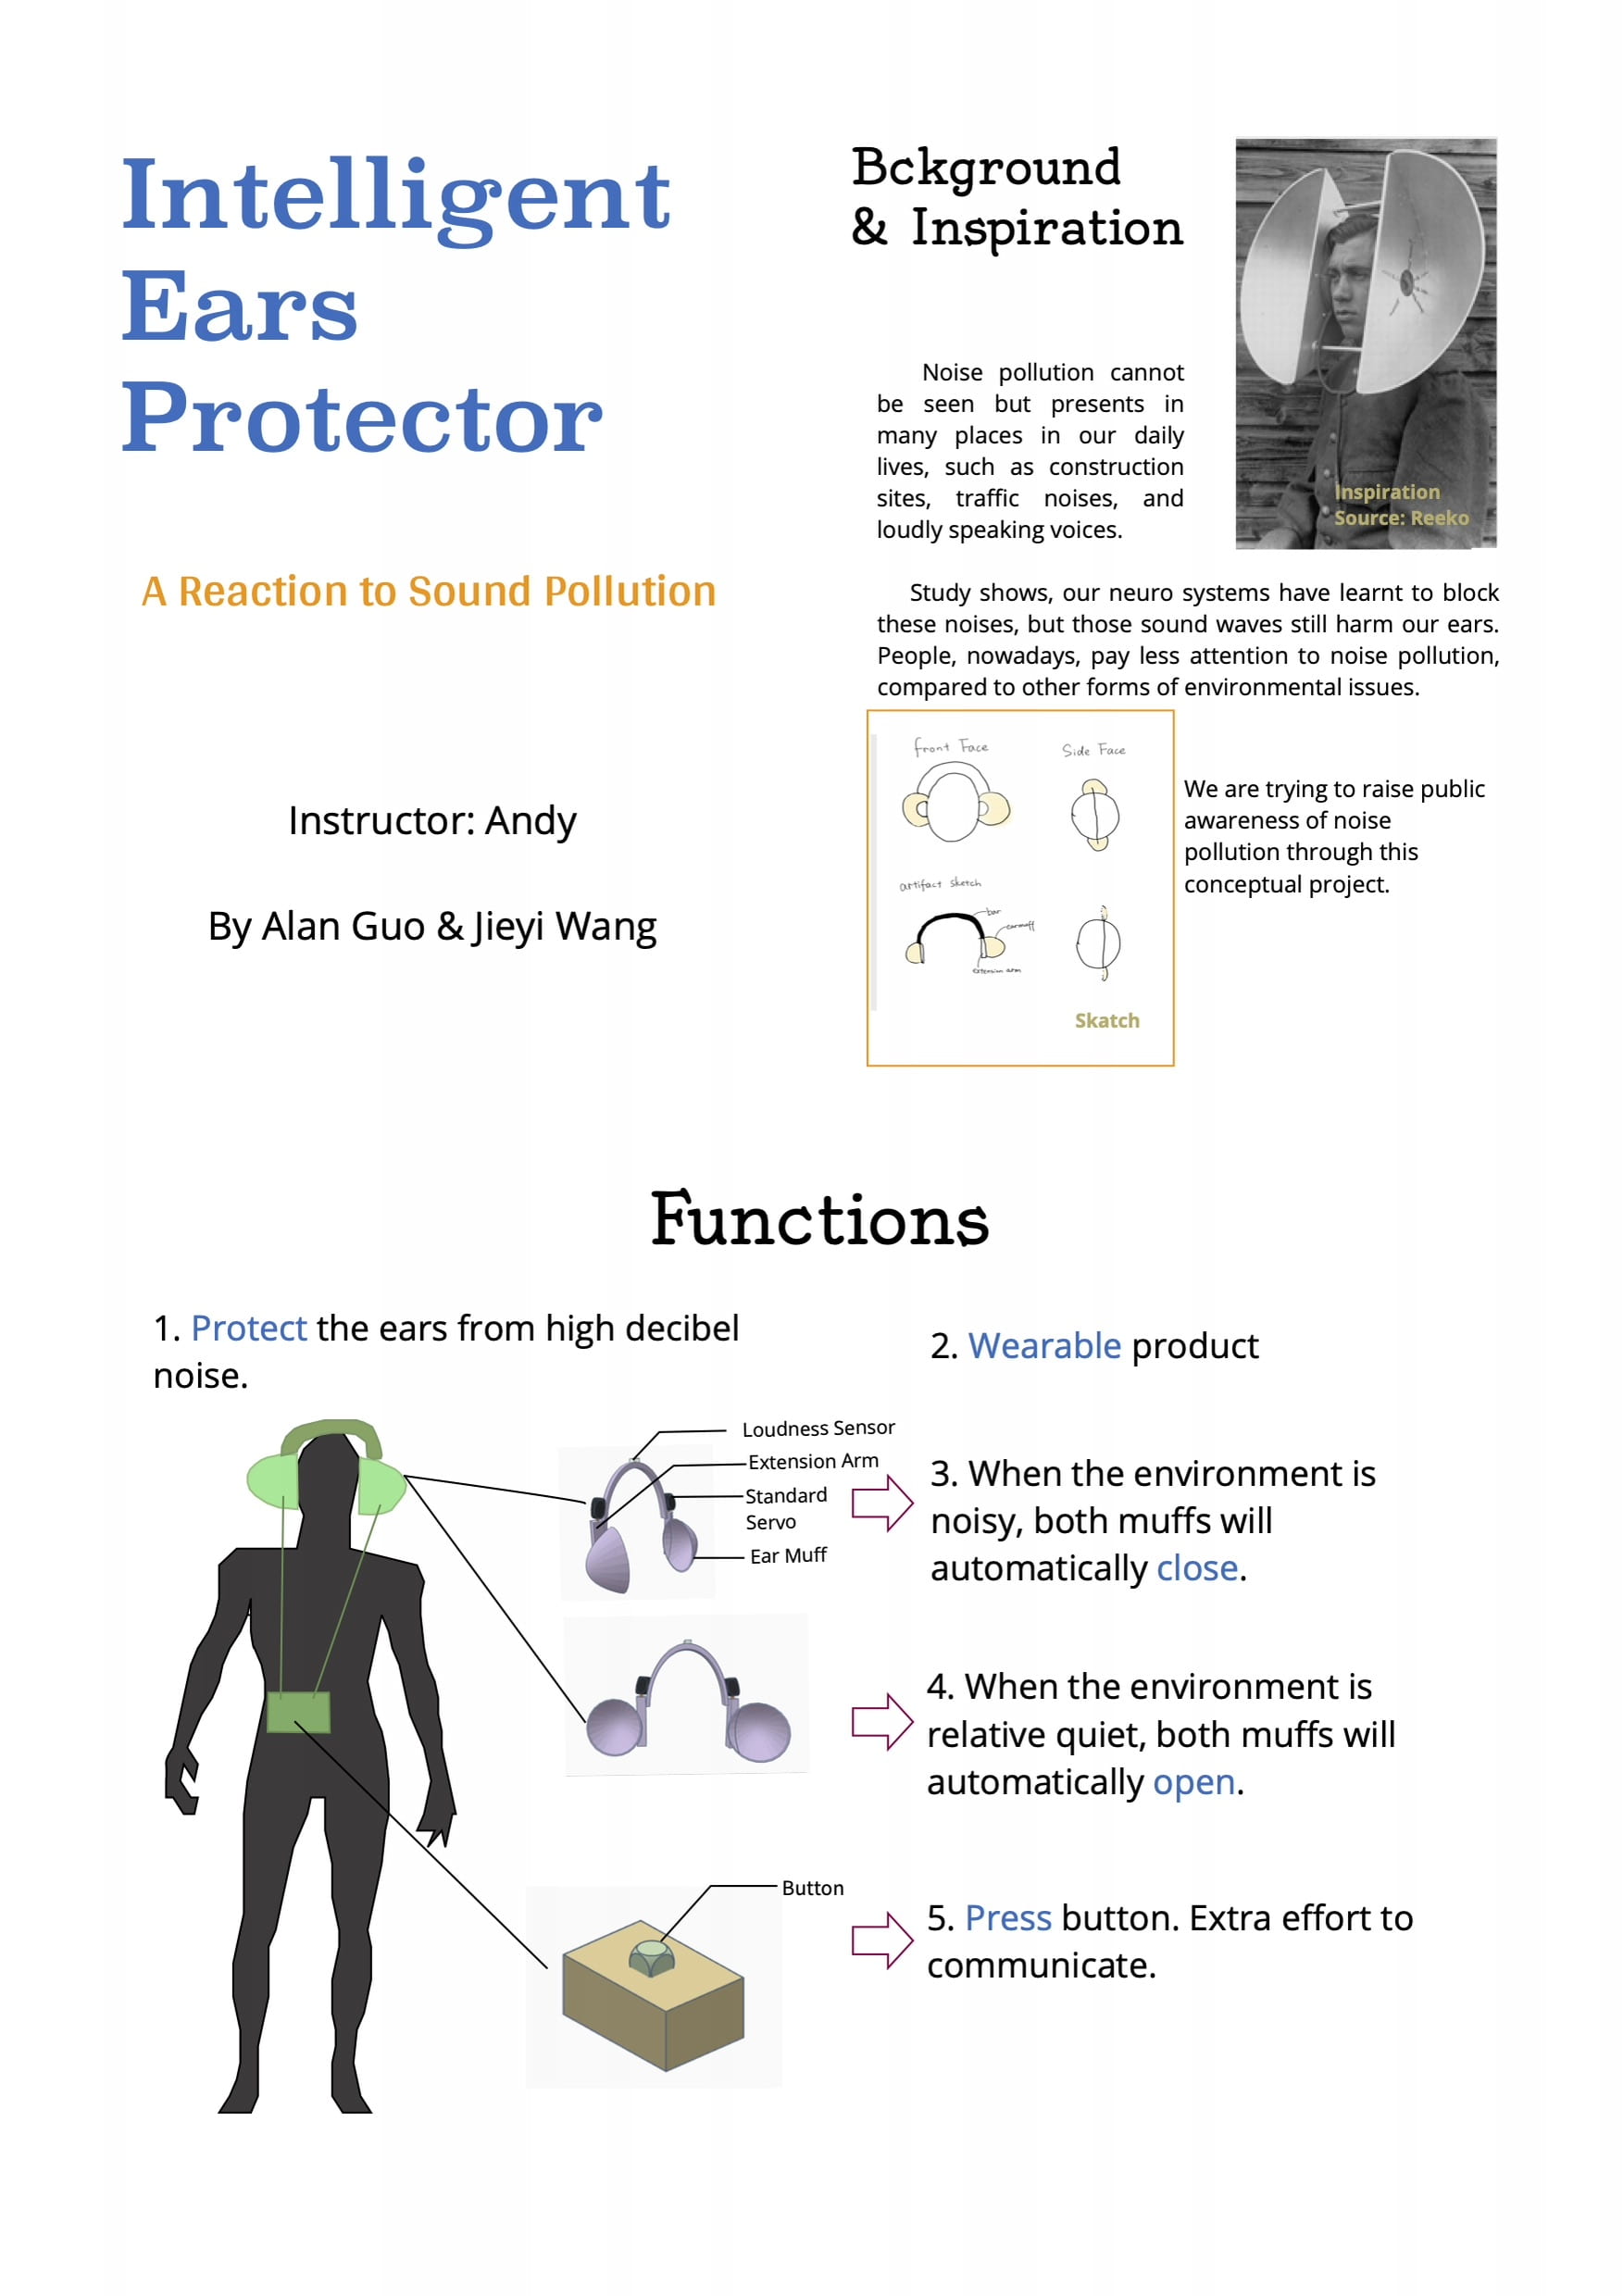
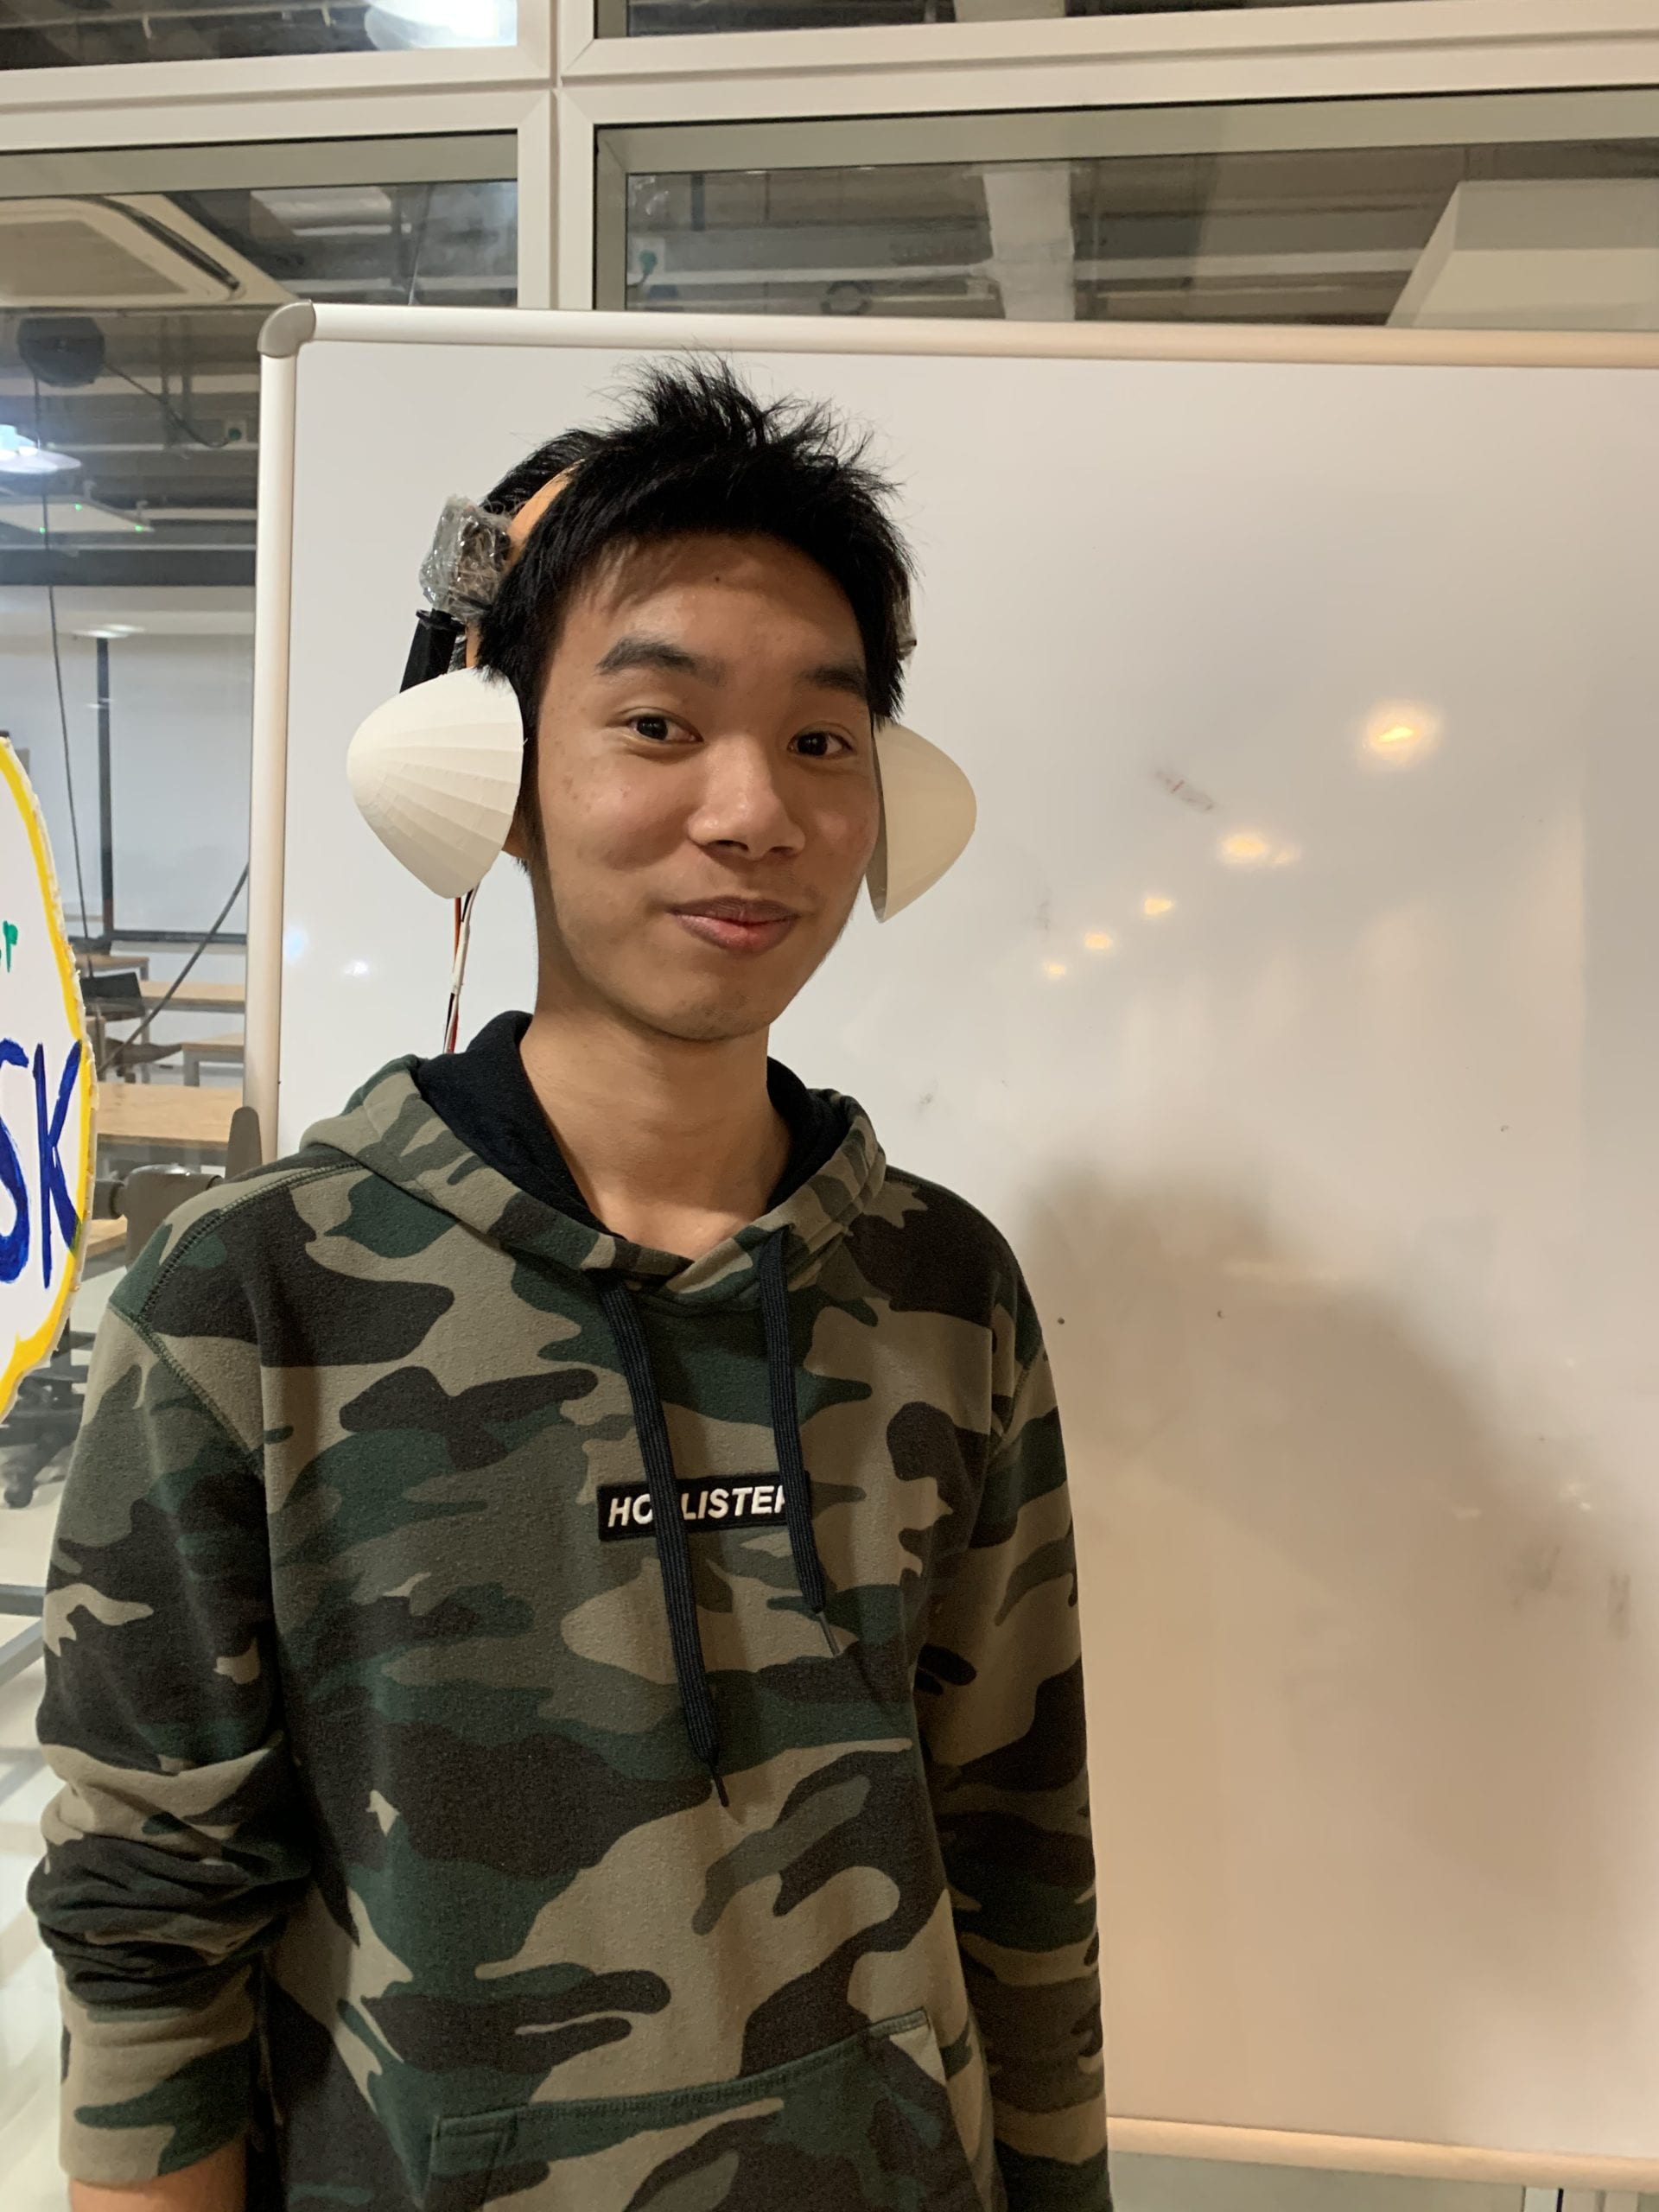
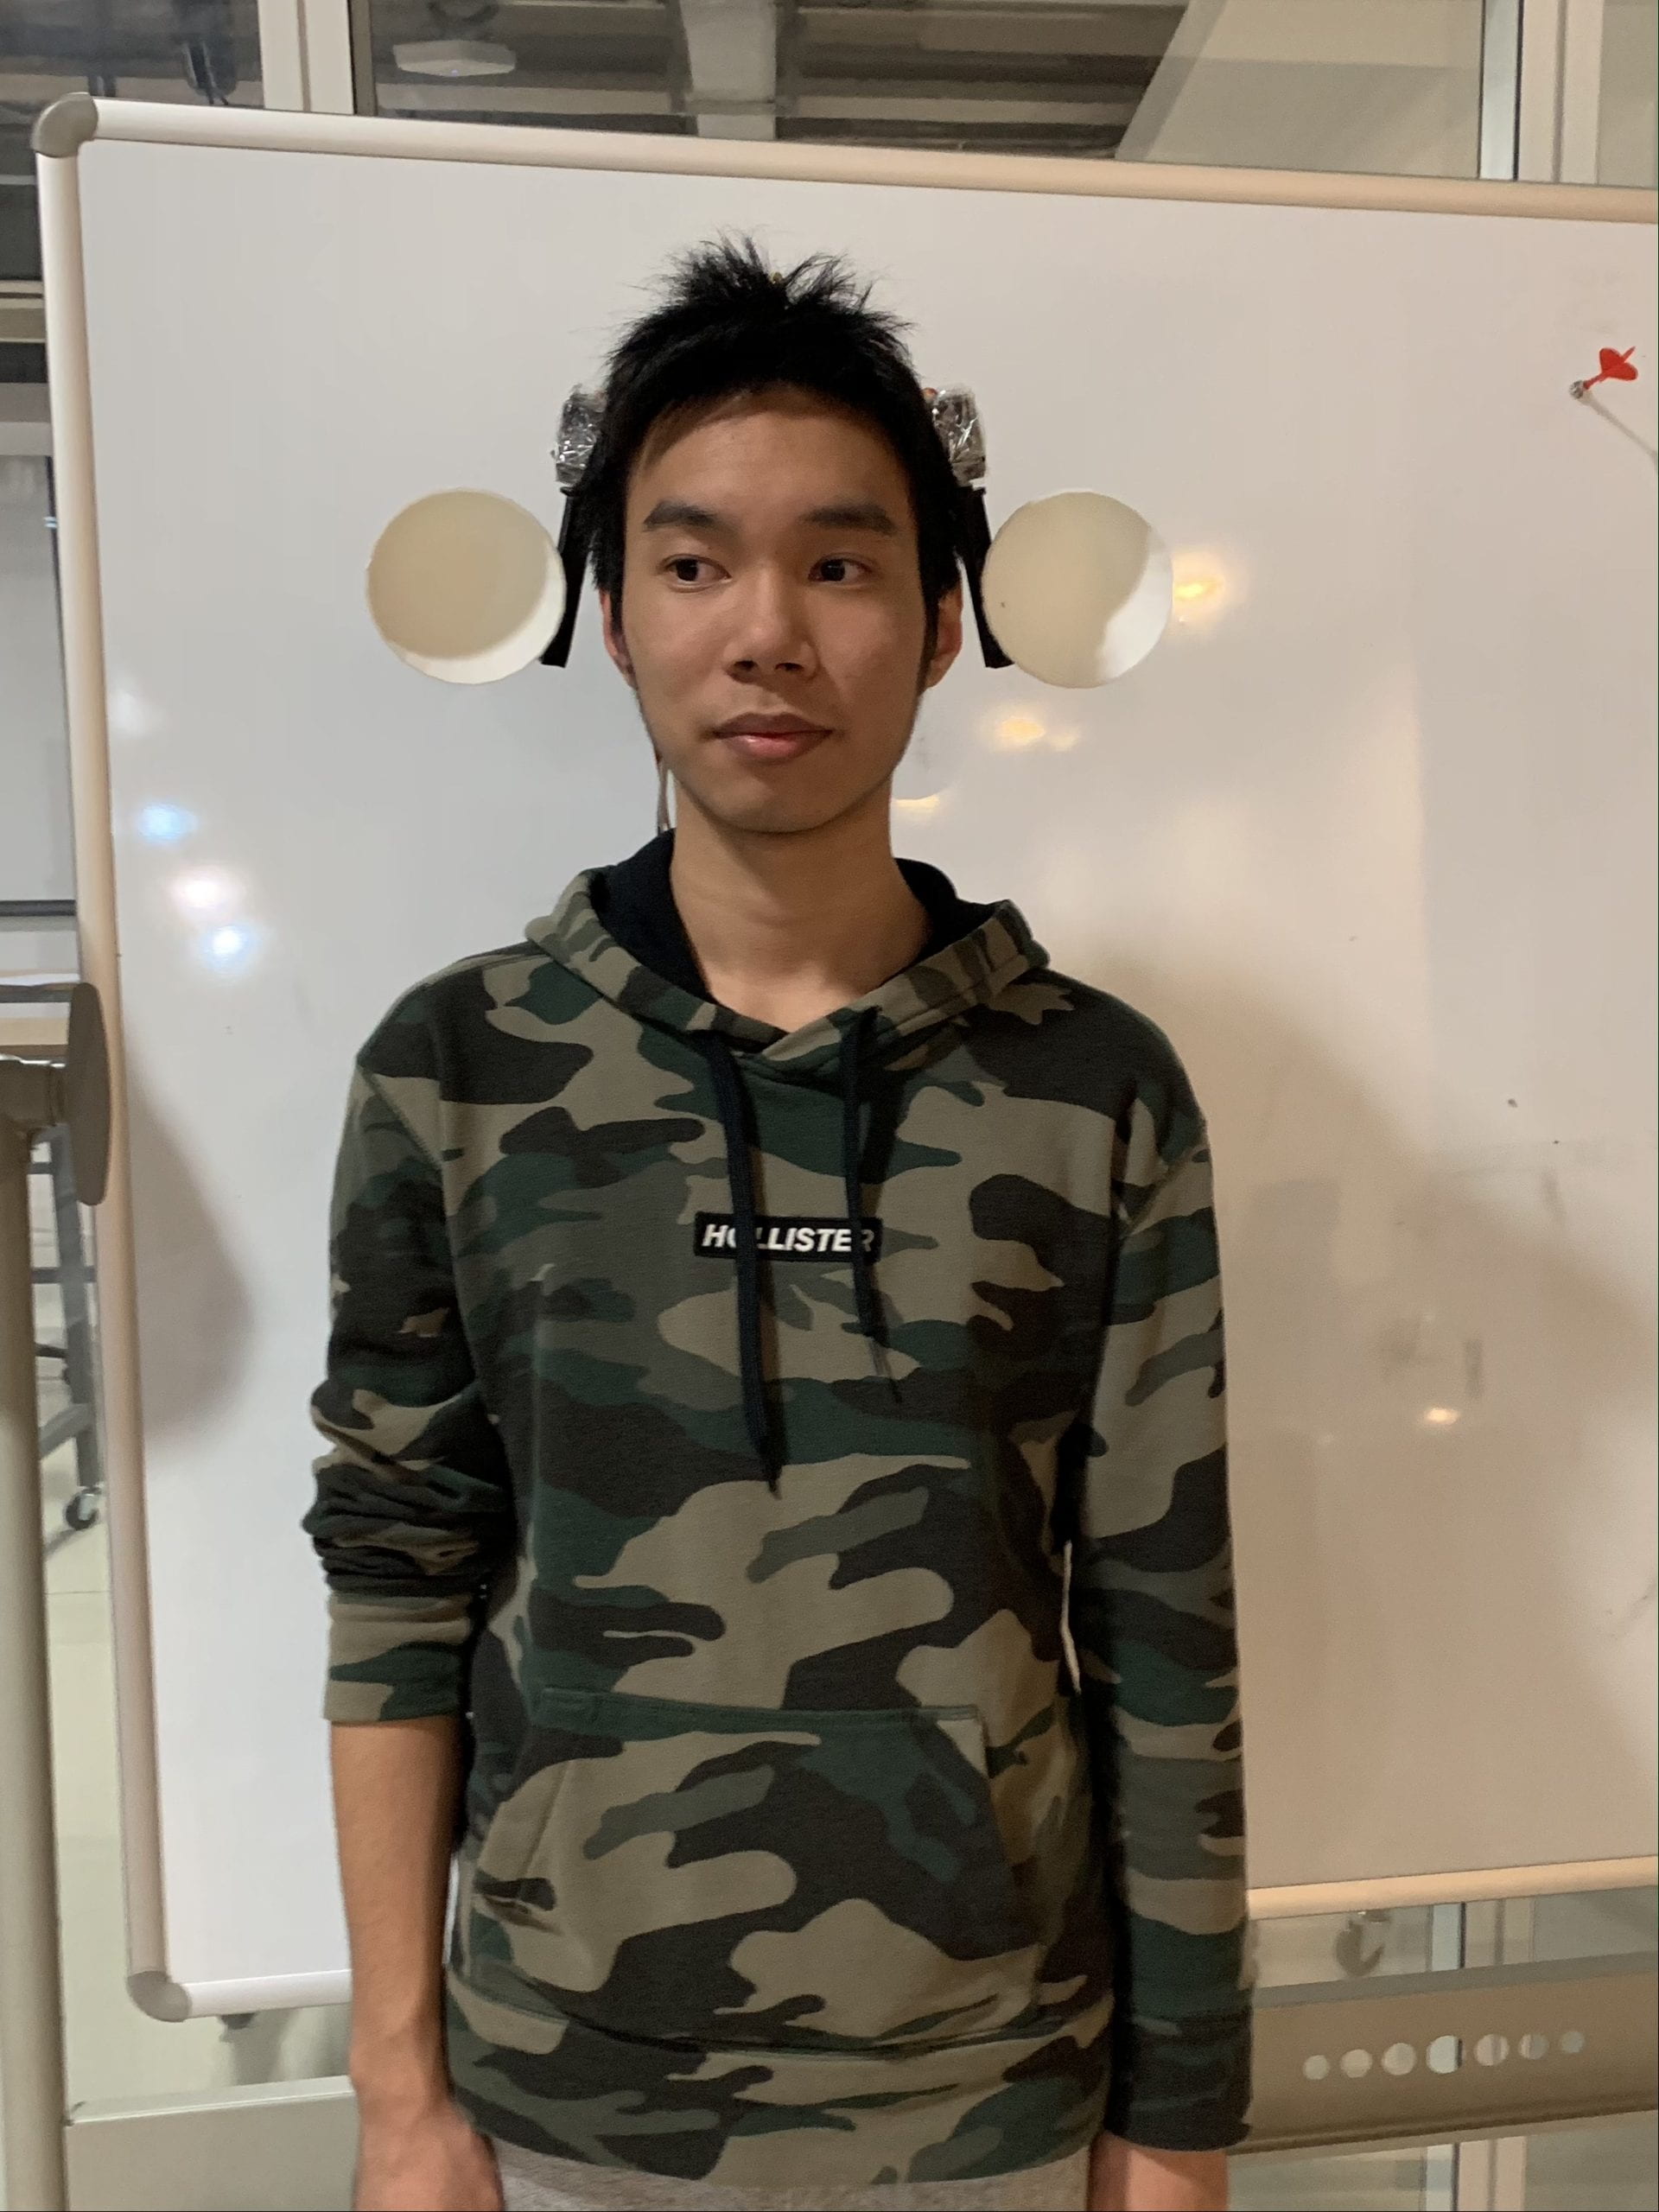
At first, Jieyi and I came up with some ideas about the functions of this wearable device. We thought about strengthen the sound to alert the problem of sound pollution or block the sound as a useful device. After considering about the feasibility and drawing the drafts, we decided to built one earmuff that can rotate. When the environment sound is too loud, the earmuff would close automatically, and open again when the outside is quiet enough. Also, we designed one button that can open the earmuff when the user wants to hear something clearly or talk to someone else. In this sense, our device provides one way for the user to interact with the outside world concerning the noice and sound.

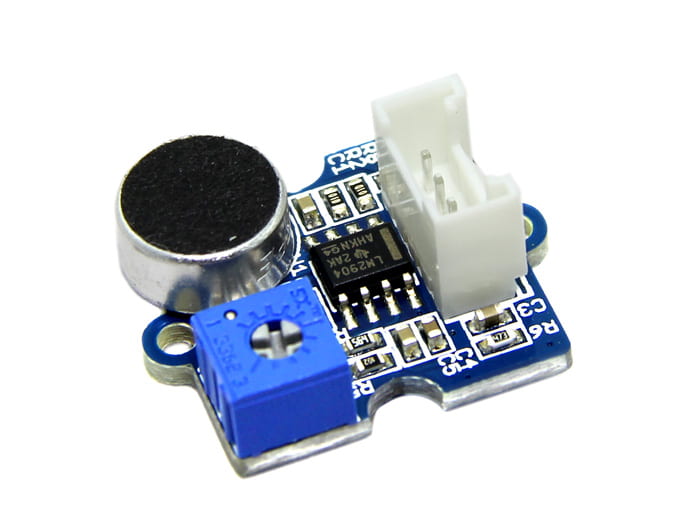
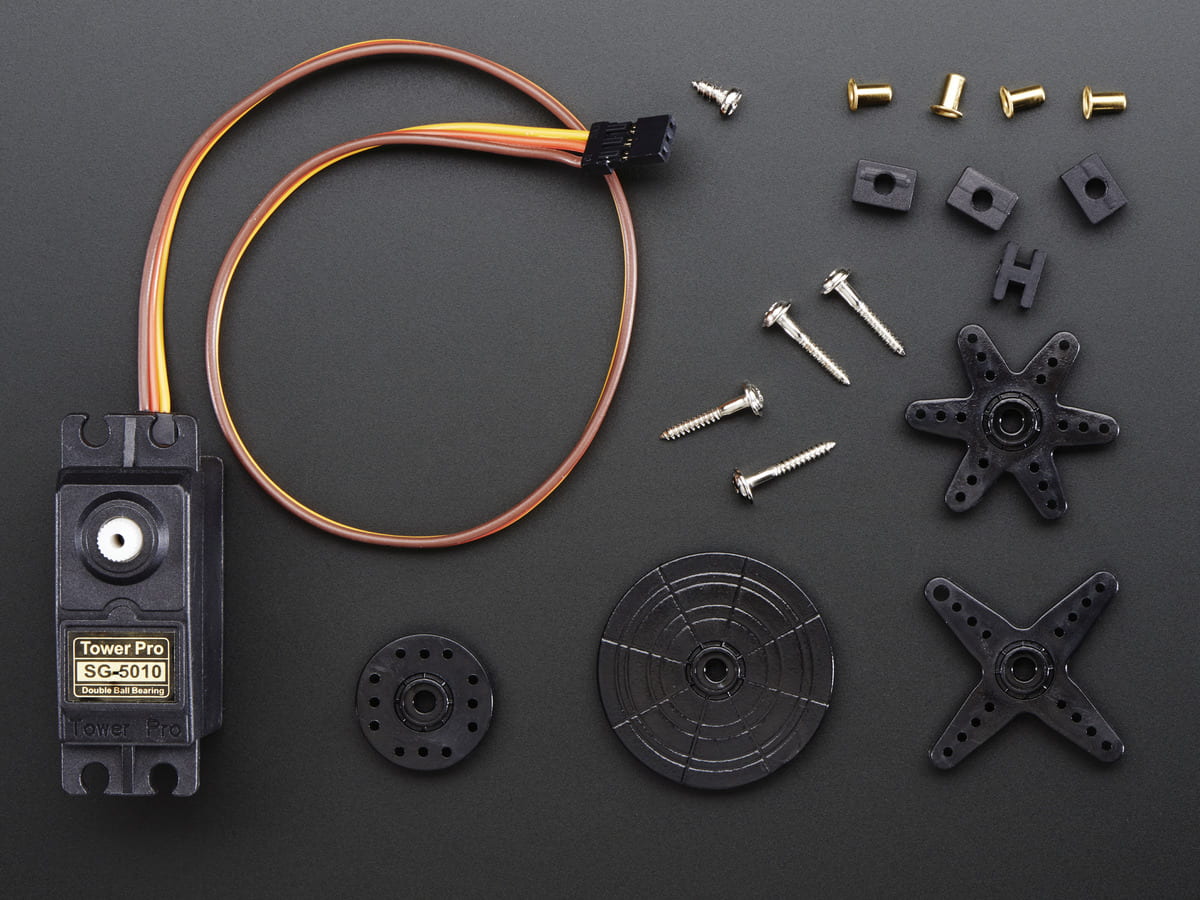
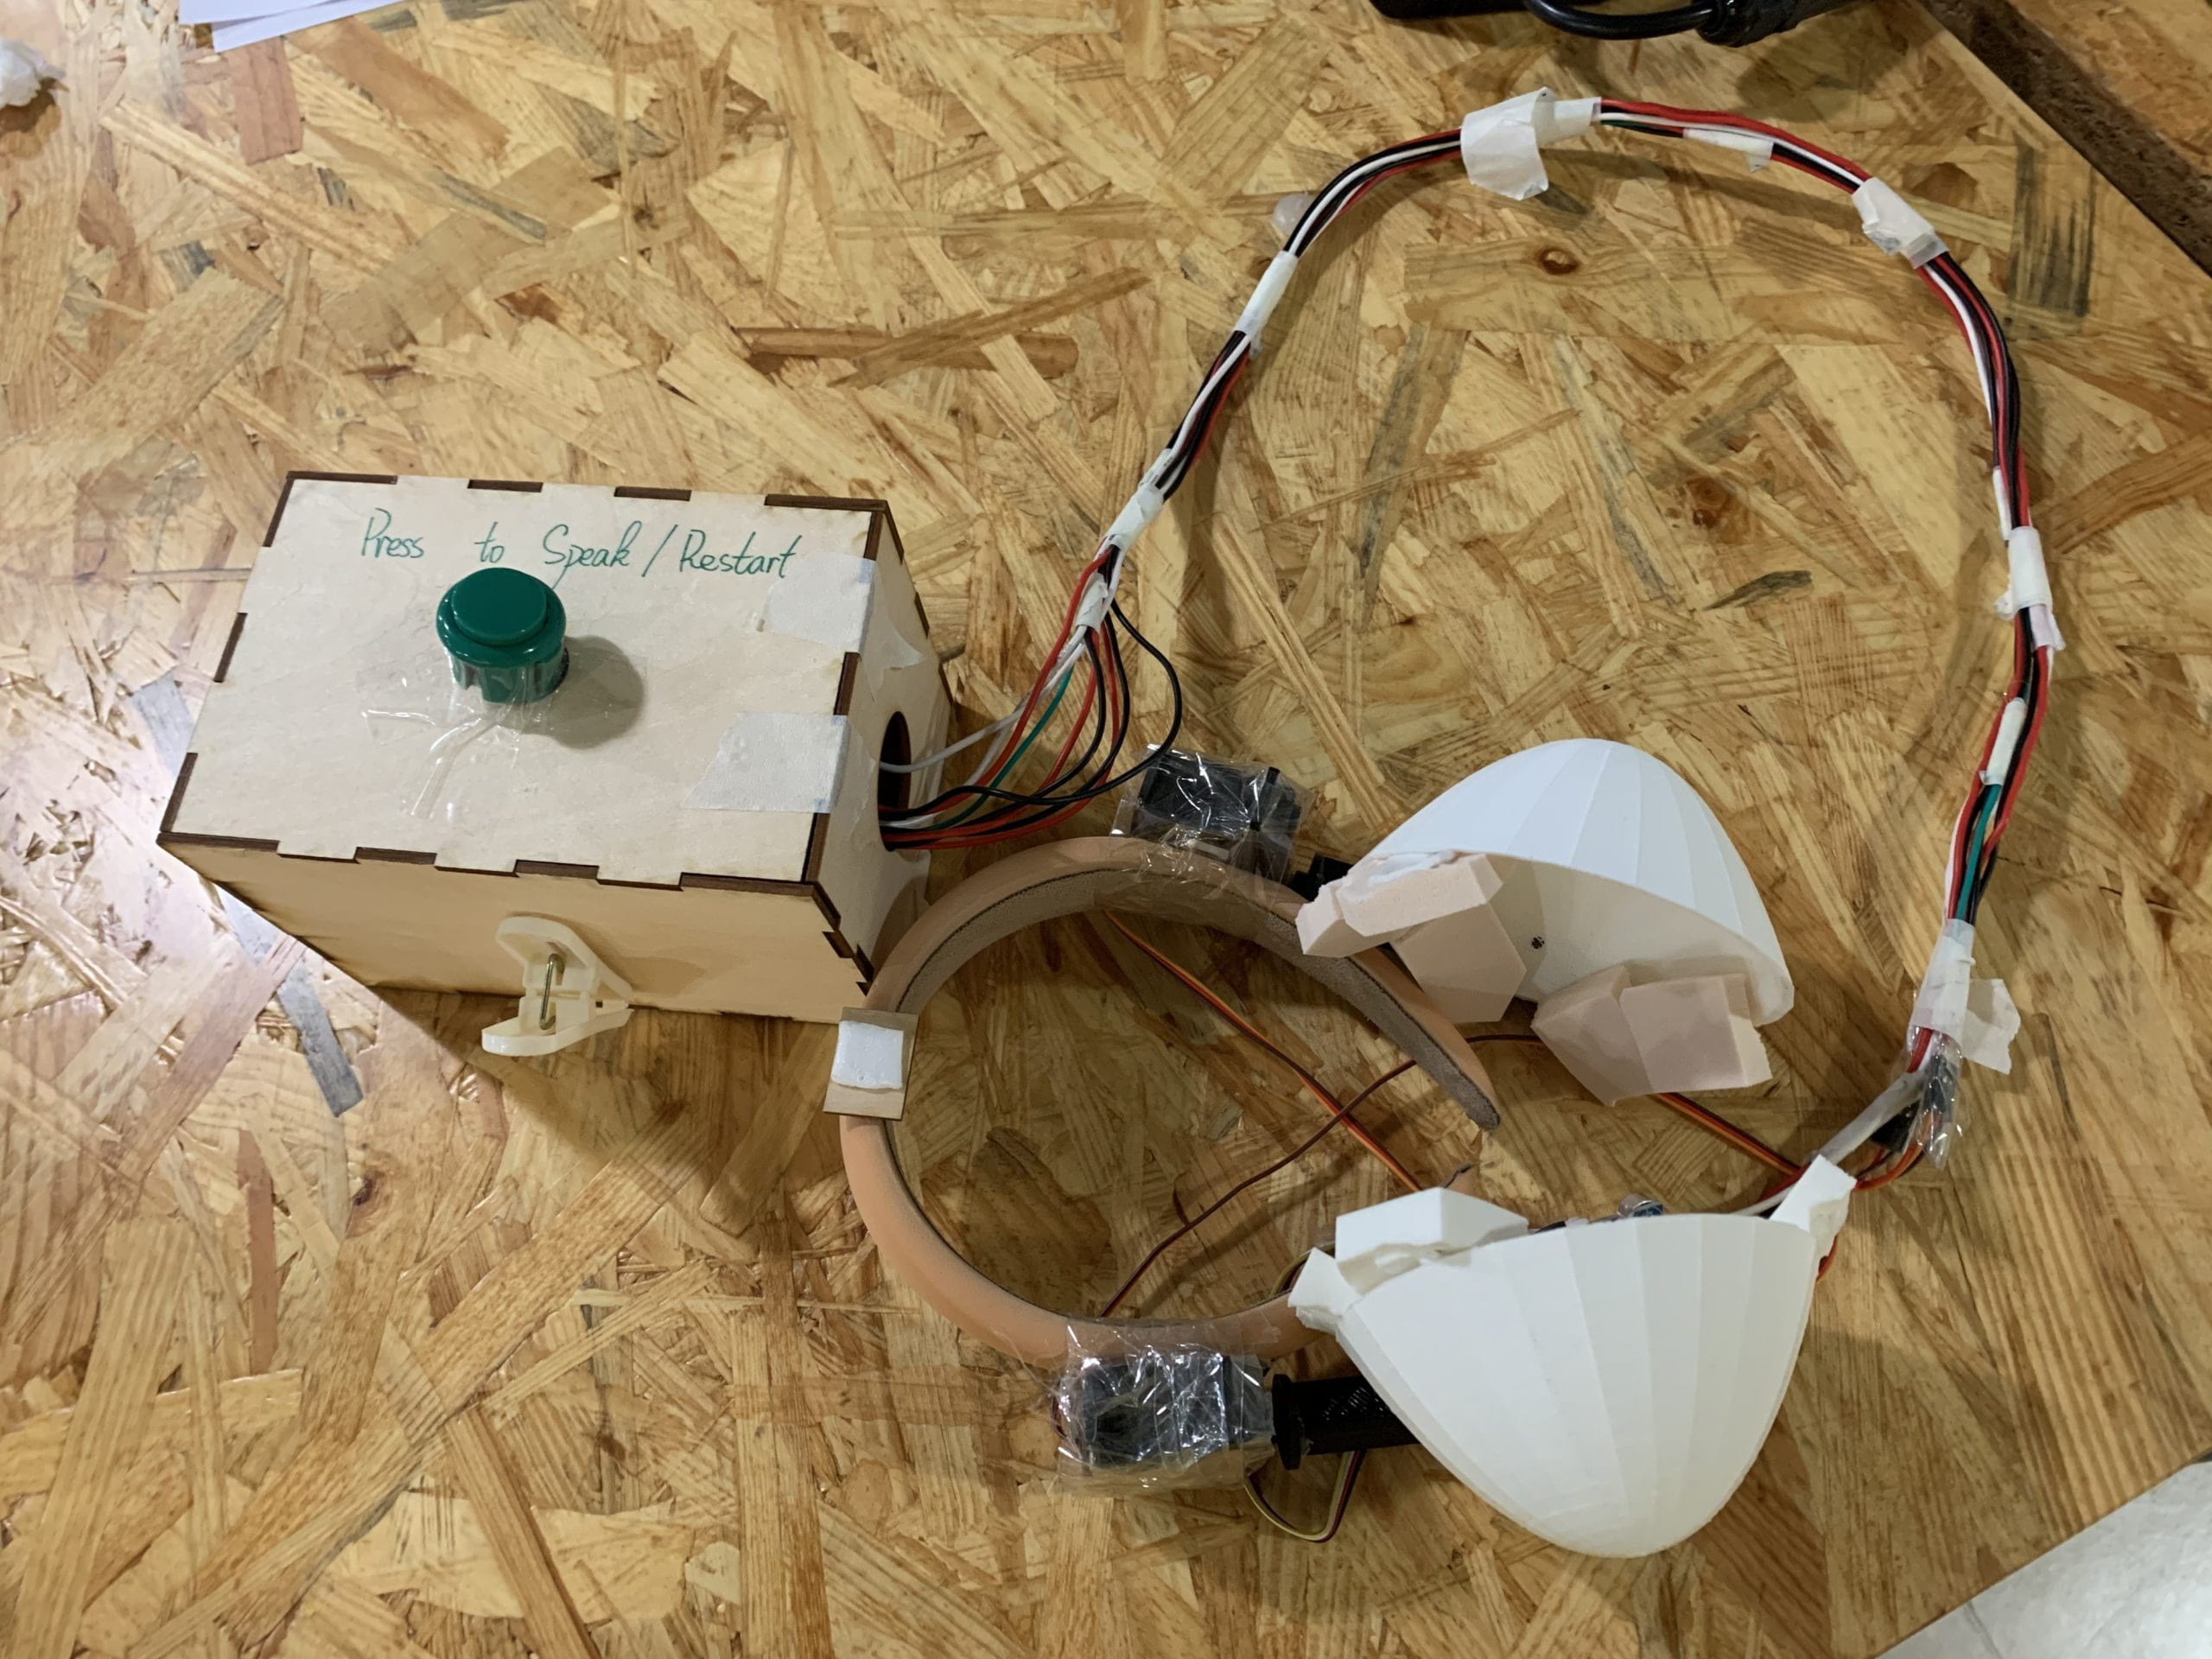
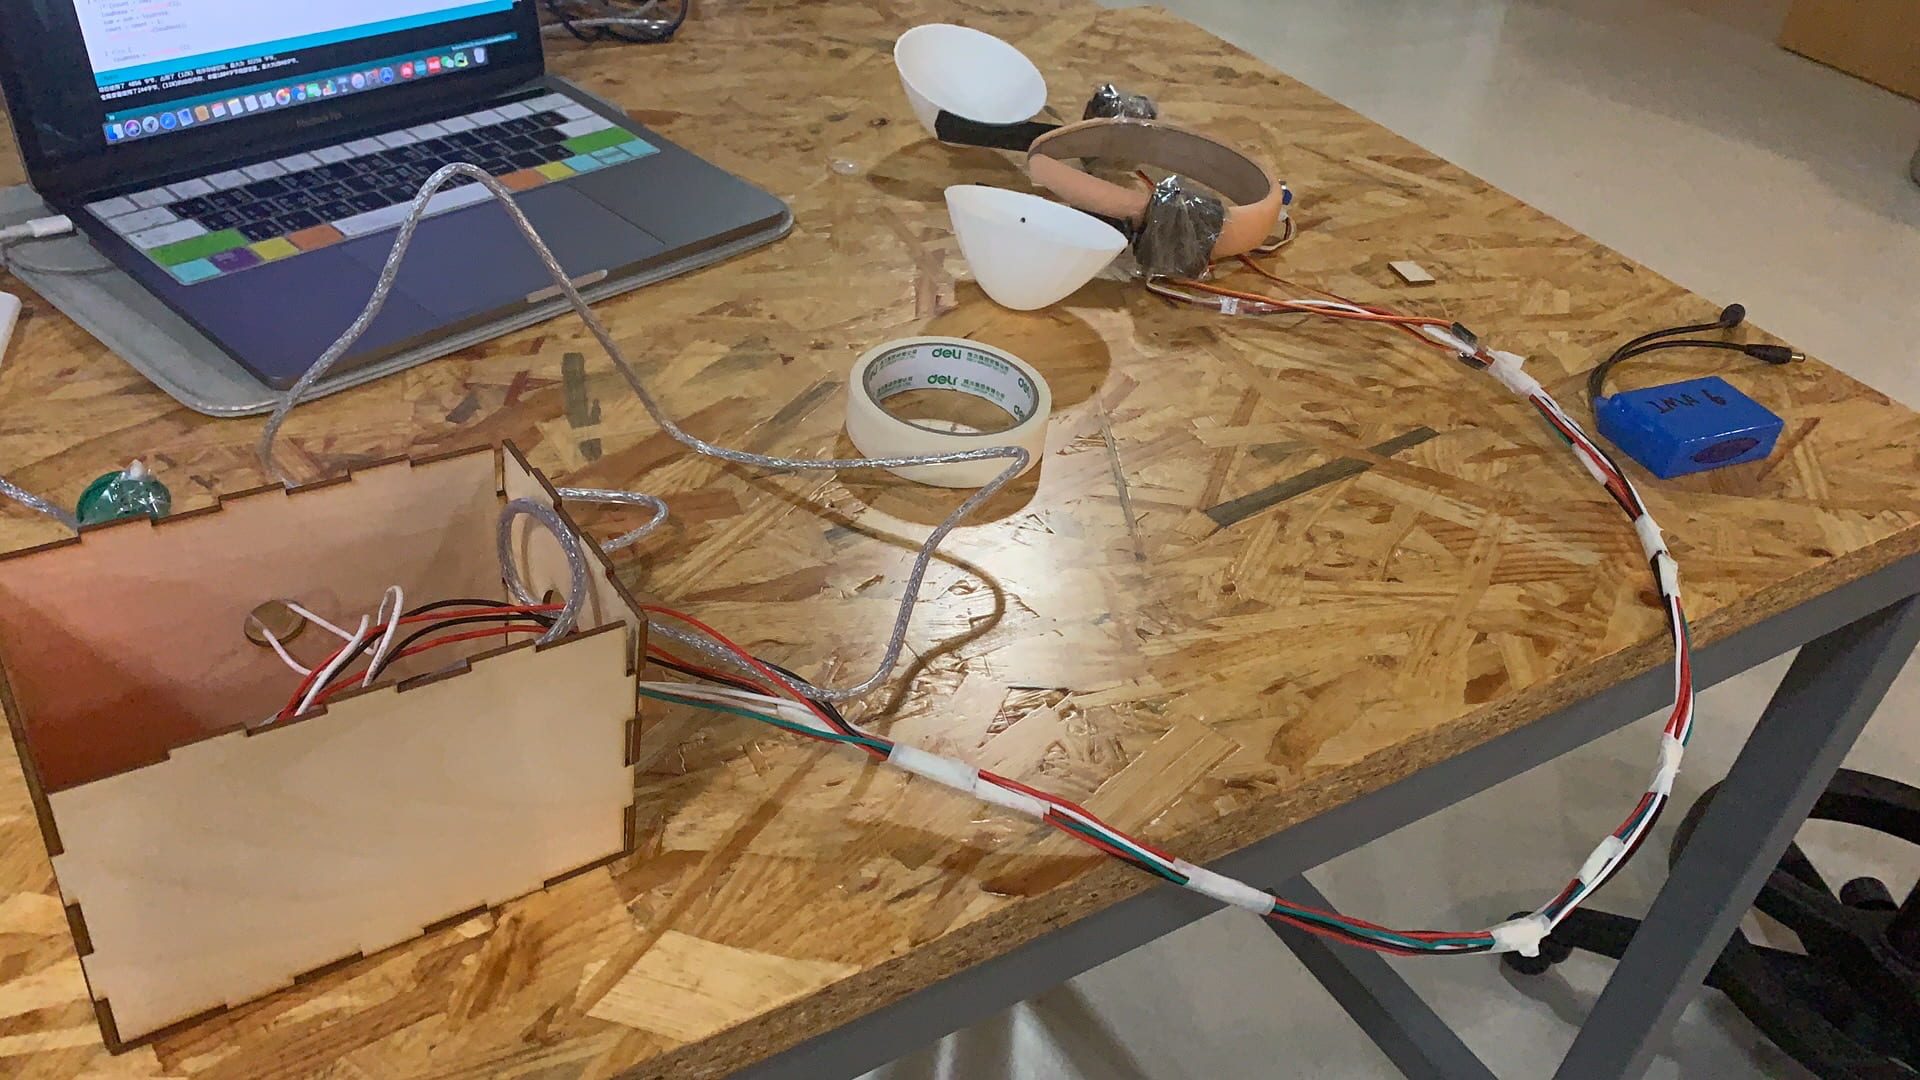
To build the whole product, we used 3D printer, laser cutter and borrowed some equipments. We borrowed the soundness sensor to detect the outside sound. To rotate the earmuff, we chose the servo. We used the servo provided in our Arduino box at first, but it turned out that the small servo is not powerful enough to rotate the whole 3D printed earmuff. So we borrowed two standard servos, where are bigger and more powerful than the smaller ones.

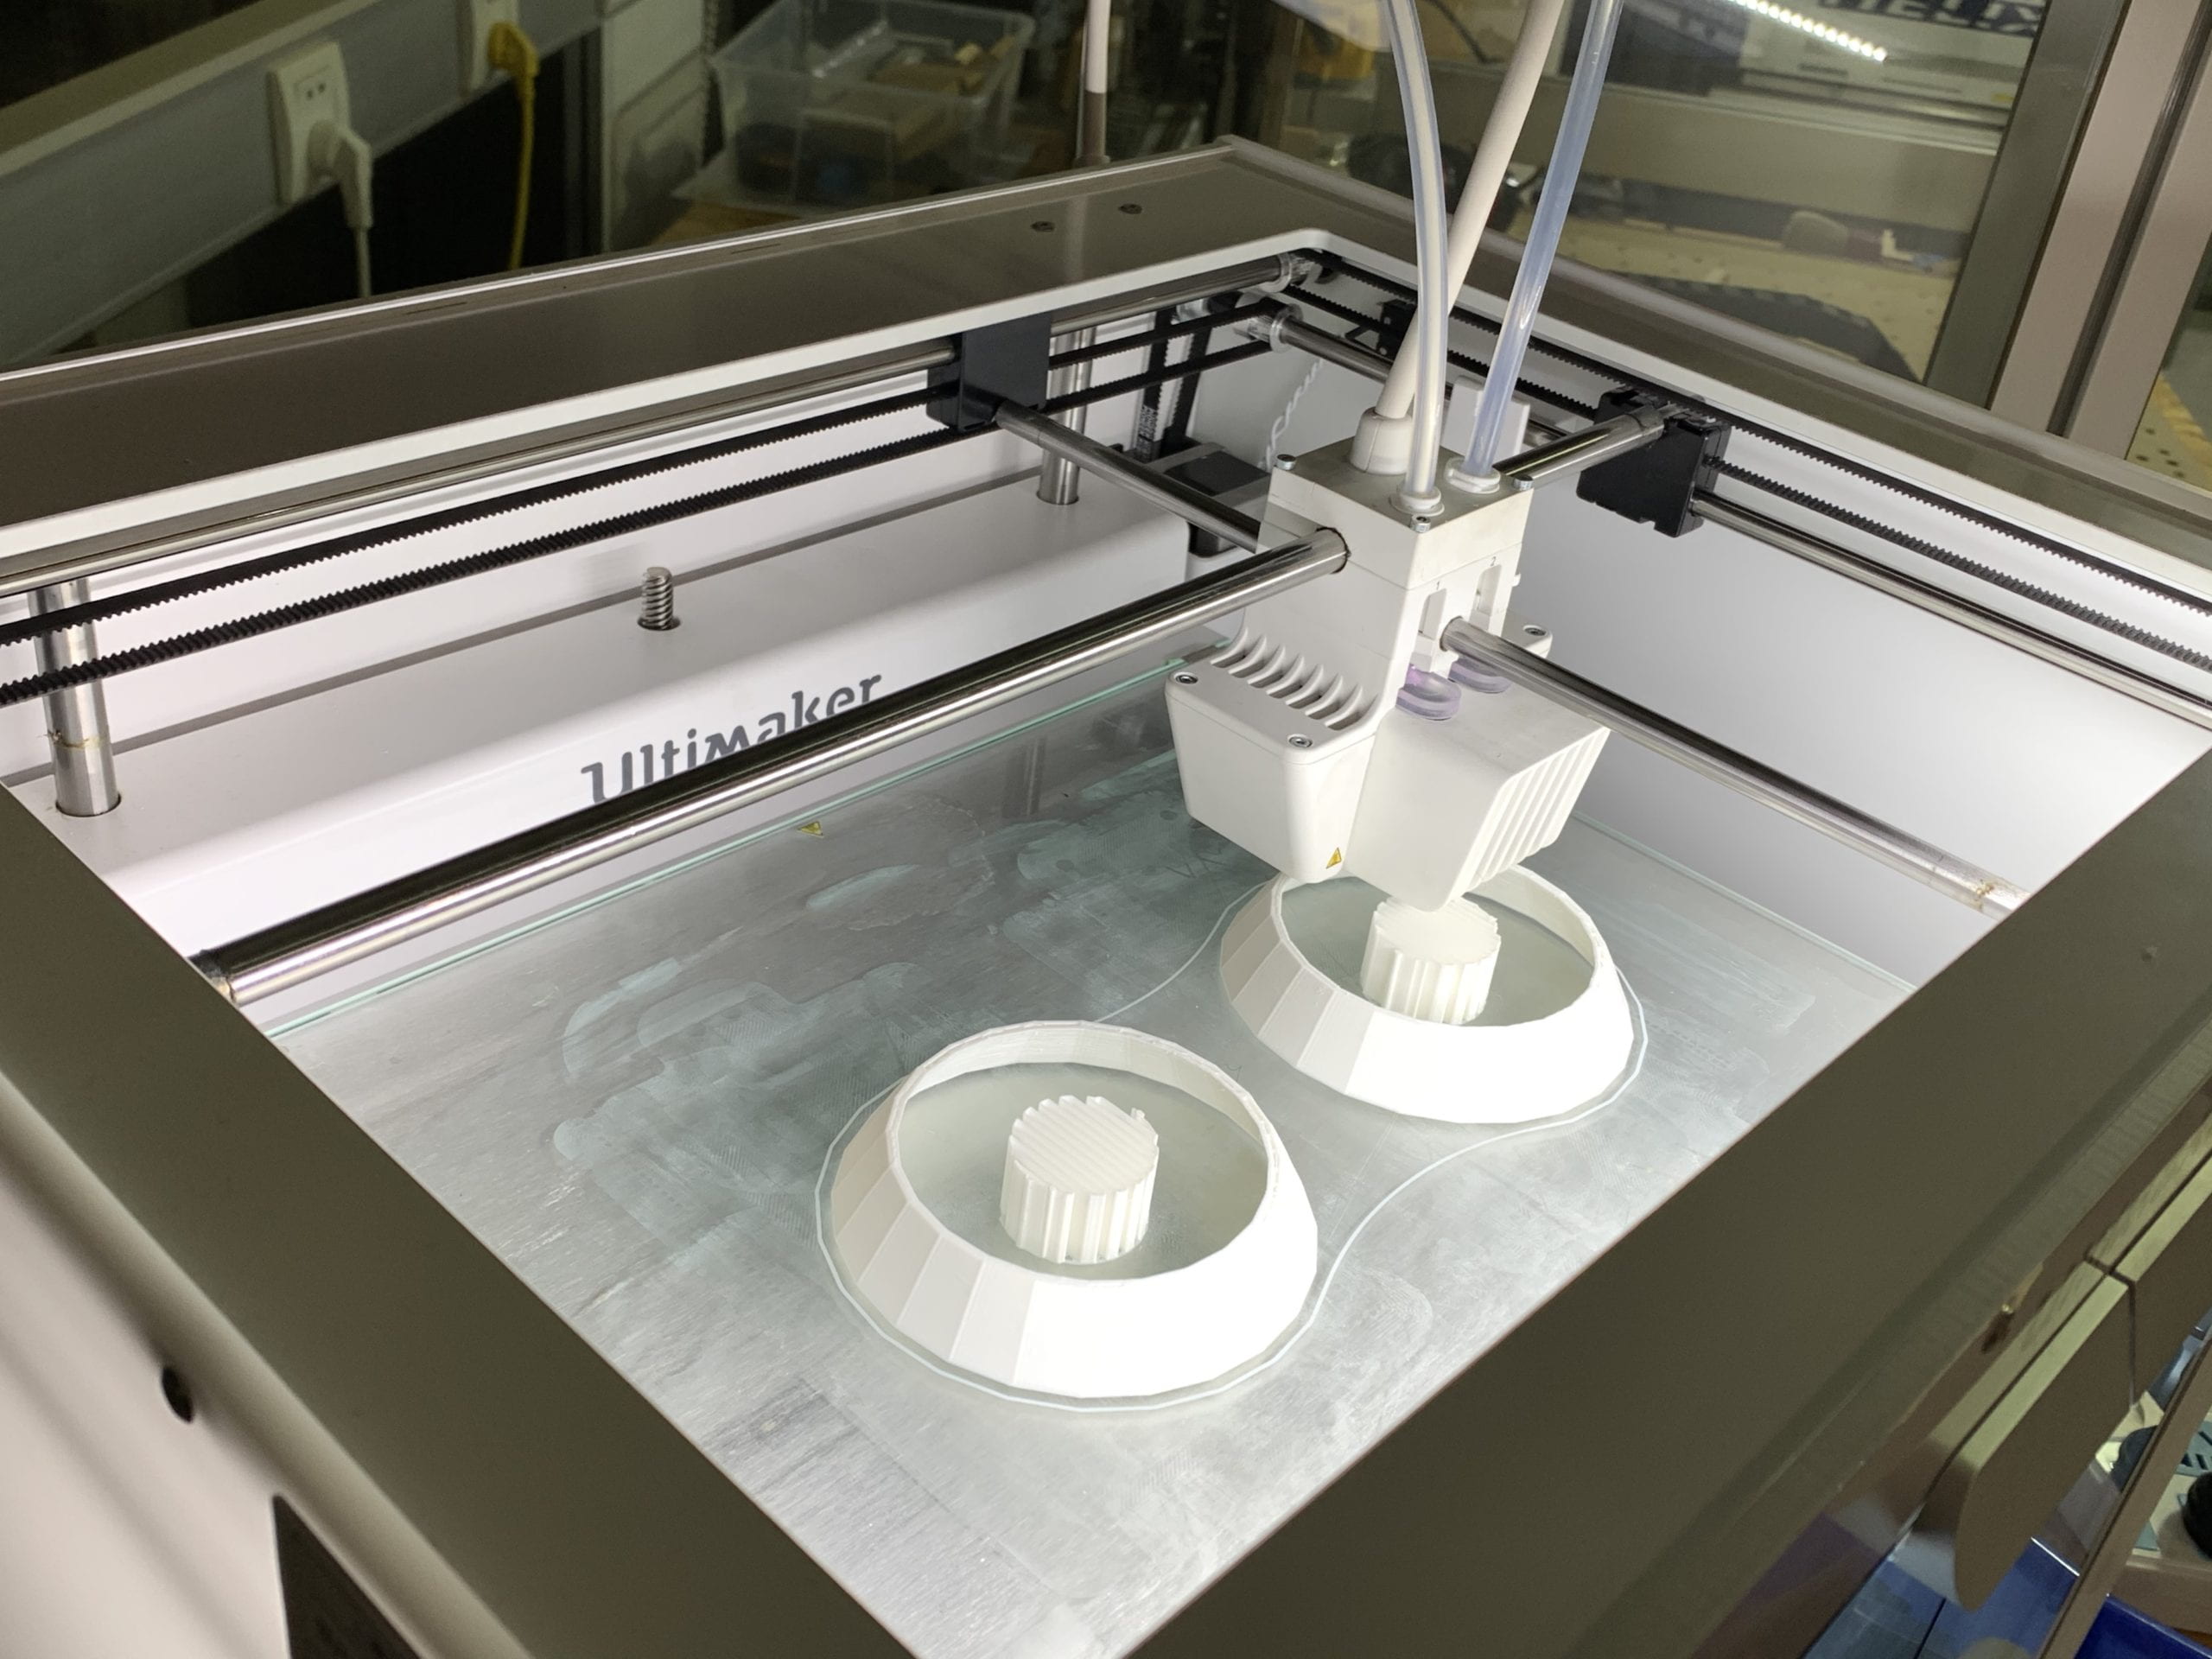
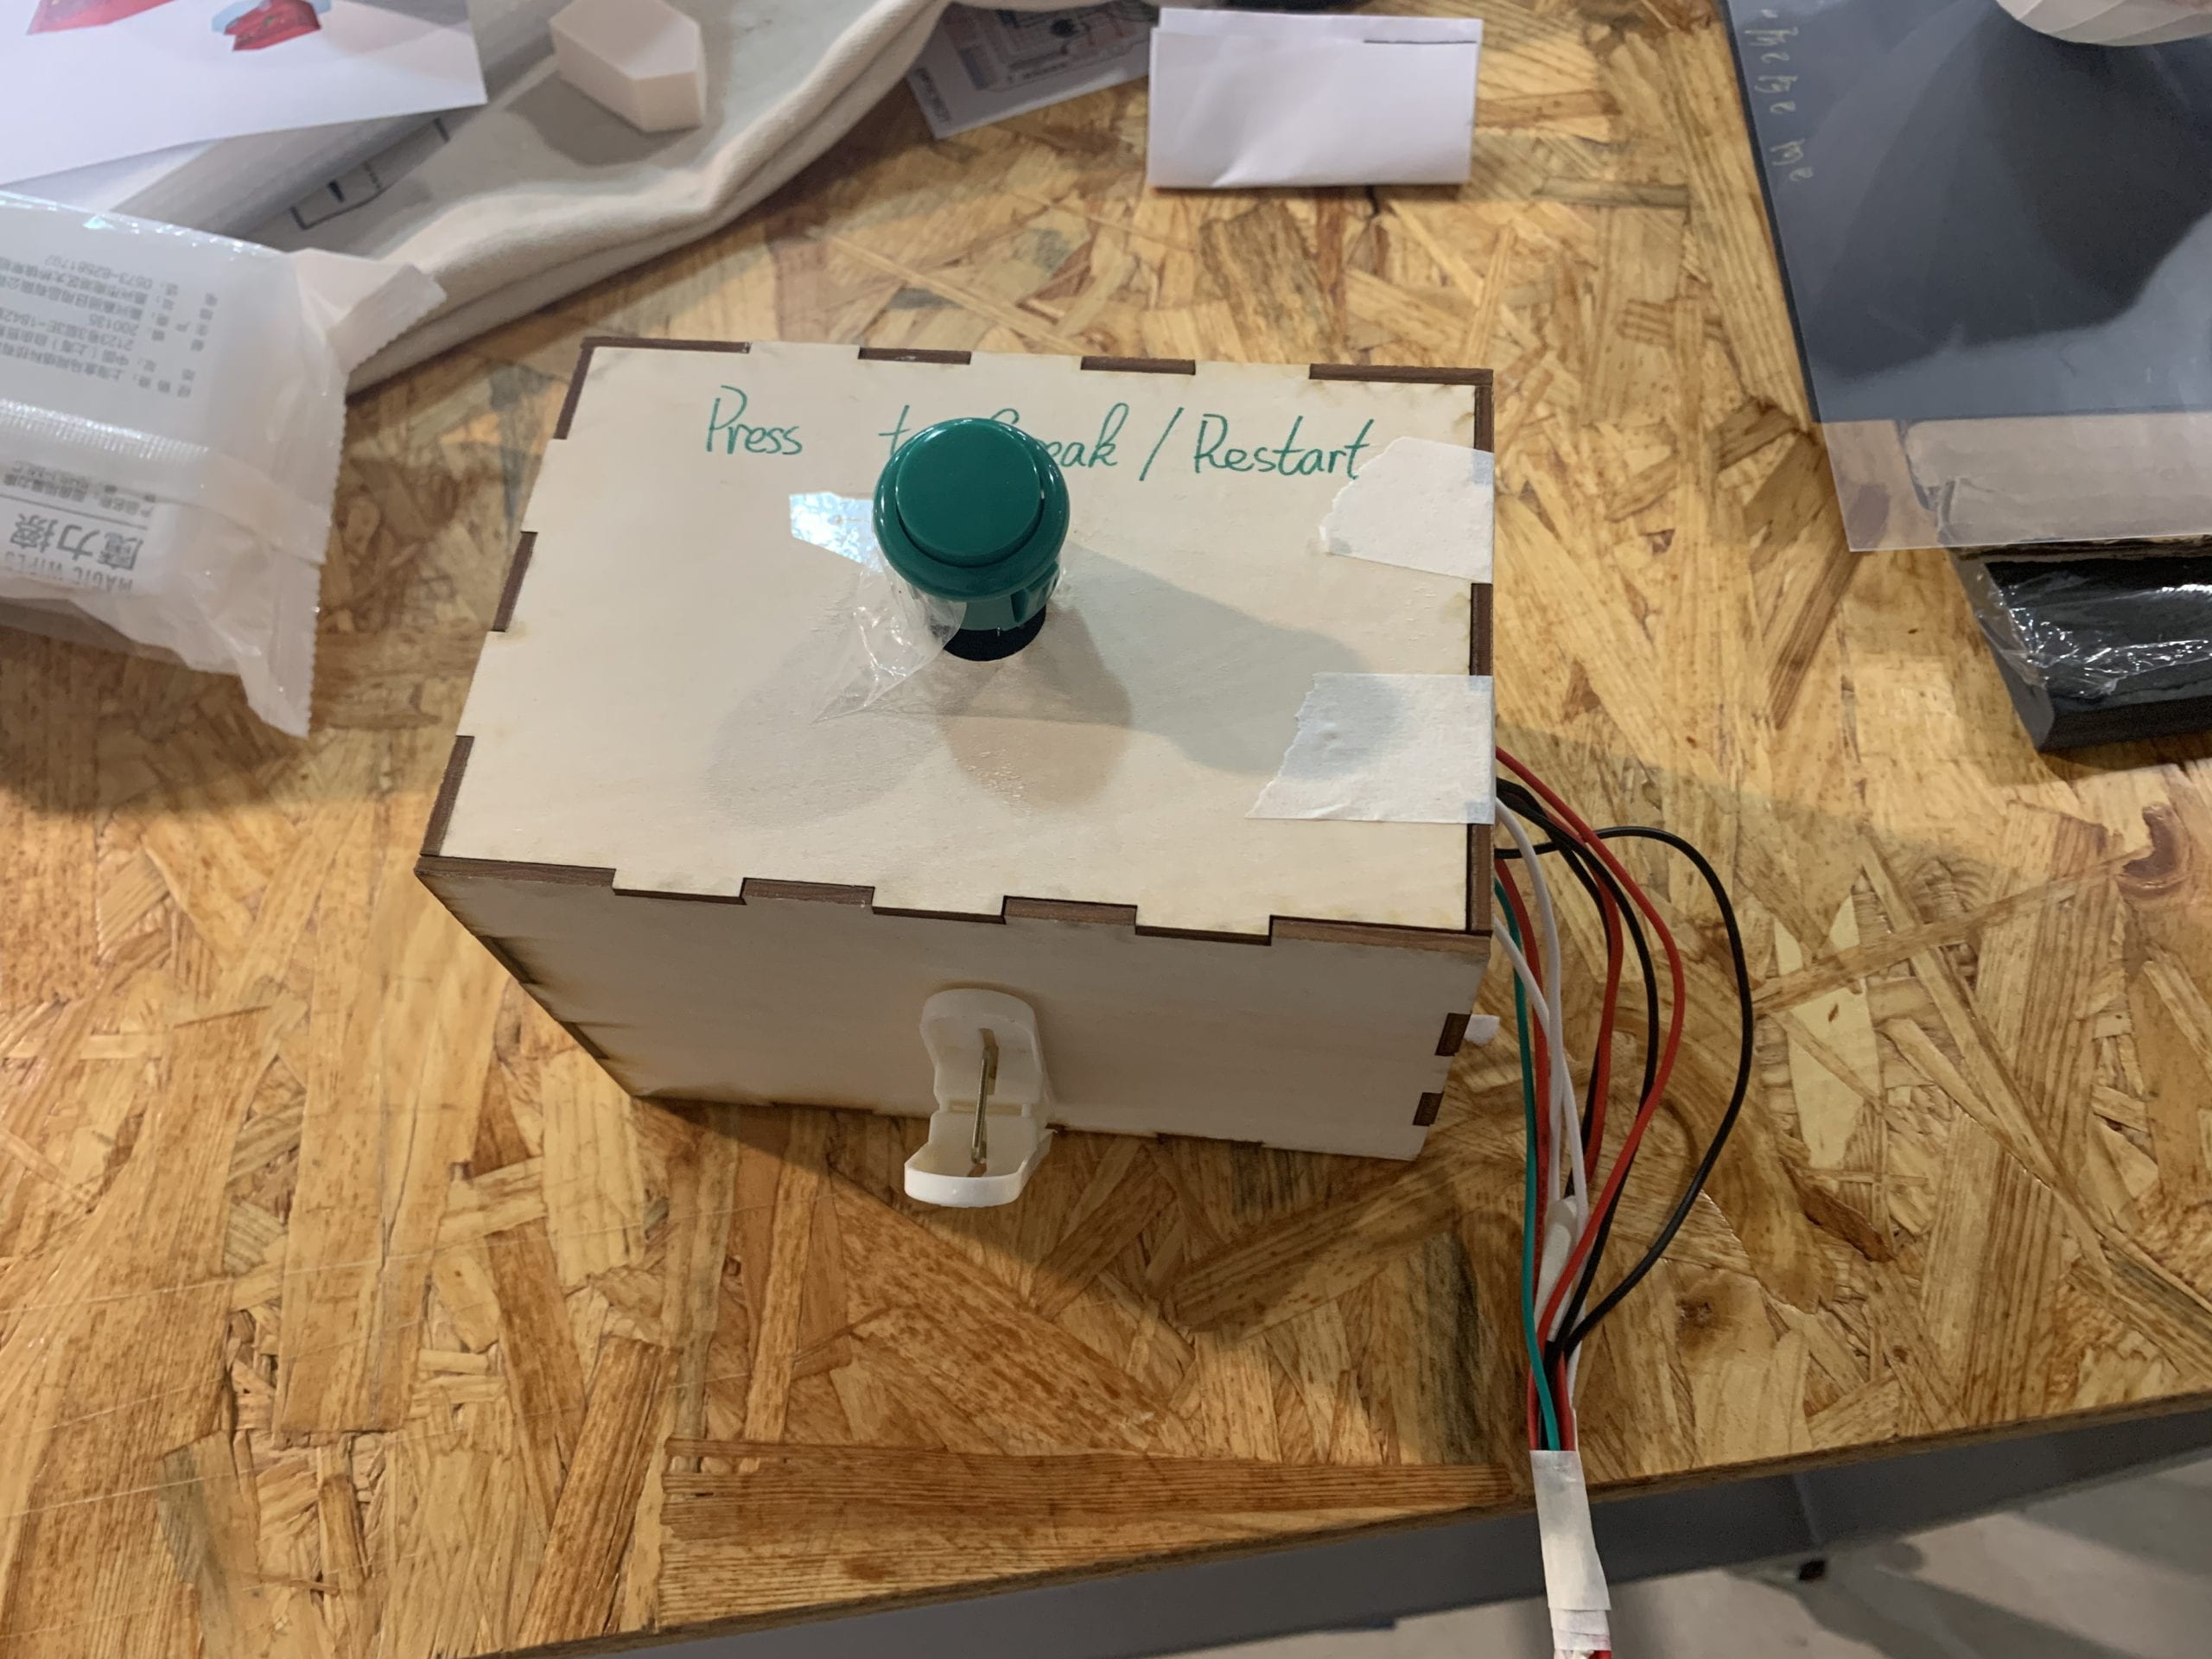
For the earmuff itself, we used 3D printer since it’s no easy job to find something with similar shapes, we also printed the axis to connect the earmuff with the servo. At last, we laser cutted a wooden box to contain the Arduino, breadboard as well as the button.

Fabrication and Production

We met quite a lot problems in the building process of the product. To name a few of them, the loudness sensor would detect the sound of servo when rotating as huge since these two are close to each other. So the sensor would regard the environment as loud all the time. So we changed the codes to take the average loudness in several seconds. In this sense, one sudden noice would not disturb the device.

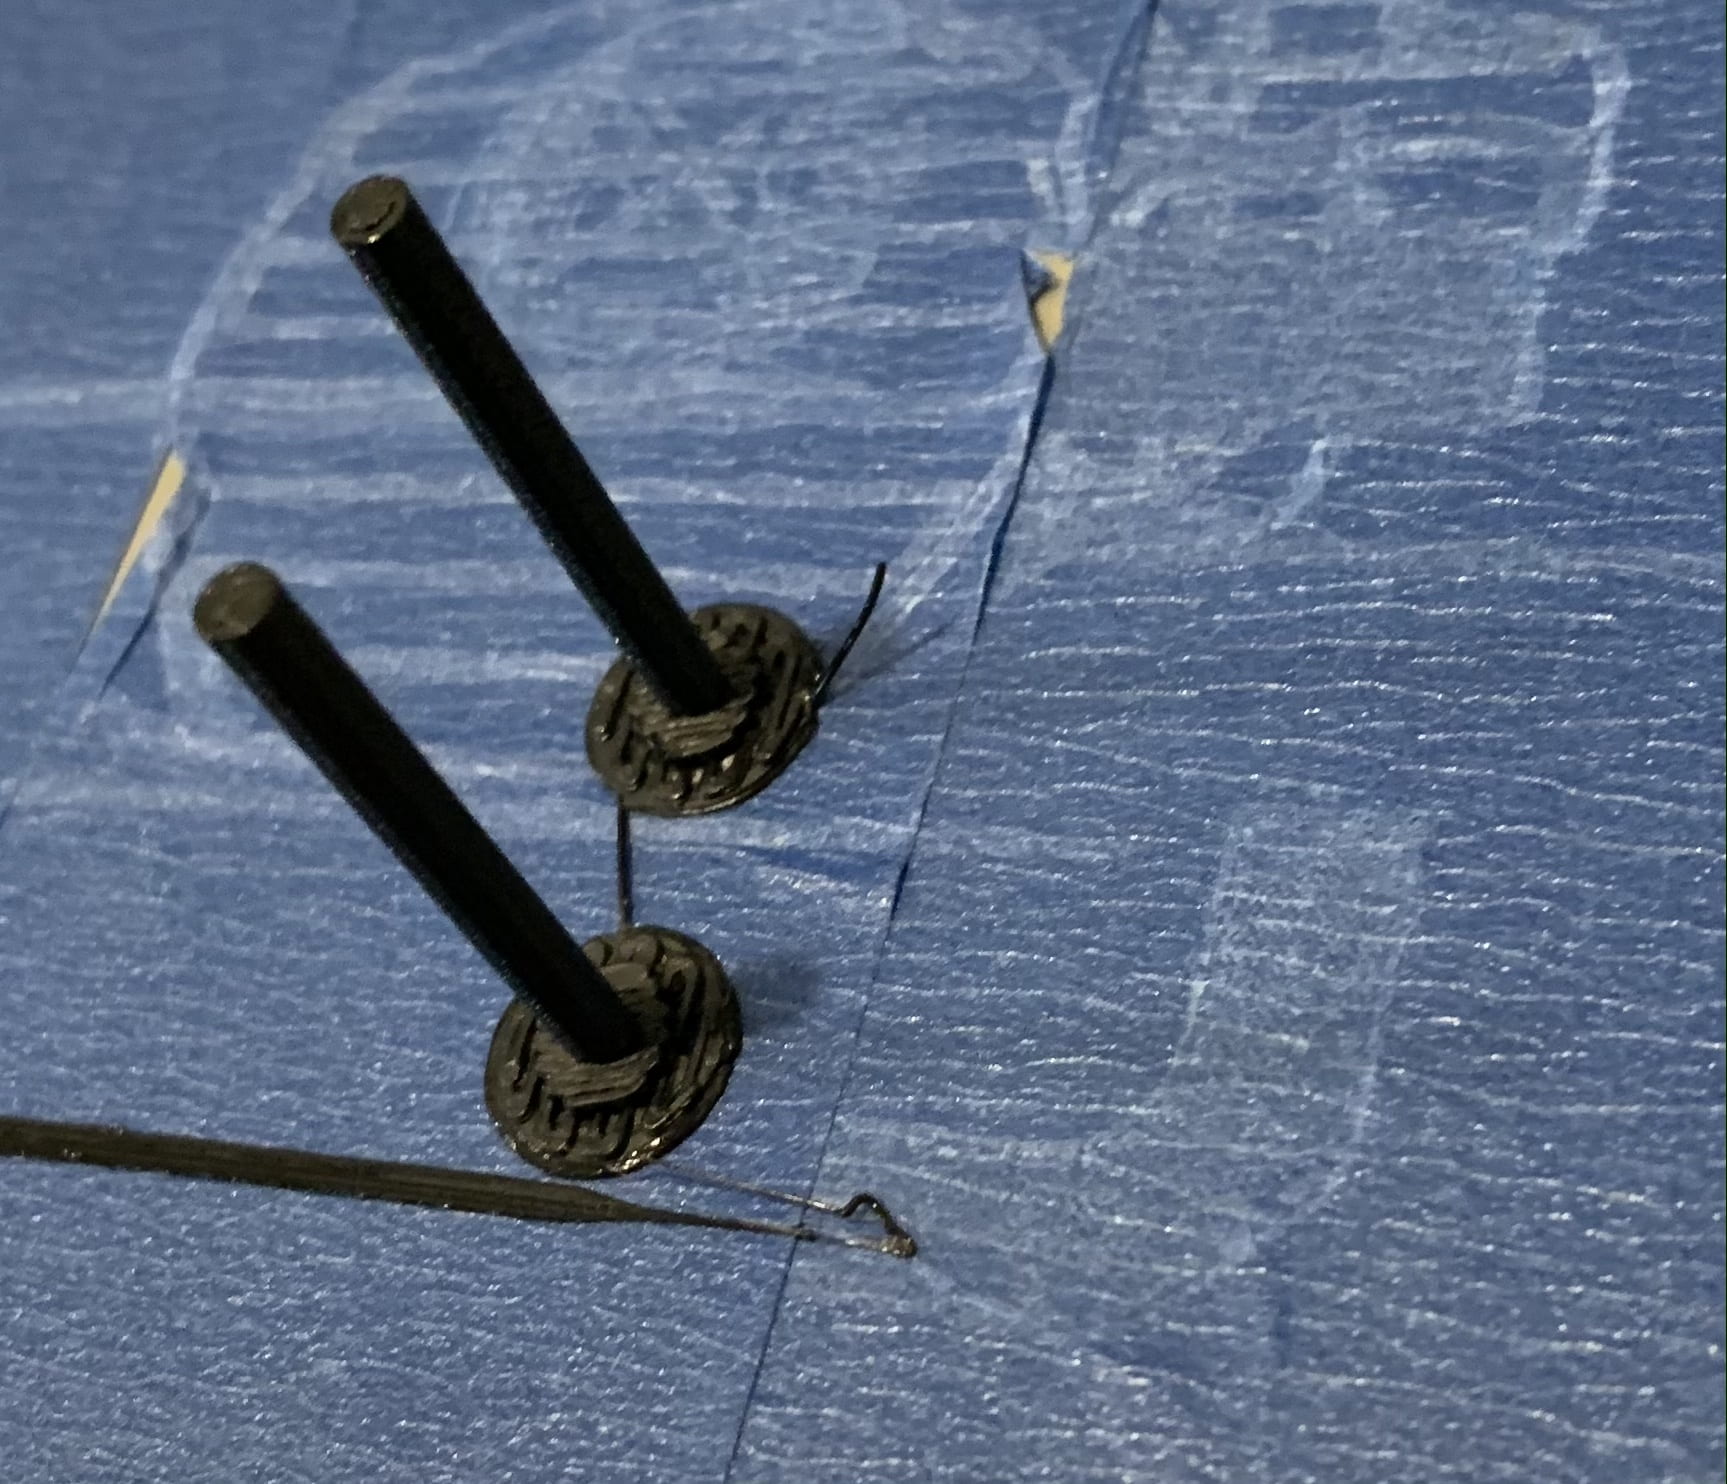
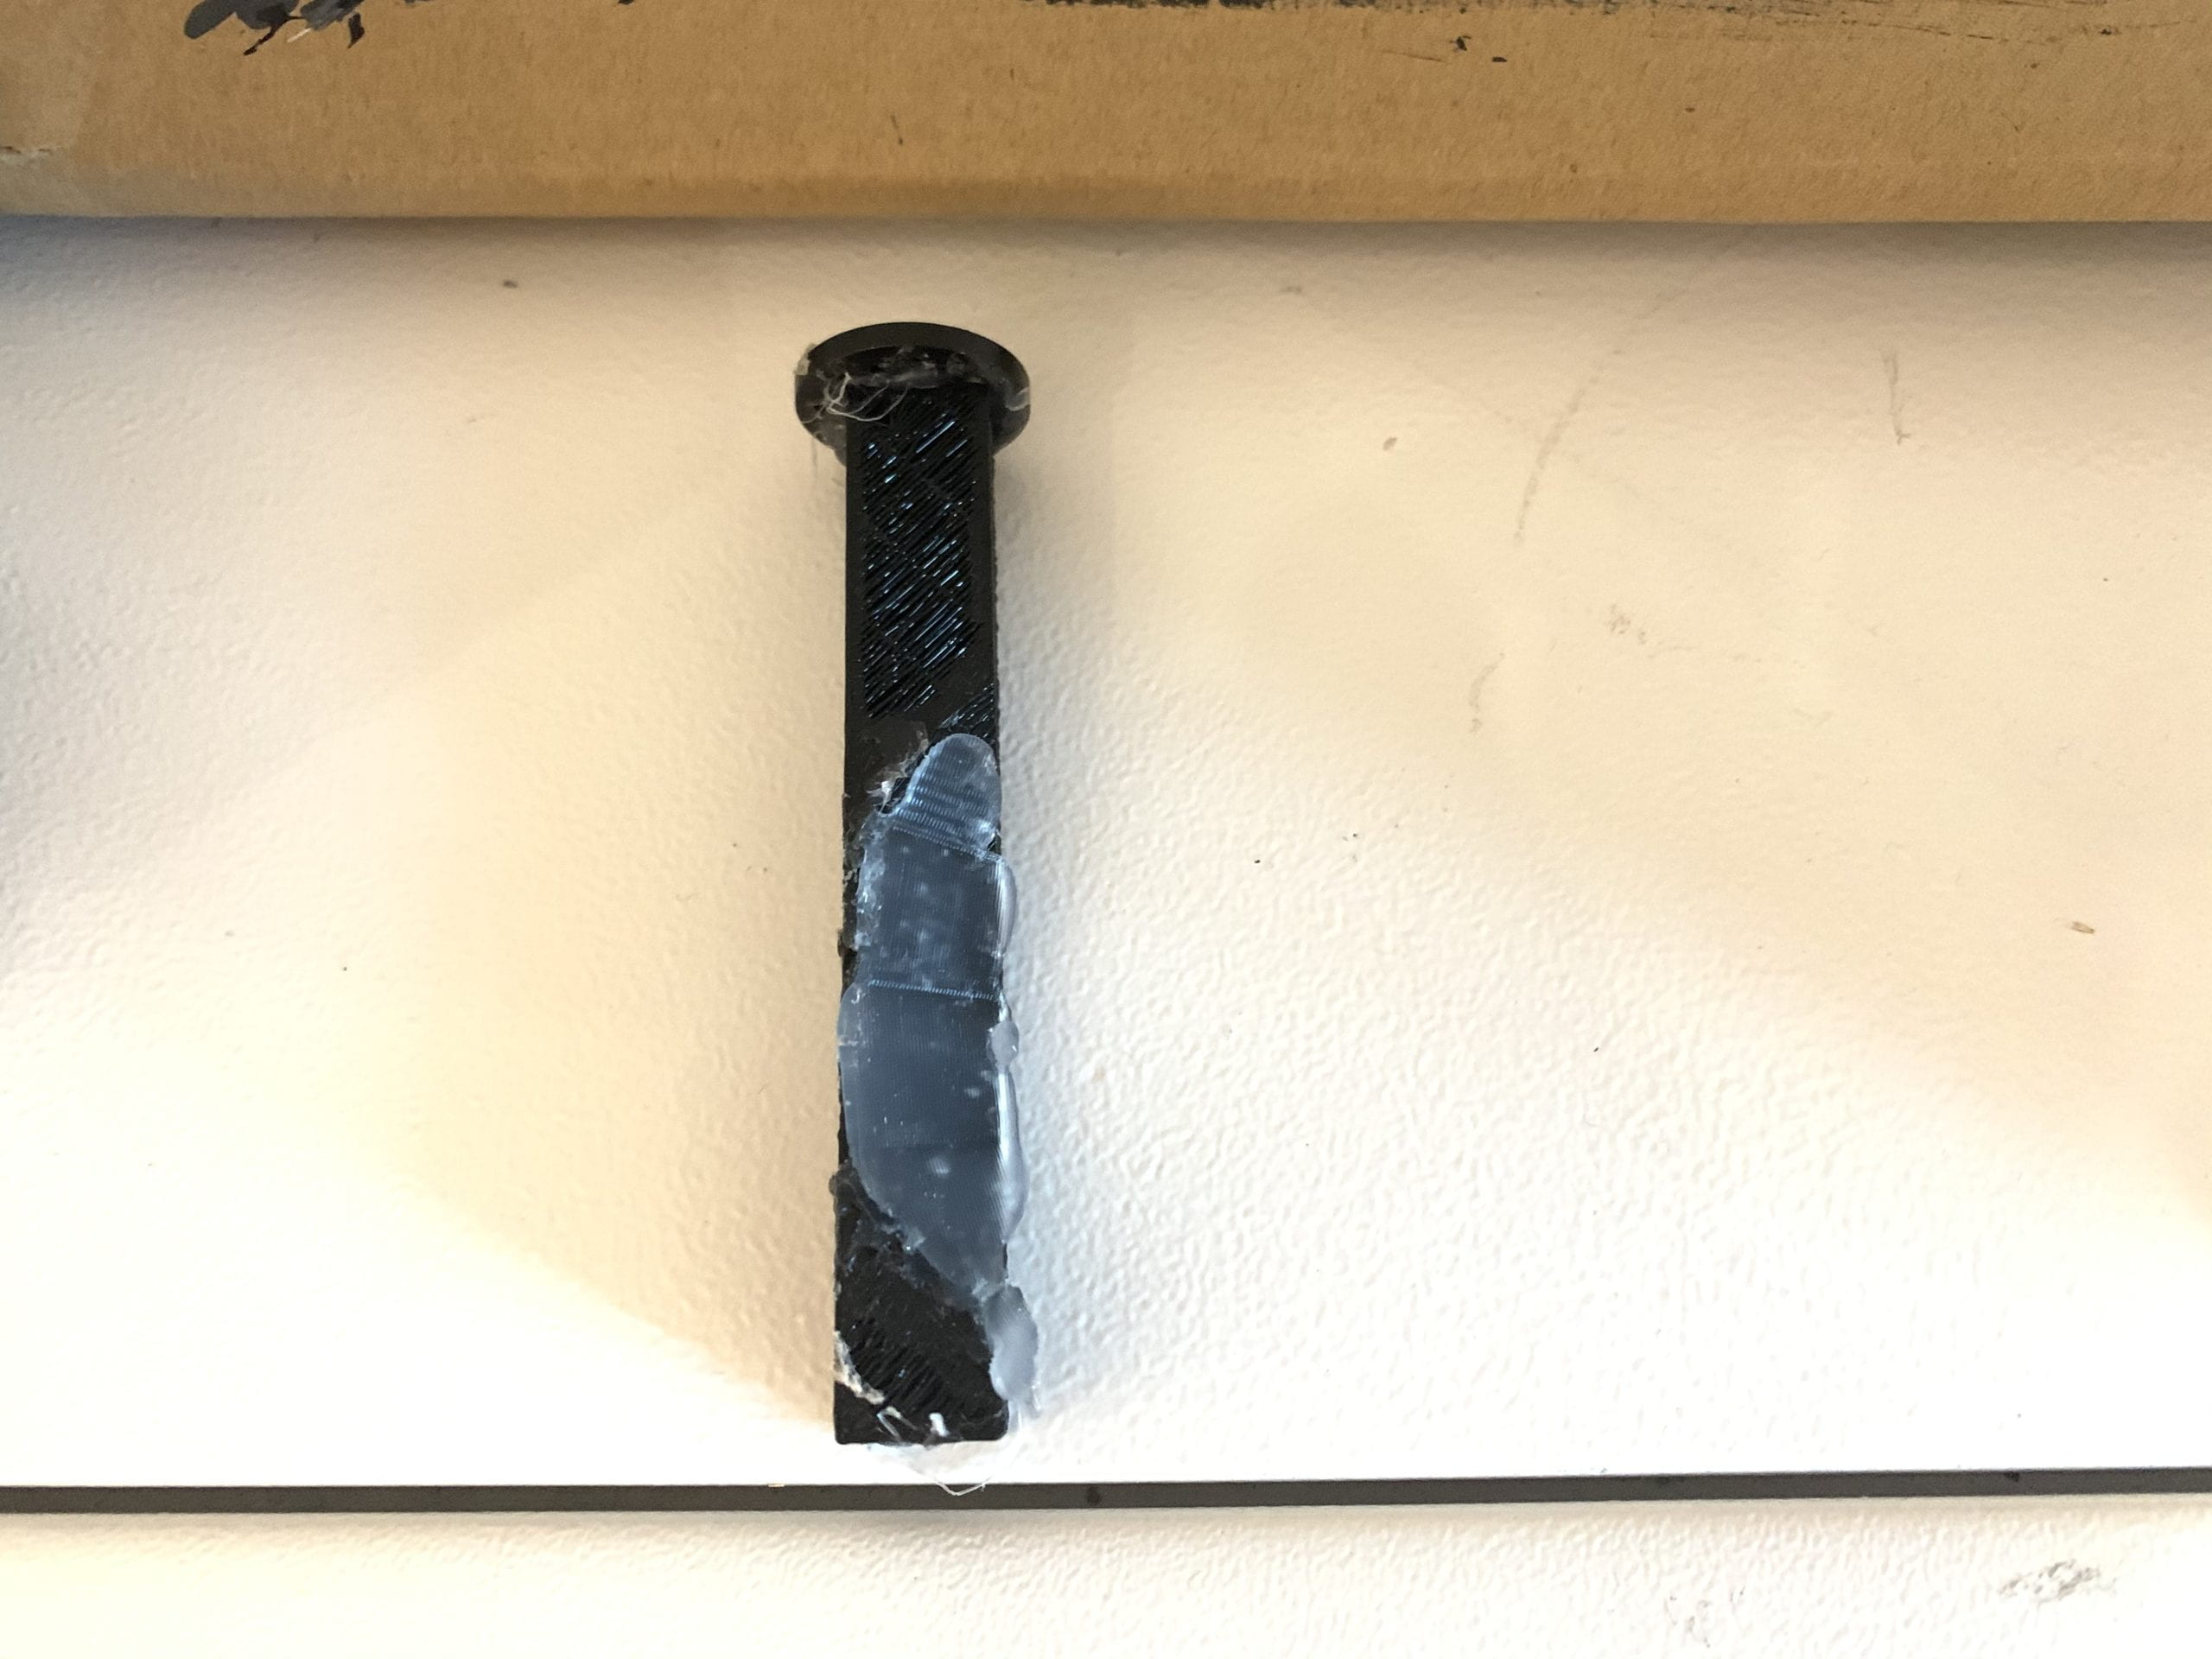
                                axis before                                                                         axis after

The axis we printed at first turned out to be not strong enough. We can’t attach the earmuff to the axis. After asking Andy for help, we printed a much thick axis with the groove of the shape of earmuff. In this way, we connected the servo with the earmuff.

In the user text section, we received a lot of suggestions and advice.

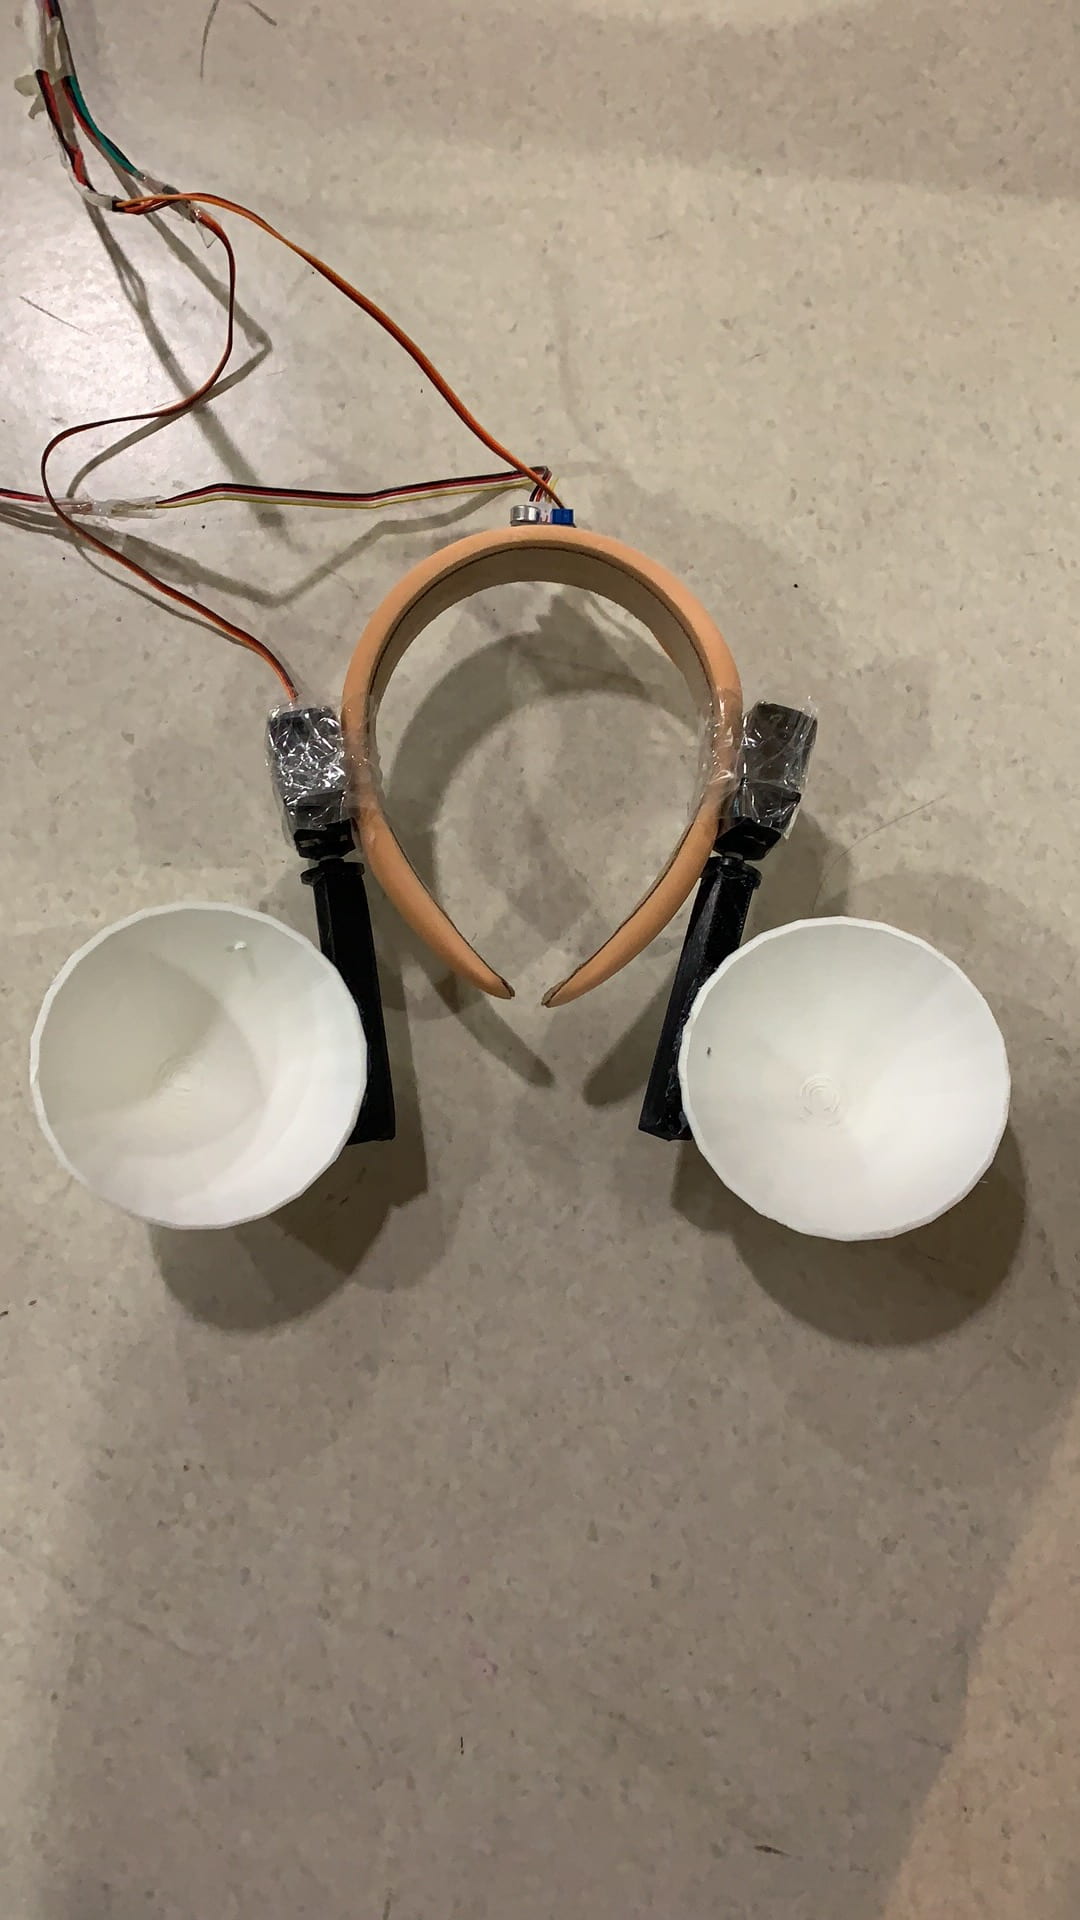
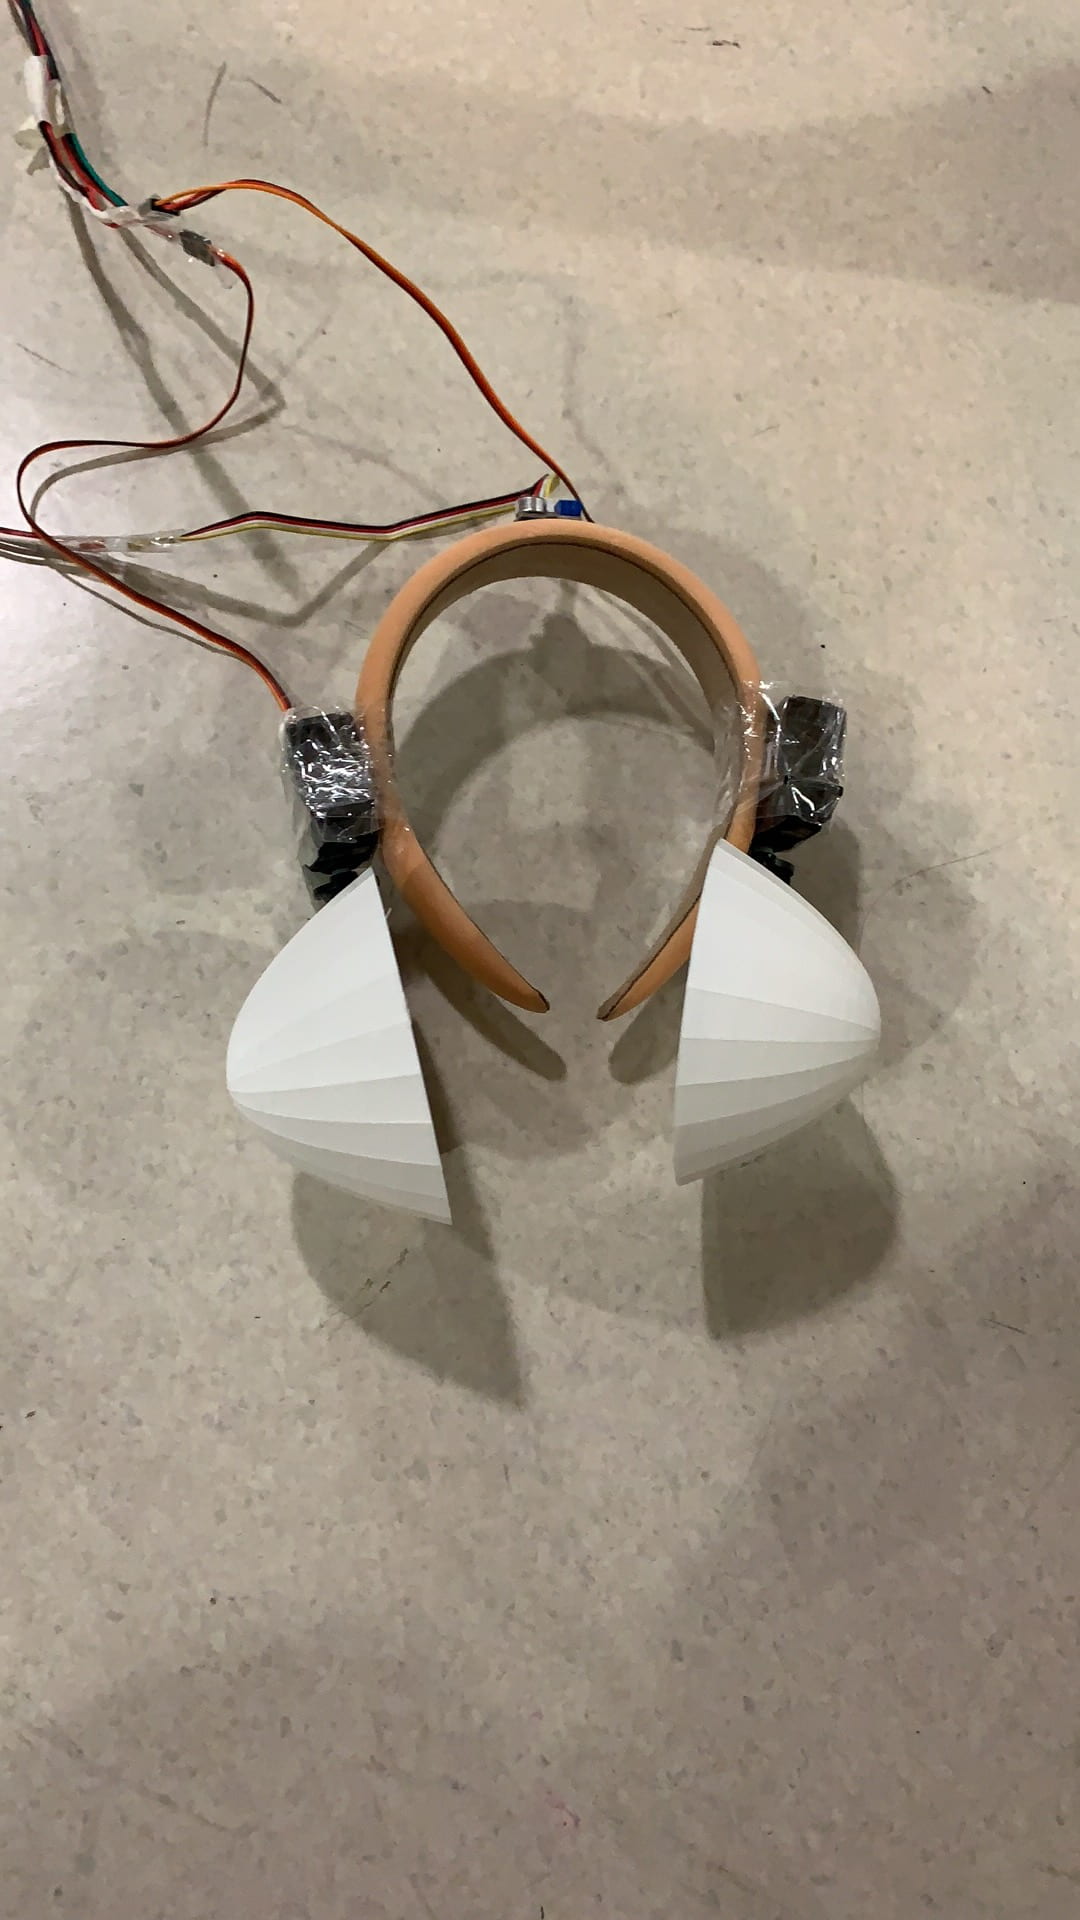
                          before improvement                                                         after improvement

1. The loudness sensor is placed at the top of the device, so it can only receive sound from above but not the direction the the user is facing. We revised by putting the sensor at front, the same direction of the user. The accuracy and efficiency improved a lot by shifting the positon.

                                                                  tied up wires

2. There are too many wires around that is annoying and hard to wear. We then tied up all the long wires using tapes. With only one thick wire, the devise is easier to wear and carry.

3. The usage of button is hard to understand and ineffective. We tried to change the codes so that pressing the button would only function as opening the earmuff for five seconds. But the code didn’t work out well. So we chose to write some short instructions around the button to guide the user.

4. The 3D printed earmuff can’t isolate sound effectively, there’s still noice after closing the earmuff. We also noticed this problem before, so we used sponge to place around the earmuff. The sponge isolated the noice a lot, and it becomes more comfortable for users to wear.

Other improvements:

To make our device truly wearable, we used power banks to power up the arduino instead of the computer. In this way, by putting the power bank into the button box, we get rid of the long wire connecting to the computer, and our device are moveable with the user. User can move around wearing the earmuff and having the button box tied on their belt.

                           Thanks Krabs a lot for our user tests again and again

Conclusions

Our project, the intelligent Ear Protector, aims to arise people’s awareness of the sound pollution around us as well as help those who suffers a lot from this problem. This earmuff can automatically close to reduce the sound when the environment is too noisy, and open again when it’s quiet enough. The button wearing on the wrist can open the earmuff whenever the user wants to hear something clearly or talk to someone.

This earmuff functions as a channel for the user to interact with the environment around him/her. To interact, the user rejects the noise and accepts the preferred quiet environment. However, there still has a lot to improve about the interaction. Now, the device has the only function to open and close, and the user doesn’t has much choice besides opening it. The interaction between the user and the earmuff itself is also not strengthened.

For improvements, we can add more functions to the ear protector that it can suit different environments. Also, we could add sensors to detect sounds from different angles, we could have the servo rotating various of angles corresponding to different levels of noice. Most importantly, we could strengthen the interaction between the user and the device, so that the user can have more options and controls over the earmuff.

For things learnt in this project, there are difficulties in every step and the experience of solving them one by one is really inspiring. From the brainstorm of what to built, the process of making prototypes, debugging the code to improvements from the user test. We reached to fellows and instructors a lot for help, and talking with others, having different ideas and solutions to come up together. I learnt about plan making, problem solving, project improving, and so on in this whole project.

All in all, we hope to build this Intellectual Ear Protector to alert people of the sound pollution problem around all of us and help people suffering from the noise. With successes and failures in the whole process, I learnt various of skills in dealing with problems in projects as well as in the real life. We hope our project can, to a little extent, awakes people to notice the sound pollution, as well as other invisible things damaging our bodies and make efforts to shift this situation.