Project Title: BE CAREFUL THE TIGER!
Name: Rita Qiu
Instructor’s name: Professor Margaret Minsky
CONCEPTION AND DESIGN:
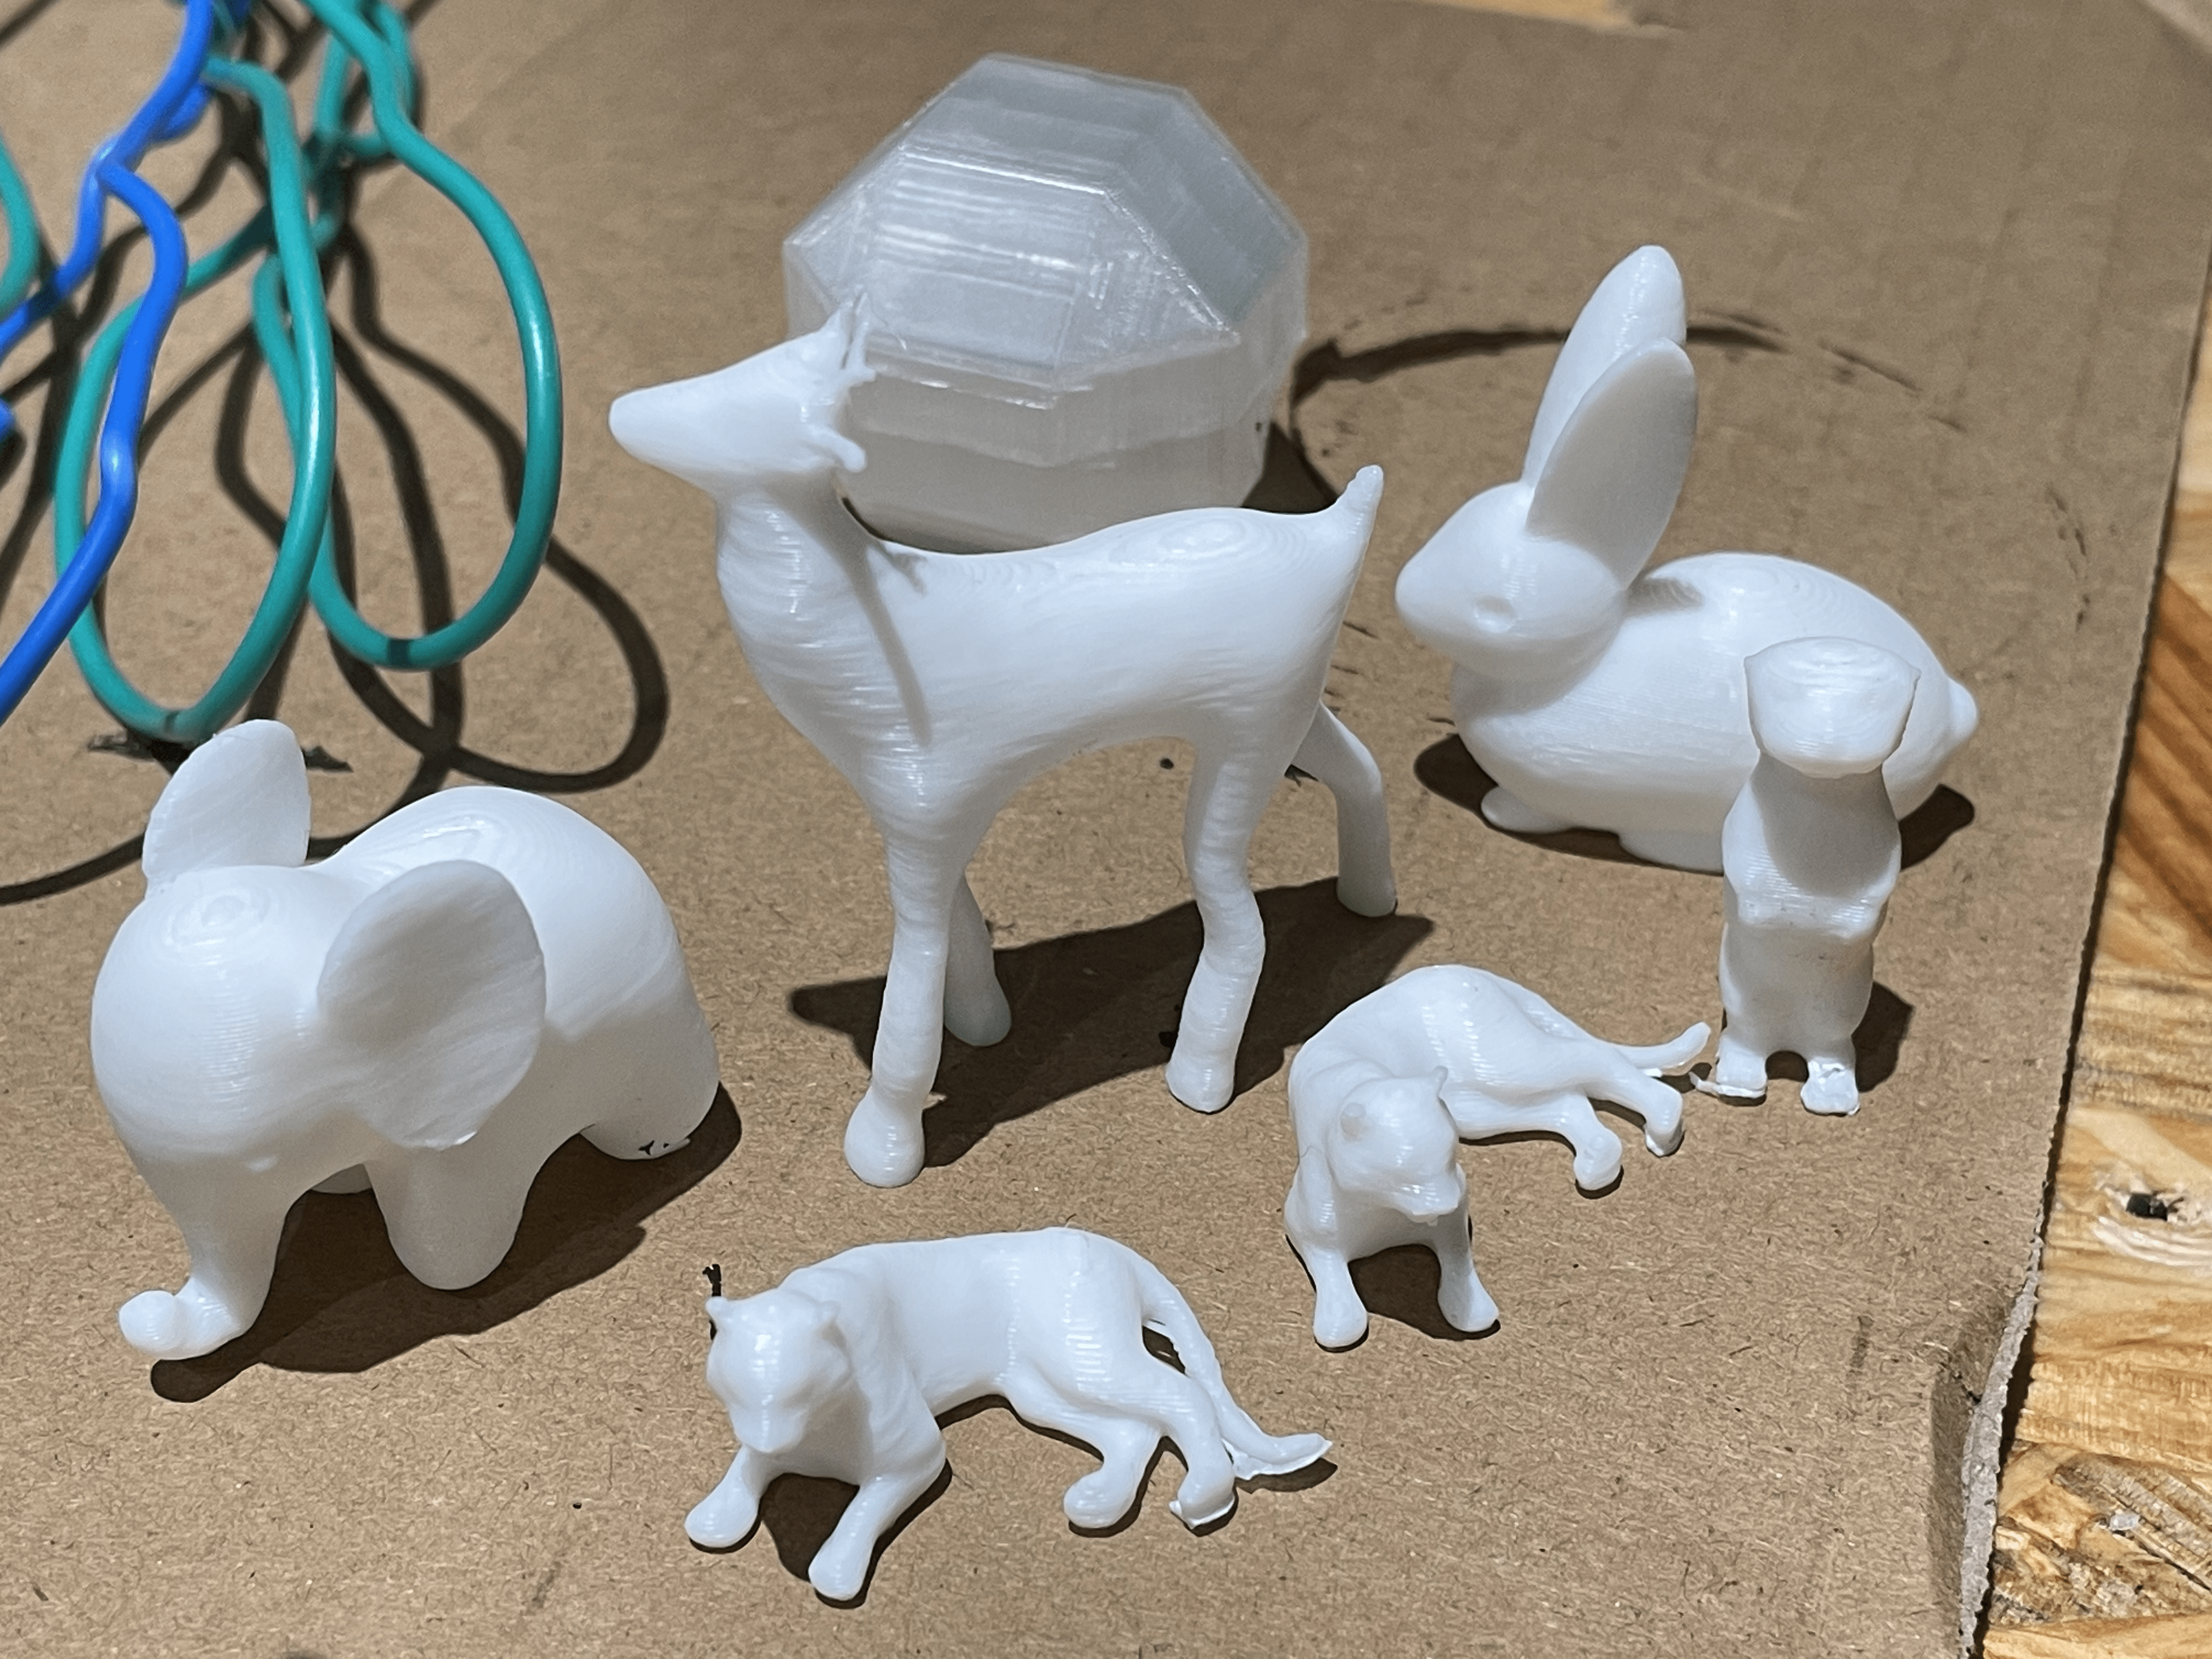
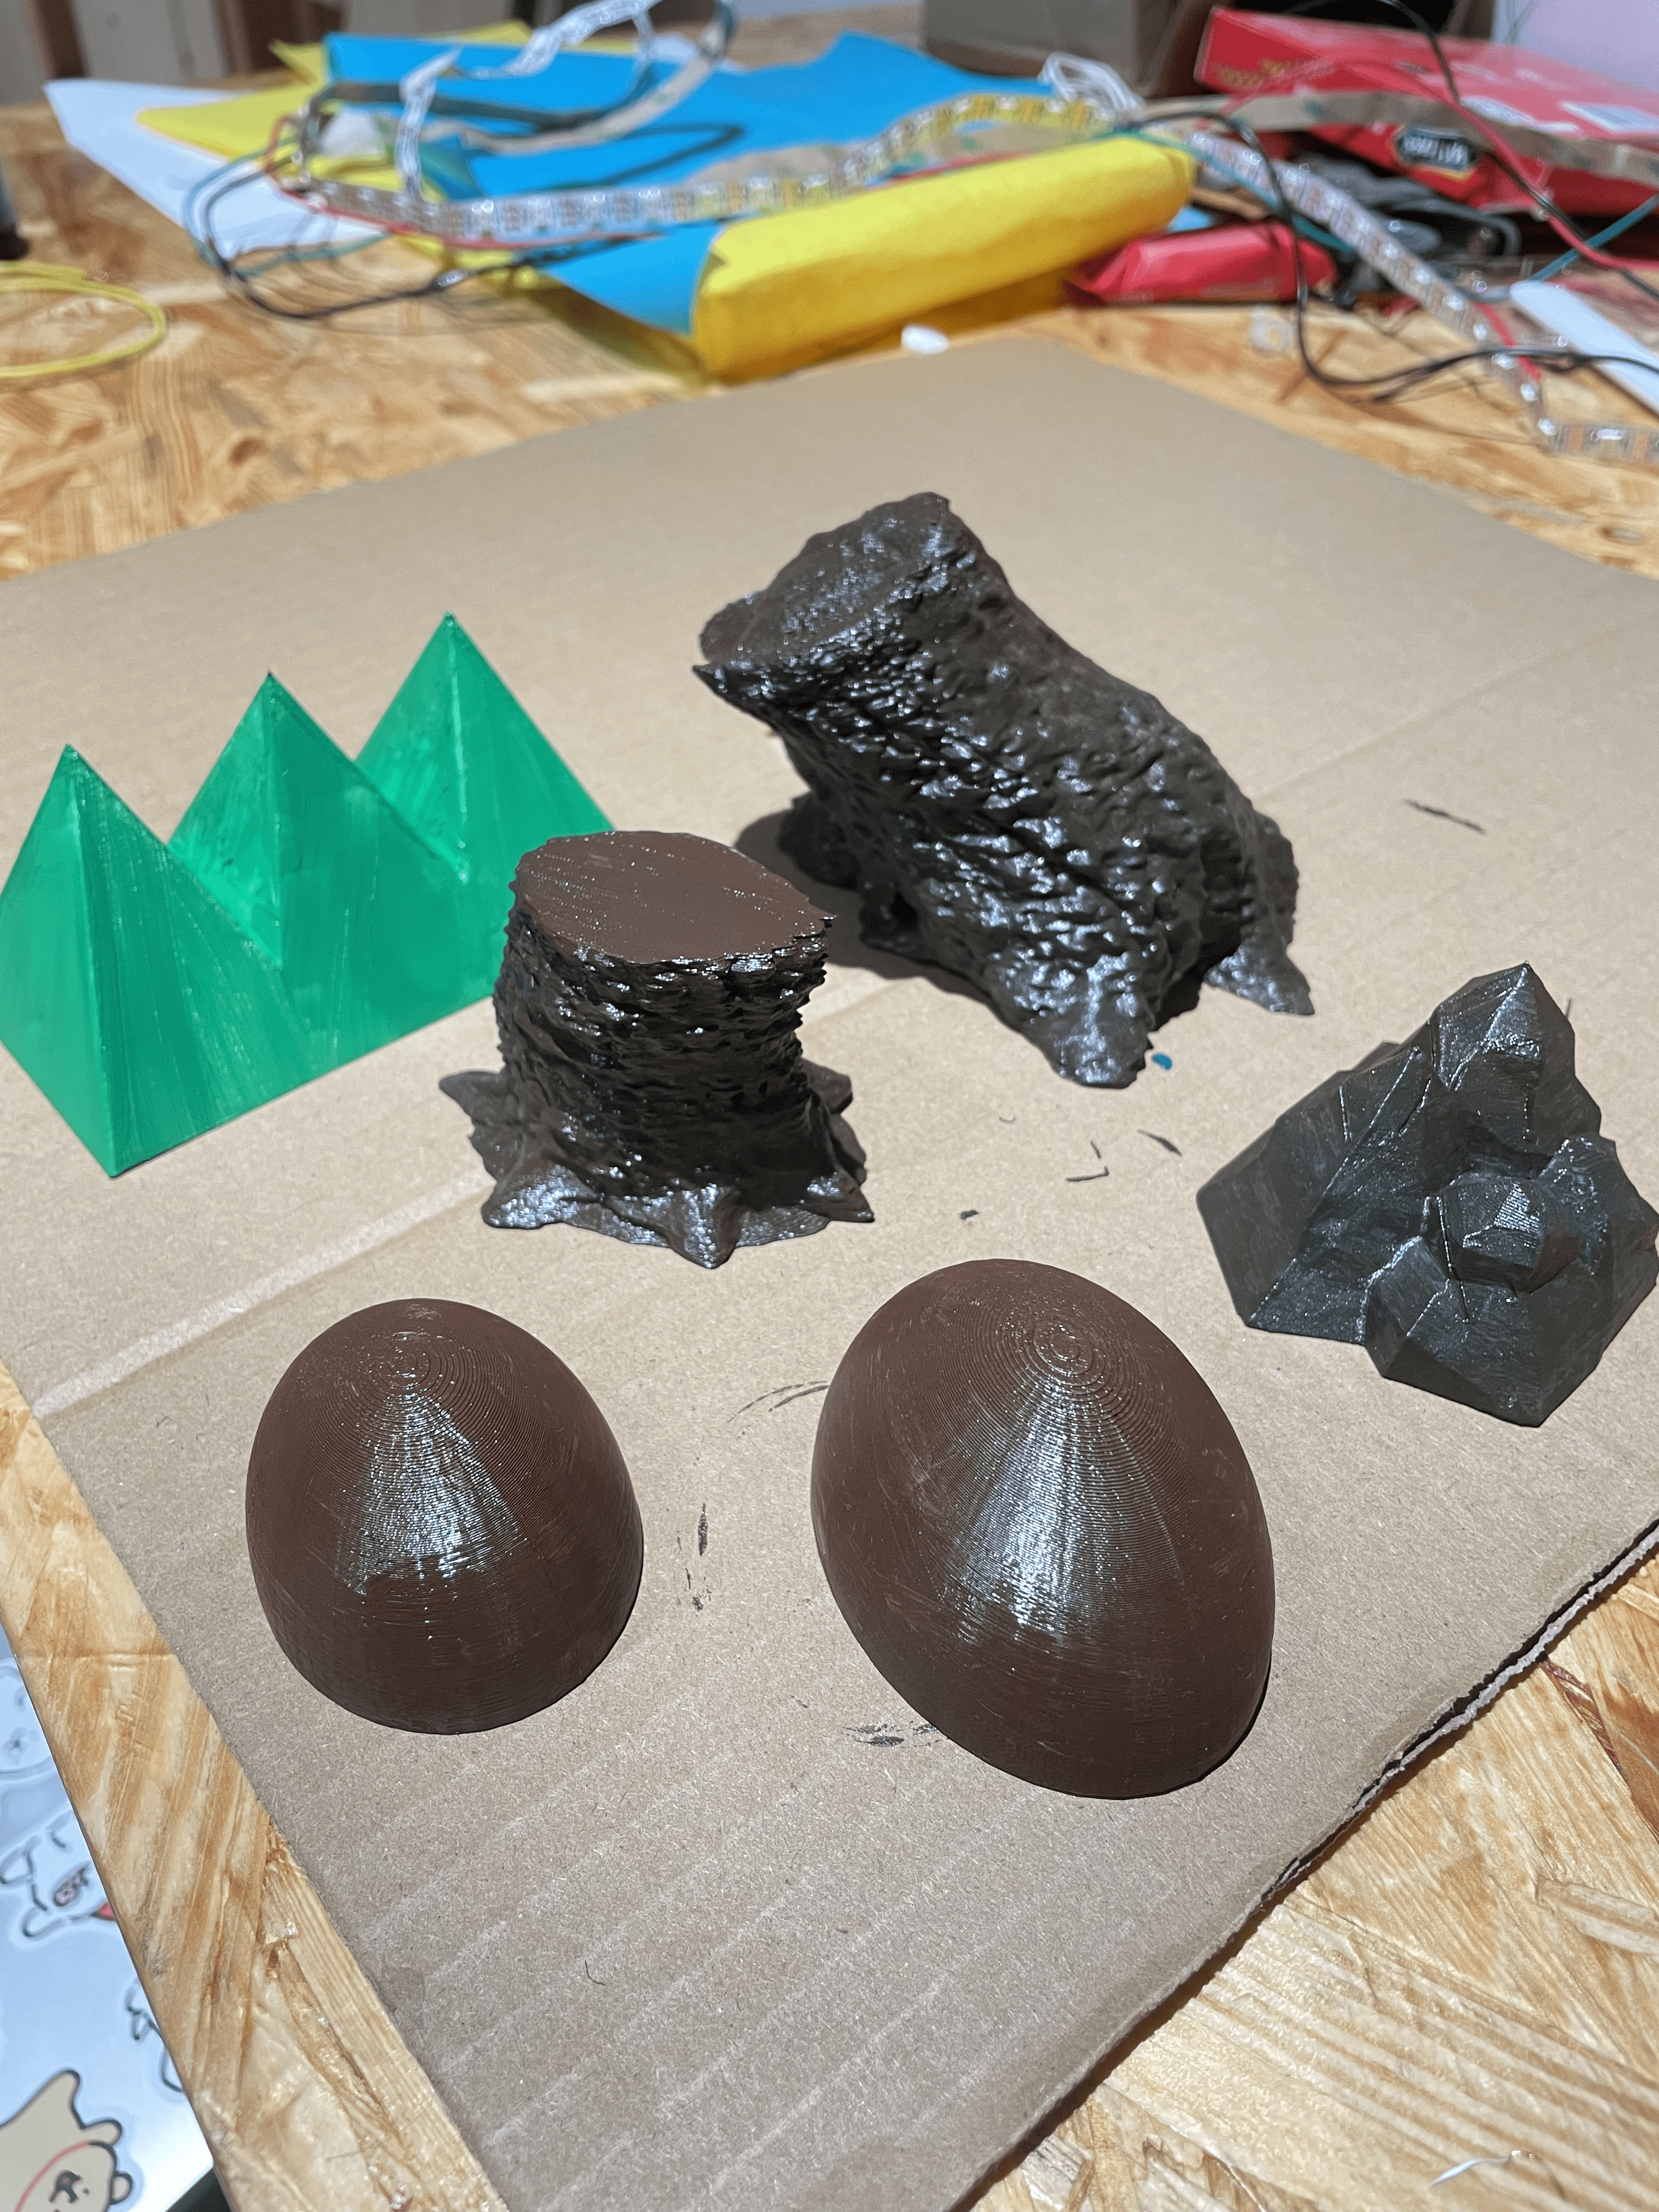
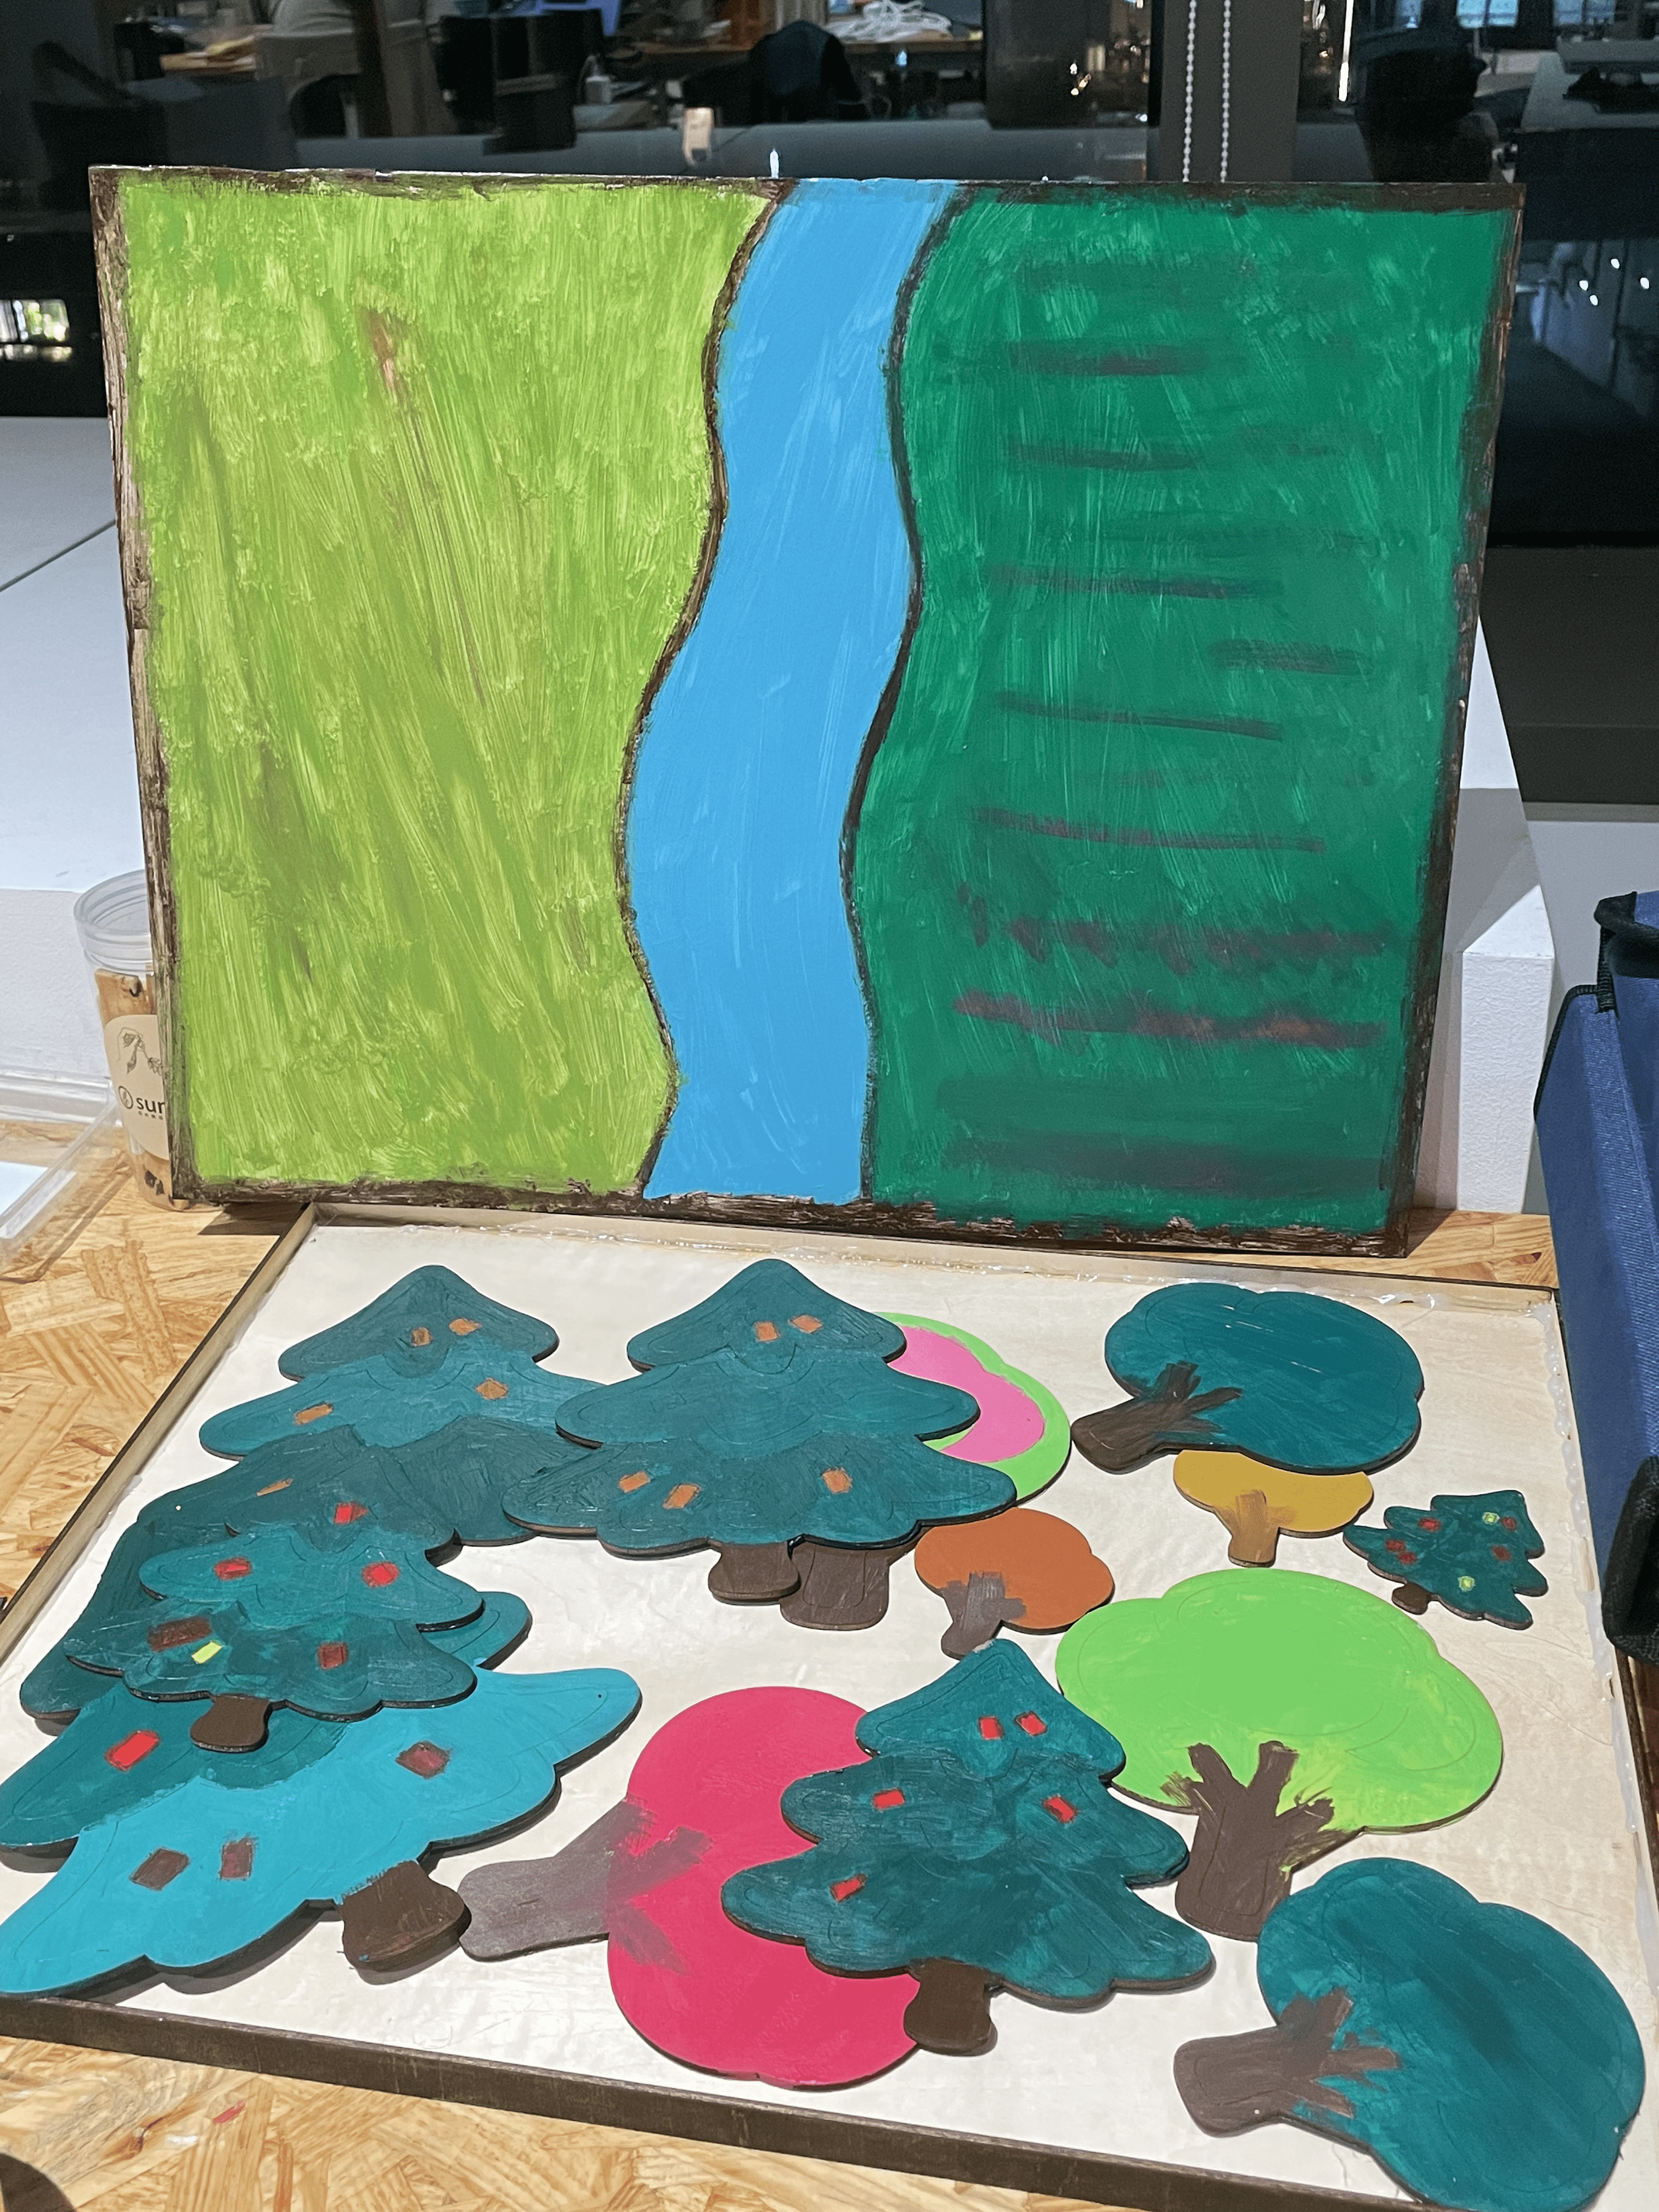
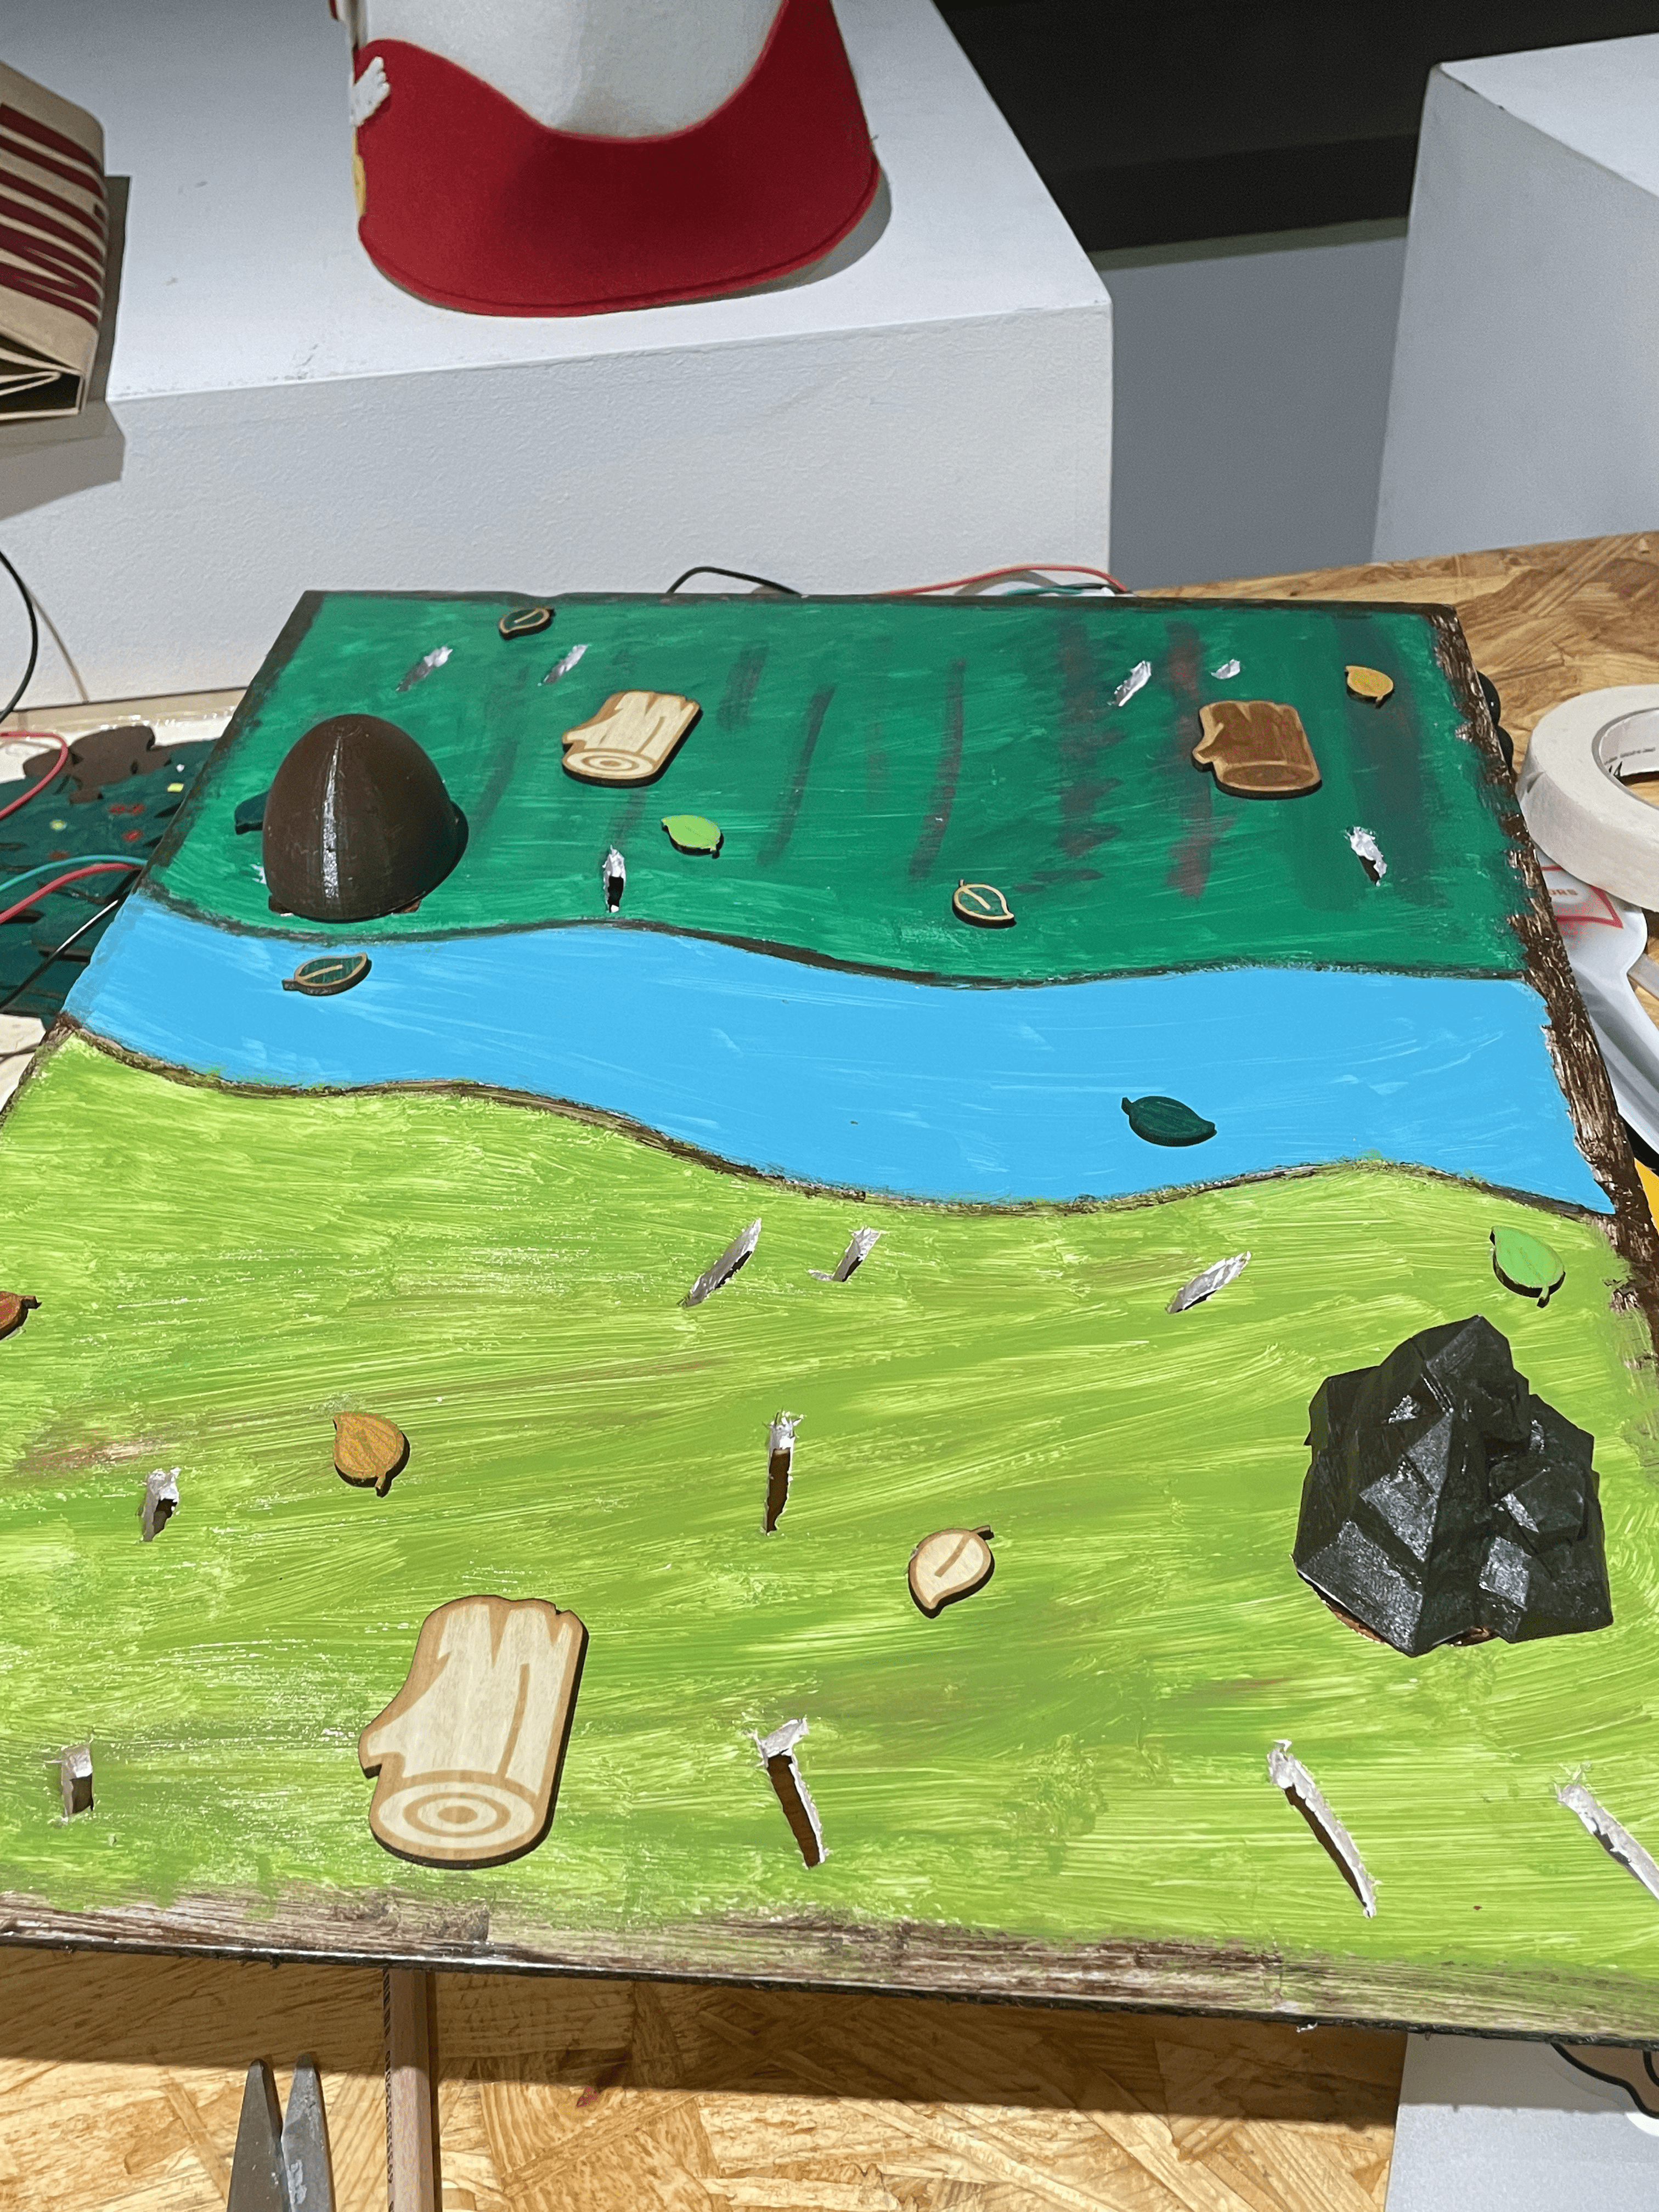
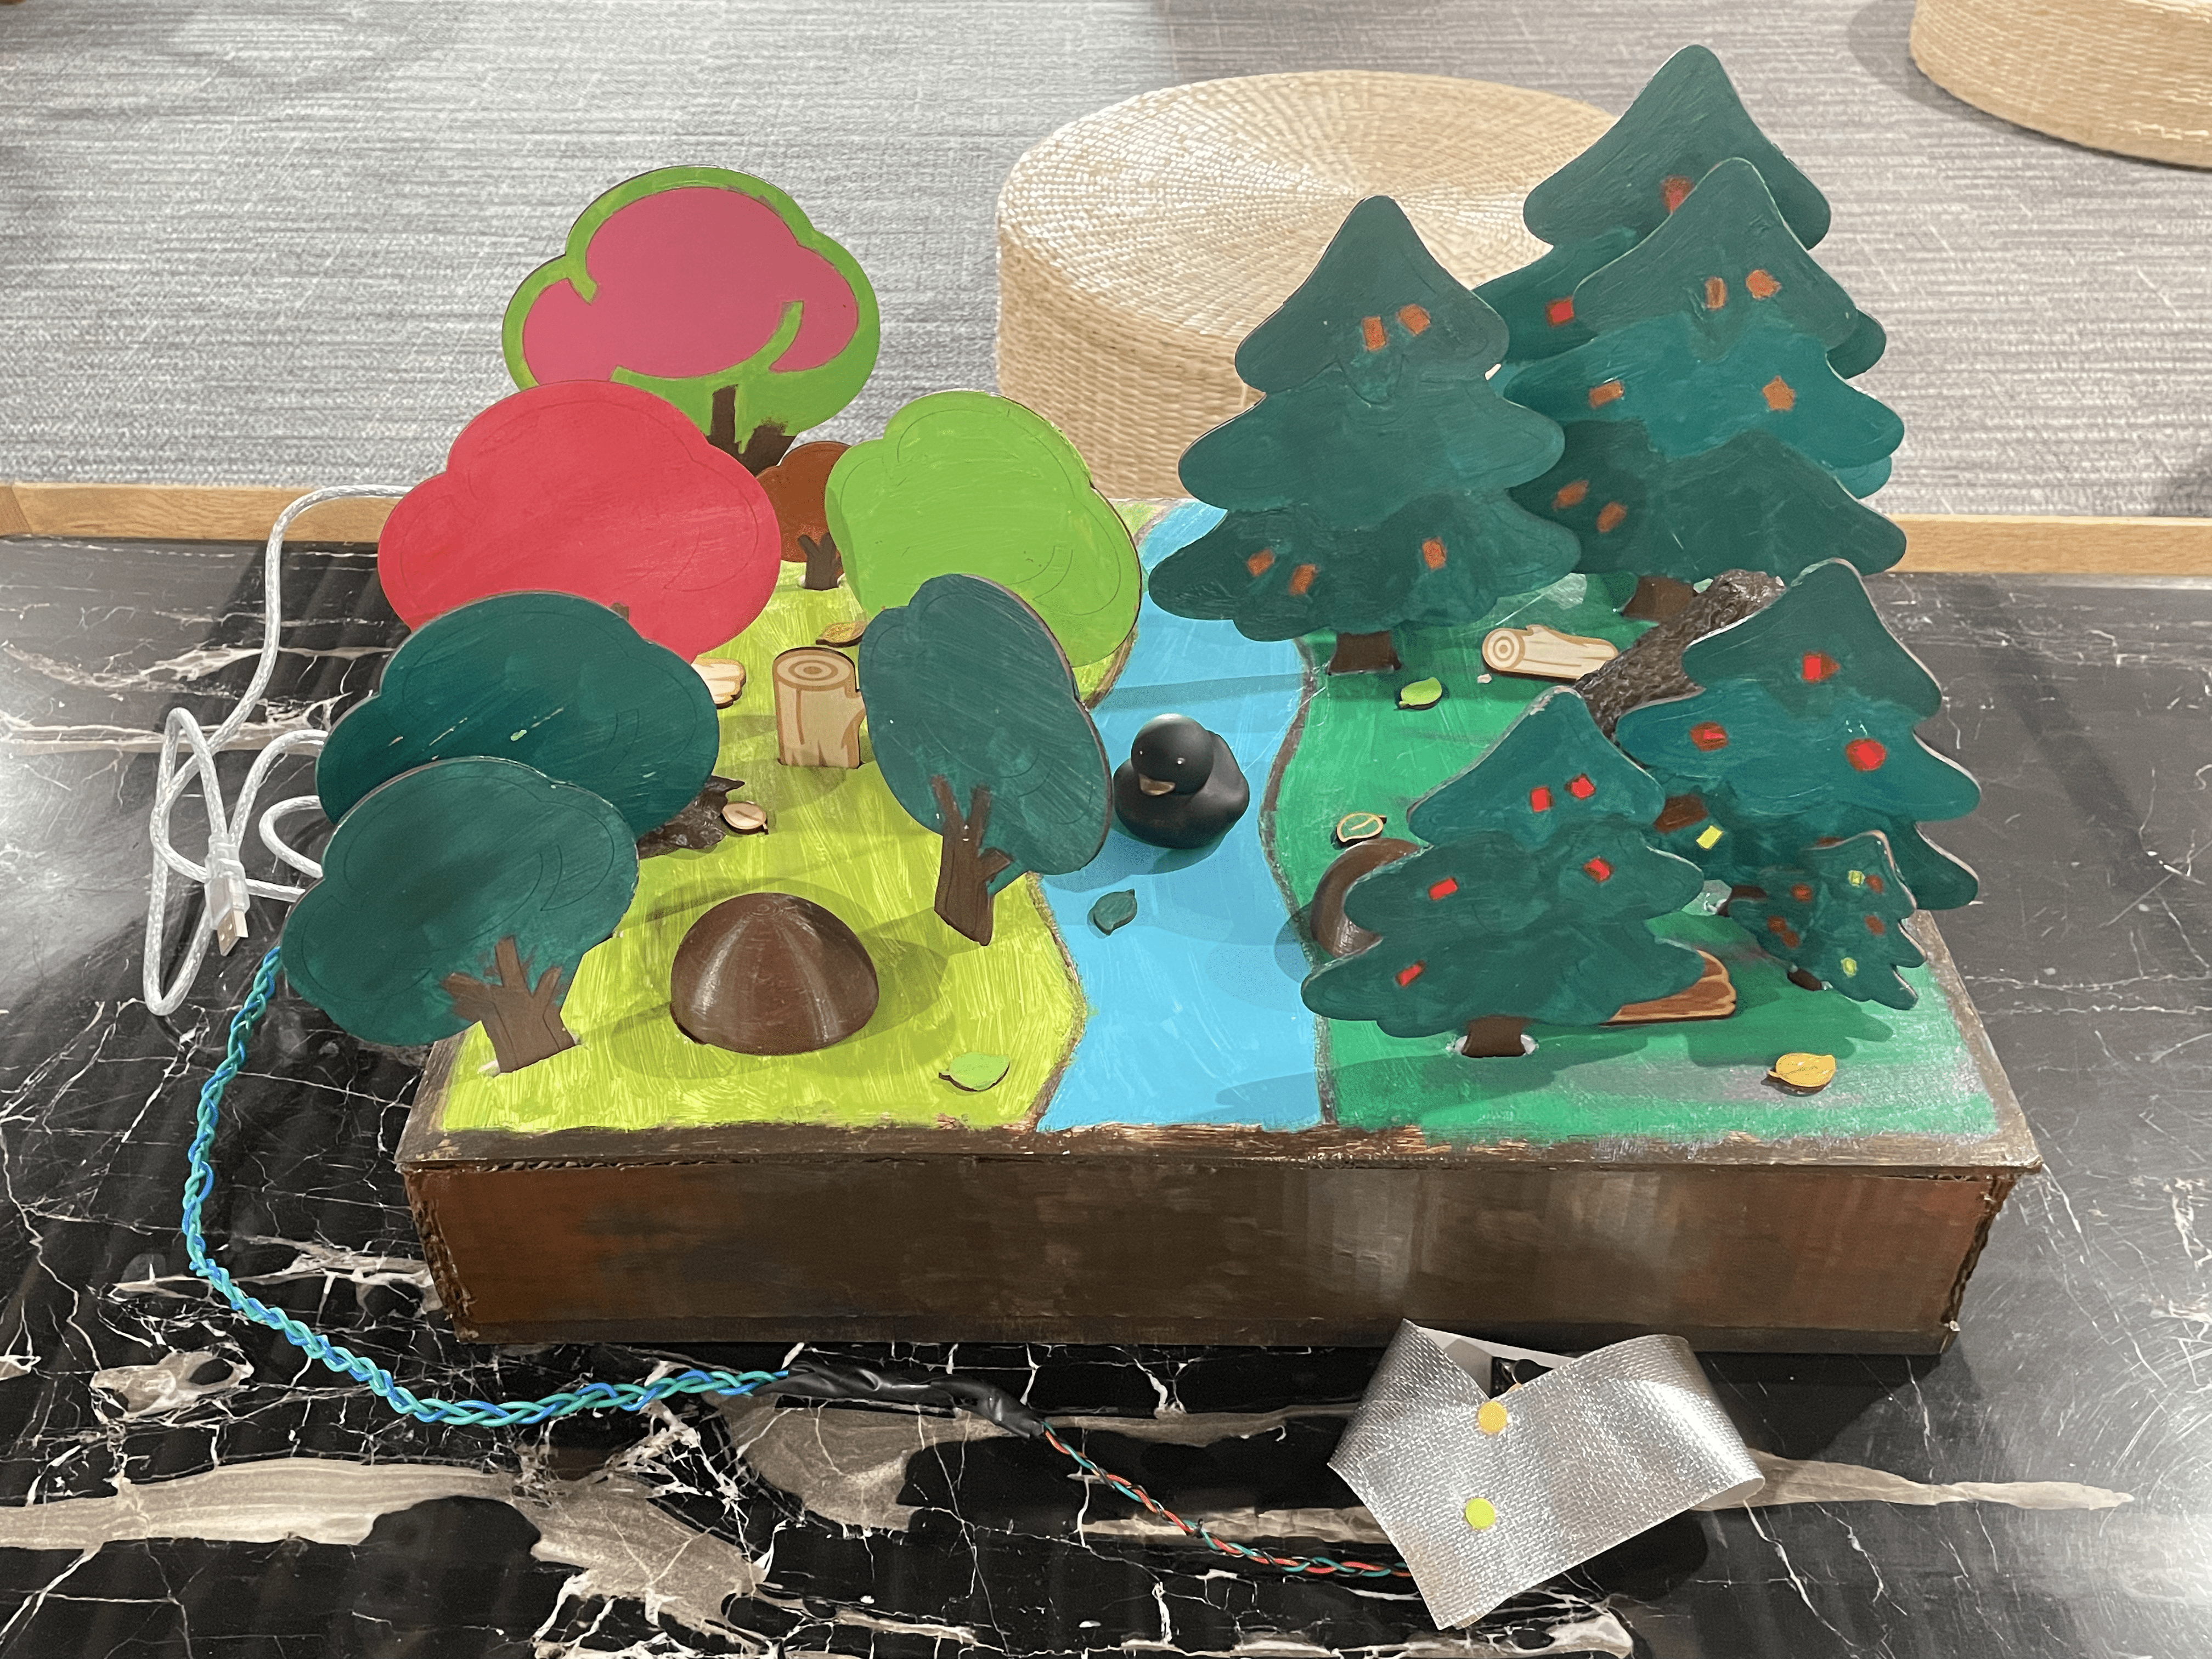
This project is an interactive game in which users explore an artificial forest in looking for hidden animals. In the scenario, the woodland environment is replicated, and animals are hidden beneath stones and other 3D Printing items. Users interact with the project by picking up stones and 3D Printing objects to expose the animals hidden beneath them. However, if they uncover a tiger, a vibration sensor makes a vibration with tiger rora from Processing to startle the user in the same sense that the tiger is biting them. The goal of the project is to engage people in the fun and challenging activity of searching for animals while adding a surprise element with the tiger encounter.
During the User Testing session, because of the wiring issue, my project cannot be used. So I can just show the users the physical forest and animals and introduce them to the playing approach. Users suggested that I can stick the animals on the board because when they find them, they don’t know how or where to put them, and it’s hard to recover those animals because they’re hidden at a particular angle. And it’s a good idea to paint the tigers a different color than the other animals to make them stand out because all of the animals are 3D printed with white wires. All of the suggestions are useful and work well with my project.
FABRICATION AND PRODUCTION:
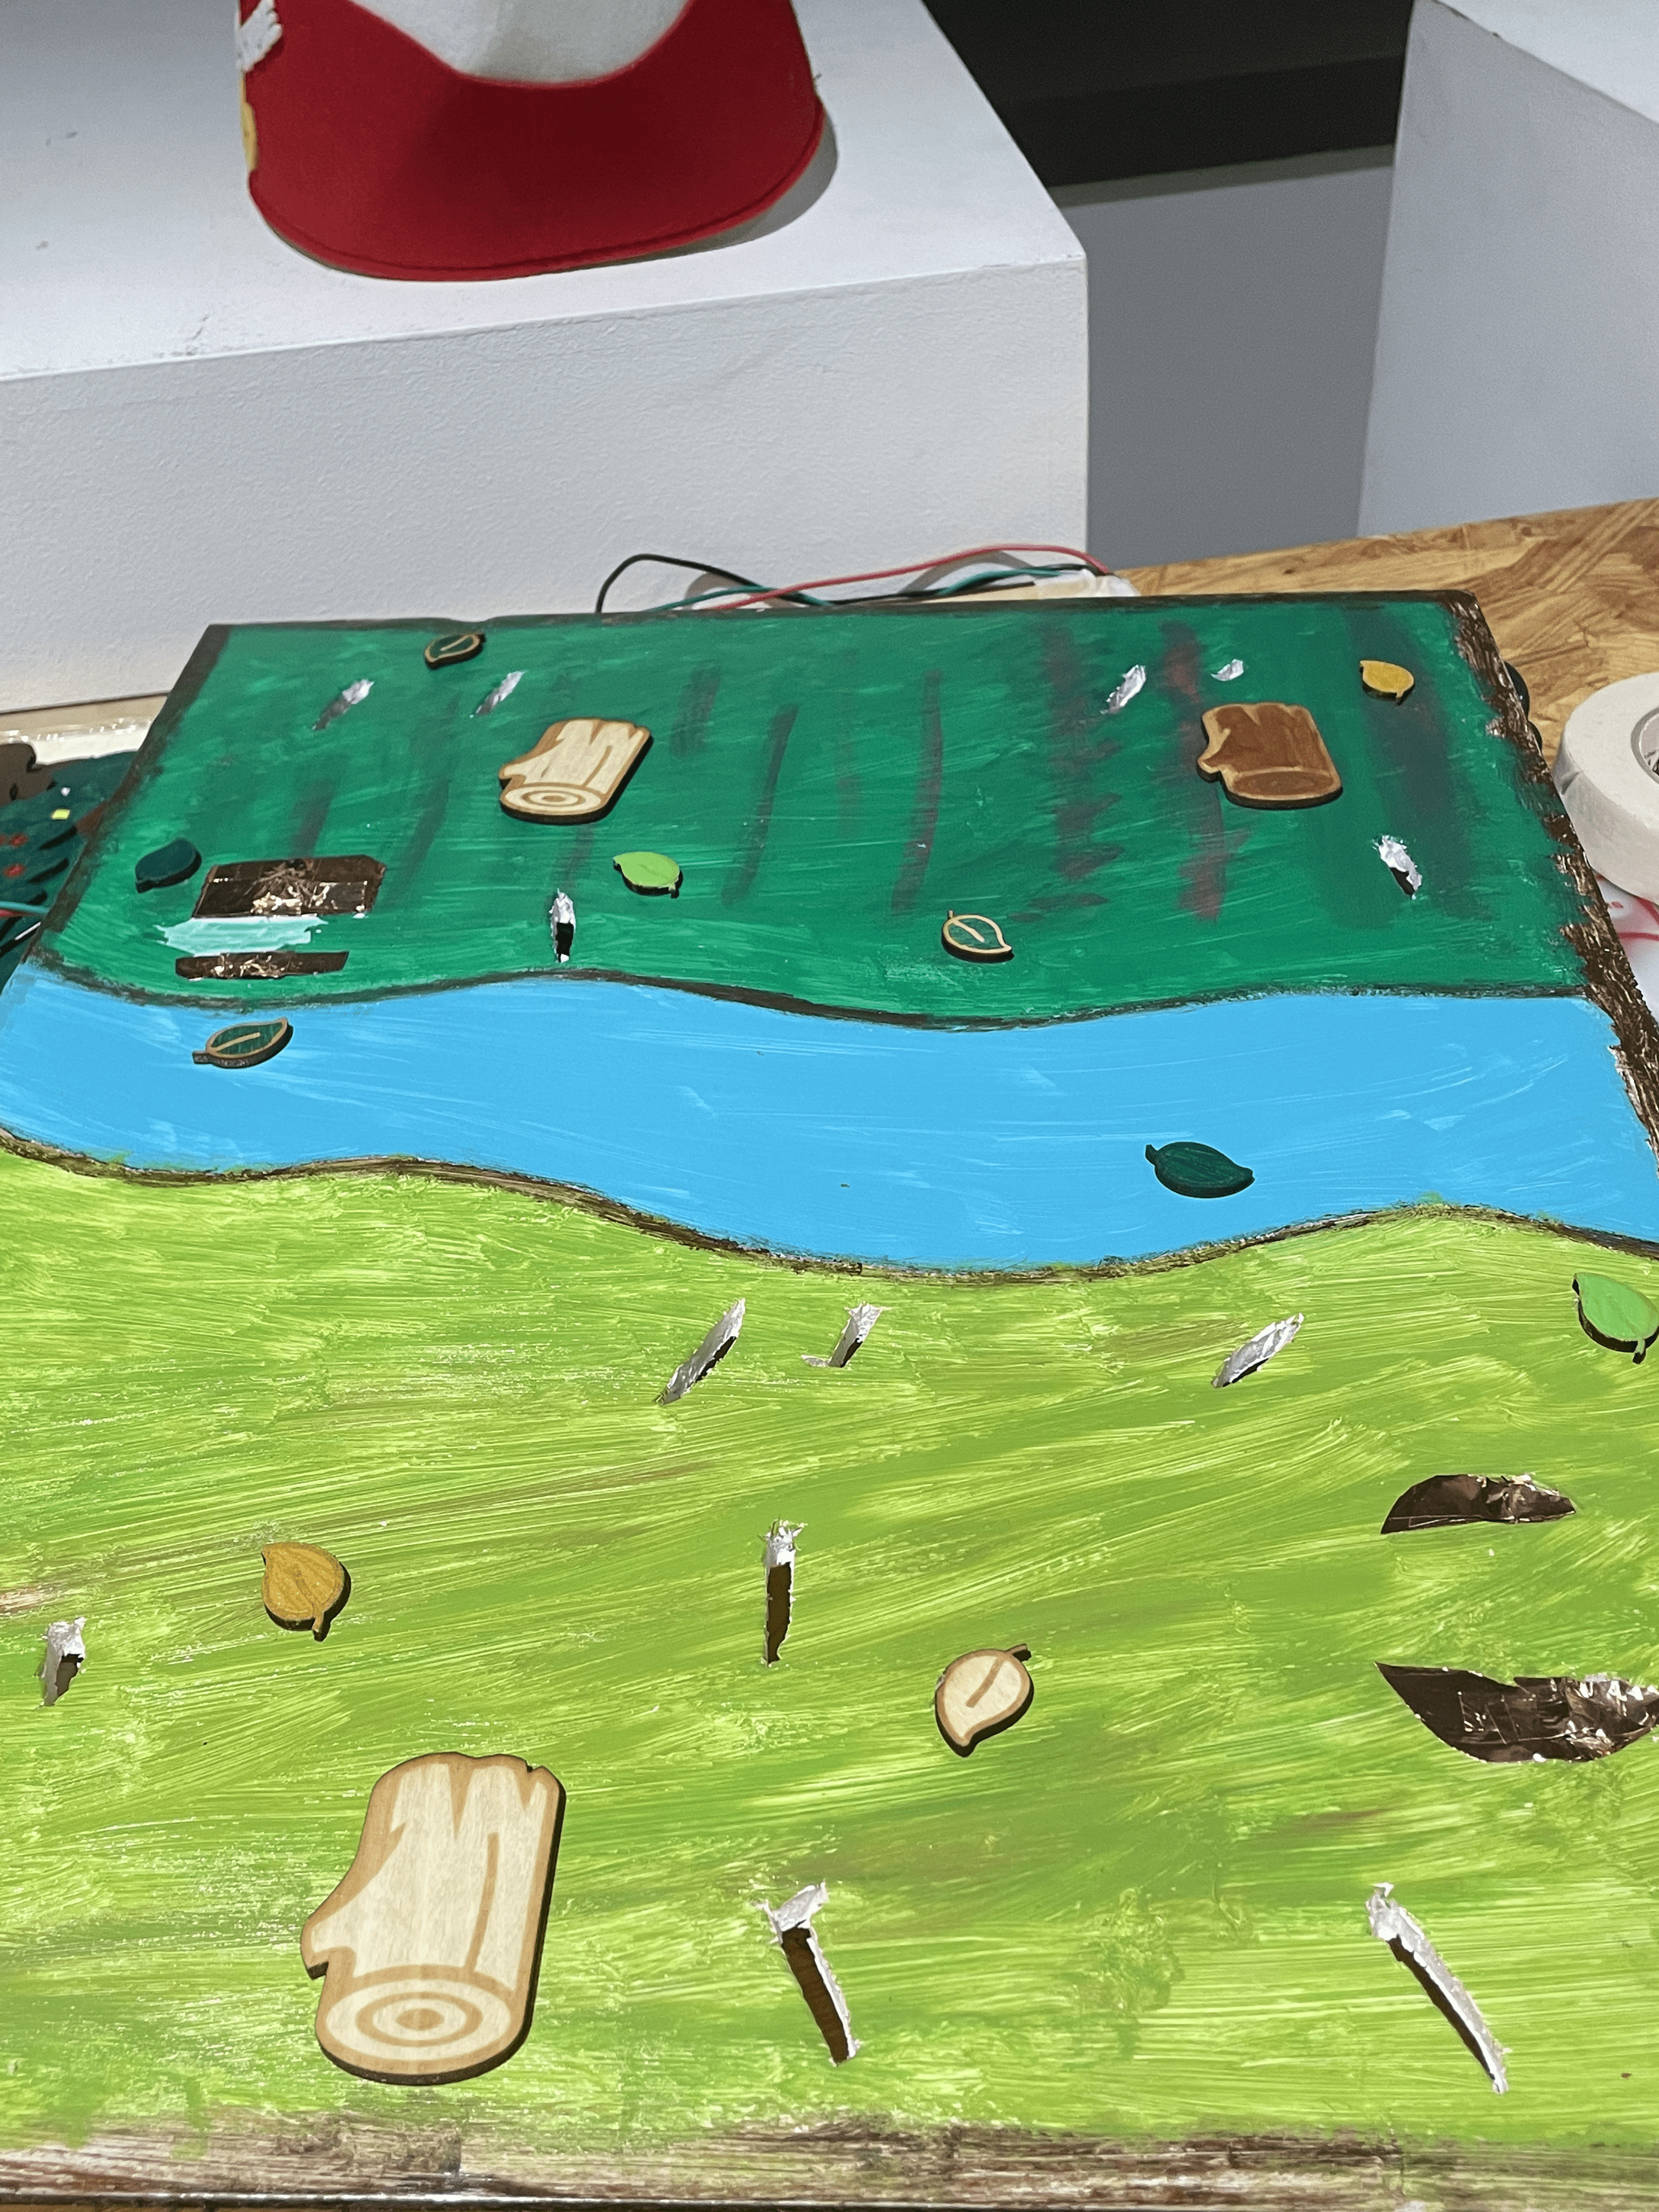
The first step I did for my project is brainstorming roughly what the forest looks like and how many animals I need. I used Cuttle to create the trees and the length and width of the box I needed, then went to Tinkercad to find some 3D model animals, stones, and trunks. Before cutting a hole for each cover, I roughly evaluated the size and height of the hole while putting the animals in the covering things. After I got my laser-cut trees and base box, I painted them all to make it look more like a forest.
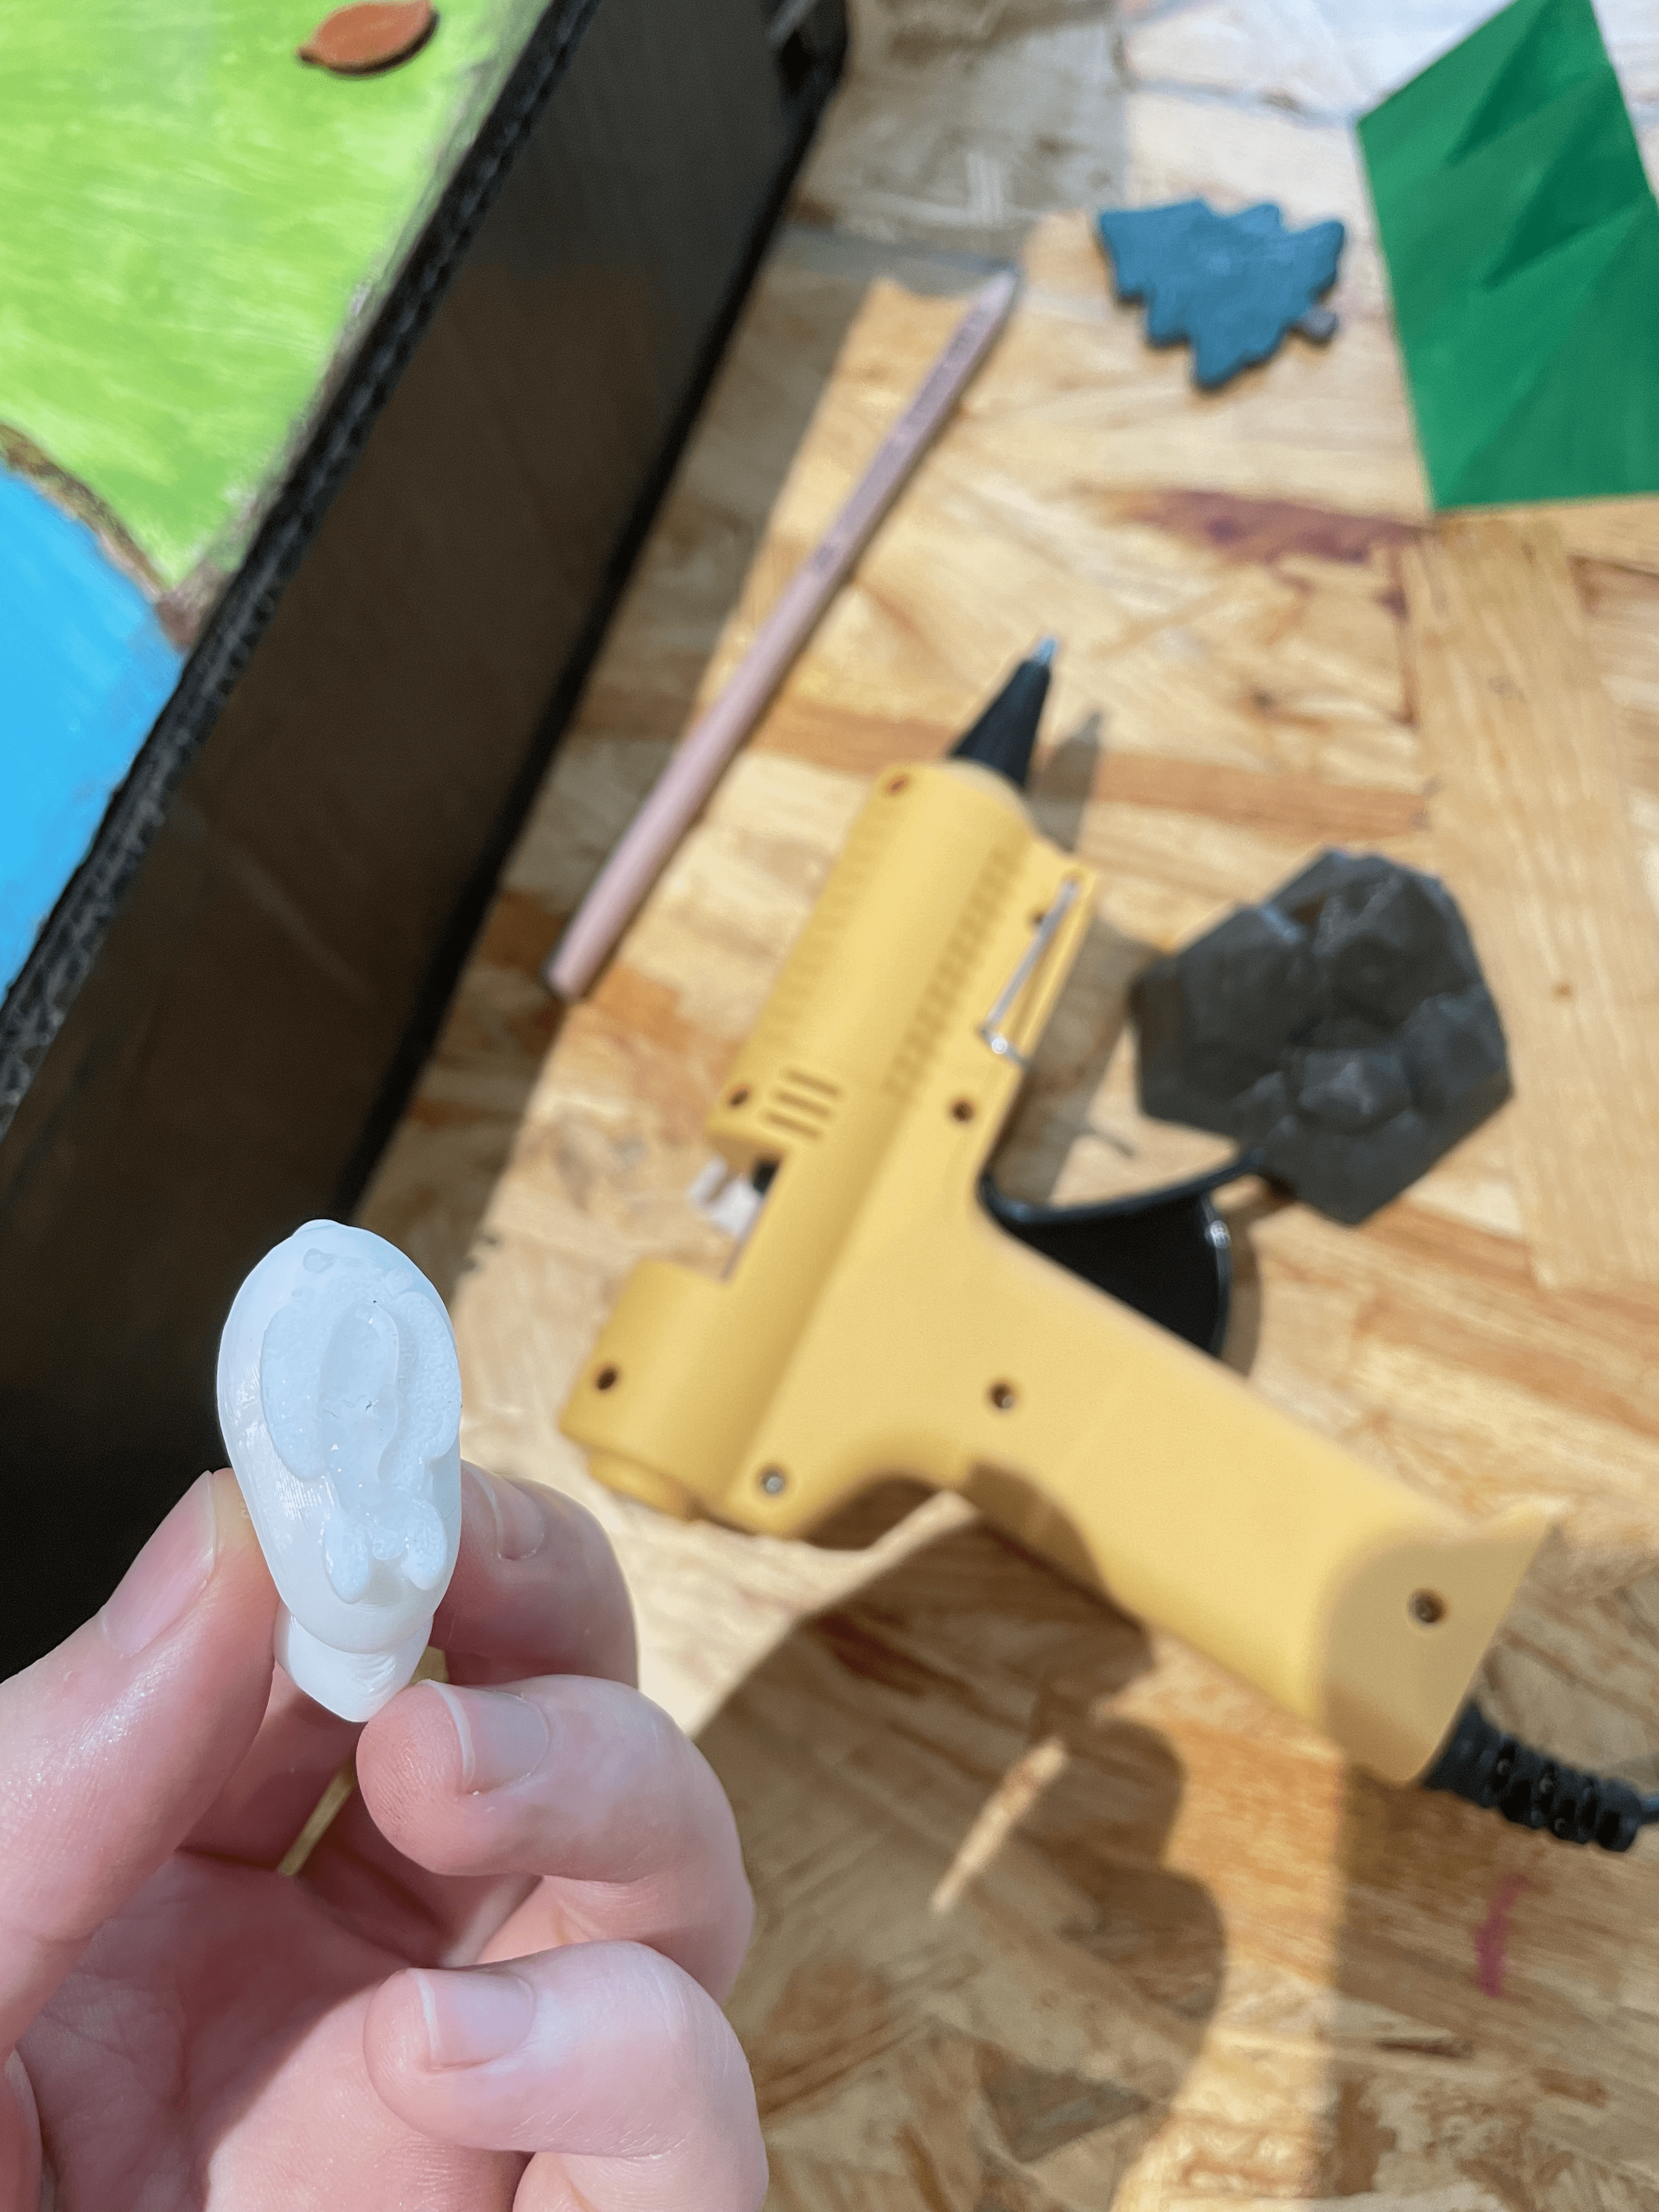
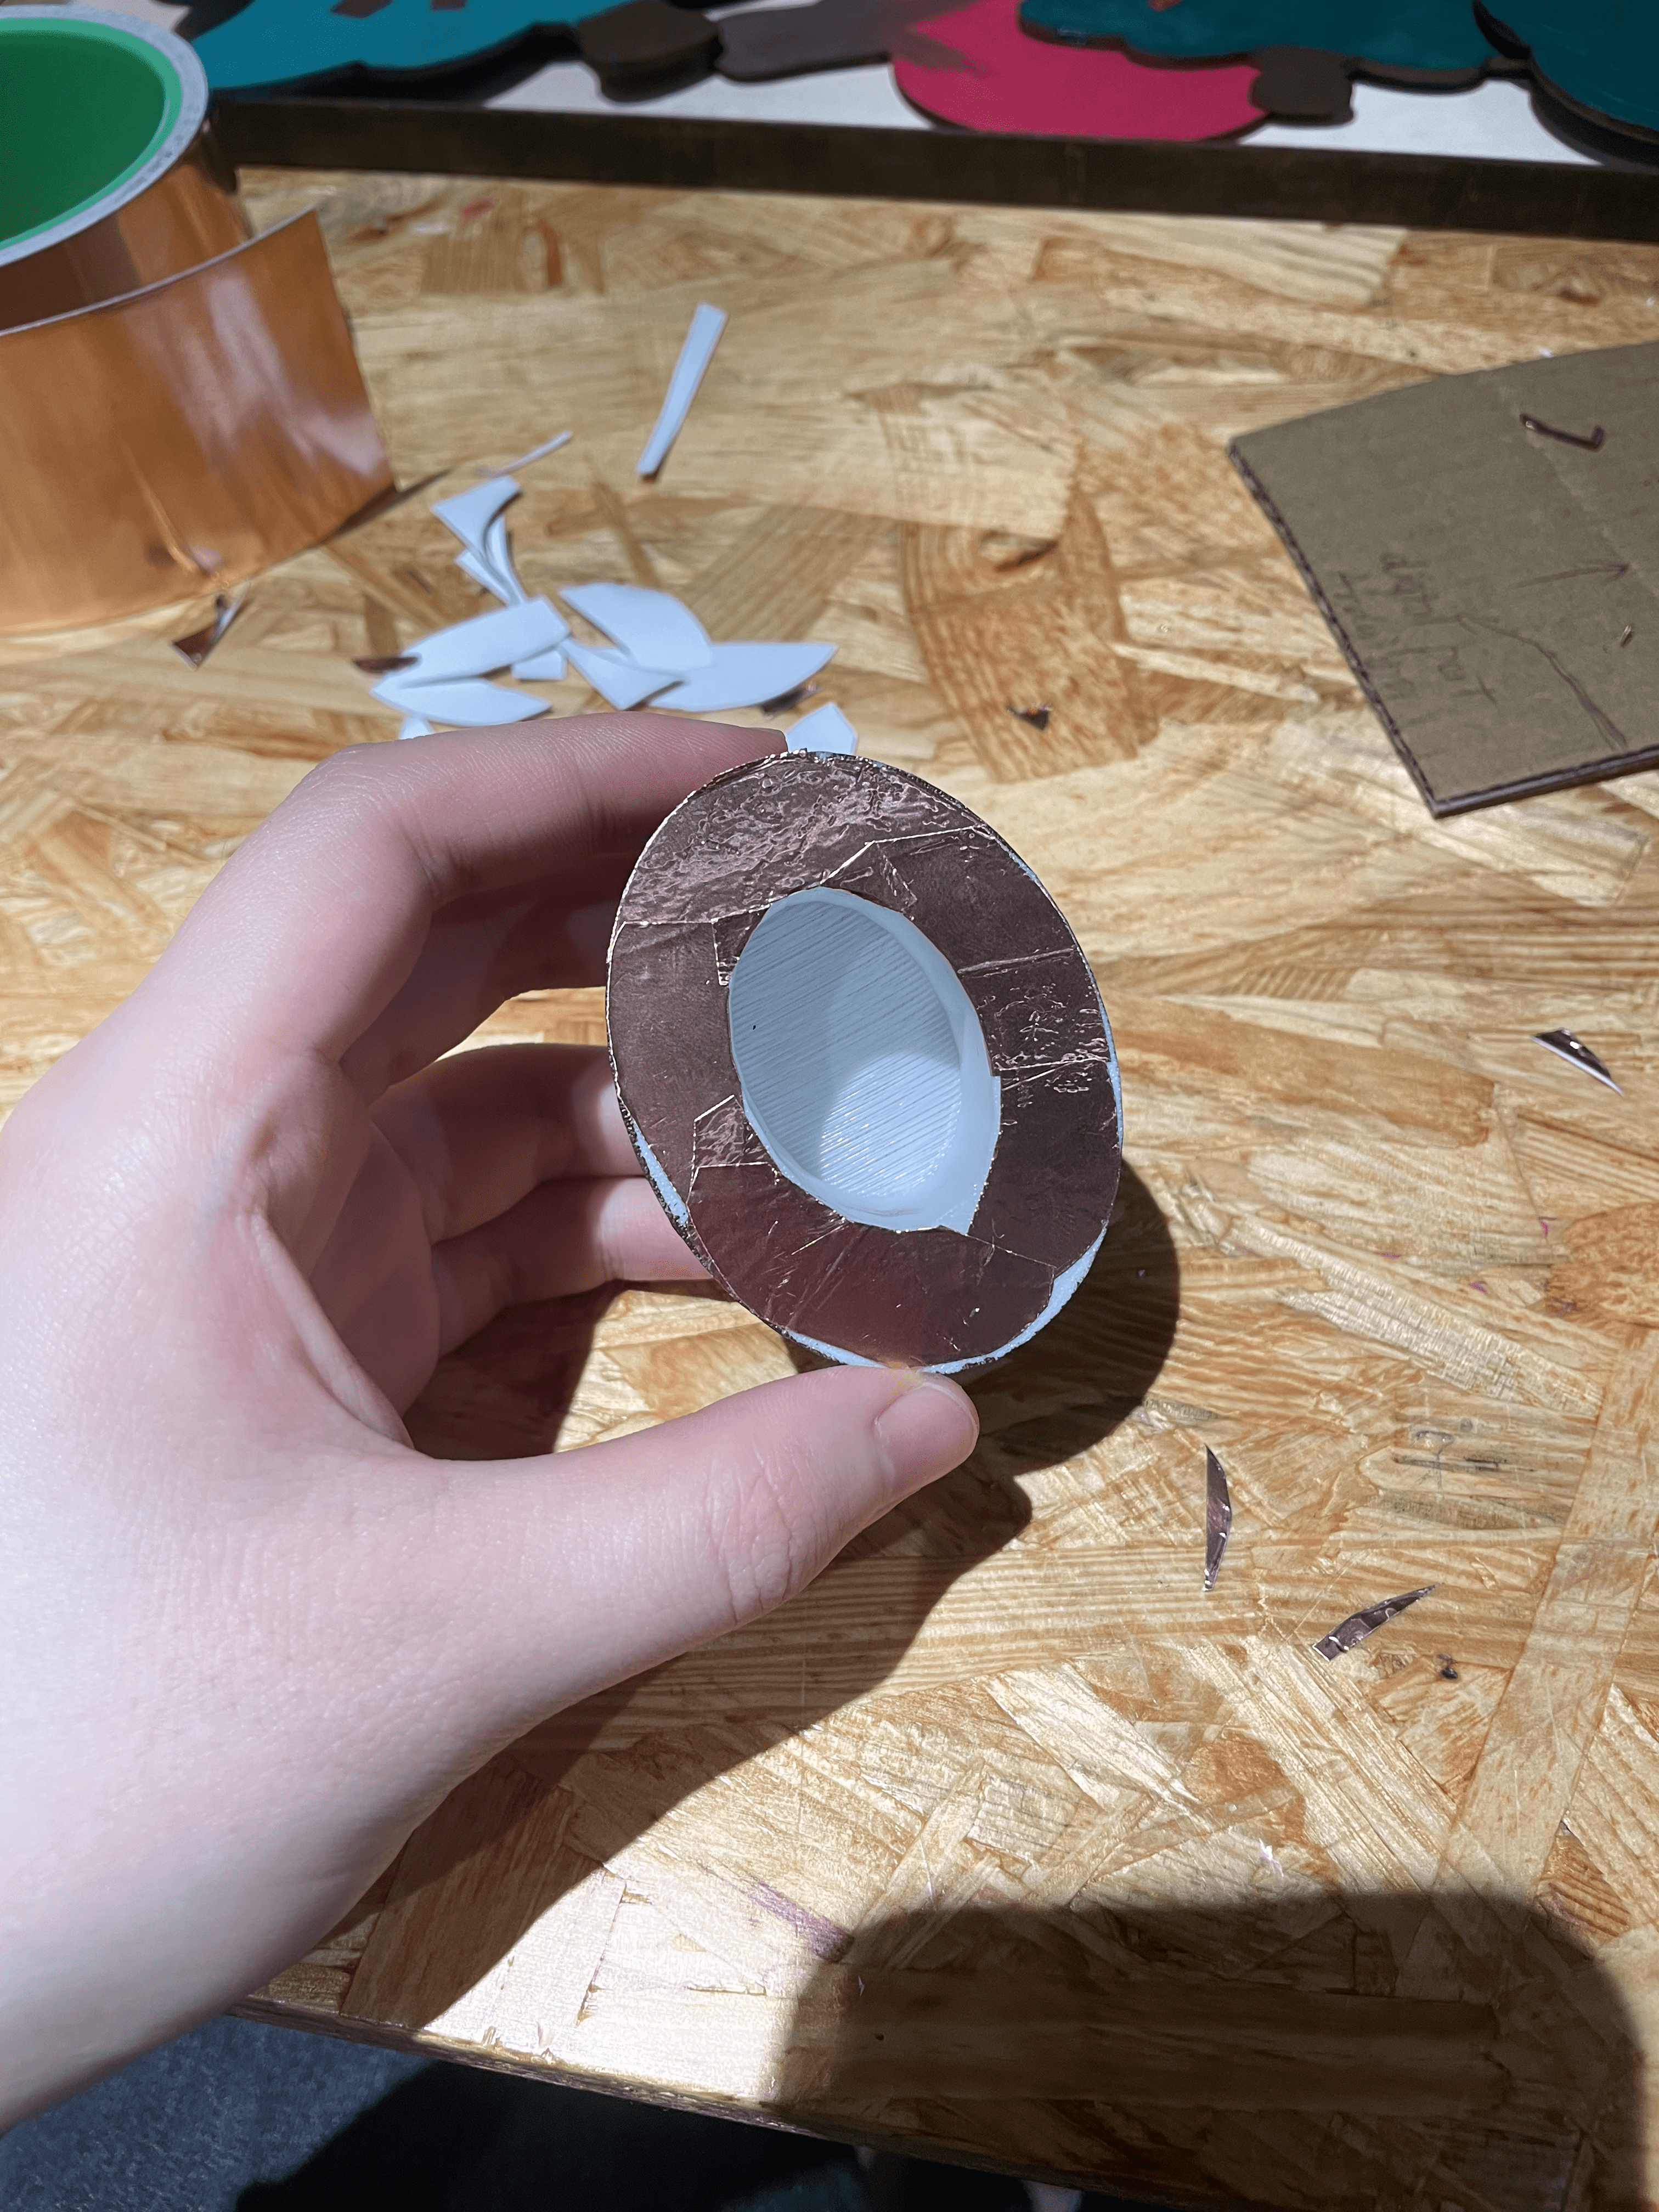
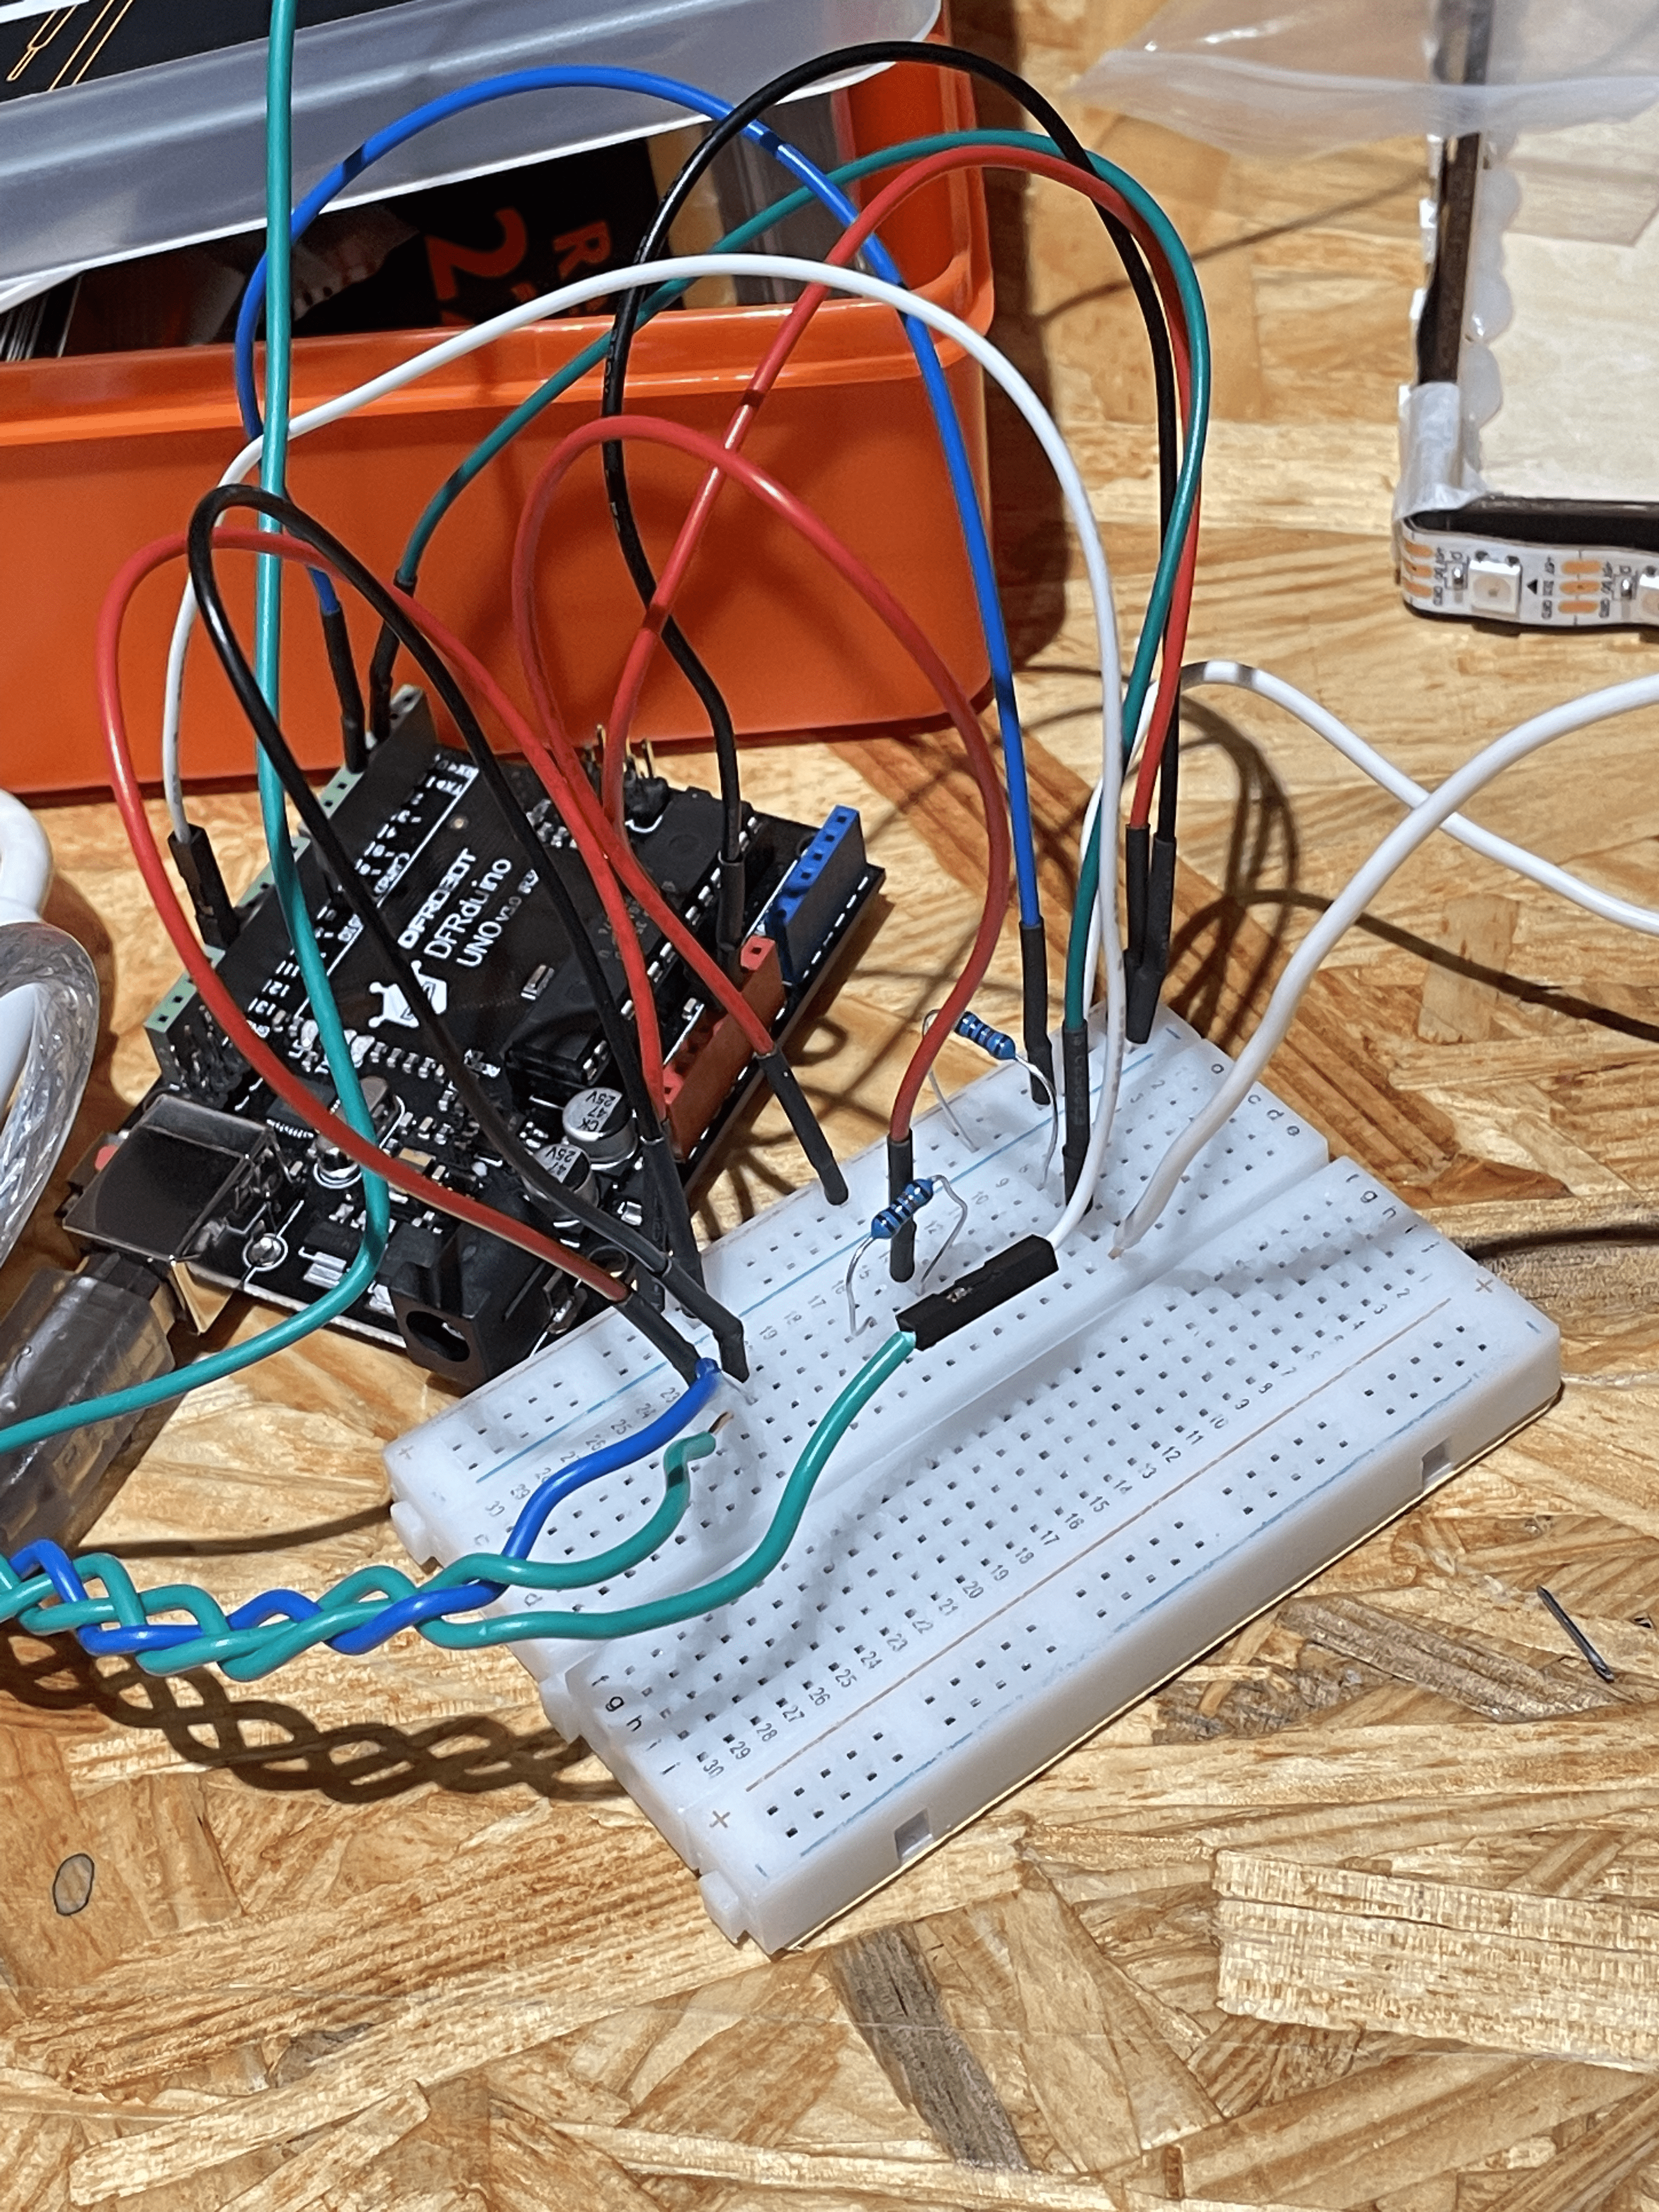
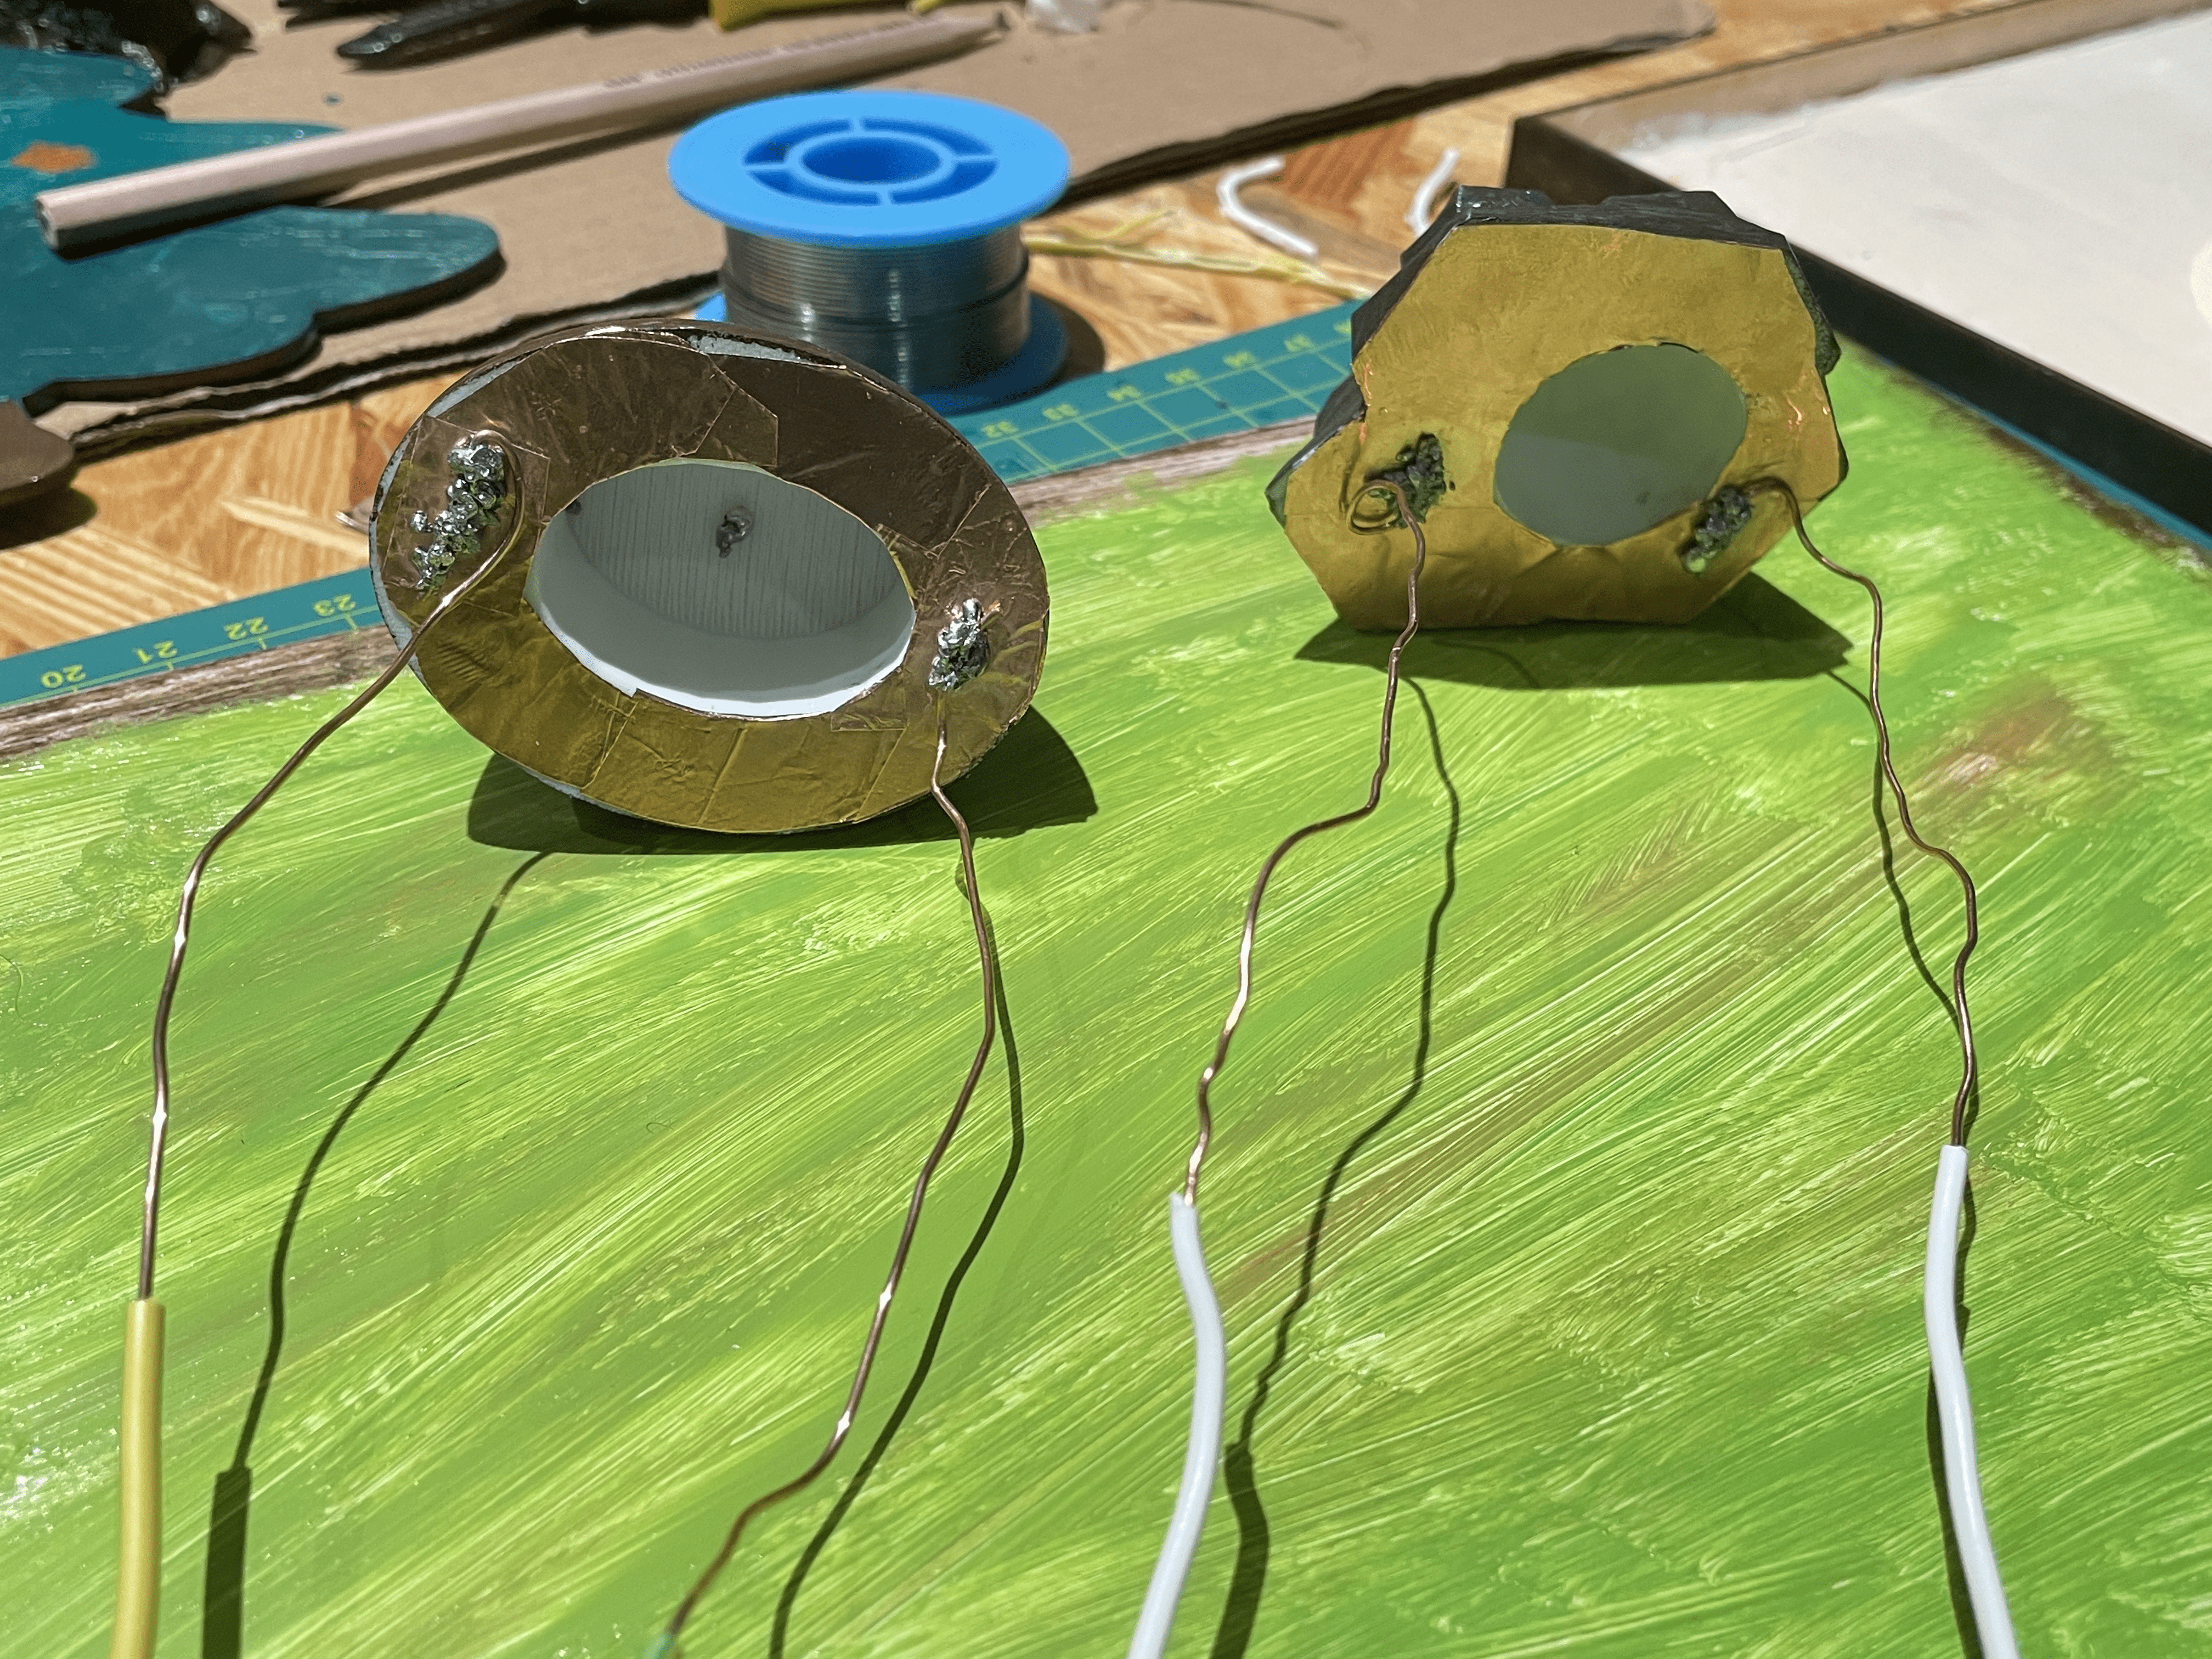
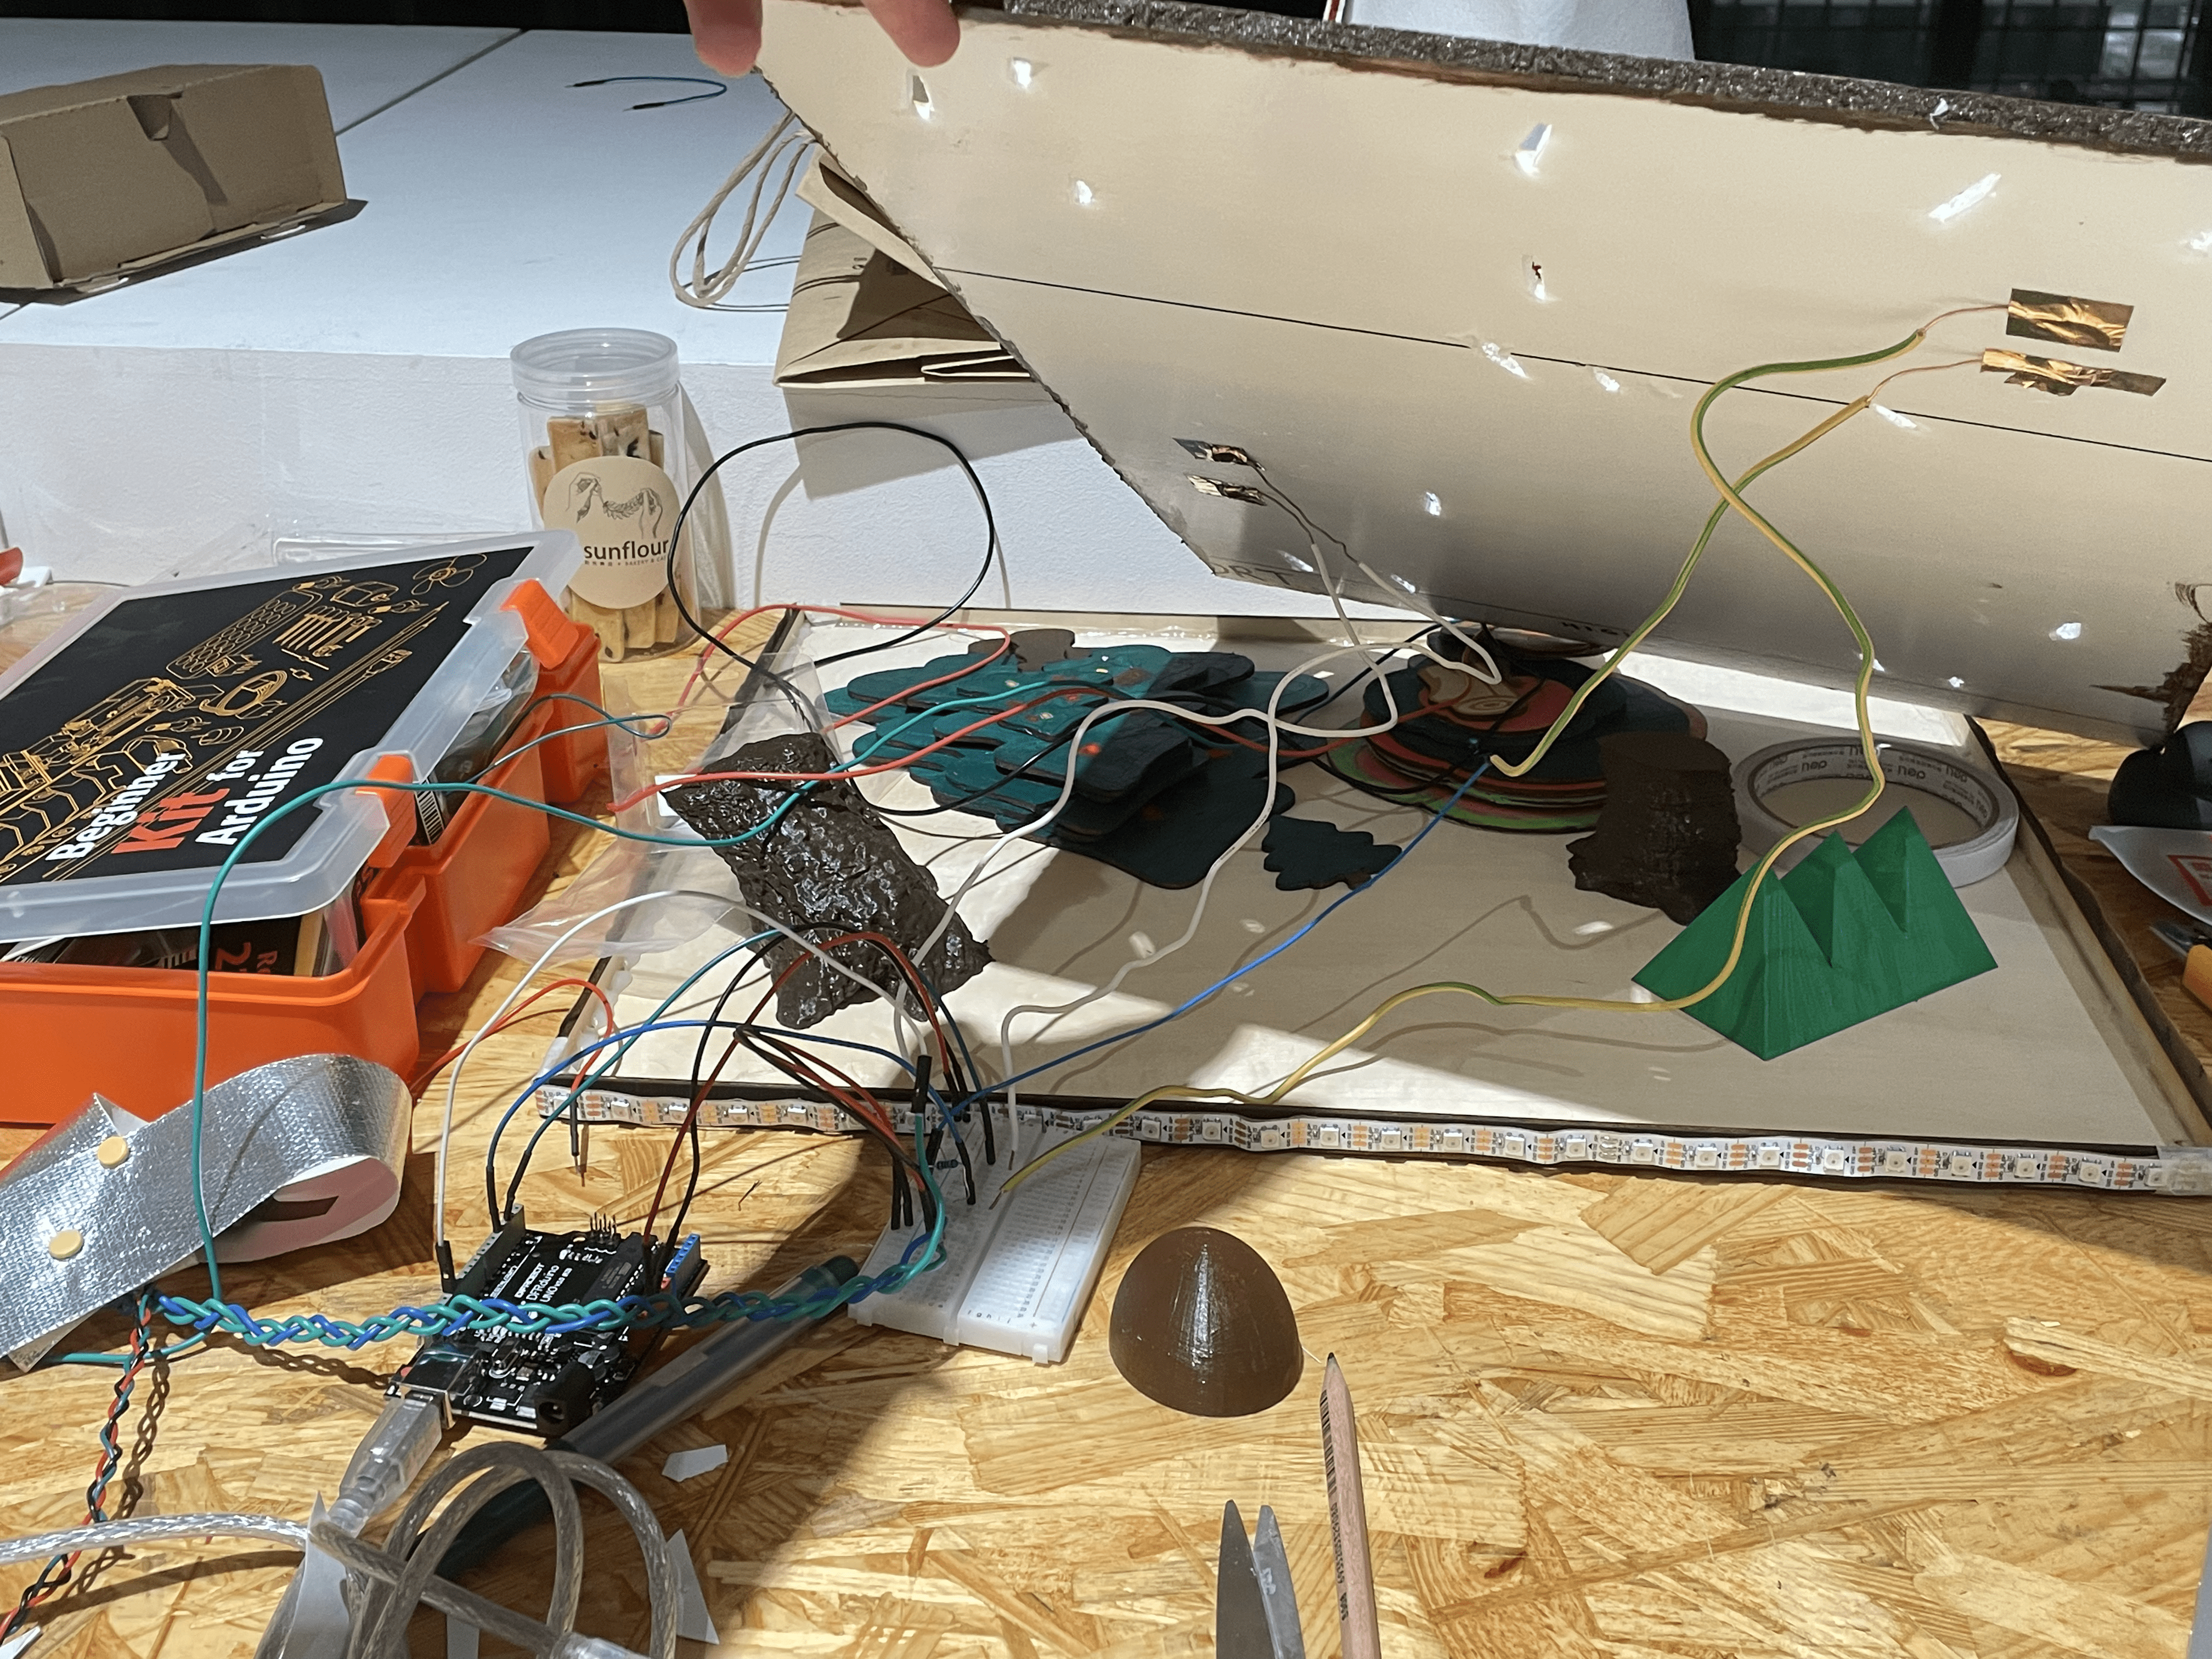
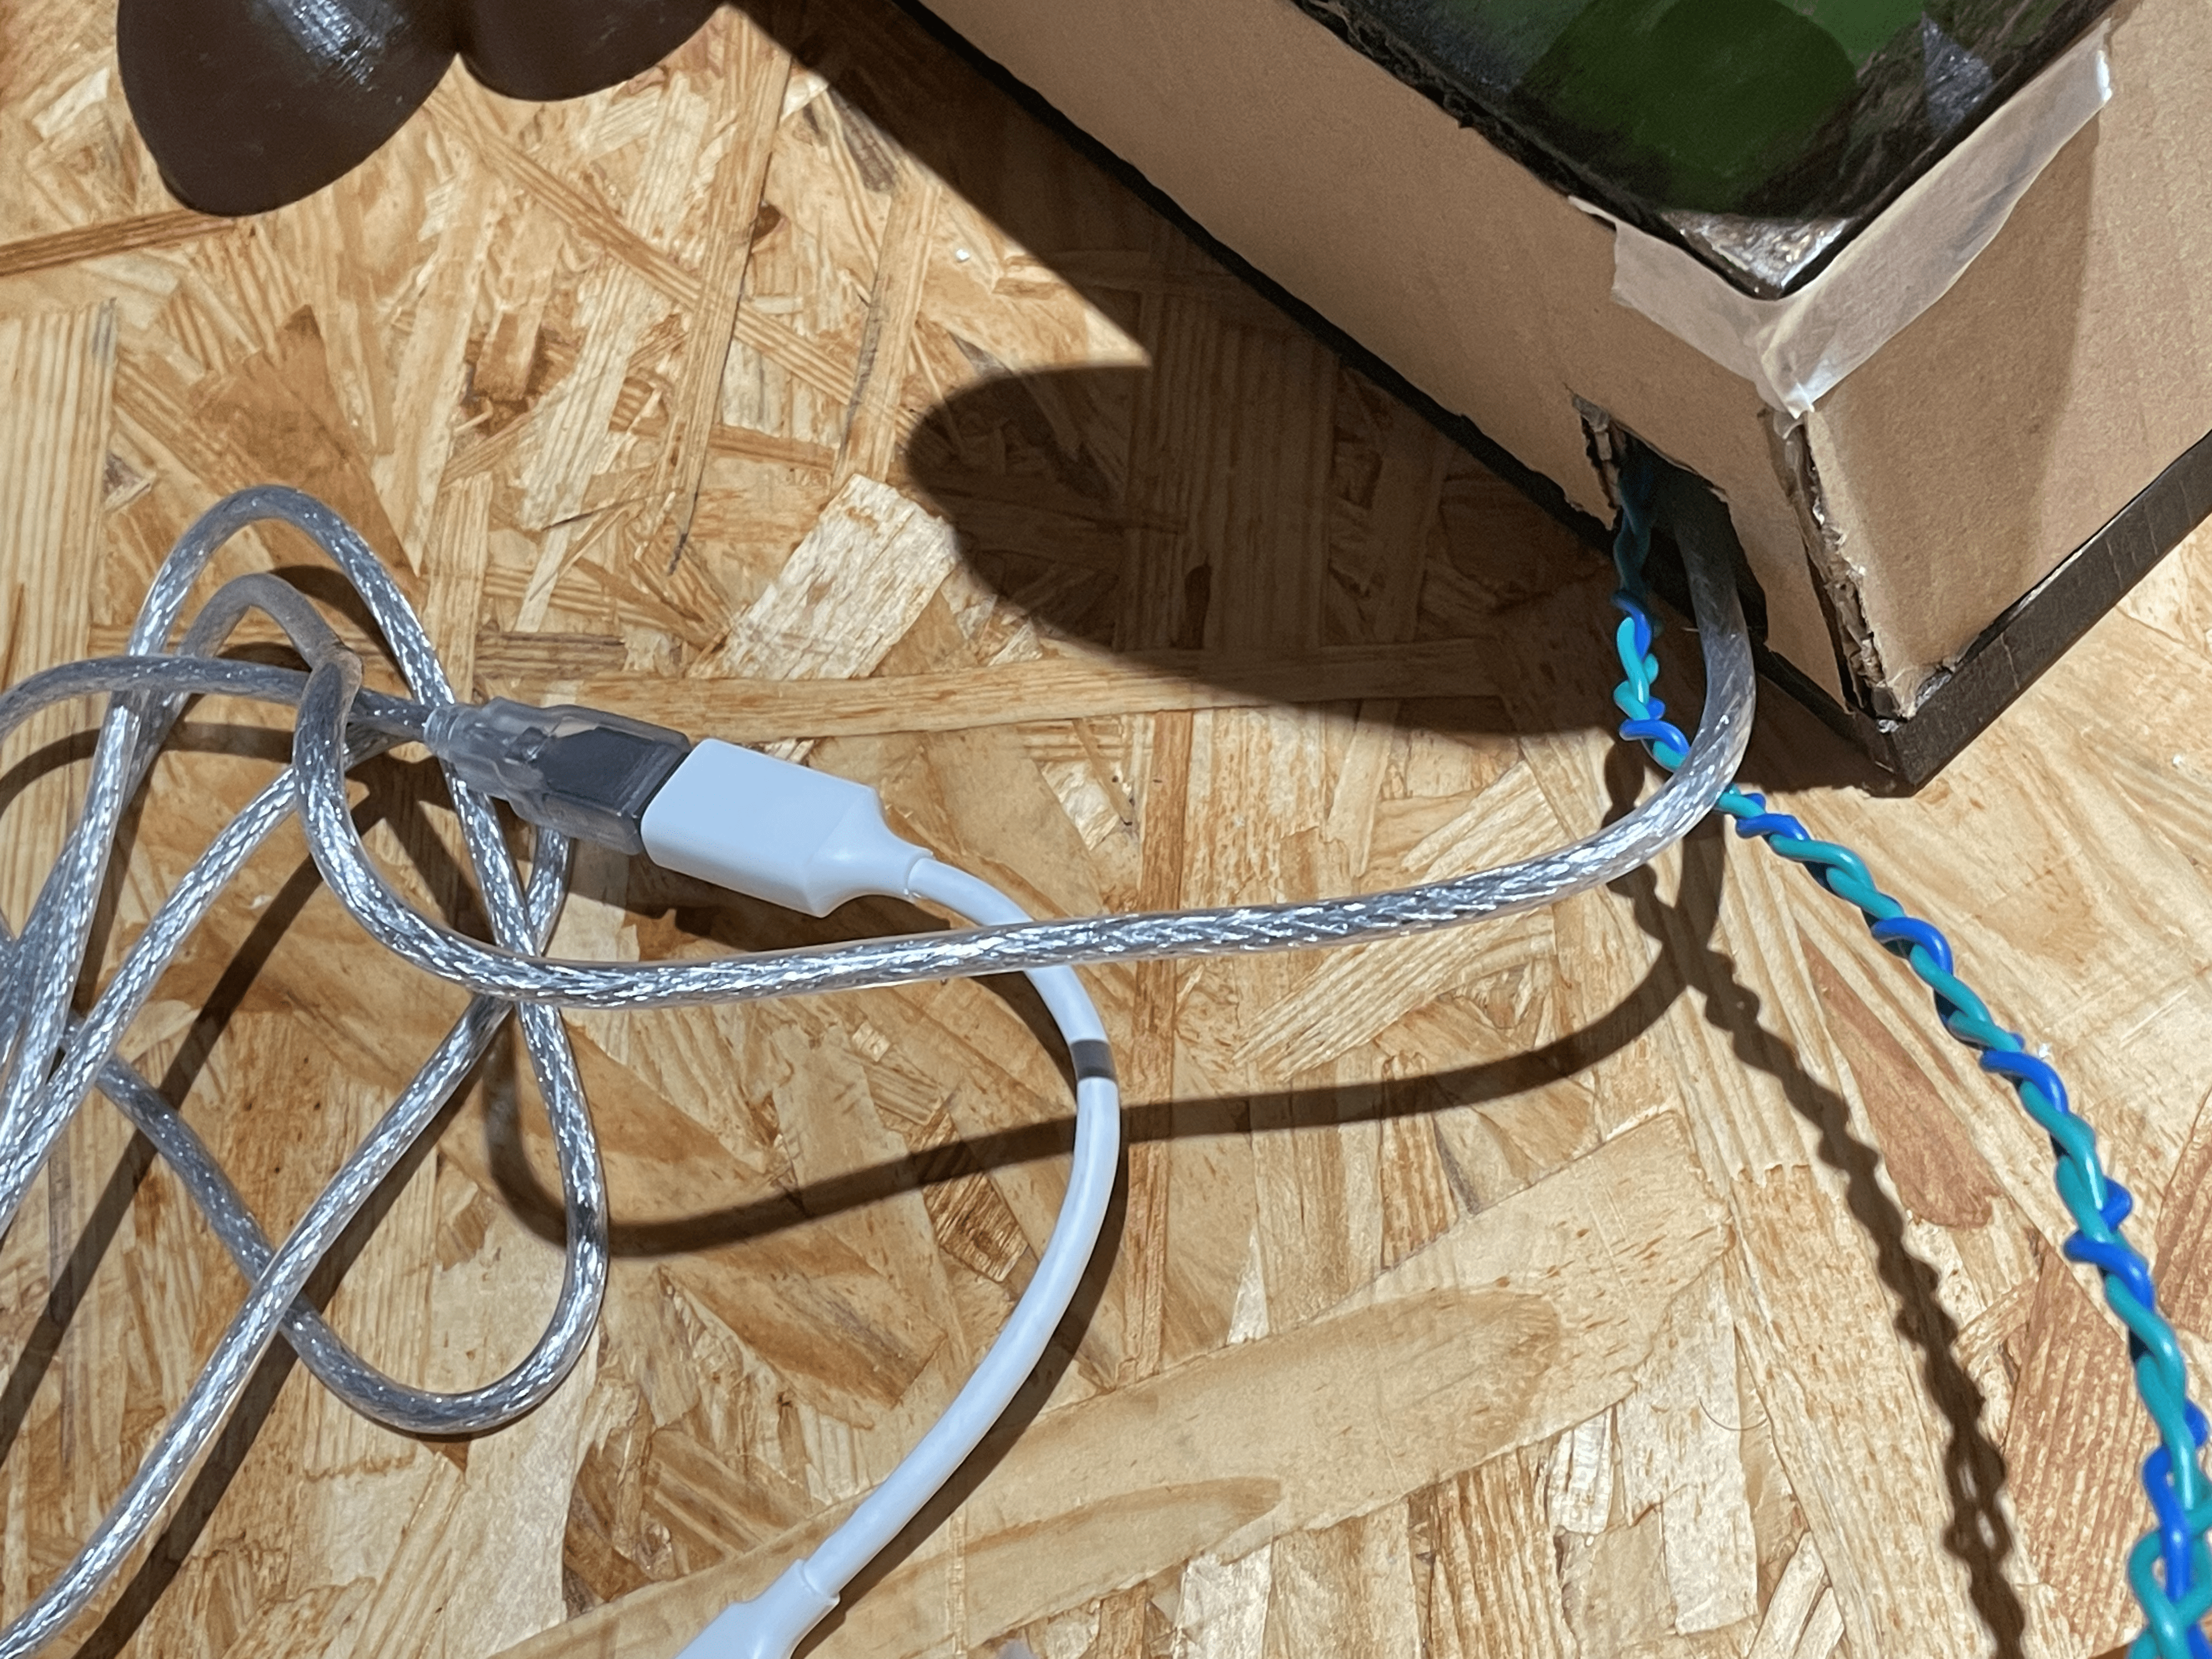
After I had completed all of the physical requirements, I began creating my circuit and code. The materials I used were an Arduino Uno, a breadboard, a USB cable, two 10K Resistors, one vibration sensor, several M/M and F/M cables, different tapes, the hot glue gun, and a soldering gun. At first, I considered utilizing an ultrasonic sensor, but if I put it under the board, it will be difficult for the ultrasonic sensor to measure the distance between the covered items and the board. So I replaced the ultrasonic sensor by making the covering things act like buttons. It worked like when the user picks it up, this part of the circuit breaks, and the vibration sensor receives the message that it should vibrate. So, I added copper stickers on the bottoms of the tiger cover things. However, I misunderstood the function of the button the first time, so I soldered the wires on the bottom of the tiger cover items, and when I tried it, the vibration sensor always vibrated since the circuit was all the way connected even if I picked up the tiger cover stones. Following that, I moved my soldering component to the location on the broad and under the tiger cover items. And this time, my project worked. I placed the circuit and the Arduino Uno inside the box, then cut a hole in the back to connect the USB cable to my computer and take the cables that connected to the vibration sensor out.
Conclusion:
My project achieved its stated goals in that users regularly wore the vibration sensor first on their unused hands and began to find the animals under the cover objects with the forest video on the computer screen as a background. When they find the tiger, the computer screen will become dark with the tiger roar, and users will be vibrated by the vibration sensor. Users enjoy interacting with my project, and they appreciate the charming animals and lovely forest. And my project fulfilled my standards of interaction in that there is feedback between human and computer interaction. If I had more time, I would include the interaction while discovering the other animals. From my accomplishment, I’m proud of myself for completing my final project individually. And I learned a lot of coding and interactive concepts. Many thanks to the professors, fellows, and LAs who assisted me; I was unable to complete it totally myself.
Here is the user testing video of my project:
https://drive.google.com/file/d/1fl2QrrfKf9rpCwGsVSt147yNkKgJ3pF2/view?usp=sharing
Here are the codes for my project:
Arduino:

// constants won't change. They're used here to set pin numbers:
const int buttonPin1 = 2;  // the number of the pushbutton pin
const int buttonPin2 = 4;
const int vibPin = 10;  // the number of the vib pin

// variables will change:
int buttonState1 = true;  // variable for reading the pushbutton status
int pButtonState1 = true;
int buttonState2 = true;
int pButtonState2 = true;

int button1 = false;
int button2 = false;


void setup() {
  // initialize the LED pin as an output:
  pinMode(vibPin, OUTPUT);
  Serial.begin(9600);
  // initialize the pushbutton pin as an input:
  pinMode(buttonPin1, INPUT);
  pinMode(buttonPin2, INPUT);
}

void loop() {
  // read the state of the pushbutton value:
  buttonState1 = digitalRead(buttonPin1);
  buttonState2 = digitalRead(buttonPin2);
  // check if the pushbutton is pressed. If it is, the buttonState is HIGH:
  if (buttonState1 == false && pButtonState1 == true) {
    // turn LED on:
    digitalWrite(vibPin, HIGH);
    button1 = true;
    delay(1000);


  } else {
    // turn LED off:
    digitalWrite(vibPin, LOW);
    button1 = false;
  }


  if (buttonState2 == false && pButtonState2 == true) {
    digitalWrite(vibPin, HIGH);
     button2 = true;
    delay(1000);

  } else {
    //turn LED off:
    digitalWrite(vibPin, LOW);
     button2 = false;
  }


  pButtonState2 = buttonState2;
  pButtonState1 = buttonState1;


  // send the values keeping this format
  Serial.print(buttonState1);
  Serial.print(",");  // put comma between sensor values
  Serial.print(pButtonState1);
  Serial.print(",");  // put comma between sensor values
  Serial.print(buttonState2);
  Serial.print(",");  // put comma between sensor values
  Serial.print(pButtonState2);
  Serial.println();  // add linefeed after sending the last sensor value
}


Processing:

import processing.serial.*;
import processing.video.*;

Movie myMovie;
Movie tigerMovie;

int m;
long startime;

Serial serialPort;
int NUM_OF_VALUES_FROM_ARDUINO = 4;

int arduino_values[] = new int[NUM_OF_VALUES_FROM_ARDUINO];


void setup() {
  //size(1500, 1100);
  fullScreen();
  noCursor();
  myMovie = new Movie(this, "animal.mp4");
  myMovie.play();

tigerMovie = new Movie (this, "tiger.mp4");
  tigerMovie.play();


  printArray(Serial.list());
  // put the name of the serial port your Arduino is connected
  // to in the line below - this should be the same as you're
  // using in the "Port" menu in the Arduino IDE
  serialPort = new Serial(this, "/dev/cu.usbmodem101", 9600);
}

void draw() {

  print(millis());
  print(", ");
  print(startime);
  print(", ");
  println(m);

  // receive the values from Arduino
  getSerialData();

  if (myMovie.available()) {
    myMovie.read();
  }

  image(myMovie, 0, 0, width, height);

  //sound.play();

  if (arduino_values[0] == 0) {
    m = 1;
  }

  if (m == 1) {
    if (millis() - startime < 5000) {
      tigerMovie.play();
      myMovie.stop();
      background(0);
    } else {
      startime = millis();
      m = 0;
    }
  } else if (m == 0) {
     myMovie.play();
     tigerMovie.stop();
  }

if (arduino_values[2] == 0) {
    m = 1;
  }

  if (m == 1) {
    if (millis() - startime < 5000) {
      tigerMovie.play();
      myMovie.stop();
      background(0);
    } else {
      startime = millis();
      m = 0;
    }
  } else if (m == 0) {
     myMovie.play();
     tigerMovie.stop();
  }


  //if (arduino_values[2] == 0 && arduino_values[3] == 1) {
  //  sound.play();
  //}
}

void getSerialData() {
  while (serialPort.available() > 0) {
    String in = serialPort.readStringUntil(10);  // 10 = '\n'  Linefeed in ASCII
    if (in != null) {
      //print("From Arduino: " + in);
      String[] serialInArray = split(trim(in), ",");
      if (serialInArray.length == NUM_OF_VALUES_FROM_ARDUINO) {
        for (int i=0; i<serialInArray.length; i++) {
          arduino_values[i] = int(serialInArray[i]);
        }
      }
    }
  }
}