- Text: The Theory of Fun, Chapter-3: What Games Are
- Tag: Game & Learning; Game Design; Brain Fucntion
- Reading Response
- Why do people love to play games?
- Games come from the reality: we see games in the same way that reality is formed, and we processed rules of games just like we process real things. But stakes are much lower in games, which allows more freedom & exploration with games than in reality.
- Also, finely designed game mechanism strikes a perfect balance between failure and pleasure, and that attract people to keep learning, trying & experiencing.
- What is your understanding about the relationship between learning and game described in this chapter?
- As noted in the text, the process of gaming and learning is similar–while learning, we try to know about patterns and put that into practice; while gaming, we’re also exploring the rule of the games and master it to rule the game. While learning, we get motivated and excited once we get positive feedback of our learning outcomes. And game design is all about lengthening the learning experience, and how to give players feedback appropriately, so that they stay interested in exploring the gaming world.
- What is good game experience in your mind? Examples?
- For me, good game experience contains two parts.
- The first one is the world view–in other words, whether a game is immersive for the audience. Great games provide players with a complete and interesting world to explore, and they achieve this by graphic & audio design and storytelling. Disco Elysium is a good example–the graphic & audio design is cool, and the storytelling tries to even shaking your recognition of values. Gris is another–the art design of this game has made it into an art piece, even if its gameplay is simple.
- The second part is the feedback, the try-and-reward system of a game’s interactive design. Just like the book indicates, great interactive design continuously generates positive feedback for players, so that they could engage and enjoy the game more, just like a enjoyable learning experience. Hollow Knight, in this respect, is a good example. Even if the game control is quite challenging in the game, people still can’t get out of it because the great gaming experience.
- For me, good game experience contains two parts.
- Why do people love to play games?
Uncategorized
Final Project: Individual Reflection by Lydia
A. PROJECT TITLE – YOUR NAME – YOUR INSTRUCTOR’S NAME
Nature Band-Rain-Professor Eric Parren
B. CONCEPTION AND DESIGN:
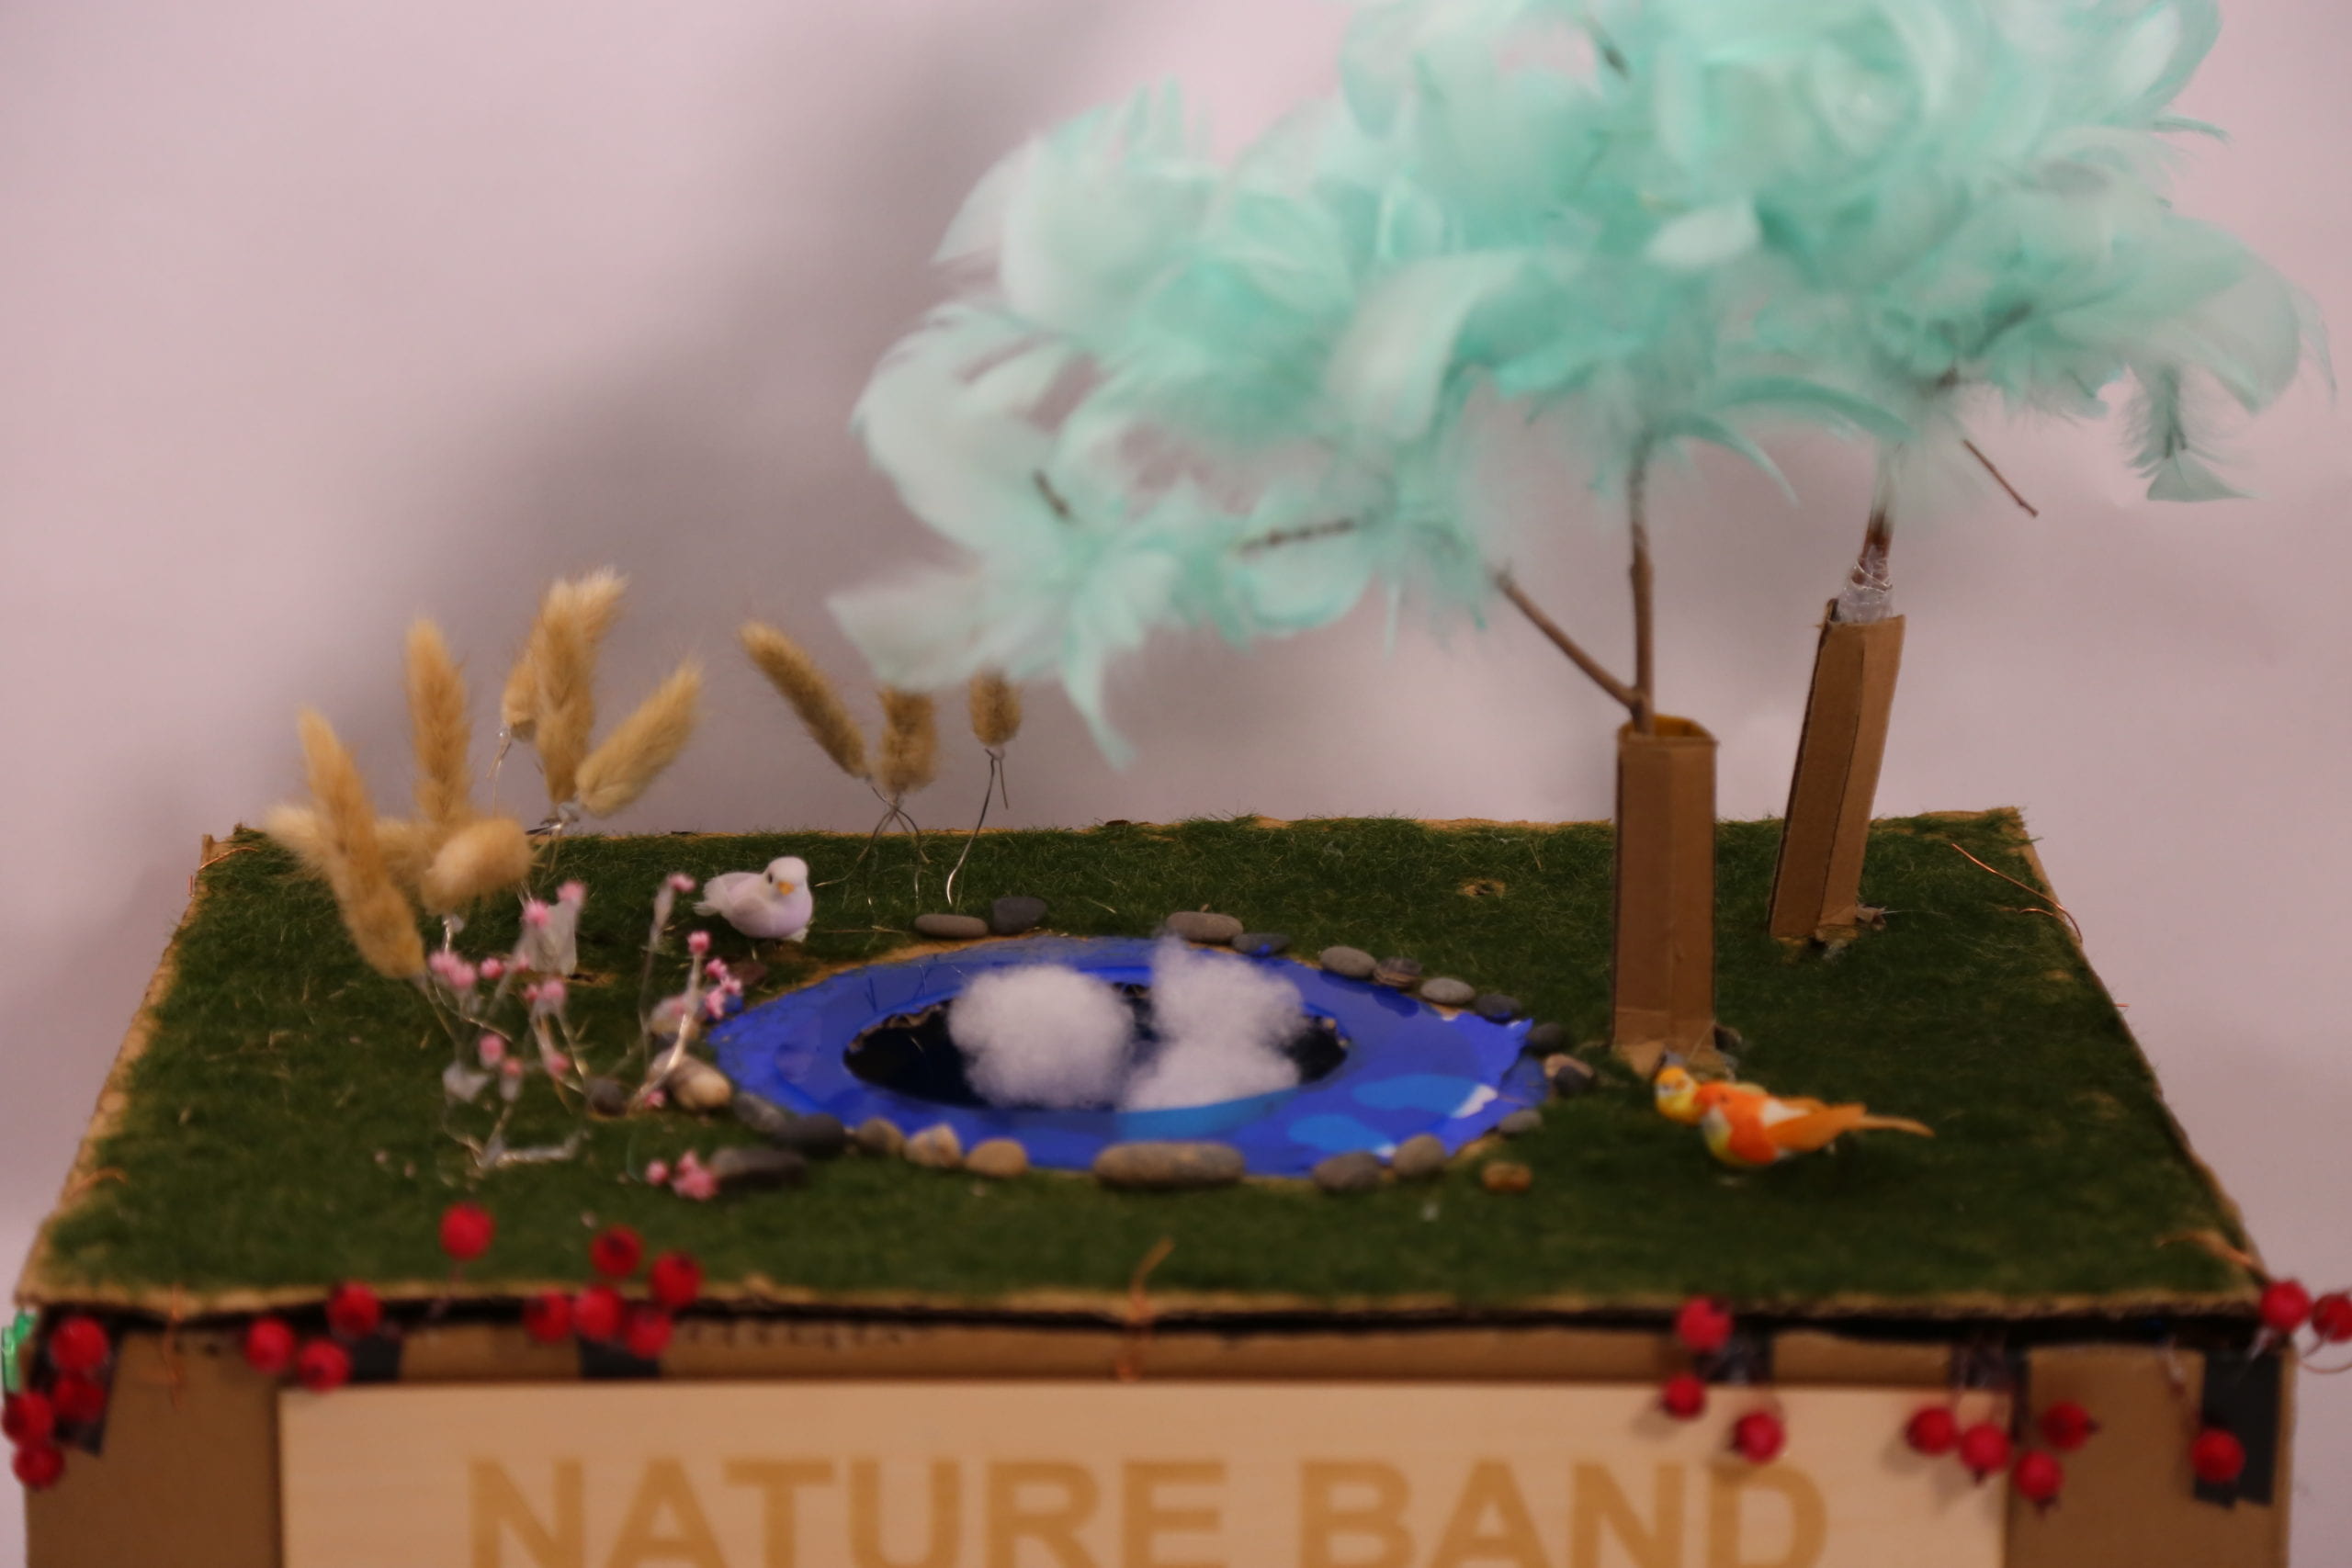
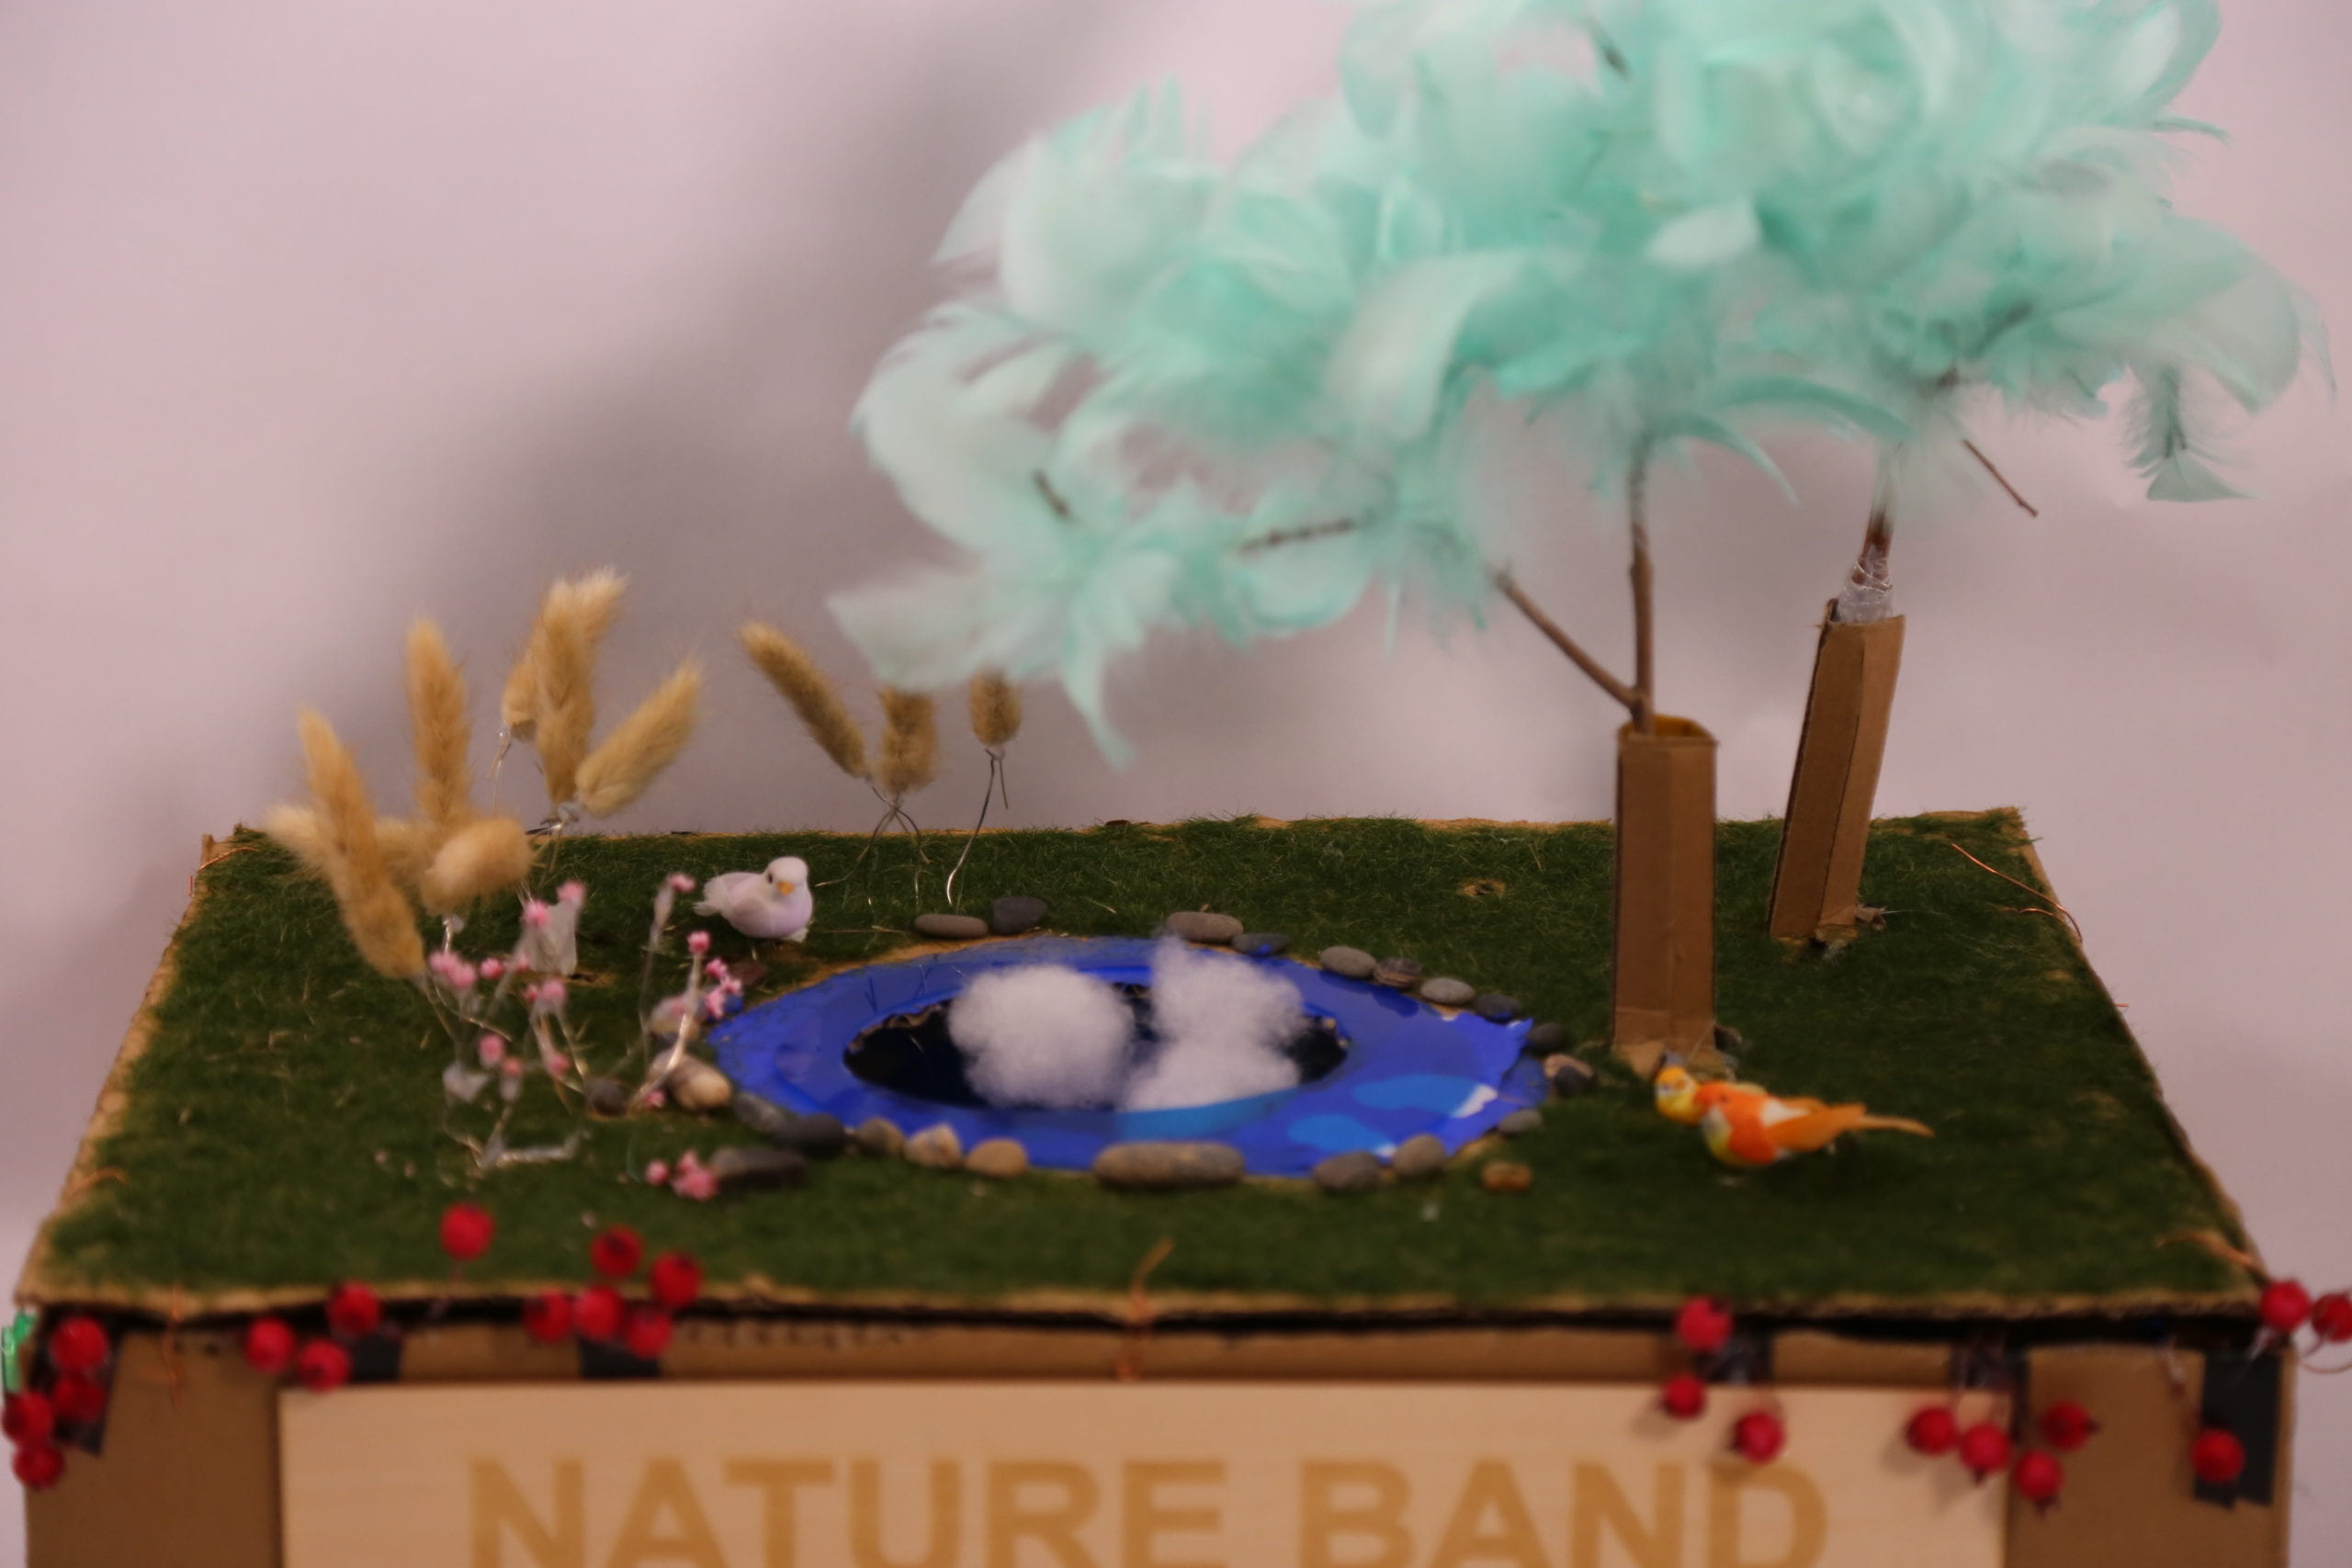
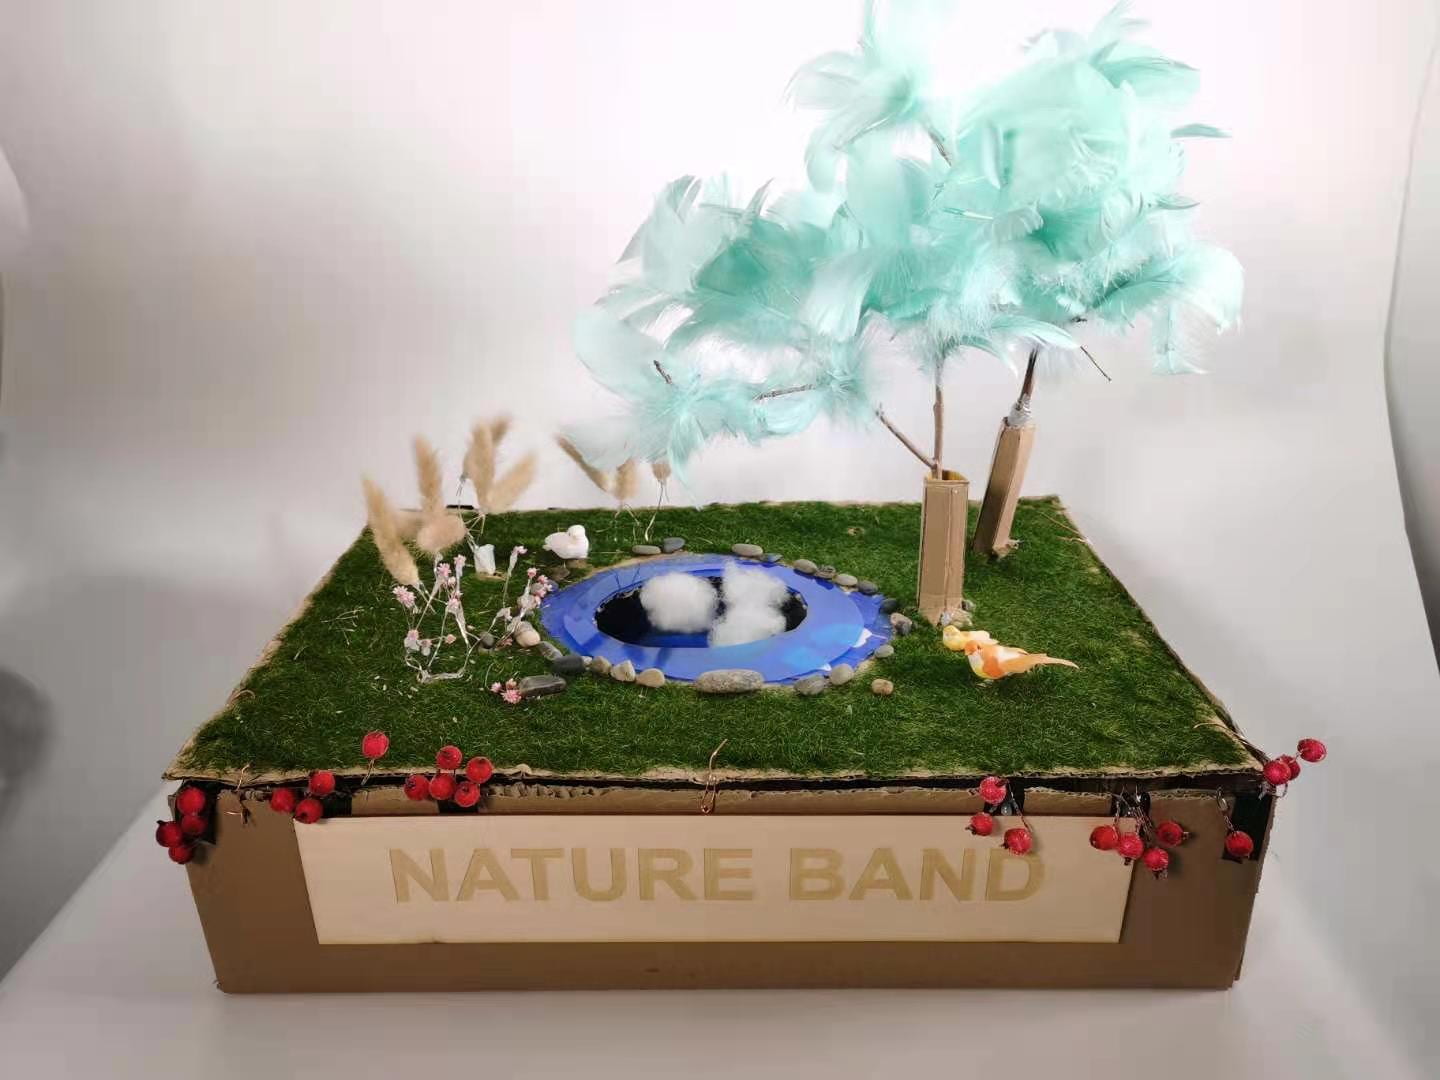
The concept of my project Nature Band is to create a band whose members are all familiar natural figures around us. With interaction to trees, flowers, birds and so on, players will be able to make a song of nature by their own, and through the process, to discover the beauty of nature sounds and nature itself.
The idea comes into shape based on inspirations drawn from the fantastic interactive project Piano Staircase by the Fun Theory. I’ve been holding the idea that to express the beauty of nature by an interactive installation, but at the time, I couldn’t decide what kind of interaction fits the concept most. Until I saw people jumping up and down on the piano staircase to make their own step music, it suddenly occurred to me that: why not use musical interaction in my installation so that users can feel its meaning while having fun? As I suspect users would love to experience the interaction through gentle movement, I chose to use soft material in the design so that users may feel more comfort and relax. And I also believe adapting some interactions which happen between people and nature in real life might make the experience make more sense, so I include some basic movements that will come to us when we see a nature figure, such as shaking flowers and grasses, throwing stones into a lake.
But as there are too many different kinds of interaction included in my final installation, many people in the user testing session suggested to me to inform users of how they should do more directly. In order to keep the installation looks like a real natural environment to the largest extent, I just simply put the instructions on the poster, but it turns out at last that I should make them even more direct in the design.
C. FABRICATION AND PRODUCTION:
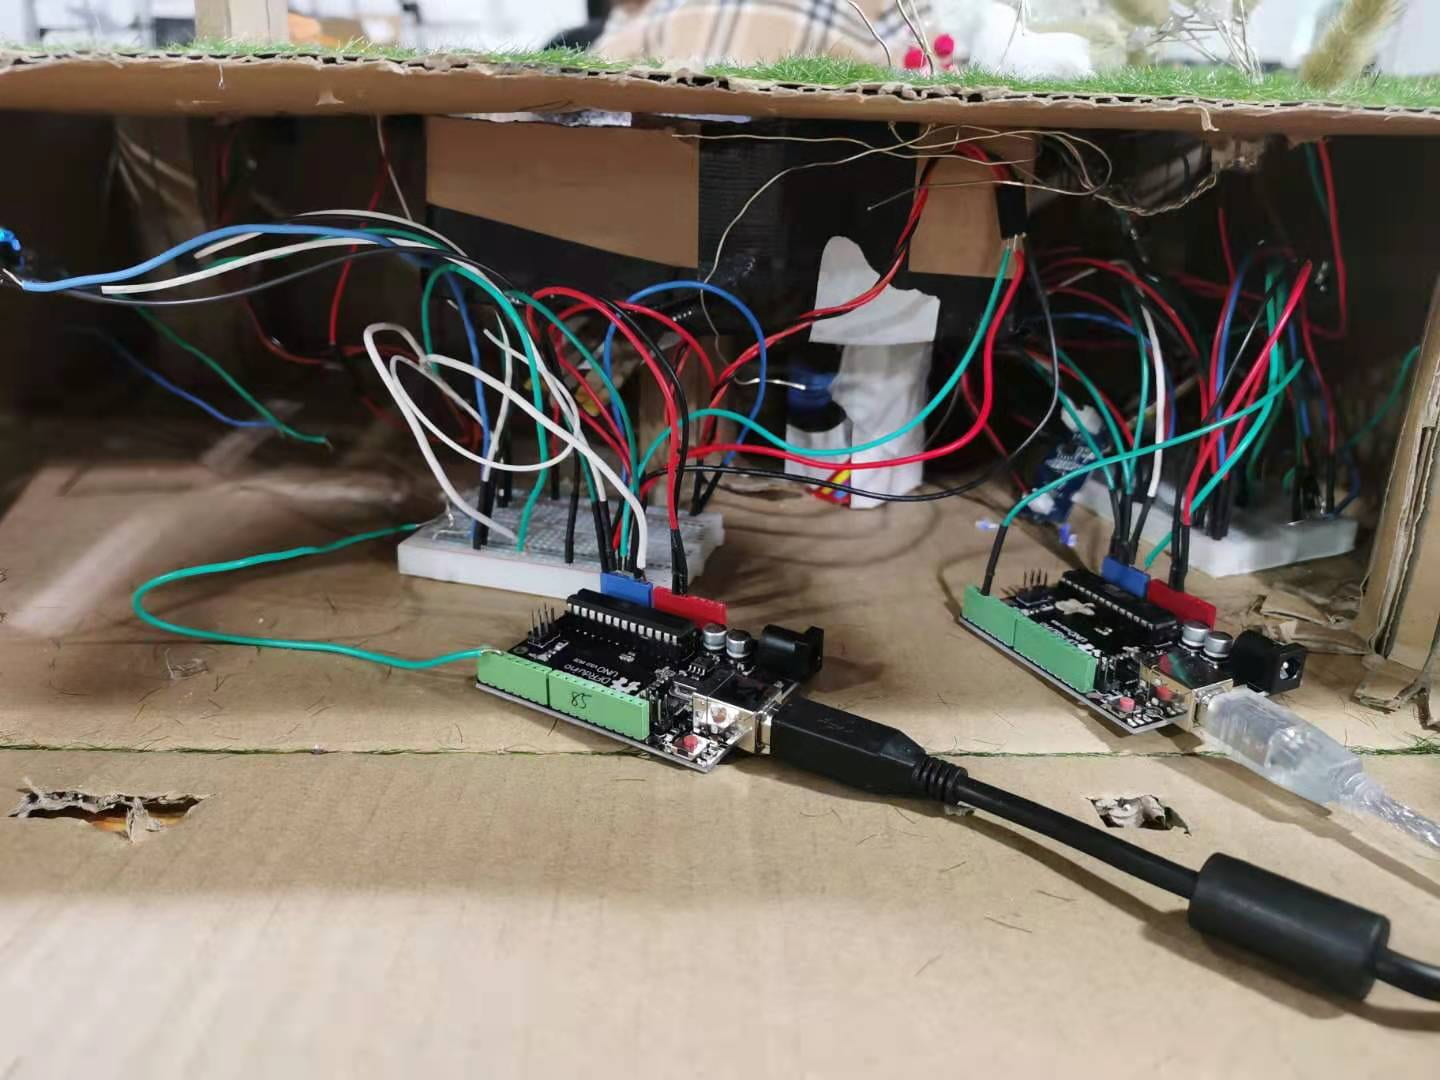
The fabrication of my final project is the most satisfying part to me. To make the installation look like the real nature more, I bought the true flowers and green bristle grass, together with grass power. At first, I wanted to use green color to paint the grasses, but the outcome was disappointing, so I rejected it. I also chose some soft material like feathers to make the tree, in order to make users enjoy the experience more, and all of these decisions turned out with positive feedback as they show the beauty of nature successfully. In order to express the idea that we have different ways to interact with the natural environment around us, I use a variety of sensors to make the experience more fun. The proposal is good, but I failed to choose a larger Arduino board to contain all of these sensors and wires. At last, I used three Arduino boards in total, and each of them needed a different Arduino and Processing window, which makes everything messy in the final presentation. At the same time, I was too stuck in the installation’s function of making music that I use some melodies and beats too heavy for the concept of nature, and this doesn’t fit my original design well.
D. CONCLUSIONS:
The final result meets part of my started goals successfully. The various ways to interact with the band and trigger different kinds of natural sounds, together with its great appearance, I believe it succeeds in making users have fun while exploring the model nature band. But because of the failures in choosing background melodies, the concept of making a completed music of nature wasn’t expressed to users efficiently.
During the whole process of doing the project, I also gain a deeper thought of the relationship between human and nature. At the same time, the skills of electronics and coding, and the idea of interaction and creativity I learnt from classes are developed through the self-making and thinking process. Different from group works I experienced before, finishing a design by my own also allows me for more spaces to reflect on the capacity and limit of myself. I realize there are still many spaces for me to improve, like self-learning skills and coding with more developed structure.
From the failure of choosing beats and melodies, I also realize that in the making process, we might be trapped in some small idea too often and lose track of our core concept for some time. In these cases, user testing and listening to others’ opinions might be crucial.
The project itself is an enjoyment for me, yet it’s also a valuable class for me. I’m much thankful for all I’ve got in this whole course!
E. TECHNICAL DOCUMENTATION:
Pics:
Videos:
Codes for Processing:
Part 1:
// IMA NYU Shanghai
// Interaction Lab
// For receiving multiple values from Arduino to Processing

/*
 * Based on the readStringUntil() example by Tom Igoe
 * https://processing.org/reference/libraries/serial/Serial_readStringUntil_.html
 */
import ddf.minim.*;
import ddf.minim.analysis.*;
import ddf.minim.effects.*;
import ddf.minim.signals.*;
import ddf.minim.spi.*;
import ddf.minim.ugens.*;

AudioPlayer grasses;
AudioPlayer flower;
AudioPlayer bugu;
AudioPlayer drum;
Minim minim;

import processing.serial.*;

String myString = null;
Serial myPort;


int NUM_OF_VALUES = 7;   /** YOU MUST CHANGE THIS ACCORDING TO YOUR PROJECT **/
int[] sensorValues;      /** this array stores values from Arduino **/

int state=0;

void setup() {
  size(500, 500);
  background(0);
  setupSerial();
  minim = new Minim(this);
  grasses = minim.loadFile("na.mp3");
  flower = minim.loadFile("flower.aiff");
  bugu = minim.loadFile("bugu.mp3");
  drum = minim.loadFile("drum.mp3");
}


void draw() {
  updateSerial();
  printArray(sensorValues);


  if (sensorValues[0]>=1000||sensorValues[1]>=1000) {
      grasses.play();
      grasses.cue(0);
    }
    if (sensorValues[2]>=1000||sensorValues[3]>=1000) {
      flower.play();
      flower.cue(0);
      delay(500);
    }
    if (sensorValues[4]>=50) {
      drum.play();
      drum.cue(0);}
    if(sensorValues[5]>=300){
      bugu.play();
      bugu.cue(0);}
    if(sensorValues[6]==1){
    grasses.pause();
    flower.pause();
    bugu.pause();
    drum.pause();
    }

  //use the values like this!
  //sensorValues[0]

  // add your code

  //
}

void setupSerial() {
  printArray(Serial.list());
  myPort = new Serial(this, Serial.list()[ 2 ], 9600);
  // WARNING!
  // You will definitely get an error here.
  // Change the PORT_INDEX to 0 and try running it again.
  // And then, check the list of the ports,
  // find the port "/dev/cu.usbmodem----" or "/dev/tty.usbmodem----"
  // and replace PORT_INDEX above with the index number of the port.

  myPort.clear();
  // Throw out the first reading,
  // in case we started reading in the middle of a string from the sender.
  myString = myPort.readStringUntil( 10 );  // 10 = '\n'  Linefeed in ASCII
  myString = null;

  sensorValues = new int[NUM_OF_VALUES];
}

void updateSerial() {
  while (myPort.available() > 0) {
    myString = myPort.readStringUntil( 10 ); // 10 = '\n'  Linefeed in ASCII
    if (myString != null) {
      String[] serialInArray = split(trim(myString), ",");
      if (serialInArray.length == NUM_OF_VALUES) {
        for (int i=0; i<serialInArray.length; i++) {
          sensorValues[i] = int(serialInArray[i]);
        }
      }
    }
  }
}
Part 2:
// IMA NYU Shanghai
// Interaction Lab
// For receiving multiple values from Arduino to Processing

/*
 * Based on the readStringUntil() example by Tom Igoe
 * https://processing.org/reference/libraries/serial/Serial_readStringUntil_.html
 */
import ddf.minim.*;
import ddf.minim.analysis.*;
import ddf.minim.effects.*;
import ddf.minim.signals.*;
import ddf.minim.spi.*;
import ddf.minim.ugens.*;

AudioPlayer tree1;
AudioPlayer tree2;
AudioPlayer pond1;
AudioPlayer pond2;
AudioPlayer pond3;
AudioPlayer bird;
AudioPlayer rain;
AudioPlayer thunder;
AudioInput microphone;
AudioRecorder record;
Minim minim;

import processing.serial.*;

String myString = null;
Serial myPort;


int NUM_OF_VALUES = 7;   /** YOU MUST CHANGE THIS ACCORDING TO YOUR PROJECT **/
int[] sensorValues;      /** this array stores values from Arduino **/


int[] hands = new int[100];

int stateN=0;
int stateO=0;

void setup() {
  size(500, 500);
  background(0);
  setupSerial();
  minim = new Minim(this);
  microphone = minim.getLineIn();
  tree1 = minim.loadFile("windStreet.mp3");
  tree2 = minim.loadFile("tree.mp3");
  pond1 = minim.loadFile("guqin.mp3");
  pond2 = minim.loadFile("waterflow.mp3");
  pond3 = minim.loadFile("pond3.mp3");
  bird = minim.loadFile("bird.mp3");
  rain = minim.loadFile("rain2.mp3");
  thunder = minim.loadFile("thunder.mp3");
  record=minim.createRecorder(microphone, "myrecording.wav");
}


void draw() {
  updateSerial();
  printArray(sensorValues);
  if (sensorValues[5]==1) {
    stateO=stateN;
    stateN=1-stateO;
  }


  if (sensorValues[1]<=6&&sensorValues[1]>=1) {
    tree1.play();
    tree1.cue(0);
  }
  //tree1.cue(0);
  if (sensorValues[2]<=6&&sensorValues[2]>=1) {
    tree2.play();
    tree2.cue(0);
  }
  if (sensorValues[0]>=20&&sensorValues[0]<=330) {
    pond3.play();
    pond3.cue(0);
  }
  if (sensorValues[0]>=331&&sensorValues[0]<=800) {
    pond2.play();
    pond2.cue(0);
  }
  if (sensorValues[0]>=801) {
    pond1.play();
    pond1.cue(0);
  }
  if (sensorValues[3]>=12) {
    delay(500);
    bird.play();
  }
  if (sensorValues[4]<=7||sensorValues[4]!=0) {
    rain.play();
    rain.cue(0);
    if (sensorValues[4]<=6) {
      thunder.play();
      thunder.cue(0);
      delay(500);
    }
  }
  if (stateN==1) {
    record.beginRecord();
    delay(500);
  }
  if (stateN==0&&stateO==1) {
    record.endRecord();
    record.save();
    delay(500);
  }

  if (sensorValues[6]==1) {
    tree1.pause();
    tree2.pause();
    pond1.pause();
    pond2.pause();
    pond3.pause();
    bird.pause();
    rain.pause();
    thunder.pause();
  }
  if (mousePressed==true) {
    tree1.pause();
    tree2.pause();
    pond1.pause();
    pond2.pause();
    pond3.pause();
    bird.pause();
    rain.pause();
    thunder.pause();
  }
}

void setupSerial() {
  printArray(Serial.list());
  myPort = new Serial(this, Serial.list()[5], 9600);
  // WARNING!
  // You will definitely get an error here.
  // Change the PORT_INDEX to 0 and try running it again.
  // And then, check the list of the ports,
  // find the port "/dev/cu.usbmodem----" or "/dev/tty.usbmodem----"
  // and replace PORT_INDEX above with the index number of the port.

  myPort.clear();
  // Throw out the first reading,
  // in case we started reading in the middle of a string from the sender.
  myString = myPort.readStringUntil( 10 );  // 10 = '\n'  Linefeed in ASCII
  myString = null;

  sensorValues = new int[NUM_OF_VALUES];
}

void updateSerial() {
  while (myPort.available() > 0) {
    myString = myPort.readStringUntil( 10 ); // 10 = '\n'  Linefeed in ASCII
    if (myString != null) {
      String[] serialInArray = split(trim(myString), ",");
      if (serialInArray.length == NUM_OF_VALUES) {
        for (int i=0; i<serialInArray.length; i++) {
          sensorValues[i] = int(serialInArray[i]);
        }
      }
    }
  }
}
Codes for Arduino
Part 1:
/*
  AnalogReadSerial

  Reads an analog input on pin 0, prints the result to the Serial Monitor.
  Graphical representation is available using Serial Plotter (Tools > Serial Plotter menu).
  Attach the center pin of a potentiometer to pin A0, and the outside pins to +5V and ground.

  This example code is in the public domain.

  http://www.arduino.cc/en/Tutorial/AnalogReadSerial
*/

// the setup routine runs once when you press reset:
void setup() {
  // initialize serial communication at 9600 bits per second:
  Serial.begin(9600);
}

// the loop routine runs over and over again forever:
void loop() {
  // read the input on analog pin 0:
  int vib1 = analogRead(A1);
  int vib2 = analogRead(A2);
  int vib3 = analogRead(A3);
  int vib4 = analogRead(A4);
  int pressureVal = analogRead(A5);
  int pressureVal2 = analogRead(A0);
  int button = digitalRead(2);
  // print out the value you read:
  Serial.print(vib1);
  Serial.print(",");
  Serial.print(vib2);
  Serial.print(",");
  Serial.print(vib3);
  Serial.print(",");
  Serial.print(vib4);
  Serial.print(",");
  Serial.print(pressureVal);
  Serial.print(",");
  Serial.print(pressureVal2);
  Serial.print(",");
  Serial.print(button);
  Serial.println();
  delay(200);        // delay in between reads for stability
}
Part 2:
const int buttonPin1 = 13;     // the number of the pushbutton pin
const int buttonPin2 = 2;

// variables will change:
int button1State = 0;
int button2State = 0;
void setup()  //程序初始化
{
  Serial.begin(9600);//设置波特率9600
  pinMode(buttonPin1, INPUT);
  pinMode(buttonPin2, INPUT);
}

void loop()//程序主体循环
{
  button2State = digitalRead(buttonPin2);

  int bigPress = analogRead(A1);

  uint16_t value1 = analogRead (A4);
  double distance1 = get_IR (value1);
  uint16_t value2 = analogRead (A5);
  double distance2 = get_IR (value2);
  uint16_t value3 = analogRead (A3);
  double distance3 = get_IR (value3);
  uint16_t valueB = analogRead (A0);
  double distanceB = get_IR (valueB);
  Serial.print(bigPress);
  Serial.print(",");
  Serial.print(distance1);
  Serial.print(",");
  Serial.print (distance2);
  Serial.print(",");
  Serial.print (distanceB);
  Serial.print(",");
  Serial.print (distance3);
  Serial.print(",");
  Serial.print (button1State);
  Serial.print(",");
  Serial.print (button2State);
  Serial.println();
  delay(200);     //延时500ms
}

double get_IR (uint16_t value) {
  if (value < 16)  value = 16;
  return 2076.0 / (value - 11.0);
}
Recitation 9: Media Controller by Rain
In this week’s recitation, the task is to manipulate media interaction through Arduino and Processing. Processing is a really good tool for sound and media interaction, and one thing important in the coding process is that remember to use map() function all the time.
I’ve done a circuit to control the speed of a rocket launching video. Here’s the result:
And following is the code:
Codes for Processing:
/**
 * Speed.
 *
 * Use the Movie.speed() method to change
 * the playback speed.
 *
 */

import processing.video.*;

Movie mov;

void setup() {
  size(560, 406);
  background(0);
  mov = new Movie(this, "launch2.mp4");
  mov.loop();
}

void movieEvent(Movie movie) {
  mov.read();
}

void draw() {
  image(mov, 0, 0);

  float newSpeed = map(mouseX, 0, width, 0.1, 2);
  mov.speed(newSpeed);

  fill(255);
  text(nfc(newSpeed, 2) + "X", 10, 30);
}
Codes for Arduino:
// IMA NYU Shanghai
// Interaction Lab
// For sending multiple values from Arduino to Processing


void setup() {
  Serial.begin(9600);
  pinMode(0, INPUT);
}

void loop() {
  int poten1 = analogRead(0);

  // keep this format
  Serial.print(poten1);
  Serial.println();
  // too fast communication might cause some latency in Processing
  // this delay resolves the issue.
  delay(100);
}
Reflection on Computer Vision for Artists and Designers: Pedagogic Tools and Techniques for Novice Programmers
Thinking of the technology used in my recitation project, I think computer manipulation has significantly simplify the process of manipulating media. In this extent, I think technology serves to facilitate project designs. However, after reading the article, I realize that when technology brings convenience for simple art works, it also introduces complex computing and logic into arts in further exploration. Like the text said, “No doubt many more vision-based artworks remain to be created, especially as these techniques gradually become incorporated into developing fields like physical computing and robotics.” Technology provide us with a broader filed to explore computing and regular patterns in arts out of intuition, and it’s this kind of intersection of logic and intuition that make technology used in arts so charming.
Recitation 4: Drawing Machines by Rain
During this recitation, we tried to build a drawing machine.
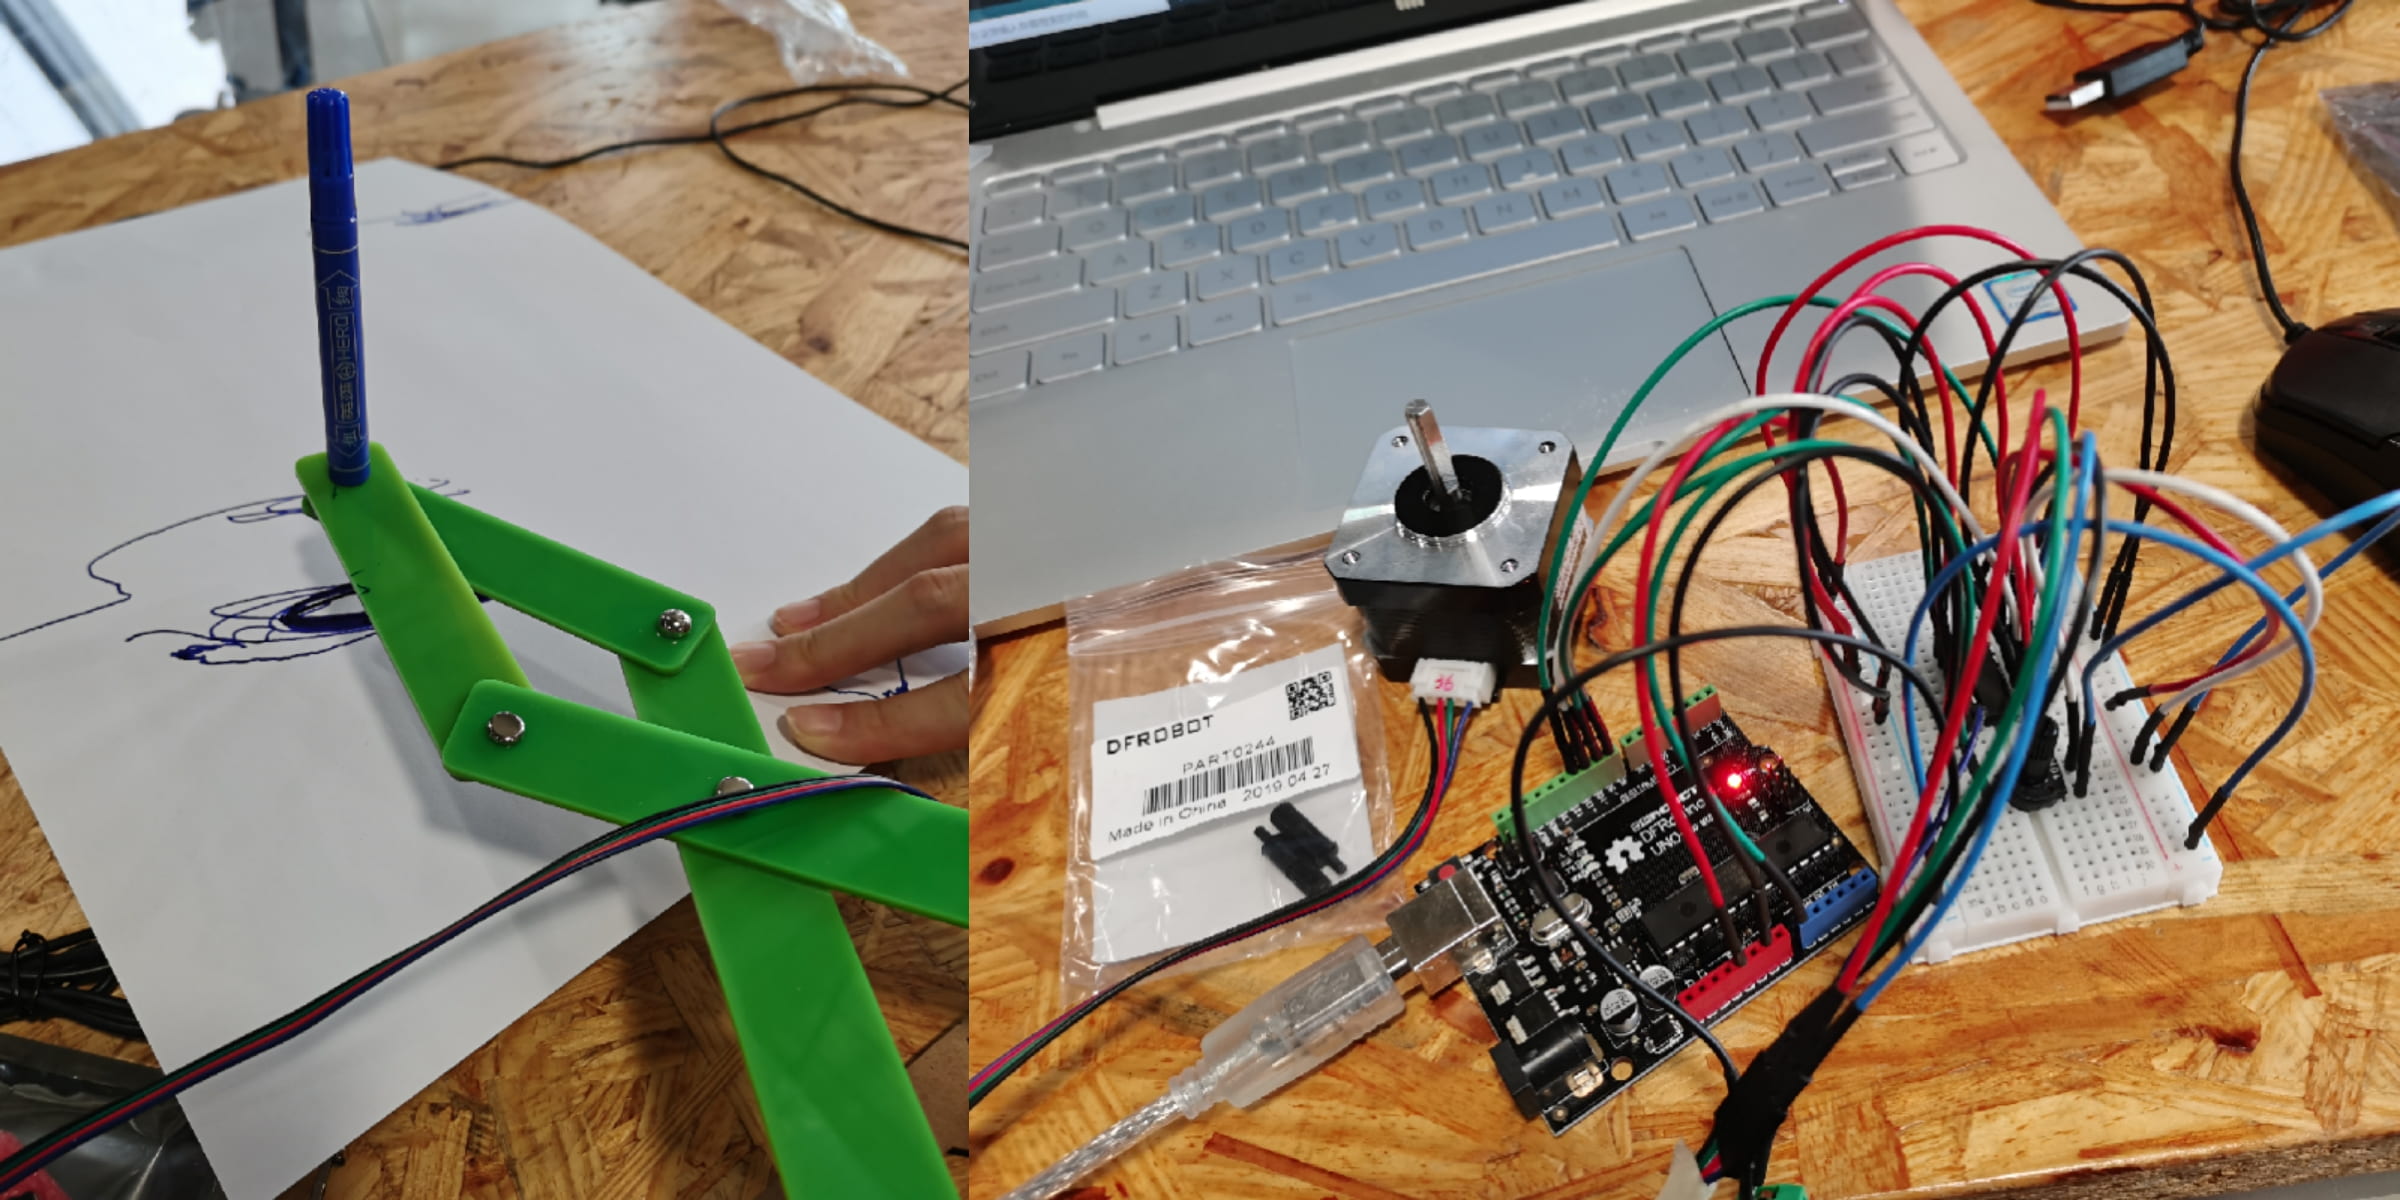
The most challenging part in the whole process must be using the function map to match the movement of the knob with the rotation of the motor. It requires a calculation on mapping the knob’s moving angle to motor’s rotating angle.
Followed is the final code we use:
/*
 * MotorKnob
 *
 * A stepper motor follows the turns of a potentiometer
 * (or other sensor) on analog input 0.
 *
 * http://www.arduino.cc/en/Reference/Stepper
 * This example code is in the public domain.
 */

#include <Stepper.h>

// change this to the number of steps on your motor
#define STEPS 200

// create an instance of the stepper class, specifying
// the number of steps of the motor and the pins it's
// attached to
Stepper stepper(STEPS, 8, 9, 10, 11);

// the previous reading from the analog input
int previous = 0;

void setup() {
  // set the speed of the motor to 30 RPMs
  stepper.setSpeed(30);
}

void loop() {
  // get the sensor value
  int val = map(analogRead(0),0,1023,0,128);

  // move a number of steps equal to the change in the
  // sensor reading
  stepper.step(val - previous);

  // remember the previous value of the sensor
  previous = val;
}
And it’s not accurate enough that there are still some angles it couldn’t cover.
Although it’s just simple movement made by the machine, but how to communicate with a machine using a language much different from what we familiar with in daily life is definitely not easy, and the process is absolutely inspiring.
Q&A
Question 1: What kind of machines would you be interested in building? Add a reflection about the use of actuators, the digital manipulation of art, and the creative process to your blog post.
I want to build a machine which can turn my words into animated picture when I say something that I want to record to it. It should contain a speaker to receive and recording my voice, and digital processing core to transform my voice into animate, together with projector which can show the final pictures.
Question 2: Choose an art installation mentioned in the reading ART + Science NOW, Stephen Wilson (Kinetics chapter). Post your thoughts about it and make a comparison with the work you did during this recitation. How do you think that the artist selected those specific actuators for his project?
The art installation attracting me is the Drumming Subhuman. It’s a computer-controlled robot who is able to perform drumming by imitate human’s movement.
The drawing machine we built in class seems much simpler than the robot, but still the drawing machine cost us much time trying to build up communicating connection and control circuit, no mention the difficulty of the robot. And also the robot is intelligent and is able to create lyrics, which create a special form of art, but our drawing machine is still controlled by human’s will.
To select appropriate actuators for the installation, first of all the artists should be clear about what function they what for their installation, then match it with specific actuators. And the process acquire transition and combination, to use basic actuators achieving difficult function. Such as to imitate hands’ movement while drumming, they need physical connections like bones and muscle controlled by motor, and sensors helping to control the speed while the hands drop and bounce.