Step 1: Choose your motif
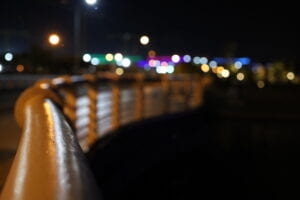

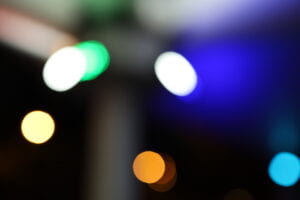
When I read the question prompt which asks me to “try to select an image that has an aesthetic quality (e.g. in light/shadow, composition, colors), and also several geometric features”, the first photo first came into my mind for its awesome light effects at night and the light dots created by the colorful lights also seemed easy to draw. However, when I get down to it, I found that I was wrong: there were just so many light dots and what’s worse, the arch of the bridge has to be using either arc() or bezierVertex(), which are either hard to understand or requires many points on the curve to be defined to make the curve out of the shape I want it to be. So when I found out that I can’t locate that many dots on my sketch paper, I gave up and chose the one on the right hand instead. This photo, also taken by me, is also a photo that I consider aesthetic for its amazing light effects and also full of “geometric features” (and fewer elements compared with the one I chose before), which makes it easier to draw. I was looking forward to seeing how it goes with processing.
Step 2: Draw your image on paper
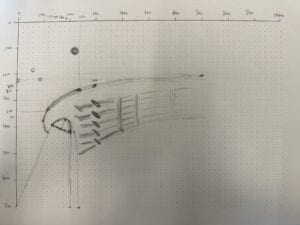

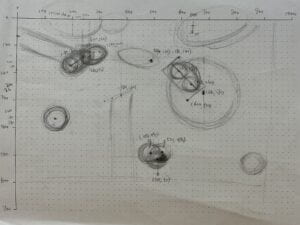
I started from the bridge and it was when I failed multiple times to create the curve the way I wanted it to be that I decided to change a different photo. And for the second photo, I wanted the drawing to the greatest extent to be identical to the original one, so I first defined a large gap of space as 100 pixels, then roughly dotted the main elements (the main light dots in the middle of the image). After that, I thought about what functions I should use when drawing those elements. Ellipse? I tried but found out that ellipses can only be either vertical or horizontal, which doesn’t match my need. So then I came up with the idea that I could probably use multiple circles in a line to make it look like an ellipse. And that’s what I did when drawing the two most eye-catching white light dots in the middle. (But when I was almost finished, I found that I could actually use a line that is about 40 or more in strokeWeight() to create the same drawing.) Anyway, I used multiple ellipses or circles of different shades to produce that gradually “fading” light effect to make it as faithful as possible to the original image. One thing that bothered me is that I couldn’t create that blurry effect created by the camera using processing, and those supposed-to-be blurry columns in the background are only displayed as half-transparent in the drawing, which is different from what is originally displayed. Also, I found it very useful to employ the (mouseX, mouseY) function to point to the places I want something to be.
void mousePressed() {
  println(mouseX, mouseY);
}
It greatly saves me the time of constantly calculating where the points are or how large they should be to look better. (I amplified all the sizes of the circles so that they look better and more similar to the original photo.)
Step 3: Draw your image with code
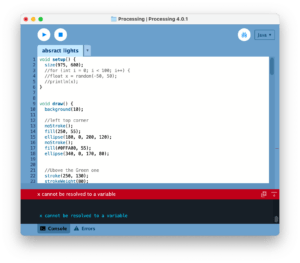
void setup() {
  size(975, 600);
}

void draw() {
  background(10);

  //left top corner
  noStroke();
  fill(250, 55);
  ellipse(180, 0, 200, 120);
  noStroke();
  fill(#0FFA00, 55);
  ellipse(340, 0, 170, 80);

  //Above the green one
  stroke(250, 130);
  strokeWeight(80);
  line(0, 70, 236, 141);
  stroke(#FF571A, 20);
  strokeWeight(80);
  line(10, 65, 29, 75);
  stroke(#FF571A, 40);
  strokeWeight(80);
  line(10, 65, 18, 66);
  stroke(#FF571A, 20);
  strokeWeight(80);
  line(194, 122, 208, 122);

  //Line in the middle between green and blue
  stroke(250, 50);
  strokeWeight(80);
  line(372, 128, 500, 170);

  //top left green and white one
  stroke(220);
  line(195, 170, 240, 140);
  noStroke();
  fill(#5AFF95, 150);
  circle(265, 135, 85);
  fill(#5AFF95, 100);
  ellipse(277, 137, 130, 90);
  fill(#5AFF95, 100);
  circle(288, 128, 85);
  fill(#5AFF95, 100);
  circle(300, 132, 85);
  fill(240);
  circle(265, 135, 50);
  fill(#5AFF95, 100);
  circle(263, 145, 85);

  fill(250);
  circle(195, 170, 75);
  fill(250);
  circle((195+240)/2, (170+140)/2, 75);
  fill(250);
  circle(206.25, 162.5, 75);
  fill(250);
  circle(228.75, 147.5, 75);
  fill(#FF571A, 129);
  circle(140, 365, 74);
  fill(#F2F282);
  circle(140, 365, 70);

  //BLUE
  fill(#3529F0, 128);
  ellipse(719, 262, 280, 200);
  fill(#3529F0, 88);
  ellipse(753, 263, 350, 200);
  fill(#0319FF, 100);
  circle(680, 270, 200);
  stroke(220);
  line(590, 190, 615, 240);
  noStroke();
  fill(250);
  circle(590, 190, 75);
  fill(250);
  circle(615, 240, 75);
  fill(250);
  circle((590+615)/2, (190+240)/2, 75);
  fill(250);
  circle(596.25, 202.5, 75);
  fill(250);
  circle(608.75, 227.5, 75);
  fill(#0319FF, 80);
  circle(629, 264, 75);
  fill(#3202F5);
  circle(624, 260, 75);
  fill(250);
  circle(615, 240, 79);

  //Orange
  fill(#FF571A, 50);
  circle(525, 490, 75);
  fill(#FF571A, 88);
  circle(515, 510, 75);
  fill(#FFAE43);
  circle(490, 490, 80);

  //Light Blue on the right corner
  fill(#00CEFF);
  circle(936, 544, 80);
  fill(#00CEFF, 20);
  circle(946, 454, 80);
  fill(#00CEFF);
  circle(936, 544, 80);

  //white and Orange line in the middle
  stroke(#F2A200, 70);
  strokeWeight(30);
  line(370, 290, 370, 650);
  stroke(250, 50);
  strokeWeight(50);
  line(400, 290, 400, 650);
  stroke(10);
  strokeWeight(40);
  line(320, 300, 453, 261);

  //right upper hand corner
  stroke(#3529F0, 110);
  strokeWeight(100);
  line(633, 111, 975, -20);
  stroke(250, 110);
  strokeWeight(200);
  line(519, 14, 800, -100);
  stroke(250, 150);
  strokeWeight(150);
  line(519, 14, 800, -100);
  stroke(250, 110);
  strokeWeight(80);
  line(674, 76, 975, -48);
}
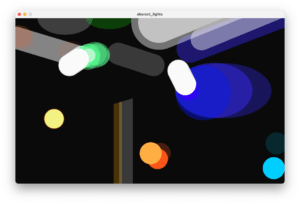
I think the drawing in Processing was a good means of realizing my design in that it drew out all the light dots in a geometric way that is both novel and aesthetic to me. Moreover, in Step 4: Going beyond, I added a random in the transparency of two of the orange light dots in the lower middle to create a flashing and blinking effect. And that is a great way to “animate” the drawing, which offers a better experience to look at as it resembles what we see when we stare at the lights and let our mind flow freely-some large light dots, sometimes flashing, sometimes blinking. And this true-to-life, relaxing experience is what I truly value.
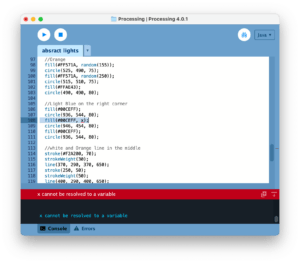
ps: I didn’t choose to use the random() function inside setup to pick randomized numbers because I failed to do so. (The system keeps reminding me “x” cannot be resolved to a variable, so I just used it in loop to create that flashing light effect.)
