Boom Box-Rachel Li-Margaret Minsky
CONTEXT AND SIGNIFICANCE
The previous research (Group project) we did was called The Thinking Box, which has flowers on the outside and the flowers are triggered only when someone wears the box on his/her head and be trapped in the endless darkness inside. The title “The Thinking Box” is named to remind people of how difficult it is to think in other people’s shoes and also actually make action to respond to it. In that project, it was the action of people wearing the box on his/head that triggered the interactive response of the flowers popping up from the outside. And this brings us to my definition of interaction: there is a clear dialogue between the user and the project, a back-and-forth interesting conversation that is expected to be explored by the user. And I think our project “Boom Box” managed to create that input-output dialogue through the users’ input of beats and the output of sound created by the relay.
I think our project is targeted to anyone that feels lonely and seeks company but unwilling to find a friend or family member to talk about it. To them, it is extremely important that they feel their outputs can be heard and also resonated with. So, our project can act as a perfect company to them in that it can listen to their outputs so attentively that they can even repeat their feelings in its own way, and creating a peaceful conversation, thus calming them down and give them a sense of being valued and prioritized.
CONCEPTION AND DESIGN:
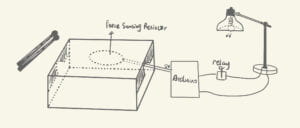
I think it was that I thought there should be a back-and-forth conversation between the user and the project we make that inspires me of the idea of the “playback”. But in fact, I first thought of using distance control (the ultrasonic ranger) to detect the distance between the user and the box, and every time the user is in the effective range, the buzzer will make a sound, and also it will be recorded to be played back. However, that probably would just make annoying sounds instead of beautiful music, and it’s also hard to define the duration of one whole “interaction”, so I soon gave up that idea.
By Rachel Li
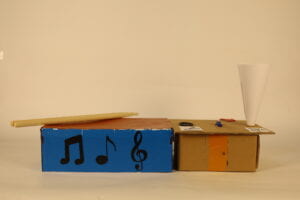
And about the “drum box”, I happened to have a shoe box that is all white on the outside, which makes it easier to paint and decorate. I thought about using the cookie box which is made of metal, which may be more sensitive to vibration, but probably too sensitive that may count one hit for ongoing multiple hits, while the shoe box made of cardboard may be just right, and also the size, the hardness of the box is ideal for a “drum”. Furthermore, to improve the users’ experience of interacting with the box, I also bought drumsticks so that users can better can the idea that it is a “drum”. (However, during the user testing, the drumsticks hadn’t arrived yet, so we drew a hand on it that says “Hit Me Hard” on it.)
FABRICATION AND PRODUCTION:
Failed experiments:
We first experimented with different ways to make that retro click-clack sound louder. And in fact, we didn’t adopt Professor Minsky’s suggestion of putting a horn on the relay to make it louder. Instead, Professor Minsky first led us to Professor Rudi in hope that we can probably do what Professor Rudi did-making a larger version of the little relay box using the conchoid (I think it is called this) -to make the sound louder, but unfortunately, the ER failed to find it, so we gave up that idea. And then, we followed Professor Rudi’s advice to try the electromagnet and something made of metal and to use the sound created the moment the metal thing is attracted to the magnet to replace the sound created by the relay. However, it was either the magnetic pull wasn’t strong enough to attract the metal, or the magnetic pull was so strong that the metal couldn’t come off.
So after failing two attempts, we decided to stick to the relay anyway, but at that time, we still didn’t add a horn to it (Probably it was because we thought that wasn’t a big problem, and we can fix it anytime).
Personal contributions:
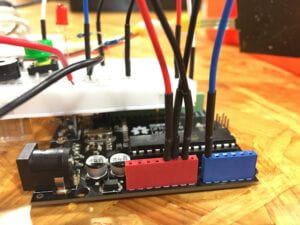
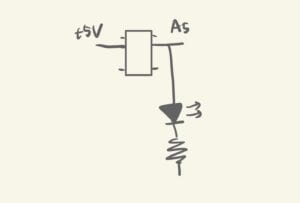
In the whole process, I was responsible for the coding part and proposing ideas for further improvement. However, I wasn’t familiar with the coding part, so I first tried to understand the coding example that Professor Misky sent us on Slack about using millis to record and playback, and I understood pretty much of it, which enabled me to explain it to the LAs the specific obstacles I came across. I also tried to modify it when there is something wrong: for example, when the relay only kinda works during the recording part, as the LED connected in the circuit used to debug only gives off faint light when a hit is made. But more often, what I did personally was limited to trying to figure out how the electronic elements work, such as how to put music into the mp3 player, how to connect the circuit, and mainly to understand the explanations Professors and LAs kindly made.
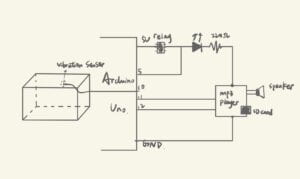
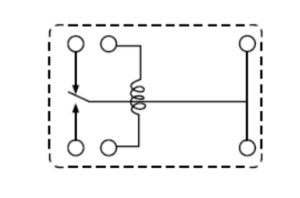
Professor Minsky carefully explained this schematics for the relay downloaded from this relay datasheet from this website: https://datasheetspdf.com/datasheet/HRS1H-S-DC5V.html
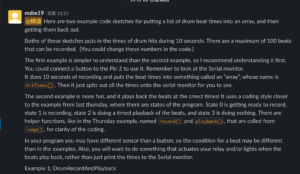
The two examples Professor Minsky sent me using millis to record and playback.
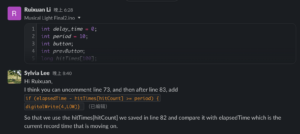
Sylvia patiently checked out how to debug the problem of why the relay doesn’t work while recording.
 /**
* A code that includes three states that can both record and playback.
* This was adapted from the tutorial example that Professor Minsky kindly sent Nicole and me.
 if (state == 0 && Val == 1) {
    recordStartTime = millis();
    hitCount = 0;
    playaudio();
    state = 1;
  }
  if (state == 1) {
    record();
  } else if (state == 2) {
    myservo.write(120);
    playback();
  } else if (state == 3) {
  }
}
*/
Group work:
Nicole and I, we did the soldering part of the relay together, because the legs of the relay were very short, and cooperation was successful in that I held the two parts to be joint together, while she melted the metal carefully with the soldering gun in order not to connect the two legs in a row and also to make the joint parts fully connected in case it falls out. And I would say it was this cooperation that made this soldering process so smooth and a great success. Also, we painted the white box blue on the sides and orange on the face through collaboration, which was much more efficient than painting it alone, I suppose.
During the User Testing Session, we found out that the users either didn’t know what to do with the hand we drew on the face: Some put their hands softly onto the hand we drew to try to match it with their hands, but of course, nothing happened; Some started to play with the speaker we put beside the box. And so I wrote “Hit Me Hard” on the hand we drew as an instruction halfway through the session, but unfortunately, that didn’t help much too. Some say they were afraid of hitting it too hard because there was already a folding on one side of the box, and many others ignored it.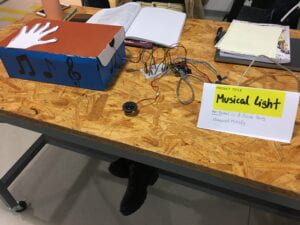 Another big problem is that they didn’t know when to start hitting the drum: They hit for the first time and there goes the music, and they were at a loss for what to do next, and after the ten seconds of music is played, we tell them that they should have been hitting the drum along with the music, so then they start to hit, but it was already in the “playback session” and their beat cannot be recorded then. So upon seeing this situation, Sylvia suggested that we can probably use a counter to count down in the record state and count up in the playback state. And also the ten-second music was too long and users may have to wait if they don’t know what to do.
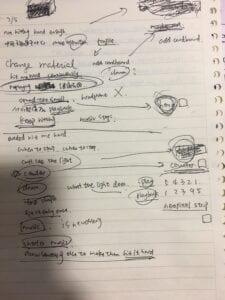 Moreover, we realized that only some people noticed the small LED that was flashing during the playback, and that was when we had the choice of keeping our original idea “Musical Light” by adding a neopixel strip around the box and changing the title to “Boom Box” and completely get away with the idea of lights. And I thought that the reason why users were at a loss for what to do after hitting the box for the first time was that there wasn’t enough feedback and they don’t know what to expect, and that was the same idea from Sylvia.
Production choices for improvement:
And as I wanted to keep to our original idea “Musical Light”, I tried to merge in the code of neopixels. But that was already one day before our final presentation, so again I was afraid to mess up and we sought help again. This time Carina helped us. And also Iris helped Carina with the problem of couldn’t turning off the lights (because the new version of the program has a different name for clearing the lights). However, even a 0.01 millisecond of delay of the neopixel lights affected our program from running normally. It was because of the delay that the servo motor started to run randomly and the playback was played at a 2.5 or even faster speed. Therefore, we decided to choose the easier way and to make it a “Boom Box” without all the lights, which still makes our project lacking in feedback, but one thing we did improve in is that this time,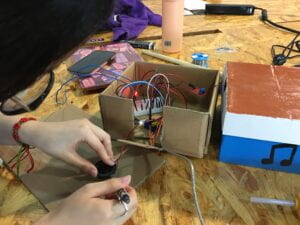 we adopted Professor Minsky’s idea of building another box to put all our circuits inside and make an interface with instructions on it so that the users can get an idea of what they should do with it. We also made an arrow that points from the “drum” to the “horn”, indicating that it is time for the users to make a transition from “creating your beat” to “listen here”. Sadly enough, in our presentation when users were testing our project again, they still couldn’t get the idea from the drumsticks and the ear we drew. And probably we should have just written things down directly. Also, I think the direct feedback right after users hit the drum, if added, will be much better.
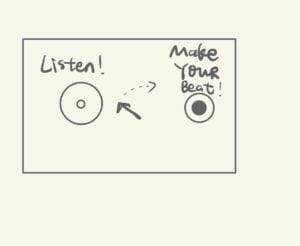 We first decided to make our interface look this way, but later changed the written instructions into pictures of drumsticks and an ear to indicate the audience more implicitly.
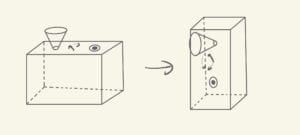
- We didn’t adopt Professor Minsky’s idea of turning the rectangular box upward for fear that the Arduino Uno and all the circuits may not be able to fill in, but at this point of documenting, I realized we actually could have put all the circuits including Arduino Uno and the mp3 player shield inside our “drum” box and connect the speaker, the relay and the servo motor with longer wires.
/**
* A neopixel strip that can turn all colorful and then off after a certain period of time.
* This was adapted from the tutorial example embedded in Arduino IDE.
void pulseWhite(uint8_t wait) {
  for (int j = 0; j < 256; j++) {  // Ramp up from 0 to 255
    // Fill entire strip with white at gamma-corrected brightness level 'j':
    strip.fill(strip.Color(0, 0, 0, strip.gamma8(j)));
    strip.show();
    delay(wait);
  }
  for (int i = 0; i <= 60; i++) {
    strip.setPixelColor(i, strip.Color(0, 0, 0));
    strip.show();
  }
}
*/
CONCLUSIONS:
The goal of our project was to create a dialogue between the user and our project through the process of the user “talking to it” and then our project “talking back to them” by repeating what they have said in a different kind of sound and also with the amazing light effects. If there were more instructions, our project results will align with our definition of “interaction” as there will be an effective “back and forth” dialogue between the user and our project. However, our project results now don’t perfectly align with our definition of “interaction” probably only after users’ multiple attempts, until they finally explore the way we want them to interact. During the user testing in our presentation, the audience ultimately did hit our box hard enough with the drumsticks we provide, and everyone then got the idea we were trying to deliver when they heard the sound of the relay clicking and clacking to playback the beats that were made. And the only thing I wasn’t that satisfied with was that perhaps the beats can be made along with the original beats of the music so that it can be a better rhythm to the ear. If we have more time, I will definitely figure out how I can include the lights back into this project, and what kinds of light we should use to make the direct feedback as clearly as possible to the audience. And we may also put the extra box we made to store our circuits vertically so that users can better hear the playback because, in this way, the horn can be the same height as our ears, which can better indicate to the audience where they should stand to get our idea in the most ideal way, as suggested by Professor Minsky.
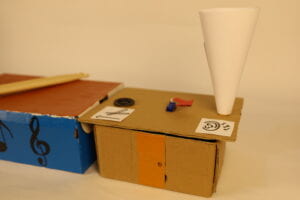
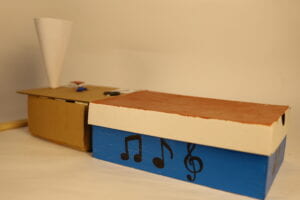
From the setbacks in which we keep failing to get our ideas across in a somehow vague and artistic way (because we didn’t want to write every instruction down so clearly, otherwise, the audience will never get the chance to explore its possibility by themselves), I learned that we should positively confront with the problem we are facing, and probably do as many experiments as possible to get to know what the users of our project are thinking, and therefore we can improve in more effective ways. And from the setbacks I encountered in the coding process, I realized that I had better experiment more with anything I am interested in and develop the ability of critical thinking in the programming language. From the accomplishments in terms of the coding that made our “play-record-playback” dialogue come true, I learned that we have to think in the Arduino way and then we can better understand how we should program it and realize the function we have in mind. And from the accomplishment in terms of the handicraft, I learned that there is always space for improvement when we compare our works to others.
To wrap up, our project is valuable because this playback function is like an echo of what you have said. From my experience, I know that when I feel lonely, talking to someone will never rescue me from that depression. And when there are no pets to communicate with, there is this choice of “talking to” musical instruments. And the best part of our musical instrument is that they can not only listen attentively, it can also “tell” you what you felt when “talking” to it, thus creating a peaceful environment where there isn’t new opinion created but calms your inner mind by repeating your feelings and resonating with you. And I think that is pretty much what mental therapy is about. Upon the creation of our project, we should always remember that we all can find someone that understands us best. And that “someone” is ourselves. Establishing good communication with ourselves is always the best way to soothe our intensified minds.
ANNEX:
Materials list:
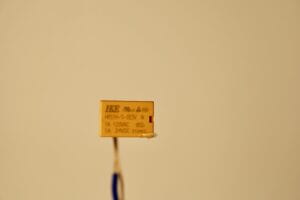 relay
relay 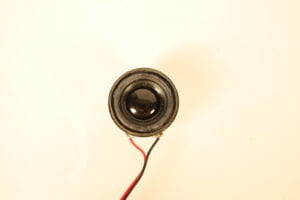 speaker
 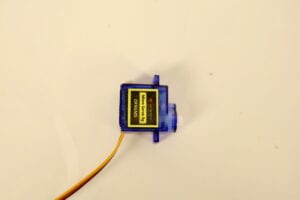 servo motor
 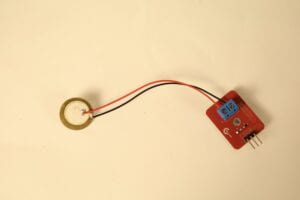 vibration sensor
 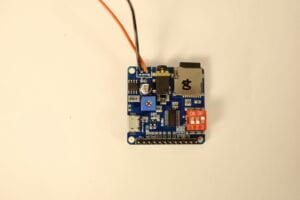 mp3 player shield & SD card
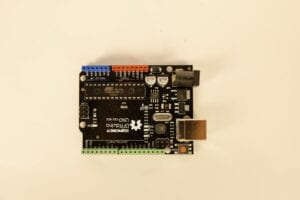 Arduino Uno
  wires
wires 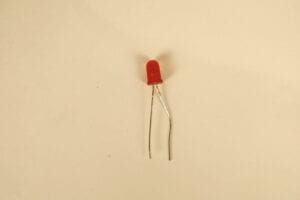 LED (red)
  220 Ohm resistor
 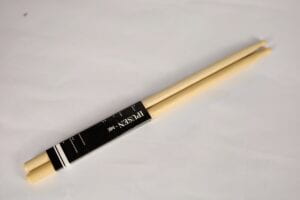 drumsticks
Full code:
/**
* A code that includes three states that can both record and playback.
* This was adapted from the tutorial example that Professor Minsky kindly sent Nicole and me.
#include <Servo.h>;
Servo myservo;
int delay_time = 0;
int period = 10;
int button;
int prevButton;
long hitTimes[100];
long recordStartTime;
long playbackStartTime;
int hitCount = 0;
int playbackIndex;
int state = 0;
#include <Arduino.h>
#include "DYPlayerArduino.h"
#include <SoftwareSerial.h>
int Val = 0;
int preVal = 0;  //previous value from the vibration sensor
int pos = 0;

SoftwareSerial SoftSerial(10, 11);  //RX and TX from Arduino
DY::Player player(&SoftSerial);     //should connect them to io0 and io1

void setup() {
  Serial.begin(9600);
  Serial.println("Starting the Player...");
  pinMode(7, INPUT);
  pinMode(4, OUTPUT);
  Serial.println(Val);
  myservo.attach(9);
}

void loop() {
  Val = digitalRead(7);
  //record drum hits for 10 seconds
  if (state == 0 && Val == 1) {
    recordStartTime = millis();
    hitCount = 0;
    playaudio();
    state = 1;
  }
  if (state == 1) {
    record();
  } else if (state == 2) {
    myservo.write(120);
    playback();
  } else if (state == 3) {
    // do nothing
  }
}

void playaudio() {
  player.begin();
  player.setPlayingDevice(DY::Device::Sd);  //SD card, USB storage volume is
  player.setVolume(15);
}

void record() {
  long elapsedTime = millis() - recordStartTime;  // how long we are recording
  if (elapsedTime < 10000 && hitCount < 100) {
    if (Val == 1) {
      myservo.write(0);
      // }
      if (Val != preVal) {  //checking if the previous value is also 1
        digitalWrite(4, HIGH);
        if (elapsedTime - hitTimes[hitCount] >= period) {
          digitalWrite(4, LOW);
        }
        hitTimes[hitCount] = elapsedTime;
        hitCount++;
      }
    }
    preVal = Val;
  } else {
    playbackStartTime = millis();
    playbackIndex = 0;
    state++;
    Serial.println("Starting playback");
  }
}

void playback() {
  long playbackTime = millis() - playbackStartTime;  // how long we are playing back
  int lastPlayback;                                  //change in playback time

  if (playbackTime == 0) {
    playaudio();
    digitalWrite(4, LOW);
  }

  if (playbackTime >= hitTimes[playbackIndex]) {
    Serial.print("hitTimes:");
    Serial.println(hitTimes[playbackIndex]);
    digitalWrite(4, HIGH);
    playbackIndex++;
  } else {
    if (playbackTime - hitTimes[playbackIndex - 1] >= period) {
      digitalWrite(4, LOW);
    }
  }

  if (playbackIndex >= hitCount) {
    Serial.println("Playback done");
    state = 0;
  }
}
*/
Many thanks to Professor Minsky for all the practical suggestions and helpful explanations, Professor Rudi for helping us with the mp3 player and the speaker problem and also giving us ideas on creating the click-clack sound in a larger volume, Professor Gottfried for changing the mp4 format in an advanced way, and all the LAs for patiently teaching us how to code, how to solder correctly, and how to improve our project, and also Jasmine who happened to be at the lab late at night when all the LAs are off the office and it was she who helped us debug our code at that time. Thank you all so much. And finally, I want to thank my partner Nicole, for always supporting me all the way through. And without her, I would have never come this far or finished our project.
