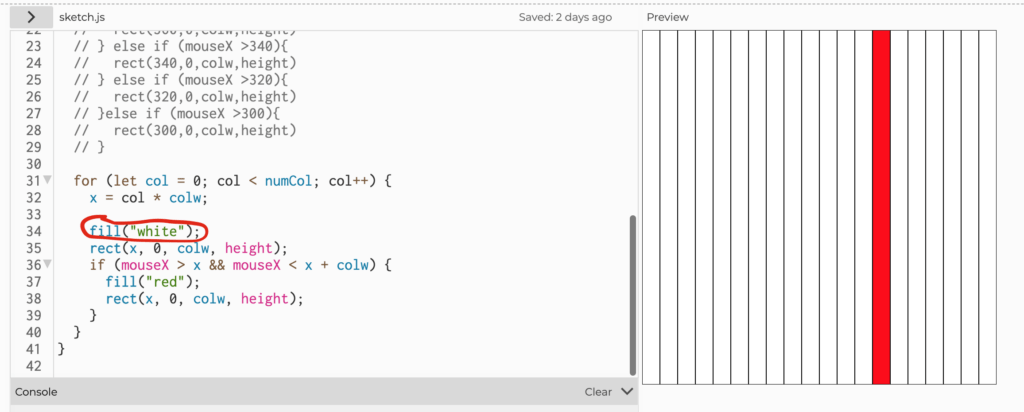
This week’s worksheet started off kind of shaky because I followed the instruction for creating the for loops but when I introduced the “if” statement into the loop and related to mouseX position it kept making the entire screen red instead of just where the mouse was. After attending a coding lab session I was able to bypass that by setting the default color of the columns to white and it solved the problem. However, I don’t know if that is exactly the right approach to solving the issue I was having but it did work.

Exercise 4.c also took a bit more thinking but I remembered the hint Mimi gave in class about using the “x % y == z” if statement inside the mouseX if statement to only color every other column. By choosing only the column numbers that are divisible by 2, I am skipping over every other column.
Exercise 4.d involved choosing a different color for each column and the method I used was to relate the rgb value of each column to the x-position of each column by mapping the total value of the canvas to the range of rgb (0-255). I can sense that this is only one of many ways to go about this question and I would like to know how to randomly assign a color for each column without relating it to the x-position of the column.
Exercise 4.3 was fairly simple since it simply involved nesting the for loop for the rows inside the for loop for the columns. And I achieved the highlighting effect using the same logic of coloring the columns to now consider both x and y positions of the mouse.
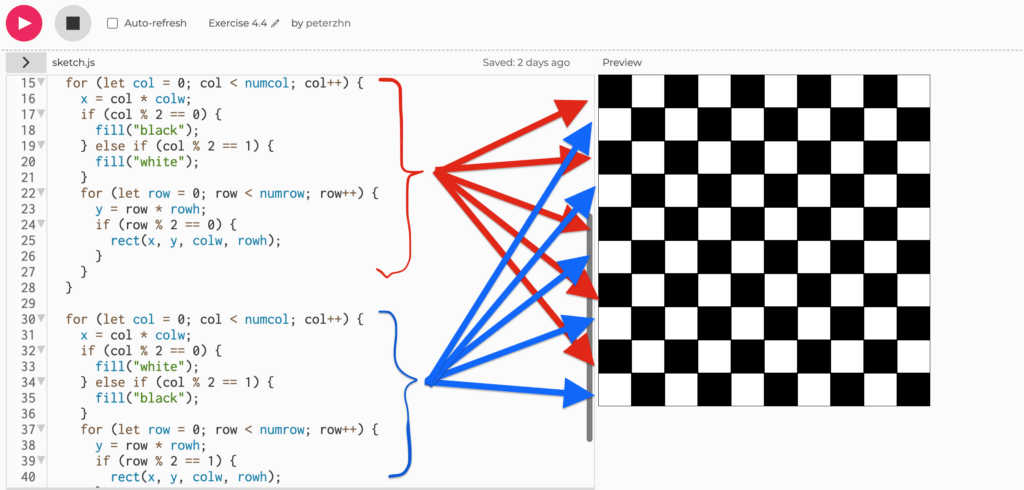
The checkerboard challenge was where my coding lab session really helped. Jeeyoon told me to break the checkerboard down into only rows first and to write a for loop for each row first before trying to consider the y-axis as well. I knew the logic of creating the checker effect involved “x % y == z”. I first drew out the first row using a for loop and using a static y value in the rect function. And for the following row the patterning is reversed. Once I have the two rows written out using for loops I copied them and change the y value. Then I realized that the way the rows are related is also the same logic in that the first row is “black first” and the second is “white first” and so forth. Therefore, I inserted a for loop for the y-axis inside both for loops I already wrote. Therefore, I realized that my initial thinking of writing everything inside one for loop was not the right approach and that by dividing the board up by rows I am able to dissect how the pattern is created in each row and then by writing them out manually I can then find ways to reintroduced for loops afterwards.

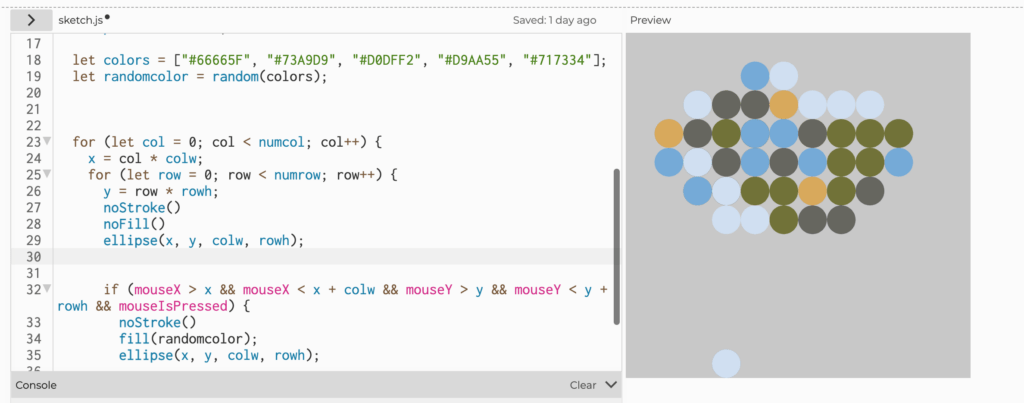
For this week’s creative assignment I combined it with my assignment for visual language, which involved using 5 colors that represent me. I knew I wanted to create a grid of circles so I used two for loops to create the x and y axises. I first moved the background to setup to create a painting canvas effect. I then set the 5 colors and used the random function to random select 1 of the 5 colors. However, when you press the mouse over the circles the colors flicker at 60 fps and then once you leave the circle the color is selected instead of when you press a circle one of the random colors is selected. So there is knowledge about the selection of color that I still don’t know how to approach. But the created effect of a grid of 10×10 circles each with 1 of the 5 colors I chose is still achieved so I am glad I was able to figure it out to some degree.
