Final Project Documentation (Video + Stills + Code)

Video:


Stills:

Code:

#include “esp_wifi.h”
#include “esp_wifi_types.h”
#include “esp_system.h”
#include “esp_event.h”
#include “esp_event_loop.h”
#include “nvs_flash.h”
#include <stdio.h>
// screen
#include <SPI.h>
#include <Wire.h>
#include <Adafruit_GFX.h>
#include <Adafruit_SH110X.h>
#define i2c_Address 0x3c
#define SCREEN_WIDTH 128 // OLED display width, in pixels
#define SCREEN_HEIGHT 64 // OLED display height, in pixels
#define OLED_RESET -1 // QT-PY / XIAO
Adafruit_SH1106G display = Adafruit_SH1106G(SCREEN_WIDTH, SCREEN_HEIGHT, &Wire, OLED_RESET);
// Define a fixed-size array to store BPM history
#define HISTORY_SIZE 24
int bpmHistory[HISTORY_SIZE] = { 0 };
// Adafruit Neopixel Settings
#include <Adafruit_NeoPixel.h>
#ifdef __AVR__
#include <avr/power.h> // Required for 16 MHz Adafruit Trinket
#endif
#define LED_PIN 5
#define LED_COUNT 1
Adafruit_NeoPixel leds(LED_COUNT, LED_PIN, NEO_GRB + NEO_KHZ800);
uint32_t col;
#define SNAP_LEN 2324 // Maximum length of each received packet
#define VIBRATION_PIN 17
/* ===== run-time variables ===== */
uint32_t tmpPacketCounter; // Temporary packet counter
int currentHeartbeatInterval = 300; // Starting interval
int dynamicShortDelay = 170;
/* Callback function for Wi-Fi promiscuous mode */
void wifi_promiscuous(void* buf, wifi_promiscuous_pkt_type_t type) {
wifi_promiscuous_pkt_t* pkt = (wifi_promiscuous_pkt_t*)buf;
wifi_pkt_rx_ctrl_t ctrl = (wifi_pkt_rx_ctrl_t)pkt->rx_ctrl;
if (type == WIFI_PKT_MISC) return; // Ignore miscellaneous packets
if (ctrl.sig_len > SNAP_LEN) return; // Ignore packets too long
tmpPacketCounter++; // Increment packet counter
}
/* plotting functions */
void updateBpmHistory(int newBpm) {
// Shift the old values
for (int i = 0; i < HISTORY_SIZE – 1; i++) {
bpmHistory[i] = bpmHistory[i + 1];
}
// Add the new value to the end
bpmHistory[HISTORY_SIZE – 1] = newBpm;
}
void drawChart() {
// Starting position for the chart
int startX = 0;
int startY = 20; // Below the text
int chartHeight = 40; // Height of the chart area
// Find the max and min BPM in the history for dynamic scaling
int maxBpm = bpmHistory[0];
int minBpm = bpmHistory[0];
for (int i = 1; i < HISTORY_SIZE; i++) {
if (bpmHistory[i] > maxBpm) {
maxBpm = bpmHistory[i];
}
if (bpmHistory[i] < minBpm) {
minBpm = bpmHistory[i];
}
}
// Prevent division by zero and ensure there’s a range
if (maxBpm == minBpm) {
maxBpm = minBpm + 1; // Ensure there’s at least a range of 1
}
for (int i = 0; i < HISTORY_SIZE – 1; i++) {
// Map the BPM values to the chart area
int yCurrent = map(bpmHistory[i], minBpm, maxBpm, startY + chartHeight, startY);
int yNext = map(bpmHistory[i + 1], minBpm, maxBpm, startY + chartHeight, startY);
// Draw a line from each BPM value to the next
display.drawLine(startX + i * 5, yCurrent, startX + (i + 1) * 5, yNext, SH110X_WHITE);
}
}
/* ===== main program ===== */
void setup() {
// Initialize Serial
Serial.begin(115200);
display.begin(i2c_Address, true); // Address 0x3C default
display.display();
delay(1000);
display.clearDisplay();
//Settings for the LED pixels
leds.begin(); // INITIALIZE NeoPixel leds object (REQUIRED)
leds.show(); // Turn OFF all pixels ASAP
leds.setBrightness(50); // Set BRIGHTNESS to about 1/5 (max = 255)
col = leds.Color(119, 0, 200); //Set a purple color for the LEDs
pinMode(VIBRATION_PIN, OUTPUT); //vibration motor pin
// Initialize NVS, TCP/IP adapter, and Wi-Fi
nvs_flash_init();
tcpip_adapter_init();
wifi_init_config_t cfg = WIFI_INIT_CONFIG_DEFAULT();
ESP_ERROR_CHECK(esp_event_loop_init(NULL, NULL));
ESP_ERROR_CHECK(esp_wifi_init(&cfg));
ESP_ERROR_CHECK(esp_wifi_set_mode(WIFI_MODE_NULL));
ESP_ERROR_CHECK(esp_wifi_start());
esp_wifi_set_promiscuous(true);
esp_wifi_set_promiscuous_rx_cb(&wifi_promiscuous);
}
void loop() {
delay(200); // Reduced wait time
Serial.print(“PPS:”);
Serial.print(int(tmpPacketCounter) * 5);
Serial.print(” “);
Serial.print(int(tmpPacketCounter));
Serial.print(“\t”);
// Map packet count to desired delay between heartbeats
int desiredHeartbeatInterval = map(constrain(tmpPacketCounter, 0, 150), 0, 150, 1000, 10);
// Smooth the transition using a weighted average
currentHeartbeatInterval = (0.9 * currentHeartbeatInterval) + (0.1 * desiredHeartbeatInterval);
// Calculate the dynamic short delay between double taps/blinks
int desiredShortDelay = map(constrain(tmpPacketCounter, 0, 120), 0, 120, 200, 50);
dynamicShortDelay = (0.8 * dynamicShortDelay) + (0.2 * desiredShortDelay);
// Calculate BPM
int bpm = 60000 / (currentHeartbeatInterval + 200 + dynamicShortDelay + 120); // Calculate Beats Per Minute
updateBpmHistory(bpm);
Serial.print(“BPM:”);
Serial.println(bpm);
// Start a display buffer
display.clearDisplay();
display.setTextSize(1); // Normal 1:1 pixel scale
display.setTextColor(SH110X_WHITE); // Draw white text
display.setCursor(0, 0); // Start at top-left corner
display.print(“BPM: “);
display.print(bpm);
display.print(” “);
display.print(“PPS: “);
display.println(int(round(tmpPacketCounter * 3.3)));
// Draw the BPM chart
drawChart();
display.display();
vibrateMotor(dynamicShortDelay);
LEDblink(dynamicShortDelay);
delay(currentHeartbeatInterval); // Smoothed delay between heartbeats
tmpPacketCounter = 0; // Reset packet counter
}
void vibrateMotor(int shortDelay) {
// Double tap vibration with dynamic short delay
for (int i = 0; i < 2; i++) {
digitalWrite(VIBRATION_PIN, HIGH);
delay(60);
digitalWrite(VIBRATION_PIN, LOW);
if (i == 0) {
delay(shortDelay); // Dynamic short delay between double taps
}
}
}
void LEDblink(int shortDelay) {
// Double tap LED blink with dynamic short delay
for (int i = 0; i < 2; i++) {
leds.setPixelColor(0, col);
leds.show();
delay(60);
leds.clear();
leds.show();
if (i == 0) {
delay(shortDelay); // Dynamic short delay between double blinks
}
}
}

Prototype 2: Kick-starting the Ambient Machine

Prototype 2: Kick-starting the Ambient Machine

In the first prototype, I built a simple Wi-Fi beeper that reflects the signal strength (RSSI) of each signal by connecting it to a buzzer. It was a proof of concept that the system can create an interactive experienece that shows how the environment can have an impact on the individual in an invisible and untouchable way. 

Taking a step further, the goal of the second prototype is to:

  • Complicate sound sources to make more sophisticated ambient sound by switching to the Mozzi library for Arduino
    • Set up and explore how Mozzi works
    • Build a simple circuit example with Mozzi
    • Use sensors/inputs to generate sound
  •  Connect Wi-Fi scanning with the established sound generation program

This blog post will be divided in 3 parts: wiring, setting up Mozzi (2 examples), and working prototype 2.

Wiring

Photo: Prototype 2 Wiring 

For prototype 2, the wiring contains two potentiometers for analog input, and an additional potentiometer for volume control (together with a capacitor to smooth audio quality). These two potentiometers are connected to ESP32, which runs Mozzi. For output, a GPIO pin with Audio (DAC) capabilities is connected to the earphone. The earphone is connected using wire clamps, corresponding to each section of the 3.5mm audio jack.

In order from the inside to the outside: Microphone -> Ground -> Left -> Right

It’s a very temporary and experimental setup, which will change in the future to improve stability and cleaner connections.

 An ESP8266, responsible for Wi-Fi scanning, is connected to ESP32 via analog, more specifics will be in the following sections. 

Setting Up Mozzi: 2 Examples

Example 1: Sine Wave Synth (Full code included at the end)

In this example, two potentiometers are mapped to pitchValue (frequency) and cutoff frequency for a low-pass filter. The potentiometers can control the features of sinwave synth. This example demonstrates a basic synth which can be shaped and manipulated further. 

Example 2: Bluetooth paired with arppeggiator

This example utilizes bluetooth scan, trying to achieve scanning and sound production on the same board, but with little success.

The logic of the bluetooth scan is as follows: 

BLEScan *scan = BLEDevice::getScan();
scan->setActiveScan(true);
BLEScanResults results = scan->start(1);
int best = CUTOFF;
for (int i = 0; i < results.getCount(); i++) {
BLEAdvertisedDevice device = results.getDevice(i);
int rssi = device.getRSSI();
if (rssi > best) {
best = rssi;
}

This code snippet will grab the “best” bluetooth signal, and countinuously return the biggest signal source and its numerial signal strength value (RSSI). In turn, the signal value (RSSI) will define an arpeggiator pattern that “should” make the sinwave synth more musical.

However, a big problem is the incompatibility of running Bluetooth/Wi-Fi on a single board, with Mozzi. Mozzi code structure includes special sections such as UpdateControl(), updateAudio(), which operates on high frequencies (~16000Hz) to match audio control rate. Adding anything related to Serial Communication, WiFi, Bluetooth, or just timing functions in general would not work with Mozzi.

Therefore, the only option left is to use another board (ESP8266) and separate the bluetooth function with the sound board, and utilize analog output/input (PWM pin) to transmit data.

Example 3: Working Prototype 2

This example plays a fluctuating ambient wash in response to the Wi-Fi scan results and a potentiometer. The Wi-Fi scan controls the base frequency of the oscillator, and the potentiometer controls oscillator offset depending on the resistance.

There are two sets of oscillators. The first set uses 7 different Cosine wavetables to produce a harmonic synth sound. The second set duplicates but slightly off frequency for adding to originals. There is a pre-set offset scale to map WiFi scan result to base frequency drift.

The base midi notes are: C3 E3 G3 A3 C4 E4, and translates to

f1 = mtof(48.f);
f2 = mtof(52.f);
f3 = mtof(55.f);
f4 = mtof(60.f);
f5 = mtof(64.f);
f6 = mtof(67.f).
 
Since as noted before, none of the Serial or on-board solutions work for Mozzi, but apparently analogRead within Mozzi’s updateControl() function works fine. Specifically, using mozziAnalogRead() works the best.
 
However, in actual testing, the result is not really user “defined”, because there is random drifts in base frequency when supposedly signals should be stable and updates every second. The next iteration of prototype need to addrss this issue, but for the current iteration it proves that Mozzi can work well with analog inputs to produce reasonably good sound.
 

Conclusion and Next Steps

The current prototype took a step further and accompolished synth generation with Wi-Fi inputs. For the next prototype, the goal is to build a more defined user experience. Achiving that requires a re-thinking of the input variables that the system uses (currently is the number of Wi-Fi signals detected). Adding temperature, light, or other inputs might complicate things further and generate richer sound. However, that requires a deeper and higher level understanding of Mozzi, especially how to change synths parameters and control sounds. 

FULL CODE

EXAMPLE 1

//sinwave synth
#include <MozziGuts.h>
#include <Oscil.h>
#include <tables/sin2048_int8.h>
#include <LowPassFilter.h>
#include <mozzi_midi.h>
// Set up the oscillator using a sine wave table
Oscil<SIN2048_NUM_CELLS, AUDIO_RATE> oscil(SIN2048_DATA);
// Set up a low-pass filter
LowPassFilter lpf;
void setup() {
pinMode(13,INPUT);
pinMode(14,INPUT);
startMozzi(); // Initialize Mozzi
}
void updateControl() {
// Read the pitch control potentiometer
int pitchValue = analogRead(13);
int midiNote = map(pitchValue, 0, 1023, 36, 84); // Map the potentiometer value to a MIDI note range
oscil.setFreq(mtof(midiNote)); // Set the oscillator frequency based on the MIDI note
// Read the filter control potentiometer
int filterValue = analogRead(14);
int cutoffFreq = map(filterValue, 0, 1023, 50, 5000); // Map to a range of cutoff frequencies
lpf.setCutoffFreq(cutoffFreq); // Set the filter’s cutoff frequency
}
int updateAudio() {
// Generate the audio signal
int sound = oscil.next();
sound = lpf.next(sound); // Filter the sound
return sound;
}
void loop() {
audioHook();
}
 

EXAMPLE 2

#include <MozziGuts.h>
#include <Oscil.h>
#include <tables/sin2048_int8.h>
#include <LowPassFilter.h>
#include <BLEDevice.h>
#include <BLEScan.h>
#include <mozzi_midi.h>
// Set up the oscillator using a sine wave table
Oscil<SIN2048_NUM_CELLS, AUDIO_RATE> oscil(SIN2048_DATA);
// Set up a low-pass filter
LowPassFilter lpf;
// Arpeggiator pattern size
const int arpSize = 4;
int arpNotes[arpSize]; // Array to hold arpeggiator notes
// BLE scan interval
unsigned long lastScanTime = 0;
const unsigned long scanInterval = 100; // Interval between scans in milliseconds
int bestRSSI = -99; // Placeholder for the strongest RSSI value
void setup() {
pinMode(13, INPUT);
pinMode(14, INPUT);
startMozzi(); // Initialize Mozzi
BLEDevice::init(“”); // Initialize BLE with an empty name string
lpf.setCutoffFreq(500); // Set an initial cutoff frequency for the low-pass filter
}
void updateControl() {
// Check if it’s time for a new BLE scan
if (millis() – lastScanTime >= scanInterval) {
BLEScan* scan = BLEDevice::getScan();
scan->setActiveScan(true); // Active scan uses more power, but get results faster
BLEScanResults results = scan->start(1, false); // Scan for 1 second
bestRSSI = -99; // Reset best RSSI value
// Iterate over each device found during the scan
for (int i = 0; i < results.getCount(); i++) {
BLEAdvertisedDevice device = results.getDevice(i);
int rssi = device.getRSSI(); // Get the RSSI of the device
if (rssi > bestRSSI) {
bestRSSI = rssi; // Save the RSSI if it’s better than the last best
}
}
lastScanTime = millis(); // Update the last scan time
// Define the arpeggiator pattern based on RSSI
int arpBaseNote = map(bestRSSI, -100, 0, 48, 72); // Map RSSI to a base MIDI note
for (int i = 0; i < arpSize; i++) {
arpNotes[i] = arpBaseNote + i * 2; // Simple pattern: base note and next three notes in scale
}
}
}
int updateAudio() {
staticunsignedint arpIndex = 0; // Index of the current note in the arpeggio
staticunsignedlong lastArpTime = 0; // Last time the note was changed
constunsignedlong arpInterval = 200; // Time between arp notes in milliseconds
// Change the note in the arpeggiator pattern based on the interval
if (millis() – lastArpTime >= arpInterval) {
oscil.setFreq(mtof(arpNotes[arpIndex])); // Set the frequency for the current step
arpIndex = (arpIndex + 1) % arpSize; // Move to the next step in the arpeggiator
lastArpTime = millis(); // Reset the timer
}
// Generate the audio signal and apply the low-pass filter
int sound = oscil.next();
sound = lpf.next(sound); // Apply the low-pass filter to the sound
return sound; // Output the filtered sound
}
void loop() {
audioHook(); // Constantly update Mozzi sound generation
}

PROTOTYPE 2

#include <MozziGuts.h>
#include <Oscil.h>
#include <tables/cos8192_int8.h>
#include <mozzi_rand.h>
#include <mozzi_midi.h>
#define THERMISTOR_PIN 13
#define LDR_PIN 14
#define PinIn 15
int data = 0;
// harmonics
Oscil<COS8192_NUM_CELLS, AUDIO_RATE> aCos1(COS8192_DATA);
Oscil<COS8192_NUM_CELLS, AUDIO_RATE> aCos2(COS8192_DATA);
Oscil<COS8192_NUM_CELLS, AUDIO_RATE> aCos3(COS8192_DATA);
Oscil<COS8192_NUM_CELLS, AUDIO_RATE> aCos4(COS8192_DATA);
Oscil<COS8192_NUM_CELLS, AUDIO_RATE> aCos5(COS8192_DATA);
Oscil<COS8192_NUM_CELLS, AUDIO_RATE> aCos6(COS8192_DATA);
// duplicates but slightly off frequency for adding to originals
Oscil<COS8192_NUM_CELLS, AUDIO_RATE> aCos1b(COS8192_DATA);
Oscil<COS8192_NUM_CELLS, AUDIO_RATE> aCos2b(COS8192_DATA);
Oscil<COS8192_NUM_CELLS, AUDIO_RATE> aCos3b(COS8192_DATA);
Oscil<COS8192_NUM_CELLS, AUDIO_RATE> aCos4b(COS8192_DATA);
Oscil<COS8192_NUM_CELLS, AUDIO_RATE> aCos5b(COS8192_DATA);
Oscil<COS8192_NUM_CELLS, AUDIO_RATE> aCos6b(COS8192_DATA);
// base pitch frequencies
float f0, f1,f2,f3,f4,f5,f6;
// to map light input to frequency divergence of the b oscillators
const float DIVERGENCE_SCALE = 0.01; // 0.01*1023 = 10.23 Hz max divergence
// to map temperature to base freq drift
const float OFFSET_SCALE = 0.1; // 0.1*1023 = 102.3 Hz max drift
void setup(){
pinMode(PinIn, INPUT);
//analogReadResolution(10); // Set ADC resolution to 10 bits to match ESP8266
 
startMozzi();
// select base frequencies using mtof
// C E G A
f1 = mtof(48.f);
f2 = mtof(52.f);
f3 = mtof(55.f);
f4 = mtof(60.f);
f5 = mtof(64.f);
f6 = mtof(67.f);
// set Oscils with chosen frequencies
aCos1.setFreq(f1);
aCos2.setFreq(f2);
aCos3.setFreq(f3);
aCos4.setFreq(f4);
aCos5.setFreq(f5);
aCos6.setFreq(f6);
// set frequencies of duplicate oscillators
aCos1b.setFreq(f1);
aCos2b.setFreq(f2);
aCos3b.setFreq(f3);
aCos4b.setFreq(f4);
aCos5b.setFreq(f5);
aCos6b.setFreq(f6);
}
void loop(){
audioHook();
}
void updateControl(){
// read analog inputs
//int temperature = mozziAnalogRead(THERMISTOR_PIN); // not calibrated to degrees!
int temperature = mozziAnalogRead(PinIn); // read from 8266
//int temperature = data;
int light_input = mozziAnalogRead(LDR_PIN);
float base_freq_offset = OFFSET_SCALE*temperature;
float divergence = DIVERGENCE_SCALE*light_input;
float freq;
// change frequencies of the oscillators, randomly choosing one pair each time to change
switch (rand(6)+1){
case1:
freq = f1+base_freq_offset;
aCos1.setFreq(freq);
aCos1b.setFreq(freq+divergence);
break;
case2:
freq = f2+base_freq_offset;
aCos2.setFreq(freq);
aCos2b.setFreq(freq+divergence);
break;
case3:
freq = f3+base_freq_offset;
aCos3.setFreq(freq);
aCos3b.setFreq(freq+divergence);
break;
case4:
freq = f4+base_freq_offset;
aCos4.setFreq(freq);
aCos4b.setFreq(freq+divergence);
break;
case5:
freq = f5+base_freq_offset;
aCos5.setFreq(freq);
aCos5b.setFreq(freq+divergence);
break;
case6:
freq = f6+base_freq_offset;
aCos6.setFreq(freq);
aCos6b.setFreq(freq+divergence);
break;
}
}
AudioOutput_t updateAudio(){
int asig =
aCos1.next() + aCos1b.next() +
aCos2.next() + aCos2b.next() +
aCos3.next() + aCos3b.next() +
aCos4.next() + aCos4b.next() +
aCos5.next() + aCos5b.next() +
aCos6.next() + aCos6b.next();
return MonoOutput::fromAlmostNBit(12, asig);
}

ESP8266

/*
This sketch demonstrates how to scan WiFi networks.
The API is almost the same as with the WiFi Shield library,
the most obvious difference being the different file you need to include:
*/
#include <ESP8266WiFi.h>
int pwmPin = D1; // Replace with your PWM capable pin
void setup() {
pinMode(pwmPin, OUTPUT);
//Serial.println(F(“\nESP8266 WiFi scan example”));
// Set WiFi to station mode
WiFi.mode(WIFI_STA);
// Disconnect from an AP if it was previously connected
WiFi.disconnect();
delay(100);
}
void loop() {
String ssid;
int32_t rssi;
uint8_t encryptionType;
uint8_t *bssid;
int32_t channel;
bool hidden;
int scanResult;
int send;
//Serial.println(F(“Starting WiFi scan…”));
scanResult = WiFi.scanNetworks(/*async=*/false, /*hidden=*/true);
if (scanResult == 0) {
//Serial.println(F(“No networks found”));
} else if (scanResult > 0) {
//Serial.printf(PSTR(“%d networks found:\n”), scanResult);
send = map(scanResult, 0, 100, 0, 300);
analogWrite(pwmPin, send);
// Print unsorted scan results
for (int8_t i = 0; i < scanResult; i++) {
WiFi.getNetworkInfo(i, ssid, encryptionType, rssi, bssid, channel, hidden);
// get extra info
const bss_info *bssInfo = WiFi.getScanInfoByIndex(i);
String phyMode;
constchar *wps = “”;
if (bssInfo) {
phyMode.reserve(12);
phyMode = F(“802.11”);
String slash;
if (bssInfo->phy_11b) {
phyMode += ‘b’;
slash = ‘/’;
}
if (bssInfo->phy_11g) {
phyMode += slash + ‘g’;
slash = ‘/’;
}
if (bssInfo->phy_11n) {
phyMode += slash + ‘n’;
}
if (bssInfo->wps) {
wps = PSTR(“WPS”);
}
}
//Serial.printf(PSTR(” %02d: [CH %02d] [%02X:%02X:%02X:%02X:%02X:%02X] %ddBm %c %c %-11s %3S %s\n”), i, channel, bssid[0], bssid[1], bssid[2], bssid[3], bssid[4], bssid[5], rssi, (encryptionType == ENC_TYPE_NONE) ? ‘ ‘ : ‘*’, hidden ? ‘H’ : ‘V’, phyMode.c_str(), wps, ssid.c_str());
//Serial.print(rssi);
yield();
}
} else {
//Serial.printf(PSTR(“WiFi scan error %d”), scanResult);
}
 
delay(1000);
 
}

Prototype 1: The Wi-Fi Beeper


The overarching theme of this project is the mix between digital and human features. Specifically, how the environment can have an impact on the individual in an invisible and untouchable way. 

Inspired by the Bluetooth Visualizer and the Ambient Machine, I want to create a sound machine that reacts to radio signals (Wi-Fi signals as the primary option to recieve signals). 

The goal for the first prototype is to test how to detect Wi-Fi and make sounds accordingly. This process is based on an ESP32 chip, and developed in Arduino IDE.

First, I explored how to detect Wi-Fi signals on an ESP32 board, using the Wi-Fi Scan example. 

In this example, the ESP32 board can get:

  • number of networks
  • SSID
  • RSSI (signal strength)
  • channel
  • encryption type

I am using RSSI (signal strength) in this prototype as the main input. The output is a simple buzzer that makes sound based on signal strength. I defined a couple of notes and their frequencies, and higher the signal strength, higher the pitch. The notes and pitch are defined as follows:


The code works as follows: the ESP32 loops through all the wifi signal that it detects, the buzzer will beep according to the signal strength. For example, if there are 3 wifi networks, signal strength are -80, -70, -60 respectively, then the buzzer will beep notes E, F, G.

The benefits of the ESP32 is portability. To demonstrate, I connected the ESP32 board to a power bank (thanks Prof de Bel for the power bank) and walked around the campus. I found that there are more wifis in the courtyard than actually inside the building (because the beeping sequence was longer). Here’s a video demo:


Overall, this simple prototype demonstrates that the basic idea works. Wi-Fi detection is feasible and easy to implement. However, in the next step, making pleasant sound is much harder. Music coding platform SuperCollider is very hard to manage. So I will try to use other ways (synthesizers) or adding effects to construct ambient sounds.


FULL CODE

#include “WiFi.h”
// Pin for buzzer
const int buzzerPin = 17;
// Notes
int noteC = 523;
int noteD = 587;
int noteE = 659;
int noteF = 698;
int noteG = 784;
int noteA = 880;
int noteB = 988;
void setup() {
// initialize buzzer pin
pinMode(buzzerPin, OUTPUT);
 
// initialize serial communication
Serial.begin(115200);
// initialize WiFi
WiFi.mode(WIFI_MODE_STA);
WiFi.disconnect();
delay(100);
 
Serial.println(“Setup done”);
}
void loop() {
// scan for nearby networks
Serial.println(“Scan start”);
int n = WiFi.scanNetworks();
Serial.println(“Scan done”);
if (n == 0) {
Serial.println(“No networks available”);
} else {
Serial.print(n);
Serial.println(” network(s) found”);
}
// loop through all networks found
for (int i = 0; i < n; ++i) {
// Print WiFi information
Serial.print(i + 1);
Serial.print(“: “);
Serial.print(WiFi.SSID(i));
Serial.print(” (“);
Serial.print(WiFi.RSSI(i));
Serial.print(” dBm)”);
Serial.println();
// Play a melody based on RSSI
playMelody(WiFi.RSSI(i));
}
delay(5000); // Wait 5 seconds before next scan
}
void playMelody(int rssi) {
int note;
if (rssi > -50) {
note = noteB;
} else if (rssi > -58) {
note = noteA;
} else if (rssi > -65) {
note = noteG;
} else if (rssi > -76) {
note = noteF;
} else if (rssi > -85) {
note = noteE;
} else if (rssi > -90) {
note = noteD;
}else {
note = noteC;
}
tone(buzzerPin, note, 200);
delay(300);
noTone(buzzerPin);
}

Immersion (Mall Map)

This immersion experience is conducted in the Taikoo Li mall 2F (stone zone). The immersion is comprised of 3 part:

  • Observe
  • Interact
  • Document

and this post documents the observe phase and interact phase. To avoid people staring at me since the immersion time lasted around 1 hour, and also implement the process more effectively, I adopted 3 items from the Oblique Strategies by Brian Eno and Peter Schmidt:

  • Water (pretend drinking water)
  • Do something boring (to explore the machine to the largest extent)
  • Is there something missing?

Here are the results: 

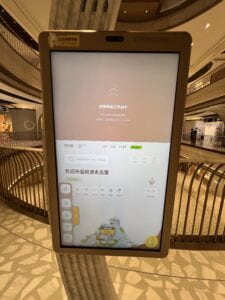
The map machine is located around the main entrance of each floor, with a industrial but modern look and design.
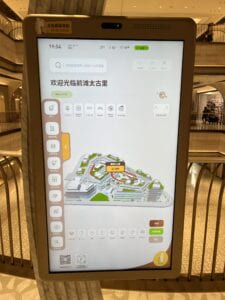
The map has a default view, with an overall map of the entire mall. Unfortunately, there were no markings, serial numbers, or indication of where it was made. The machine is housed by a metallic case, which makes it hard to probe its insides.
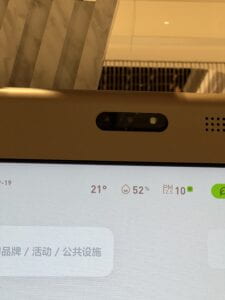
Immdiately, a camara mounted on the top of the machine is very visible. There were no applications in the machine that explicitly uses the camara, which left me wonder what it actually does (facial recognition? consumer portraits?)

A very detailed air quality dashboard.

IMG_8502

When I touched the screen, the bubble upon touch resembles an android system.
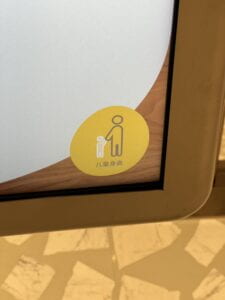
Height friendly mode that changes the screen size.
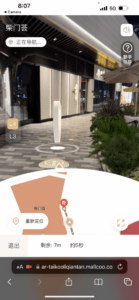
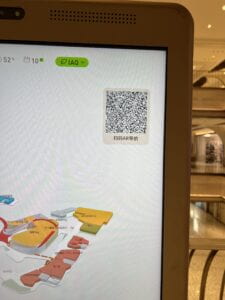
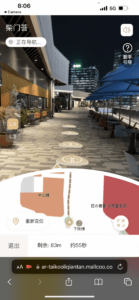
Finally, a very interesting AR navigation experiment. Scan a QR code, login on the phone, then the AR app will take you to your destination. But it is awkward because you need to hold the phone high and aim at the road in front of you.
Unpacking the Black Box (ice cream machine)

The Ice Cream Machine Visit: The interaction (see the interaction illustration below)

The interaction between human and the ice cream machine starts with the customer selecting and paying for the ice cream, which the process is operated on a screen and a computer. Then, the computer sends instructions to a robotic arm which it will perform a set sequence of making the ice cream and delivering it to the customer.

In the entire process, no human is involved except for the customer. But for maintainance, there has to be someone to fill up the supplies, such as milk and the cones. 

The content on the screen is pretty simple: a button to start ordering, a payment system based on WeChat or Alipay, and then a finishing up animation.

In terms of sounds, it was very interesting that no computer-generated sounds were used at all. For the robotic arm, it makes basically no sounds, so the experience is mostly visual and psysical.


First Post!

  • Image search for “smart city”: three dominant visual elements

The first eye-catching and most obvious theme is the visualization of the “invisible links” of smart cities, which could represent the internet, data transfers, or something else.

The second theme common is a background picture of a highly developed city, typically at night, emphasizing the use of electricity as a manifestation of development.

The third themes is a futuristic, or even cyberpunk, interpretation of the smart city. 

  • -Why are these themes used?

These themes are a symbolic representation of some of the characteristics of the smart city. They give people a feeling that smart cities are inadvertently linked to high-tech, the internet, highly-developed big metropolises. 

  • -What smart technologies do you use in the city (excluding your smart phone)

The shared bikes! Shared umbrellas sometimes too. Waimai (delivery services).

  • -what are some of the benefits and what are some of the frustrations you encounter while interacting with these technologies?

The benefits are mostly convenience to commute (especially when the distance traveled is shorter than a taxi ride but too long for walking), and the fact that you can use the services by just having a phone. The frustration is that the placement of bikes are mostly random, and at peak times you cannot find a bike home.

  • MIT Technology Review: The smart city is a perpetually unrealized utopia 

    I find that Constant’s idea of “the nomadic life of creative play” a very interesting concept. There are many ways to play in the city, and I think Constant meant creating a life of leisure inside the city, which could include things like going to the movies, a bar, or taking a walk in a park.

Technology could enhance play mainly by automation and awareness. The author of the article mentioned that “Spaces in New Babylon would somehow need to be ‘aware’ of the activities taking place in them so that the environment could know when to change its appearance and behavior.” The ambient environment and its automation enhances the experience of many leisure activities, but not to the extend that Constant may have envisioned.

  • In terms of a more humane city, putting humans and their interactions at the center of the conversation should be the norms when we talk about smart cities. Because, as the article suggests, “The visions of the sensor-studded battlefield and the instrumented city both seem to lack a central ingredient: human bodies.” Technologies that improves communications between humans, and improves the living conditions of animals, should be considered helpful techonology.
  • The deployment of complex networks of sensors and adaptive systems benefit both civilian and military use of these technologies, reflecting duality of the systems in place right now. The impact, I believe, is that while sensing and networking of cities benefit the people living in them, it leaves the city some vulnerbility for attacks and exploitation.

Lastly, diversity represents a significant factor in the making of a smart city. To quote from the article, “the smartness comes from the diverse human bodies of different genders, cultures, and classes whose rich, complex, and even fragile identities ultimately make the city what it is.” It’s the engagement and blending of people from different backgrounds that matters more than just the technology or the profit stream of companies.