Survive the Plastic – Tracy and Elaine – Andy Garcia
CONCEPTION AND DESIGN:
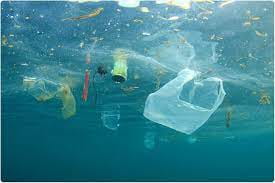
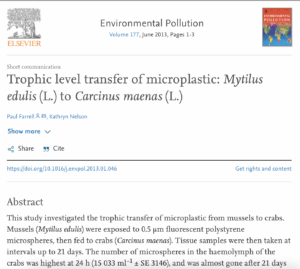
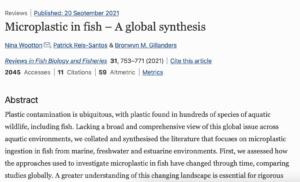
Our project aims to raise people’s awareness of protecting the Marine environment by reducing the immoderate use and production of plastic and trash. We searched online for the constitution of marine pollution and found that plastic pollution was a big part of it. So we also looked up online to search for relative information. We found that: Plastic pollution includes micro-plastic pollution; Micro-plastic can be consumed by fishes and they are deadly…

And with those information, we thought that it would be great if we can make it into a survival game to illustrate the idea that fish would die if touching the micro-plastic. We imagine that the interaction would be, players using some sensors to control the movement of fishes, for example potentiometers or joysticks. And for the computer’s respond, for example, if the fish touches a micro-plastic, the computer will respond by giving a sound and a visual effect that the fish will disappear as if it’s dead. However, initially, we wanted that if the player want to control the fish to eat shrimp, they should make sound to trigger the movement of eating, but after several tries by ourselves and our friends we found that it’s both quite difficult to use the potentiometer and the joystick to control the fish, and the players already are trying hard to control the fish’s position already, if they still need to make sound to trigger the movement of eating shrimp, it can be too hard and may reduce the fun of playing the game, so we decided not to add the sound triggering eating part. And by testing with Andy, he suggested that it would be better if the fish don’t disappear as soon as it touches the plastic, in order to give the players more chances and to have fun, we should give life counts to the fishes. So after receiving these suggestions, we removed the sound triggering part and added the life counts. They did have a better feedback from players we invited to play.
FABRICATION AND PRODUCTION:
Some significant parts in our process is the following: The design of the elements in the game; Responds the computer give according to what the players(fishes) touch; The arrangement of the stages of the game. And I will introduce the difficulties we encountered in each part.
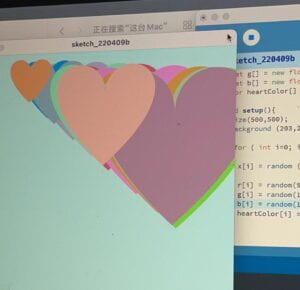
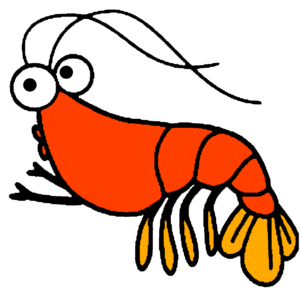
Firstly, the design of the elements. We have three elements in our game, the fishes(the players), the shrimps(fish can grow bigger by eating them), and the micro-plastic(fish will die if touching it). We designed these graphs by ourselves, we painted the shrimp and the fish using ps and gravit.
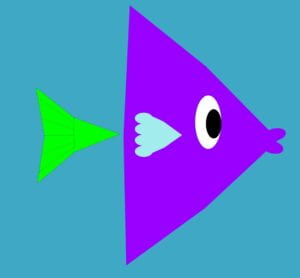
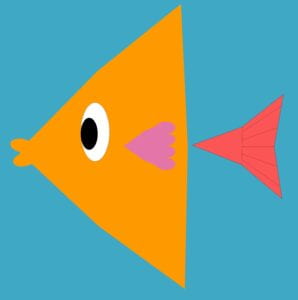
We coded the micro-plastic at first, however, after some office hours with LAs and Andy, they suggested that the coded plastic is a bit confusing, so we changed them into cartoon images of plastic bags and plastic bottles.
At first, we wanted there to be a settled number of plastic and shrimps, and we added a pollution layer like this 👇
that acts as count down by keep rising from the bottom of the screen and making the movement area smaller and smaller(the game can only be played in the blue area). However, after talking with Andy, we found that because of the density of micro-plastic varies, so they actually won’t all accumulate at the bottom of the sea. So we wanted to change the count down into the growing number of micro-plastic and the reduction of shrimp(Also to illustrate the idea that shrimps will die of micro-plastic as well and micro-plastic is increasing nowadays). However, we couldn’t successfully make the plastic increase according to time, which is a little pity in this project. But during this process we also learnt more about the micro-plastic and the fact that it’s spreading all over the sea.
Secondly, the computer’s respond.
As was mentioned above, we added life counts for the fish. And other visual effects are 1, shrimps will disappear after the fish touches them 2, fish will disappear after touching the micro-plastic for three times. The first part was easy to code, but the second part was really challenging.
if (d4[i] < (5+size[i]/2) && touch1==false &&counter1 !=0) {//i
      touch1=true;
      counter1=counter1-1;
      lastCircle1 =i;
      sound1.play();
    }

    if (d2[lastCircle1]>(5+size[lastCircle1]/2)) {
      touch1 =false;
    }
    if (counter1 == 0 && fishalive1 == true) {
      x2=-200;
      y2=-200;
       heartx5=-100;
       hearty5=-100;
       photo4 = loadImage(“plose.jpeg”);
      sound2.play();
      fishalive1=false;
      break;
    }
    if (d4[lastCircle2]>(5+size[lastCircle2]/2)) {
      touch2 =false;
    }
    if (counter2 == 0 && fishalive2 == true) {
      x3=-200;
      y3=-200;
       heartx5=-100;
       hearty5=-100;
      sound2.play();
      fishalive2=false;
      break;
    }
The most difficult part was that the fish/the heart(stands for life counts) needs to stay disappear even if it no longer touches the micro-plastic, however the processing runs as a loop, so in order to do this, Winny and I tried Boolean. Also, the line “lastCircle1=I” and “d4[lastCircle2]” took us a long time to figure out. They both together enable the effect of the fish/the heart(stands for life counts) needs to stay disappear even if it no longer touches the micro-plastic,
Last but not least, the arrangement of the stages of the game. We had three stages: the first is the introduction. Following by the game, and then ending with a picture illustrating that as we eat fish, we eat plastic. At first we distinguished the three stages by the count of time, however, it didn’t work. Andy suggested the switch case to us, which, is life changing. This is very convenient and effective and make our code looks so logical as well.
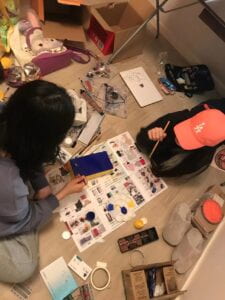
Tracy and I did make a separate work sheet before we start, but basically we did everything together and helped each other the whole process.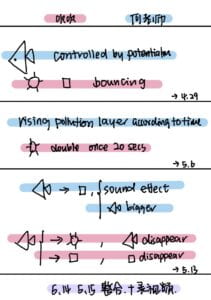
CONCLUSIONS:
Our project wants to use the setting of the game, which is that the fish will die of micro-plastic, and eventually both fishes will die because there is too much of micro-plastic, to illustrate the idea that the micro-plastic we humans produced has caused great harm to the marine life and marine environment. Also, the final page of our project, the picture that shows a fish full of plastic placing on a plate, stating that those micro-plastic consumed by the fish will eventually be consumed by us, also shows that the harm we caused to the marine will eventually pay back on ourselves. We hope our project can arouse people’s awareness of reducing the production of trash and plastic, to protect the environment and to protect ourselves. I think our project did convey this idea, whether by the texts at the beginning and the picture at the end, or the game itself.
I think our project is interactive for it creates a communication platform: players controlling the fish, and computers giving responds accordingly. Friends we invited to play with our game did found that it’s a game that actually needs some strategy to play, for example, although eating shrimps can make the fish bigger, it makes it harder to avoid the plastic. Some friends would adopt the strategy of not eating any shrimps so that it can avoid the plastic more easily. However, if we have more time, we do want to make more improvement, for example, if the player doesn’t consume shrimp in a certain period of time, the fish will lose one life count, which is more related to the reality that fishes need food, and also makes the game a bit harder, that the players can’t avoid dying by not eating shrimps. Also, we didn’t manage to make the effect of micro-plastic increasing according to time, if we have enough time, maybe we can succeeded in making that effect come true and make the lose-lose situation more obvious. Also, according to some of our friends’ question like whether the game can be played by one person only, I think if we have more time, we can make the game more “professional” with a starting page, providing options of “single player” and “two players”, and by clicking on the specific option the player wants, they will play the game by themselves or with a partner.
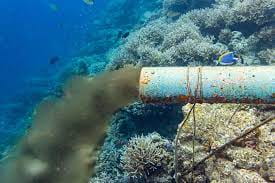
I think the focus of our project is important. For it’s responding one of the most intense environmental issue nowadays. And people should care because the plastic pollution not only pollutes the marine environment as we shown in the game, but also the air, as we shown in the video, what’s more, it is affecting ourselves as well, by the air we breath and the fish we eat. It’s important to show this idea to everyone who gets to play our game because plastic pollution is accumulated by everyone’s daily life, one more person realizing this issue can contribute to some reduction of plastic pollution. Everyone counts and every realization matters. By this game, we hope to have more people realizing this issue and start with their everyday life, use plastic products properly and cut the plastic pollution gradually.
TECHNICAL DOCUMENTATION:
Code:
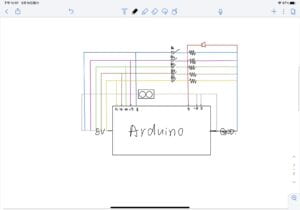
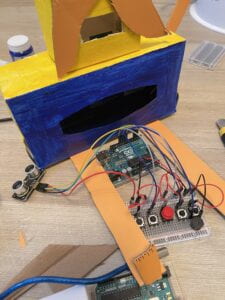
Arduino:
void setup(){
  Serial.begin(9600);
}
void loop(){
  int sensor1 = analogRead(A0);
  int sensor2 = analogRead(A1);
  int sensor3 = analogRead(A2);
  int sensor4 = analogRead(A3);
  int sensor5 =  digitalRead(9);
  Serial.print(sensor1);
  Serial.print(",");  // put comma between sensor values
  Serial.print(sensor2);
  Serial.print(","); // add linefeed after sending the last sensor value
  Serial.print(sensor3);
  Serial.print(",");
 Serial.print(sensor4);
  Serial.println();
  delay(100);
}
Processing :
The beginning 1 page with rising texts:
import processing.sound.*;
int amount=20;
int count=20;

float startY;
float x[] = new float[count];
float yy;
float size[]= new float [count];
PImage photo1;
PImage photo2;
PImage photo3;

float[] Bx = new float[amount];
float[] By = new float[amount];
float[] Bsize = new float[amount];
float[] Bspeed = new float[amount];
SinOsc[] sine = new SinOsc[amount];
Env [] envelope = new Env [amount];
float [] freq = new float [amount];
int num=0;

long time;

void setup(){
  //size(800,800);

  fullScreen();
  background(0);
  photo1 = loadImage("shrimp.png");
  photo2 = loadImage("fish1.jpg");
  photo3 = loadImage("fish2.jpg");
   for (int i=0; i<amount; i++) {
    Bx[i] = random(width);
    By[i] = random(height, height * 2);
    Bsize[i] = random(10, 50);
    Bspeed[i] = map(size[i], 10, 50, 1, 5);
    sine[i] = new SinOsc (this);
    envelope[i] = new Env (this);
    freq[i] = map(Bsize[i], 10, 50, 500, 100);
  }
}


void draw(){

   switch(num) {
   case 0:
   background(#3FA8C4);

    background(#3FA8C4);
    for (int i=0; i<amount; i++) {
      noStroke();
      fill(255, 120);
      circle(Bx[i], By[i], Bsize[i]);
      // Bubbles float to the top
      By[i] -= Bspeed[i];
      // if bubbles reaches the surface, create a new random bubble
      if (By[i] < 80+(Bsize[i]/2)) {
        Bx[i] = random(width);
        By[i] = random(height, height * 2);
        Bsize[i] = random(10, 50);
        Bspeed[i] = map(Bsize[i], 10, 20, 1, 2);
        sine[i].freq(freq[i]);
        envelope[i].play(sine[i], 0.0005, 0.05, 0.2, 1);
        freq[i] = map(Bsize[i], 10, 50, 500, 100);
        sine[i].play();
      }
  }
   startY=height;
 //startY=700;
 if (frameCount<10.0) {
    yy = startY - (frameCount * 2);
  }
    startY=height-100;
   if ( frameCount  < 20.0) {

    yy = startY - ((frameCount-1) * 2);
  }
   startY=height-200;
   if ( frameCount  < 30.0) {

    yy = startY - ((frameCount-2) * 2);
  }
  startY=height-300;
   if ( frameCount  < 40.0) {

    yy = startY - ((frameCount-3) * 2);
  }
   startY=height-400;
   if (frameCount  < 50.0) {

    yy = startY - ((frameCount-4) * 2);
  }
   startY=height-500;
    if (frameCount  < 60.0) {

    yy = startY - ((frameCount-5) * 2);
  }


  fill(255);
 textSize(30);
  text("Water popullution is a severe issue nowadays", 1/6*width, yy);

  textSize(30);
  text("Marine pollution is a combination of chemicals and trash", 1/7*width, yy+100);


  textSize(30);
  text("one of the 6 types of marine pollution is plastic pollution", 1/7*width, yy+200);

  textSize(30);
  text("which includes micro-plastic", 1/5*width,yy+300);
  break;

   }
}
Following stages:
int num = 1;
import processing.serial.*;
import processing.sound.*;
SoundFile sound1;
SoundFile sound2;
SoundFile sound3;
SoundFile sound4;
int NUM_OF_VALUES_FROM_ARDUINO = 2;   /** YOU MUST CHANGE THIS ACCORDING TO YOUR PROJECT **/
int sensorValues[];      /** this array stores values from Arduino **/
String myString = null;
Serial myPort;
int  count =10;
float x[] = new float[count];
float y[] = new float[count];
float u[] = new float[count];
float v[] = new float[count];
float  xspeed[] = new float[count];
float  yspeed[] = new float[count];
float  uspeed[] = new float[count];
float  vspeed[] = new float[count];
float size[] = new float[count];
float r[] = new float[count];
float g[] = new float[count];
float b[] = new float[count];
float d1;
float d2[]= new float[count];
float d3;
float d4[]=new float[count];
float pred2;
float pred4;
//float m=mouseX;
//float n=mouseY;
float x2, y2;
float x3, y3;
float heartx1=680;
float hearty1=25;
float heartx2=700;
float hearty2=25;
float heartx3=720;
float hearty3=25;
float heartx4=740;
float hearty4=25;
float heartx5=760;
float hearty5=25;
float heartX1=20;
float heartY1=25;
float heartX2=40;
float heartY2=25;
float heartX3=60;
float heartY3=25;
float heartX4=80;
float heartY4=25;
float heartX5=100;
float heartY5=25;
boolean touch1=true;
boolean fishalive1=true;
boolean touch2=true;
boolean fishalive2=true;
int counter1=5;
int counter2=5;
int lastCircle1;
int lastCircle2;
float fishSize=20;
color faceColor[] = new color[count];
PImage photo1;
PImage photo2;
PImage photo3;
PImage photo4;
void setup() {
  size(800, 600);
  //fullScreen();
  background(0);
  sound1 = new SoundFile(this, "broken-string-bounce.wav");
  sound2 = new SoundFile(this, "wah.mp3");
  sound3 = new SoundFile(this, "bite.wav");
  sound4 = new SoundFile(this, "lose.mp3");
  imageMode(CENTER);
  photo1 = loadImage("shrimp.png");
  photo2 = loadImage("fish1.jpg");
  photo3 = loadImage("fish4.png”");
  photo4 = loadImage("plose.jpeg");
  setupSerial();
  printArray(Serial.list());
  for ( int i=0; i < x.length; i++) {
    x[i] = random (100, width-100);
    y[i] = random (100, height-100);
    size[i]=random (50, 80);
    xspeed[i] = random (0.05, 0.1);
    yspeed[i] = random (0.05, 0.1);
  }
  for ( int i=0; i < u.length; i++) {
    u[i] = random (100, width-100);
    v[i] = random (100, height-100);
    uspeed[i] = random (0.05, 0.1);
    vspeed[i] = random (0.05, 0.1);
    r[i] = random(0, 255);
    g[i] = random(255);
    b[i] = random(255);
    faceColor[i] = color(r[i], g[i], b[i]);
  }
}//random size and speed for shrimps and the plastic, random color for the plastic
void draw() {
  getSerialData();
  // printArray(sensorValues);
  background(#3FA8C4);
  for ( int i=0; i < x.length; i++) {
    d1=dist(x[i], y[i], x2, y2);
    d2[i]=dist(u[i], v[i], x2, y2);
    d3=dist(x[i], y[i], x3, y3);
    d4[i]=dist(u[i], v[i], x3, y3);
    if (d1 < (2 + size[i]/2)) {
      fishSize+=10;
      sound3.play();
      x[i]=-100;
      y[i]=-100;
    }
    if (d3 < (2 + size[i]/2)) {
      fishSize+=10;
      sound3.play();
      x[i]=-100;
      y[i]=-100;
    }//the shrimp will disappear when the fish touches it, and the fish will grow bigger
    plastic(u[i], v[i], 10, faceColor[i]);
    if (d2[i] < (5+size[i]/2) && touch1==false &&counter1 !=0) {//i
      touch1=true;
      counter1=counter1-1;
      lastCircle1 =i;
      sound1.play();
      //heartx1=-100;
      //hearty1=-100;
    }
    if (d4[i] < (5+size[i]/2) && touch2==false &&counter2 !=0) {//i
      touch2=true;
      counter2=counter2-1;
      lastCircle2 =i;
      sound1.play();
    }
    //if(counter==4){
    //  heartx1=-100;
    //  hearty1=-100;
    //}
    //else if(counter==3){
    //  heartx2=-100;
    //  hearty2=-100;
    //}
    //else if(counter==2){
    //  heartx3=-100;
    //  hearty3=-100;
    //}
    //else if(counter==1){
    //  heartx4=-100;
    //  hearty4=-100;
    //}
    //else if(counter==0){
    //  heartx5=-100;
    //  hearty5=-100;
    //   fill (#DE4848);
    //heart(heartx1, hearty1, 0.3);
    //heart(heartx2, hearty2, 0.3);
    //heart(heartx3, hearty3, 0.3);
    //heart(heartx4, hearty4, 0.3);
    //heart(heartx5, hearty5, 0.3);
    if (d2[lastCircle1]>(5+size[lastCircle1]/2)) {
      touch1 =false;
    }
    //if (counter==0) {
    //if (counter == 0 && fishalive == true){
    //     sound2.play();
    //     break;
    //    }
    // fishalive=false;
    //sound2.play();
    //touch=true;
    //   }
    //  if (fishalive=false){
    if (counter1 == 0 && fishalive1 == true) {
      x2=-200;
      y2=-200;
      heartx5=-100;
      hearty5=-100;
      sound2.play();
      fishalive1=false;
      break;
    }
    if (d4[lastCircle2]>(5+size[lastCircle2]/2)) {
      touch2 =false;
    }
    if (counter2 == 0 && fishalive2 == true) {
      x3=-200;
      y3=-200;
      heartx5=-100;
      hearty5=-100;
      sound2.play();
      fishalive2=false;
      break;
    }
    if (counter1==0 && counter2 == 0) {
      switch( num ){
      case 1:
      size(800,600);
        photo4 = loadImage("plose.jpeg");
        break;
      }
    print(counter1);

    println(counter2);
    move();
    bounce();
    x2=sensorValues[0];
    y2=sensorValues[1];
    //  x3=sensorValues[2];
    // y3=sensorValues[3];
    x2=map(x2, 0, 1024, 0, width);
    y2=map(y2, 0, 1024, 0, height);
    x3=map(x3, 0, 1024, 0, width);
    y3=map(y3, 0, 1024, 0, height);
    if (fishalive1==true) {
      image(photo2, x2, y2, fishSize, fishSize);
    }
    if (fishalive2==true) {
      image(photo3, x3, y3, fishSize, fishSize);
    }
    image(photo1, x[i], y[i], 20, 20);
  }// the fish will disappear when touches the plastic five times.
  //pred2=d2[;
  if (counter1==4) {
    heartx1=-100;
    hearty1=-100;
  } else if (counter1==3) {
    heartx2=-100;
    hearty2=-100;
  } else if (counter1==2) {
    heartx3=-100;
    hearty3=-100;
  } else if (counter1==1) {
    heartx4=-100;
    hearty4=-100;
  }
  fill (#DE4848);
  heart(heartx1, hearty1, 0.3);
  heart(heartx2, hearty2, 0.3);
  heart(heartx3, hearty3, 0.3);
  heart(heartx4, hearty4, 0.3);
  heart(heartx5, hearty5, 0.3);
  //println(counter);
  if (counter2==4) {
    heartx1=-100;
    hearty1=-100;
  } else if (counter2==3) {
    heartx2=-100;
    hearty2=-100;
  } else if (counter2==2) {
    heartx3=-100;
    hearty3=-100;
  } else if (counter2==1) {
    heartx4=-100;
    hearty4=-100;
  }
  fill (#DE4848);
  heart(heartX1, heartY1, 0.3);
  heart(heartX2, heartY2, 0.3);
  heart(heartX3, heartY3, 0.3);
  heart(heartX4, heartY4, 0.3);
  heart(heartX5, heartY5, 0.3);
  //println(counter);
}
    }
void move() {
  for ( int i=0; i < x.length; i++) {
    x[i] += xspeed[i] ;
    y[i]  += yspeed[i] ;
  }
  for ( int i=0; i < u.length; i++) {
    u[i] += uspeed[i] ;
    v[i]  += vspeed[i] ;
  }
}
void bounce() {
  for ( int i=0; i < x.length; i++) {
    if ( x[i] <= 0 + size[i]/2 || x[i]>= width - size[i]/2-40) {
      xspeed[i] = -xspeed[i];
    }
    if ( y[i] <= 0+ size[i]/2 || y[i]>= height - size[i]/2-30 ) {
      yspeed[i] = -yspeed[i];
    }
  }
  for ( int i=0; i < x.length; i++) {
    if ( u[i] <= 0 + size[i]/2 || u[i]>= width - size[i]/2-40) {
      uspeed[i] = -uspeed[i];
    }
    if ( v[i] <= 0+ size[i]/2 || v[i]>= height - size[i]/2-30) {
      vspeed[i] = -vspeed[i];
    }
  }
}
void plastic(float u, float v, float size, color c) {
  fill(c);
  noStroke();
  circle(u, v, size);
  fill(c);
  noStroke();
  circle(u+10, v, size/2);
  fill(c);
  noStroke();
  circle(u-10, v-5, size-7);
  fill(c);
  noStroke();
  circle(u-10, v+4, size-8);
  fill(c);
  noStroke();
  circle(u-10, v+8, size-7);
}
void heart (float x, float y, float size) {
  pushMatrix();
  translate(x, y);
  scale(size);
  noStroke();
  beginShape();
  vertex(50, 15);
  bezierVertex(50, -5, 90, 5, 50, 40);
  vertex(50, 15);
  bezierVertex(50, -5, 10, 5, 50, 40);
  endShape();
  popMatrix();
}
void setupSerial() {
  printArray(Serial.list());
  myPort = new Serial(this, Serial.list()[ 2 ], 9600);
  // WARNING!
  // You will definitely get an error here.
  // Change the PORT_INDEX to 0 and try running it again.
  // And then, check the list of the ports,
  // find the port “/dev/cu.usbmodem----” or “/dev/tty.usbmodem----”
  // and replace PORT_INDEX above with the index number of the port.
  myPort.clear();
  // Throw out the first reading,
  // in case we started reading in the middle of a string from the sender.
  myString = myPort.readStringUntil( 10 );  // 10 = ‘\n’  Linefeed in ASCII
  myString = null;
  sensorValues = new int[NUM_OF_VALUES_FROM_ARDUINO];
}
void getSerialData() {
  while (myPort.available() > 0) {
    myString = myPort.readStringUntil( 10 ); // 10 = ‘\n’  Linefeed in ASCII
    if (myString != null) {
      String[] serialInArray = split(trim(myString), ",");
      if (serialInArray.length == NUM_OF_VALUES_FROM_ARDUINO) {
        for (int i=0; i<serialInArray.length; i++) {
          sensorValues[i] = int(serialInArray[i]);
        }
      }
    }
  }
}
Some videos we took during the process:
“🐟 can eat 🦐 and grow!!”
Struggles with shrimps and plastic:
More struggle:
Struggle with difficult controlling of the fish:
We’ve had a great time making this game, and I really learnt a lot during this semester. Although it’s a bit frustrating that we spent a big part of this class online, the class environment is still so good. I always look forward to interaction lab on Tuesdays and Thursdays, and being able to code some interesting things has been so stress-relieving. Every time I’m tired of writing essays or doing maths, I would always do a bit practicing of coding myself, which is so interesting and I had a lot of fun.
Thank you so much Andy for providing us so much help not only for the final but for the whole semester!! 🥰🎉