A Journey to Hogwarts
made by Zhixuan Gu (Grace) & Sara He
instructed by Andy Garcia
CONTEXT AND SIGNIFICANCE
In our third recitation, we made a project that have two sensors to control the LED light. When I press the tinfoil of the capacitive sensor, the value becomes 1 and the LED is on. When I keep this lighting condition, the sensor A, which is an analog input, has the control of the degree of brightness. The higher value it has, the brighter the LED will become.Also basically, more light it has been shone on, the higher value it will produce. This impressed me and I think it is one of the important type of interaction, which means the users’ action will directly influence the project and showed by the result. It will let users be like really play their part in the project. Since we all like Harry Potter, we decided to make a Marauder’s Map. Formally, it is an Interactive Diorama about the Harry Potter’s world. Then, our instructor Andy shared some examples of Interactive Diorama and inspired us to add more kinds of sensors to make a multi-sensory project. When users are playing with our project, their action can trigger many different sensors which can help them quickly feel like getting into the world of magic. I make the model and wrote the code to run this project together with my partner. I think our targeted audience is the fun of Harry Potter or people who have interest in magic. Because our model is just like a small Hogwarts and help users feeling like they are a first year student of Hogwarts and will soon start their magic trip.
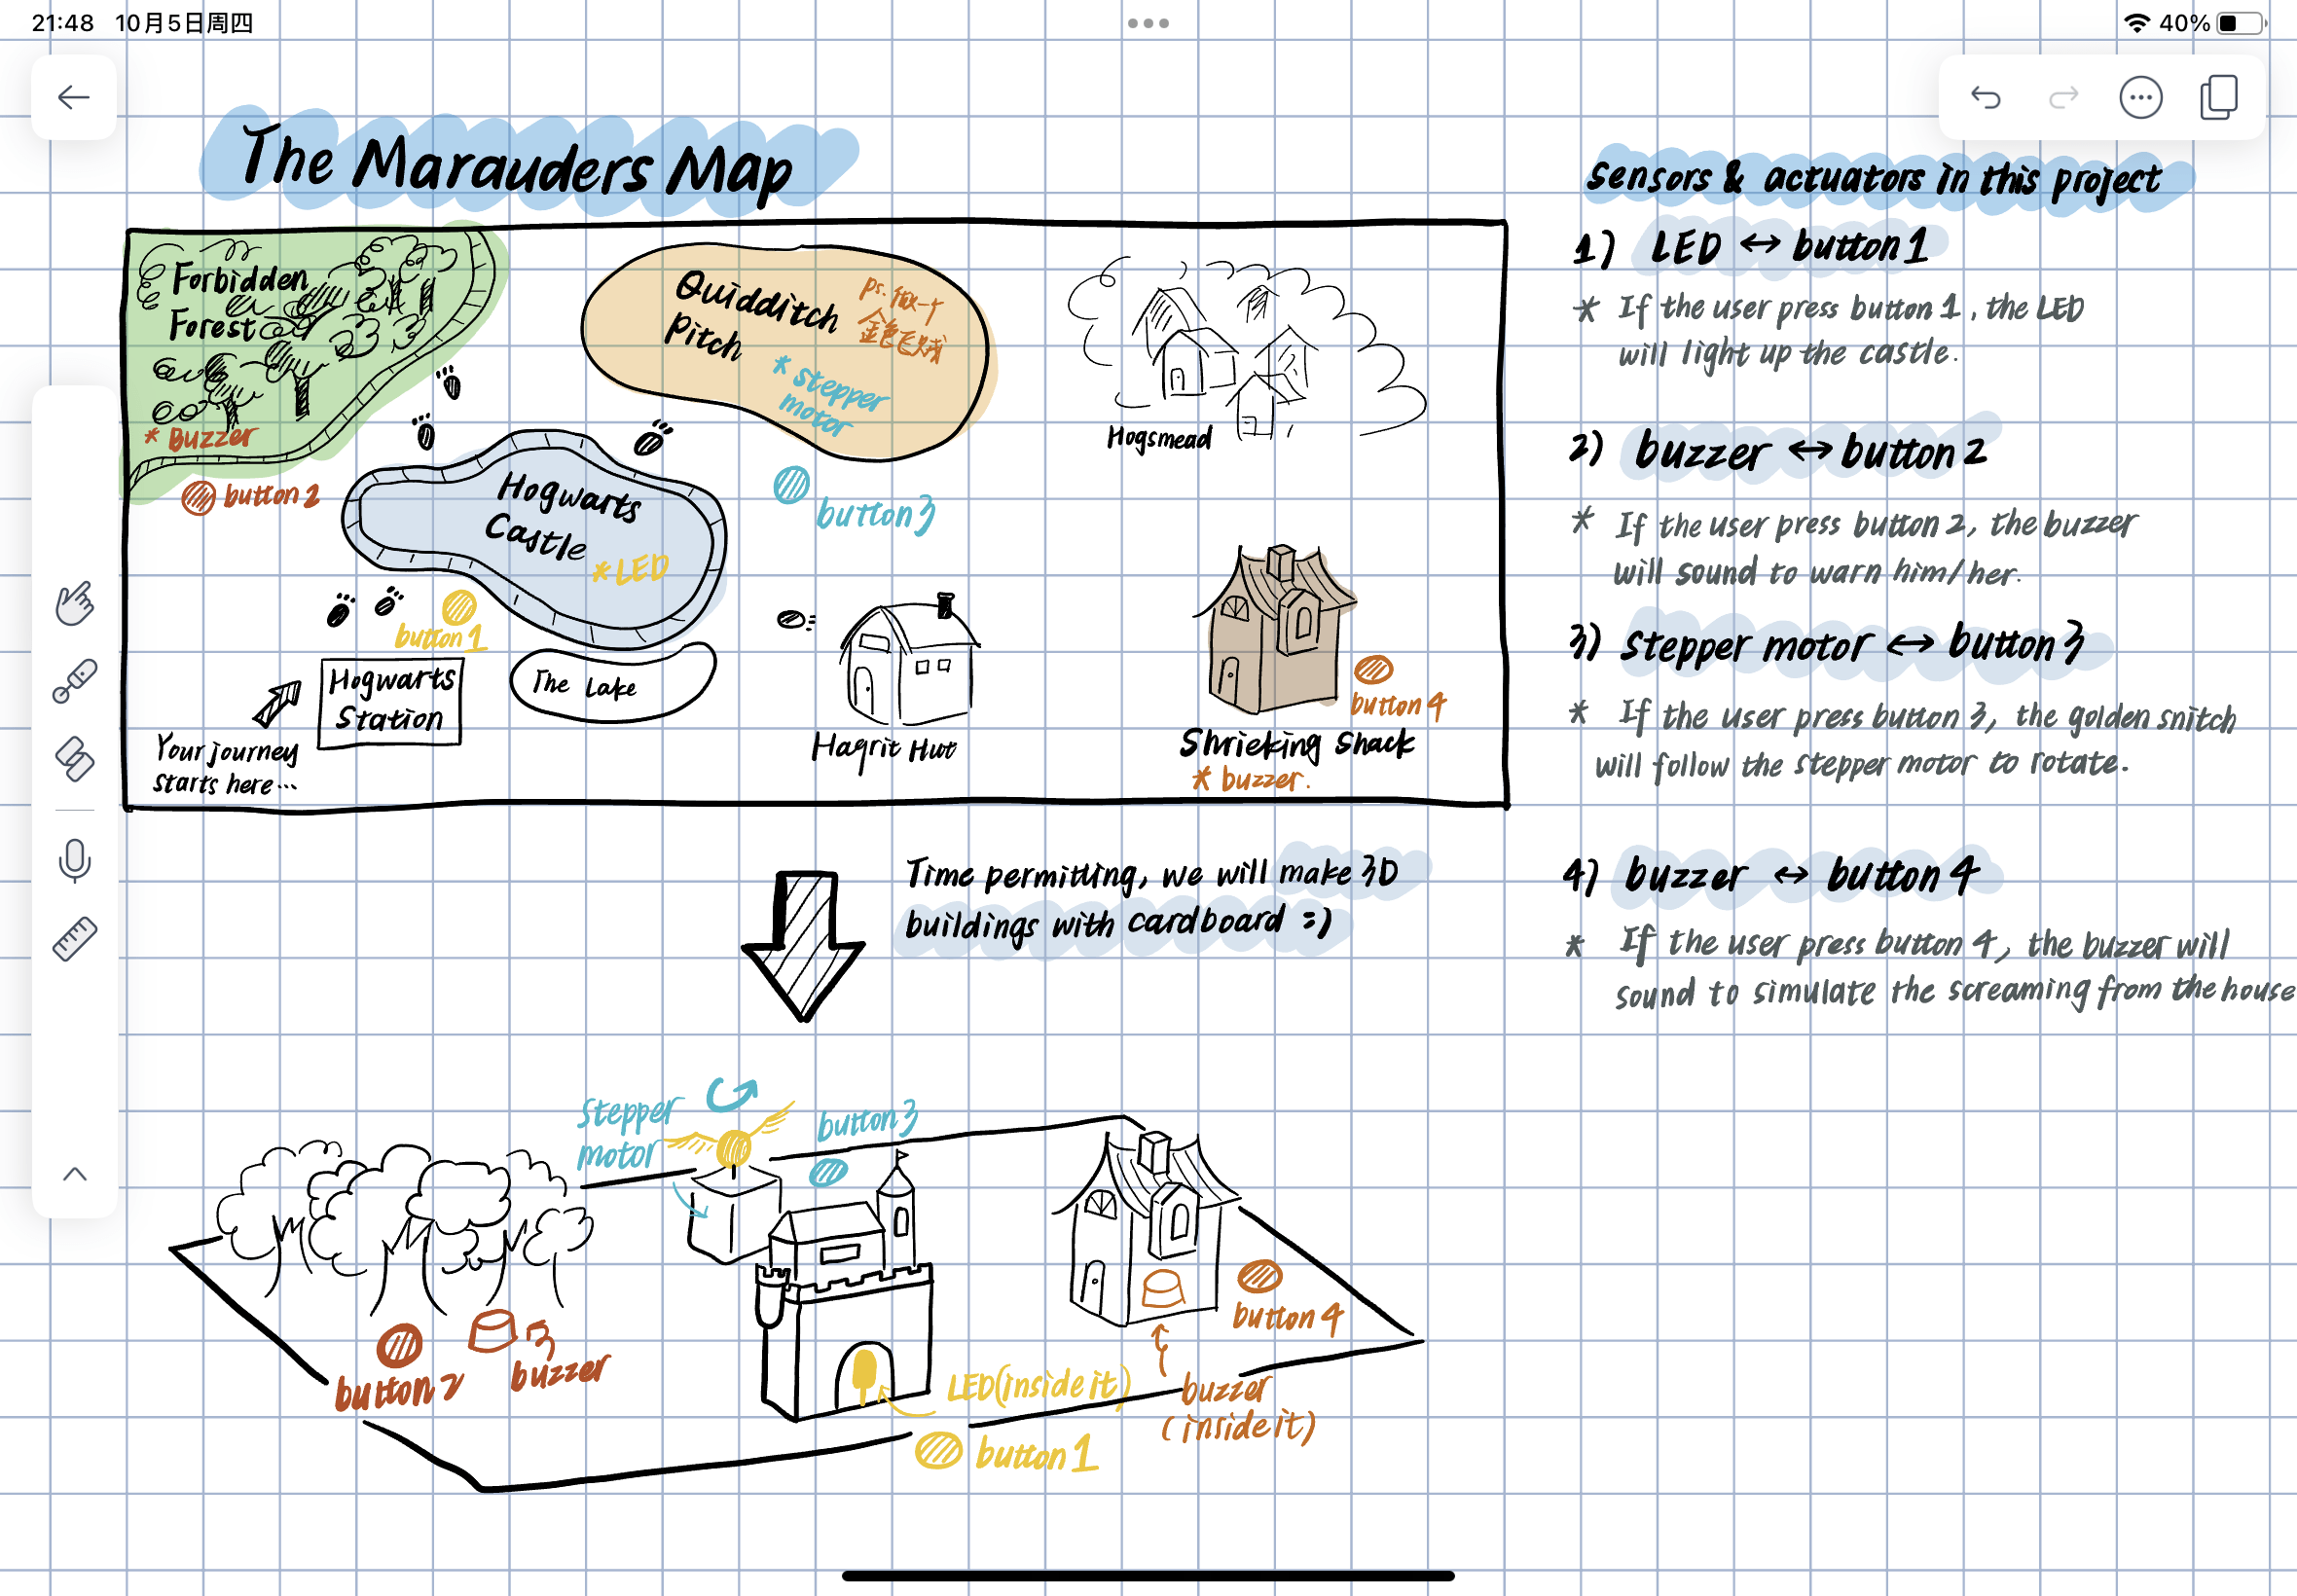
( Our first Draft)
My third recitation report:https: https://www.youtube.com/watch?v=Mu_eyvMjwmw
The related project: Interactive Halloween Diorama https://www.youtube.com/watch?v=Mu_eyvMjwmw
CONCEPTION AND DESIGN
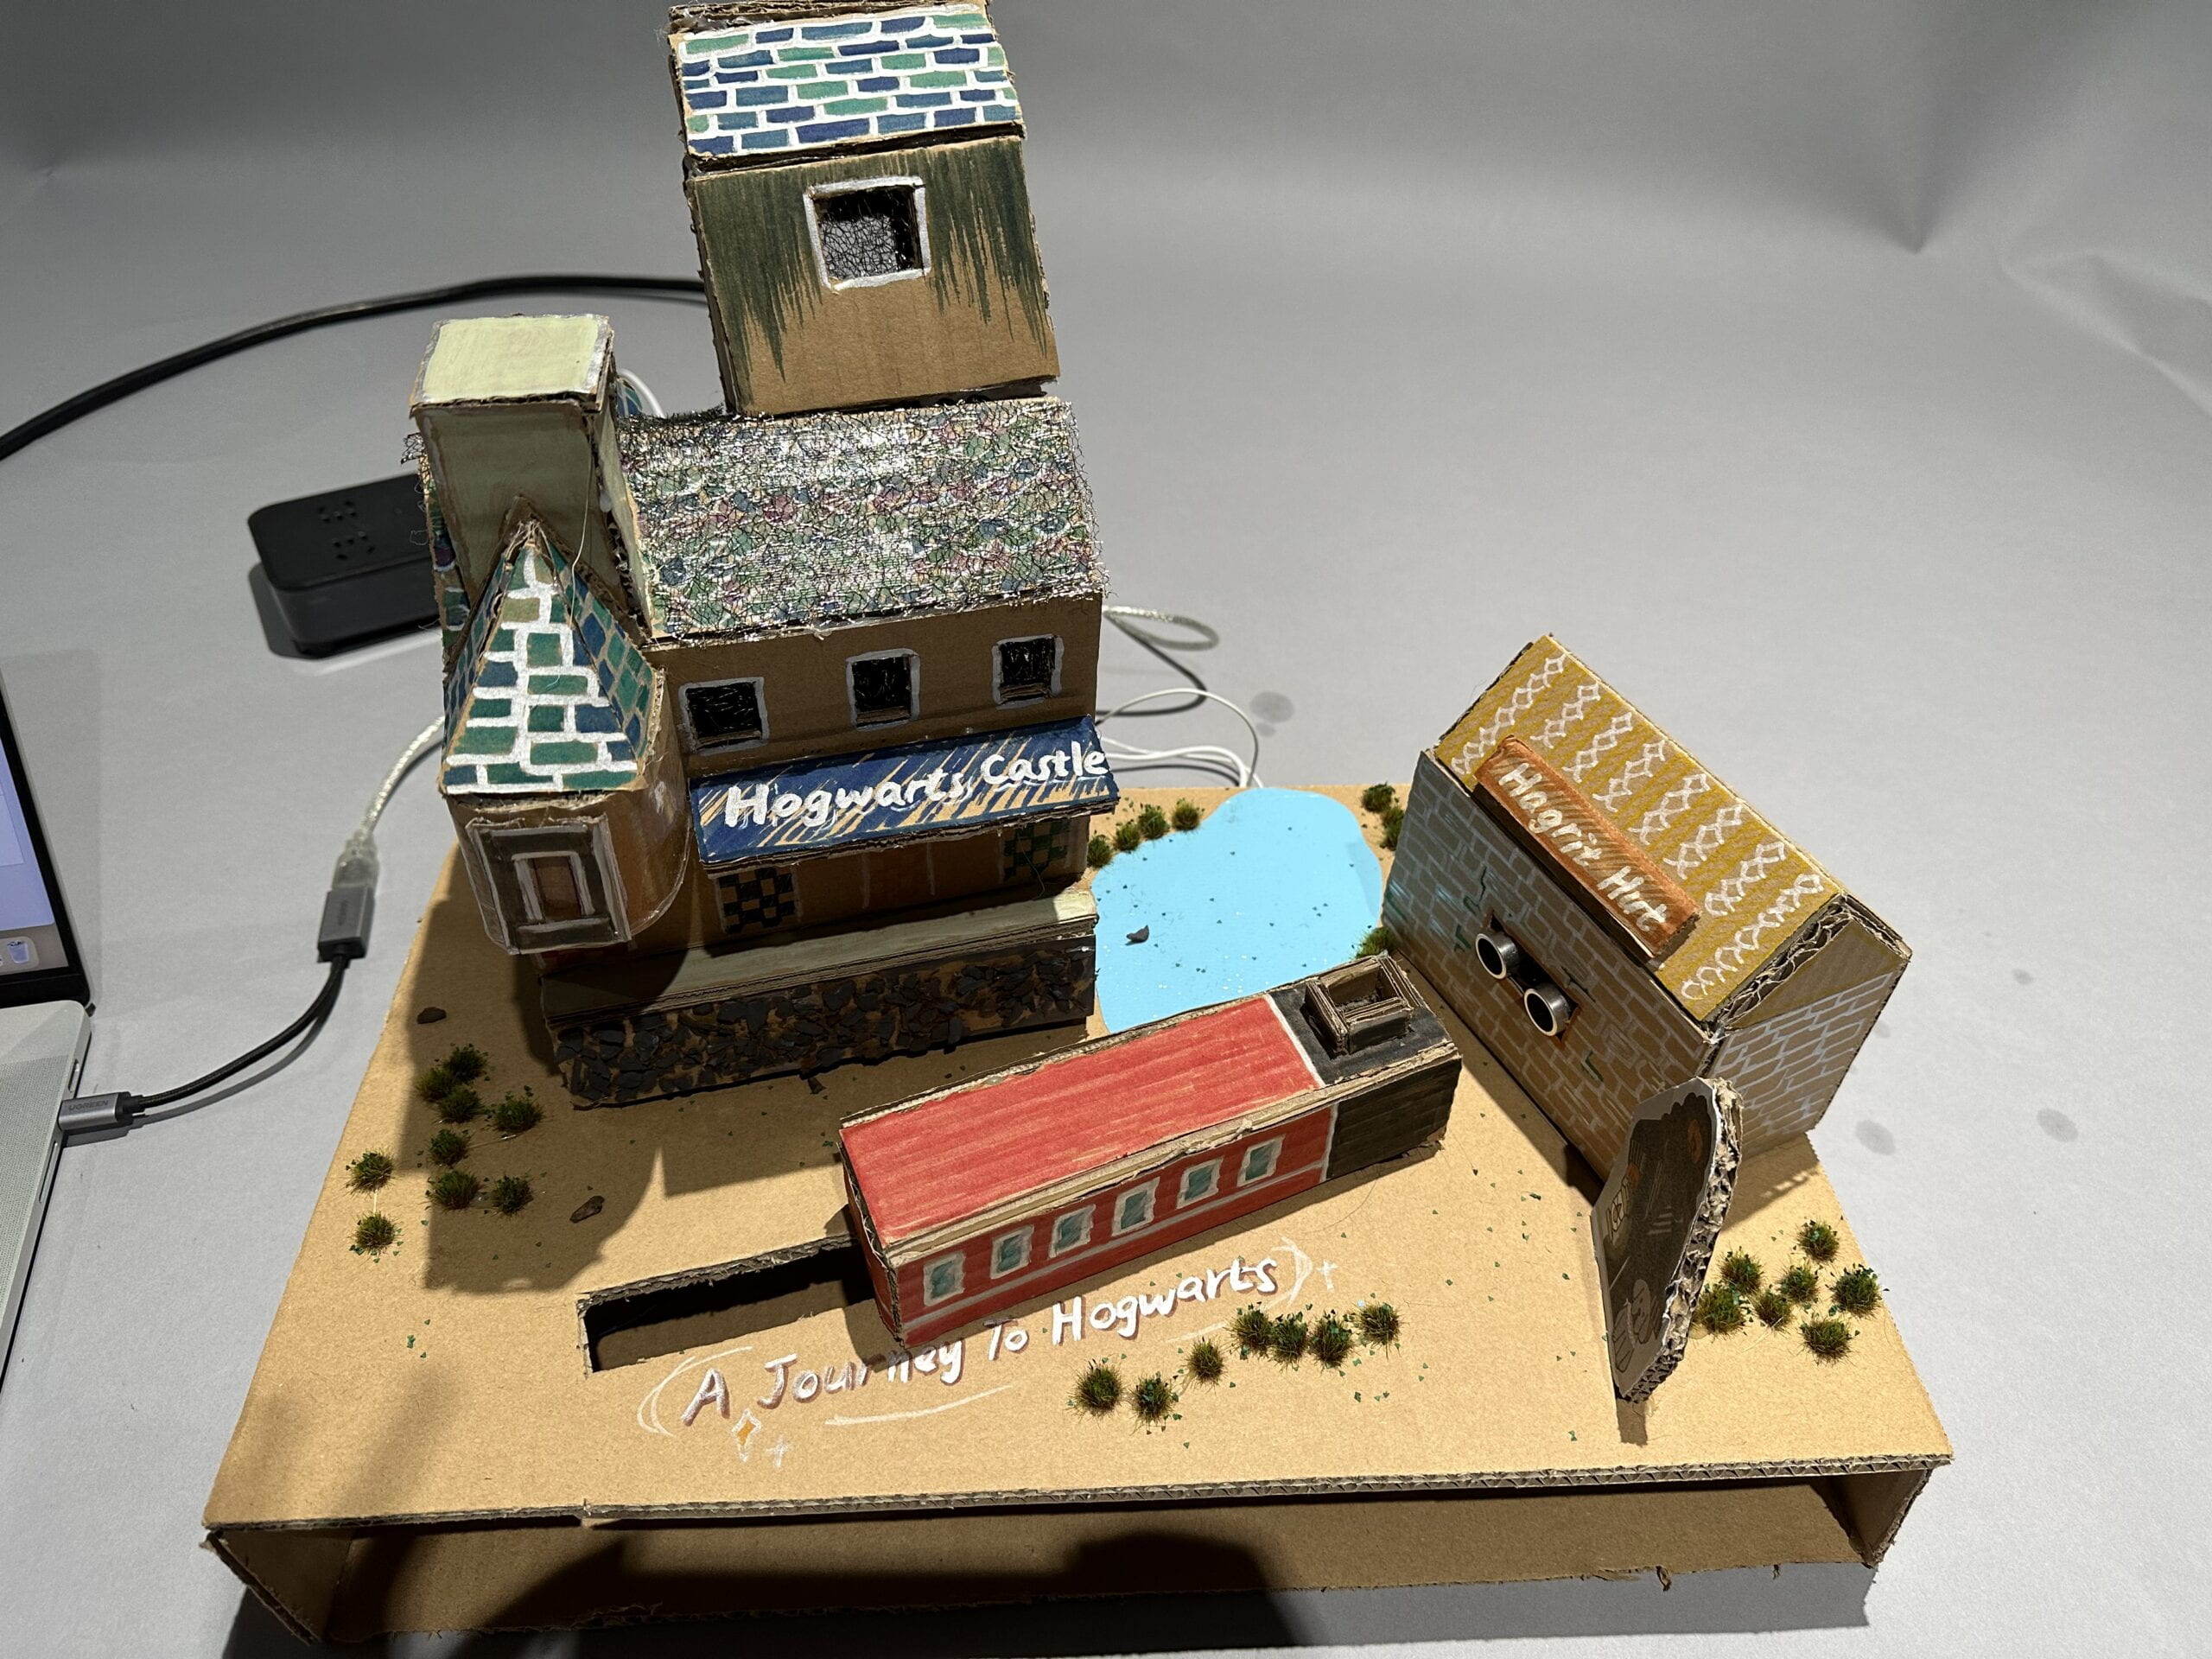
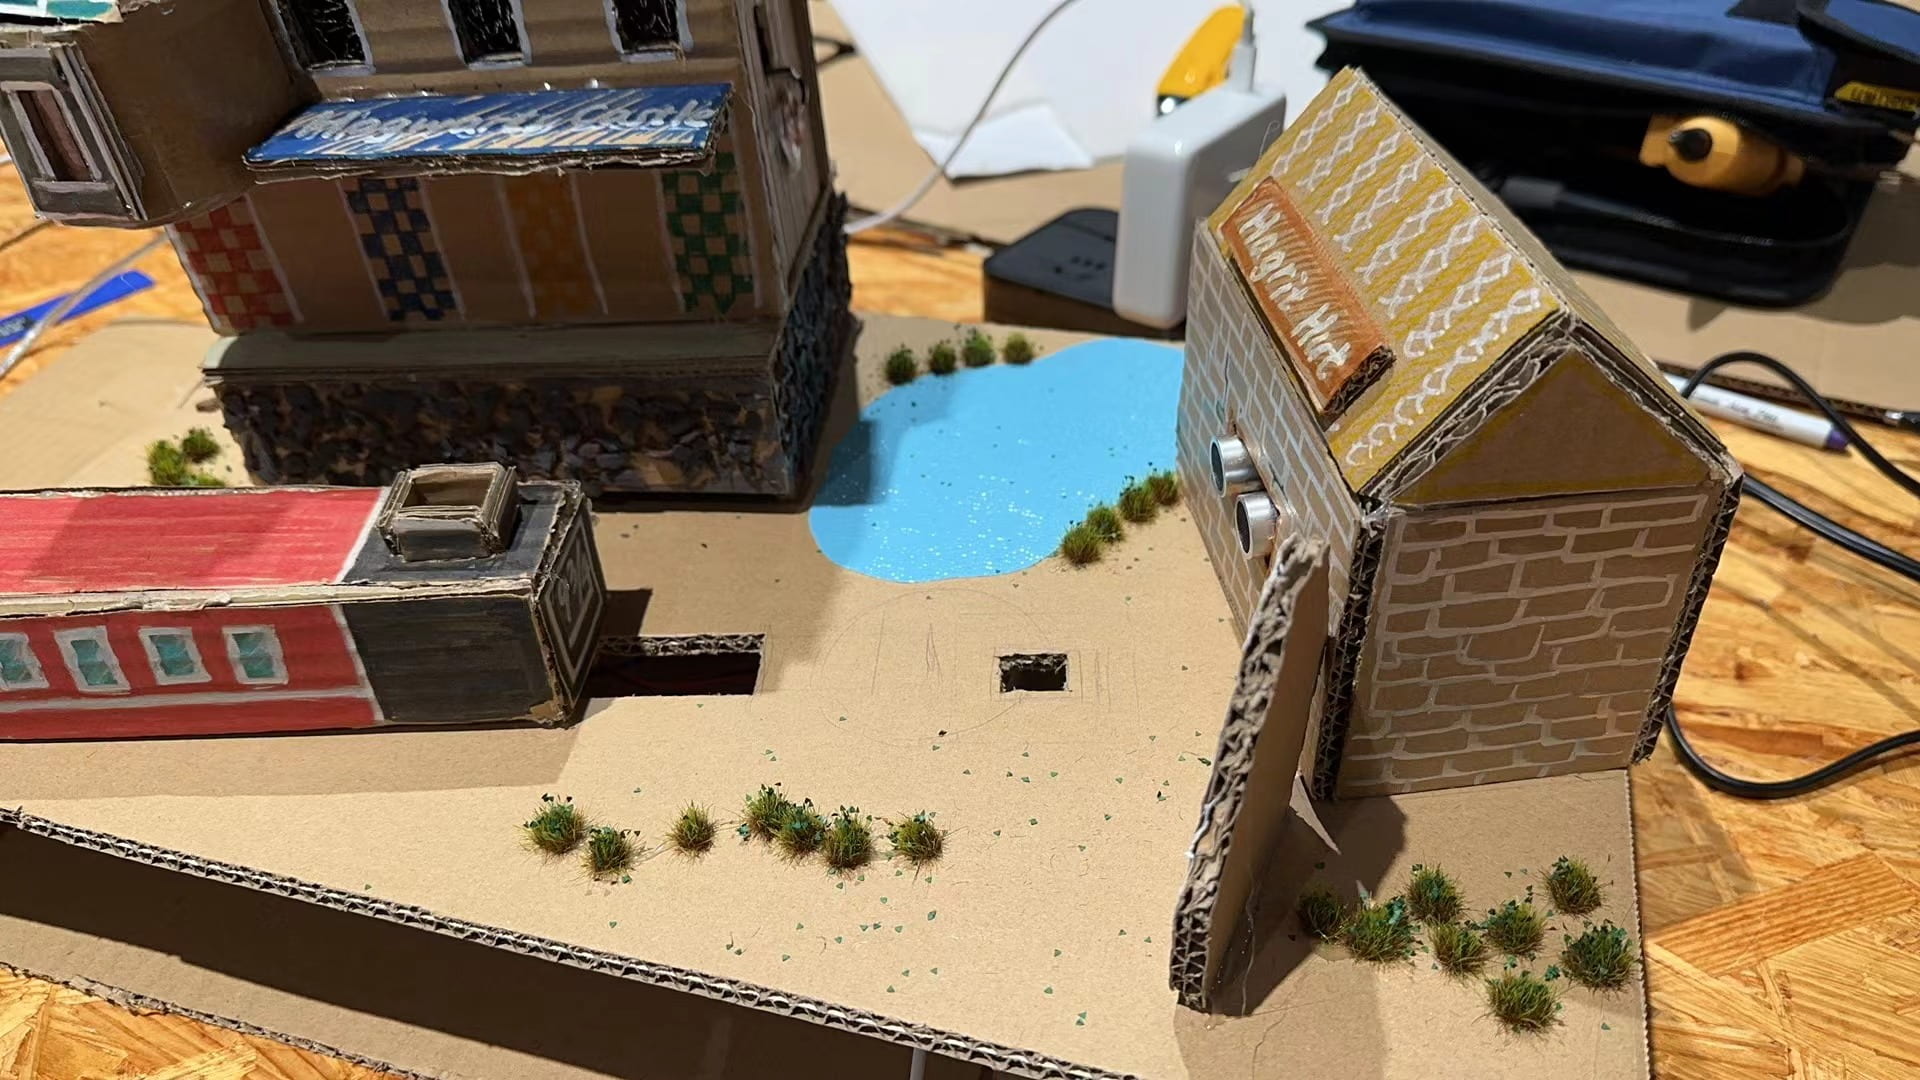
Firstly, we decided to do four different spots in the Harry Potter’s world and each of them will have one related sensor. But then, our instructor Andy suggested that we should focus on the most important spot and make it as vivid and exquisite as we can. Also, we should try to connect each sensor and let it become a story, so we revise the first draft into this one. Mainly focusing on the castle and let the fog sensor connected with the distance sensor and the buzzer.
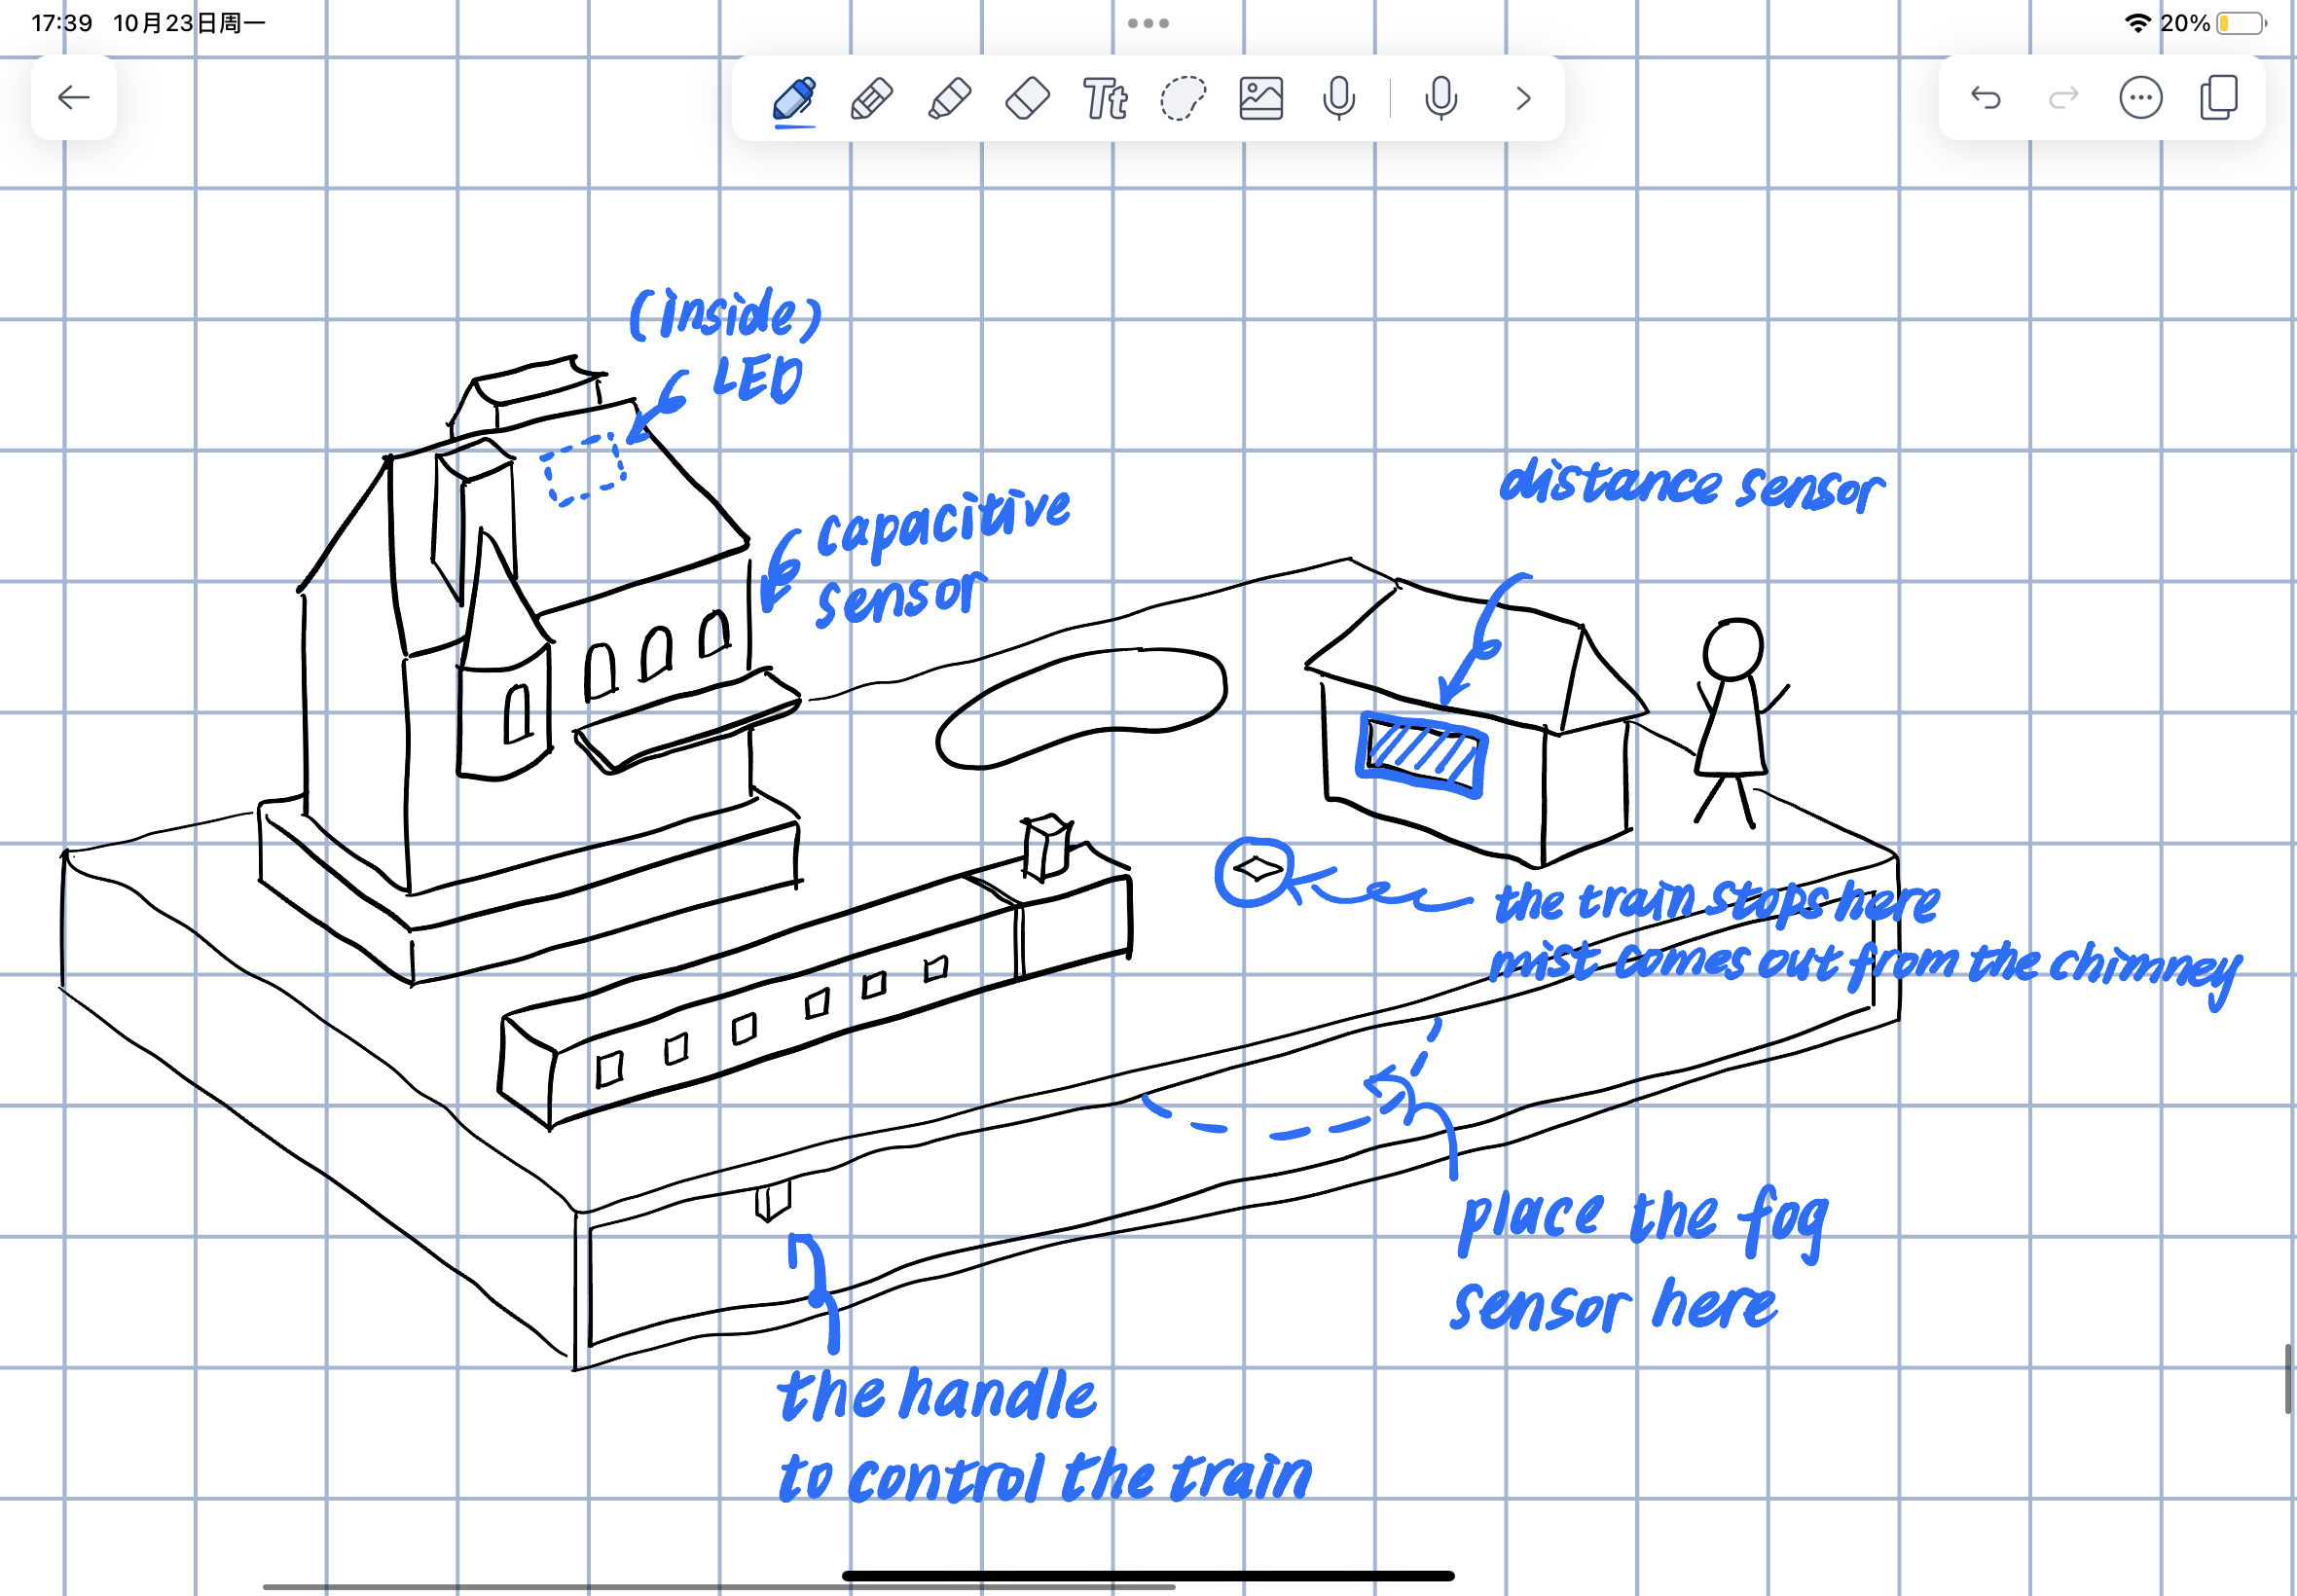
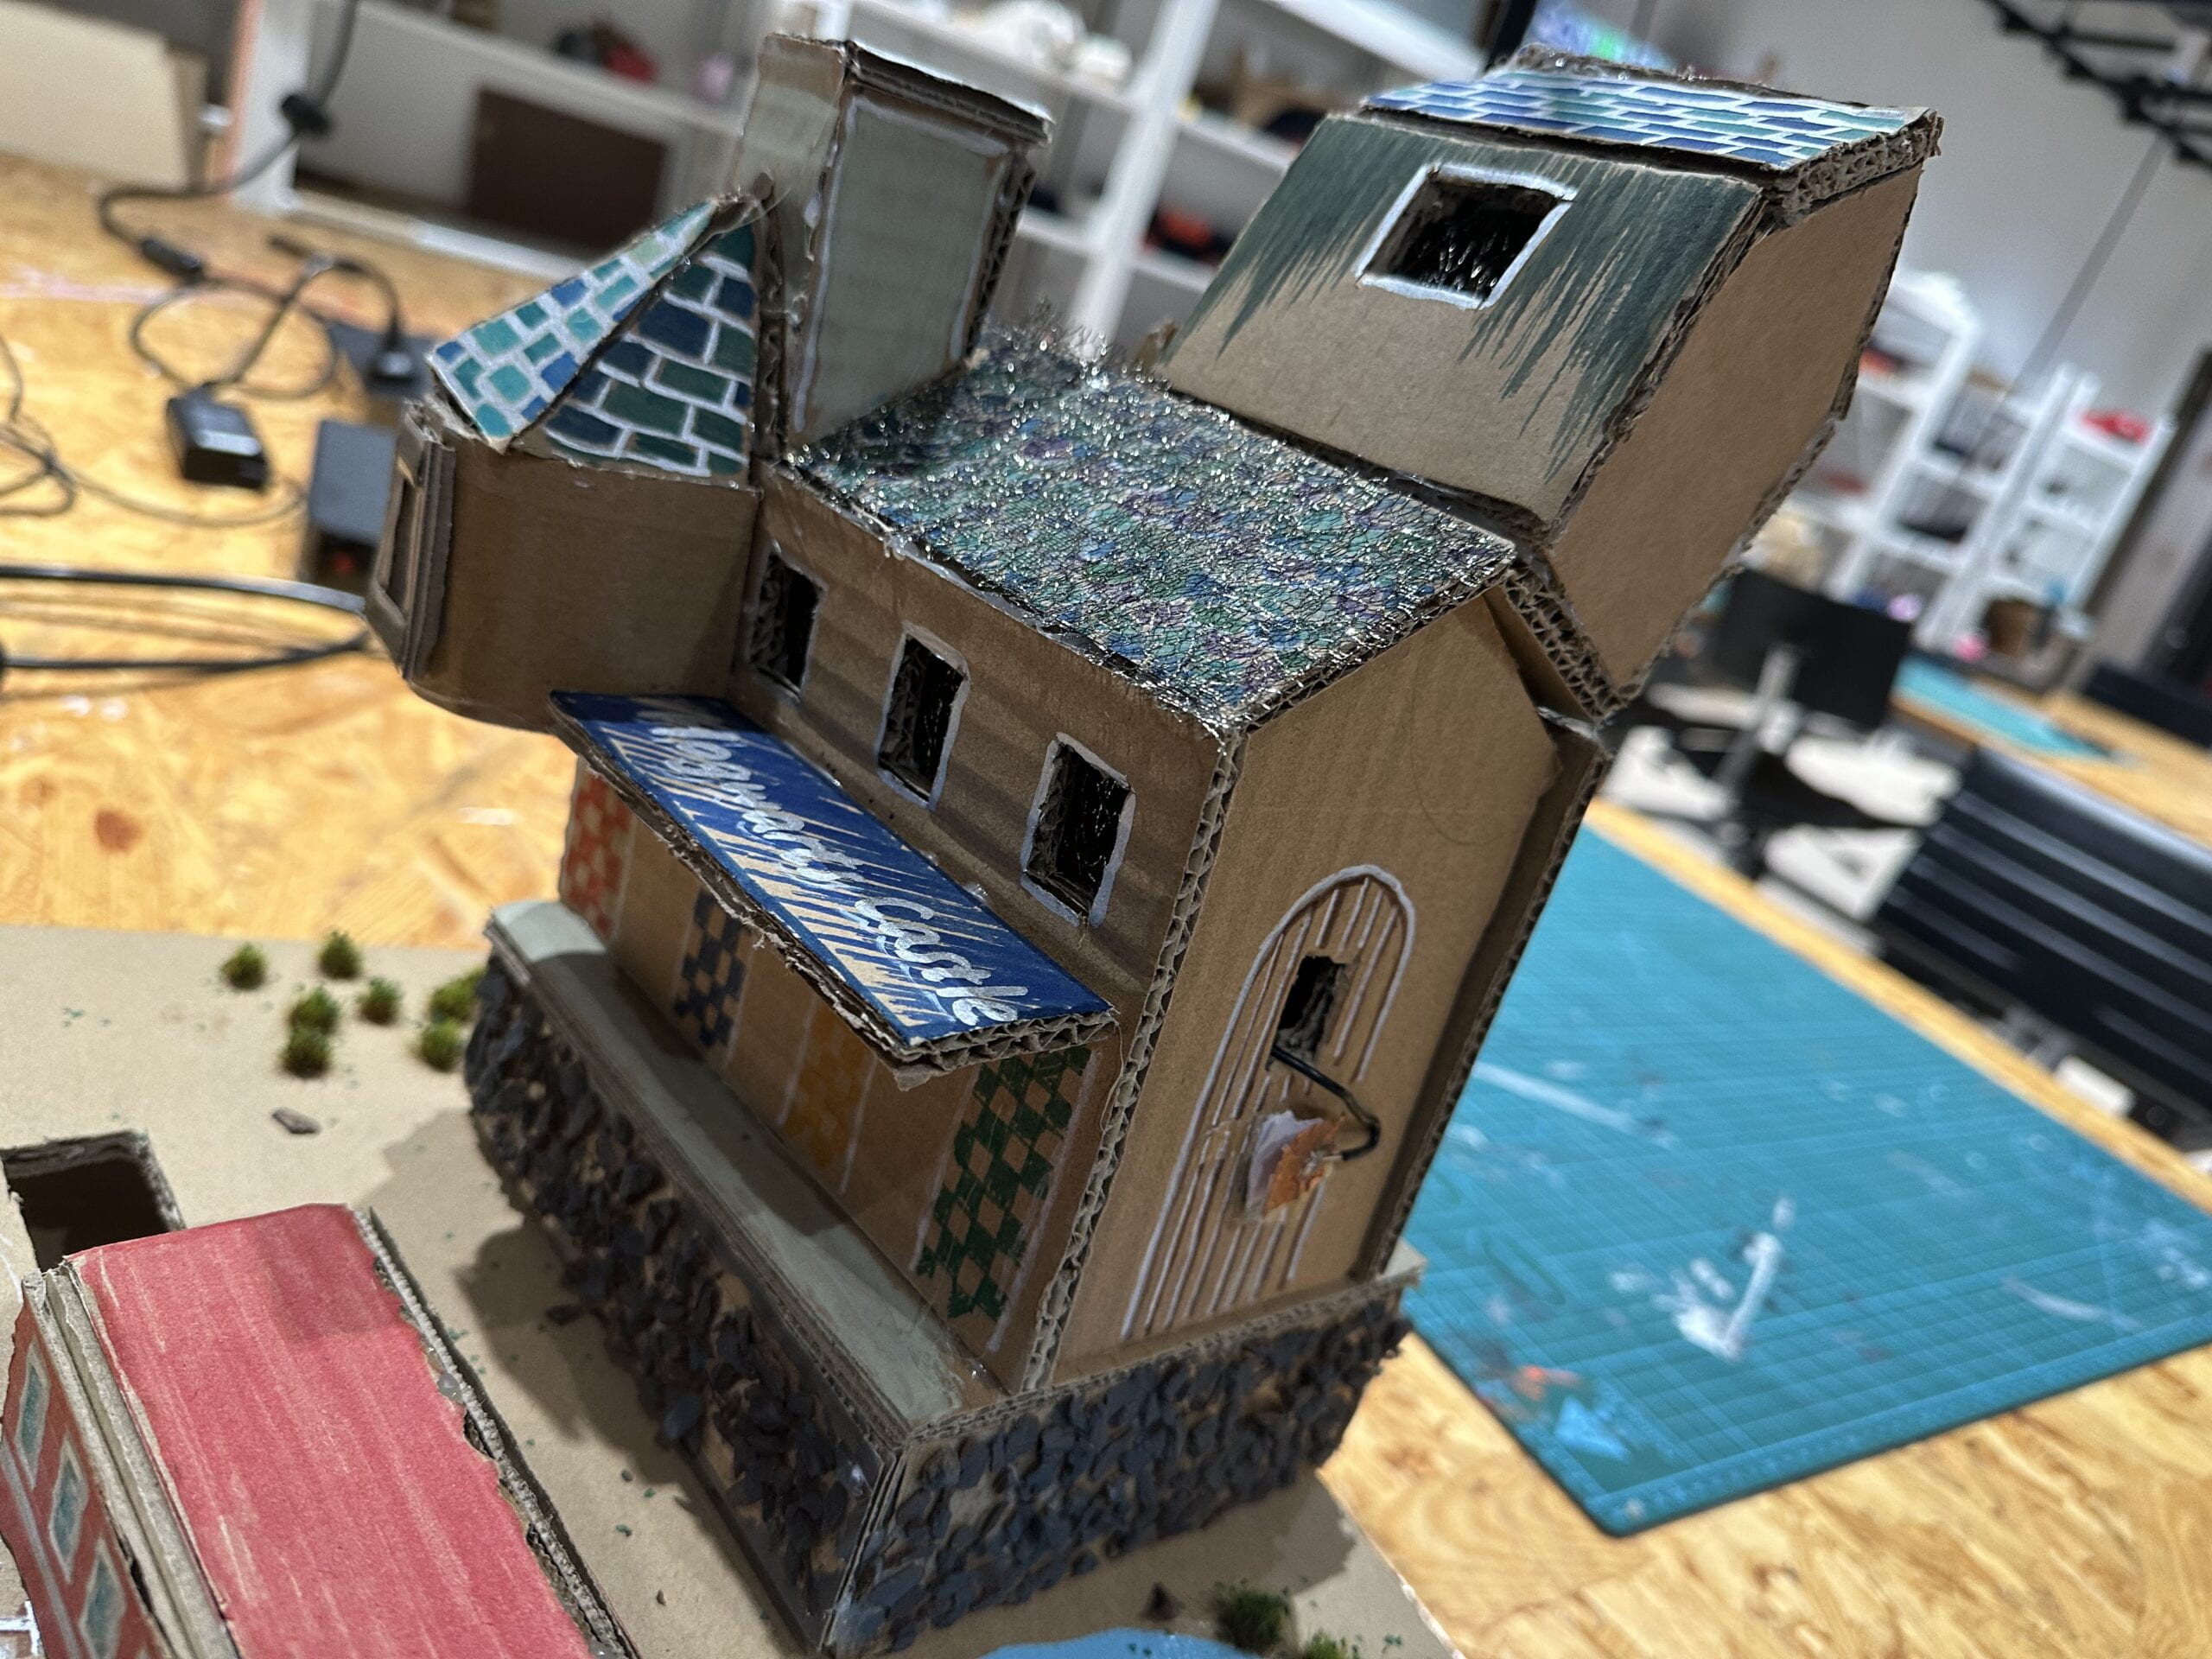
Secondly, we want to let each sensor become reasonable. So we cut the tinfoil smaller to make it look like a small doorknob of the castle. Also, we put the distance sensor in the war of Hagrid House to make it like a detector to know someone is coming. It will trigger the smoke of the train and the background music which works as a welcoming gift for the user. Finally, we painted all the cardboard and used materials we bought from the Internet to make it more beautiful and let users better immerse themselves in the magic world. All material we choose is work for the story to let it become more vivid and attractive.
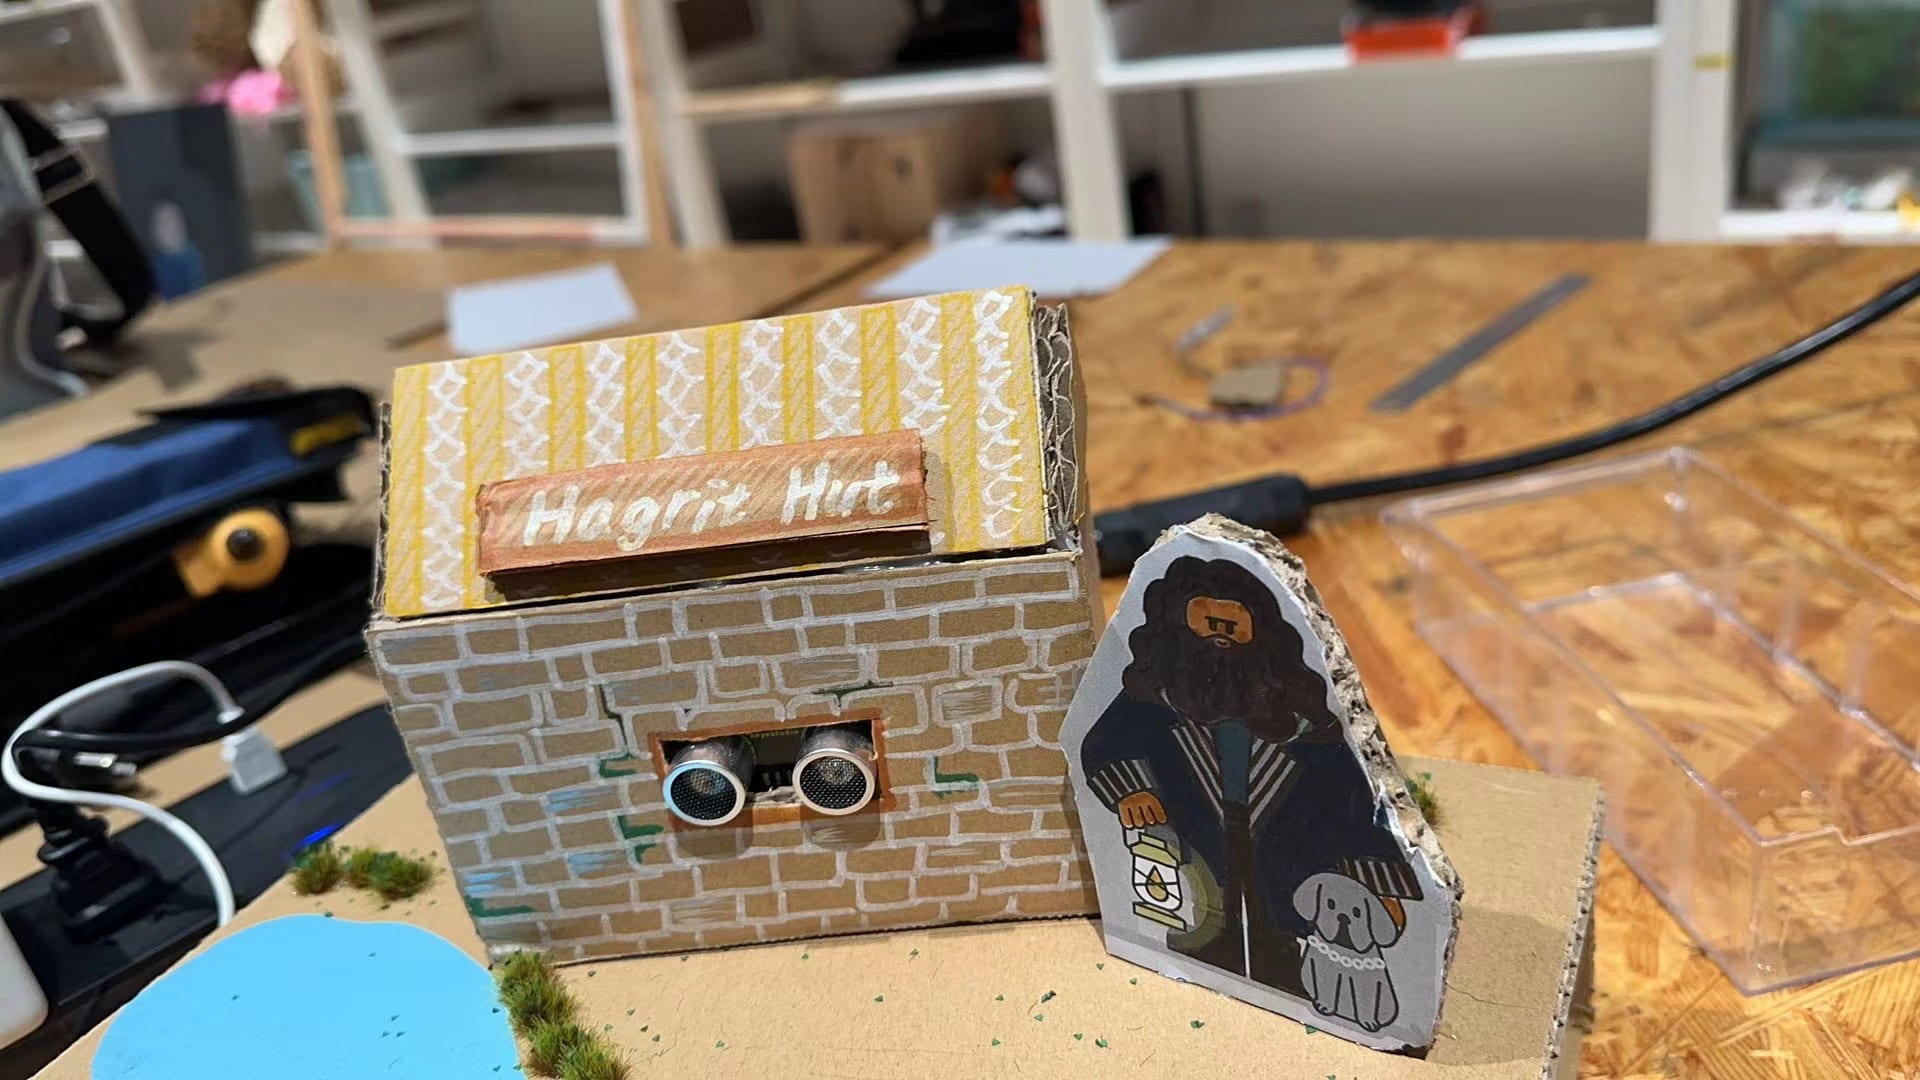
The photo of Hagrid: http://xhslink.com/4Z5VLv
FABRICATION AND PRODUCTION
I cut the cardboard to make the foundation of the project and some parts of the castle. Also, we write our code and do the painting work together. We met trouble while writing the melody code of Hedwig’s theme – Harry Potter. Andy told us there is a website we can refer to get the code. Finally, we change the speed and make it more in line with our situation.
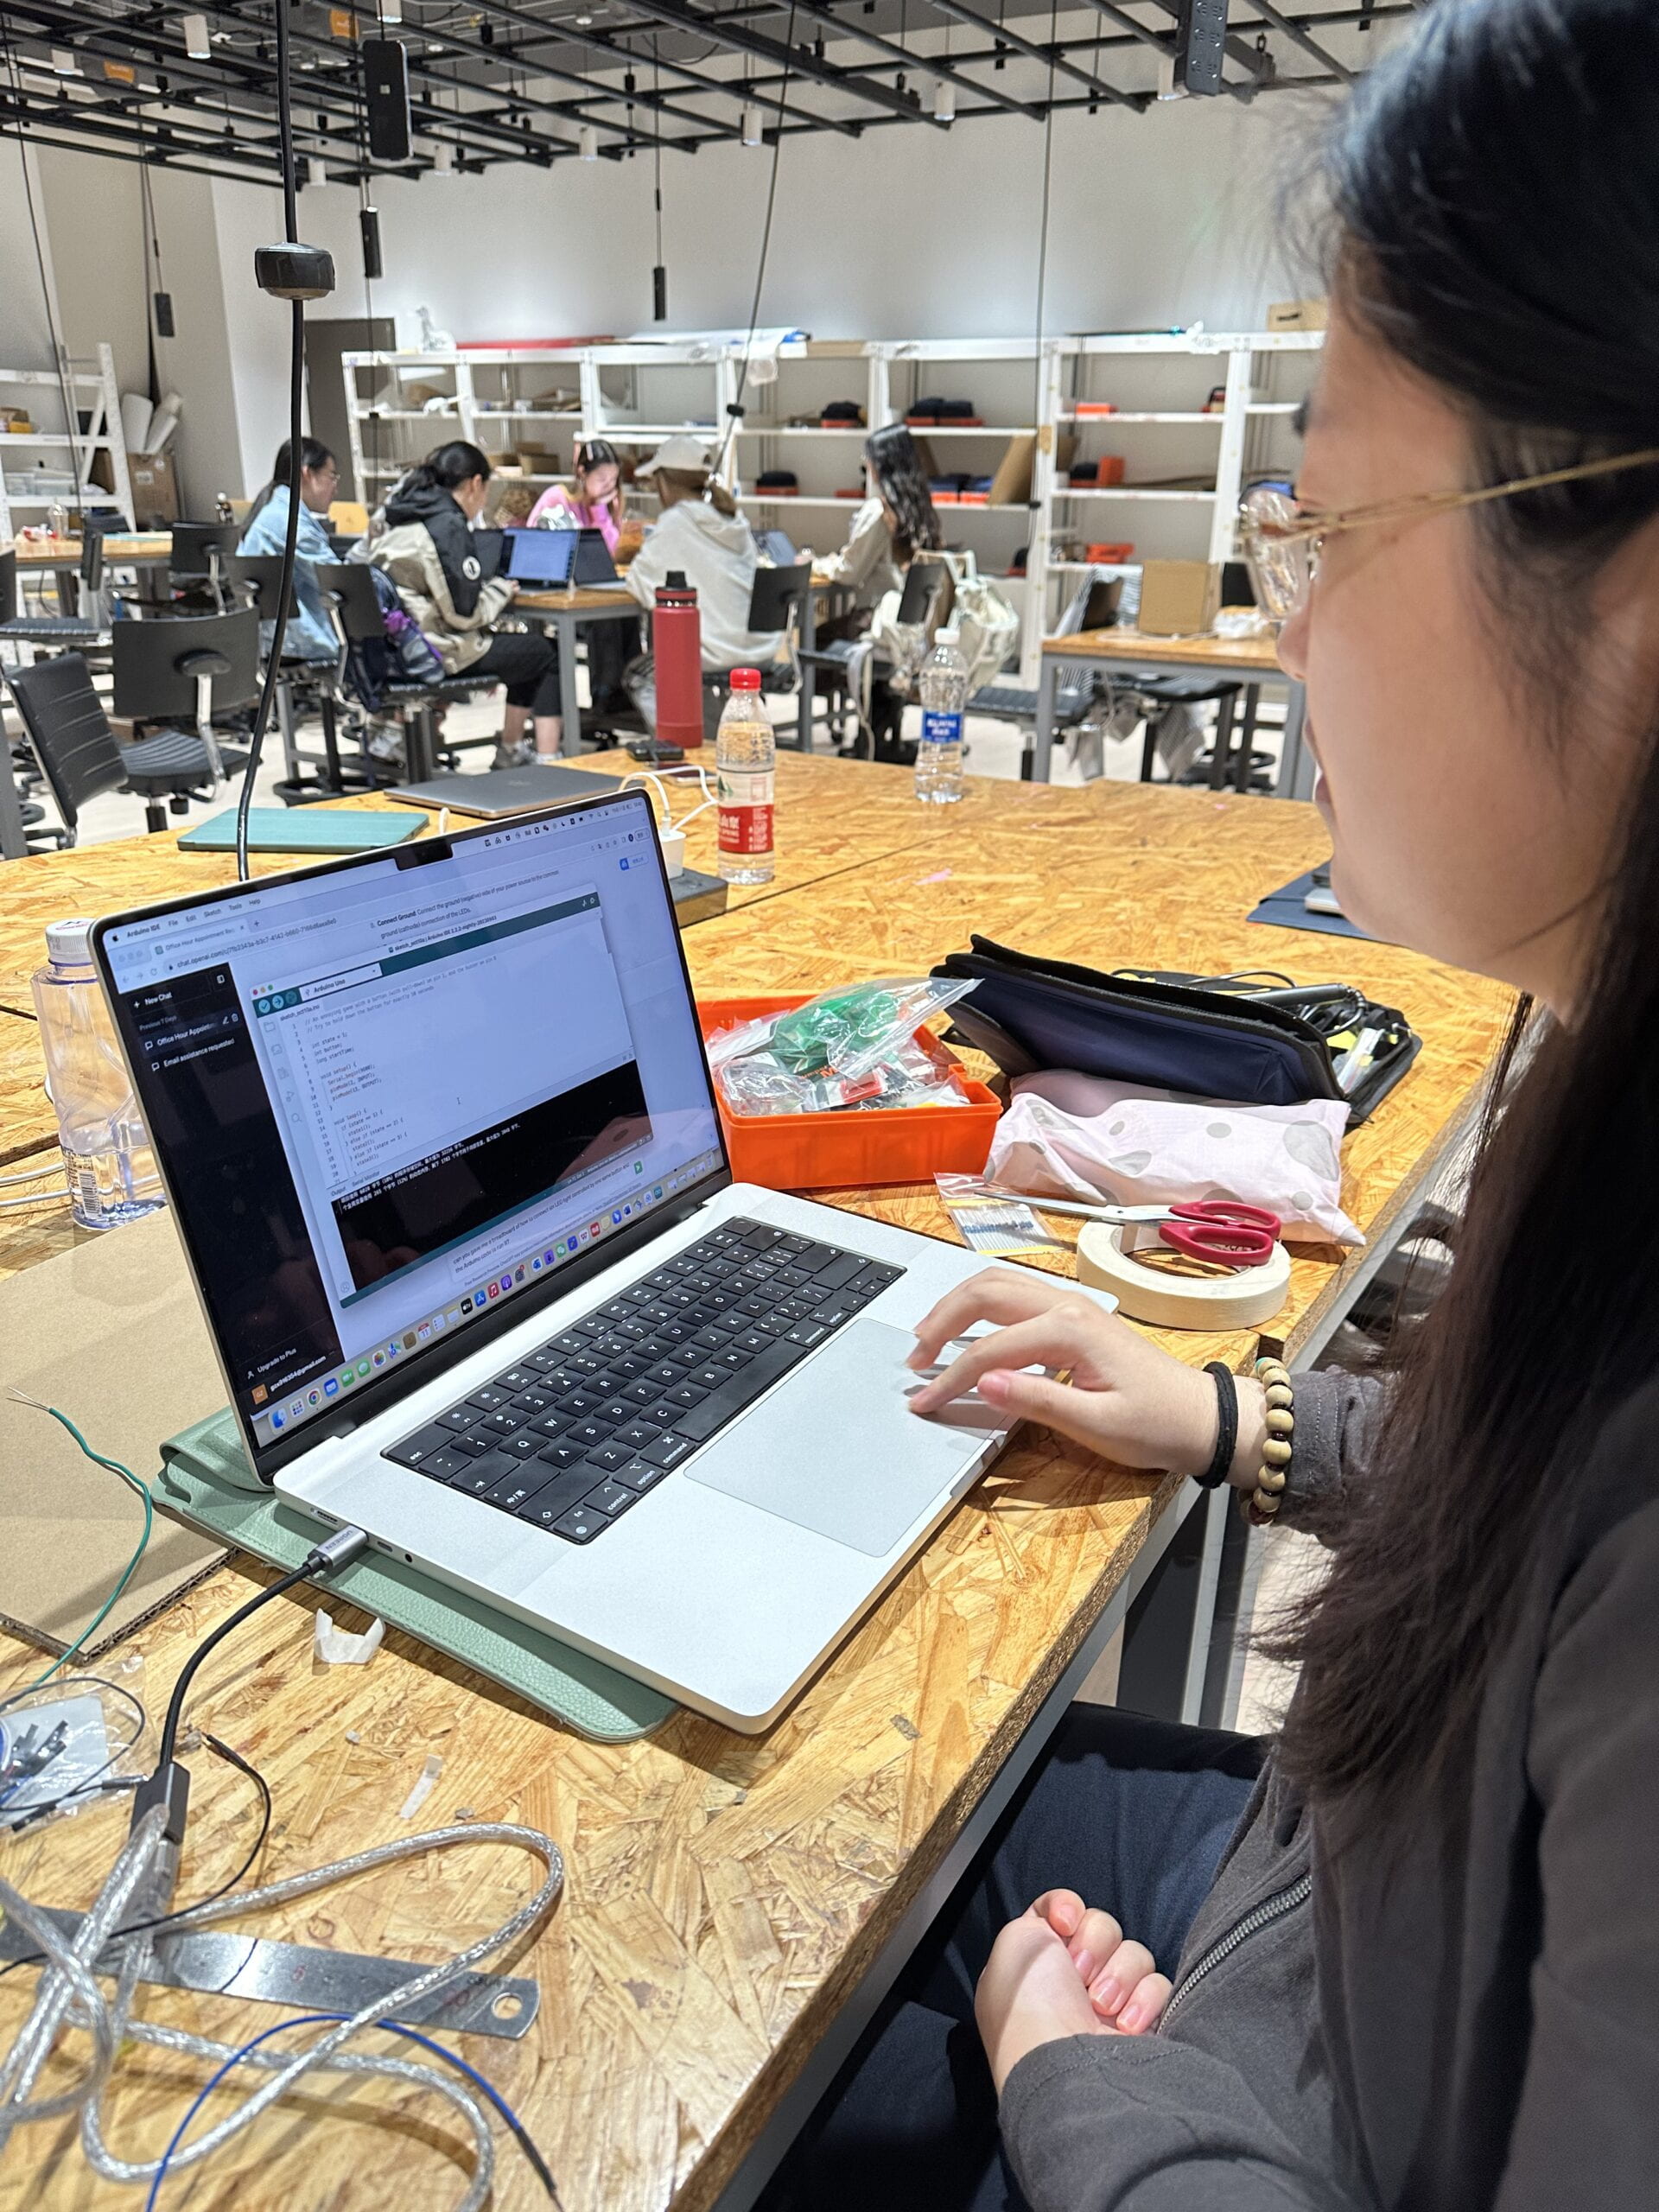
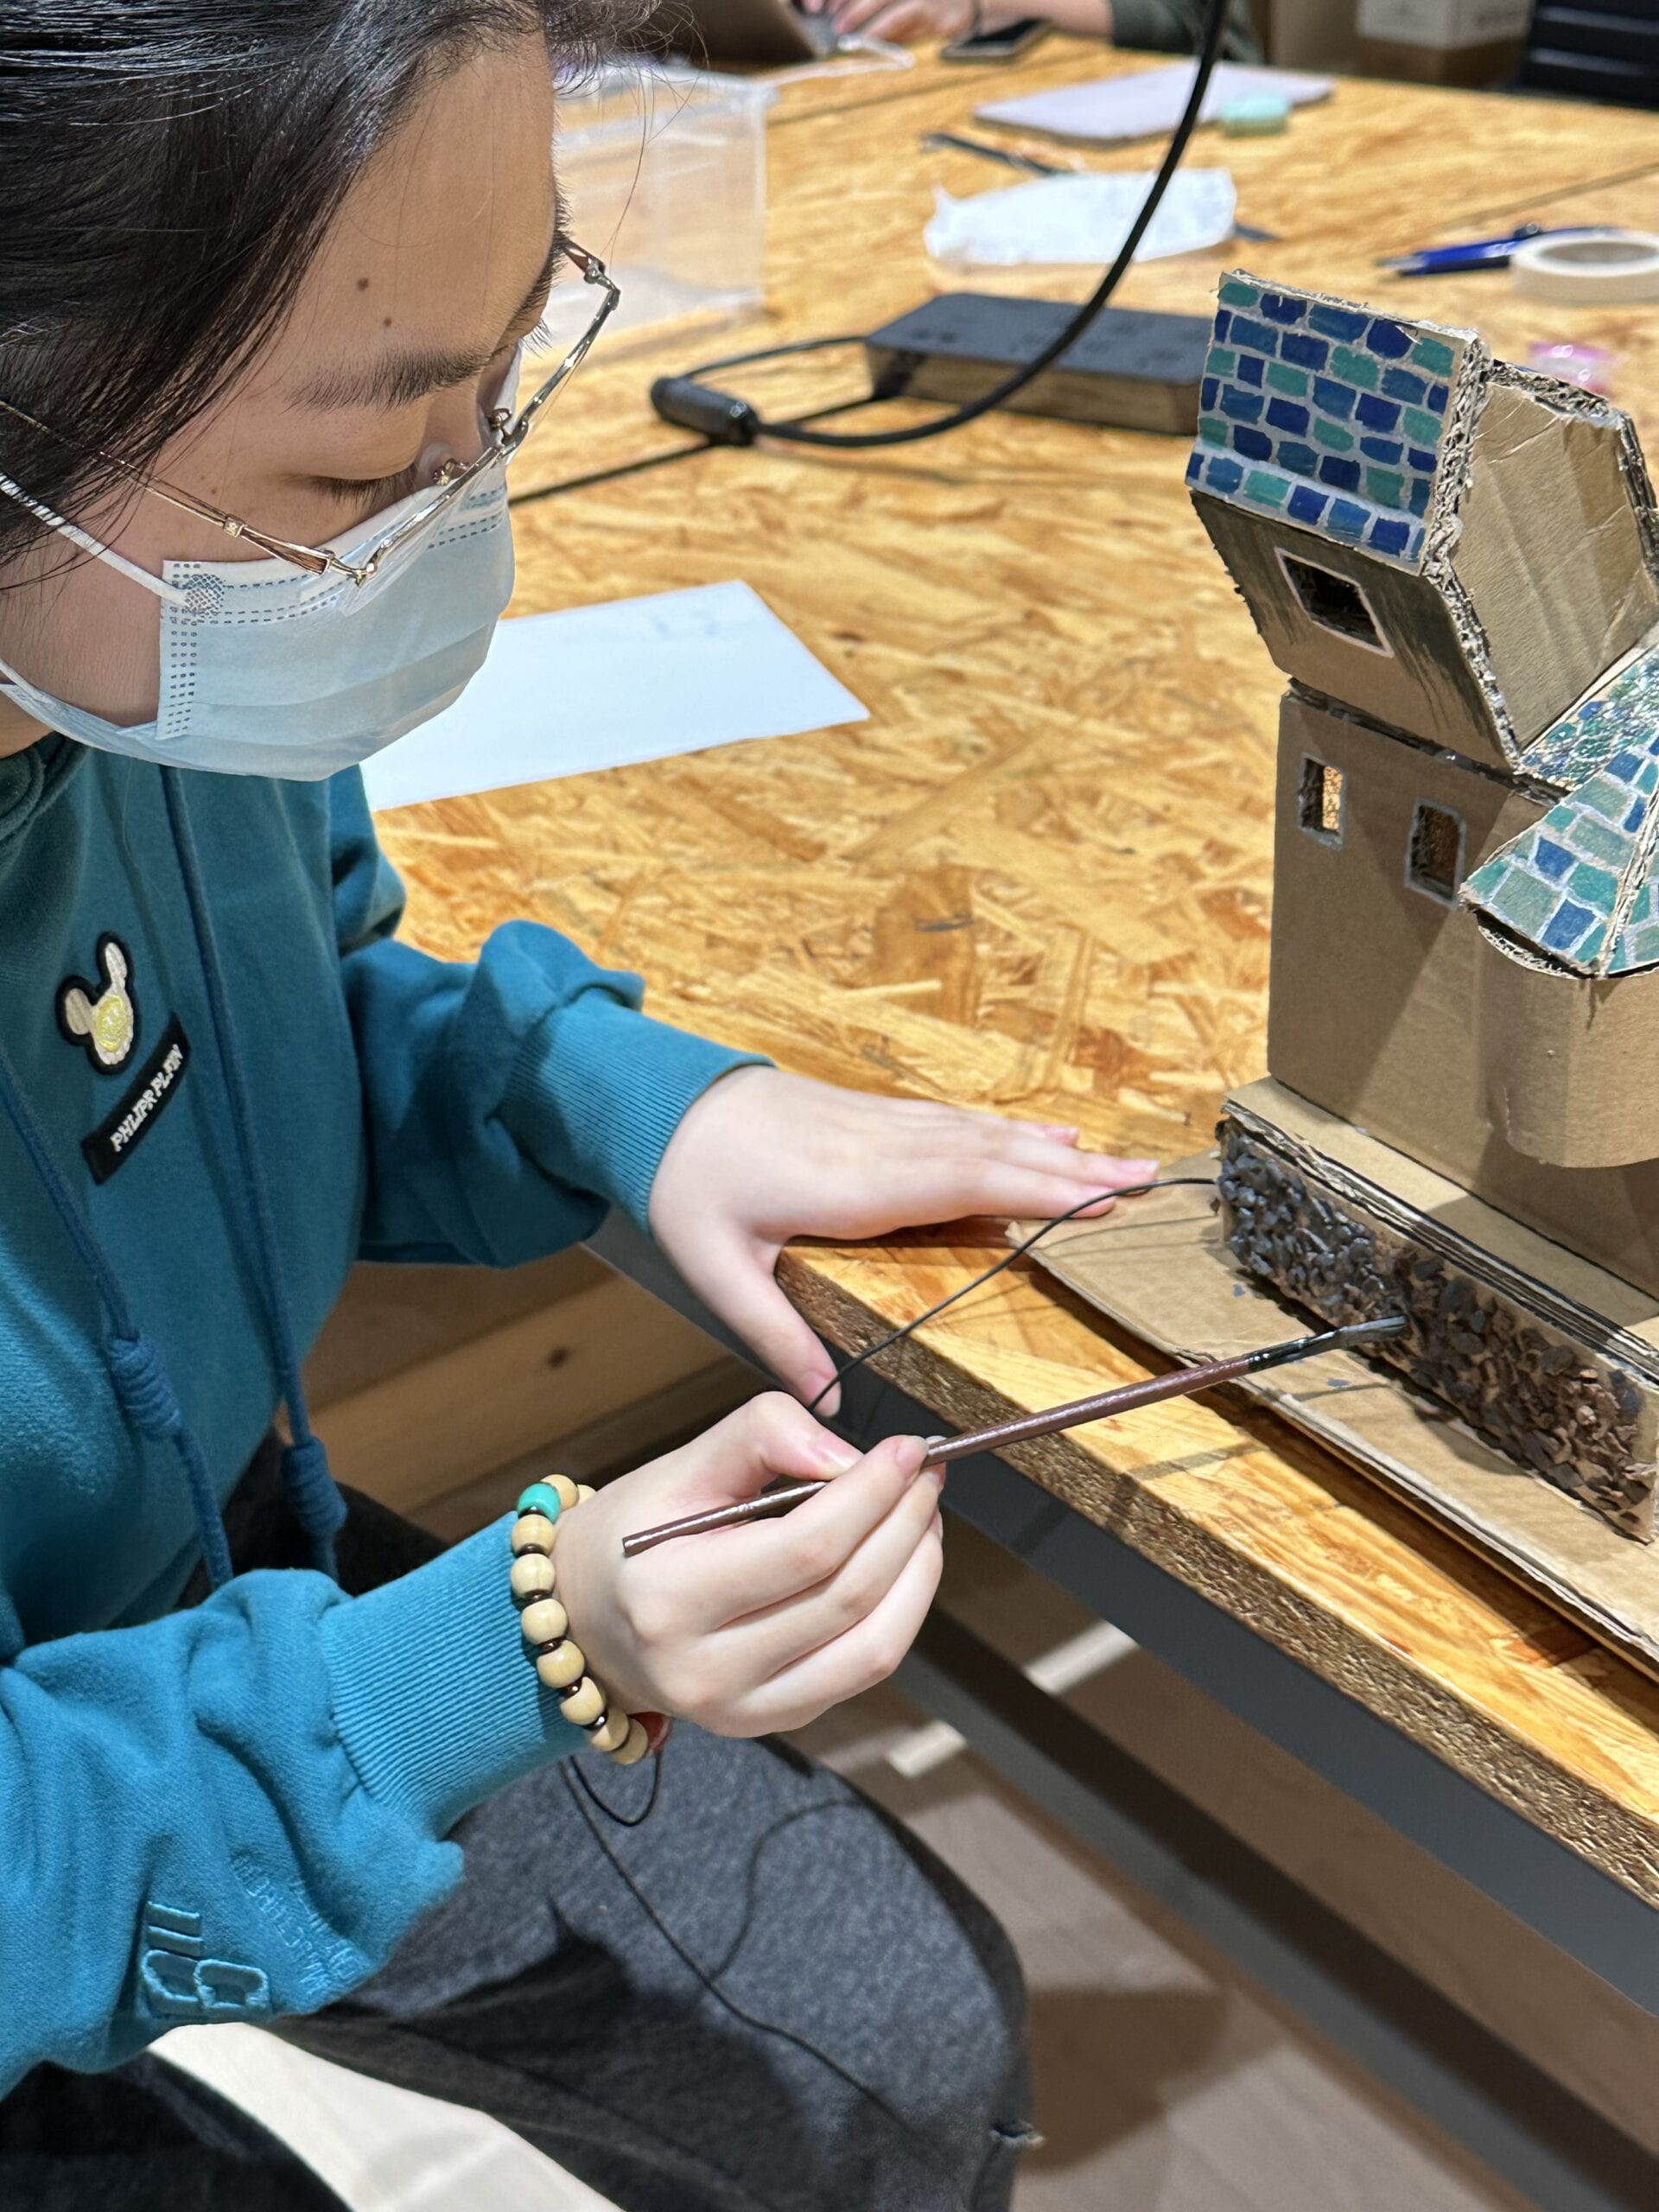
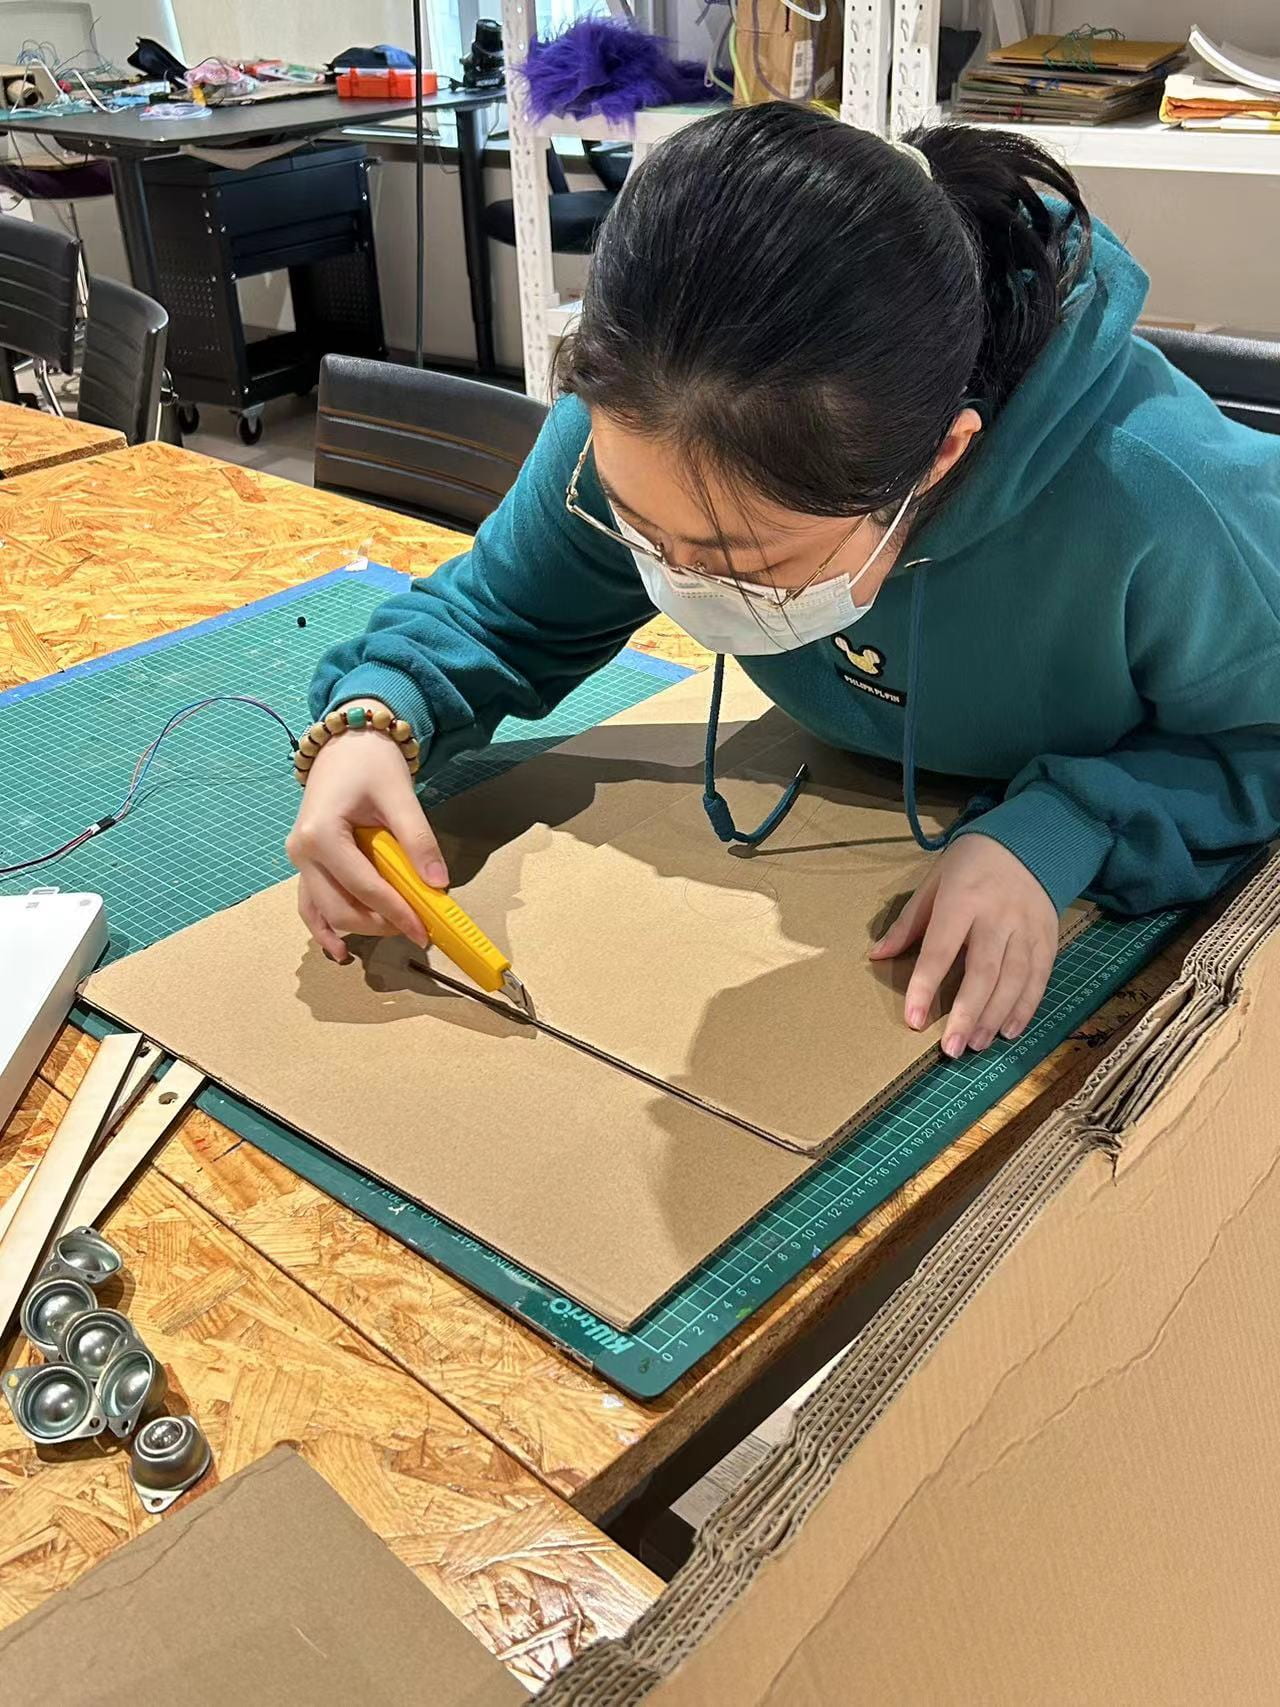
After the user testing, we found out many problems and received many suggestions.
The main problem is that our project isn’t completed and we haven’t give the fog sensor an appropriate place. Later, we discussed together and concerning all elements, we decided to put the fog sensor under the train to make it like the smoke of the train. We connected the fog and buzzer together with the distance sensor. When the train is in a certain range of distance with the sensor, it will trigger those two sensors and make it a welcoming gift to invite users to enter the magic world at first. Then the story is completed and the problem is solved. Later, we also met many problems about coding, one of the most impressive for me is that we can’t let the music and the fog start together at first. Then we asked professor Gottfried Haider to help us. He told us it is because we put the code of the fog after the buzzer. The easiest way to solve it is to move it before the buzzer’s and set it to work during the music. After this change, the mist can successfully be with the buzzer at the same time and also end together. All these changes are effective and make our project better to let users.
The code:
/*Hedwig's theme - Harry PotterConnect a piezo buzzer or speaker to pin 11 or select a new pin.More songs available at https://github.com/robsoncouto/arduino-songsRobson Couto, 2019*/#define NOTE_B0 31#define NOTE_C1 33#define NOTE_CS1 35#define NOTE_D1 37#define NOTE_DS1 39#define NOTE_E1 41#define NOTE_F1 44#define NOTE_FS1 46#define NOTE_G1 49#define NOTE_GS1 52#define NOTE_A1 55#define NOTE_AS1 58#define NOTE_B1 62#define NOTE_C2 65#define NOTE_CS2 69#define NOTE_D2 73#define NOTE_DS2 78#define NOTE_E2 82#define NOTE_F2 87#define NOTE_FS2 93#define NOTE_G2 98#define NOTE_GS2 104#define NOTE_A2 110#define NOTE_AS2 117#define NOTE_B2 123#define NOTE_C3 131#define NOTE_CS3 139#define NOTE_D3 147#define NOTE_DS3 156#define NOTE_E3 165#define NOTE_F3 175#define NOTE_FS3 185#define NOTE_G3 196#define NOTE_GS3 208#define NOTE_A3 220#define NOTE_AS3 233#define NOTE_B3 247#define NOTE_C4 262#define NOTE_CS4 277#define NOTE_D4 294#define NOTE_DS4 311#define NOTE_E4 330#define NOTE_F4 349#define NOTE_FS4 370#define NOTE_G4 392#define NOTE_GS4 415#define NOTE_A4 440#define NOTE_AS4 466#define NOTE_B4 494#define NOTE_C5 523#define NOTE_CS5 554#define NOTE_D5 587#define NOTE_DS5 622#define NOTE_E5 659#define NOTE_F5 698#define NOTE_FS5 740#define NOTE_G5 784#define NOTE_GS5 831#define NOTE_A5 880#define NOTE_AS5 932#define NOTE_B5 988#define NOTE_C6 1047#define NOTE_CS6 1109#define NOTE_D6 1175#define NOTE_DS6 1245#define NOTE_E6 1319#define NOTE_F6 1397#define NOTE_FS6 1480#define NOTE_G6 1568#define NOTE_GS6 1661#define NOTE_A6 1760#define NOTE_AS6 1865#define NOTE_B6 1976#define NOTE_C7 2093#define NOTE_CS7 2217#define NOTE_D7 2349#define NOTE_DS7 2489#define NOTE_E7 2637#define NOTE_F7 2794#define NOTE_FS7 2960#define NOTE_G7 3136#define NOTE_GS7 3322#define NOTE_A7 3520#define NOTE_AS7 3729#define NOTE_B7 3951#define NOTE_C8 4186#define NOTE_CS8 4435#define NOTE_D8 4699#define NOTE_DS8 4978#define REST 0// change this to make the song slower or fasterint tempo = 180;// change this to whichever pin you want to useint buzzer = 11;// notes of the moledy followed by the duration.// a 4 means a quarter note, 8 an eighteenth , 16 sixteenth, so on// !!negative numbers are used to represent dotted notes,// so -4 means a dotted quarter note, that is, a quarter plus an eighteenth!!int melody[] = {// Hedwig's theme fromn the Harry Potter Movies// Socre from https://musescore.com/user/3811306/scores/4906610REST,2,NOTE_D4,4,NOTE_G4,-4,NOTE_AS4,8,NOTE_A4,4,NOTE_G4,2,NOTE_D5,4,NOTE_C5,-2,NOTE_A4,-2,NOTE_G4,-4,NOTE_AS4,8,NOTE_A4,4,NOTE_F4,2,NOTE_GS4,4,NOTE_D4,-1,NOTE_D4,4,NOTE_G4,-4,NOTE_AS4,8,NOTE_A4,4, //10NOTE_G4,2,NOTE_D5,4,NOTE_F5,2,NOTE_E5,4,NOTE_DS5,2,NOTE_B4,4,NOTE_DS5,-4,NOTE_D5,8,NOTE_CS5,4,NOTE_CS4,2,NOTE_B4,4,NOTE_G4,-1,NOTE_AS4,4,NOTE_D5,2,NOTE_AS4,4, //18NOTE_D5,2,NOTE_AS4,4,NOTE_DS5,2,NOTE_D5,4,NOTE_CS5,2,NOTE_A4,4,NOTE_AS4,-4,NOTE_D5,8,NOTE_CS5,4,NOTE_CS4,2,NOTE_D4,4,NOTE_D5,-1,REST,4,NOTE_AS4,4,NOTE_D5,2,NOTE_AS4,4, //26NOTE_D5,2,NOTE_AS4,4,NOTE_F5,2,NOTE_E5,4,NOTE_DS5,2,NOTE_B4,4,NOTE_DS5,-4,NOTE_D5,8,NOTE_CS5,4,NOTE_CS4,2,NOTE_AS4,4,NOTE_G4,-1,};// sizeof gives the number of bytes, each int value is composed of two bytes (16 bits)// there are two values per note (pitch and duration), so for each note there are four bytesint notes = sizeof(melody) / sizeof(melody[0]) / 2;// this calculates the duration of a whole note in ms (60s/tempo)*4 beatsint wholenote = (60000 * 4) / tempo;int divider = 0, noteDuration = 0;int SENSOR_PIN = 2; // doorint sensorVal; // door stateint ledPin = 8;bool playing = false;const int trigPin = 9;const int echoPin = 10;// defines variableslong duration;int distance;void setup() {// initialize serial communication at 9600 bits per second:Serial.begin(9600);// make the digital sensor's pin an input:pinMode(SENSOR_PIN, INPUT);pinMode(ledPin, OUTPUT);pinMode(trigPin, OUTPUT); // Sets the trigPin as an OutputpinMode(echoPin, INPUT); // Sets the echoPin as an Input// initialize digital pin LED_BUILTIN as an output.pinMode(12, OUTPUT);}void loop() {// Clears the trigPindigitalWrite(trigPin, LOW);delayMicroseconds(2);// Sets the trigPin on HIGH state for 10 micro secondsdigitalWrite(trigPin, HIGH);delayMicroseconds(10);digitalWrite(trigPin, LOW);// Reads the echoPin, returns the sound wave travel time in microsecondsduration = pulseIn(echoPin, HIGH);// Calculating the distancedistance = duration * 0.034 / 2;// Prints the distance on the Serial MonitorSerial.print("Distance: ");Serial.println(distance);if(distance > 5 && distance < 8 && playing == false){digitalWrite(12, HIGH); // turn the LED on (HIGH is the voltage level)// iterate over the notes of the melody.// Remember, the array is twice the number of notes (notes + durations)for(int thisNote = 0; thisNote < notes * 2; thisNote = thisNote + 2){// calculates the duration of each notedivider = melody[thisNote + 1];if(divider > 0){// regular note, just proceednoteDuration = (wholenote) / divider;}elseif(divider < 0){// dotted notes are represented with negative durations!!noteDuration = (wholenote) / abs(divider);noteDuration *= 1.5; // increases the duration in half for dotted notes}// we only play the note for 90% of the duration, leaving 10% as a pausetone(buzzer, melody[thisNote], noteDuration * 0.9);// Wait for the specief duration before playing the next note.delay(noteDuration);// stop the waveform generation before the next note.noTone(buzzer);playing = true;}digitalWrite(12, LOW); // turn the LED off by making the voltage LOWdelay(1000); // wait for a second}// read the input pin:sensorVal = digitalRead(SENSOR_PIN);// print out the state of the button:Serial.println(sensorVal);if(sensorVal == 1){digitalWrite(ledPin, HIGH);}elseif(sensorVal == 0){digitalWrite(ledPin, LOW);}// no need to repeat the melody.}*the melody code is from https://github.com/robsoncouto/arduino-songs/blob/master/harrypotter/harrypotter.ino* The fog sensor was adapted from a the tutorial found here: https://www.arduino.cc/en/Tutorial/BuiltInExamples/Blink*/
CONCLUSION
Our project goal is to let our users experience the feeling of entering the Harry Potter’s magic world. I think the result of our project is in line with my definition of interaction. Because user’s every step is closely related to the project and will trigger many sensors. But there are still some places where my project isn’t interactive. Since users can hardly find every step by themselves, we write the narrative part to lead the users’ action. Also, it only has one result, maybe it will decrease the surprise when users are playing with the project and feel a little bit bored. If I have more time, I may make my project bigger to contain more places with more different sensors. Second, I will add the chance to fail to enter Hogwarts to give users some excitement and tension. However, I am still very satisfied with my project. I learned that we should never give up, try to think things in multiple ways and always have the courage to ask others for help and learn more things we may not know from my frustration and failure. Moreover, I gain much more knowledge and senses of achievement from this project and I’m really thankful for this experience.
A full video of an user interacting with our project: