First watch some videos!
(recording your music!—“Song1”)
(And play back!—“Song1”)
(from another perspective—“Song1”)
(a long shot—“song” 2)
Function and Effect:
First of all, I felt my product was a very unconventional interaction lab project. Compared to all kinds of creative and exciting games my colleagues created, my product stresses on creating music by cooperation and exploring different possibilities, rather than on competition or following a fixed script. The function of this product is simple: 3 users control 3 kinds of instruments respectively—saxophone, xylophone and drum set. When they start, just click q to start recording and after “performing” together, they can just click e to stop recording and click w to play back if they are satisfied with their performance. At the same time, the light strip will also change the number of leds lighting up, brightness and color according to the sound of saxophone, xylophone and drum set respectively. Simultaneously, the sizes of images on the screen will also change accordingly. It challenges the traditional idea of treating human’s 5 senses as separate concepts. Instead, it tries to build a connection between hearing and sight, fully stimulating the fun of exploring music. And the “playing back” function can bring users more inspiration and joy than just letting the beautiful melody they create fade with wind. In summary, click q to start recording and one person plays saxophone, one plays xylophone and one plays the drum set. Then, click e to stop recording and click w to automatically play back and just enjoy your music and light!
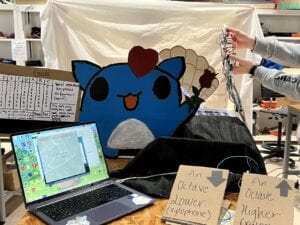
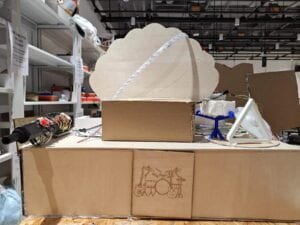
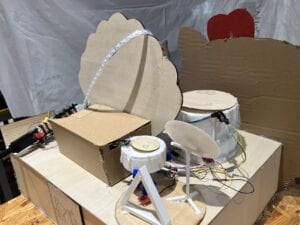
(this is crazy in size)
Feedbacks from users:
Considering this set of instruments contains well beyond 150 interconnected wires, and over 600 lines of code without any redundancy, I will call it a miracle that this project can record and play back stably, soundly and up to my original expectation. You may wonder why I’m so obsessed with building a set of instruments with recording functions, or who are the potential users of this crazy stuff—this is a question I received in the present day, and why I’m stuck with simulating acoustic instruments rather than making some more “innovative” but simpler instruments. I will say that the reason that I spare no effort to work out these time-consuming things is hiding in the concept I believe this project should embody. Definitely, there’s more feedback I received, like displaying some tutorials on the screen or hiding the wires inside the tube of the saxophone. They are definitely inspiring for future improvement as I did realize the complicated operation and fingering of saxophone make it less accessible. On IMA show, most user can play xylophone happily right after I told them how to use the pedals, and drumset as well. However, none of them acquired how to use the saxophone in such short time, so I definitely need to improve this part in the future.
Concept and beginning:
1.The start point of this journey—3 ideas: (1) Music game: the first part is similar. It contains a saxophone and drum set which can record what users have played and store them in matrices, and then it can turn it into a music game automatically (piano tile) using these matrices. The inspiration comes from realizing the difficulty of creating a song in some prevailing music games like Phigros. Users mostly can’t create a “music sheet” themselves but only can play the official one. Even some games allow them to create their own music sheet, it’s a nightmare to do so due to the high difficulty. So this product offers them an accessible and interesting method to create a chapter themselves and give them the joy of playing what they have created.
(2)Music visualization: This project is similar to the ultimate one but the only difference is in its visualization method. It aims to fix a drumhead above the speaker to project some patterns in a box. Basically, we will attach Leds on to the drumhead and with the vibration driven by the speaker, the patterns will change accordingly, and this is a multisensory experience .
(3)(ultimate version) Music visualization:It’s somehow the compromise with the reality that we don’t have that much energy to do all elements. But I add a xylophone so that users can make some “real music”. In my belief, a piano, a drum set and a string or wind instrument are enough to make a decent piece. This is why I add this additional instrument—I want the product to focus on music more, which is the core function. But I still think sound visualization is what can distinguish our interactive product from the traditional acoustic or electronic instruments, so we preserve this feature but make it simpler.
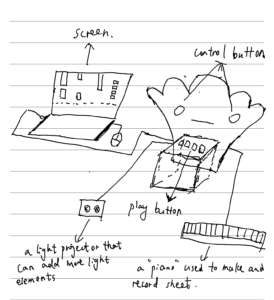
(abandoned idea)
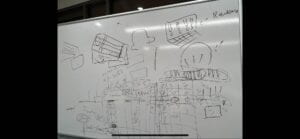
(brainstorming)
2.Concept of this project
Among all the abandoned plans, they may have different ultimate goals, like generating music games or sound visualization, but the common goal they all have is music creation. Personally, I have practiced saxophone for some years and would refer to myself as a music lover in some sense. Thus, I’m well aware of the fact that a serious music productor should use some professional synthesizer. So this product is still for a less serious purpose and less professional users. In my opinion, users don’t need to “perform” some music following music sheets, but just can randomly play something that comes into your mind with your friends, giving you the pleasure of creating something beautiful by cooperation, and offer you the opportunity to play back what you have played if you find this melody is enjoyable. So we can see this product has some advantages acoustic instruments can’t make. We normally won’t record while we are playing acoustic instruments. So normally it’s hard to grasp your fleeting inspirations if you don’t know which notes you’re playing, which is quite a pity, not to mention it’s time consuming to learn a serious instrument. This product doesn’t consume lots of time to acquire, and always allows you to hear back what you have achieved, so it can bring users without any experience in music some fun and inspiration. Unlike a complex bandstand which is hard to acquire or a musical toy which can’t play the full range, this product has both the advantages of accessibility, fun, inspiration and playability. This is also why we preserve some features of acoustic instruments.

(a professional electronic saxophone)

(my self-made electronic saxophone)
3.Inspiration I get during the journey
No idea comes out of the air. The idea of “recording” and “playing” function is a continuation of my midterm project, which failed to achieve the desired effect due to the limitation of buzzers. That time, some users complained the instruction was not clear enough, amplitude couldn’t be controlled and sound was not of good quality. This time, thanks to Processing, these problems are all addressed. And to be in line with environmental protection, I reused some laser-cutted boards from the midterm to minimize waste, like the seashell board.
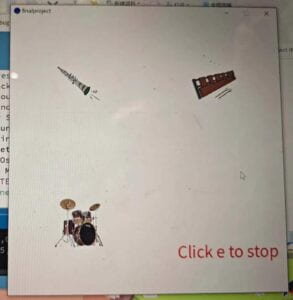
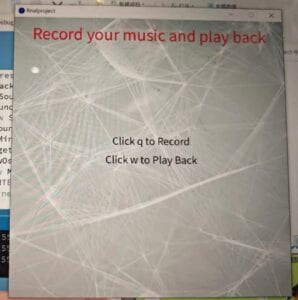
(the clear instruction on the interfaces)
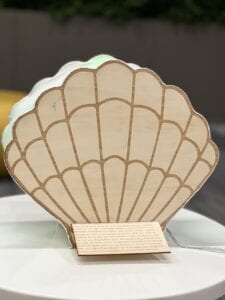
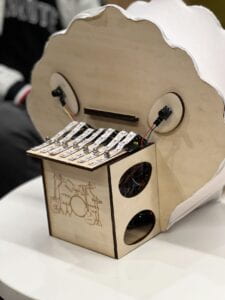
(some inspiration from the midterm project)
And if you look into the keys on the electronic saxophone carefully, you can find they are not buttons, but are similar to keys in acoustic saxophone, both in appearance and sense of touch. This idea stemmed from the paddle button in the first recitation, and due to my pursuit for improving users’ feeling, even though it’s not easy to tape so many wires on a narrow tube, I still stuck to this idea and finally made it out.
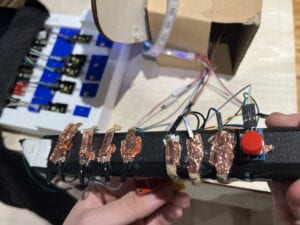
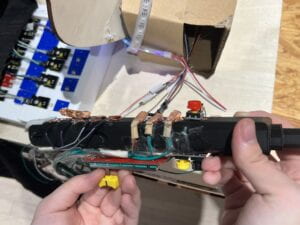
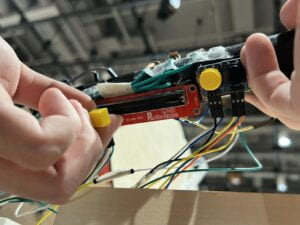
(saxophone paddle keys)
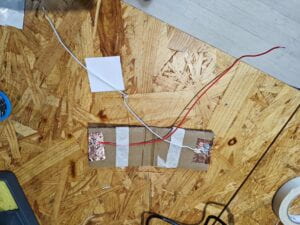
(inspiration from the first rec)
How do we realize it? —the process of production
0.Cooperation
One big improvement we made is that we have cooperation now. My teammate does the 3D printing and drawing parts and I do the designing, coding, wiring and assembling parts. Due to the high complexity of the code and wiring, I have to do these parts completely on my own. But we had lots of cooperation on the fabrication part. I mostly told my teammate the rough blueprints of these instruments and he was in charge of actually making them. Anyway, let me break down each part and interpret it!
1.Material:
I cannot simply conclude which material this product has employed. Basically, it almost employs all possible methods: 3D printing in the instrument part, laser cutting in decoration and boxes, and also cardboard to draw the cute Bugcat Capoo holding the instruction. As a technically developed project, I still want it to be artistic and aesthetic in appearance. This is why we draw this cute character to make it more vibrant and warmer, and definitely cardboard is the best candidate for painting. And as the size of this product is that big, the only possible way to make the box holding all components is to use thick woods, which also has strong stability and can withstand heavy strikes.
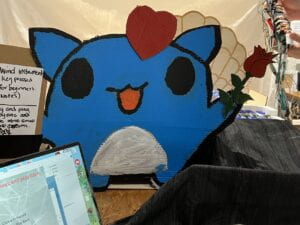
(the Bugcat for decoration)

(all kinds of materials used)
2.Interpretation of each part:
(0).The interface:
There are 3 kinds of interfaces on the display board. When the switch is in “stop” state, the program enters the interface_main() function and shows 2 lines of instructions—click q to record and click w to play back. And the background will also be a picture.
| void interface_main() {//main interface background(background0);//the background is a picture fill(0); textSize(24); text(“Click q to Record”, width / 2, height / 2 – 20); fill(0); textSize(24); text(“Click w to Play Back”, width / 2, height / 2 + 20); fill(#FF0000); // Set fill color to red textSize(38); // Set text size textAlign(CENTER); // Center-align the text text(“Record your music and play back”, width / 2, 50); } |

When the switch is in “record” or “playback” state, the program enters the interface_rp() function and the background becomes pure white with just 3 images of the corresponding instruments on each side. And the size of the image will also change with the amplitude of the corresponding instrument.

| void interface_rp(int count, int max_drum, int max_xylo) { background(255); int a = 0; int b = 0; int c =0; a = int(map(count, 0, 100, 100, 150)); b = int(map(max_drum, 0, 1030, 100, 150)); c = int(map(max_xylo, 0, 1030, 100, 150)); image(wind, 150-a/2, 150-a/2, a, a);//determine the sizes of the 3 images of the instruments according to // the state of the instruments(for xylo and drum, it’s the max // value of all the keys and for wind instrument, it’s the duration // of continuously playing) image(drum, 150-b/2, 450-b/2, b, b); image(xylo, 450-c/2, 150-c/2, c, c); text(“Click e to stop”, 470, 525); } |
When the program enters the stop state, it will play a video on the display board. To ensure executing this function only once per click, it will use “pre” to prevent over executing:
| if (pre == 0&&stop ==1) { playing = true; loading.play(); }//ensure this will be only executed once after exiting the playing or recording functions if (playing == true) { if (loading.available()) { loading.read(); } image(loading, 0, 0, width, height); //loading.play(); if (loading.time() >= loading.duration()) { playing = false; } }//just extract each frame to the screen pre = stop; |
And you may wonder what I mean by “switch”. It’s actually a function to judge the current mode.
| void Mode() { if (key == ‘q’) { record =1; } else { record = 0; }//click q and record will be 1 if (key == ‘w’) { play =1; } else { play = 0; }//click w and it will plays if (key!=‘q’&&key!=‘w’) { stop = 1; } else { stop = 0; }//stop recording or playing and return to the main interface } //detect which key you press and change the corresponding mode variable to 1 |
(1).Wind instrument:
If I can vote for the most “nightmare” part in the whole project, I will definitely vote for building this saxophone. To make the sense of pressing on a button more pleasant, I use the paddle buttons and tons of pull up buttons to detect the state of each key. However, even after re taping conductive tapes for 10 times, they still can’t perform stably enough, due to the non conductive glue on the tape. So I learned a lesson from this: the most prior concern should always be the stability of the product rather than the appearance, especially for the essential parts like the keys.


(saxo)
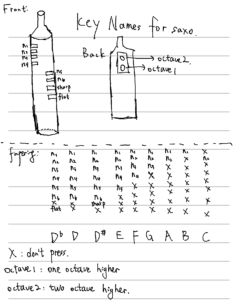
(finger chart)
(saxo solo)
Then let’s discuss the coding part. The source of the sound of this instrument is from the Sound library. Considering there are over 30 notes in total, even though uploading some online sources may result in better audio quality, including so many sound files is not a practical option. This is why I ultimately decided to use the built-in sound to simulate saxo, which is surprisingly quite similar.
This is the sine sound I employ:
| SawOsc saw; |
This is the “wind sound” function:
| void play_wind(int NOTE, int STRENGTH) { float amp = map(STRENGTH, 0, 1030, 0, 1); saw.stop(); saw.play(NOTE, amp);//play the note of the wind instrument } |
And both in Playing and Recording function, this function will be used to generate the saxo sound by inputting the note and amplitude. Please note that what the arduino sends is only which buttons you have pressed. So we need to use a turn() function to convert the state of paddle buttons to the corresponding note. Amplitude corresponds to the sound sensor. You can also find a weird variable “count”. This is to count how long this has been continuously making sound and will send it to arduino to generate some light effect.
(2). Xylophone:
Under each blue key, there’s a small piece of sponge tape covering the detection part of the force sensor. At the beginning, after doing some experiments, I found the force sensor will reveal the correct strength only if it was pressed by something soft. This is basically why we use the soft and thick sponge tape to cover it. To prevent the keys from moving from side to side, we also use nails to fix them after drilling some holes in them. Actually, I have to admit there’s a design flaw: the second row is not long enough in width to accommodate the force sensors’ wires, so these wires have to touch the keys on the first row and bring some inconvenience.
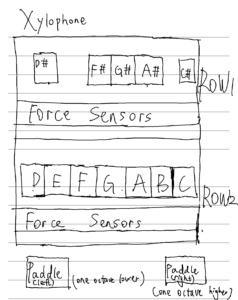
(xylophone key layout)
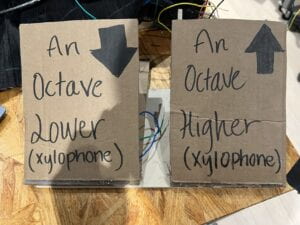
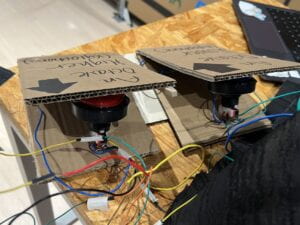
(octave pedals)
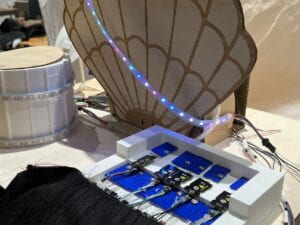
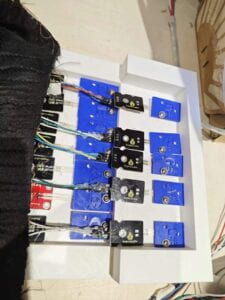
(you can see that note names are engraved on keys)
(control the octave with your foot)
(and play back, see how brightness change with sound?)
(another “song”—recording part)
(play back part)
Then I want to briefly discuss the coding part. Unlike the saxophone, the xylophone won’t make a stable sound when you strike it. Just based on your real life experience, you may realize this xylophone needs to make “a fading sound” per strike. And the harder you strike the key, the longer the duration and higher the strength of that sound are. Thus, to simplify the model, I just simply give it a linear approximation: duration = 3*strength[strength = map(the value of Force sensor,0,1030,0,1)]. To prevent over triggering, which means triggering this sound multiple times during just one strike because the duration of the strike covers several time intervals (40ms), I add an additional constraint for making a sound: it must be the first time interval during your strike on this key.
Judge whether to make a sound at this time interval:
| if (state_xylo[j-1][i]<200&&xylokey[i]>200&&j>0) {//similar to the drum part play_xylo(i, state_xylo[j][i], octave[j]); //the first term is the type of drum, the second is the strength, the third is the octave } |
The function to make xylophone sound:
| void play_xylo(int TYPE, int STRENGTH, int OCTAVE) { if (STRENGTH>0) { float strength = map(STRENGTH, 0, 1000, 0, 1); out.playNote( 0.0, strength, new SineInstrument( xylo(TYPE, OCTAVE ))); //second component is amplitude and duration. Duration = 3*amplitude(based on real life experience) //third component is the frequency of the note } } |
xylo(TYPE, OCTAVE ) :this function determines the frequency . Actually, TYPE corresponds to which key it is, and OCTAVE is up to which pedal you are stepping on. This function can convert them into the corresponding frequency.
out.playNote() is a sound function in the minim library. It can make a xylophone-like sound by inputting the strength (which determines duration) and frequency.
Unlike the Recording() part, in the Playing() function, you will find there’s one more constraint: pre2 = 0. This is to ensure that the sound function will be only executed once during one time interval. Because the updating speed in Playing() is much faster than the Recording(), before exiting one time interval(while (millis() – start < times[j])), the sound function can be updated for multiple times, thus repeatedly generating sound. In the following code, you can see that the middle part will be only executed once per j (time interval).
| pre2 = 0;
while (millis() – start < times[j]) {//judge which time interval you are at and give instruments the |
(3)Drum sets:
On the presentation day, some users commented that it’s the most appealing part. This set contains 4 instruments: bass drum, snare drum, cymbal and triangle.
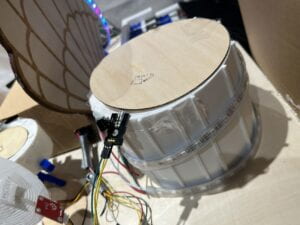
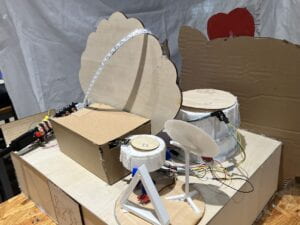
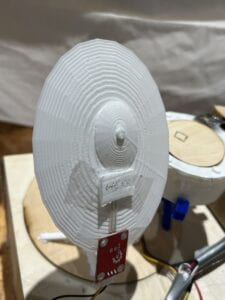
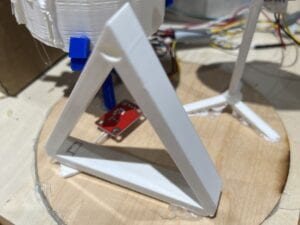
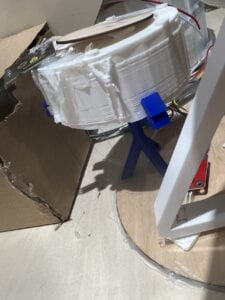
(bass drum, cymbal, snare drum and triangle)
(recording the drumset)
(and automatically playback)
Unlike the above 2 types of instruments. This set only has 4 members, meaning that it’s quite easy to just use some sound files directly. I believe this is why it has better sound quality than the other 2. Basically, the only difference with xylophone is it uses the object.play(1,amplitude) function to make sound, which is a built-in function in the sound library.
| void play_drum(int TYPE, int STRENGTH) { if (STRENGTH>0) { float strength = map(STRENGTH, 0, 1030, 0, 1); if (TYPE == 0) { bass.play(1, strength); }//The first time is bass drum if (TYPE == 1) { snare.play(1, strength); }//snare drum if (TYPE == 2) { cymbal.play(1, strength); }//cymbal if (TYPE == 3) { Triangle.play(1, strength); }//triangle } } |
However, the fabrication difficulty of the drums’ shells is high. For the 2 drums, I just put 2 thin wood boards on the drumheads. When striked, the wood boards will pressure the force sensors under and the other 2 instruments are also similar, but in a somewhat “cuter” way. Actually, one drawback of this design is that the cymbal can easily collapse due to little support, especially when someone gives it a “strong strike”. So on reflection, I think maybe the better option is to abandon the traditional appearance of the cymbal to increase stability instead.(actually, my triangle is a good example). What’s more, the size and layout of these instruments are also not reasonable enough, which definitely require further improvement.
(4)Led light strips:
Unlike the instrument part which receives values from arduino to generate some songs, the light part receives data from Processing and uses them to generate some lighting effects. Then let me clarify the structure:
saxophone:Duration of continuously playing notes—processing_value[0]-—number of leds lighting up
xylophone:the max value of all keys—processing_value[1]-—brightness of leds
drum set:the max value of all drums—processing_value[2]-—change color when the max>200(change once per strike)
(how the led light changes with different instruments)
Yeah, I have to admit the light strip is not that thrilling in a visual sense. But I believe it reveals the connectedness of these seemingly separate instruments. Not only is the position of the light strip in the middle, representing its role as the medium among all instruments, but it also coordinates all instruments’ sounds into the same context. Users are not playing separately but cooperatively—this light strip is a good reminder and witness.
3.Obstacles I encountered on the way and solutions
You may feel amazed at how complex the code and product are. This elaborate stuff definitely can’t be worked out just at your first attempt. There are so many obstacles I have encountered and some methods to address such obstacles I have already included in the Interpretation part.
Let me just list a few:
(1): Paddle key: due to some glue stuck to the keys, it’s conductivity is not that stable. So I have to replace the tapes several times. Now they are much more stable.
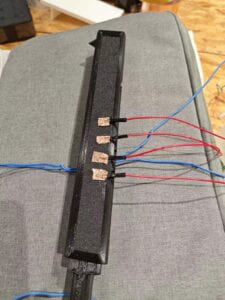
(saxophone on progress)
(2): Misuse of delay in Processing: the frame will only be refreshed at the end of the draw function, which I didn’t realize at the beginning. So at that time, my code contained some functions blocking the program, so the interface couldn’t be refreshed at all. So I have to break them down and use the draw to loop them instead of using for loop within this function.
(3): Sending and receiving at the same time: After finishing all works, I found the light strip works well in tests but never lights up in the actual execution. So I doubted it’s because the arduino didn’t receive data from processing properly, which turned out to be wrong. Ultimately I found the mistake was quite trivial and could have been avoided if I was a little bit more careful.
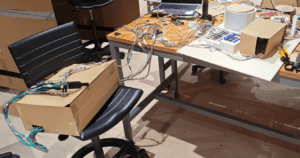
(4)Connecting and hiding all wires: It’s always boring to connect wires. But when you need to connect 150 wires, the whole thing becomes scary. I originally felt some wires are too loose and can be easily ripped out by other wires. So my solution was to use hot glue to fix them—thanks to the suggestion of one of my colleagues. Luckily, after that, none of them came off. But hiding them became a new problem, our simple solution is just to cover it with a black fabric—well, quite an efficient and safe one.
(scary wirings at the beginning)
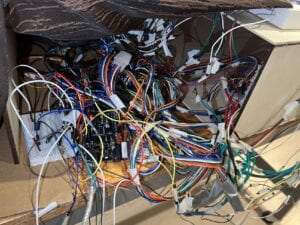
(still scary but covered by fabric at the end)
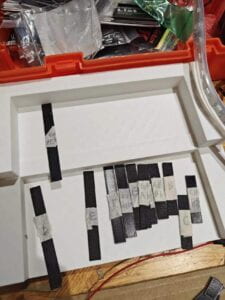
(abandoned keys due to the wrong size)
- Some problems and future improvement:
However, there remain some problems unsolved:
(1):Inaccuracy of detecting force sensor value:due to the algorithm I use, the amplitude of the sound xylo or drum make is up to the sensor value from the first time interval during the strike, which can’t fully represent the actual strength of your strike. As the value of the force sensor will gradually increase to the max of this strike with time, the sound will only use the first value that exceeds a particular threshold, which is quite inaccurate. So in future, I want to find a better algorithm to reflect the strength of a strike better.
(2)Sound sensor: this is used to detect your airflow into the tube of saxo, but it can’t work stably and return some continuous values. So I have to use a potentiometer instead. I hope I can find a better option in the future.
(3)Tutorial: Some users complain the current fingering chart is not clear enough. I may make an online tutorial in the future.
- Schematic:(due to the large number of wires, I’ll only briefly discussion the connection method)
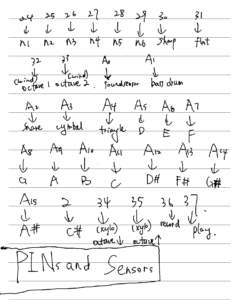


(pin—sensor) (saxophone key layout) (xylophone keys)
Word description: pin24-pin33 are used to receive data from the saxophone keys as you can see in the second chart. These paddle keys used pull-up methods to be detected. And for the xylophone and drumset parts, they all used force sensors so they are directly connected to the mega pins. And it’s the same for sound sensor. The two pedals for xylophone are connected to 34 and 35 respectively. 36 and 37 weren’t employed finally so you can ignore them.(I finally used keyboard to determine modes). Note that the microcontroller we use is Arduino mega.
Conclusion:
The goal of my project is to build a set of instruments that can bring happiness and musical inspiration to users without any experience in music. And on the testing, they just played what they liked and enjoyed the process, so I’ll say this product lives up to its goal. You can see, it’s an exhaustive project, both in the senses of coding, wiring and fabrication, but in my opinion, it’s also a meaningful one which taught me a lot. Not only it taught me the importance of cooperation and the value of organizing things systematically, always prioritizing users’ feelings into consideration and working things out piece by piece, it also made me realize the difference between the approaches employed in theoretical work and practical application. As a math student, theoretical works concentrate more on the mechanism and solving a specific problem, but in an IMA project, there’s no destination to reach. It’s more like exploring around and finding out how to achieve it rather than the mechanism of every step. For example, we don’t need to know how to achieve serial communication line by line but just use it.
Anywhy, it’s a very comprehensive and interactive project involving all kinds of techniques we learned in lectures: 3D printing, processing, arduino, circuit, laser cutting. And it also involves some creative points: like the cute “Bugcat”, the playing back function and the sound visualization light strip. It’s done by cooperation and something people can constantly interact with, using all their senses, and always receive reactions according to their inputs. All in all, I hope you also enjoy this product, and thank you for reading this documentation. If you are interested, you can read the complete version of code below.
Citation
All pictures(drumset, clarinet and xylopnone): https://www.pngsucai.com/
All soundfiles(drumset): https://www.noiiz.com/sounds
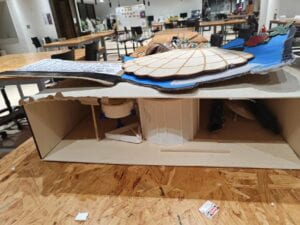
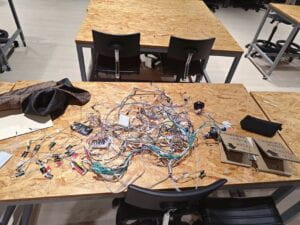
Disassembling
Full version of code(with comments)
For processing:
import processing.video.*; import ddf.minim.*; import ddf.minim.analysis.*; import ddf.minim.effects.*; import ddf.minim.signals.*; import ddf.minim.spi.*; import ddf.minim.ugens.*; import processing.sound.*; import processing.serial.*;//import some libraries PImage xylo; PImage drum; PImage wind; PImage background0; Movie loading; SoundFile bass; SoundFile cymbal; SoundFile snare; SoundFile triangle; SawOsc saw; Minim minim; AudioOutput out; Serial serialPort;//define classes class SineInstrument implements Instrument { Oscil wave; Line ampEnv; SineInstrument( float frequency ) { // make a sine wave oscillator // the amplitude is zero because // we are going to patch a Line to it anyway wave = new Oscil( frequency, 0, Waves.SINE ); ampEnv = new Line(); ampEnv.patch( wave.amplitude ); } // this is called by the sequencer when this instrument // should start making sound. the duration is expressed in seconds. void noteOn( float strength ) { // start the amplitude envelope ampEnv.activate( strength*3, 1f*strength, 0 ); // attach the oscil to the output so it makes sound wave.patch( out ); } // this is called by the sequencer when the instrument should // stop making sound void noteOff() { wave.unpatch( out ); } }//in order to control the amplitude for xylo, we need to define an instrument class with input of amplitude int ready=0;//judge whether to play the video int j =0;//time interval you are at int count = 0;//the duration of the wind instrument having continously making sound int pre2;//in Playing() function, prevent xylo and drum to be triggered too many times in one time interval int maxVal = 100000;//maximum recording time int pre;//only allow video to be shown for one time per stop int airflow;//strength of airflow(but we don't have a usable sound sensor) int NUM_OF_VALUES_FROM_ARDUINO = 31;//the length of sensor values int arduino_values[] = new int[NUM_OF_VALUES_FROM_ARDUINO];//the order of values matters.This stores what //arduino send to processing int note;//frequency of the note you play int octave[] = new int[maxVal];//the current octave xylophone at int windkey[] = new int[10]; //store the current values of the state of keys of the "flute" int drumkey[] = new int[4];//store the current analog values of the state of keys of the "drum" int xylokey[] = new int[12];//store the current analog value of the state of every xylo key int state_wind[][] = new int[maxVal][2];//the matrix for the flute,the first colume is the note and the second is the amplitude int state_drum[][] = new int[maxVal][4];//the matrix for drum int state_xylo[][] = new int[maxVal][12];//the matrix for xylo long times[] = new long[maxVal];//the mark of every time interval int timeinterval = 40;//length of time interval in recording int freqs_1[][] = { {147, 165, 175, 196, 220, 247, 262}, {156, 175, 185, 208, 233, 262, 277}, {139, 156, 165, 185, 208, 233, 247} };//first octave int freqs_2[][] = { {294, 330, 349, 392, 440, 494, 523}, {311, 349, 370, 415, 466, 523, 554}, {277, 311, 330, 370, 415, 466, 494} };//second octave,first array corresponds to the natural,second corresonds to the sharp //and third to the flat int freqs_3[][] = { {587, 659, 698, 784, 880, 123, 131}, {622, 698, 740, 831, 932, 131, 139}, {554, 622, 659, 740, 831, 117, 123} };//third octave int record = 0;//mode int play = 0;//mode long start;//store the start time int NUM_OF_VALUES_FROM_PROCESSING = 3;//how many values we will send to arduino int processing_values[] = new int[NUM_OF_VALUES_FROM_PROCESSING];// the array we will send to arduino int stop =1;//mode void setup() { size(600, 600);//size of the canvas background(137, 162, 188); xylo = loadImage("xylo.png"); drum = loadImage("drum.png"); wind = loadImage("wind.png"); background0 = loadImage("background.png"); background0.resize(width, height);//fit it to the size of canvas background(background0); cymbal= new SoundFile(this, "cymbal.wav"); bass= new SoundFile(this, "bass.wav"); triangle= new SoundFile(this, "triangle.wav"); snare= new SoundFile(this, "snare.wav"); minim = new Minim(this); out = minim.getLineOut(); saw = new SawOsc(this); loading = new Movie(this, "loading.mp4"); textAlign(CENTER, CENTER); serialPort = new Serial(this, "COM13", 115200);//don't forget to choose an available port } boolean playing = false;//when to end playing the video void Mode() { if (key == 'q') { record =1; } else { record = 0; }//click q and record will be 1 if (key == 'w') { play =1; } else { play = 0; }//click w and it will plays if (key!='q'&&key!='w') { stop = 1; } else { stop = 0; }//stop recording or playing and return to the main interface } //detect which key you press and change the corresponding mode variable to 1 void draw() { if (record==0&&play==0) { interface_main(); }//if not recording and playing, then return to main interface Mode();//update the state of Mode Keys if (j==0) { start = millis(); }//if not during recording and playing, then update the start time if (record==1&&j<maxVal) { if (j==0) { for (int n = 0; n < maxVal; n++) { for (int m = 0; m<2; m++) { state_wind[n][m] = 0; } for (int m = 0; m<4; m++) { state_drum[n][m] = 0; } for (int m = 0; m<12; m++) { state_xylo[n][m] = 0; } } }//before recording, just clear all matrices so that there won't be any data from previous recording not overlapped Recording();//execute recording function repeatedly j = j+1;//update the time interval you are at } if (play==1&&j<maxVal) { Playing(); j = j+1; }//similar as recording() if (stop == 1) { j = 0; count = 0; saw.stop(); }//when stop is clicked, then immediately turn off all voice and set count and j to be 0 so that //saw can be turned off and enable the start time to be updated if (pre == 0&&stop ==1) { playing = true; loading.play(); }//ensure this will be only executed once after exiting the playing or recording functions if (playing == true) { if (loading.available()) { loading.read(); } image(loading, 0, 0, width, height); //loading.play(); if (loading.time() >= loading.duration()) { playing = false; } }//just extract each frame to the screen pre = stop;//avoid over-executing } void Recording() {//you can start playing and it will record what you have played background(255);//we want the canvas to be white to meet the backgrounds of the images of instruments int max_drum=0;//update it each time interval so that it can represents the largest value from all drums int max_xylo = 0;// same but it represents the max value from all xylo keys times[j] = millis() - start;//record each time interval getSerialData();//update the values of the 31 sensors(in arduino_values[31]) if (j<maxVal-1) { for (int i = 0; i<10; i++) { windkey[i] = arduino_values[i]; }//first 10 are the wind keys note = turn();//convert them to a note if (count>0&¬e == 0) { count = count -4; }/*This is to count how long the wind instrument has playing until reaching 100, if it's not playing then let it decays at the same speed until 0*/ if (count<100&¬e>0) { count = count +1; } airflow = arduino_values[10];//the 11th value is for airflow state_wind[j][0] = note; state_wind[j][1] = airflow;//store the note and airflow in the jth row of state_wind[][] play_wind(note, airflow);//play a sound processing_values[0] = count;//we will send count to arduino to determine how many leds should light up for (int i = 0; i<4; i++) { drumkey[i] = arduino_values[i+11];//next 4 are for the drum part if ( drumkey[i] > max_drum) { max_drum = drumkey[i]; }// we will use it to determine whether the color of the led light strip should be changed,only //striking one drumhead will enable the color to change state_drum[j][i] = drumkey[i];//store the state of drum if (j>0) {//adding j>0 is because we have j-1 below if (state_drum[j-1][i]<200&&drumkey[i]>200) { /*only play the drum sound once per strike*/ play_drum(i, state_drum[j][i]);//the first term is the type of drum, the second is the strength} } } } processing_values[1] = max_drum;//we will send the max strength from all drums to arduino /*below is the xylo part*/ octave[j] = 1;//without pressing on any buttons, it's the second octave by default if (arduino_values[27]==0) { octave[j]=0; }//27th value corresponds to the left button, if pressed, then later note will be one octave lower if (arduino_values[28]==0) { octave[j]=2; }//28th value corresponds to the right button, if pressed, then later note will be one octave higher for (int i = 0; i<11; i++) { xylokey[i] = arduino_values[i+15];//the next 12 values are for xylo key values if (xylokey[i]>max_xylo) { max_xylo = xylokey[i]; }//also get the max of all xylo key values and send it to arduino to determine the brightness of //the led strip state_xylo[j][i] = xylokey[i]; if (j>0) { if (state_xylo[j-1][i]<200&&xylokey[i]>200&&j>0) {//similar to the drum part play_xylo(i, state_xylo[j][i], octave[j]); //the first term is the type of drum, the second is the strength, the third is the octave } } } processing_values[2] = max_xylo;//send it to arduino to determine the brightness of light strip } sendSerialData(); interface_rp(count, max_drum, max_xylo);//update the interface delay(timeinterval);//delay time interval } void sendSerialData() { String data = ""; for (int i=0; i<processing_values.length; i++) { data += processing_values[i]; // if i is less than the index number of the last element in the values array if (i < processing_values.length-1) { data += ","; // add splitter character "," between each values element } // if it is the last element in the values array else { data += "\n"; // add the end of data character "n" } } // write to Arduino serialPort.write(data); print("To Arduino: " + data); // this prints to the console the values going to Arduino } void getSerialData() { while (serialPort.available() > 0) { String in = serialPort.readStringUntil( 10 ); // 10 = '\n' Linefeed in ASCII if (in != null) { print("From Arduino: " + in); String[] serialInArray = split(trim(in), ","); if (serialInArray.length == NUM_OF_VALUES_FROM_ARDUINO) { for (int i=0; i<serialInArray.length; i++) { arduino_values[i] = int(serialInArray[i]); } } } } }//get the 31 sensor data from the arduino int turn() {// this function can turn the keys you press to the corresonding note int a = 0;//a represents sharp(1)/natural(0)/flat(2) int b = 0;//b represents note int NOTE=0; if (windkey[0]==1&&windkey[1]==1&&windkey[2]==1&&windkey[3]==1&&windkey[4]==1&&windkey[5]==1) { b=0; } //111111 is D else if (windkey[0]==1&&windkey[1]==1&&windkey[2]==1&&windkey[3]==1&&windkey[4]==1&&windkey[5]==0) { b=1; } //111110 is E else if (windkey[0]==1&&windkey[1]==1&&windkey[2]==1&&windkey[3]==1&&windkey[4]==0&&windkey[5]==0) { b=2; } //111100 is F else if (windkey[0]==1&&windkey[1]==1&&windkey[2]==1&&windkey[3]==0&&windkey[4]==0&&windkey[5]==0) { b=3; } //111000 is G else if (windkey[0]==1&&windkey[1]==1&&windkey[2]==0&&windkey[3]==0&&windkey[4]==0&&windkey[5]==0) { b=4; } //110000 is A else if (windkey[0]==1&&windkey[1]==0&&windkey[2]==0&&windkey[3]==0&&windkey[4]==0&&windkey[5]==0) { b=5; } //100000 is B else if (windkey[0]==0&&windkey[1]==1&&windkey[2]==0&&windkey[3]==0&&windkey[4]==0&&windkey[5]==0) { b=6; } //010000 is C else { return 0; } //if no defined note is detected, then return a freq of 0 if (windkey[6]==1) { a=1; }//sharp if (windkey[7]==1) { a=2; }//flat //if no octave key is pressed, then is the first octave if (windkey[8]==1) { NOTE = freqs_2[a][b]; } else if (windkey[9]==1) { NOTE = freqs_3[a][b]; } else { NOTE = freqs_1[a][b]; }//give the corresponding frequency return NOTE; } void Playing() { background(255); int max_drum =0; int max_xylo = 0; pre2 = 0;// this is unique to Playing() which is to ensure each play() functions for each instrument // will be only executed once per time interval if (state_wind[j][0]==0&&count>0) { count = count -4; } if (state_wind[j][0]>0&&count<100) { count = count+1; } processing_values[0] = count; while (millis() - start < times[j]) {//judge which time interval you are at and give instruments the // corresonding sound in the state[][] matrices if (pre2 == 0) { play_wind(state_wind[j][0], state_wind[j][1]); } for (int i=0; i<4; i++) { if (state_drum[j][i]>max_drum) { max_drum = state_drum[j][i]; } if (j>0) { if (state_drum[j-1][i]<200&&state_drum[j][i]>200&&pre2 == 0&&j>0) { play_drum(i, state_drum[j][i]); } } } processing_values[1] = max_drum; for (int i = 0; i<12; i++) { if (state_xylo[j][i]>max_xylo) { max_xylo = state_xylo[j][i]; } if (j>0) { if (state_xylo[j-1][i]<200&&state_xylo[j][i]>200&&pre2 == 0&&j>0) { play_xylo(i, state_xylo[j][i], octave[j]); } } } processing_values[2] = max_xylo; delay(floor(timeinterval*0.2));//delay a very short time to avoid any bugs due to too fast execution pre2 = 1;//turn it to be 1 so that each play function will only be entered once in each time interval }//note that the last interval is blank, so all sound will be turned out sendSerialData(); interface_rp(count, max_drum, max_xylo);//the interface is the same as the recording one }//play back what you have recorded void play_drum(int TYPE, int STRENGTH) { if (STRENGTH>0) { float strength = map(STRENGTH, 0, 1030, 0, 1); if (TYPE == 0) { bass.play(1, strength); }//The first time is bass drum if (TYPE == 1) { snare.play(1, strength); }//snare drum if (TYPE == 2) { cymbal.play(1, strength); }//cymbal if (TYPE == 3) { triangle.play(1, strength); }//triangle } } void play_xylo(int TYPE, int STRENGTH, int OCTAVE) { if (STRENGTH>0) { float strength = map(STRENGTH, 0, 1000, 0, 1); out.playNote( 0.0, strength, new SineInstrument( xylo(TYPE, OCTAVE ))); //second component is amplitude and duration. Duration = 2*amplitude(based on real life experience) //third component is the frequency of the note } } void play_wind(int NOTE, int STRENGTH) { float amp = map(STRENGTH, 0, 1030, 0, 1); saw.stop(); saw.play(NOTE, amp);//play the note of the wind instrument } int xylo(int TYPE, int OCTAVE) { int x; int y; if (TYPE==7) {//first key on the second line is D sharp x=1;//means "sharp" y=0;//first one in the sharp notes array } else if (TYPE==8) {//second is F sharp x=1; y=2; } else if (TYPE==9) {//third is G sharp x=1; y=3; } else if (TYPE==10) {//fourth is A sharp x=1; y=4; } else if (TYPE==11) {//fifth is C sharp(unluckily it's broken) x=1; y=6; } else { x=0; y = TYPE;//every key on the first row corresponds to the natural note in sequence } if (OCTAVE ==0) {//which octave it's in return freqs_1[x][y]; } if (OCTAVE ==1) { return freqs_2[x][y]; } if (OCTAVE ==2) { return freqs_3[x][y]; } return 0; } void interface_main() {//main interface background(background0);//the background is a picture fill(0); textSize(24); text("Click q to Record", width / 2, height / 2 - 20); fill(0); textSize(24); text("Click w to Play Back", width / 2, height / 2 + 20); fill(#FF0000); // Set fill color to red textSize(38); // Set text size textAlign(CENTER); // Center-align the text text("Record your music and play back", width / 2, 50); } void interface_rp(int count, int max_drum, int max_xylo) { background(255); int a = 0; int b = 0; int c =0; a = int(map(count, 0, 100, 100, 150)); b = int(map(max_drum, 0, 1030, 100, 150)); c = int(map(max_xylo, 0, 1030, 100, 150)); image(wind, 150-a/2, 150-a/2, a, a);//determine the sizes of the 3 images of the instruments according to // the state of the instruments(for xylo and drum, it's the max // value of all the keys and for wind isntrument, it's the duration // of continously playing) image(drum, 150-b/2, 450-b/2, b, b); image(xylo, 450-c/2, 150-c/2, c, c); text("Click e to stop", 470, 525); } void music_interface() { out.playNote( 0.0, 0.9, 97.99 ); out.playNote( 1.0, 0.9, 123.47 ); out.playNote( 2.0, 2.9, "C3" ); out.playNote( 3.0, 1.9, "E3" ); out.playNote( 4.0, 0.9, "G3" ); out.playNote( 5.0, "" ); out.playNote( 6.0, 329.63); out.playNote( 7.0, "G4" ); out.setNoteOffset( 8.1 ); out.playNote( "G5" ); out.playNote( 987.77 ); }
Here is the arduino part:
#include

#define NUM_LEDS 120                    // How many LEDs in your strip?
#define DATA_PIN 3                      // Which pin is connected to the strip's DIN?
#define NUM_OF_VALUES_FROM_PROCESSING 3 /* CHANGE THIS ACCORDING TO YOUR PROJECT */

/* This array stores values from Processing */
int processing_values[NUM_OF_VALUES_FROM_PROCESSING];
int pre;
int pre_on;
int numberOfLightsOn;
float brightness;
int colors;
CRGB leds[NUM_LEDS];
//RGB leds[color()];
int sensor_pin[31] = { 24, 25, 26, 27, 28, 29, 30, 31, 32, 33, A0, A1, A2, A3, A4, A5, A6, A7, A8, A9, A10, A11, A12, A13, A14, A15, 2, 34, 35, 36, 37 };  //for the keys of the flute(first10),detect airflow(11),read values from the drums(the 12-15th),xylophone(last 12)
int sensor[31];                                                                                                                                            //store the values to this array

void setup() {
  Serial.begin(115200);
  for (int i = 0; i < 29; i++) { pinMode(sensor_pin[i], INPUT); }
  pinMode(sensor_pin[29], INPUT_PULLUP);
  pinMode(sensor_pin[30], INPUT_PULLUP);
  FastLED.addLeds<NEOPIXEL, DATA_PIN>(leds, NUM_LEDS);
  FastLED.setBrightness(3);
  test();

}  //setup the pins


void loop() {
  for (int i = 0; i < 10; i++) {
    sensor[i] = digitalRead(sensor_pin[i]);

  }  //read the first 10 digital pins
  for (int i = 10; i < 27; i++) {
    sensor[i] = analogRead(sensor_pin[i]);

  }  //read the next 5 analog pins
  for (int i = 27; i < 31; i++) { sensor[i] = digitalRead(sensor_pin[i]); }
  for (int i = 0; i < 31; i++) {
    Serial.print(sensor[i]);
    if (i < 30) { Serial.print(","); } } //print them into the serial monitor Serial.println(); delay(40);//the above part just send the sensor value to processing getSerialData();//receive 3 values from processing numberOfLightsOn = int(map(processing_values[0], 0, 100, 20, NUM_LEDS));//how many leds we will turn on //is determined by how long wind instrument has been continously making sound brightness = map(processing_values[2], 0, 1030, 10, 200); //it's determined by the max of the xylo key values if (processing_values[1] > 200) {
    colors = 1;
  } else {
    colors = 0;
  }// if there is at least one drum part exceeds 200 in value, then change color for all leds

  if (colors == 1 && pre == 0) {
    for (int i = 0; i < numberOfLightsOn + 1; i = i + 1) {
      leds[i] = CRGB(random(255), random(255), random(255));
    }//make sure each strike on drums will only change color once
  } else {
    for (int i = pre_on; i < numberOfLightsOn + 1; i = i + 1) {
      leds[i] = CRGB(random(255), random(255), random(255));
    }
  }//and also update the newly lit up leds' colors

  FastLED.setBrightness(brightness);//set brightness according to the max of xylo keys
  for (int i = numberOfLightsOn + 1; i < NUM_LEDS; i = i + 1) {
    leds[i] = CRGB(0, 0, 0);
  }//turn the remaining keys to be all black

  FastLED.show();
  pre = colors;
  pre_on = numberOfLightsOn;//remember the previous value of leds turned on
}

void test() {
  for (int i = 0; i < NUM_LEDS; i = i + 1) {
    leds[i] = CRGB(255, 0, 0);
  }
  FastLED.show();
  delay(2000);
  for (int i = 0; i < NUM_LEDS; i = i + 1) {
    leds[i] = CRGB(0, 0, 0);
  }
  FastLED.show();
}//turn on all leds to be red at the begining to make sure they work well

void getSerialData() {
  static int tempValue = 0;
  static int valueIndex = 0;
  while (Serial.available()) {
    char c = Serial.read();
    // switch - case checks the value of the variable in the switch function
    // in this case, the char c, then runs one of the cases that fit the value of the variable
    // for more information, visit the reference page: https://www.arduino.cc/en/Reference/SwitchCase
    switch (c) {
      // if the char c from Processing is a number between 0 and 9
      case '0' ... '9':
        // save the value of char c to tempValue
        // but simultaneously rearrange the existing values saved in tempValue
        // for the digits received through char c to remain coherent
        // if this does not make sense and would like to know more, send an email to me!
        tempValue = tempValue * 10 + c - '0';
        break;
      // if the char c from Processing is a comma
      // indicating that the following values of char c is for the next element in the values array
      case ',':
        processing_values[valueIndex] = tempValue;
        // reset tempValue value
        tempValue = 0;
        // increment valuesIndex by 1
        valueIndex++;
        break;
      // if the char c from Processing is character 'n'
      // which signals that it is the end of data
      case '\n':
        // save the tempValue
        // this will b the last element in the values array
        processing_values[valueIndex] = tempValue;
        // reset tempValue and valueIndex values
        // to clear out the values array for the next round of readings from Processing
        tempValue = 0;
        valueIndex = 0;
        break;
    }
  }
}
Leave a Reply