Documentation of Recitation 2
Circuit 1: Fade
According to the circuit-building part of the provided instructions,I built the first circuit with an LED, two cables, one resistor, one breadboard and one Arduino UNO. I used a cable to connect the positive end of the LED to digital output pin 9. Then I connect the negative leg in order with a 220 ohm resistor and the ground. After connecting the elements, I searched for the “Fade” code in Arduino IDE and uploaded it to my Arduino. Then the LED began to fade.
Circuit 2 : ToneMelody
To build this circuit, I connected the digital output pin 8, a buzzer, and the ground with 2 cables. Then I followed the instruction to upload the example code of tonemelody to my Arduino. As a result, I heard a little piece of melody made by the buzzer.
Circuit 3:Speed Game
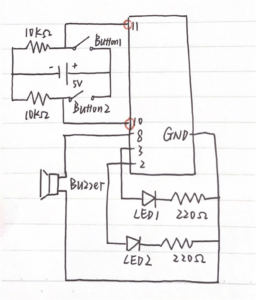
According to the layout diagram through the provided link, me and my partner worked together on one breadboard to built the circuit. It went smoothly since we only needed to follow the detailed instruction. After connecting it, we copied the code into my Arduino IDE. We then opened up the Serial Monitor in the Arduino IDE to see the result of the game.
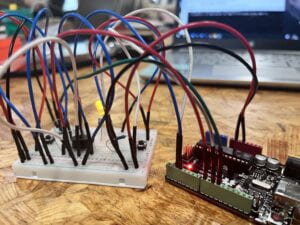
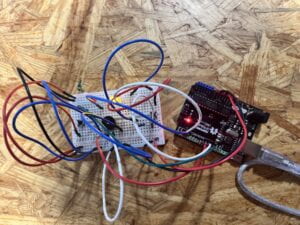
the schematic : (Actually this is the hardest part for me and I’m still not sure whether the schematic is correct.)
 To make the game more interesting, we then switched the pushbuttons with the DIY paddles we made last week and resetted the red button for another game.
Answer to Question1:
“Author and game programmer Chris Crawford has a great definition for it: interaction is “an iterative process of listening, thinking, and speaking between two or more actors.” Most physical co mputing projects (and most computer applications in general) can be broken down into these same three stages: listening, thinking, and speaking—or, in computer terms: input, processing, and output…Input transducers (sensors), such as switches and variable resistors, convert heat, light, motion, and sound into electrical energy.”
To make the game more interactive, we can replace the pushbuttons with two small crank handles. Each time we take a full turn of the crank handle can be considered as one push on the button. Thus, to win the game, players should turn the handle for 10 times as fast as they can. It takes more time and makes the operation of the game more comlex, which is a more complicated and interactive form of the “input” stage.
Answer to Question2:
The 10 kOhm resistor here works as a pull-own resistor to effectively control current flow from digital pins to the ground at a low level, so that we always read LOW when the button is not pressed.
Answer to Question3:
“Classic engineering relies on a strict process for getting from A to B; the Arduino Way delights in the possibility of getting lost on the way and finding C instead. This is the tinkering process — playing with the medium in an open-ended way and finding the unexpected. ..We believe that it is essential to play with technology, exploring different possibilities directly on hardware and software— sometimes without a very defined goal. Reusing existing technology is one of the best ways of tinkering. Getting cheap toys or old discarded equipment and hacking them to make them do something new is one of the best ways to get to great results. ”
Banzi, Massimo, and Michael Shiloh. Getting Started with Arduino : The Open Source Electronics Prototyping Platform, Maker Media, Incorported, 2014.
Project: MagicPAPER
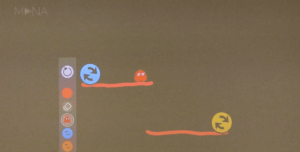
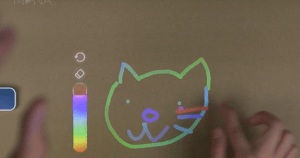
“MagicPAPER is an integrated shadow- art hardware device enabling touch interaction on kraft paper. We preserve the comfortable touch of the traditional paper and allow users to combine physical paintings or virtual tools to the kraft paper to realize physical touch interaction.”
团队成员/Team members:吴琴/Qin Wu 王思睿/Sirui Wang 王嘉元/Jiayuan Wang 余陈美/Chenmei Yu 尹杨茂竹/Maozhu YinYang
The project, MagicPAPER, can be used as an example for the Arduino Way project. Based on but not limited to the regular and conventional use of kraft paper, the project allows us to play with the material , and explore more possible functions of the paper. In this project, we use the cheap and accessible kraft paper to make something new- it can be a game, fast mask-changing, dimension door, playing the piano, etc. This project is actually exploring the unexpected but possible in an open-ended way. Therefore, I think this project can explain the idea of Arduino way.
