Task 1 :Build the Circuits
In this task, me and my partner were asked to incrementally build a circuit, using the provided materials.
In step1, we used a five volt battery, a buzzer, a button, 3 cables and a breadboard to connect the circuit. We first connected the two ends of the battery to the left two lines on the breadboard, positive to positive end, and negative to negative end. The connection to the buzzer was successful after inserting one end of the cable to the positive line and the other end to the same row as the buzzer. But when it came to the button, we didn’t know the right way to insert it into the breadboard. With the help of Professor Gottfried and fellows, we learned that each side of the button has two connectors which are able to let the current flow. We put the button in the middle with two connectors on one side inserted into the left part of the breadboard and the other side into the right part. After this step, we then connected the buzzer and the button in order. Finally, we heard the sound made by the buzzer when pressing the button.
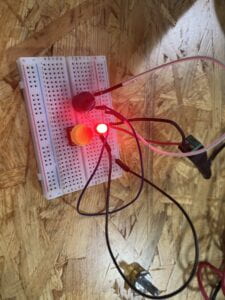
In step 2, we needed to add a branch circuit to the previous one which contains cables, a 220 Ω resistor, and an LED. At first, we mistakenly inserted the negative end of the LED to a dot between the button and the power, which resulted in the LED running constantly. Realizing this, we changed the negative end of the LED to a dot between the cable and the flow-in connector of the button. Thus, the current of this new circuit was able to flow through the button successfully. At the end of this step, we pressed on the button, and the buzzer and the LED both worked.
In step 3, another circuit was required. Refering to the information at the end of the document, we learned to vertically place the POT, connecting one end to the LED and the other to the register. However, it was not until I reread the instructions again that I found that we actually mistook the circuit. According to the instruction, we should have connected LED1 and the resistors directly to the power, letting it run constantly, but what we actually did was connect the new circuit to the button, which meant it only lighted up when we pressed the button. Regardless, the whole circuit worked and the current successfully flew through all the elements, just in a different way.
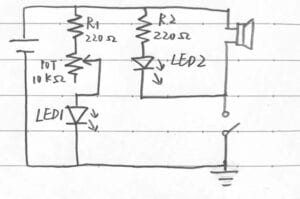
how the circuit was required to be built
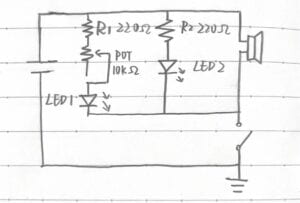
how we connected it
Reflection:
- I have to slow down to read the instruction more carefully.
- The result of our recitation actually deepens my understanding of different ways a circuit can be connected, including parallel connection and series connection.

Task 2: Build a Switch
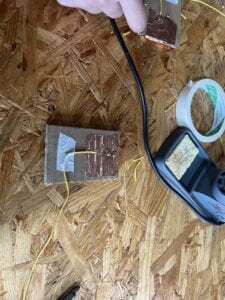
Building such a paddle switch is my very first experience of soldering. We were first taught how to use tools to cut a cable, and the different ways to simply cut off a cable and remove the plastic wrapping the metal wire. After fixing the cable to a cardboard, it came to the soldering work. Using an electronic iron to melt one end of a metal wire, we tried to combine the cable with the copper tape stuck on the cardboard. The melting process didn’t go well at first, and that’s when Professor Rudi suggested scraping the cusp in the metal net to polish it. Following his instruction, we finally succeeded in finishing the soldering work
Task3: Switch the switches and send a meaasage
We replaced the button with our DIY switch and tried several times to check if it worked well. Then we watched the video and referred to the code chart, wondering what message to send. We simply decided to send “DUCK” since a toy duck in the room caught my eye at the moment. We also communicated with the group next to us by using Morse Code and decoded their message, which was “LOVE”.
Answer to Question 1:
to limit the amount of the current in this circuit to protect the LED
Answer to Question 2: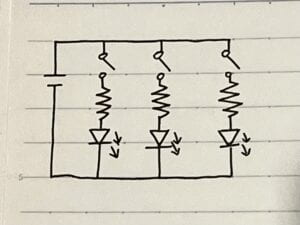
Answer to Question 3:
“[I]nteraction: a cyclic process in which two actors alternately listen, think, and speak. If we want to get academic, I suppose we could replace listen, think, and speak with input, process, and output.”
In the circuit we built in the recitation, I think the process where we pressed the button or the paddle to let the current flow through all the elements and let them work includes interactivity. In this process, the circuit received (listen) the action of our pressing the button, the current flew (think) through the cables and arrived to each element in order, and then the LED went on and the buzzer rang (speak), which formed a complete process of “interaction”.
Answer to Question 4:
