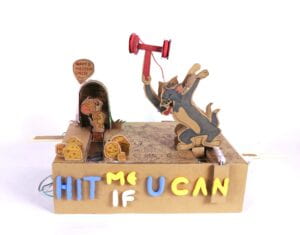
HIT ME IF YOU CAN, Xiangyi Zhong, Gottfried
CONTEXT AND SIGNIFICANCE
新媒体舞剧—《墨生》SEE THE WORLD OF SOUND.Oct.11.2018.
作品主创: 程雨阳(导演/纪录片出品人)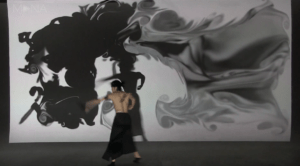
联合创作: 聂晓光(技术支 持)
舞蹈演员: 石飞洋(青年舞蹈演员)
https://www.manamana.net/video/detail?id=3646#!zh
This project triggered my understanding of interaction because I can find the interaction in 2 pairs: one between music and the ink-painting; the other between the actor and ink-painting. My understanding of this is the actor is interacting with the music, using the ink-painting as a special medium to visualize the interaction preocess. Therefore, our project wants users to interact with each other, using the game installation we built as media. This is in line with my definition of interaction, that is, two or more sides–whether human or other objects in a space and time–communicate, affect, react, and respond to each other in a certain way. We designed our interactive project in the form of a game to make it more interesting and attractive. This simple game can help players release pressure and get some fun experience. I also think using the iconic figures of Tom and Jerry would be fun wishing it could bring back memories of watching that comic animation.
CONCEPTION AND DESIGN:
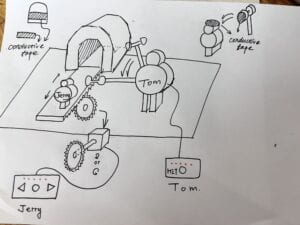
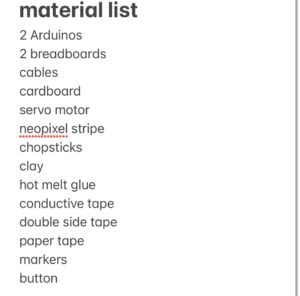
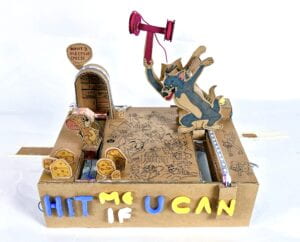
Our interaction design is letting users control the two characters’ movements to win, and this requires us to build tracks for both figures. At first, my partner and I decided to use a 3D printer or laser-cutting machine to make a gear to complete the horizontal movements of Tom and Jerry. But they were not suggested in the instruction. Also, cardboard was the most convenient material by hand, easy to cut and trim into different shapes. Therefore, we simplified our project to using cardboard to build a track and a movable handle to move Tom and Jerry.
To strengthen the handle in case it gets broken in games, we asked for advice from professors, fellows, and learning assistants, whose suggestions included using metal pieces stuck underneath the handle, injecting hot melt glue into the gaps of the side of the cardboard, and sticking chopsticks on both sides of the handle. But to get metal pieces, we would have to cut an empty can, the slices of which could be sharp and curled. Besides, since we already fixed the handle into the base box, it could be rather troublesome to stick the metal pieces from both ends, which would also be easy to form a weak point in the middle. Injecting glue into every single gap was infeasible as well. So we adopted the chopstick one in the end.
FABRICATION AND PRODUCTION:
We started by making the frame of Tom and Jerry, using two pieces of cardboard with the same shape. After that, I spent some time drawing the characters on the cardboard and connected the frames with cardboard in between to thicken the figures, which was also for enlarging the contact area of Jerry’s head and the hammer, and leaving space for the servo motor. Then we built the pedestal, measured and cut the tracks, and then set and fixed the handle under the figures with glue. When the basic structure was done, we moved on to the part of using a button to control the servo motor to drive Tom’s arm and the hammer to move. We struggled with the code and asked fellows for help. Then we made several adjustments to our code to test the most suitable speed and angle for waving the hammer. Here is the code for this part.(I colored the part used to adjust the speed)
#include ;// pushbutton pin const int buttonPin = 7; // servo pin const int servoPin = 9; Servo servo; // create servo object to control a servo // twelve servo objects can be created on most boardsint pos = 0; int prepos = 0; // variable to store the servo position void setup() { servo.attach(servoPin); Serial.begin(9600); // Set up the pushbutton pins to be an input: pinMode(buttonPin, INPUT);} void loop() { // local variable to hold the pushbutton states int buttonState; //read the digital state of buttonPin with digitalRead() function and store the //value in buttonState variable buttonState = digitalRead(buttonPin); // Serial.println(buttonState); //if the button is pressed increment counter and wait a tiny bit to give us some //time to release the button if (buttonState == HIGH && pos == 0) { for (pos = 0; pos <= 100; pos += 4) { // goes from 0 degrees to 180 degrees // in steps of 1 degree servo.write(pos); // tell servo to go to position in variable 'pos' delay(15); Serial.println(pos); // waits 15 ms for the servo to reach the position } for (pos = 100; pos >= 0; pos -= 4) { // goes from 180 degrees to 0 degrees servo.write(pos); // tell servo to go to position in variable 'pos' delay(15); // waits 15 ms for the servo to reach the position } } else if (buttonState == LOW) { pos = 0; } }
The code of this part was adapted from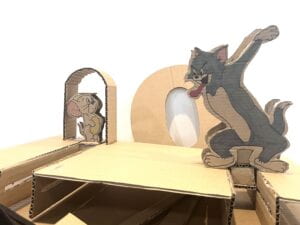 https://docs.arduino.cc/learn/electronics/servo-motors
The next step was making the switch with conductive tape. In fact, we did that many times because the tape was easy to fall off the cardboard, as a result of which we got much more familiar with soldering…
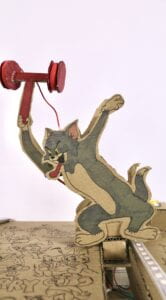
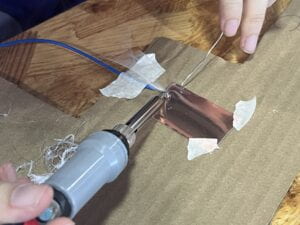
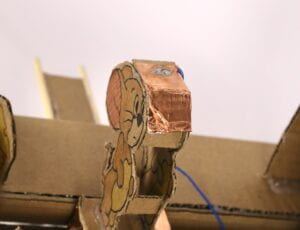
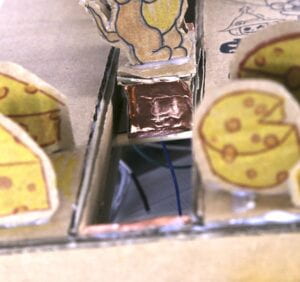
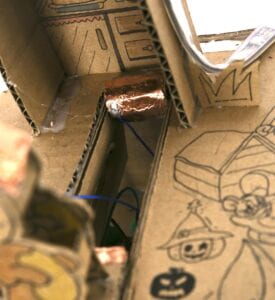
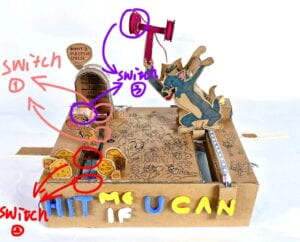 switches in final presentation
We then began the feedback part. At first, we decided to use LEDs and buzzers on both sides to show the result of the game. But we didn’t finish that by user test and found this feedback was not obvious at all. So this was the first problem remaining to be solved. We also had some problems with the game rule, like how to make the difficulty for both players to win more balanced, because since then all Jerry needed to do was to escape to the mouse hole and touch the switch once, which was too easy to win.
We had some ideas for better feedback after noticing some other projects using neopixels stripe. For the second problem, we received a lot of creative and helpful suggestions during the user test, including adding a shield for Jerry, removing the mousehole to let Jerry keep escaping, and counting how many times Tom hits Jerry… In the end after discussion, we decided to regulate the times Jerry gets out to the cheese and goes back to the mouse hole. In our setting, Jerry needed to reach the cheese side and go back to the hole 3 times to get 3 pieces of cheese. We had planned to refer to the similar coding part in the previous recitation since we didn’t have any better ideas. But Professor Gottfried instructed us to achieve that:
int mouseScore = 0; int mouseSensor1; int mouseSensor2; int catSensor; int lastMouseSensor = 0; // which sensor was last activated #include <Adafruit_NeoPixel.h> #define PIN 6 // On Trinket or Gemma, suggest changing this to 1 #define NUMPIXELS 60 // Popular NeoPixel ring size Adafruit_NeoPixel pixels(NUMPIXELS, PIN, NEO_GRB + NEO_KHZ800); void setup() { pinMode(2, INPUT_PULLUP); // mouse is at home pinMode(3, INPUT_PULLUP); // mouse is picking up cheese pinMode(4, INPUT_PULLUP); // cat hits the mouse pixels.begin(); // INITIALIZE NeoPixel strip object (REQUIRED) pixels.clear(); // Set all pixel colors to 'off' Serial.begin(9600); } void loop() { mouseSensor1 = !digitalRead(2); mouseSensor2 = !digitalRead(3); catSensor = !digitalRead(4); Serial.println(catSensor); if (mouseSensor1 == HIGH) { // mouse got home if (lastMouseSensor == 2) { mouseScore = mouseScore + 1; } lastMouseSensor = 1; } if (mouseSensor2 == HIGH) { // mouse picks up cheeselastMouseSensor = 2;}
To improve the feedback, we adopted Adafruit NeoPixel. Professor Gottfried instructed us on how to control different LEDs and relate this to the “mouse score”. Later that day I asked Professor Minsky for her advice for using the neopixels stripe, and she proposed two ways: one is to cut the stripe LEDs into two stripes and separately connect them to the circuit; the other is to fix the two ends of the LED stripe on Jerry and Tom’s sides, hide the middle part, and use code to control LEDs in different sides to light up. We adopted the latter one which was easier and would not break our materials. We also kept the waterproof plastic due to safety concerns. Then we asked Professor Rudi to show the LED feedback more brilliantly and managed to keep one half bright and the other half dark if either player successfully connected the switch.
if (mouseScore > 0) {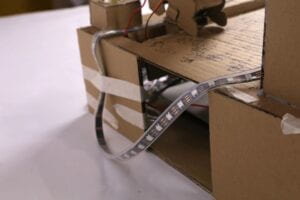 pixels.setPixelColor(6, pixels.Color(0, 32, 0));
pixels.show(); // Send the updated pixel colors to the hardware.
}
if (mouseScore > 1) {
pixels.setPixelColor(7, pixels.Color(0, 32, 0));
pixels.show(); // Send the updated pixel colors to the hardware.
}
if (mouseScore > 2) {
pixels.setPixelColor(8, pixels.Color(0, 32, 0));
pixels.show();
delay(500);
pixels.rainbow();
for (int i = NUMPIXELS / 2; i < NUMPIXELS; i++) { // For each pixel...
// pixels.Color() takes RGB values, from 0,0,0 up to 255,255,255
// Here we're using a moderately bright green color:
pixels.setPixelColor(i, pixels.Color(0, 0, 0));
}
// pixels.setPixelColor(10, pixels.Color(0, 32, 0)); // Send the updated pixel colors to the hardware.
// mousewin();
// pixels.rainbow();
delay(300);
}
if (catSensor == HIGH) {
pixels.rainbow();
for (int i =0; i < NUMPIXELS/2; i++) { // For each pixel...
// pixels.Color() takes RGB values, from 0,0,0 up to 255,255,255
// Here we're using a moderately bright green color:
pixels.setPixelColor(i, pixels.Color(0, 0, 0));
}
pixels.show();
delay(300);
}
}
// void mousewin(){
// for(int i; i < 16; i++){
// pixels.setPixelColor(i, pixels.Color(0, 32, 0));
// }
// pixels.show();
// }
pixels.setPixelColor(6, pixels.Color(0, 32, 0));
pixels.show(); // Send the updated pixel colors to the hardware.
}
if (mouseScore > 1) {
pixels.setPixelColor(7, pixels.Color(0, 32, 0));
pixels.show(); // Send the updated pixel colors to the hardware.
}
if (mouseScore > 2) {
pixels.setPixelColor(8, pixels.Color(0, 32, 0));
pixels.show();
delay(500);
pixels.rainbow();
for (int i = NUMPIXELS / 2; i < NUMPIXELS; i++) { // For each pixel...
// pixels.Color() takes RGB values, from 0,0,0 up to 255,255,255
// Here we're using a moderately bright green color:
pixels.setPixelColor(i, pixels.Color(0, 0, 0));
}
// pixels.setPixelColor(10, pixels.Color(0, 32, 0)); // Send the updated pixel colors to the hardware.
// mousewin();
// pixels.rainbow();
delay(300);
}
if (catSensor == HIGH) {
pixels.rainbow();
for (int i =0; i < NUMPIXELS/2; i++) { // For each pixel...
// pixels.Color() takes RGB values, from 0,0,0 up to 255,255,255
// Here we're using a moderately bright green color:
pixels.setPixelColor(i, pixels.Color(0, 0, 0));
}
pixels.show();
delay(300);
}
}
// void mousewin(){
// for(int i; i < 16; i++){
// pixels.setPixelColor(i, pixels.Color(0, 32, 0));
// }
// pixels.show();
// }Here is the code of the whole feed back part:
int mouseScore = 0;
int mouseSensor1;
int mouseSensor2;
int catSensor;
int lastMouseSensor = 0; // which sensor was last activated
#include <Adafruit_NeoPixel.h>
#define PIN 6 // On Trinket or Gemma, suggest changing this to 1
#define NUMPIXELS 60 // Popular NeoPixel ring size
Adafruit_NeoPixel pixels(NUMPIXELS, PIN, NEO_GRB + NEO_KHZ800);
void setup() {
pinMode(2, INPUT_PULLUP); // mouse is at home
pinMode(3, INPUT_PULLUP); // mouse is picking up cheese
pinMode(4, INPUT_PULLUP); // cat hits the mouse
pixels.begin(); // INITIALIZE NeoPixel strip object (REQUIRED)
pixels.clear(); // Set all pixel colors to 'off'
Serial.begin(9600);
}
void loop() {
mouseSensor1 = !digitalRead(2);
mouseSensor2 = !digitalRead(3);
catSensor = !digitalRead(4);
Serial.println(catSensor);
if (mouseSensor1 == HIGH) {
// mouse got home
if (lastMouseSensor == 2) {
mouseScore = mouseScore + 1;
}
lastMouseSensor = 1;
}
if (mouseSensor2 == HIGH) {
// mouse picks up cheese
lastMouseSensor = 2; }
if (mouseScore > 0) {
pixels.setPixelColor(6, pixels.Color(0, 32, 0));
pixels.show(); // Send the updated pixel colors to the hardware.
}
if (mouseScore > 1) {
pixels.setPixelColor(7, pixels.Color(0, 32, 0));
pixels.show(); // Send the updated pixel colors to the hardware.
}
if (mouseScore > 2) {
pixels.setPixelColor(8, pixels.Color(0, 32, 0));
pixels.show();
delay(500);
pixels.rainbow();
for (int i = NUMPIXELS / 2; i < NUMPIXELS; i++) { // For each pixel...
// pixels.Color() takes RGB values, from 0,0,0 up to 255,255,255
// Here we're using a moderately bright green color:
pixels.setPixelColor(i, pixels.Color(0, 0, 0));
}
// pixels.setPixelColor(10, pixels.Color(0, 32, 0)); // Send the updated pixel colors to the hardware.
// mousewin();
// pixels.rainbow();
delay(300);
}
if (catSensor == HIGH) {
pixels.rainbow();
for (int i =0; i < NUMPIXELS/2; i++) { // For each pixel...
// pixels.Color() takes RGB values, from 0,0,0 up to 255,255,255
// Here we're using a moderately bright green color:
pixels.setPixelColor(i, pixels.Color(0, 0, 0));
}
pixels.show();
delay(300);
}
}The feedback code was adapted from the tutorial ones in the neopixels library.
Up to then, we were basically finished.Then for decoration, we used clay to show the name of our project and did some drawings on the surface of the box underneath so that it wouldn’t look too dull. I agree that other forms of decoration like printing out the patterns on paper and sticking them to the cardboard would bring about a better visual effect. But that would cause inharmony in our project because the two figures were hand-painted at first.
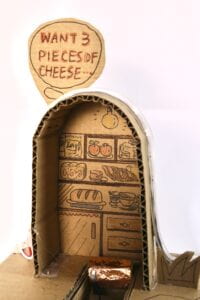
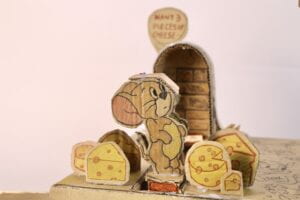
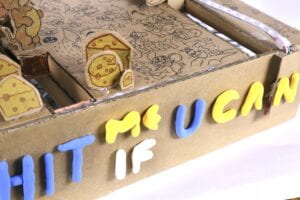 our decoration
Most of the work was done together by me and Yanran. My personal contribution could be the painting and the neopixels feedback.
CONCLUSIONS:
Our goal is to let users play the game by controlling two characters’ movements. In our project, participants use the project as media to interact with each other. One player uses the handle to control Jerry to move back and force, finishing 3 round trips to win; the other player uses the handle to move Tom and clicks the button to wield the hammer to hit Jerry. Each time Jerry finishes one round trip, which means he gets one piece of cheese, one LED on the top of the mouse hole shines. Once three LEDs shine, the LEDs on Jerry’s side will present a rainbow-colored light, showing Jerry wins. Once Tom’s hammer touches Jerry’s head, the LEDs on Tom’s side light up to show Tom wins.
There is still a lot to be improved, especially in the feedback part. For example, we can add buzzers and speakers to play different tones when one player wins, or add a vibration motor to imitate being hit by the hammer. In addition, it seems still easy for Jerry to win, so we may accelerate the speed of the falling hammer so that the game can be more thrilling.
Looking back at how we made these all things from a draft to a real game, I feel surprised, proud, and grateful. During the process of designing and building it, my partner and I got discouraged by the setbacks many times and struggled to come up with better, and also practical ideas for users to interact with our project. Personally, I have to admit that I easy to lack self-confidence (even in something I am good at), think negatively, and feel self-doubt. But it was after this project that I found I can make efforts to help with something even in the field that I was not familiar with or skilled in. I feel satisfied seeing people absorbedly play the game and enjoy hearing their cheers after winning, which shows they are attracted by our project and are willing to try it. I believe the biggest reward I get from this project is a step towards self-confidence and the bravery to explore the unknown.I sincerely appreciate all the professors, fellows, learning assistants and classmates for their help, suggestions, and encouragement.
ANNEX:

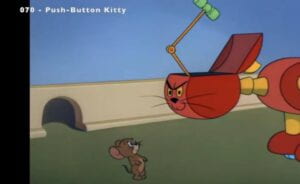
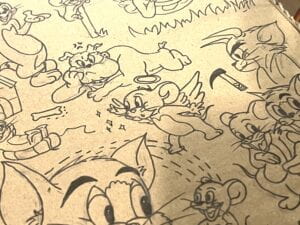
 the figure reference screenshots from Tom and Jerry, Wikipedia
Project inspiration and reference:
William , H., & Joseph , B. (1940). Tom and Jerry. cartoon. Retrieved October 30, 2022.
We used the character design of Tom and Jerry, and the comic fight between the two iconic adversaries.
