This week, I and my partner Cissy built actuators and mechanisms together. The two of us divided the work, I was responsible for cutting and pasting the cardboard, and she was responsible for connecting the circuit. We had a great time working together and finished the first part very quickly, so we had a long time to refine our personalized part and change different parts of the code to see what the difference would be.
Step1: Build the circuit
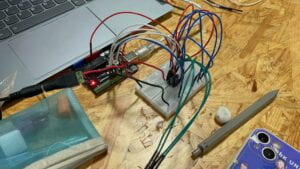
We should make sure that we orient the IC in the correct position. The pin to the left is pin 1, and the diagram beside depicts how the other pins are numbered. Also, we connected a USB protector to Cissy’s computer because this week, we worked with higher voltages, if the circuit was not built properly by the provided schematics, there is the potential to damage the computer without USB protection. Thus, Cissy followed the steps shown on the website one by one.
This is what the circuit looks like.
Step2: Build a cardboard mechanism!
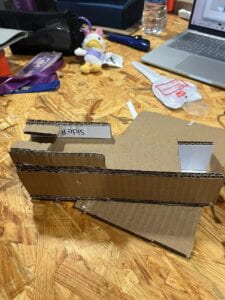
I taped the template to the cardboard and then cut the cardboard into different sections along the solid lines(with a cutting mat in a bid not to damage the table). Then I glued the cardboard together with a glue gun. I put the gun on the abandoned cardboard so that it would not damage the table. But I made a mistake, I glued the Side Rail at first, then I found the top cardboard could not be stuck in. But luckily the glue didn’t cool down so fast and I re-glued them in place.
Here is how I cut the cardboard. And what the mechanism looks like.
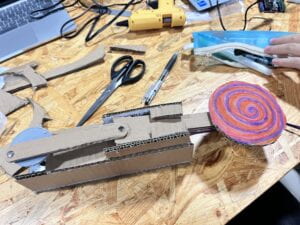
At the same time, Cissy finished the circuit part and helped me. She put the rivets into the shaft adapter. And then, we unplugged the stepper motor from our breadboard since it will be embedded in our cardboard mechanism, and we reconnected later. (This was hard because there were 4 wires and we tried not to miss connect them.)
And finally, we got this!
This video shows how the motor works.
When we put the motor in, it didn’t work at first because it got stuck. We adjusted the angle, and it can run in a circle smoothly.
See the error version:
Step 3
I drew a lollipop and my partner drew a dog’s head. We changed the code to make the delay time 0, and it looked like the dog is continuously licking the lollipop.
We changed different parts of the code, for example, to change the speed of the motor rotation. We changed it from 60 to 100, and it spins faster, as in the video below.
We also changed the angle of rotation from 500 to 200, and it spins less, as in the video below.
Additional Questions
Question 1: Choose an art installation mentioned in the reading ART + Science NOW, Stephen Wilson (Kinetics chapter). Post your thoughts about it and make a comparison with the work you did during this recitation. How do you think that the artist selected those specific actuators for his project?
Chico MacMurtrie/Amorphic Robot Works, The Drumming and Drawing Subhuman, 2000. This computer-controlled pneumatic robotic sculpture performs on the drums by moving its hands in a style similar to the human drummer. This project is very interesting and I think it has a slightly different motor than what we do. Our motor can only do the simple spinning and needs to build cardboard to complete a series of coherent movements, while this robot can make different movements and even play drums. There is beauty and elegance in the movement itself. When selecting a specific actuator, the creator has to consider whether the robot’s movements are realistic and anthropomorphic, and how often it hits the drum. The rhythm of the different joints of the robot needs to cooperate to have an aesthetic sense.
Question 2: What kind of mechanism would you be interested in building for your midterm project? Explain your idea using a sketch (conceptual or technical) with a list of materials that you plan to use. Include details about the ways that you expect the user to embrace in physical interaction with your project. In particular, explain how would your motor (or motors) with a mechanism will be different than using animation on a digital screen.
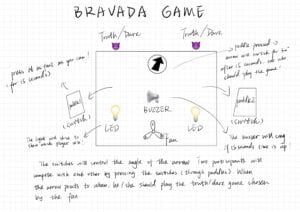
I want to create a game with interactivity. I will use a DC motor to control my fan, a motor to control the angle of rotation of the arrow, and two clapping claps to fix my paddle switch, I also need a buzzer and two small LED lights. The switch completes an operation when the user shakes clapping clap. Within 15 seconds, the two players will compete to see who can clap more times to control the direction of rotation of the arrow (controlled by the motor). When the time is up, the buzzer will sound and the LED will indicate who has won! Using a physical motor will be more realistic than the animation on the electronic screen, which also allows the game player to better experience interactivity. Also, the sound played by the buzzer and the clapping will add more fun.
These are my sketches:
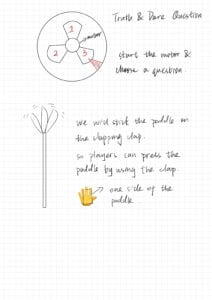
I will put them all in the box and stick the turnplate on cardboard to make it look more beautiful.