BEWARE OF THE DOG!
Ruilin Wu & Steve Lu
Instructed by Rudi
A. Conception & Design
1. Explanation of Concept
Actively engaging digital and analog media, Be Aware of the Dog attempts to provide a seamless experience for the audience to perceive a dog from two distinct perspectives. On top of that, the project ambitiously(boastfully) explores new forms of interaction.
2. Conception

Initially, our idea was to make a physical fluffy dog and its digital twin presented on the screen. Unfortunately, we couldn’t justify the choice of having two dogs at the same time. During the talk with our instructor Rudi, I was inspired and proposed the idea of interacting with a digital dog with physical approaches, and later substantiated the approaches into pulling the leash and feeding bones.
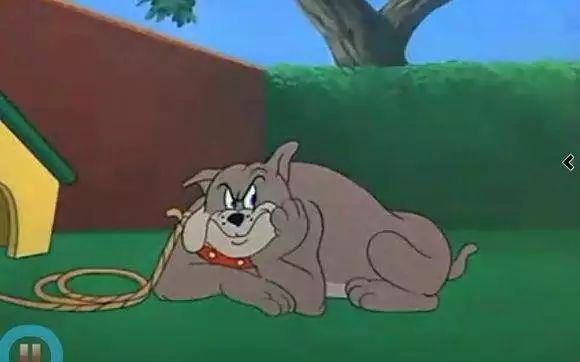
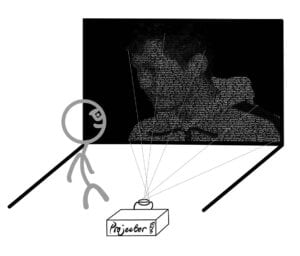
The leash pulled my thought further to the cartoon series Tom&Jerry, in which I remembered a scene where Tom is pulling a long rope to him, believing there to be something good on the other end of the rope, while it turns out to be The Dog and Tom then gets his ass beaten up. The way Tom&Jerry play with the plot, setting up the suspense and afterward breaking your expectancy reasonably, gave me a hint on what we can achieve in our project. The dog should look huge and fierce in shadow, but eventually, turn out to be a lovely dog out of the shadow.
3. The Interaction Expected & The Corresponding Decisions on Design
The interaction that we are trying realize is a unique interactive narration, with unexpected surprises, just like those one may encounter in Disneyland. We expected users to interact with our project through the leash and the bowl. We took the affordance of our design seriously.
In terms of the leash, we planned to have the leash pulled away from the user gradually, evoking their attention as well as interest in the leash. Later, we found it even better if some textual hint in the design could be involved. On one hand, textual information sets the tone and background of the interaction; on the other hand, texts should clearly anchor interactivity.
Moving on to the dog bowl, we thought the existence of a dog bowl should have given a message clear enough for the audience to feed the dog. We also hinted at the audience in other ways. A dogbone is hung on the dog’s house in the animation, which resembles the looking of the dogbone we offered our audience. Plus, the bones were put right in front of the dog bowl. On account of the above, just in case, we followed the same pattern and provided the audience with an extra textual hint on the screen.
4. User Test & Adaptions
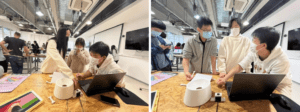
The users learned about our project idea, tested the food bowl, and viewed the animated pictures during the user testing session. In all honesty, the suggestions and comments made by the users are very motivating. Margaret, the instructor, advised that we consider what feelings the users would have that might motivate them to take the second step. In order to prevent users from being scared away by the prior ominous shadow and refusing to feed the dog, we made the adorable puppy leave the house before they could feed it a bone. However, one student questioned how the prompts would fit into our project. We gave it some considerable thought. Using inspiration from the video game Minecraft, we gave the puppy values for hunger and happiness, showing when it is in that state and prompting people to give it a bone. It turns out that both modifications work well and are successful.
One of the things that we were really hesitating about is whether we should leave a hole in the middle of the dog bowl or not. Leaving a hole there adds extra clarity for users to interact with, but somehow isn’t cool enough. Not leaving the hole then requires another mechanism to move the cover around for the bone to drop. We decided to consult our users regarding the unsettled dispute. We’ll discuss this in the following section.
B. Fabrication & Produciton
1. Animation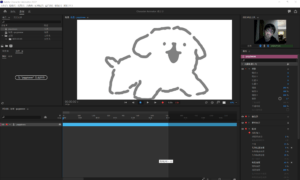
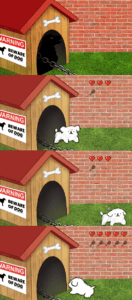
We started to produce the animation first, and didn’t finish it till very late. Given the notable significance animation played in our project, we put some effort into it. The first technical solution we turned to is Adobe Character Animator, in which I created a puppet whose limbs can be maneuvered around and whose head can tilt corresponding to the movement of my head. The solution was pretty mature except for its particular movement as a four-leg creature. I mean, the three legs that you can see here worked perfectly. The sad thing is that the hidden fourth leg didn’t always disappear. When the puppy moves around, his legs work in turn. My limited technical capability couldn’t solve the temporal overlapping.
So, instead, Rin decided to draw the animation out frame by frame. It was a painstaking process which I will not elaborate on here, but her hard work should be appreciated. Anyway, in terms of the design, there were a few things on the layout that we were extra cautious when dealing with:

Backdrop. We tried to keep the background simple so that users wouldn’t be distracted.
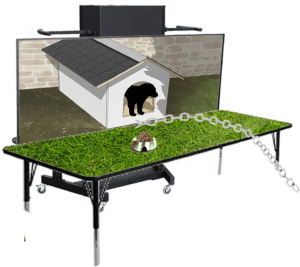
The grass. Rin painted the grass this way specifically to fit the physical grass, that we bought to lay on the table.
Dog house. We put the house right in the front, instead of somewhere far away. We preferred it this way because we wanted the audience to feel as if the interaction were happening right in front of them, at the intersection of the grass.
Movement of the dog. The exact position where the dog stops to eat is designed to fit the location of the actual dog bowl.
The anger & hunger progress bar. The idea is proposed by Rin. She felt there lacked a smooth transition between the angry dog and the hungry dog. Similarly, during the user test, professor Margaret Minsky also pointed out the discontinuity in emotion.
Why would people want to feed a dog that looks aggressive?
Taking them into account, genius Rinrin came up with the idea of hunger and anger value, giving a crystal clear message that the dog is hungry. Besides, throughout the design, we spared no effort in making the puppy as adorable as possible. You know when puppies get super cute, even their aggression and offense could be interpreted as being cute. Fair enough, people should like to soothe an angry cuuuutttteee puppy. Consequently, we were convinced that the contrastive transition from scary dog to cute puppy ought to have debunked the fear already.
You can picture how people would sigh with relief seeing the cute puppy running out, can’t you?
2. Leash
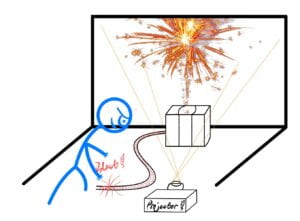
I have always wanted to make users feel like there’s a real dog at the other end of the leash. So, I borrowed a stepper motor from the equipment room. The reason why I went with the stepper is that the servo motors available were not powerful enough to pull the leash. Though perhaps I could have bought some better motors online, I slacked off a little bit and turned to the easiest way out.
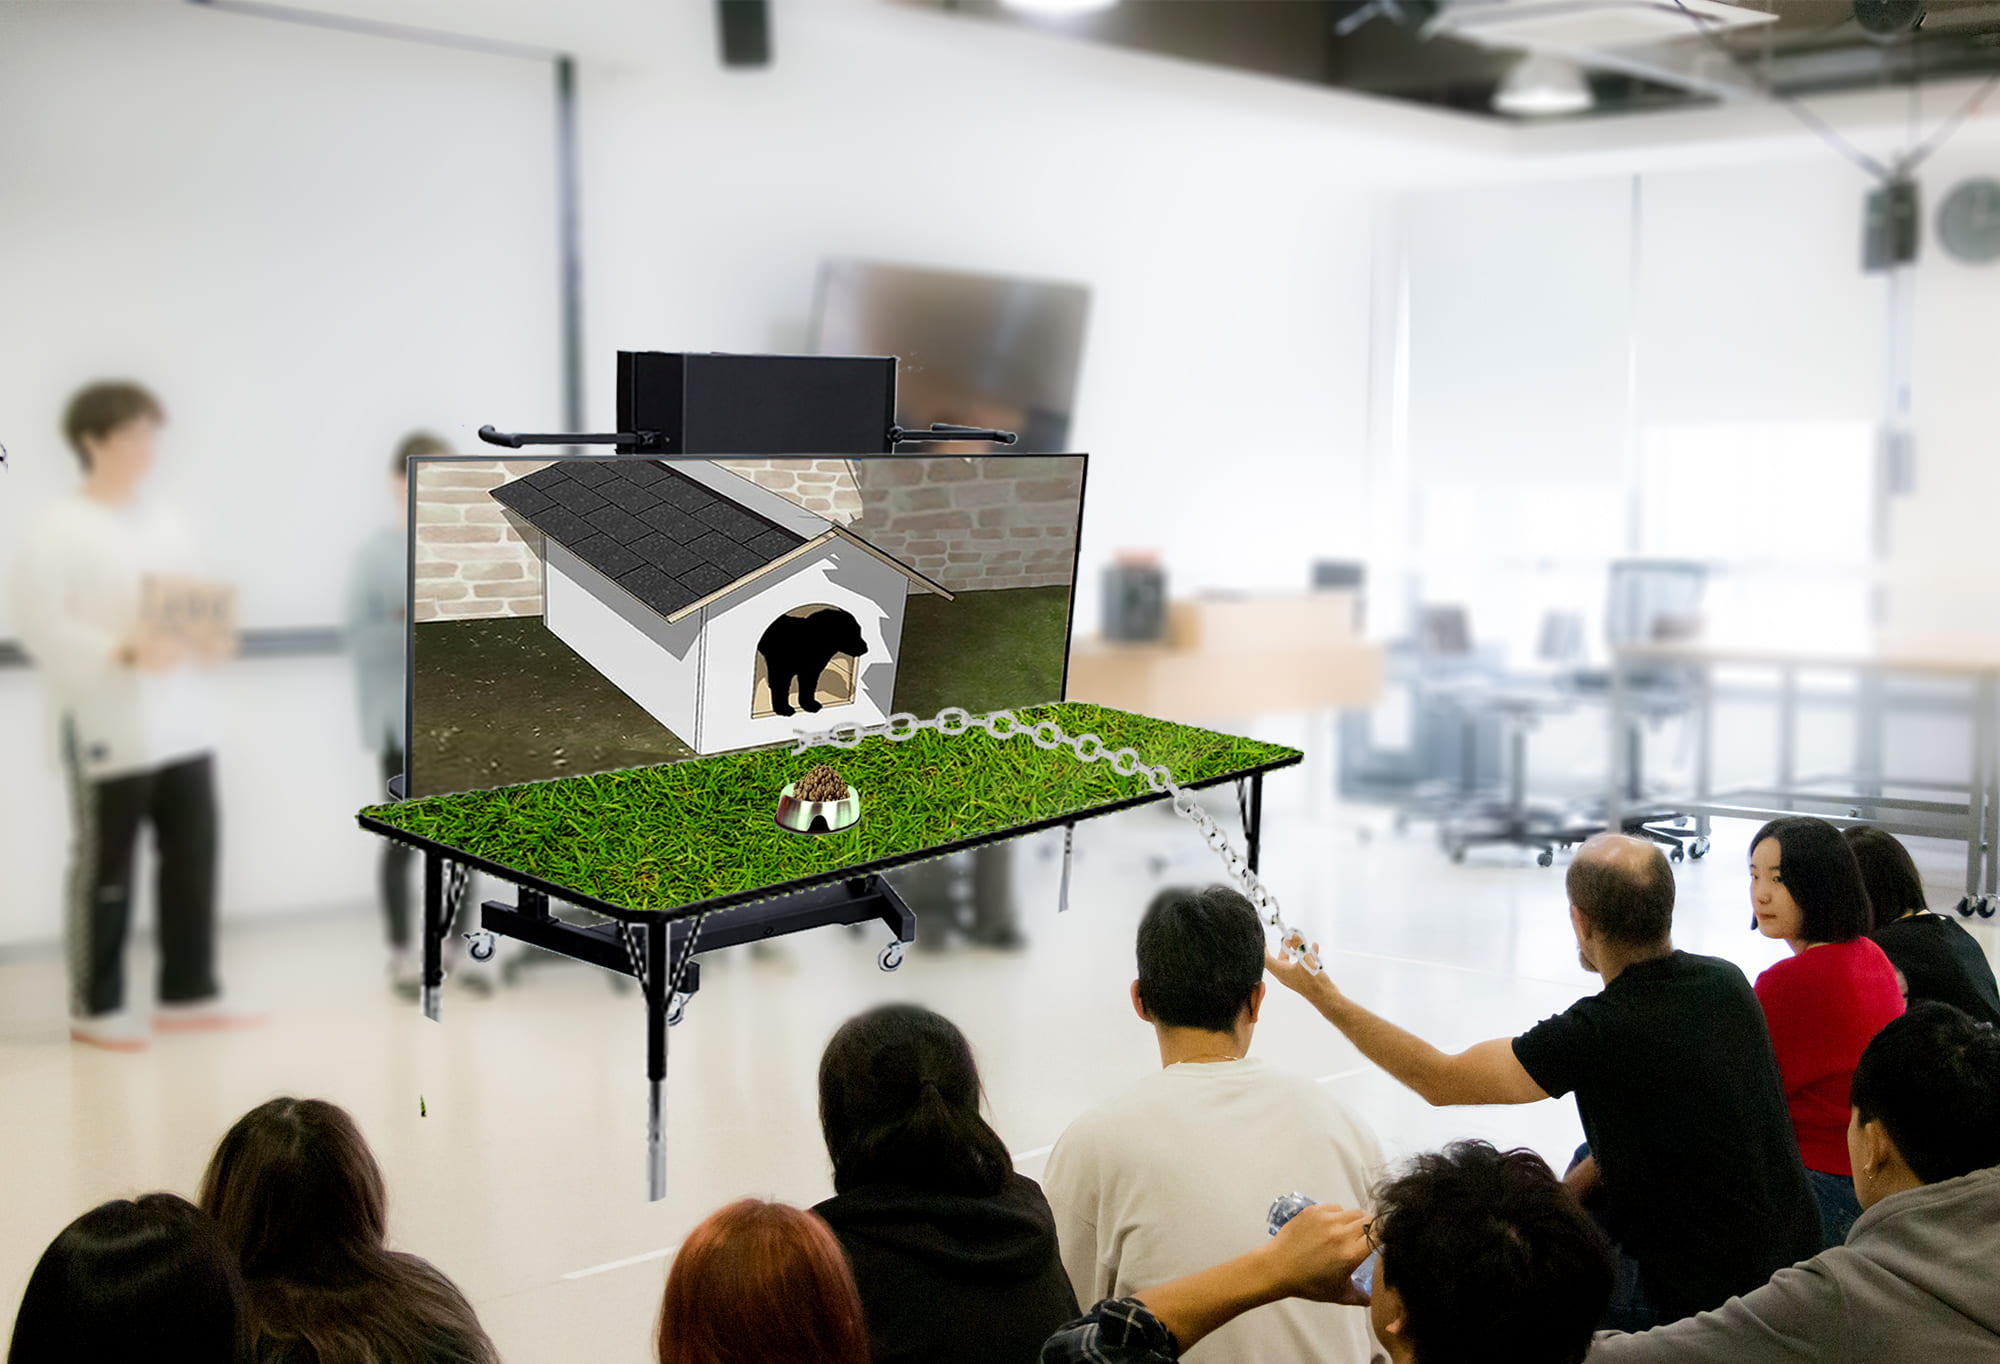
Initially, I tried to control the output of the motor according to how much the user was pulling the leash against the motor. I thought about quantifying the power of the motor’s use. Unfortunately, as I looked into the detailed mechanism of the stepper, I found it completely over my head. There is a lot of intricate physics involved and I couldn’t be sure how the power of the motor varies according to the load. Though I may look into them or conduct some experiments to figure it out myself, I rejected the proposal because of the tight schedule. Similarly, I considered using a force sensor to do the work, but the only available type of force sensor here was a pressure sensor. They don’t work well in my situation.
So, the alternative I thought about to sense the pulling of the leash is to measure its displacement, for which I pictured two ways.
First, is to use a potentiometer.
 I took the empty roll of the 3D printing filaments and found that they may serve as a perfect pulley for the leash. I would be able to know how far the user had pulled the leash if I rolled the leash around the filament role and mounted the whole structure to a centered spindle whose axis is connected to a potentiometer, as well as the stepper motor. Although the stepper could only turn the roll for one revolution due to the structure of the potentiometer, it will allow the leash to travel a remarkably long distance, if the roll is big. Eventually, the plan was abolished because I was afraid that the stepper motor may not be powerful enough to drive the whole, as I thought about its feasibility in physics.
Secondly, plan B, also the one I actually adopted in the presentation of our project, is to use a sliding rheostat. No longer had to worry about the turning limit of the potentiometer, the design largely alleviated the burden on the stepper motor, while running the risk that only a limited amount could the leash be pulled. A string connects the end of the chain, tied around the slider, and is attached to the stepper’s turning wheel. Here’s how it works. In its position by default, the slider is placed down its end closer to the stepper. When the leash is pulled, the string pulls the slider towards the other end of the bar. Once it reaches the end of the bar, it triggers a signal for processing to start the play (namely jumping the video to where the second stage is). Meanwhile, the signal also triggers the stepper to pull the leash back, which 1. stop the signal 2. prepare the mechanism for next interaction.
3. Dog bowl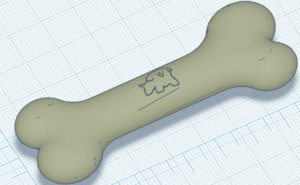
The magic of our project is all hidden inside the dog bowl. Its function is quite straightforward, taking the bones in and nothing else. Notwithstanding the simple job, you may find the bowl quite intricate. So frankly, I did run a bit off the trail on the way and wasted some time and materials. Why don’t I tell you the story bit by bit?
- Dog bone
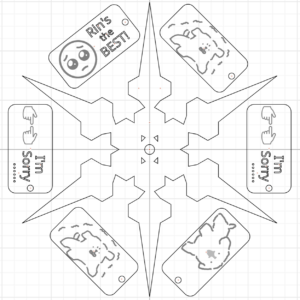
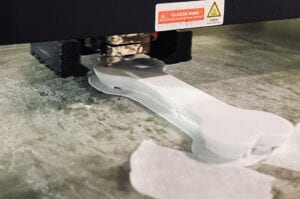
It all began with the dog bone in the design. In the hopes that the 3D printer would produce a realistic, adorable puppy on the bone, I altered the size of the library model before engraving it on the bone. Naturally, things just became blurry. This demonstrates that the accuracy of 3D printing is fairly constrained. The fine detail might not be portrayed the way we would like. In addition, there is no way that you cannot notice the layers here. I took my time polishing the bones. Frankly, given how minor of a part bones are playing in our project and how much time I invested, it’s not the best use of time. There was unquestionably a mismatch.
- Detector
The detector I conceived while cooking the bones was an FSR (pressure sensor). Honestly, it was the very first thing I made throughout the project. I checked its parameter and decided to connect the FSR in series with a 1Mohm resistor so that the voltage would show a difference, big enough to be told by Arduino Uno. That’s not wise work, as I reflected on it right now. Two reasons. 1. I spent two to three hours that afternoon, trying to solder everything together. I personally graded the work inefficient because I didn’t know the perfect soldering environment in 823 at that time, and I wasted much time perfecting the solder, which ALWAYS makes things much worse; 2. Despite all the effort, the bone wasn’t heavy enough to trigger a proper response in the FSR. (I thought about embedding a metal component in the middle of the bone during the printing). Even if it worked, the response curve of resistance is initially non-linear, thus it will quickly increase, adding more difficulty.
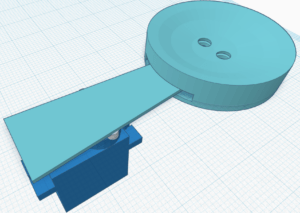
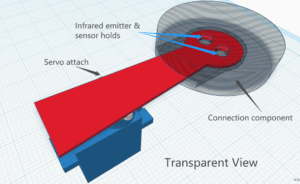
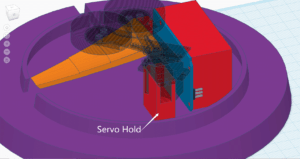
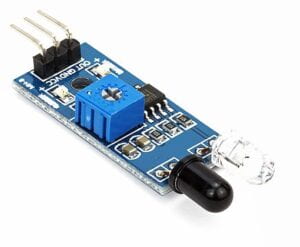 I then began looking for another alternative. It seemed like a decent idea to use this IR sensor. I gave it a try and it worked well. In order for the sensor to function, an infrared beam must be emitted. An adjacent infrared-sensitive diode must then catch the reflected beam and convert it into an electric signal. The sensor can therefore determine when an object is positioned close to its front. Turning the blue knob specifically changes the distance threshold. So I worked hard (maybe for an hour) to desolder the diodes and extend them with cables. It performed flawlessly. I then built a sensor hold according to their sizes. The hold, which serves as the bowl’s bottom, was then easily fitted with them within.
- Servo
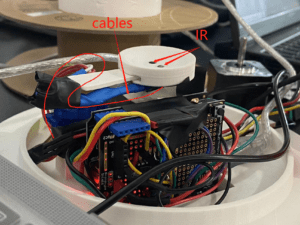
The bottom of the bowl, as well as the sensor, are connected to the servo attach. When it senses the coming of the bone, the servo automatically moves the arm aside, and letting the bone in. The cables goes alone the arm and are then connected to the board.
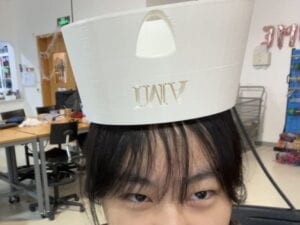
Of course, the bowl is specifically designed to fit my partner’s head.
——————Illustrations down below for better and clearer understanding——————
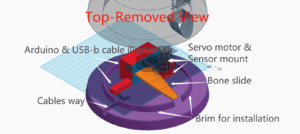
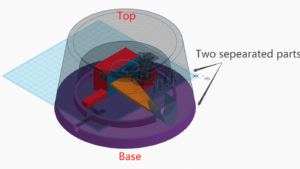
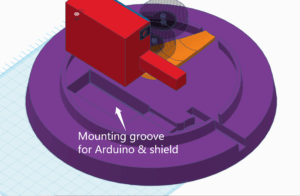
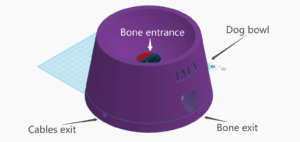
C. Conclusions
- Success? Goal Achieved?
The goal of the project is to bridge the virtual and the physical. Through physical actions, the audience can interact with the world within the screen. Then, what happens within the screen serves as feedback to the audience, encouraging them to take further actions. Specifically, we want the audience to interact with the project exactly the way how they would act in real life. In more tangible terms, they are pulling the leash and feeding bones, instead of pressing buttons or so.
I would say the project was a success. Through the hints and the affordance developed purposefully, audience largely followed our design, and carried out the whole interaction. Moreover, from how thrilled they appeared to be, I believed a bond had been built between them and the virtual puppy. Eventually, both users executed the interactions as we planned, and the puppy got successfully returned to his home, full and satisfied.
👇don’t miss it!!! (video nicely embedded by Rin)
 Improvements?
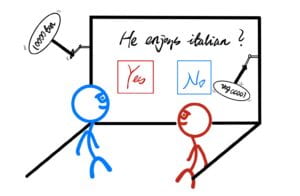
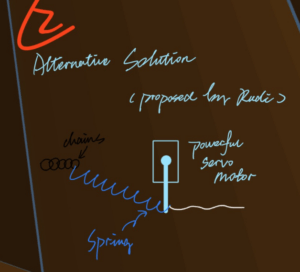
One of the major improvements could be with the leash. As suggested by Rudi, the current design probably isn’t optimized. For instance, the chain leash and the rheostat are connected rigidly, which is potentially perilous to the project. On account of the great possibility, the audience pulls hard against the leash, and adopting a hard-wired linkage runs the risk of breaking things off. Rather, Rudi suggested the design shown in the diagram (if I understood it correctly). Attaching the chain to a spring and a strong servo subtly bypasses the jeopardy we mentioned above. Moreover, given Hooke’s law (namely the spring extends when it is pulled), adopting the spring here permits an extended redundancy for the audience to pull.
- Lessons?
There are many lessons that I learned throughout the project. Some with the techniques, and others with the time management skills in making a project.
1. 3D printing
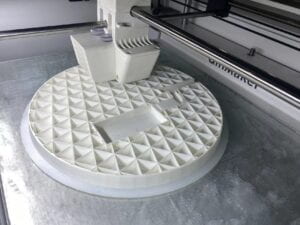 I learned how to design in 3D and prepare the model in slicers, though those skills are immature still. Many of the designs could have been optimized. As for the base shown here, given the size, I went for an infill of around 5%, which did save some time but sacrificed the smoothness of the surface as well as the strength. Andy, professor Garcia from the fabrication lab then suggested that I could actually make the thing hollow, and print it with a higher infill, which saves the material and time, and produces a structure with guaranteed strength and smoothness.
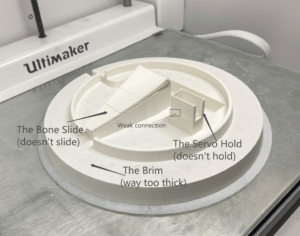
The other thing I learned is that printers run with tolerance. The model I designed, which should perfectly hold the Arduino Uno, the sensors, or even the servo, didn’t fit in. They were bigger than I thought. Fortunately, this can be solved. I heated them up with a heat gun and inserted the components, while the PLA shrunk as it cooled down, it squeezed into those components and produced a better stiffness. Well, also, unfortunately, that didn’t work well with the servo hold. As I made the sides too thin and without proper reinforcement on the outside, the whole top fell off. So, eventually, I heated up again and stuck it back in. Afterward, I simply wrapped it with tape.
2. Soldering
I believed I had to utilize a H bridge because I used a stepper in the project. Soldering the chip to the shield and all the extended wires took a lot of my time. Despite the lovely work, I could just as easily use a drive board. I’ve learned from this experience to never create a wheel from scratch again if it is already made.
- Final Say
Humans interact THROUGH technology,
rather than humans interacting WITH technology itself.
——— Edmonds, 2011
Wow, exactly what we want to achieve in the project. A seamless experience of blending the digital and the physical, as I denoted somewhere above, is our ambition. And standing here, I’ll say we have achieved the goal (most of it, if you find it boastful). In making the project, my partner and I dedicated ourselves to hide the technology, from the dog bowl, to the digital puppy.
We place a strong focus on interactivity to make the feeling that you are actually standing here on the lawn squarely in front of a dog house. Particularly, we covered the table with fake grass and other props, and concealed the motors, and wiring, in order to lessen the presence of technology and utilize it as a tool for engagement rather than the actual act of interaction.
On top of that, our project succeeded in attracting the audience’s attention and sustaining it. Let’s talk about how attractive it is. Undoubtedly, our project looks appealing and distinctive. It’s appealing because of the setup, it takes up an amount of space, creating a magic circle around the lawn. Bones, dog bowl, and leash scatter among. It’s distinctive because of the setup, we don’t have a wooden box on the table. Instead, what you see is what you see. Every single thing on the lawn could be a prop.
Then how it sustains attention then? To actively keep the audience involved, we created progressive interaction. The value of hunger and happiness, for instance, will continue to decline if the user does nothing and the puppy is unable to receive its food. On the other hand, if the user gives the puppy a bone, the dog will become joyful. This is saying that the circumstances are determined by user behavior.
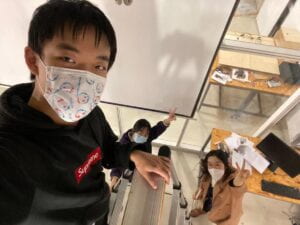 I’ve come to realize how important collaboration is while completing a challenging and intricate assignment. We clearly divide up the work, but Rin and I also appreciate each other’s opinions. We never hesitate to solicit one other’s perspectives when it comes to significant issues that fall within the purview of our duties, coming to an understanding prior to beginning the task. In general, it was enjoyable to work with her.🙂
—This Is It!—
—Farewell To the Unbelievable Semester, and The Interaction Lab—
![]()
D. Annex
Processing Code
import processing.serial.*;
import osteele.processing.SerialRecord.*;
import processing.video.*;

Serial serialPort;
SerialRecord serialRecord;
Movie video;

PFont cute;

int state = 2, bone_state, pull_state;
boolean runChecker1 = false;
boolean runChecker2 = false;

void movieEvent(Movie m) {
  m.read();
}
void setup() {
  cute = createFont("BalonkuRegular-la1w.otf", 128);
  frameRate(25);
  imageMode(CENTER);
  background(0);
  //fullScreen();
  size(1920, 1080);
  textFont(cute);

  //String serialPortName = SerialUtils.findArduinoPort();
  //serialPort = new Serial(this, serialPortName, 9600);
  //serialRecord = new SerialRecord(this, serialPort, 2);
  //serialRecord.logToCanvas(true);

  video = new Movie(this, "video.mp4");
  video.loop();
}

void draw() {
  println(video.time());
  //serialRecord.read();
  //int pull_state = serialRecord.values[0];
  //int bone_state = serialRecord.values[1];

  if (pull_state==1) {
    state = 1;
  }
  if (bone_state==1 && state==1) {
    state = 2;
  }

  // sleep by default
  if (state==0) {
    if (video.time() > 3) {
      video.jump(0);
    }
    image(video, width/2, height/2);
    tint(255, 50);
    if (video.time() % 3 <1) {
      sleep();
    }
  }

//  // pull leash enter anger angry and come out
  else if (state==1) {
    image(video, width/2, height/2);
    if (runChecker1==false) {
      video.jump(3.2);
      runChecker1 = true;
      }
    if (video.time() > 20.8) {
      feed();
      video.jump(19);
    }
    if (video.time() >19) {
      tint(255, 99);
      feed();
    }
  }

  //go for bone and return
  else if (state==2) {
    image(video, width/2, height/2);
    if (runChecker2==false) {
      video.jump(21);
      runChecker2 = true;
    }
    if (video.time() > 38) {
      runChecker1 = false;
      runChecker2 = false;
      delay(5000);
      video.jump(0);
      state = 0;
    }
  }
}

void feed() {
  textSize(80);
  text("Puppy's not happy,", 0.58*width, 0.53*height);
  textSize(65);
  text("Why not", 0.58*width, 0.63*height);
  text("him something?", 0.68*width, 0.72*height);
  textSize(135);
  text("feed", 0.76*width, 0.64*height);
}

void sleep() {
  textSize(80);
  text("Puppy's sleeping,", 0.62*width, 0.3*height);
  textSize(180);
  text("PLZ!!!", 0.62*width, 0.48*height);
  textSize(80);
  text("don't pull the leash,", 0.55*width, 0.59*height);
  text("it'll disturb him!", 0.55*width, 0.67*height);
}
Arduino Code
#include <Stepper.h>
#include "SerialRecord.h"
#include <Servo.h>

Servo myservo;

// for serial record setup
SerialRecord reader(1);
SerialRecord writer(2);
int slide; // from sliding resistance, know how much it goes
int bone_state = 0; // to send whether there's bone in the bowl
int pull_state = 0; // to send whether the leash is pulled enough
bool infra = true;

bool runChecker = false;
unsigned long time;

// for stepper setup

const int stepsPerRevolution = 200;  // change this to fit the number of steps per revolution
// for your motor
// initialize the stepper library on pins 8 through 11:
Stepper myStepper(stepsPerRevolution, 8, 9, 10, 11);

void setup() {
  Serial.begin(9600);

  myservo.attach(12);

  // set the speed at 15 rpm:
  myStepper.setSpeed(15);
}

void loop() {
  leash(); // control stepper motion
  boneCheck();
  writer[0] = pull_state;
  writer[1] = bone_state;
  writer.send();

}

void leash() {
    // step one revolution  in one direction:
  slide = analogRead(A0);
  if (slide==1023) {
    pull_state = 1;

    // for the stepper motor to pull the leash back a bit
    step();
  }
  else {
    pull_state = 0;
  }
}

void step() {
  // step 1/100 of a revolution:
  if (!runChecker) {
    time = millis();
    ! runChecker;
  }
  while (millis()-time<=5000) {
    myStepper.step(stepsPerRevolution / 100);
  }
}

void boneCheck() {
  if (infra==true) {
    infra = digitalRead(3);
    myservo.write(140);
    runChecker = false;
          // Serial.println(infra);
  }
  if (infra==false) {
    if (runChecker==false) {
      time = millis();
      runChecker = true;
    }
    if (millis()-time<3000) {
      myservo.write(180);
      bone_state = 1;
    }
    if (millis()-time>=3000) {
      myservo.write(140);
      bone_state = 0;
      Serial.println("ueeu");
    }
    if (millis()-time>=4000) {
      infra = true;
    }
  }
}
