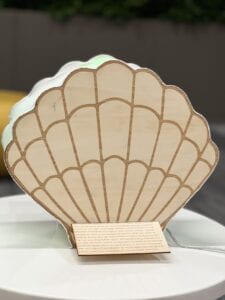
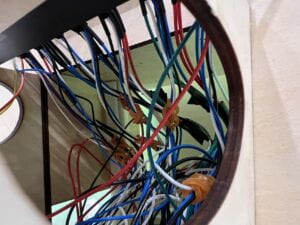
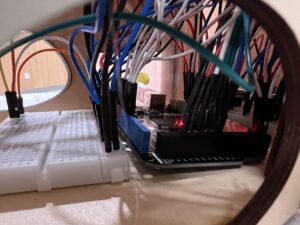
Before explaining anything specific, I want to give you some basic information of what our project is. What you can see at first glance is a seashell with some light strips and buttons on its surface. Surely, you can not look into the shell and see the inner structure, which is just all wires and electrical components placed in order. The user can first push the button on the left hand side to start this device. At the same time, the colorful flashing light will stop and then you can press the force sensors on the light strip to make a sound. You will notice that the number of leds lit up will change according to the intensity you press it. When pressing the left button again, the recording will stop and you can see flashing lights through the fabric again. What’s special about this seashell is that you can actually play back by clicking the right button. The light strips and buzzer will repeat what you have just played. Surely, you can definitely stop playing in advance by clicking the right button again.
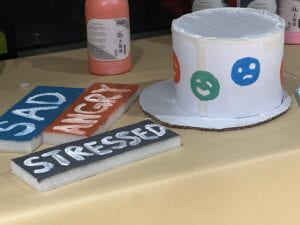
The idea of making a self-playing synthesizer doesn’t come into my head from the air. Actually, I integrate some inspiration from the previous project, which is the mood changing machine that can treat patients’ anxiety and depression. Although that machine doesn’t need complex wires and codes to actually function, its idea of triggering multiple types of human’s senses really inspired me to add some light elements to the seashell. And it strictly follows the concept of interaction that interactive artifact should be able to respond to user’s operation. Just like the mood machine will change into a different color according to the user’s mood, your strength of pressing the sensors will also determine how many leds will light up. So the users’ participation in the process of achieving the desired effect is to the core of “interaction”, and this is why I want to make this device that user can actually act on rather than merely be an audience. Everyone can be its targeted user and play some rhythm. If you luckily play a beautiful melody, then when you hear it played back, you will definitely feel a sense of achievement because you know you just created something enjoyable, which is what piano without recording function can’t do.
I expect that it’s impossible for users to figure out which button corresponds to “record” and which to “play”. And some users may want to place some music sheets. So I added a small music stand on the front board to hold sheets. So you may think I can just put a instruction label below the button, but as the front board of the seashell looks like a face, I ultimately choose to print an instruction board and glued it to the other side to avoid destroying the “face’s” wholeness. The material we use is wood board, which is something that comes from nature just like seashell. So I choose this kind of material to remain the device’s wholeness and harmony. Another reason is that cardboard can easily fall apart if users press the button too hard while wood board has really strong stability. Definitely, we also use fabric to connect the front board and the backboard. The reason we use it is because it’s the only material that is flexible enough to cater its shape to the outline of the seashell and thin enough to allow light to pass through at the same time. There’s no other substitution. Acrylic board is impossible to bend and cardboard won’t allow light to pass through. So it’s already an optimized choice.
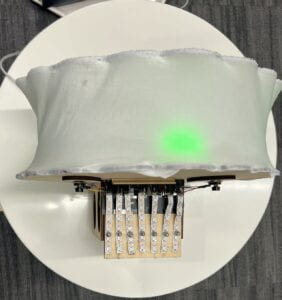
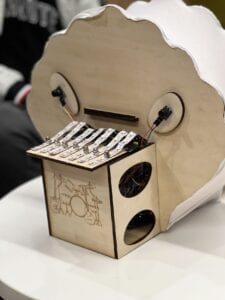
Different people can have very different focusing points on their project because the function they want to achieve and mechanism behind can be quite different. Our device’s function is heavily dependent on the code, so I just focused on optimizing my code, and, definitely, debugging. The most fundamental function should be recording and playing back, but how to store the continuous state of every button? It’s not something we have learned in class. So I just invented my own method of recording continuous state of force sensors. I use a [max of time interval]*[number of buttons] matrix to store the continuous state. Arduino will read the state of every button every 50 milliseconds and store it in the next row of the matrix. What’s more, whenever the Arduino records a particular state, it will also calculate the time interval from the beginning of the recording and store it in an array continuously. So the i-th term of the array should correspond to the time interval of the i-th row of the matrix. When the “playback” button is pressed, the arduino will calculate the current time interval from starting time and determine which recorded time interval it falls into and give buzzer and light strip the corresponding state of that time interval. Surely, it’s only the core part of the code and there’s definitely much more details than that. Given its complexity, I met with various problems in coding. The first is that arduino uno has very limited internal storage, so I can’t make the time interval of detection too short and recording time too long, making the recording less precise as it doesn’t detect the state of force sensors frequently enough. My solution is to use an arduino mega which has larger storage and also more analog pins, which is also helpful because I need 7 analog read pins to input the state of force sensors, 7 analog output to light up the light strip and tons of digital pins to trigger the buzzers and decorative leds, and uno definitely can’t provide that much pins. There were some more subtle problems I encountered. Normally, we use “int” to define a variable, but when using it to store the outcome of millis function, the number can easily surpass the limit. So I use the “long” type to define it instead. But debugging is just like working with a black box, you can only see the outcome. The outcome going wrong is that you can not playback twice. After using the serial monitor, I found the “time” variable storing the outcome of millis() becomes negative during the second playing back time. Suddenly I realized it’s due to the “int” type can’t store a big number so it’s not the appropriate type to store time which can be quite large. The third problem I met is the light won’t turn off after playing back if all sensors are pressed at the last time interval during the recording. This is because we don’t have another time interval to overlap the state at the last time interval. My solution is to add one more time interval and one more row in the matrix but never record anything in this row, so this row will be left to be all 0 by default. When the playback process ends, this special time interval will turn off everything at last. Of course, perfection is something people continuously seek but never achieve. I have some problems remain to be solved in the future. Considering I use force sensors as the keys of this instrument, the loudness of the buzzers should be able to be controlled by the user. However, while the intensity of your press can control how many leds will light up, the loudness of the buzzer will remain the same no matter how hard you press. The reason is that the only way we have learned to make a sound is to use the tone() function, which unfortunately can’t control the loudness of buzzers. What’s more, the tone function won’t allow 2 buzzers to sound simultaneously. Even if you don’t include noTone afterwards, the first buzzer will still be silenced by the system when you use tone() for another buzzer. These 2 problems are all due to the limitation of tone functions and I ultimately have to make some compromise.
if (record) {//I'll only discuss the recording part

      for (int i = 0; i < maxVal; i++) {

        for (int j = 0; j < 7; j++) {

          state[i][j] = 0;    //clear the state function(overlap)

        }

      }

      start = millis();     //start time recorded

      delay(15);

      pre = 1;  //enable it to enter

      for (int j = 0; j < maxVal; j++) {     //for each time interval

        record = digitalRead(record_pin);

        if (record == 1 && pre == 0) { break; }// detect whether recording should stop

        time[j] = millis() - start;   // the array I just mentioned

        for (int i = 0; i < 7; i++) {//for each button

          if (j < maxVal - 1) {  // ensure that the last time interval won't be recorded

            butt[i] = analogRead(butt_pin[i]);

            state[j][i] = butt[i];    // record the state of button into matrix

          }

          if (state[j][i] > 250) {

            buzzer[i] = 1;

          } else {

            buzzer[i] = 0;

          }

          lit(i, state[j][i]);

          if (buzzer[i] == 1) {

            tone(buzzer_pin[i], freq[i]);

          } else {

            noTone(buzzer_pin[i]);

          }

        }      // light up light strips and sound the buzzers

        pre = record;

        delay(timeinterval);   //sample frequency

      }

      effect_end(color1_pin);  // leds blink 4 times

    }
Basically, I did all the fabrication and coding parts, including cutting all wood boards using the laser cutter, connecting all the wires, light strips, sensors and buzzers, and designing the appearance of this device. My teammates cut and installed the fabric covering the middle part between two sides. Unfortunately, we don’t have any joint work because I finish all these steps during the weekend on my own while my teammates have some activities so can’t show up. I really think teamworks can make things more efficient because the more people, the more perspectives, but it’s a pity that we didn’t collaborate well at this time. But TA Kevin, Professor Gohai and an LA of the fabrication lab helped me so much on how to light up light strips, where to get a lighter Led and how to use the laser cutter respectively during the weekend. Without them, it’s impossible for me to complete such a complex project in a weekend. One can never know everything required, so I realize the importance of coordination. Except for the help from teachers, on the test day when my project is just a simplified version without any shell and light strip, a classmate suggested that I could add some light elements so that it could be more interactive, and this was where the light strip came from. Considering the sound effect of the buzzer is not that good, the light effect is definitely a good complement.
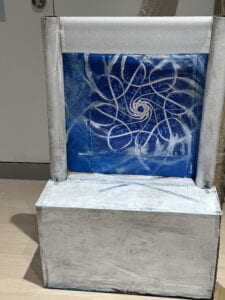
The goal of this project is to build a non-traditional interactive electronic piano that combines sound and light, that records your performance and that gives users a sense of achievement. Interactive projects should involve multiple types of senses and will respond to the user’s operation. This project has light and sound, and the buzzer and led strip will also respond to how users press the sensors. It’s interactive by definition. On the presentation day, most users think it’s an innovative device while somehow strange that the loudness can’t be controlled. Most of them got a little bit confused about which button to press to start and end recording. So except for tackling the 2 unsolved problems, I will also make the function of each button clear enough to understand even at the first glance. A warm hearted LA gave me some suggestions on linking light to sound more closely. I will later create a device consisting of a drumhead covering the buzzers and a laser transmitter. When the buzzers make sound, the drumhead will be generated to vibrate according to the sound and the laser will be deflected to the wall and form different shapes. It’s a quite innovative method to visualize sound. Anyway, in a conversation with Kevin, he said sometimes you don’t need to figure everything out. There are too many libraries so you can’t know everything. So instead of sticking to the idea of learning, what I should focus on is to use acquired techniques to achieve what I can achieve. Be creative and ask yourself what you can do!
(For those who are interested in the code part:)
#include <FastLED.h>

#define NUM_LEDS_PER_STRIP 6

#define NUM_STRIPS 7

    const int maxVal = 401;

  int time[maxVal];

  int state[maxVal][7];

  int butt[7];

  int buzzer[7];

  int butt_pin[7] = { A1, A2, A3, A4, A5, A6, A7 };

  int buzzer_pin[7] = { 36, 38, 40, 42, 44, 46, 48 };

  int freq[7] = { 262, 294, 330, 349, 392, 440, 494 };

  int timeinterval = 50;

  int color_pin[3] = { 2, 3, 4 };

  CRGB leds[NUM_STRIPS][NUM_LEDS_PER_STRIP];

  CRGB colors[7] = { CRGB::Red, CRGB::Orange, CRGB::Yellow, CRGB::Green, CRGB::Blue, CRGB::Pink, CRGB::Purple };

  long start;

  int diff;

  int record = 0;

  int play = 0;

  int record_pin = 22;

  int play_pin = 23;

  int pre;

  int color1_pin = 2;

  int color2_pin = 3;

  int color3_pin = 4;

  void setup() {

    Serial.begin(9600);

    for (int i = 0; i < 7; i++) {

      pinMode(butt_pin[i], INPUT);

      pinMode(buzzer_pin[i], OUTPUT);

    }

    FastLED.addLeds<NEOPIXEL, 13>(leds[0], NUM_LEDS_PER_STRIP);

    FastLED.addLeds<NEOPIXEL, 12>(leds[1], NUM_LEDS_PER_STRIP);

    FastLED.addLeds<NEOPIXEL, 11>(leds[2], NUM_LEDS_PER_STRIP);

    FastLED.addLeds<NEOPIXEL, 10>(leds[3], NUM_LEDS_PER_STRIP);

    FastLED.addLeds<NEOPIXEL, 9>(leds[4], NUM_LEDS_PER_STRIP);

    FastLED.addLeds<NEOPIXEL, 8>(leds[5], NUM_LEDS_PER_STRIP);

    FastLED.addLeds<NEOPIXEL, 14>(leds[6], NUM_LEDS_PER_STRIP);

    pinMode(record_pin, INPUT);

    pinMode(play_pin, INPUT);

    pinMode(24, OUTPUT);

    pinMode(color1_pin, OUTPUT);

    pinMode(color2_pin, OUTPUT);

    pinMode(color3_pin, OUTPUT);

  }

  void loop() {

    record = digitalRead(record_pin);

    play = digitalRead(play_pin);

    effect(color_pin[random(0, 3)]);

    if (record) {

      for (int i = 0; i < maxVal; i++) {

        for (int j = 0; j < 7; j++) {

          state[i][j] = 0;

        }

      }

      start = millis();

      delay(15);

      pre = 1;

      for (int j = 0; j < maxVal; j++) {

        record = digitalRead(record_pin);

        if (record == 1 && pre == 0) { break; }

        time[j] = millis() - start;

        for (int i = 0; i < 7; i++) {

          if (j < maxVal - 1) {

            butt[i] = analogRead(butt_pin[i]);

            state[j][i] = butt[i];

          }

          if (state[j][i] > 250) {

            buzzer[i] = 1;

          } else {

            buzzer[i] = 0;

          }

          lit(i, state[j][i]);

          if (buzzer[i] == 1) {

            tone(buzzer_pin[i], freq[i]);

          } else {

            noTone(buzzer_pin[i]);

          }

        }

        pre = record;

        delay(timeinterval);

      }

      effect_end(color1_pin);

    }

    if (play) {

      start = millis();

      pre = 1;

      for (int i = 0; i < maxVal; i++) {

        play = digitalRead(play_pin);

        if (play == 1 && pre == 0) { break; }

        while (millis() - start < time[i]) {

          for (int j = 0; j < 7; j++) {

            if (state[i][j] > 250) {

              buzzer[j] = 1;

            } else {

              buzzer[j] = 0;

            }

            if (buzzer[j] == 1) {

              tone(buzzer_pin[j], freq[j]);

            } else {

              noTone(buzzer_pin[j]);

            }

            lit(j, state[i][j]);

          }

        }

        pre = play;

      }

      effect_end(color2_pin);

    }

  }

  void lit(int INDEX, int LED) {

    int maxNUM = map(LED, 0, 850, 0, 5);

    for (int i = 1; i <= maxNUM; i++) {

      leds[INDEX][i] = colors[INDEX];

      FastLED.show();

    }

    for (int i = maxNUM + 1; i < 6; i++) {

      leds[INDEX][i] = CRGB::Black;

      FastLED.show();

    }

  }

  void effect(int PIN) {

    for (int fadeValue = 0; fadeValue <= 1000; fadeValue += 100) {

      analogWrite(PIN, fadeValue);

      delay(10);

    }

    for (int fadeValue = 1000; fadeValue >= 0; fadeValue -= 100) {

      analogWrite(PIN, fadeValue);

      delay(10);

    }

  }

  void effect_end(int PIN) {

    for (int i = 0; i < 5; i++) {

      digitalWrite(PIN, HIGH);

      delay(100);

      digitalWrite(PIN, LOW);

      delay(100);

    }

  }
Leave a Reply