Innovation Lab: Sprint Session
Challenge 2 Future Selves
For the sprint session, we focused on a Challenge 2 Future Selves, which is about innovating things for disabilities. The range of disabilities varied, and each team was assigned an initial disability to research, create a presentation, and compose an empathy tool that reflects the condition we are focusing on. Then we were to test the empathy tool with the designated team for the swap, and test out their empathy tool. For the next session, we were to develop an innovative tool to help solve the disability that the swap team focused on; each team member generates one concept and a physical prototype. For the final session, each team member needed to refine their physical prototype and concept from session 3, and then create a presentation to explain each concept, prototype, and refinements. This led to the project swap of refined prototypes with another group.
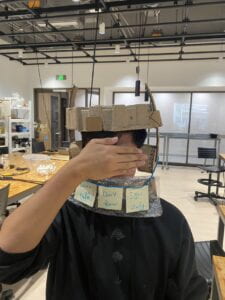
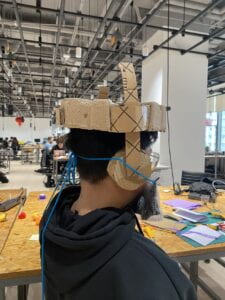
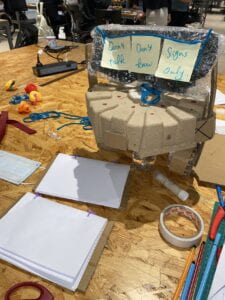


For the second session, My team (section 1 team 2) was assigned hearing disabilities for our initial focus group, and within the broad range of different hearing disabilities, we decided to focus specifically on deaf children. While we were doing research on the range of hearing impairments to complete deafness, we realized that a lot of assistive technology was made for older audiences who previously learned how to read, write, and communicate through their understanding of language. However from the perspective of children, who might have been born deaf or suffered an injury or illness that may have abruptly left them deaf, they may not have adequately learned a language, implying that they don’t know how to read, write, or even read lips. For these situations, our main question was: how do deaf children communicate their wants and needs? To compose an empathy tool that adequately mirrored the condition for deaf children, we made a helmet headset out of cardboard (visually similar to the Dyson Headphones), with adjustable ear covers that have an insulated feature (bubble wrap) to resemble noise cancellation. It also has a mouth covering connected to the headphones with a string, to further show that the children cannot speak. To communicate, the deaf child and the person can only use the drawing boards to draw things without using any language. The person being communicated with also cannot mouth any words or talk because the deaf child is unable to understand them. The child can only draw things like food to show that they are hungry, or a cup of water to emphasize thirst, and other things like a toilet for using the restroom, and bed for sleeping. This empathy tool focused on limiting the user’s communication ability to recreate the frustration many deaf children may experience as they cannot talk or perhaps completely understand the person they are interacting with. Our group tested this with each other and with the first swap team, and the results were exactly as we hoped because the user became a little frustrated trying to communicate what kind of food they wanted to eat, and other things only through drawing which is a tedious and long task.
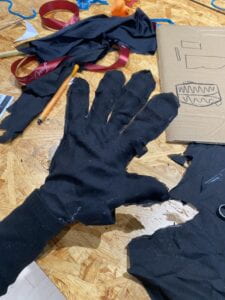
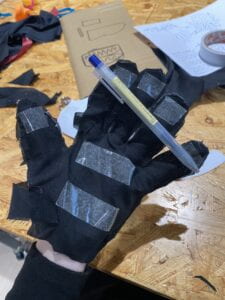
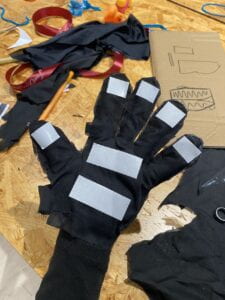
For the third session, my team swapped with team 4, who focused on hand dexterity. Their empathy tool were gloves with cardboard tubes around each finger, cotton balls attached to the tip of each finger, and 2 rubber bands around 2-3 fingers to emphasize the difficulty people experience with hand dexterity. As I was testing out this empathy tool, it was incredibly difficult for me to put on a watch, type on the computer, open water bottles, and pick up pens and smaller items. I believe that team 4’s empathy tool adequately conveyed the hand dexterity condition. For the concept to help alleviate the strain of this issue, I decided to focus on the motion of making the action of picking up small objects much easier. My first concept was a glove with multiple suction cups, however, there are no mini suction cups lying around in the IMA lab. To do this, I reused the idea of a glove with a rubber somewhat sticky latex material on it to help grip onto things easily, along with a glove cover to hide the sticky latex material. First, I used a soft comfortable fabric to trace my hand with, cut out 3 identical fabric prints, and then hot-glued two of the cut-outs together. For the third hand cut-out, which is supposed to act as a cover, I decided to glue the bottom wrist part directly on the glove. Because there is no such sticky latex material lying around in the lab, I decided to substitute it with double sided tape. I placed double sided tape on each finger tip, a long piece horizontally where the fingers meet the palm base, and another medium size piece at the lower palm base. The cover can be flipped up or pulled down without completely being ripped off, and it stays onto the glove by directly sticking to the double sided tape. While I tested out this tool, I felt that the double-sided tape quickly lost its grip after pulling off the cover 2-3 times. The cover could be pulled down but it would just hang there which made it inconvenient. The material of the gloves was also too soft and not stable or sturdy, and the hot-glue used to attach the two cutouts kept falling apart and causing the glove to rip.
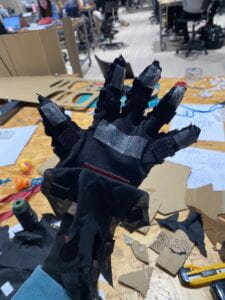
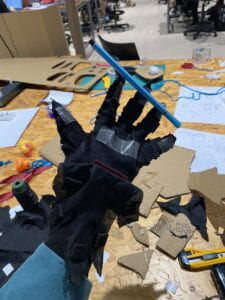
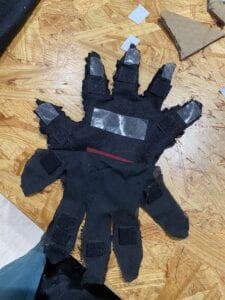
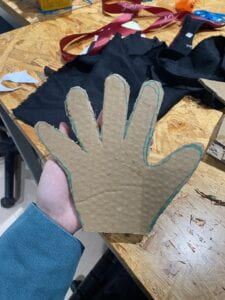
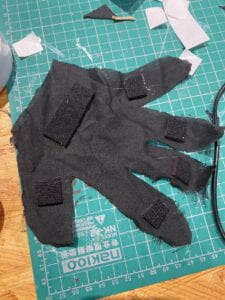
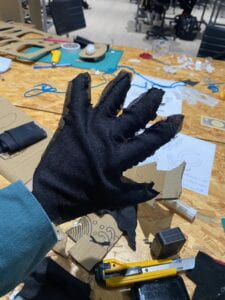
For the final session, we were to refine our prototype from session three, and because I experienced multiple mishaps with my first prototype, I heavily considered the issues I had and redesigned my concept. Firstly, I needed to use a completely different material for my glove, since the initial soft fabric was not durable enough. After scrummaging through the fabric in the lab bins, I found a more linen aligned fabric, and instead of gluing it, I decided to sew it together for extra durability and flip it inside out for a visually appealing look. Because my first glove had the wrong proportions and was too tight around some fingers, I traced my hand on cardboard first, and also left extra room for the sewing process. Then I used the cardboard as a guide to cut out 2 hand shapes; I did not cut a third because I ran out of fabric and couldn’t find another identical fabric piece so I ended up reusing the first cover. After I sewed together the 2 hand cut-outs and flipped it inside out, I cut up pieces of velcro and its corresponding fabric material to glue onto the glove itself and the cover. So the glove itself had the velcro pieces glued onto it, small pieces just below the tip of the finger and a longer piece on the bottom base. On the cover, I glued on the corresponding puffy fabric in the same places where the velcro was placed so that it attached perfectly to the glove. I used velcro because it makes the glove cover detachable and out of sight so that it doesn’t just hang there after being pulled off. Again, the latex material was not available in the lab so I used double-sided tape again at the tips of the fingers, and at the upper part of the hand base. Using velcro also allowed me to preserve the double sided tape’s stickiness so that it functions properly. This redesigned “Sticky” Glove allows people with hand dexterity to grab smaller objects with ease, and without putting strain on their fingers. With the object sticking onto the glove, it can easily be removed for usage on the other hand.
