Final Project: Make, Present & Report

A. Painter – Tawan Kondhorn – Rodolfo Cossovich

B. CONCEPTION AND DESIGN:

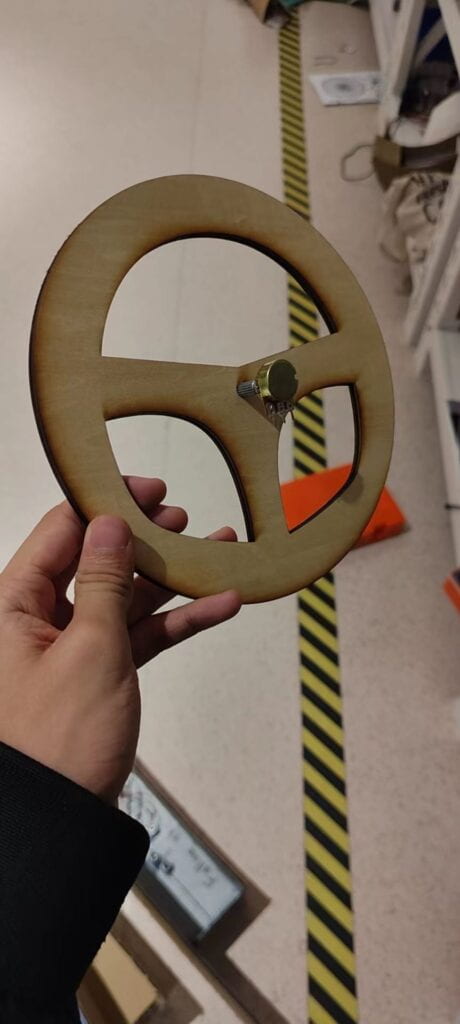
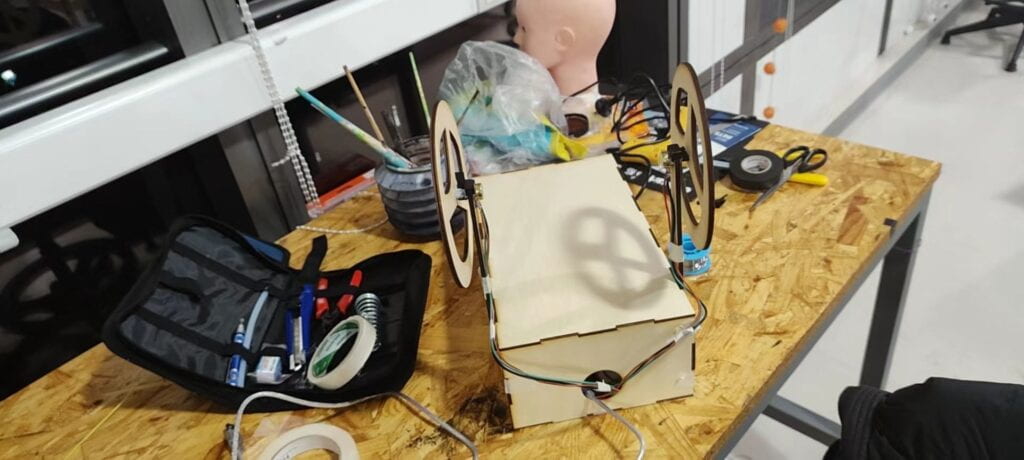
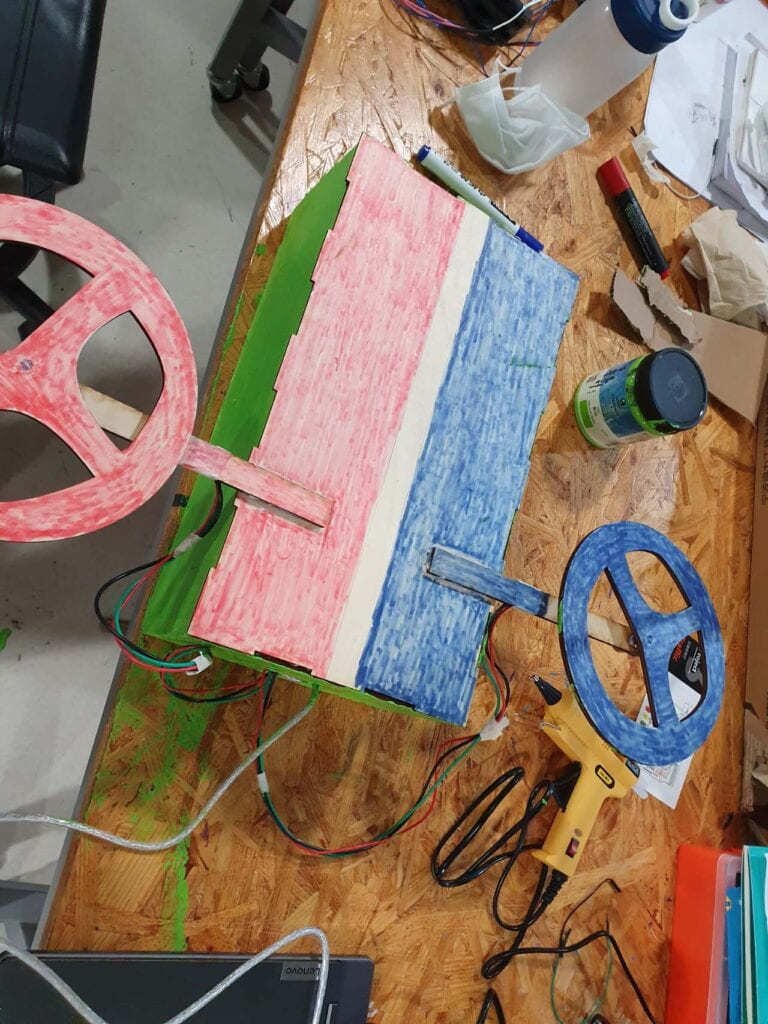
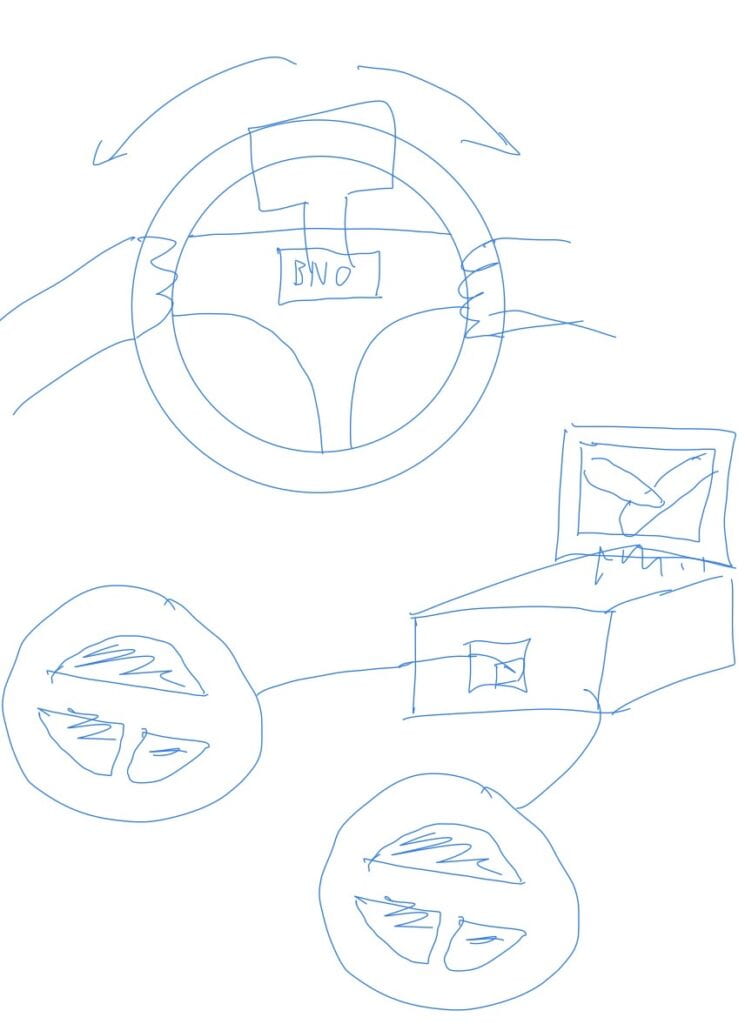
This project was inspired by a multiplayer game where 2 users control a paintbrush to paint as much area as they can in a specific time. We also decided to include power-ups in order to make the game more interesting. In terms of interaction, we decided to create a “steering wheel”, where the users would feel as if they’re actually steering the paintbrush in the game. We’ve received multiple constructive criticisms about our project. The main point was that the design made it for the player to look at the screen while also playing the game. The next main point was that after a while, the user complained that it was difficult to locate the head of the paint. These feedbacks allow us to change the design of our project as well as add some codes to fix those problems. The first thing we did was remove the handle and reposition it to be horizontal instead of vertical. This allows the user to look at the screen and navigate the paint better than the previous design. The other adjustment we made was coding the head of the paint to have a stroke around it in order to make it easier to navigate. Both adjustments turned out to be effective since they were able to fix the problem.

C. FABRICATION AND PRODUCTION:

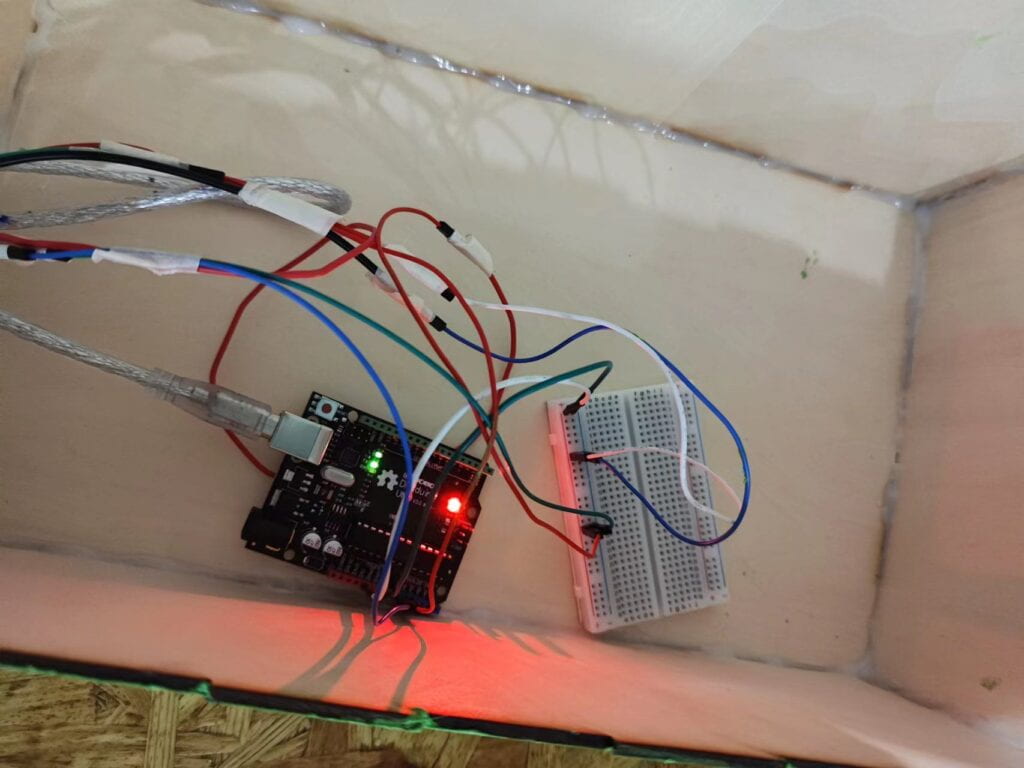
The hardest part of our project was figuring out which component to use for detecting the rotation. We first started with using 2 BNOs, but we later found out that using that is very highly complex to make it work and might result in us not finishing the project in time. After that, we decided to go with what we’re familiar with – a potentiometer. The next step that was difficult was the coding. However, we’ve already had some experiences with coding from our midterm project, so we didn’t struggle as much. My task in the group project was to figure out the hardware components and put them together as well as design the project. My partner Jim worked on the code for the game.

D. CONCLUSIONS:

Our project’s goal is to create a game that involves the domination of the area. We wanted to create a 2 player game, where each one will control a “paintbrush”, and the goal is to paint as much area as they can in a specific amount of time. We included power-ups and designed an actual steering wheel in order to make the game more interesting. Based on our audience’s responses, they seemed to love the game. However, they said that we could’ve taken this project a step further and made it more complex and interesting, which we would’ve done so if we had more time. There are many values that I’ve learned from this project’s setback, where one of them is that if there’s a failure in a specific part, there’s always another way out. 

E. Annex:


Arduino:

#include "SerialRecord.h"

// Change this number to send a different number of values
SerialRecord writer(2);

void setup() {
  Serial.begin(9600);
}

void loop() {
  int sensorValue = analogRead(A0);
  int sensorValue1 = analogRead(A1);

  writer[0] = sensorValue;
  writer[1] = sensorValue1;
  writer.send();

  // This delay slows down the loop, so that it runs less frequently. This can
  // make it easier to debug the sketch, because new values are printed at a
  // slower rate.
  delay(100);
} 

Processing:

import processing.serial.*;
import processing.sound.*;
import osteele.processing.SerialRecord.*;
Serial serialPort;
SoundFile sound;
SerialRecord serialRecord;
float x1_direction, y1_direction;
float x2_direction, y2_direction;
float x1, y1, x2, y2;
float prex1, prey1, prex2, prey2;
long countred=0;
long countblue=0;
int flag=1;
int buff, x, y;
boolean buff21=false;
boolean buff22=false;
boolean buff31=false;
boolean buff32=false;
boolean e=true;
long pre21=0;
long pre31=0;
long pre22=0;
long pre32=0;
int r1=200;
int r2=200;
long gamestart;
int gamestarted;

void setup() {
  fullScreen();
  background(0);
  rectMode(CENTER);
  String serialPortName = SerialUtils.findArduinoPort();
  serialPort = new Serial(this, serialPortName, 9600);
  ellipseMode(CENTER);
  // If the Arduino sketch sends a different number of values, modify the number
  // `2` on the next line to match the number of values that it sends.
  serialRecord = new SerialRecord(this, serialPort, 2);
  sound = new SoundFile(this, "final.mp3");
  buff=18250;
  x=floor(random(0, width));
  y=floor(random(0, height));
}

void setbuff(int bx, int by) {
  push();
  noStroke();
  translate(bx, by);
  rotate(PI/4);
  fill(#FFCD43);
  circle(0, 0, 200);
  fill(0);
  textAlign(CENTER, CENTER);
  textSize(170);
  text("?", 0, 0);
  pop();
}

void getbuff1(int effect) {

  switch(effect) {
  case 1:
  case 2:
    {
      fill(255, 0, 0);
      noStroke();
      for (int size=200; size<=1200; size+=10) {
        circle(x, y, size);
      }
      break;
    }
  case 3:
  case 4:
    {
      pre21=millis()-gamestart;
      buff21=true;
      break;
    }
  case 5:
  case 6:
    {
      pre31=millis()-gamestart;
      buff31=true;
      break;
    }
  case 7:
    background(255*floor(random(0, 2)), 0, 255*floor(random(0, 2)));
  }
}
void getbuff2(int effect) {

  switch(effect) {
  case 1:
  case 2:
    {
      fill(0, 0, 255);
      noStroke();
      for (int size=200; size<=1200; size+=10) {
        circle(x, y, size);
      }
      break;
    }
  case 3:
  case 4:
    {
      pre22=millis()-gamestart;
      buff22=true;
      break;
    }
  case 5:
  case 6:

    {
      pre32=millis()-gamestart;
      buff32=true;
      break;
    }
  case 7:
    {
      background(255*floor(random(0, 2)), 0, 255*floor(random(0, 2)));
    }
  }
}


void draw() {
  noStroke();
  strokeWeight(3);
  if (gamestarted==0) {
    textAlign(CENTER, CENTER);
    textSize(80);
    text("CLICK TO START", width/2, height/2);
    if (mousePressed) {
      gamestarted=1;
      fill(0);
      noStroke();
      rect(width/2, height/2, 800, 800);
      gamestart=millis();
      sound.play();
    }
  }
  if (gamestarted==1) {
    if (millis()-gamestart<=4000) {
      x1=width/4;
      y1=height/2;
      x2=width*3/4;
      y2=height/2;
      fill(255, 0, 0);
      noStroke();
      ellipse(x1, y1, 200, 200);
      fill(0, 0, 255);
      ellipse(x2, y2, 200, 200);
      fill(0);

      rect(width/2, height/2, 650, 650);
      fill(255);
      textSize(80);
      textAlign(CENTER, CENTER);
      text("WHO PAINTS MORE", width/2, height/2);
    }
    if (millis()-gamestart>4000&&millis()-gamestart<=5000) {
      fill(0);
      rect(width/2, height/2, 650, 650);
      fill(#74EAC0);
      textSize(300);
      textAlign(CENTER, CENTER);
      text("5", width/2, height/2);
    }
    if (millis()-gamestart>5000&&millis()-gamestart<=6000) {
      fill(0);
      rect(width/2, height/2, 320, 320);
      fill(#74BCEA);
      textSize(300);
      textAlign(CENTER, CENTER);
      text("4", width/2, height/2);
    }
    if (millis()-gamestart>6000&&millis()-gamestart<=7000) {
      fill(0);
      rect(width/2, height/2, 320, 320);
      fill(#5D59F5);
      textSize(300);
      textAlign(CENTER, CENTER);
      text("3", width/2, height/2);
    }
    if (millis()-gamestart>7000&&millis()-gamestart<=8000) {
      fill(0);
      rect(width/2, height/2, 320, 320);
      fill(#F00F52);
      textSize(300);
      textAlign(CENTER, CENTER);
      text("2", width/2, height/2);
    }
    if (millis()-gamestart>8000&&millis()-gamestart<=9000) {
      fill(0);
      rect(width/2, height/2, 320, 320);
      fill(#F00F52);
      textSize(300);
      textAlign(CENTER, CENTER);
      text("1", width/2, height/2);
    }

    if (millis()-gamestart>9000&&millis()-gamestart<=10000) {
      fill(0);
      rect(width/2, height/2, 320, 320);
      if (millis()-gamestart<=9900) {
        fill(#F00F52);
        textSize(200);
        textAlign(CENTER, CENTER);
        text("GO", width/2, height/2);
      }
    }


    if (millis()-gamestart>10001&&millis()-gamestart<=73000) {
      if (millis()-gamestart-pre21>=5000&&millis()-gamestart-pre21<=5100) {
        buff21=false;
      }
      if (millis()-gamestart-pre22>=5000&&millis()-gamestart-pre22<=5100) {
        buff22=false;
      }
      if (millis()-gamestart-pre31>=5000&&millis()-gamestart-pre31<=5100) {
        buff31=false;
      }
      if (millis()-gamestart-pre32>=5000&&millis()-gamestart-pre32<=5100) {
        buff32=false;
      }
      serialRecord.read();
      int value1 = serialRecord.values[0];
      int value2 = serialRecord.values[1];

      float angle1 = map(value1, 0, 1024, 0, 360);
      float angle2 = map(value2, 0, 1024, 0, 360);


      x1_direction=15*cos(radians(angle1));
      y1_direction=15*sin(radians(angle1));
      x2_direction=15*cos(radians(angle2));
      y2_direction=15*sin(radians(angle2));
      prex1=x1;
      prex2=x2;
      prey1=y1;
      prey2=y2;

      stroke(0);
      if (buff31) {
        x1=x1+2*x1_direction;
        y1=y1+2*y1_direction;
      } else {
        x1=x1+x1_direction;
        y1=y1+y1_direction;
      }
      if (buff32) {
        x2=x2+2*x2_direction;
        y2=y2+2*y2_direction;
      } else {
        x2=x2+x2_direction;
        y2=y2+y2_direction;
      }
      if (x1<0) x1+=width;
      if (x1>width) x1-=width;
      if (y1<0) y1+=height;
      if (y1>height) y1-=height;
      if (x2<0) x2+=width;
      if (x2>width) x2-=width;
      if (y2<0) y2+=height;
      if (y2>height) y2-=height;
      fill(255, 0, 0);
      if (buff21) {
        ellipse(x1, y1, 2*r1, 2*r1);
        push();
        noStroke();
        ellipse(prex1, prey1, 2*r1+4, 2*r2+4);
        pop();
      } else {
        ellipse(x1, y1, r1, r1);
        push();
        noStroke();
        ellipse(prex1, prey1, r1+4, r2+4);
        pop();
      }
      fill(0, 0, 255);
      if (buff22) {
        ellipse(x2, y2, 2*r2, 2*r2);
        push();
        noStroke();
        ellipse(prex2, prey2, 2*r2+4, 2*r2+4);
        pop();
      } else {
        ellipse(x2, y2, r2, r2);
        push();
        noStroke();
        ellipse(prex2, prey2, r2+4, r2+4);
        pop();
      }

      if (abs(millis()-gamestart-buff)<20&&e) {
        setbuff(x, y);
        e=false;
      }
      if (dist(x1, y1, x, y)<=100&&millis()-gamestart>buff) {
        getbuff1(floor(random(1, 8)));

        e=true;
        noStroke();
        fill(255, 0, 0);
        circle(x, y, 210);
        buff=floor(random(millis()-gamestart+5000, millis()-gamestart+10000));
        x=floor(random(0, width));
        y=floor(random(0, height));
      }
      if (dist(x2, y2, x, y)<=100&&millis()-gamestart>buff) {
        getbuff2(floor(random(1, 8)));

        e=true;
        noStroke();
        fill(0, 0, 255);
        circle(x, y, 210);
        buff=floor(random(millis()-gamestart+5000, millis()-gamestart+10000));
        x=floor(random(0, width));
        y=floor(random(0, height));
      }
    }

    if (millis()-gamestart>73000&&flag==1) {
      loadPixels();
      flag=0;
      for (int i=0; i<height*width; i++) {
        if (pixels[i]==color(0, 0, 255)) {
          countblue++;
        }
        if (pixels[i]==color(255, 0, 0)) {
          countred++;
        }
        pixels[i]=color(0, 0, 0);
      }
      updatePixels();
      fill(#221D23);
      rect(width/2, height/2, width, height);
      textSize(300);
      textAlign(CENTER, CENTER);
      int ratioblue=floor(countblue*100/(countred+countblue)+0.5);
      int ratiored=floor(countred*100/(countred+countblue)+0.5);
      if (countblue>countred) {
        fill(0, 0, 255);
        text("BLUE WINS", width/2, height/3);
        ratioblue++;
        text(ratiored+":"+ratioblue, width/2, height*2/3);
      } else {
        fill(255, 0, 0);
        text("RED WINS", width/2, height/3);
        ratiored++;
        text(ratiored+":"+ratioblue, width/2, height*2/3);
      }
      delay(10000);
    }
  }
}
Recitation 10: Image & Video

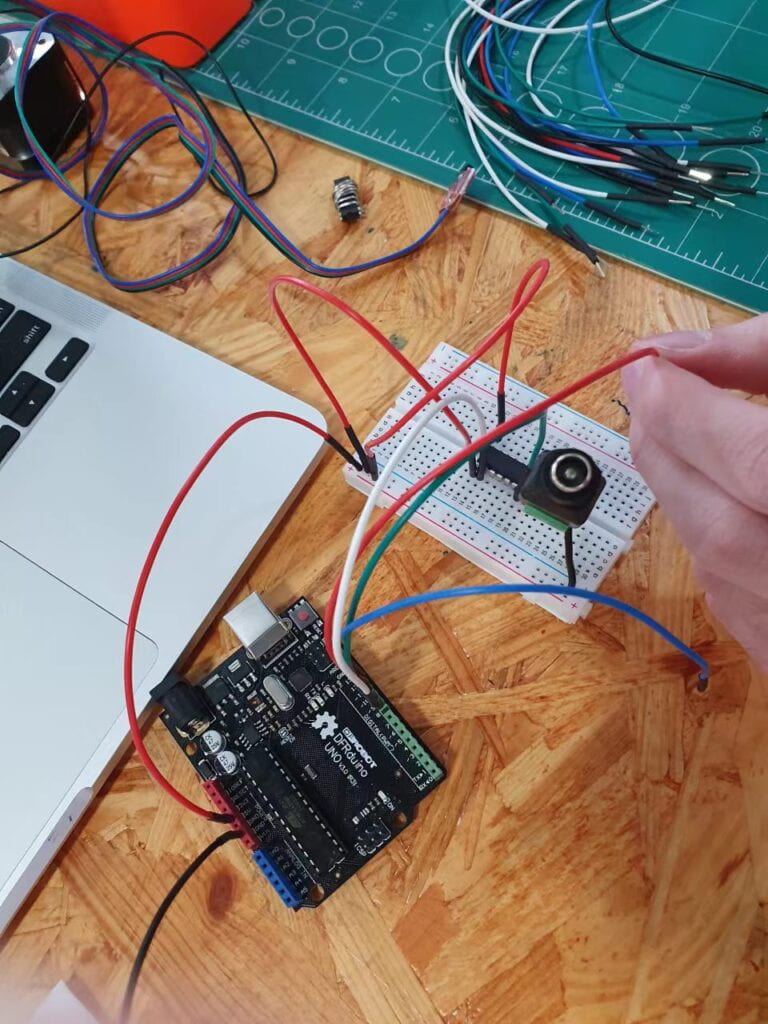
For the Arduino part, I decided to use a potentiometer as my input device since it’s the one that I’m most comfortable with. After that, I coded the Arduino to link with processing, where it will send 1 value to the codes in processing.

For the Processing part, I had the idea in mind that I wanted to change the filter based on the Arduino input. I started by connecting the Arduino code to the processing code. After that, I coded in Processing to display the camera. I put the tint code after the camera code in order to shift the color based on the input from the potentiometer. I had some problems with coding the cameras at first, but after asking the professors for help, I was able to solve that problem. Putting the tint in the code had some issues too, but it wasn’t too difficult and I was able to figure it out before the end of class.


Final Project: Essay

Paint Area game

         This project is meant for all type of people, especially people who enjoys competition and gaming. Me and my partner researched how we could make a project that involves both Arduino and Processing. We were inspired by random games throughout the internet, and we combined the advantages of each one and created our own. Our definition of interaction made us brainstorm the design of the project for a reasonable amount of time. We wanted the users to interact with the screen more than just with buttons and clicking. We wanted them to feel like they were in the actual game.

         Our project’s goal is to create a game that involves the domination of the area. We wanted to create a 2 player game, where each one will control a “paintbrush”, and the goal is to paint as much area as they can in a specific amount of time. We also decided to include power-ups in order to make the game more interesting. In terms of interaction, we decided to create a “steering wheel”, where the users would feel as if they’re actually steering the paintbrush in the game.

         Our preparatory research and analysis impact/inspire our projects in many ways, including interaction, design, concept, and many more. As I said before, we were inspired by many games on the internet, and we take the good things from each one for our own project. Our project aligns with the term interaction because the users have to steer the steering wheel physically in order to move the paintbrush in the designated direction. The users input value by steering, and the input would interact back to the users by displaying the control that the users did. Most games similar to this were already created on the internet, but what they lack is the interaction that the game has with the users. However, our project would elevate what they had because we include more things into the game as well as making the game more interactive with the users.

Recitation 9: Digital Fabrication

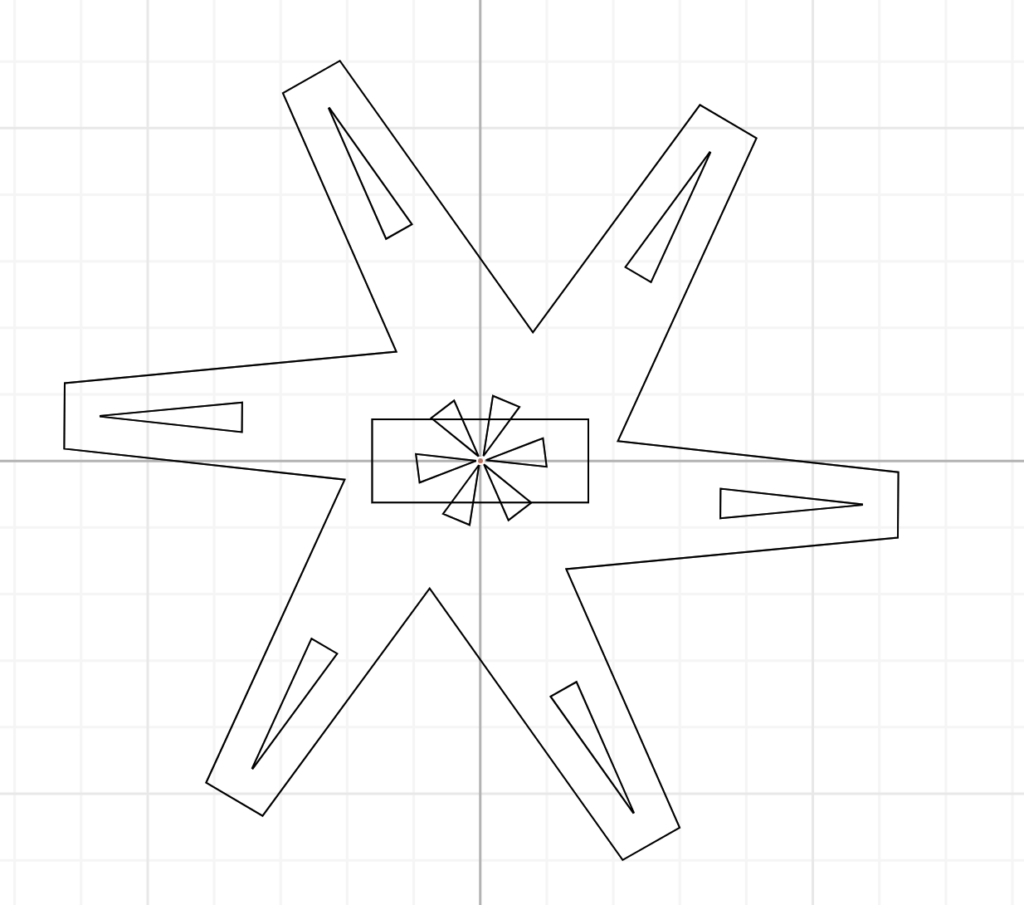
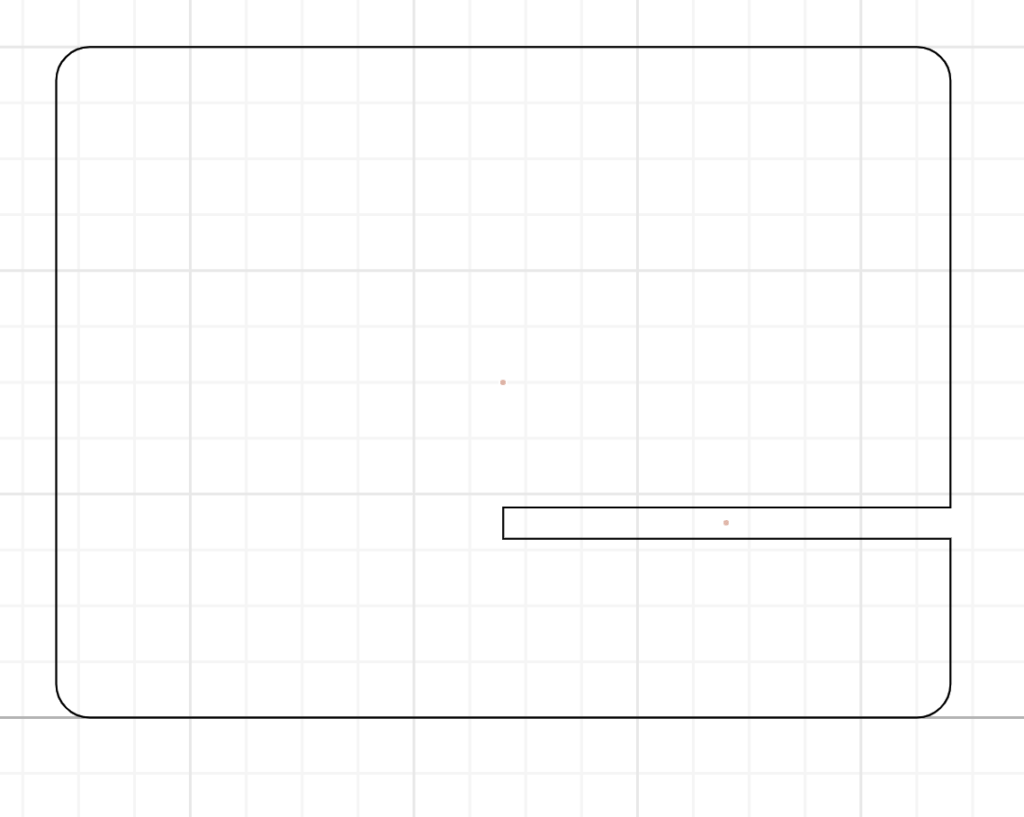
Step 1.1: Design

I worked with Nuri for this recitation class. After discussing with each other, I represented Student B while she represented Student A. Although this step is quite simple, we still took some time since we are both unfamiliar with using cuttle. 

Step 1.2: Pattern design

Me and my partner spent most of the class’s time on this step. We couldn’t figure out how to make the pattern work correctly since some designs will result in laser cutting through everything. However, with the help of the professors and the learning assistants, we were able to finally complete our 2 designs on cuttle and proceed to print them.

Step 1.3: Export your design

This step was relatively simple, so we didn’t struggle that much with it. We exported our file as an SVG and then uploaded it into google drive as required.

Step 2: Laser cut


In this step, me and my partner went to the fabrication lab and laser cutter our design. The process itself was amazing to watch, and it didn’t take as much time as I thought it would. 

Step 3: Assemble 


After we printed our boards, we opened Arduino and follow the steps from the recitation guide. After that, we assemble the boards to the motor and the Arduino, and everything worked out as planned.

Recitation 8: Serial Communication

Task #1 Documentation

This task started off straightforwardly because we’ve done the hardware part so many times before. The code was also given to us so the first part started off pretty strong for me. However, I was struggling with the second part where I had to replicate Etch-A-Sketch. I went back to the code in order to understand what the process is, then I asked one of the Learning Assistants to help me solve the problem. After some tips and comprehension, I was finally able to grasp the concept and succeed in making the Etch-A-Sketch replica. The interaction was between the 2 potentiometer that controls the x and y axis, which would then output the relative position of those values on Processing.


Task #2 Documentation

Teammate: Stephen Li

This task was extremely hard for both of us. At first, we couldn’t figure out how to link Processing with Arduino since our first trial didn’t work at all. We couldn’t figure it out throughout the class and we had to work after the recitation ended. We decided to check the codes separately on Arduino and Processing, and both of them seemed to be working well independently. After some help from the Learning Assistant and our own trial and error, we were able to do what the task assigned. The interaction is the circle would hit the edge of the screen which would then output that to the motor to turn, as if it was hitting the circle back the other way.


Final Project: Research

B.

An interactive project that I found incredibly interesting is a project from Majeed Kazemitabaar on Youtube. He built an interactive glove that links to a TV screen where he can control it similar to a remote. He also used it to play video games in the video, which is awesome. I chose this project because it is also similar to the project I did during my midterm project, which was much simpler compared to this. This project not only incorporates finger tapping (which I did in my Midterm Project), but also finger speed, finger orientation, and finger bending. All of these detections lead to different outputs on the TV screen, thus increasing the interactivity between the user and the technology.

Another interactive project I found very intriguing is a project from the Arduino website. This project combines both Arduino and Processing, both of which we have already learned in class. This project creates art on a screen when we move objects in front of a sensor. The sensor would input the value of the distance between the object and the sensor, and the output would be converted into shapes and colors, which would be displayed on the screen based on that value. I want to do a project similar to this because it would challenge me to tackle both Arduino and Processing at the same time, which would eventually turn out to be a captivating experience for the user.

https://www.arduino.cc/education/interactive-art-project

C.

I believe that a successful interactive experience must include a unique interactivity between the user and the technology. The interactivity has to be something memorable that the user has not experienced on a daily basis. I also believe that a successful interactive experience should include the user learning something new from this interactivity, and not only just the purpose of the project but also something new that was created from the interaction. In the article “Art, Interaction, and Engagement”, Ernest Edmonds defined one type of interaction as Dynamic Interactive, which states that “the human ‘viewer’ has an active role in influencing the changes in the art object.”(Edmonds, 3). This supports my definition of a successful interactive experience because he also emphasizes the part where the user has a prominent role in shaping how the final output would end up based on their input.

https://drive.google.com/file/d/1YYyhVTtNTBXQP2dlK8vE_QRJnpmCGvTE/view

Recitation 6: Animated Poster

Recitation:


Code:

void setup() {
  size(1024, 768);
  background(255);
  fill(102);
  strokeWeight(10);
}

void draw() {
  if (frameCount % 50 == 0) {
   fill(random(255), random(255), random(255));
  }
  rect(20, 20, 1004, 740, 20, 748, 1004, 748);
  fill(50);
  text("IMA",400,400);


  for (int y = 0; y < height; y = y+40) {
    for (int x = 0; x < width; x= x+40) {
      if (frameCount % 50 == 0) {
        fill(random(255), random(255), random(255));
        strokeWeight(10);
        textSize(120);
        text("IMA", random(1000), random(755));
      }
      }
    }
  }


In this recitation period, I learned how to create animations in processing. It was quite difficult to learn this art but it turned out as a great experience in the end.

Task #1: Add a Fixed Pattern

void setup() {
  size(1024, 768);
  background(255);
  fill(102);
  strokeWeight(10);
}
void draw() {
  int r = int(random(0, 255));
  int g = int(random(0, 255));
  int b = int(random(0, 255));
  if (frameCount % 50 == 0) {
    background(r, g, b);

    for (int y = 0; y < height; y = y+40) {
      for (int x = 0; x < width; x= x+40) {
        fill(random(255));
        rect(x, y, 20, 20);
      }
    }

    fill(random(255), random(255), random(255));
    circle(random(1000), random(700), random(700));
    circle(random(1000), random(700), random(700));
    circle(random(1000), random(700), random(700));

    fill(random(255), random(255), random(255));
    rect(random(750), random(750), random(750), random(750), random(750), random(750), random(750), random(750));
    rect(random(750), random(750), random(750), random(750), random(750), random(750), random(750), random(750));
    rect(random(750), random(750), random(750), random(750), random(750), random(750), random(750), random(750));

    fill(random(255), random(255), random(255));
    triangle(random(200), random(150), random(200), random(150), random(200), random(150));
    triangle(random(1000), random(750), random(1000), random(750), random(1000), random(750));
    triangle(random(201, 500), random(150, 300), random(201, 500), random(150, 300), random(201, 500), random(150, 300));
    triangle(random(501, 700), random(301, 501), random(501, 700), random(301, 501), random(501, 700), random(301, 501));
    triangle(random(701, 1000), random(501, 751), random(701, 1000), random(501, 751), random(701, 1000), random(501, 751));
  }
}
void mousePressed() {
  fill(random(255), random(100), random(100));
  strokeWeight(10);
  textSize(120);
  text("IMA", random(1000), random(755));
}

With the help of Youtube videos, I was able to understand how to create patterns on processing.

Task #3: Make it interactive


Code:

void setup() {
  size(1024, 768);
  background(255);
  fill(102);
  strokeWeight(10);
}
void draw() {
  int r = int(random(0, 255));
  int g = int(random(0, 255));
  int b = int(random(0, 255));
  if (frameCount % 50 == 0) {
    background(r, g, b);
    
    fill(random(255), random(255), random(255));
    circle(random(1000),random(700),random(700));
    circle(random(1000),random(700),random(700));
    circle(random(1000),random(700),random(700));
    
    fill(random(255), random(255), random(255));
    rect(random(750),random(750),random(750),random(750),random(750),random(750),random(750),random(750));
    rect(random(750),random(750),random(750),random(750),random(750),random(750),random(750),random(750));
    rect(random(750),random(750),random(750),random(750),random(750),random(750),random(750),random(750));
    
    fill(random(255), random(255), random(255));
    triangle(random(200), random(150), random(200), random(150), random(200), random(150));
    triangle(random(1000), random(750), random(1000), random(750), random(1000), random(750));
    triangle(random(201, 500), random(150, 300), random(201, 500), random(150, 300), random(201, 500), random(150, 300));
    triangle(random(501, 700), random(301, 501), random(501, 700), random(301, 501), random(501, 700), random(301, 501));
    triangle(random(701, 1000), random(501, 751), random(701, 1000), random(501, 751), random(701, 1000), random(501, 751));
  }
}
void mousePressed() {
      fill(random(255),random(100),random(100));
      strokeWeight(10);
      textSize(120);
      text("IMA", random(1000), random(755));
}

I was able to learn how to use the void mousePressed() in this code, and it turned out to be extremely useful.

Recitation 5: Processing Basics

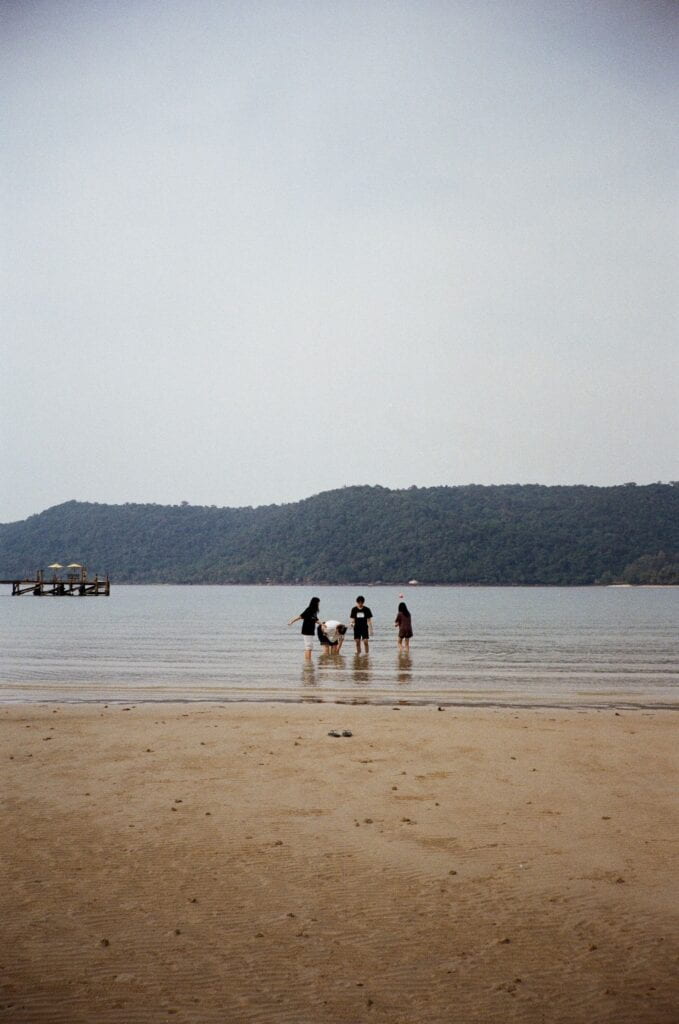
I chose this photo because it’s aesthetically beautiful, and it represents my home country, Thailand. I wanted to convert this image into simple shapes and code it into Processing. 

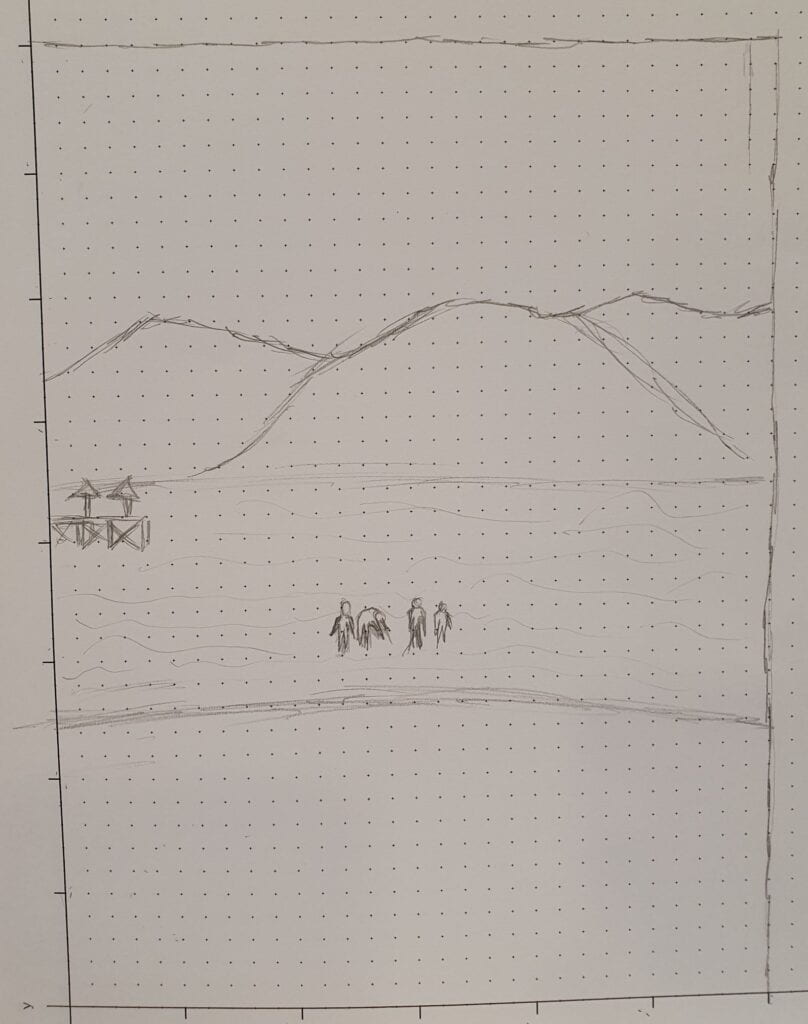
This drawing is similar to the original photo in ways that the structures are the same, however I removed the unnecessary details so that it would be easier for me to code in Processing. 

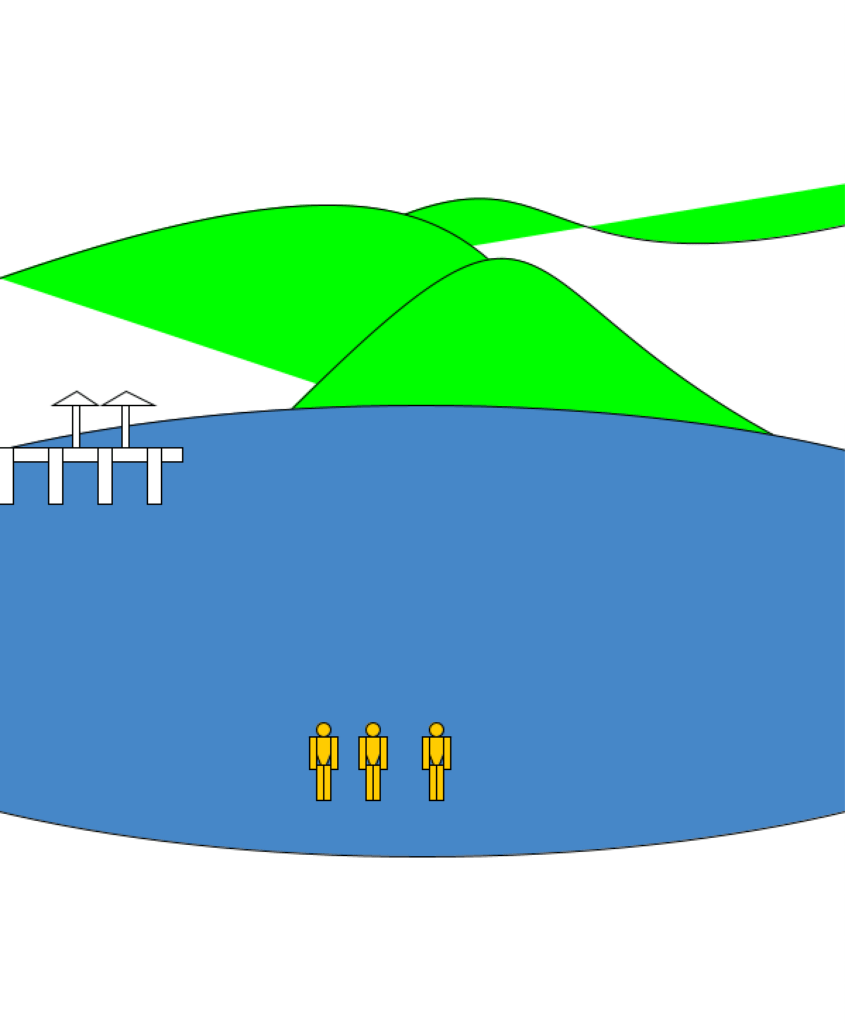
This is my drawing for Processing. I do believe that this is a good mean for my design, since there are endless of possibilities that I can do with it for art. I added some colors to make it look better, but I still have a lot to work on.

Code:

void setup() {
    size(600, 800);
}
void draw() {
    // Your drawing code goes here
    background(255);
    color g = color(0,255,0);
    fill(g);

    bezier(200, 200, 460, 40, 300, 290, 800,100); //mountain 1
    bezier(00, 200, 460, 40, 300, 290, 600,400); //mountain 2
    bezier(200, 300, 460, 40, 300, 290, 800,400); //mountain 3

    color b = color(70, 135, 200);
    fill(b);
    arc(300, 450, 1000, 320, 0, TWO_PI, CLOSE);

    fill(255);
    rect(0, 320, 130, 10); //platform
    rect(0, 320, 10, 40); //wall 1
    rect(35, 320, 10, 40); //wall 2
    rect(70, 320, 10, 40); //wall 3
    rect(105, 320, 10, 40); //wall 4
    rect(70, 320, 10, 40); //wall 5
    rect(52, 290, 5, 30); //stand
    rect(87, 290, 5, 30); //stand
    triangle(38, 290, 55, 280, 70, 290); // umbrella
    triangle(73, 290, 90, 280, 110, 290); //umbrella

    color c = color(255, 204, 0);
    fill(c);
    circle(230, 520, 10);
    triangle(220, 525, 240, 525, 230, 550);
    rect(225, 545, 5, 25);
    rect(230, 545, 5, 25);
    rect(220, 525, 5, 23);
    rect(235, 525, 5, 23);

    circle(265, 520, 10);
    triangle(255, 525, 275, 525, 265, 550);
    rect(260, 545, 5, 25);
    rect(265, 545, 5, 25);
    rect(255, 525, 5, 23);
    rect(270, 525, 5, 23);

    circle(310, 520, 10);
    triangle(300, 525, 320, 525, 310, 550);
    rect(305, 545, 5, 25);
    rect(310, 545, 5, 25);
    rect(300, 525, 5, 23);
    rect(315, 525, 5, 23);}

Midterm Project: Make, Present & Report

A. Music Hand – Tawan – Rodolfo Cossovich

B. CONTEXT AND SIGNIFICANCE

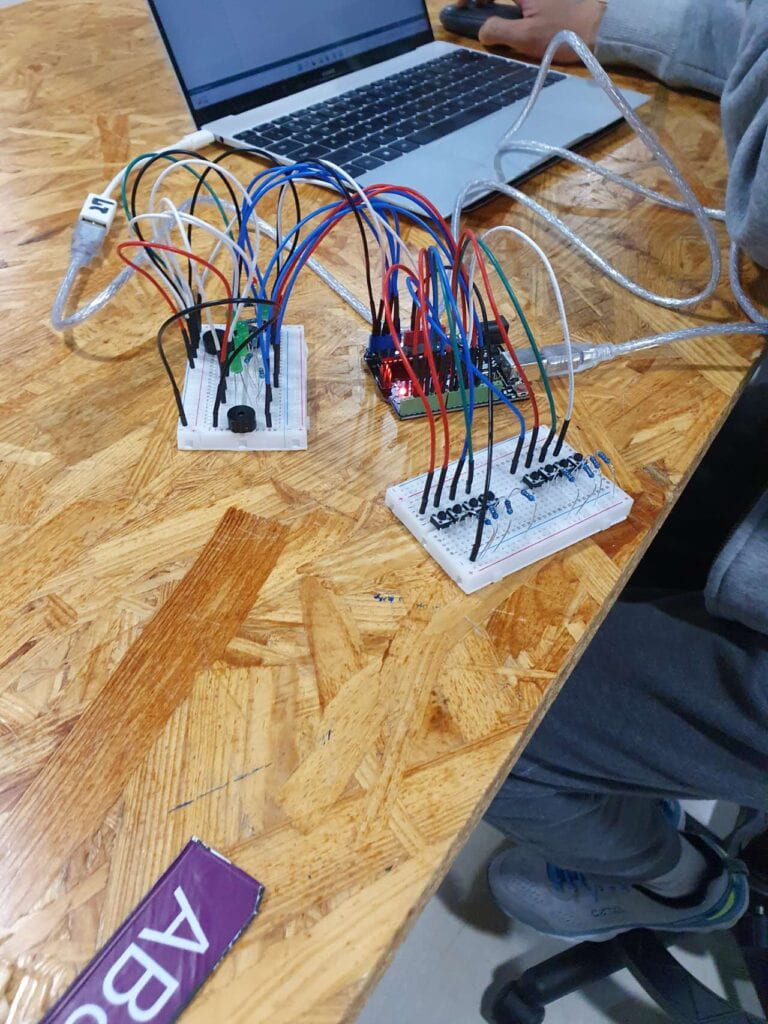
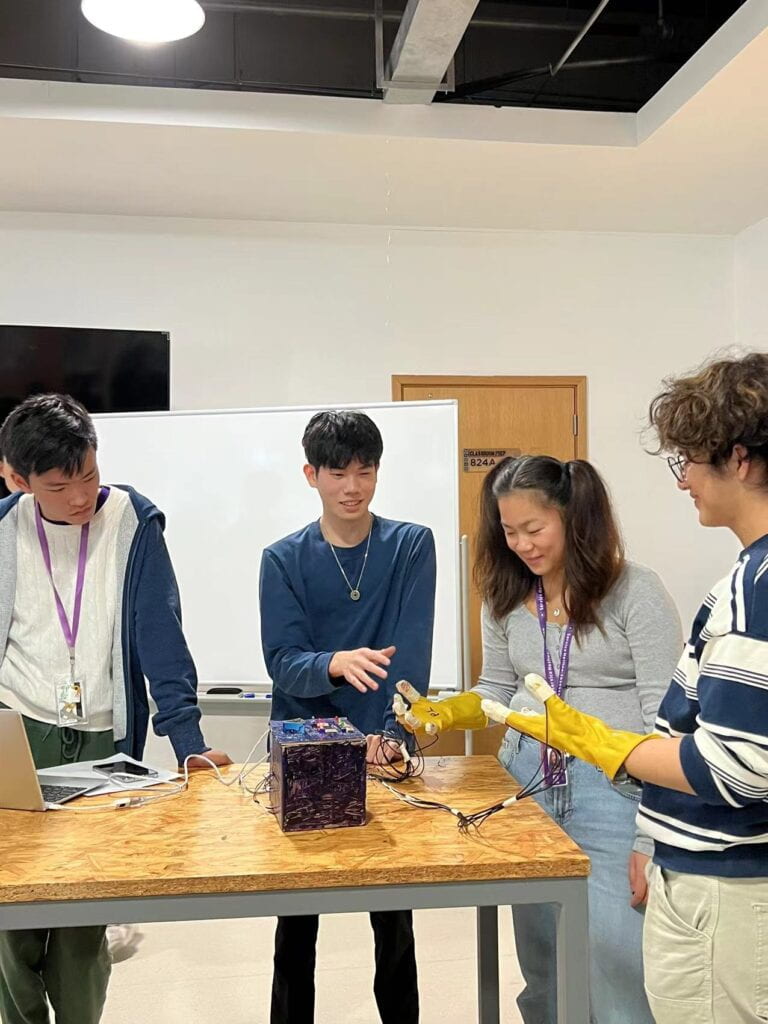
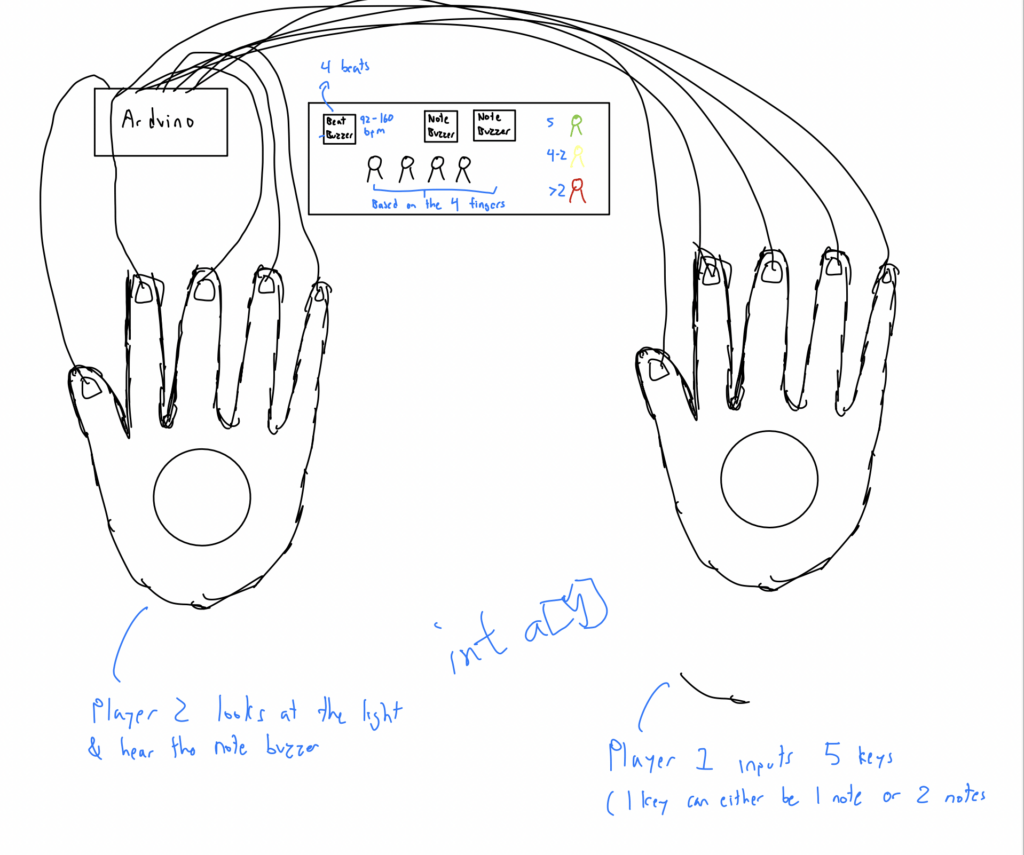
          The previous group project has allowed me to be better equipped for working on a group project. For instance, the time management and the work division are far more efficient than the first group project. This midterm project shows interaction because based on my definition of it, the user sends a signal to the glove and the buzzer and the lights respond back to the user. This project was based on a music game where players have to press the right note, but we’ve elevated it so that there’s much more interaction than just a finger and a screen. We’ve also made it multiplayer, in which musicians can play this game in order to test their memory and hearing skills.

 D. FABRICATION AND PRODUCTION:

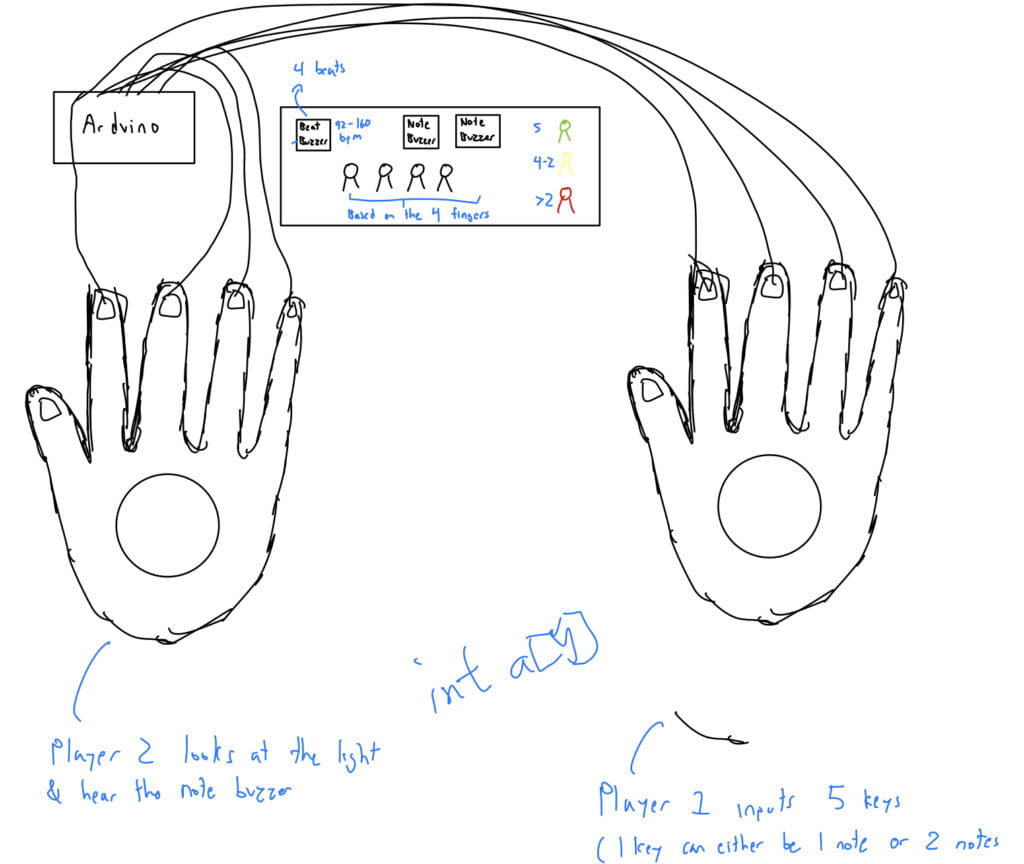
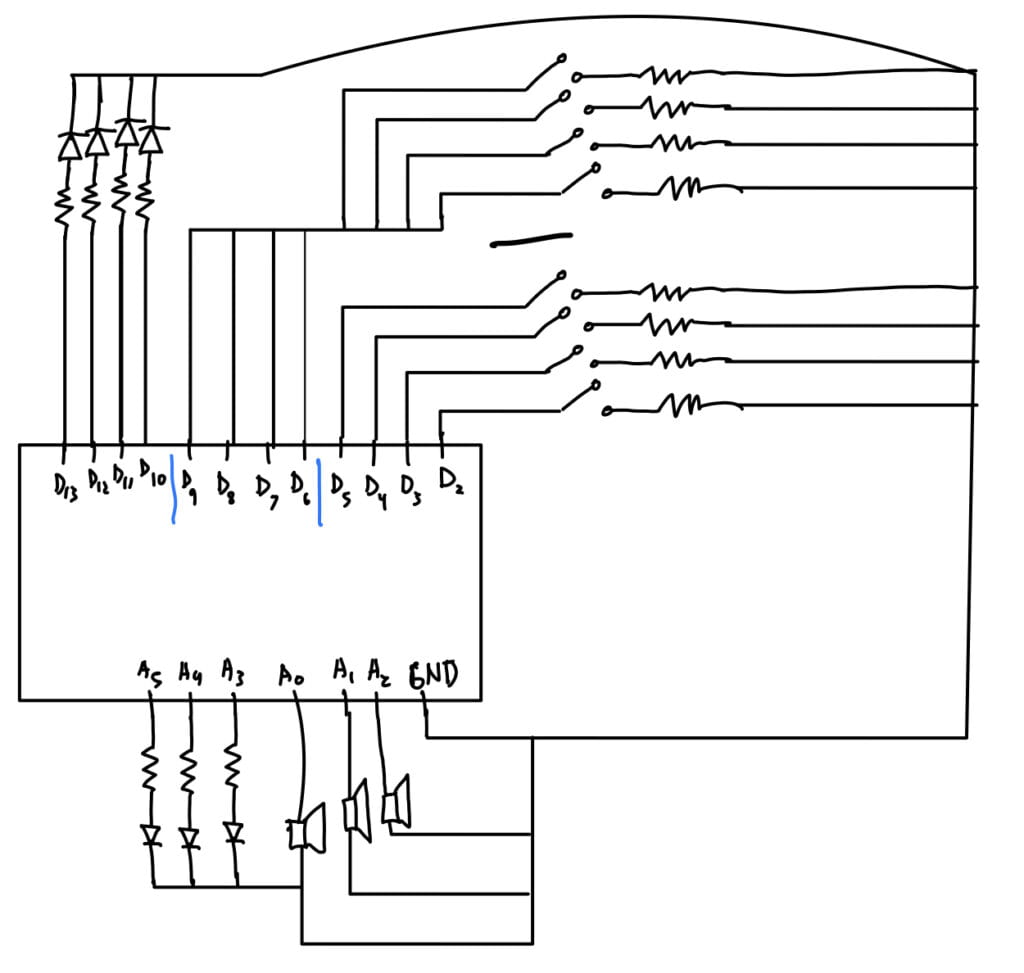
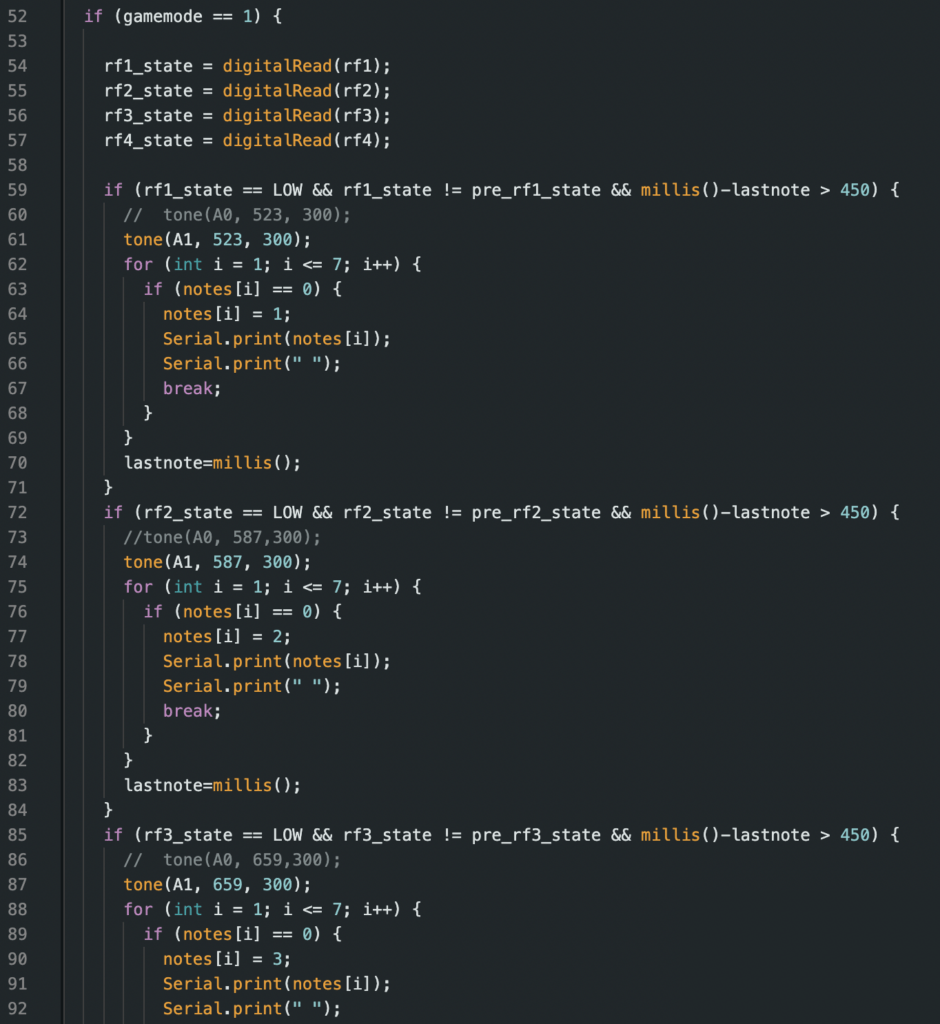
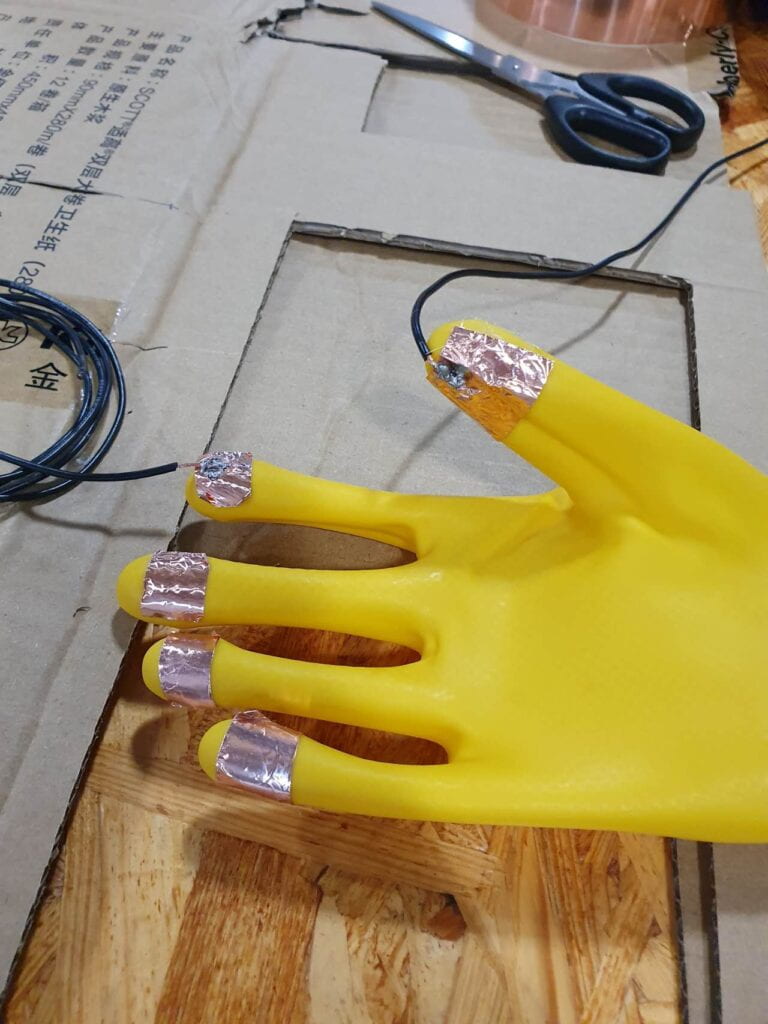
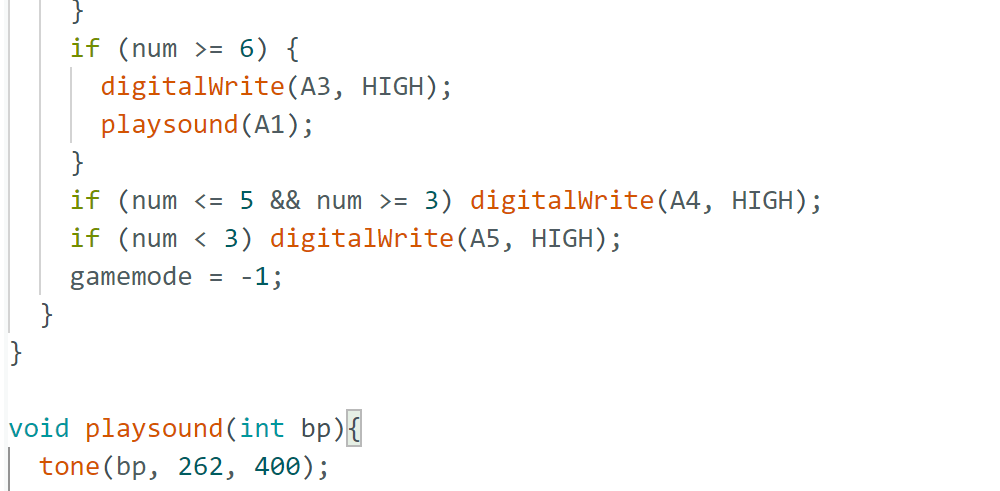
          Throughout the project, we’ve stumbled upon several problems that almost made us change the entire project, hardware and software included. We ran into coding problems where the if-then statement for the competition game part doesn’t work, which would then defeat the whole purpose of this project. We’ve also run into hardware problems such as the aluminum foil not sending proper or accurate signals to the output, which caused some abnormal errors and malfunctions. We’ve got several good feedbacks from the User Testing Session, but one critique that we got repeatedly is to use LEDs as a visualizer for the game so that the player can understand the game better. We didn’t alter anything much after the user testing since we’ve basically finished 80% of the project, so our adaptation after that session was just improving the errors that occurred several times during the testing. We’ve always known that we were going to make an instrument that would also be a game, and we decided to work on the details that would still make this project interesting while not being too much out of our skill level.

E. CONCLUSIONS:

          Our goal for this project always has been to create an instrument that would also act as a game, and I believe that we’ve done exactly that for our final result. This midterm project shows interaction because based on my definition of it, the user sends a signal to the glove and the buzzer and the lights respond back to the user. The audience interacted exactly the same way I expected them to interact with this project. If I had more time, I would definitely improve the finger sensor so that it’s easier to press while also not making the metal plate fall off the glove. I’ve taken away many good and bad feedbacks from this project, such as time management and dividing workload are essential to group projects, and I’ve also realized that most of the time the real result of the project would be much different than the initial plan due to all the setbacks we would face throughout the process. This led me to learn that everything needs trial and error before we can find the most optimal solution to a problem. This project can allow the user to test and improve their memory skill as well as their hearing skill, which would be very beneficial, especially to musicians.

 User Testing:
 

Final product:


F. ANNEX

Recitation 4: Actuators & Mechanisms

Step 1: Build the circuit

In this step, my partner Stephen and I ran into some problems such as not knowing the name of each component and its functions. After some research and questions, we could figure out the general idea of what this recitation is about. We made sure to follow the hardware diagram carefully since we didn’t want to mess it up and figure out which part was wrong again, so we tried to do it right on the first try. In the end, it worked out in our favor.

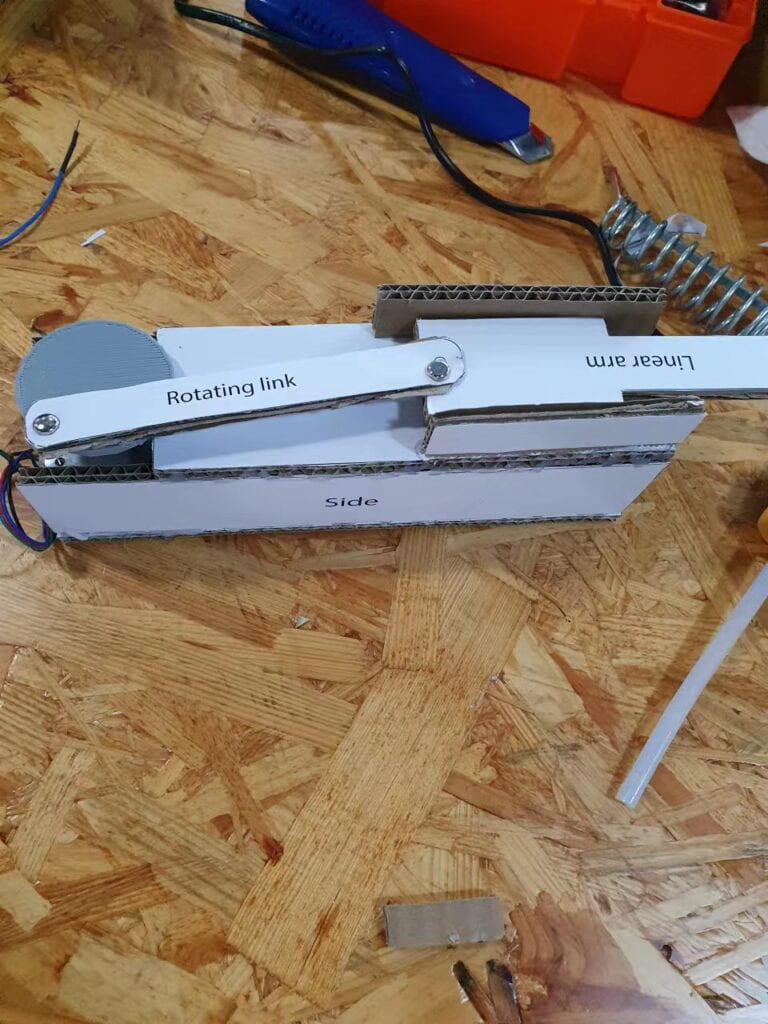
Step 2: Build a cardboard mechanism!

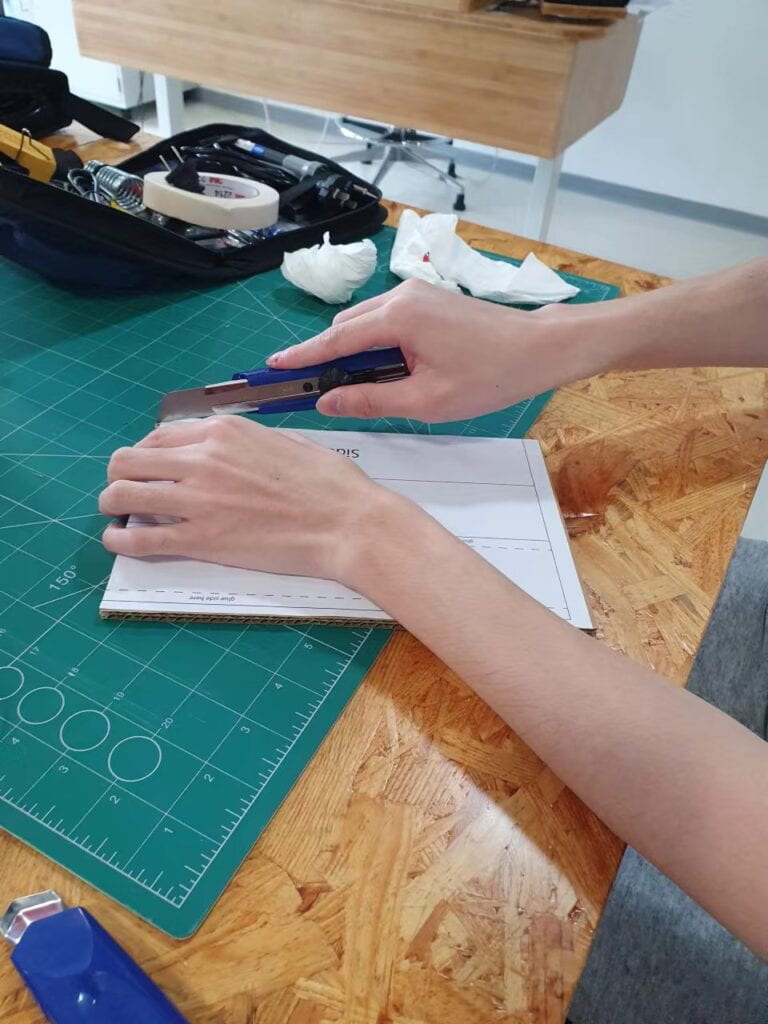
We didn’t really run into any problems in this step because all we had to do was cut out the pieces of cardboard and assemble them together. However, the cutting part took the most time out of all the steps in this recitation. 


Step 3: Personalize it

In this step, we added a triangle in the front of the machine and increase the rotation speed to its max. We also remove the counterclockwise code so that the machine would only spin one way.


Documentation

Question 1: Bill Vorn, Hysterical Machine, 2006

This machine that Bill Vorn made is similar to our recitation project because the legs that he used for the machine also use actuators that move back and forth and works as a joint, or an arm. The artist is likely to choose the actuator based on the function that he wants the part to do.

Question 2: 

The mechanism I’m interested in building for my midterm includes a mechanism that functions on a glove. Me and my partner wanted to make a glove instrument that makes a sound, in which a mechanism that involves hand function would suit our project. Our motor will be different in that instead of using the finger and screen as the input and the output, we will use each finger and sensor as the input and the output.