GEO-DASH: JUMP – Shauna Stewart- Rodolfo Cossovich
Three Ideas:
We originally had to come up with three ideas for the final exam and we wanted to create a game for the final exam. The first idea was the idea we ended up going with for the final project. Mostly because out of the three ideas it was the one that we were most interested in trying to build. The original sketch included two parts, a game pad that the user would jump on and a hoop that the user would lift up and down. We were going to use these two different parts to create different sections of the game and require the user to interact with both. We realized that this was too ambitious so we decided to drop the hoop section and just focus on the game pad.
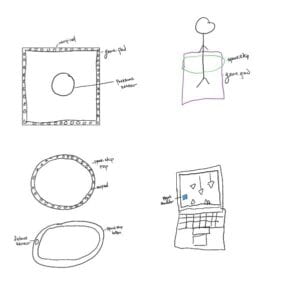
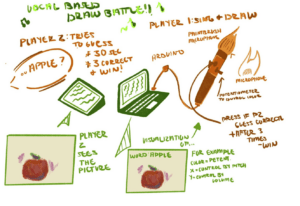
The second idea that we came up with was to create a Pictionary-like game where the user would use their voice to draw images on a canvas. One player would be given the word that they have to draw while the other user would have to guess what they were drawing and the game would end after three rounds. Their pitch would control the x coordinates and their volume would control the y coordinates. They would be able to change the color of the line using a potentiometer located on the device.
We decided not to go with this idea because we thought it would be too difficult for the user to actually draw something that someone else could guess using this type of controls.
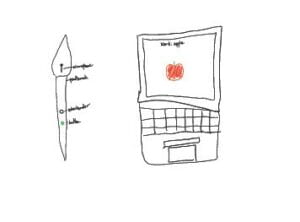
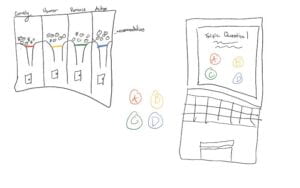
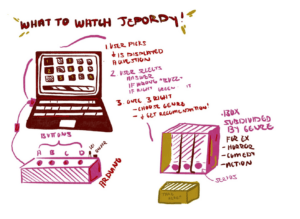
The third idea was to make a machine that could give the user recommendations of shows to watch but require them to answer triva questions first. This idea was not as fleshed out as the other two and we weren’t particularly interested in trying to create this project so we decided not to go with this idea.
CONCEPTION AND DESIGN:
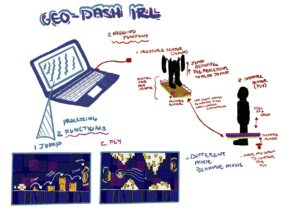
We came up with the idea for this project based off of the mobile phone game Geometry Dash. When coming up with ideas for our final project I wanted to do some sort of game that would be for purely entertainment purposes. When coming up with game ideas that we could do, we thought it would be interesting to have the user jump and the character on screen respond to their movement. We decided to use Geometry Dash as our inspiration because the game features a lot of geometric shapes that we thought would lend themselves well to processing.
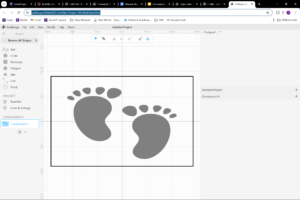
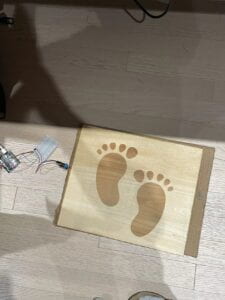
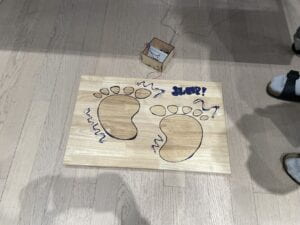
We expected our users to be able to jump on the game pad and have that movement mirrored by the on screen character so we created a game pad that felt sturdy enough to jump on while also feeling slightly precarious so that the player had to keep their balance while avoiding obstacles. We wanted to make it very obvious what the user was expected to do with the game pad so it was placed on the floor and had two footprints engraved into it with the word jump written on it. We also made the obstacles in the game red signaling to the user to avoid the obstacles.
During the User Testing we recieved a lot of helpful feedback on our project. We had some issues with the project breaking whenever the user tried to jump twice without letting the character land first, so the interaction was not as smooth for the user as we had originally hoped.
Since we created a game we got a lot of feedback on the design aspects of our project such as the character being too boring or the game pad being too boring.
We also recieved feedback on the scoring mechanic of the game. Originally the score would go up when you hit the obstacles causing the users to believe that the goal was to collect the obstacles as opposed to avoid them. We fixed this by making the obstacles red in color and also having the score decrese each time you hit an obstacle. When the score reached zero the game would end and you would recieve a game over screen. We also had the obstacle coming at the character from multiple heights so it was too difficult for the player to avoid. To fix this we set perameters for the obstacles so they would only appear within a certain height range. We also had to decrease the number of obstacles appearing to prevent the obstacles from overlapping on each other.
Most of the changes we made after user testing were effective. We had a better reaction to our project during the final presentation and it was much easier for the user to play the game. We may have over corrected for the mistakes we experiencef during user testing because during the final presentaion we recieved the feedback that the game was now too easy.
FABRICATION AND PRODUCTION:
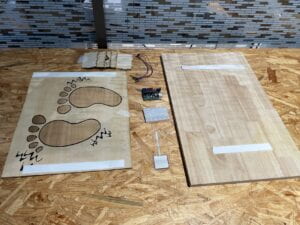
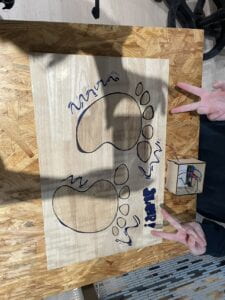
The major aspect of fabrication for this project was the game pad. Originally we were unsure of how to create it and were planning on 3D printing a rubber sheet that we could put on top of a piece of cardboard with the sensor sitting in between the two layers. We then realized it would take a lot of time to 3D print a rubber sheet and we decided to test out some other materials. We took a small piece of leftover 3mm plywood and put it on top of a piece of cardboard with a vibration sensor in the middle. The vibration sensor worked well in this small prototype so we decided to go with these materials for the project. Once we user tested with this method however it did not work well. The sensor would catch the vibration some times and not others and it was also possible for the user to play the game by tapping one foot instead of jumping with both feet. After user testing we changed the vibration sensor to a large force sensor. Once we did that, we realized that the cardboard was absorbing all of the force so the sensor was not reading it. We then decided to take a larger and thicker piece of wood and lay it ontop of the 3mm plywood with the sensor inbetween. We used foam tape and cardboard to create a cusion for the board to sit on and then used the foam tape and cardboard to create pressure on the sensor once the user stands on it.
Original GamePad with 3mm wood
New GamePad
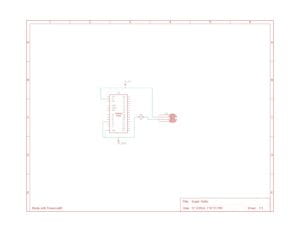
The force sensor ended up being better suited to our project than the vibration sensor because it was bigger and more sensitive to the changes in pressure which influence the character’s ability to jump. It also did not have the issue of working some times and not working at other times, we also did not have to worry about the vibrations being aborbed by the materials we were using. When we were using the vibration sensor we were using it digitally because we wanted to have a value of either zero or one. When we changed to using a force sensor we decided to use it as analog to get more accurate readings and we mapped the values of the anolog sensor to read either zero or one. If it read one it meant the person was jumping and there was no force being placed on the sensor if it read zero that meant the person was standing on the sensor. This was much smoother than trying to account for the vibrations of the person’s jump.
In keeping with the theme of Geometry Dash we were going to add a section of the game where it flips upside down and the character has to continue jumping to avoid the obstacles. However we ran out of time and we also thought that the game without that section was still enjoyable to the user. We did not want to make the game more confusing for the user especially because our game did not have any instructions.
Code (Arduino to Processing)
void setup() {
  Serial.begin(9600);
}

void loop() {
  // to send values to Processing assign the values you want to send
  // this is an example:
  int sensor0 = analogRead(A3);


  // send the values keeping this format
  // Serial.println(sensor0);
  // Serial.print(",");  // put comma between sensor values
  if (sensor0 > 750) {
    Serial.println("0");
  } else {
    Serial.println("1");
  }


  // too fast communication might cause some latency in Processing
  // this delay resolves the issue
  delay(20);

  // end of example sending values
}
Code (Processing)
// global variables (top of sketch)
float[] xs = new float[10];
float[] ys = new float[10];
float[] sizes = new float[10];
color[] colors = new color[10];
float[] xspeeds = new float[10];
float[] yspeeds = new float[10];

player p1;
int obstacles;
PImage img;
PFont FONT;

import processing.serial.*;
import processing.sound.*;

//declare a SoundFile object
SoundFile sound;
SoundFile sound2;

Serial serialPort;
int NUM_OF_VALUES_FROM_ARDUINO = 1;  /* CHANGE THIS ACCORDING TO YOUR PROJECT */
/* This array stores values from Arduino */
int arduino_values[] = new int[NUM_OF_VALUES_FROM_ARDUINO];

void setup() {
  fullScreen();
  //size(800, 400); this was used to check the gameplay without having it run full screen so we could still see the processing values
  p1 = new player (width/2, height/2, 100, 100);

  sound = new SoundFile(this, "baseafterbase.mp3");
  // play the sound on loop
  sound.loop();

  sound2 = new SoundFile(this, "lost.mp3");


  img=loadImage("FinBackresize.jpg");


  FONT = createFont("GameFont.ttf", 100);

  printArray(Serial.list());
  // put the name of the serial port your Arduino is connected
  // to in the line below - this should be the same as you're
  // using in the "Port" menu in the Arduino IDE
  serialPort = new Serial(this, "COM10", 9600);

  for (int i=0; i < 3; i=i+1) {
    xs[i] = random(width);
    //ys[i] = random(height);
    ys[i] = random(600, 650);
    sizes[i] = random(50, 100);
    colors[i] = color(255, 0, 0);
    xspeeds[i] = (9);
    //yspeeds[i] = random(1, 5);
  }
}

void draw() {
  // receive the values from Arduino
  getSerialData();

  // use the values like this:
  float x = map(arduino_values[0], 0, 1023, 0, width);
  float y = map(arduino_values[0], 0, 1023, 0, height);


  if (arduino_values[0] == 1) {
    p1.isJumping = true;
  }


  // the helper function below receives the values from Arduino
  // in the "arduino_values" array from a connected Arduino
  // running the "serial_AtoP_arduino" sketch
  // (You won't need to change this code.)

  image(img, 0, 0);

  //background (42);


  noStroke();
  for (int i=0; i < 3; i=i+1) {
    fill(colors[i]);
    //circle(xs[i], ys[i], sizes[i]);
    triangle(xs[i], ys[i], (xs[i]-50), (ys[i] +200), (xs[i] + 50), (ys[i] + 200));
    xs[i] = xs[i] - xspeeds[i];
    //ys[i] = ys[i] + yspeeds[i];
    //println("ys[i] " + ys[i]);
    // check right edge
    if (xs[i] < 0) {
      xs[i] = width;
    }
    // check bottom edge
    if (ys[i] > height) {
      ys[i] = 0;
    }

    fill (255);
    /*this part of the code was adapted from Chris Whitmire Lessons. Getting a Player to Move Left and Right in Processing. 2022. YouTube, https://www.youtube.com/watch?v=jgr31WIYWdk.
     and Chris Whitmire Lessons. Getting a Player to Jump in Processing. 2022. YouTube, https://www.youtube.com/watch?v=8uCXGcWK4BA.
     */

    p1.render();
    p1.jumping();
    p1.falling();
    p1.JumpStop();
    p1.land();

    // when player comes into constact with an obstacle
    if (dist(p1.x, p1.y, xs[i], ys[i]) < sizes[i]) {
      println("hit by " + i);
      obstacles -=1;
      println(obstacles);
    }
    textSize(100);
    fill(255);
    textFont(FONT);
    text("score" + (obstacles+100), 20, 120);
  }
  if (obstacles <= -100) {
    for (int i=0; i < 3; i=i+1) {
      xs[i] = 0;
      tint(255, 0, 0);
      sound.amp(0);
      sound2.play();
      //image(img, 0, 0);
      textSize(100);
      fill(255);
      textFont(FONT);
      text("GAME OVER", 560, 370);
    }
  }
}


void getSerialData() {
  while (serialPort.available() > 0) {
    String in = serialPort.readStringUntil( 10 );  // 10 = '\n'  Linefeed in ASCII
    if (in != null) {
      //print("From Arduino: " + in);
      String[] serialInArray = split(trim(in), ",");
      if (serialInArray.length == NUM_OF_VALUES_FROM_ARDUINO) {
        for (int i=0; i<serialInArray.length; i++) {
          arduino_values[i] = int(serialInArray[i]);
        }
      }
    }
  }
}
class player {
  /*this part of the code was adapted from Chris Whitmire Lessons. Getting a Player to Move Left and Right in Processing. 2022. YouTube, https://www.youtube.com/watch?v=jgr31WIYWdk.
   and Chris Whitmire Lessons. Getting a Player to Jump in Processing. 2022. YouTube, https://www.youtube.com/watch?v=8uCXGcWK4BA.
   */
  int x;
  int y;

  int w;
  int h;

  boolean isMovingLeft;
  boolean isMovingRight;

  boolean isJumping;
  boolean isFalling;

  int speed;

  int jumpHeight; //distance you can jump up
  int topOfJump; //y value of top of jump

  int obstacles;


  //constructor
  player(int startingX, int startingY, int startingW, int startingH) {
    x= startingX;
    y= startingY;
    w = startingW;
    h= startingH;


    isMovingLeft = false;
    isMovingRight = false;

    isJumping = false;
    isFalling = false;

    speed = 7;

    jumpHeight = 500;
    topOfJump = y- jumpHeight;
  }
  //functions
  void render() {
    rectMode (CENTER);
    rect(x, y, w, h);
    fill (255, 204, 255);
  }


  void jumping () {
    if (isJumping == true) {
      y-=speed;
    }
  }

  void falling() {
    if (isFalling == true) {
      y+= speed;
    }
  }

  void JumpStop() {
    if (y<= topOfJump) {
      isJumping = false; // stop jumping upward
      isFalling = true; //start falling downward
    }
  }

  void land () {
    if (y>= height/2) {
      isFalling = false; //stop falling
      y = height/2; // snap player to middle of screen
    }
  }
}
Videos:
CONCLUSIONS:
The goal of our project was to create a game that recreated aspects from a popular mobile game Geometry Dash. Although we were not able to recreate all of the aspects such as the gravity switching or flying aspects of the game, our project was still able to give the users an enjoyable experience that had a distict visual aspect. Ultimately the audience response to our project was positive especially because most of our audience was able to witness the growth our project made from user testing to the final presentation. The user who interacted with our project for the final presentation was able to easily play the game and there were no issues with the game pad or jumping funtion which was a considerable improvement over the previous version.
The project results aligned with my definition of interaction because the user was able to physically do something in their real environment and affect the character in the digital environment. They were able to engage in a sort of conversation with the game and their actions directly impacted the outcome of the game.
If we had more time I think I would have wanted to add a loading screen with instructions for the user and maybe a countdown for the game to actually start. I think it caused some confusion when the game started with no warning and obstacles began appearing. I also think it would have been cool to add a character selection screen where they could customize the square character by changing the color or adding facial expressions.
From the setbacks we had I learned the value of testing in many different circumstances. One of the issues that appeared from our use of the vibration sensor was because while testing the prototype we hit it with our fist instead of jumping on it so when we went to jump on it, it did not work. Another issue came in the difference in pressure of people jumping with shoes on and shoes off. So it was very important that we test the project under all of these different circumstances so that no matter what the user did, our project would respond the way we wanted it to.
From my accomplishments I takeaway that it is actually possible to build a game in processing even though it was a bit difficult.
In conclusion I am proud that we were able to make a game that was functional, had a distinct look and was enjoyed by the user. This project has made me interested in game design and I hope to learn more about game design in the future.
DISASSEMBLY:
APPENDIX
Parts of the code were adapted from the following tutorials:
