1. CONCEPTION AND DESIGN:
The concept of this project is to build a somatosensory fighting game that integrates all operation systems into a pair of gloves. The inspiration comes from the handles of the VR game set and the WII game set from Nintendo. Both are mature examples of somatosensory games. However, my initial proposal was to build an operating system that required real action from players (i.e.players do really punching for a fighting game) rather than simply pushing buttons on their controller. My idea was to create an operating system that focused on the movement of the user’s hand and only used buttons and slides as auxiliary means. During user testing, I found the gloves’ sliders are hard to access. Also, the UI part lacks instructions, which makes it hard to understand how to play with it. 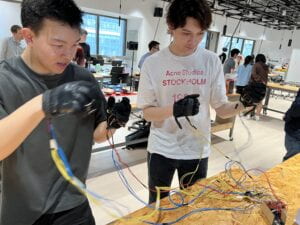 (photo taken during user testing)
Thus, I made some adjustments to the positions of the buttons to make this project more user-friendly. Also, I polished the UI.
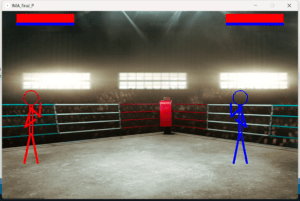 (The final version of the UI)
Those suggestions are pretty helpful for my project since they come from users’ first impressions, which offered me a new version of the project, like UI design.
2. FABRICATION AND PRODUCTION:
To build this project, I chose two pairs of gloves from Mechanix. The core to detecting the user’s hand movement is using acceleration sensors. Thus, I prepared two kinds of acceleration sensors: ADXL335 and ADXL345.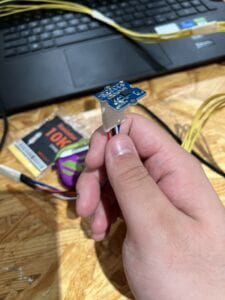
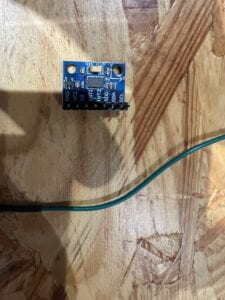
Due to the limited amount of pins on the Arduino(though it’s a Mega2560), I used two different brands of acceleration sensors for each player. The acceleration sensor is attached to the glove with tape. 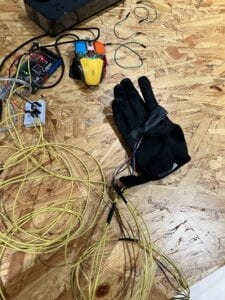
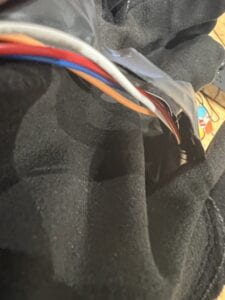
According to the design, this is the only sensor on the right hand. Players could do punches and block defense by punching and blocking. However, due to the difference between different acceleration sensors, the blocking function only works for ADLX345. Therefore, I add a button on one of the player’s operating system for him to do block action.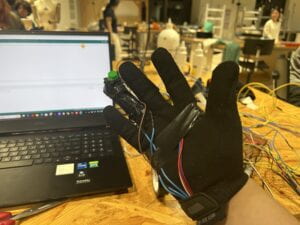
The operating system on the right hand mainly consists of a slider to control the moving action and a button for a kick.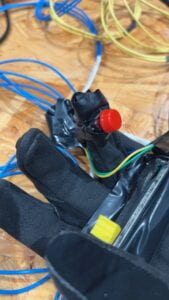 Like many games, kicks have a limitation and would cost the skill points in the game. Soon after I finished the first pair of gloves, the Arduino controller easily fell off the table. Considering this, I designed a box to set the Arduino and breadboard and used laser cutting to make it.
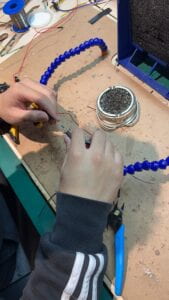
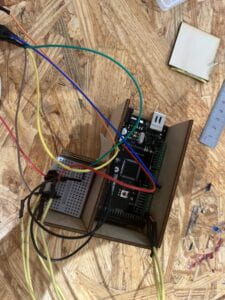 For the second pair of gloves, the only difference is an extra button on the right hand for blocking. Moreover, I chose to solder the wires and resisters with a longer one to get more space
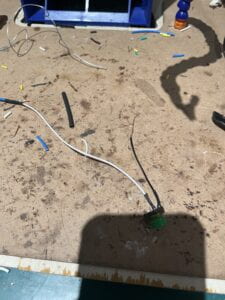
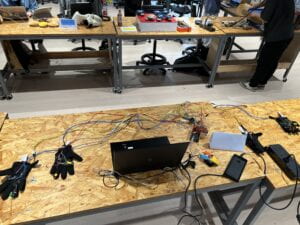 (this is the final outlook of this project)
For the UI part, I chose to draw everything in the processing. The first version of the UI only consists of grey in character and red in health present.
an example of the early draft of the UI
However, after the user testing, I did some polishment on the UI to make it more user-friendly
and here’s a video taken for the final version of the project
And here’s the code from Arduino:
import processing.serial.*;
PImage photo;
Serial serialPort;
float edge1= 200.0;
int NUM_OF_VALUES_FROM_ARDUINO = 11;  /* CHANGE THIS ACCORDING TO YOUR PROJECT */
float p1=100;
float p2=924;
/* This array stores values from Arduino */
float arduino_values[] = new float[NUM_OF_VALUES_FROM_ARDUINO];
boolean x1=false;
boolean y1=false;
boolean z1=false;
int fist1=0;
int leg1=0;
int fist2=0;
int leg2=0;
float hp1=100.0;
float hp2=100.0;
float mp1=100.0;
float mp2=100.0;
void setup() {
  size(1024, 650);
  photo = loadImage("B1.jpg");
  printArray(Serial.list());
  // put the name of the serial port your Arduino is connected
  // to in the line below - this should be the same as you're
  // using in the "Port" menu in the Arduino IDE
  serialPort = new Serial(this, "COM3", 115200);
  getSerialData();
}

int time1 = 0;
int Ptime1=0;
int time2 = 0;
int Ptime2=0;
void draw() {
  text("Player1: right hand forward:punch,right hand upward:block, red button: kick,slider: movement", 48, 180, -120);
  int Pleg1=leg1;
  int Pleg2=leg2;
  int Pfist1=fist1;
  int Pfist2=fist2;
  background(arduino_values[3]);
  if (map(arduino_values[3], 0, 350, 0, 700)+100<924-map(arduino_values[9], 0, 350, 0, 700)-100) {
    p1=map(arduino_values[3], 0, 350, 0, 700)+100;
    p2=924-map(arduino_values[9], 0, 350, 0, 700)-100;
  }
  background(0);
  image(photo, 0, 0);
  float px=arduino_values[0];
  float py=arduino_values[1];
  float pz=arduino_values[2];
  float px2=arduino_values[5];
  float py2=arduino_values[6];
  float pz2=arduino_values[7];
  //receive the values from Arduino
  getSerialData();
  float x=arduino_values[0];
  float y=arduino_values[1];
  float z=arduino_values[2];
  float x2=arduino_values[5];
  float y2=arduino_values[6];
  float z2=arduino_values[7];
  if (abs(x-px)>edge1) {
    x1=true;
  } else x1=false;
  if (abs(y-py)>edge1) {
    y1=true;
  } else y1=false;
  if (abs(z-pz)>edge1) {
    z1=true;
  } else z1=false;
  if (arduino_values[4]==1&&mp1>0) {
    leg1=1;
    if (Pleg1==0)
      mp1-=30;
  } else leg1=0;
  if (arduino_values[10]==1&&mp2>0) {
    leg2=1;
    if (Pleg2==0)
      mp2-=30;
  } else leg2=0;
  if (z-pz>250  &&x-px<edge1&&mp1>0) {
    Ptime1=millis();
    fist1=2;
    //mp1-=5;
  } else {
    time1=millis();
    if (time1-Ptime1>100)
      fist1=0;
  }
  //println(x1,y1,z1);
  if (x-px>edge1) {
    Ptime1=millis();
    fist1=1;
  } else {
    time1=millis();
    if (time1-Ptime1>100)
      fist1=0;
  }
  if (arduino_values[8]==1&&mp2>0)
  {
    fist2=2;
    mp2-=5;
  } else {
    if ((px2-x2)>1.5) {
      Ptime2=millis();
      fist2=1;
    } else
    {
      time2=millis();
      if (time2-Ptime2>100)
        fist2=0;
    }
  }
  if (abs(p1-p2)<150)
  {
    if (fist1==1 && fist2!=2&&Pfist1!=1)
      hp2-=5;
    if (fist2==1&&fist1!=2&&Pfist2!=1)
      hp1-=5;
    if (leg1==1&&Pleg1!=1)
      hp2-=20;
    if (leg2==1&&Pleg2!=1)
      hp1-=20;
  }
  if (hp1>0&&hp2>0) {
    drawPlayer1();
    drawPlayer2();
    strokeWeight(0);
    rect(0, 0, 50, 50);
    rect(974, 0, 50, 50);
    fill(255, 0, 0);
    rect(50, 10, hp1*2, 30);
    rect(974-hp2*2, 10, hp2*2, 30);
    fill(0, 0, 255);
    rect(50, 40, mp1*2, 10);
    rect(974-mp2*2, 40, mp2*2, 10);
    //text("Player1: right hand forward:punch,right hand upward:block, red button: kick,slider: movement", 48, 200);
    //text("Player2: right hand forward:punch,right hand button:block, left button: kick,slider: movement", 48, 250);
    noFill();
    //print(p1,p2);
    //delay(10);
    if(mp1<=100)
    mp1+=0.05;
    if(mp2<=100)
    mp2+=0.05;
  }
  if (hp1<=0&&hp2>0)
  {
    textSize(128);
    fill(0, 408, 612, 816);
    text("Player2 Win", 48, 180, -120);
  }
  if (hp2<=0&&hp1>0)
  {
    textSize(128);
    fill(0, 408, 612, 816);
    text("Player1 Win", 48, 180, -120);
  }
}
void drawBody1() {
  stroke(255, 0, 0);
  strokeWeight(3);
  circle(p1, 300, 50);
  strokeWeight(5);
  rect(p1-5, 325, 10, 100);
  if (leg1==0) {
    strokeWeight(7);
    line(p1-3, 425, p1-23, 525);
    line(p1+3, 425, p1+23, 525);
  }
  if (leg1==1) {
    strokeWeight(7);
    line(p1+3, 425, p1+10, 475);
    line(p1+10, 475, p1+3, 525);
    line(p1, 425, p1+45, 415);
    line(p1+45, 415, p1+90, 425);
  }
}
void drawPlayer1() {
  if (fist1==0) {
    stroke(255, 0, 0);
    strokeWeight(7);
    line(p1, 335, p1-20, 400);
    line(p1-20, 400, p1+15, 375);
    drawBody1();
    line(p1, 335, p1+30, 365);
    line(p1+30, 365, p1+32.5, 320);
    return;
  }
  if (fist1==1) {
    stroke(255, 0, 0);
    strokeWeight(7);
    line(p1, 335, p1-20, 400);
    line(p1-20, 400, p1+15, 375);
    drawBody1();
    line(p1, 335, p1+100, 335);
    //delay(50);
    return;
  }
  if (fist1==2)
  {
    drawBody1();
    line(p1, 335, p1+30, 365);
    line(p1+30, 365, p1+32.5, 320);
    line(p1, 335, p1+25, 375);
    line(p1+25, 375, p1+27.5, 335);
    return;
  }
}
void drawPlayer2() {
  if (fist2==0) {
    stroke(0, 0, 255);
    strokeWeight(7);
    line(p2, 335, p2+20, 400);
    line(p2+20, 400, p2-15, 375);
    drawBody2();
    line(p2, 335, p2-30, 365);
    line(p2-30, 365, p2-32.5, 320);
    return;
  }
  if (fist2==1) {
    stroke(0, 0, 255);
    strokeWeight(7);
    line(p2, 335, p2+20, 400);
    line(p2+20, 400, p2-15, 375);
    drawBody2();
    line(p2, 335, p2-100, 335);
    //delay(50);
    return;
  }
  if (fist2==2)
  {
    drawBody2();
    line(p2, 335, p2-30, 365);
    line(p2-30, 365, p2-32.5, 320);
    line(p2, 335, p2-25, 375);
    line(p2-25, 375, p2-27.5, 335);
    return;
  }
}
void drawBody2() {
  stroke(0, 0, 255);
  strokeWeight(3);
  circle(p2, 300, 50);
  strokeWeight(5);
  rect(p2-5, 325, 10, 100);
  if (leg2==0) {
    strokeWeight(7);
    line(p2-3, 425, p2-23, 525);
    line(p2+3, 425, p2+23, 525);
  }
  if (leg2==1) {
    strokeWeight(7);
    line(p2-3, 425, p2-10, 475);
    line(p2-10, 475, p2-3, 525);
    line(p2, 425, p2-45, 415);
    line(p2-45, 415, p2-90, 425);
  }
}

// the helper function below receives the values from Arduino
// in the "arduino_values" array from a connected Arduino
// running the "serial_AtoP_arduino" sketch
// (You won't need to change this code.)

void getSerialData() {
  while (serialPort.available() > 0) {
    String in = serialPort.readStringUntil( 10 );  // 10 = '\n'  Linefeed in ASCII
    if (in != null) {
      print("From Arduino: " + in);
      String[] serialInArray = split(trim(in), ",");
      if (serialInArray.length == NUM_OF_VALUES_FROM_ARDUINO) {
        for (int i=0; i<serialInArray.length; i++) {
          arduino_values[i] = float(serialInArray[i]);
        }
      } else {
        println("Serial comm error");
      }
    }
  }
}

4. APPENDIX
the video for the laser cutting process:
The video of how the left-hand part looks like after putting on the gloves: