Soulmate Showdown – Savanna Peng – Andy Garcia
Conception & Design
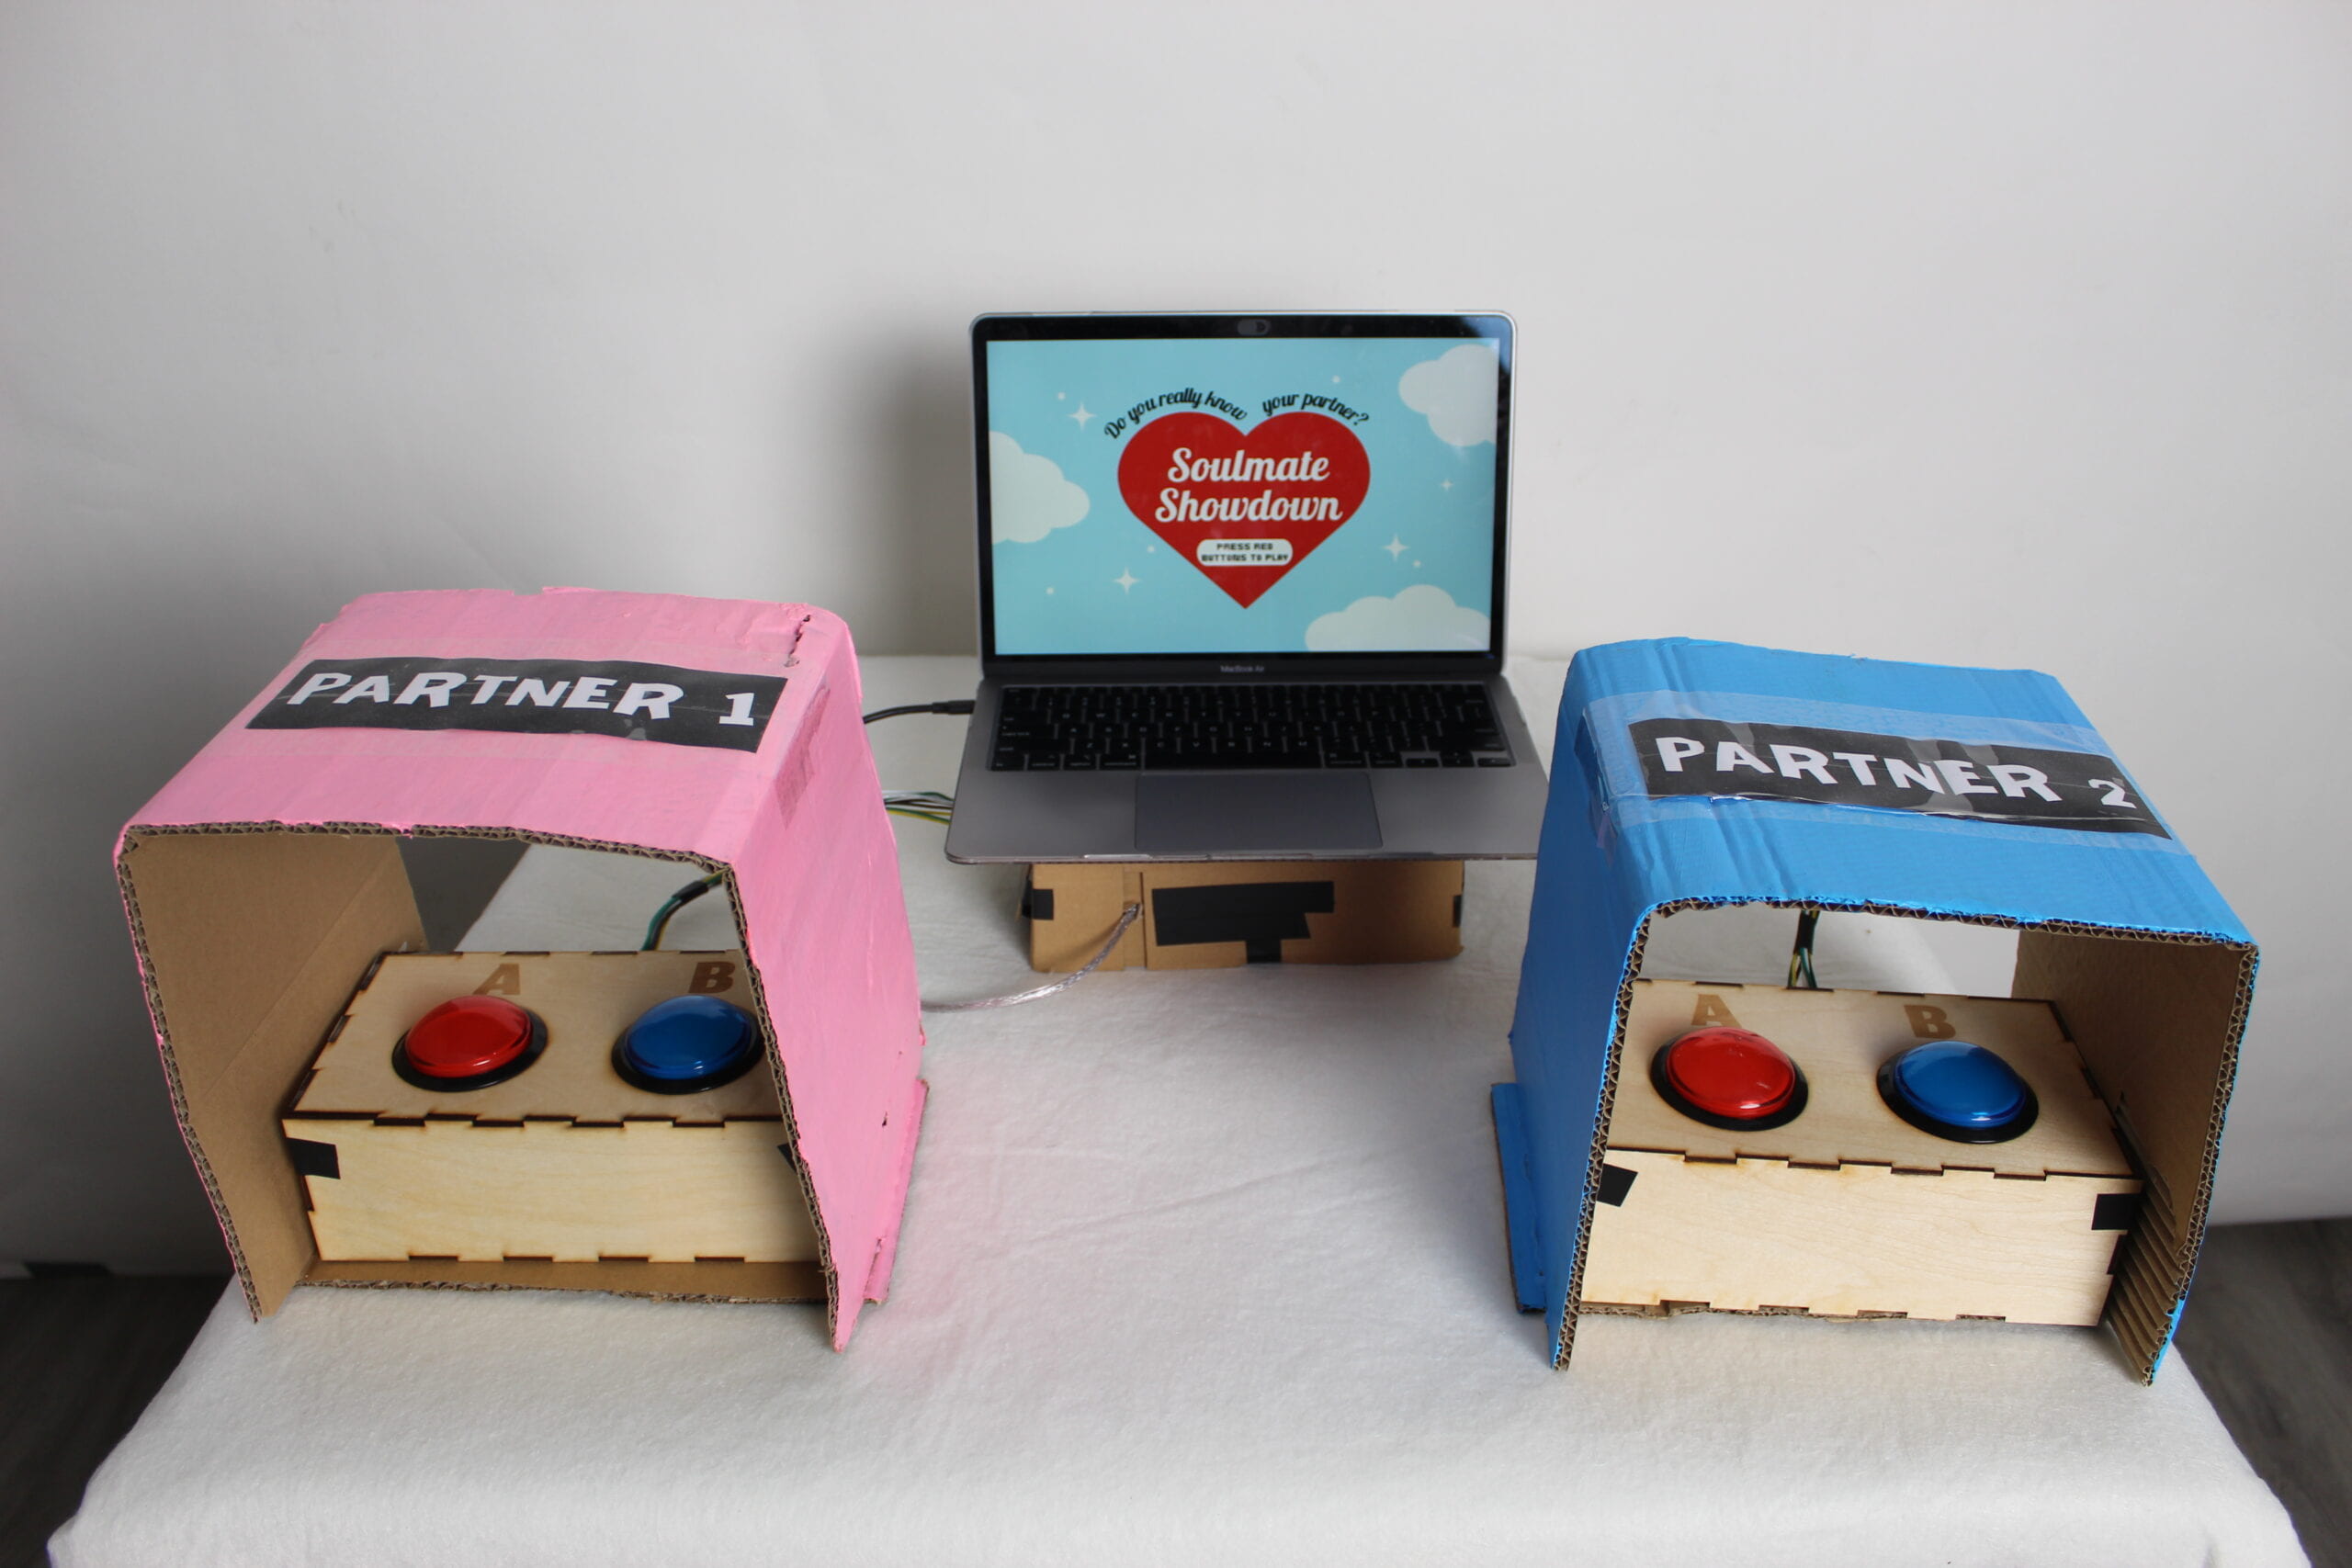
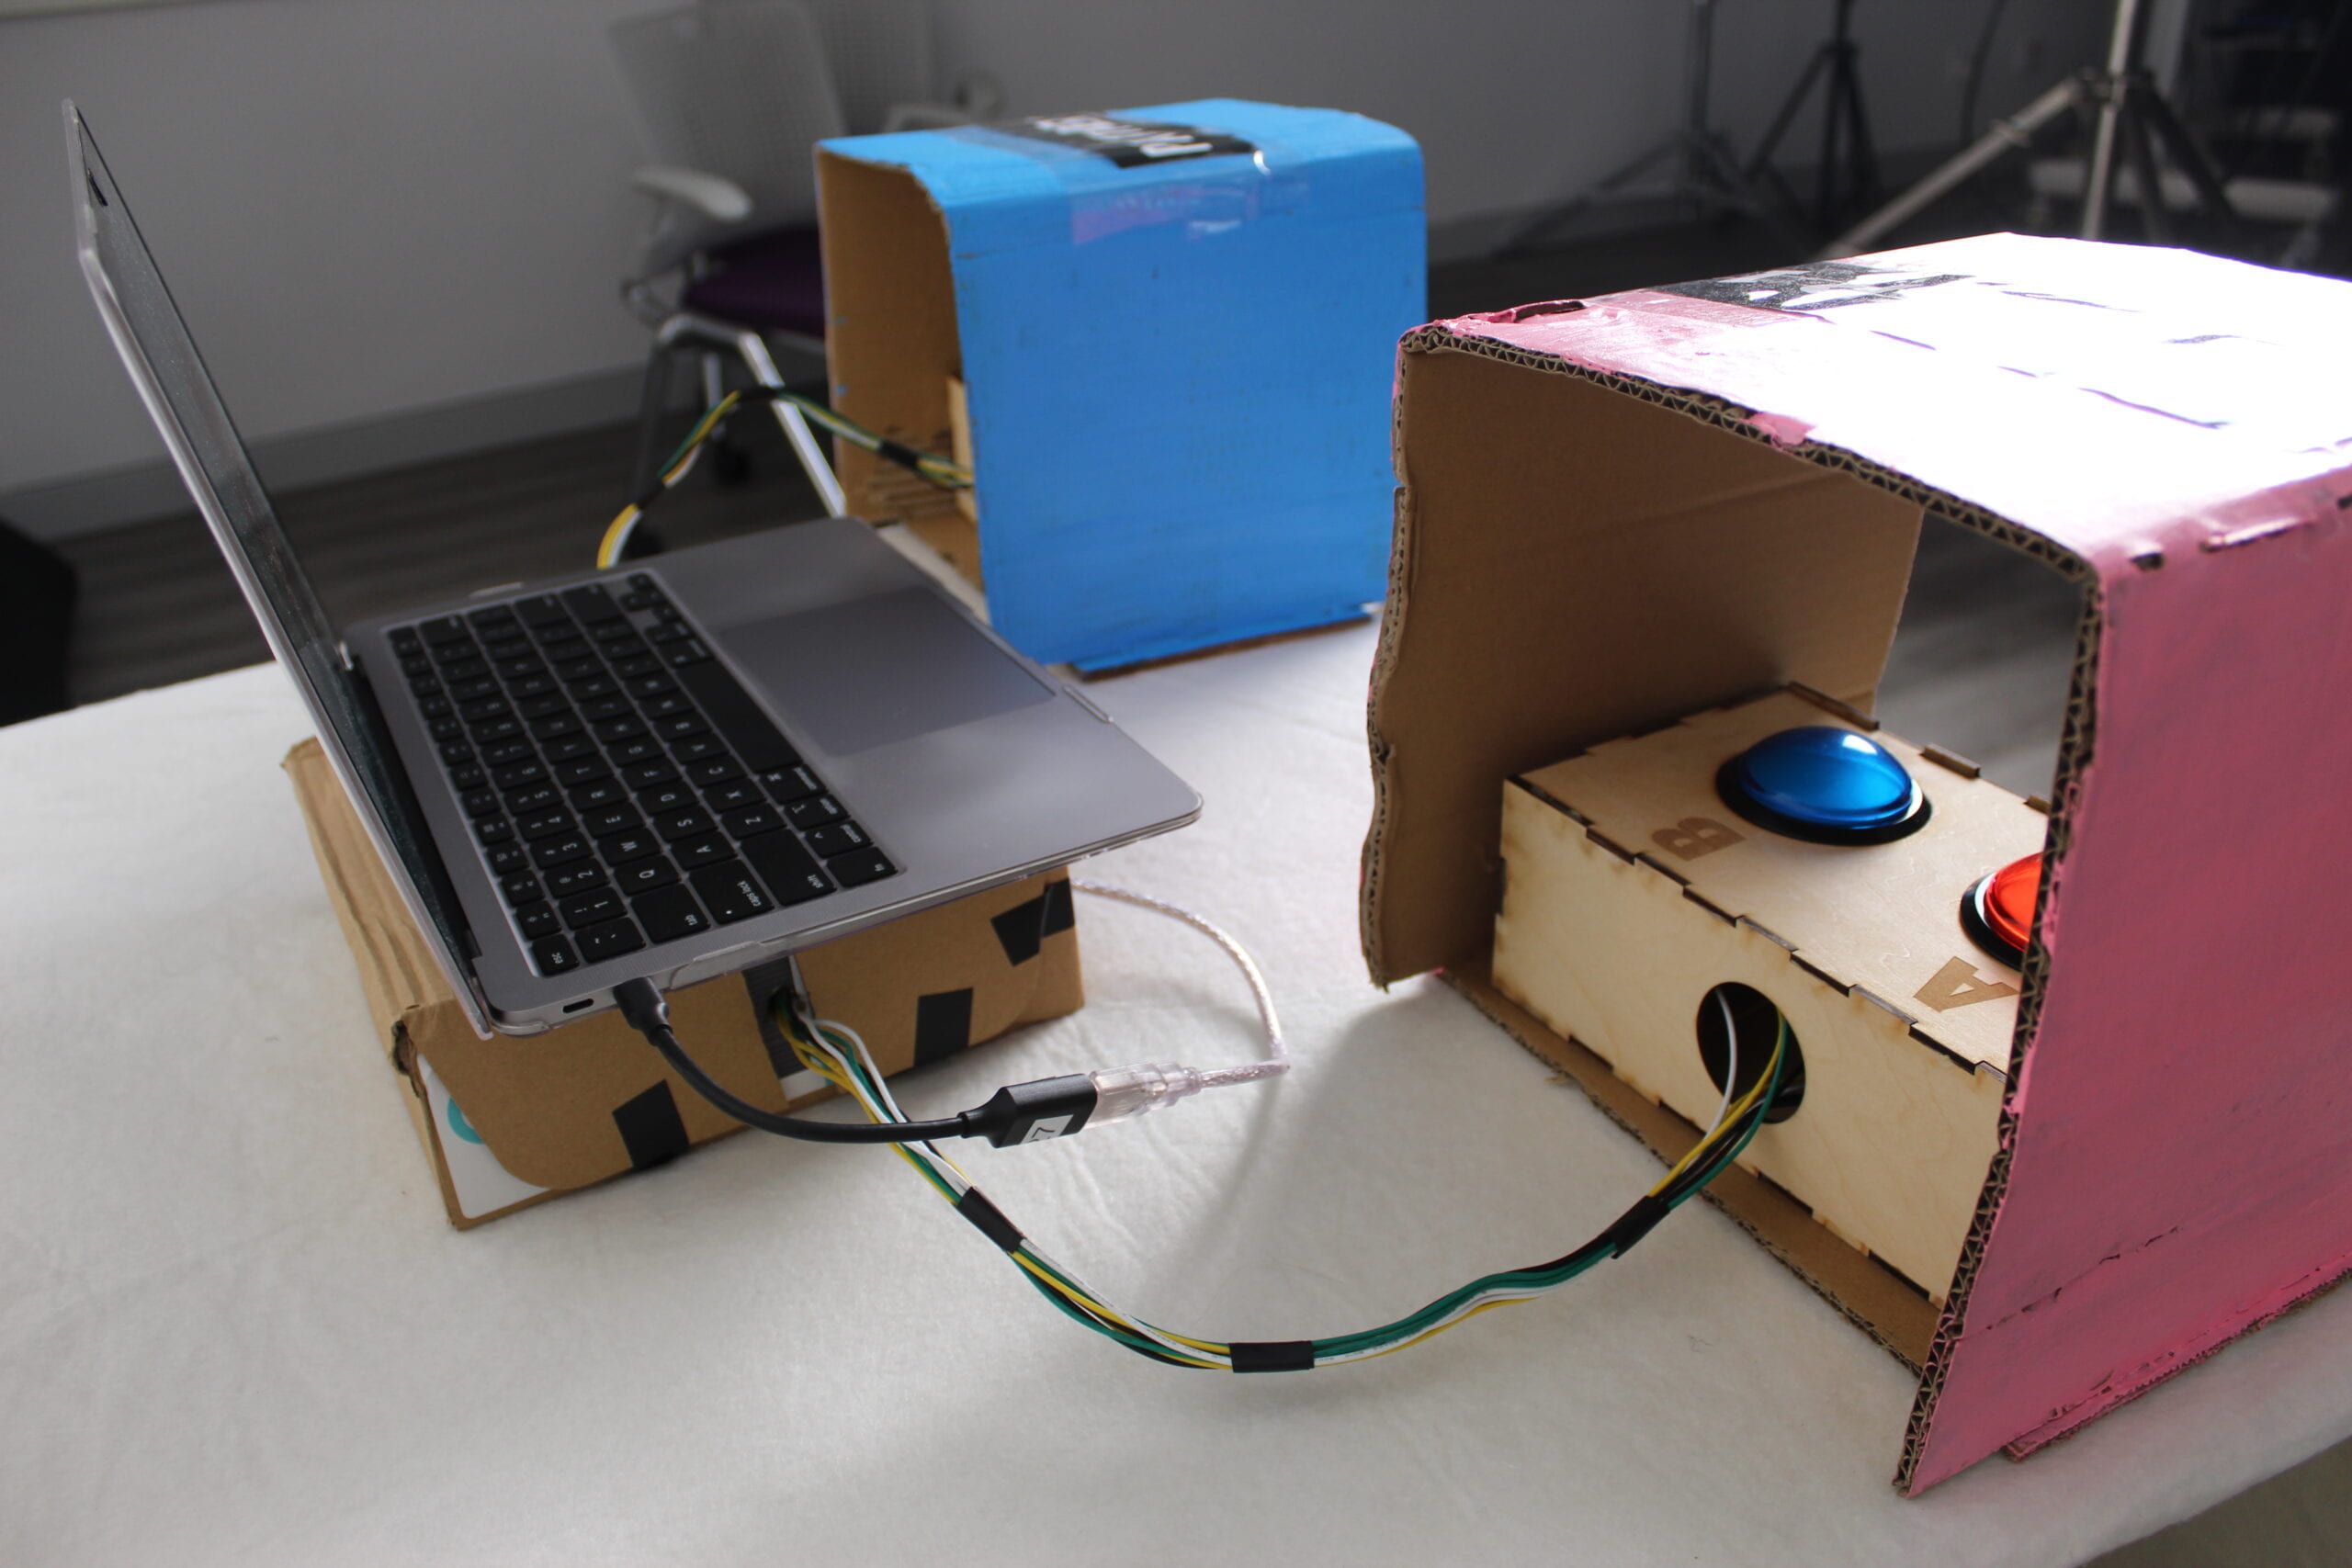
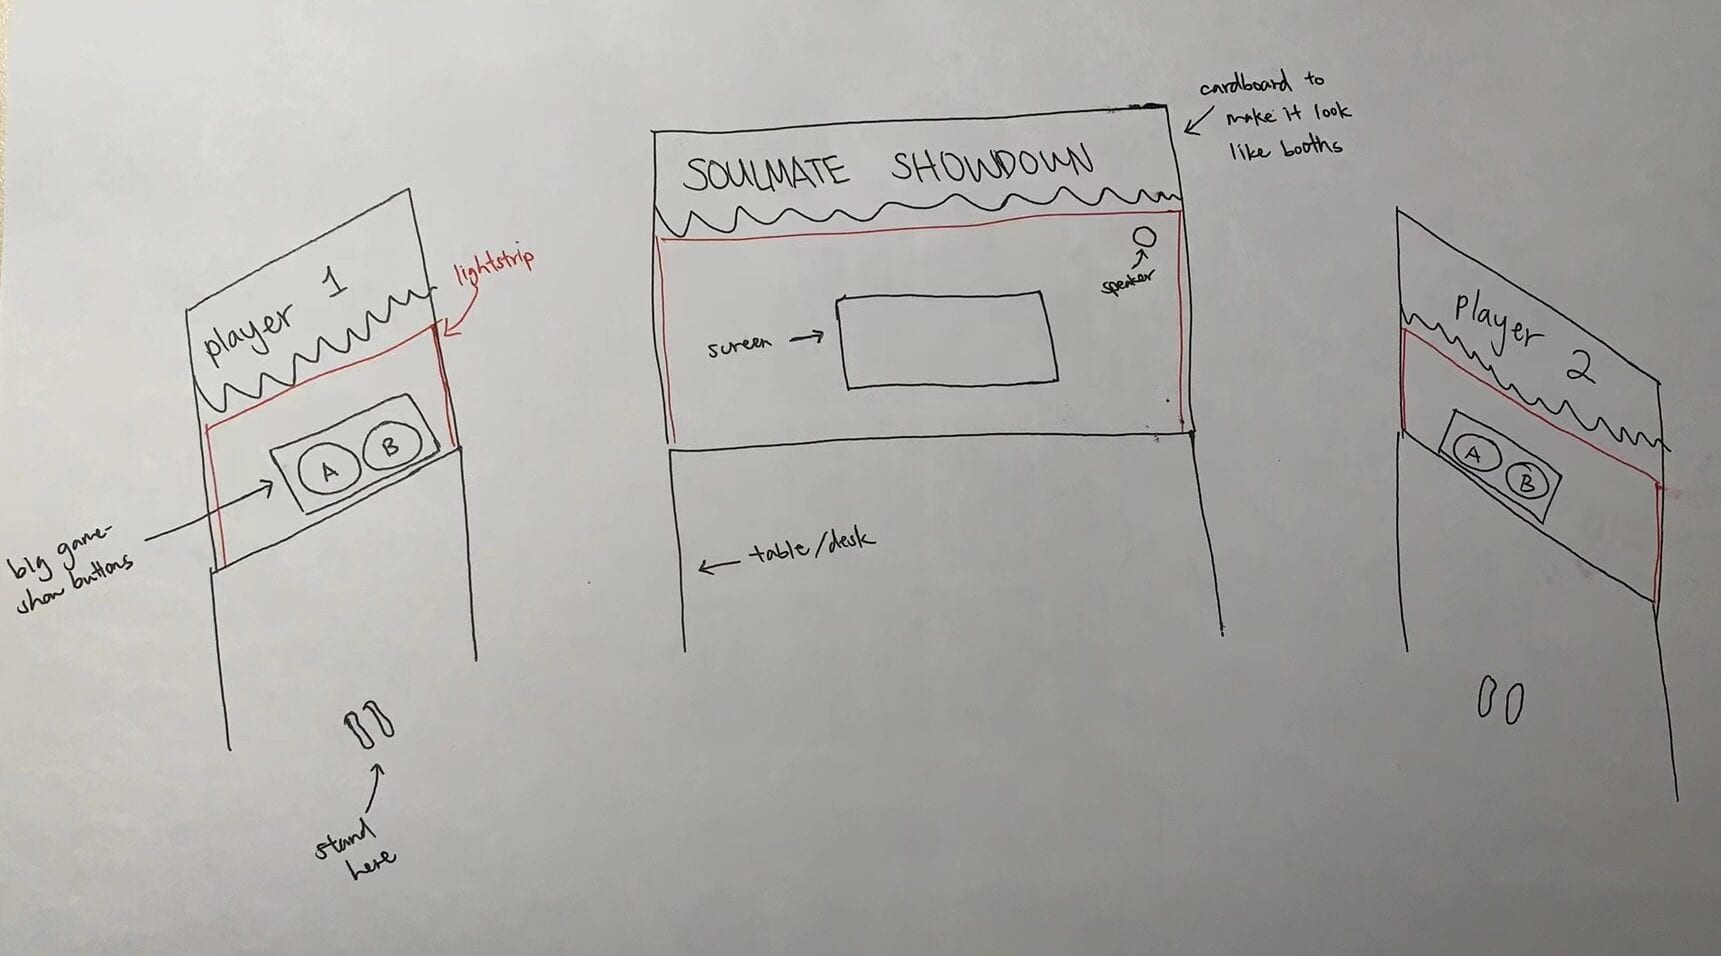
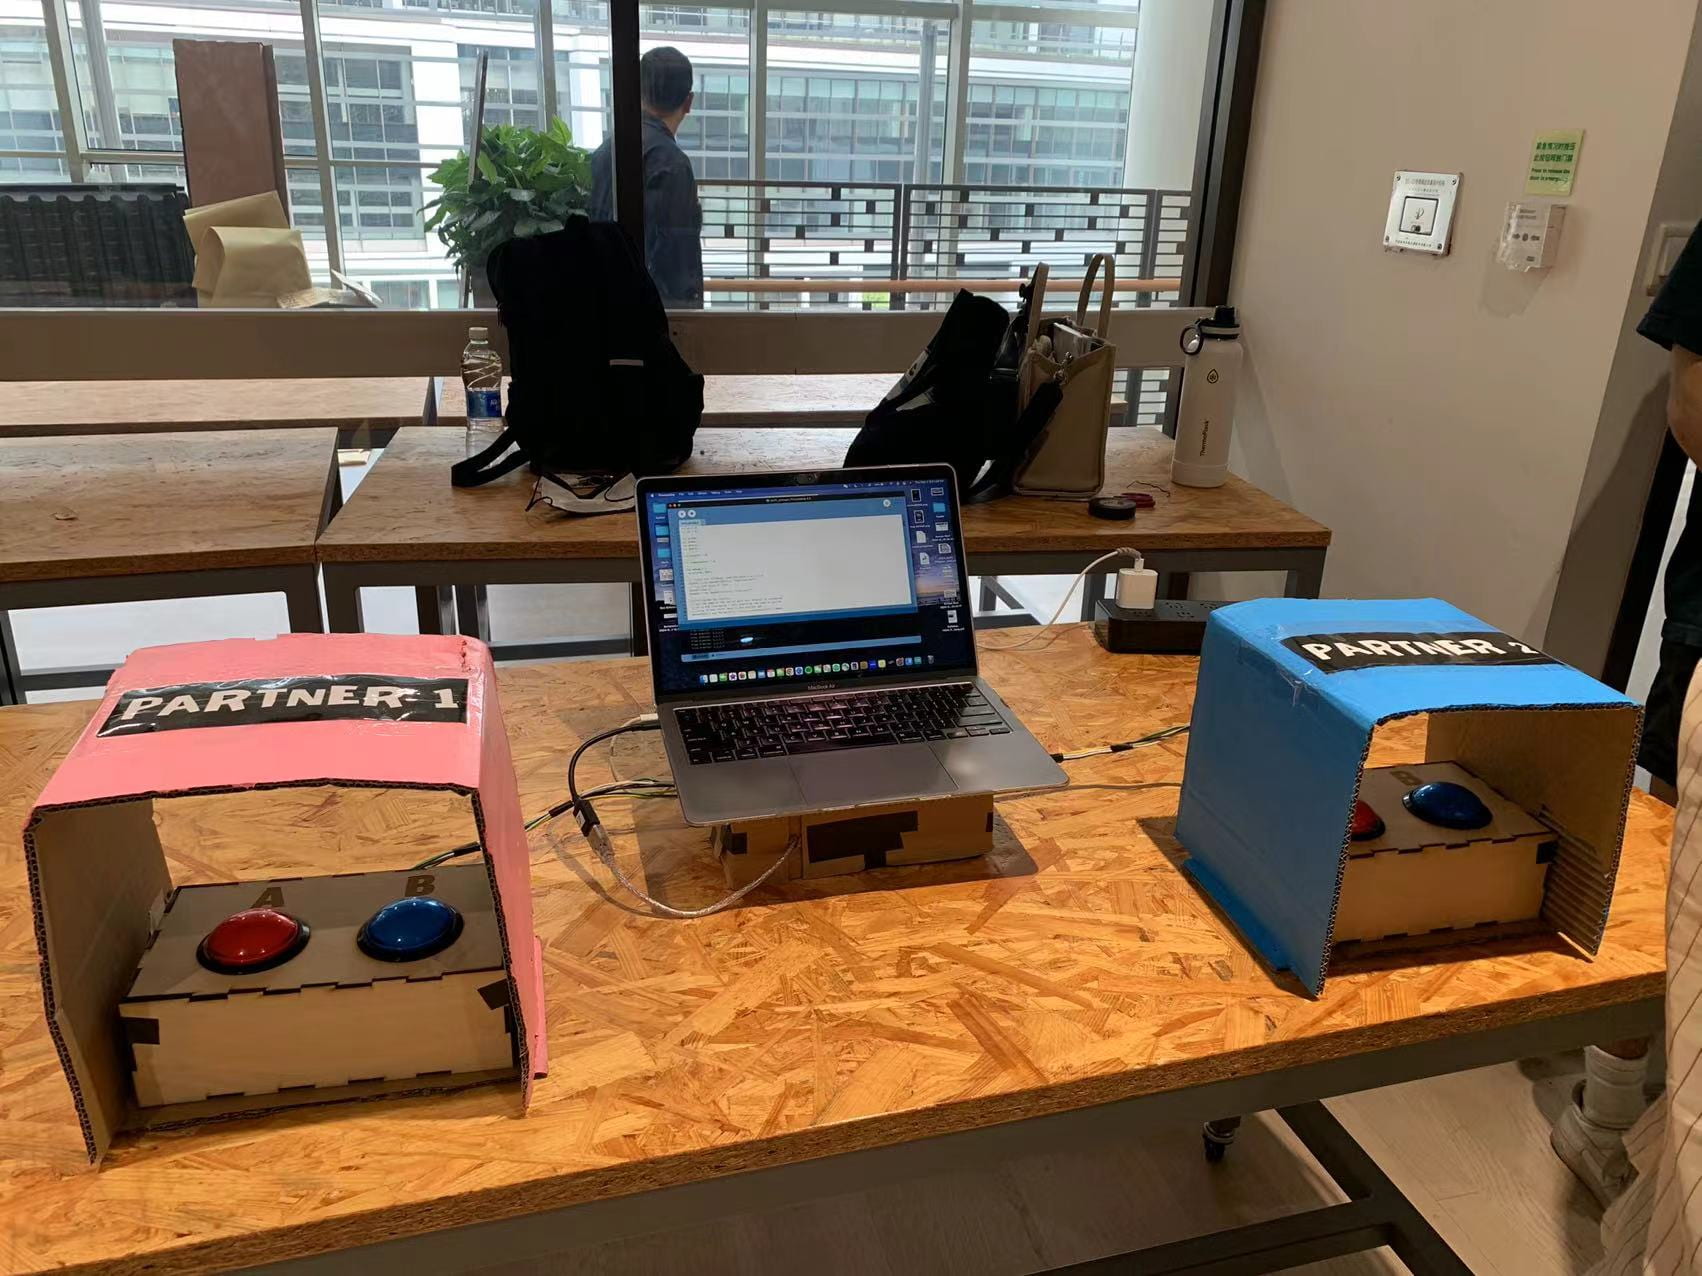
The concept of my project revolves around the idea and inspiration of gameshows aired on TV. My initial vision for this project was not to design it in this way, but to make it a fun, lighthearted activity. After speaking with Andy, he recommended that I take inspiration from the idea of gameshows, making my project more dramatic, engaging, and emotional. I then went on to research more about what environments gameshows create visually, audibly, and emotionally. I realized that gameshows hold simple props, like buttons and LED screens, and the “drama” mainly stems from the surrounding characteristics, like the lighting, music, and point system/competitiveness. Due to the results of my research and my understanding of how users will interact with my project, I decided to keep my hardware designs simple, with only two sets of buttons, and keep all of the intricate designs to be displayed on the screen. During User Testing, I received positive feedback about how the game is heartwarming, easy to understand, and engaging. Some suggestions I received that influenced my design afterward were to make the game longer, change the original length of five questions to ten questions, add music, clarify the rules and relationship status choice pages, and cover the buttons so the partners could not see each other’s responses. These additions improved my project by clarifying the game, increasing the users’ interactions with my project and with each other, and making the results more enjoyable and effective.
Fabrication & Production
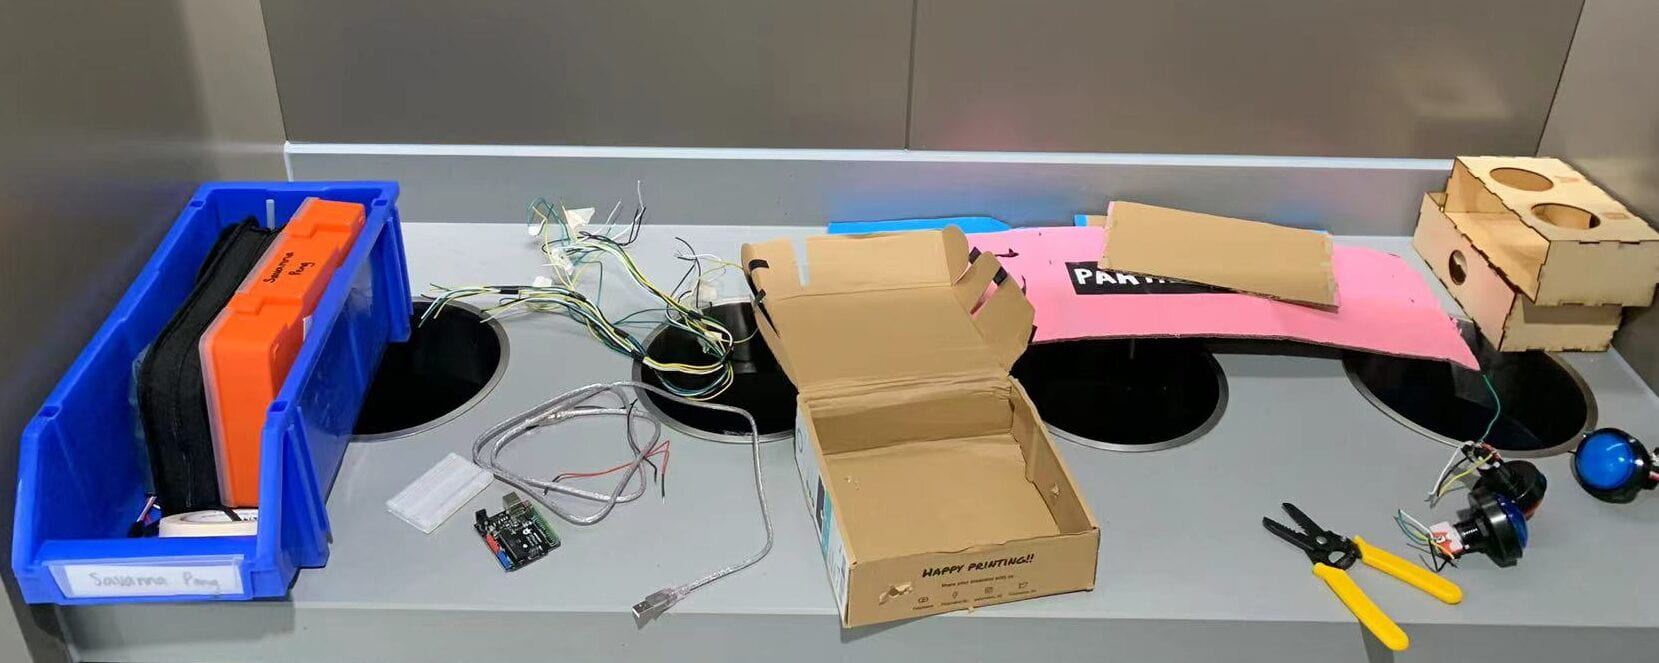
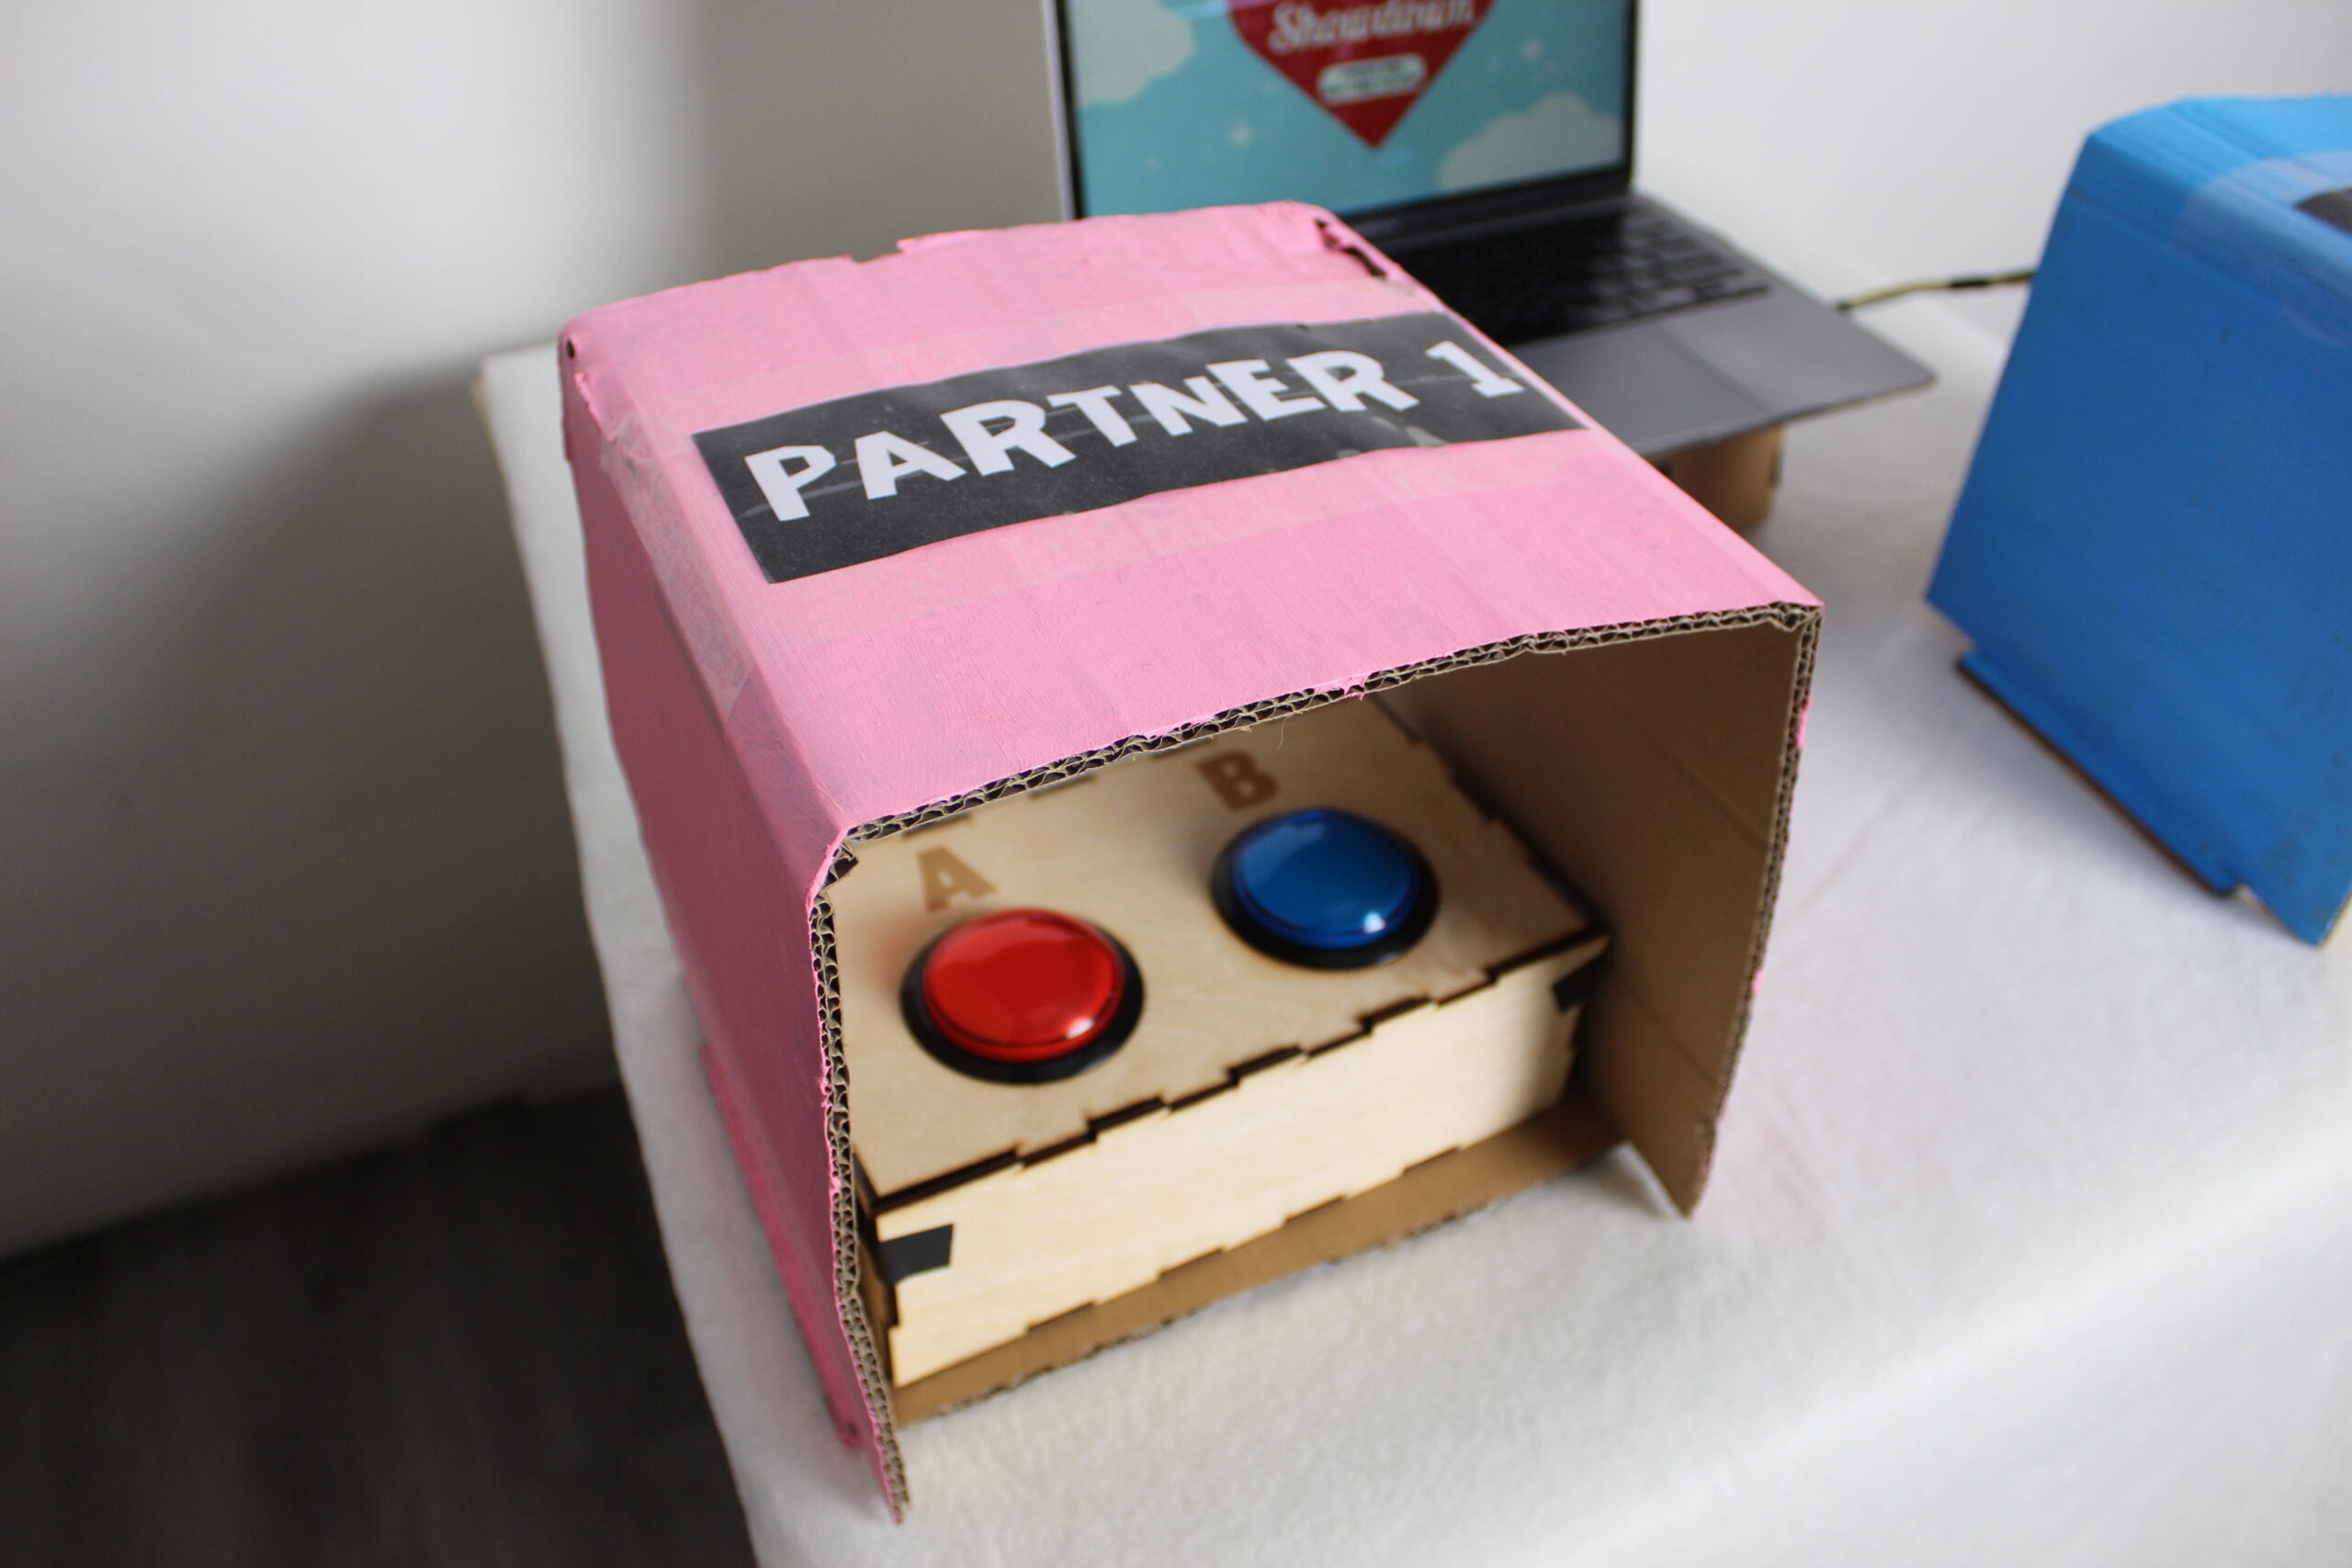
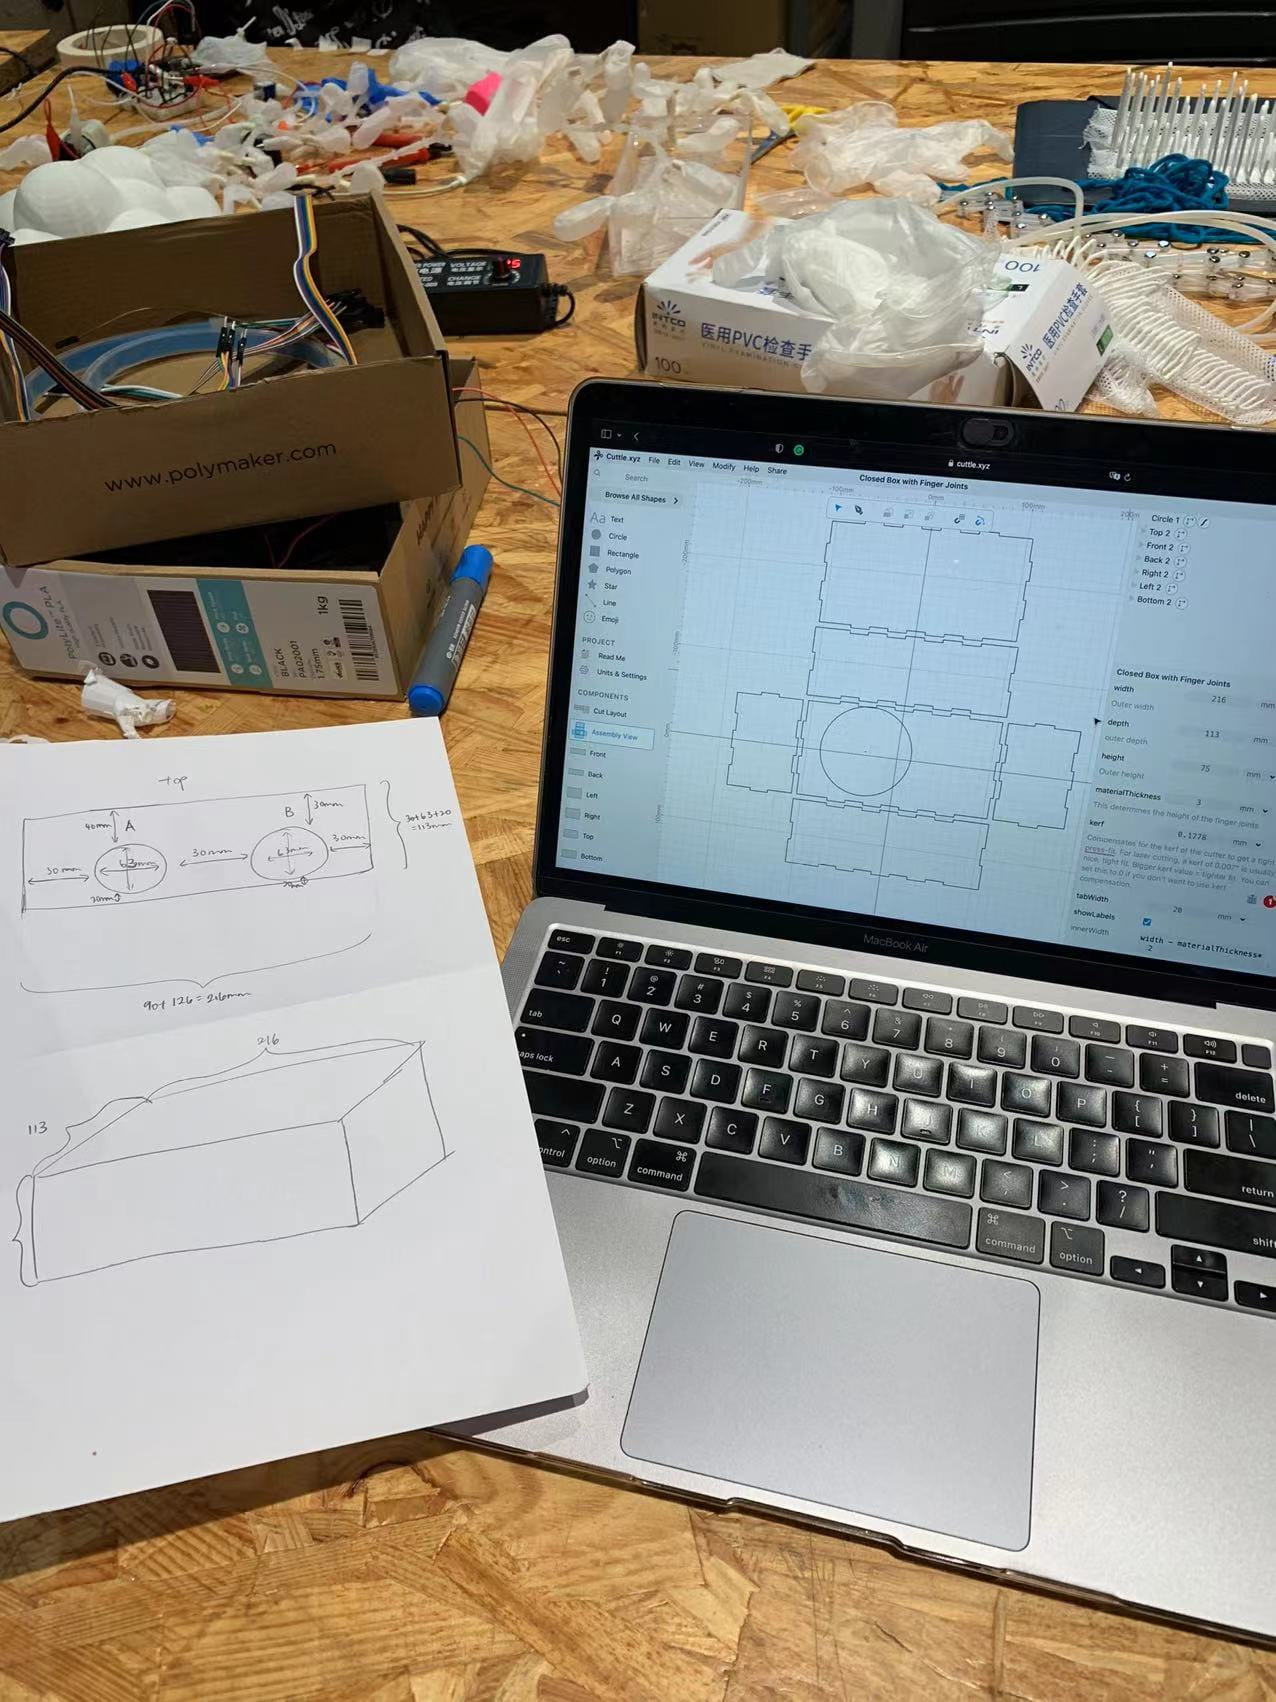
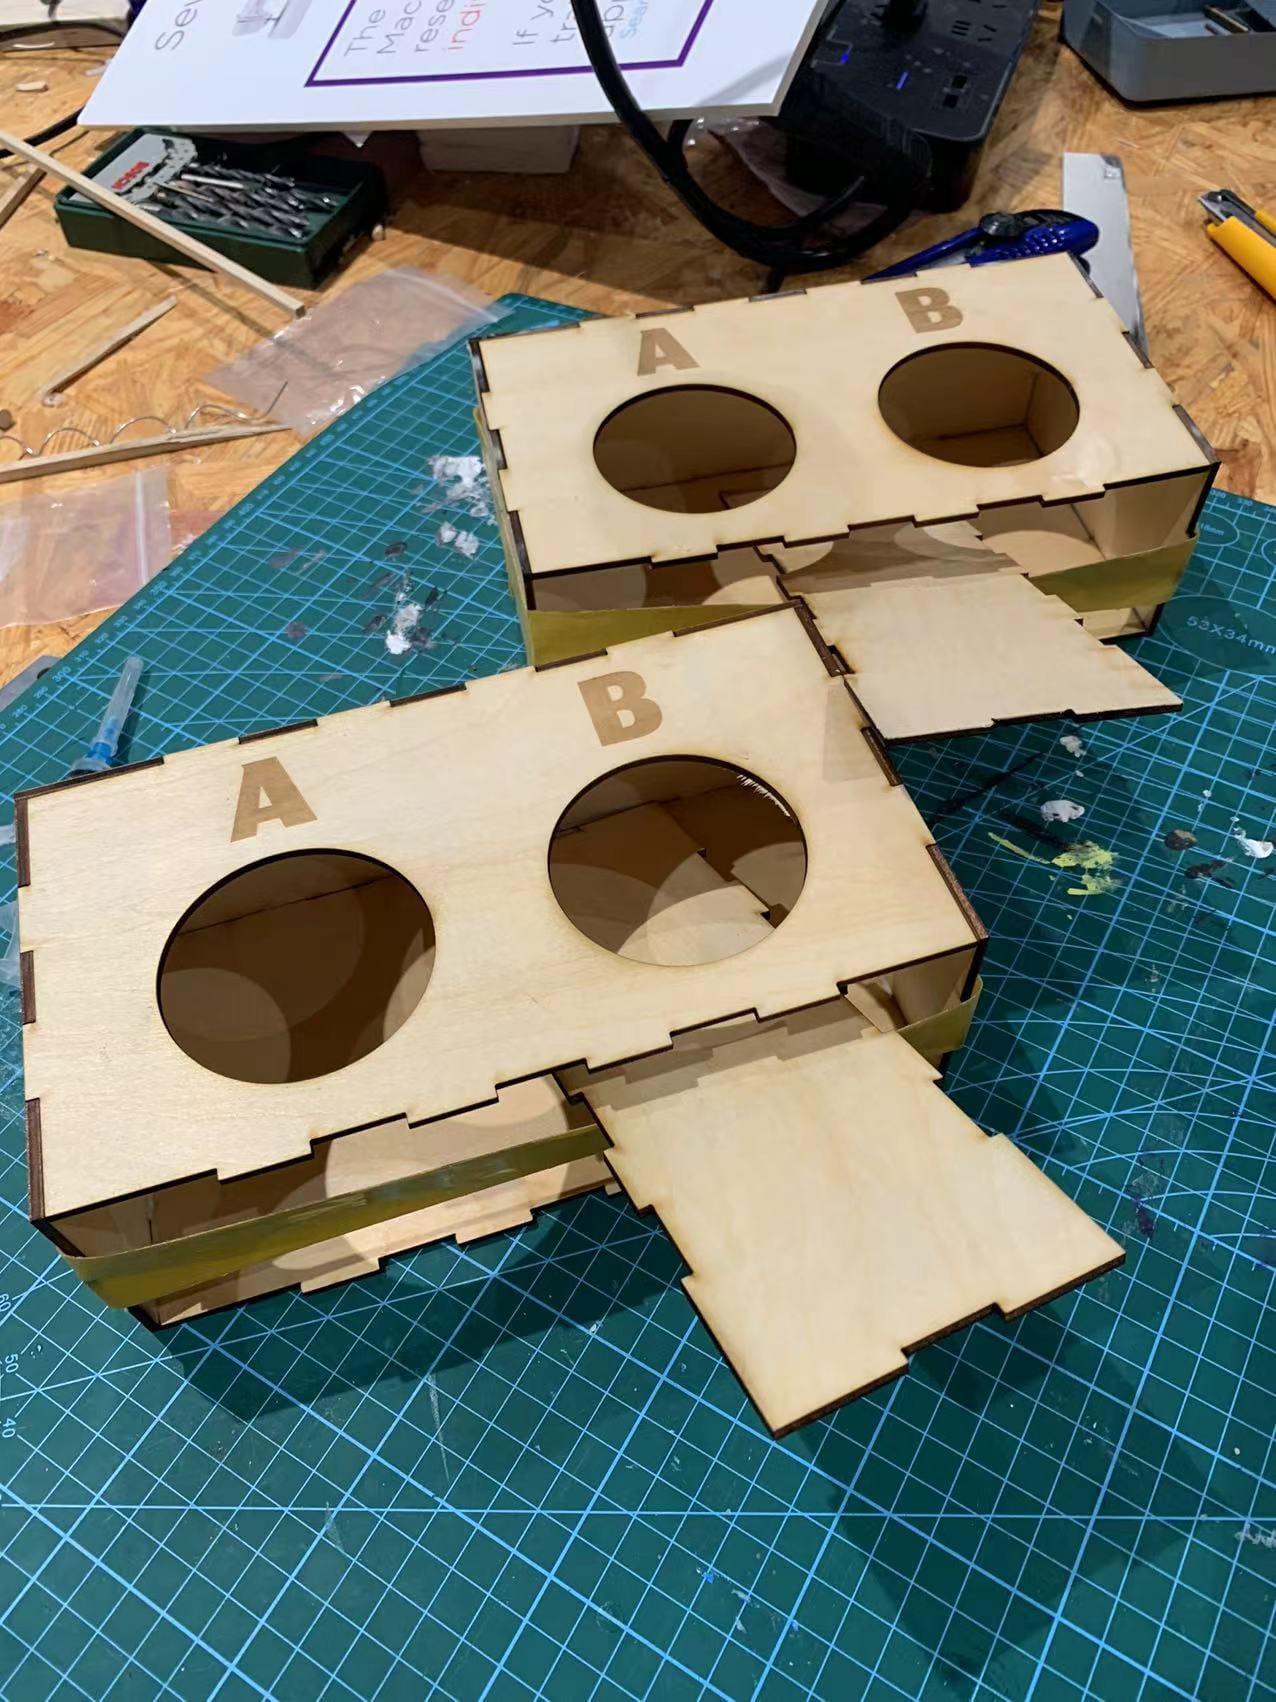
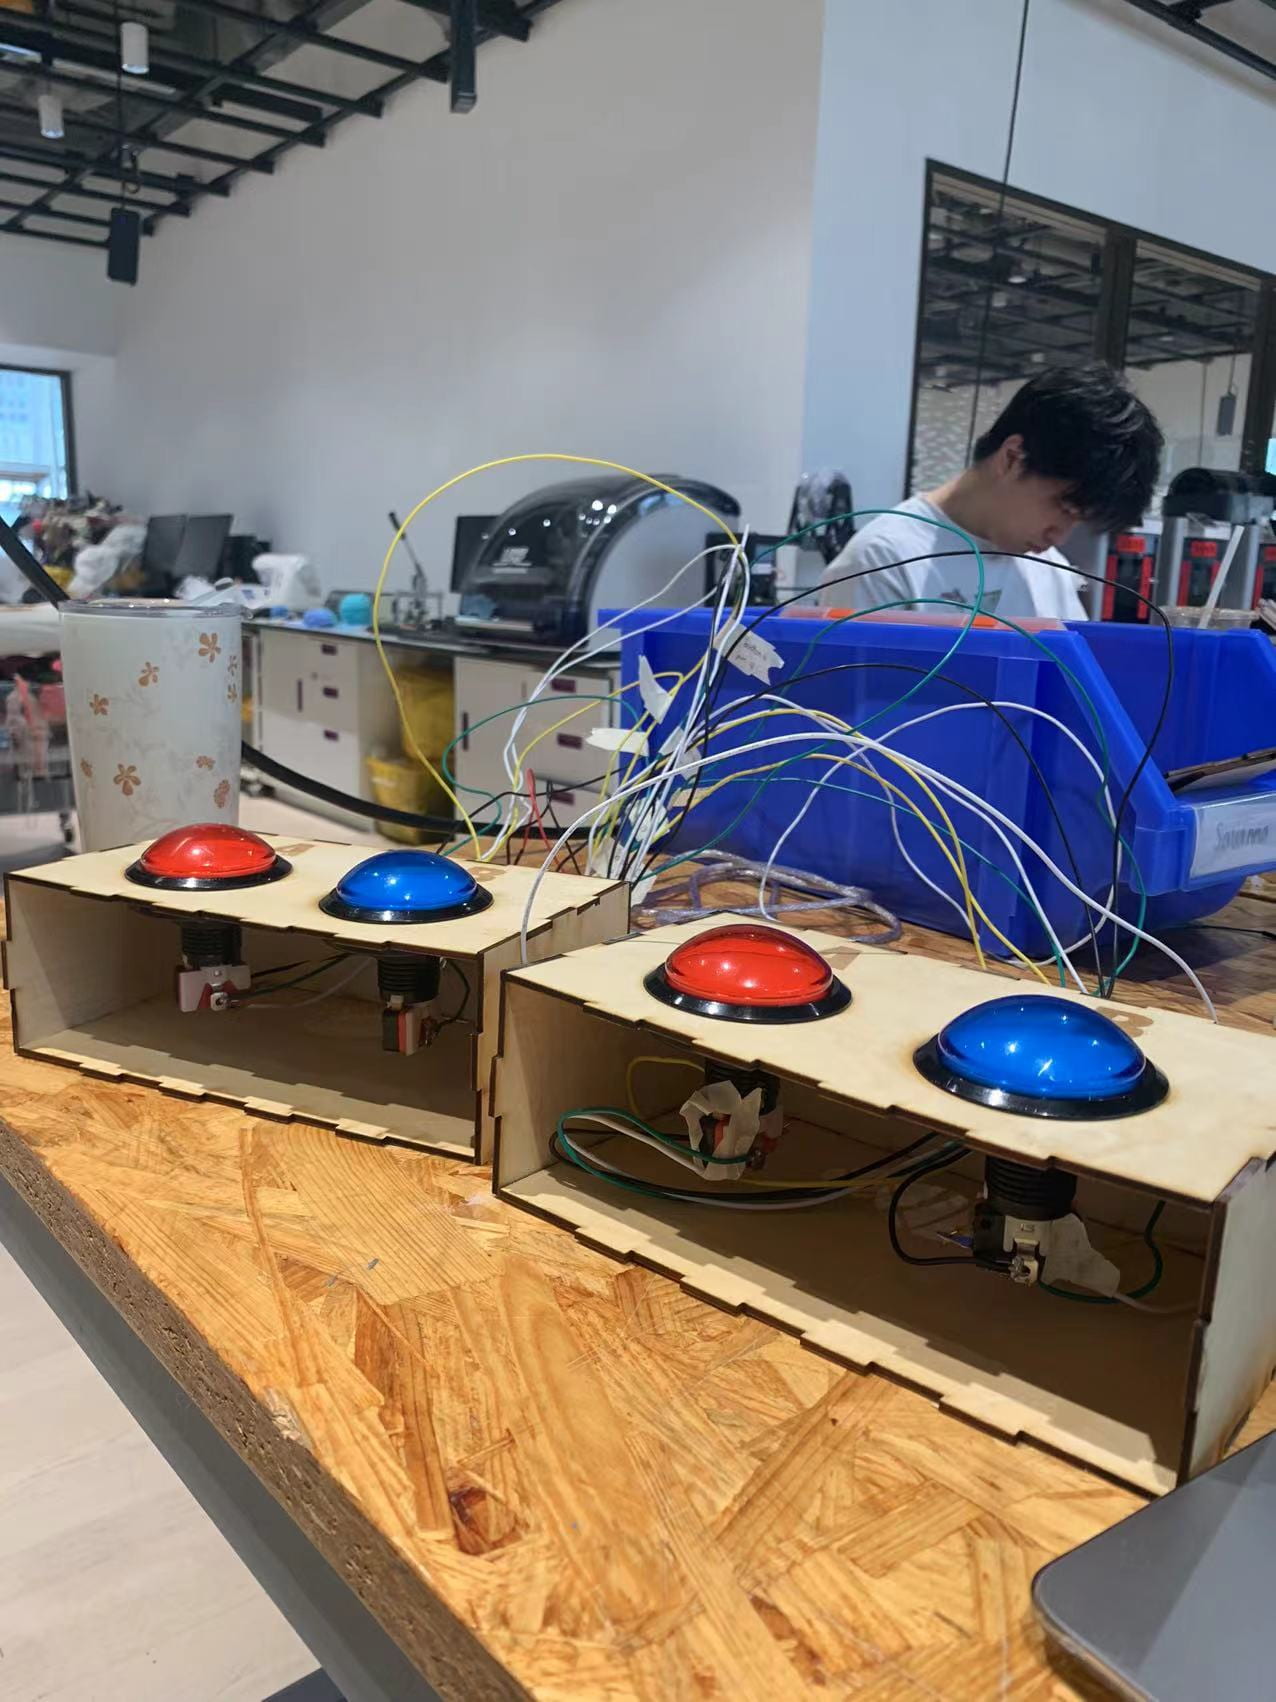
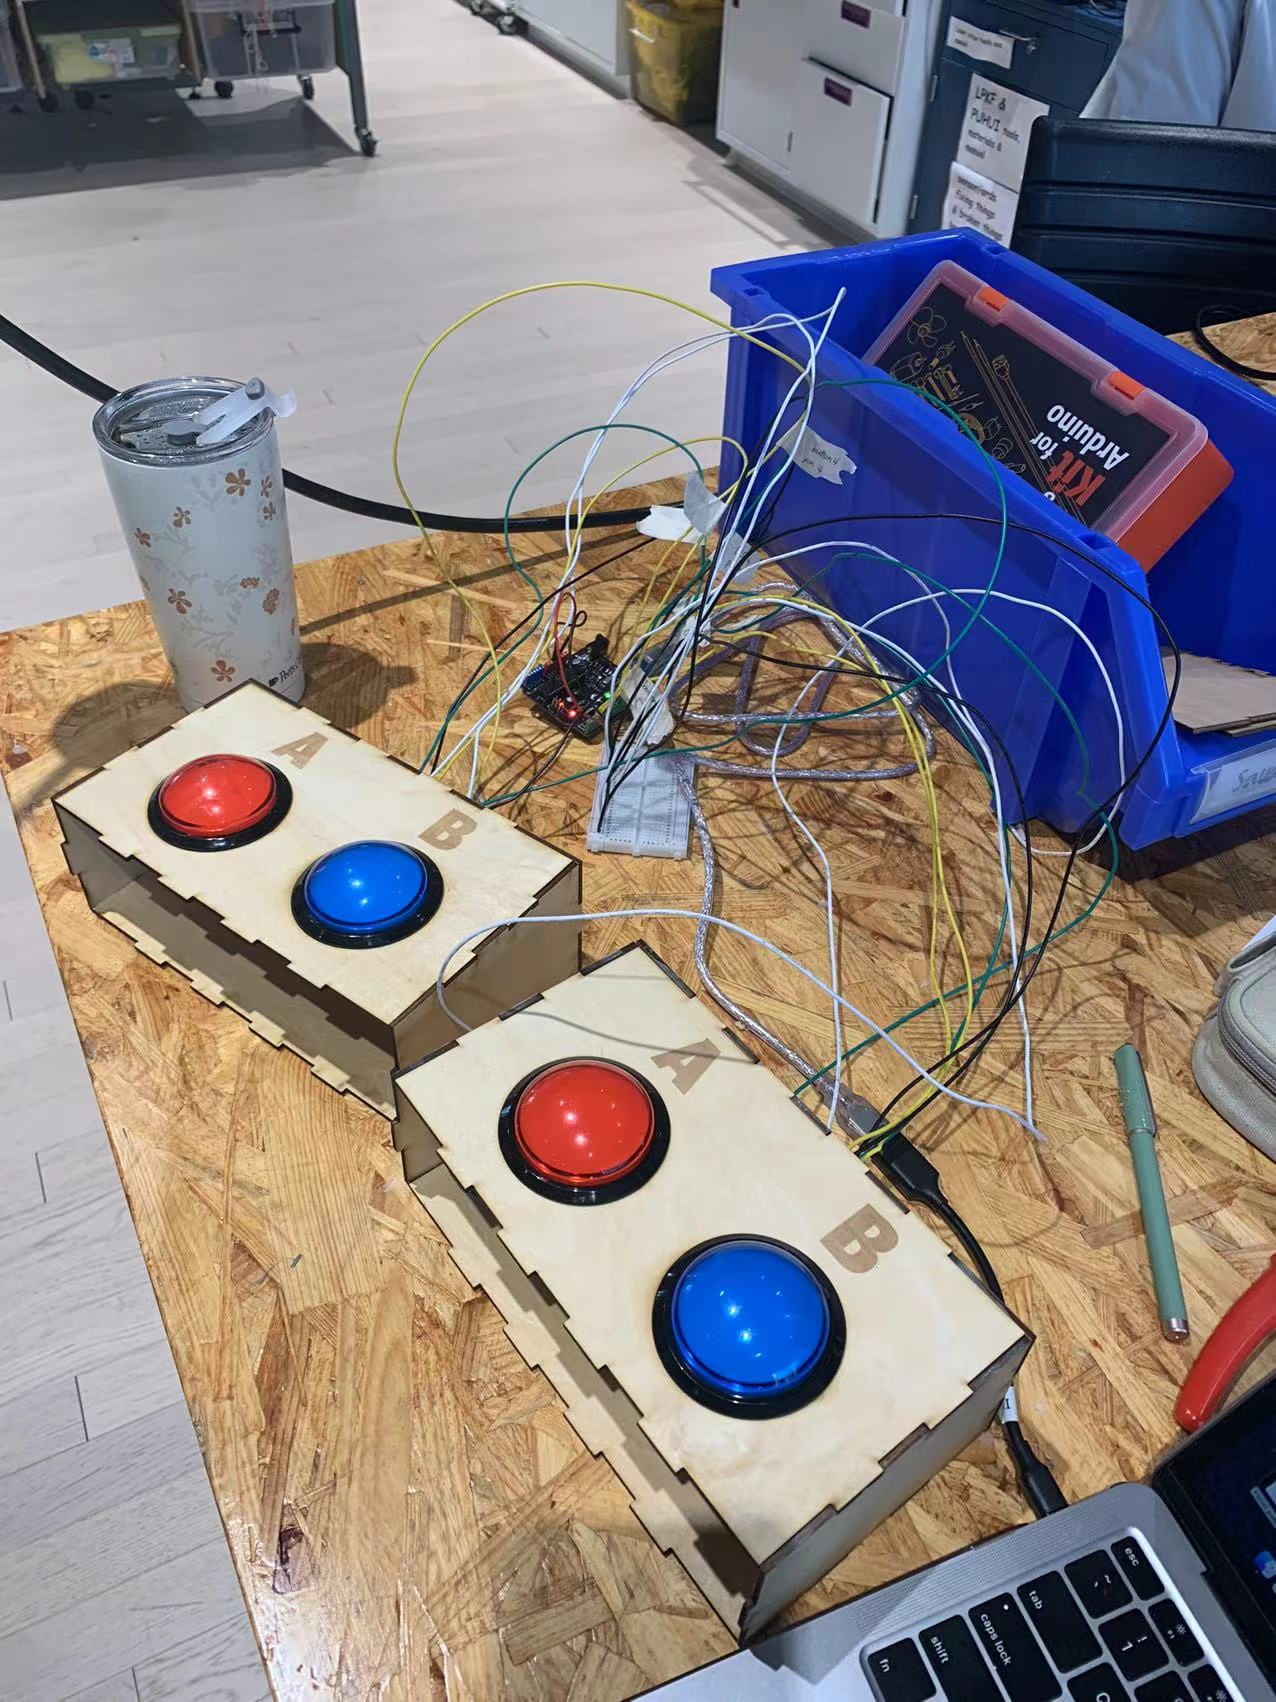
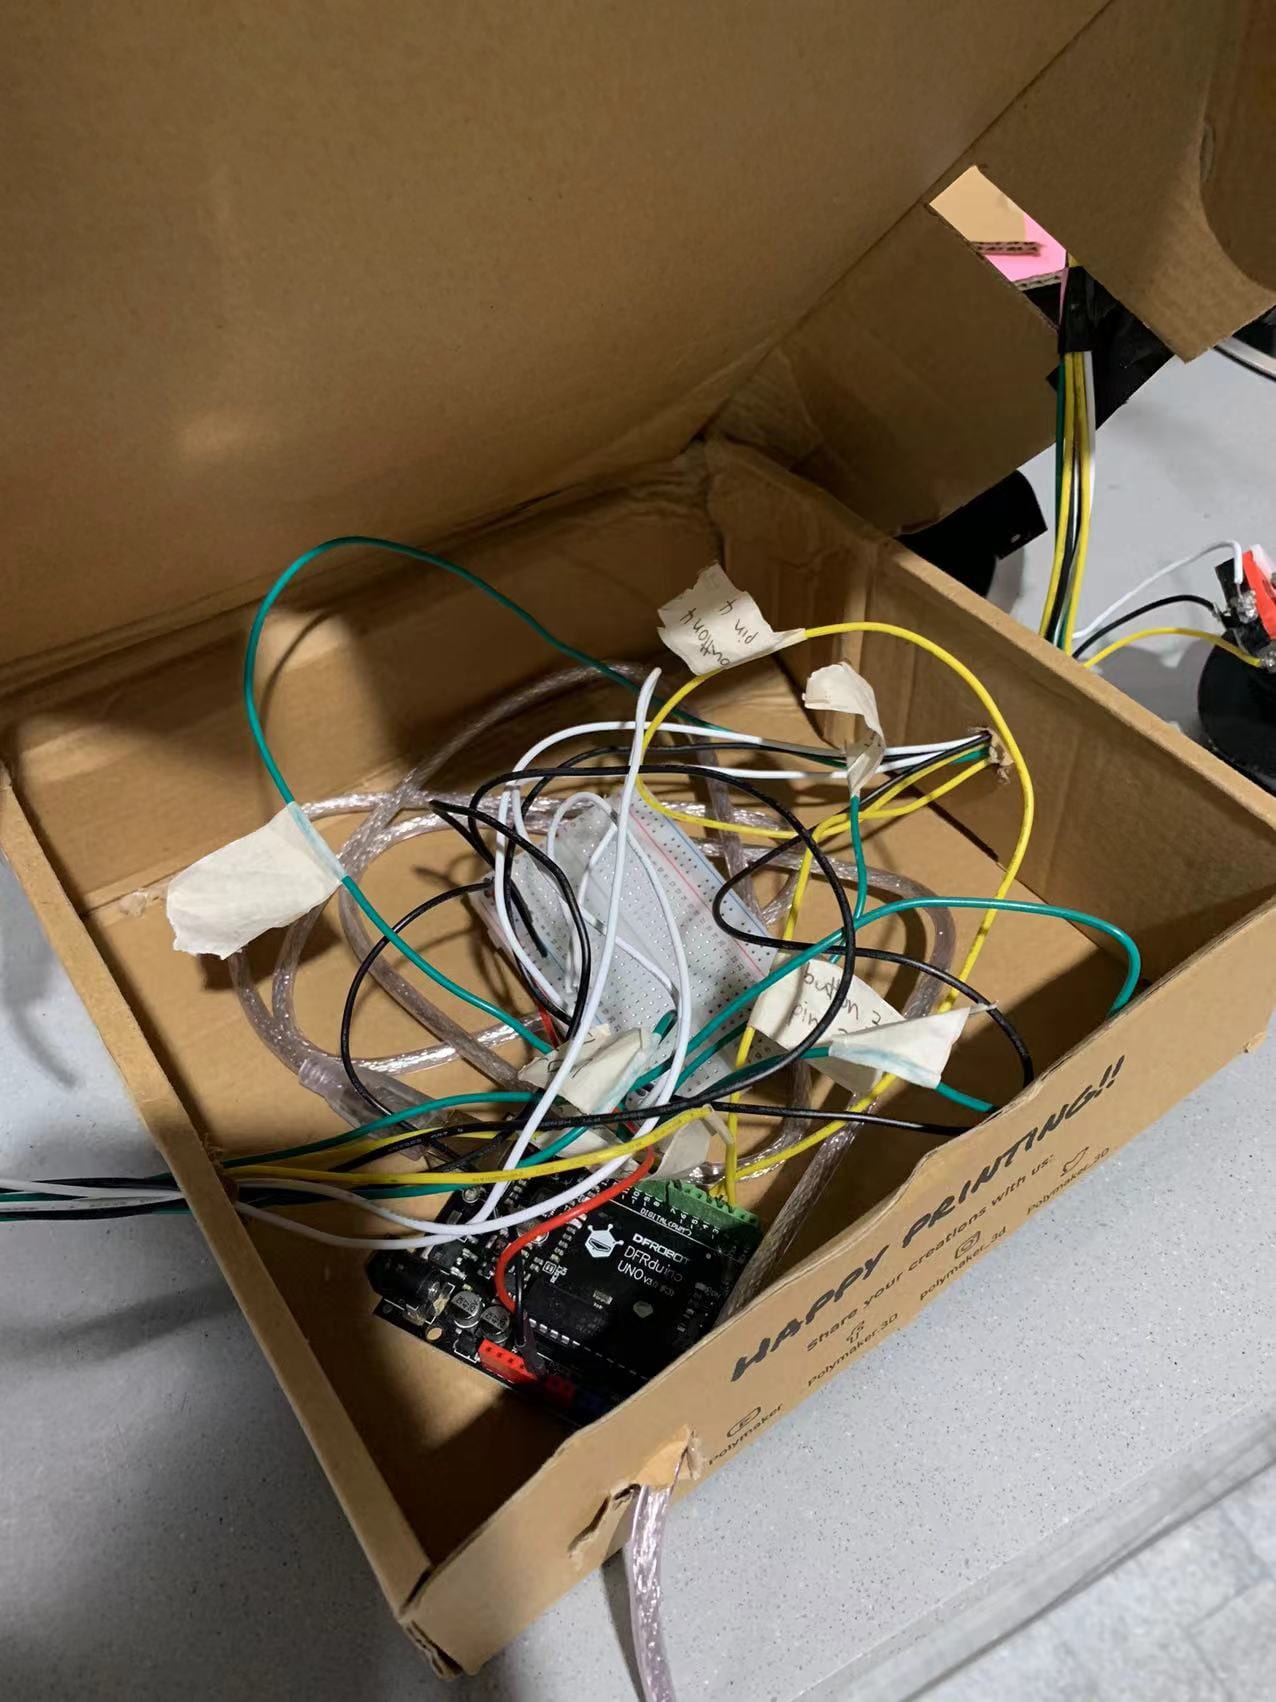
First, I acquired four big game buttons, two red and two blues, for the two choices that the partners can choose from. Keeping in mind the initial objective and idea for this project, I wanted to use big game buttons that replicated gameshow buttons, especially after putting them into their customized button stands/holders. I then measured the buttons’ measurements and designed the boxes to hold them and for laser cutting. I downloaded a template of a box and uploaded it to Cuttle to adjust the measurements, add two holes per box to hold the buttons and label the buttons A and B. When designing these boxes, I wished that I was more careful with the designs and measurements as I did not count for the laser cutting machine’s mistakes in measurements. I also forgot to cut out a hole in the back of the box for the wires to go through, which I was fortunate enough to have been able to cut out later even after I glued the box together. I then soldered the wires to the four buttons and built the circuit, put them together with the boxes, and began coding the game. One thing I did that helped a lot throughout the wiring and rewiring process was labeling my wires with masking tape with what button or LED it corresponds to and which pin it should be in.
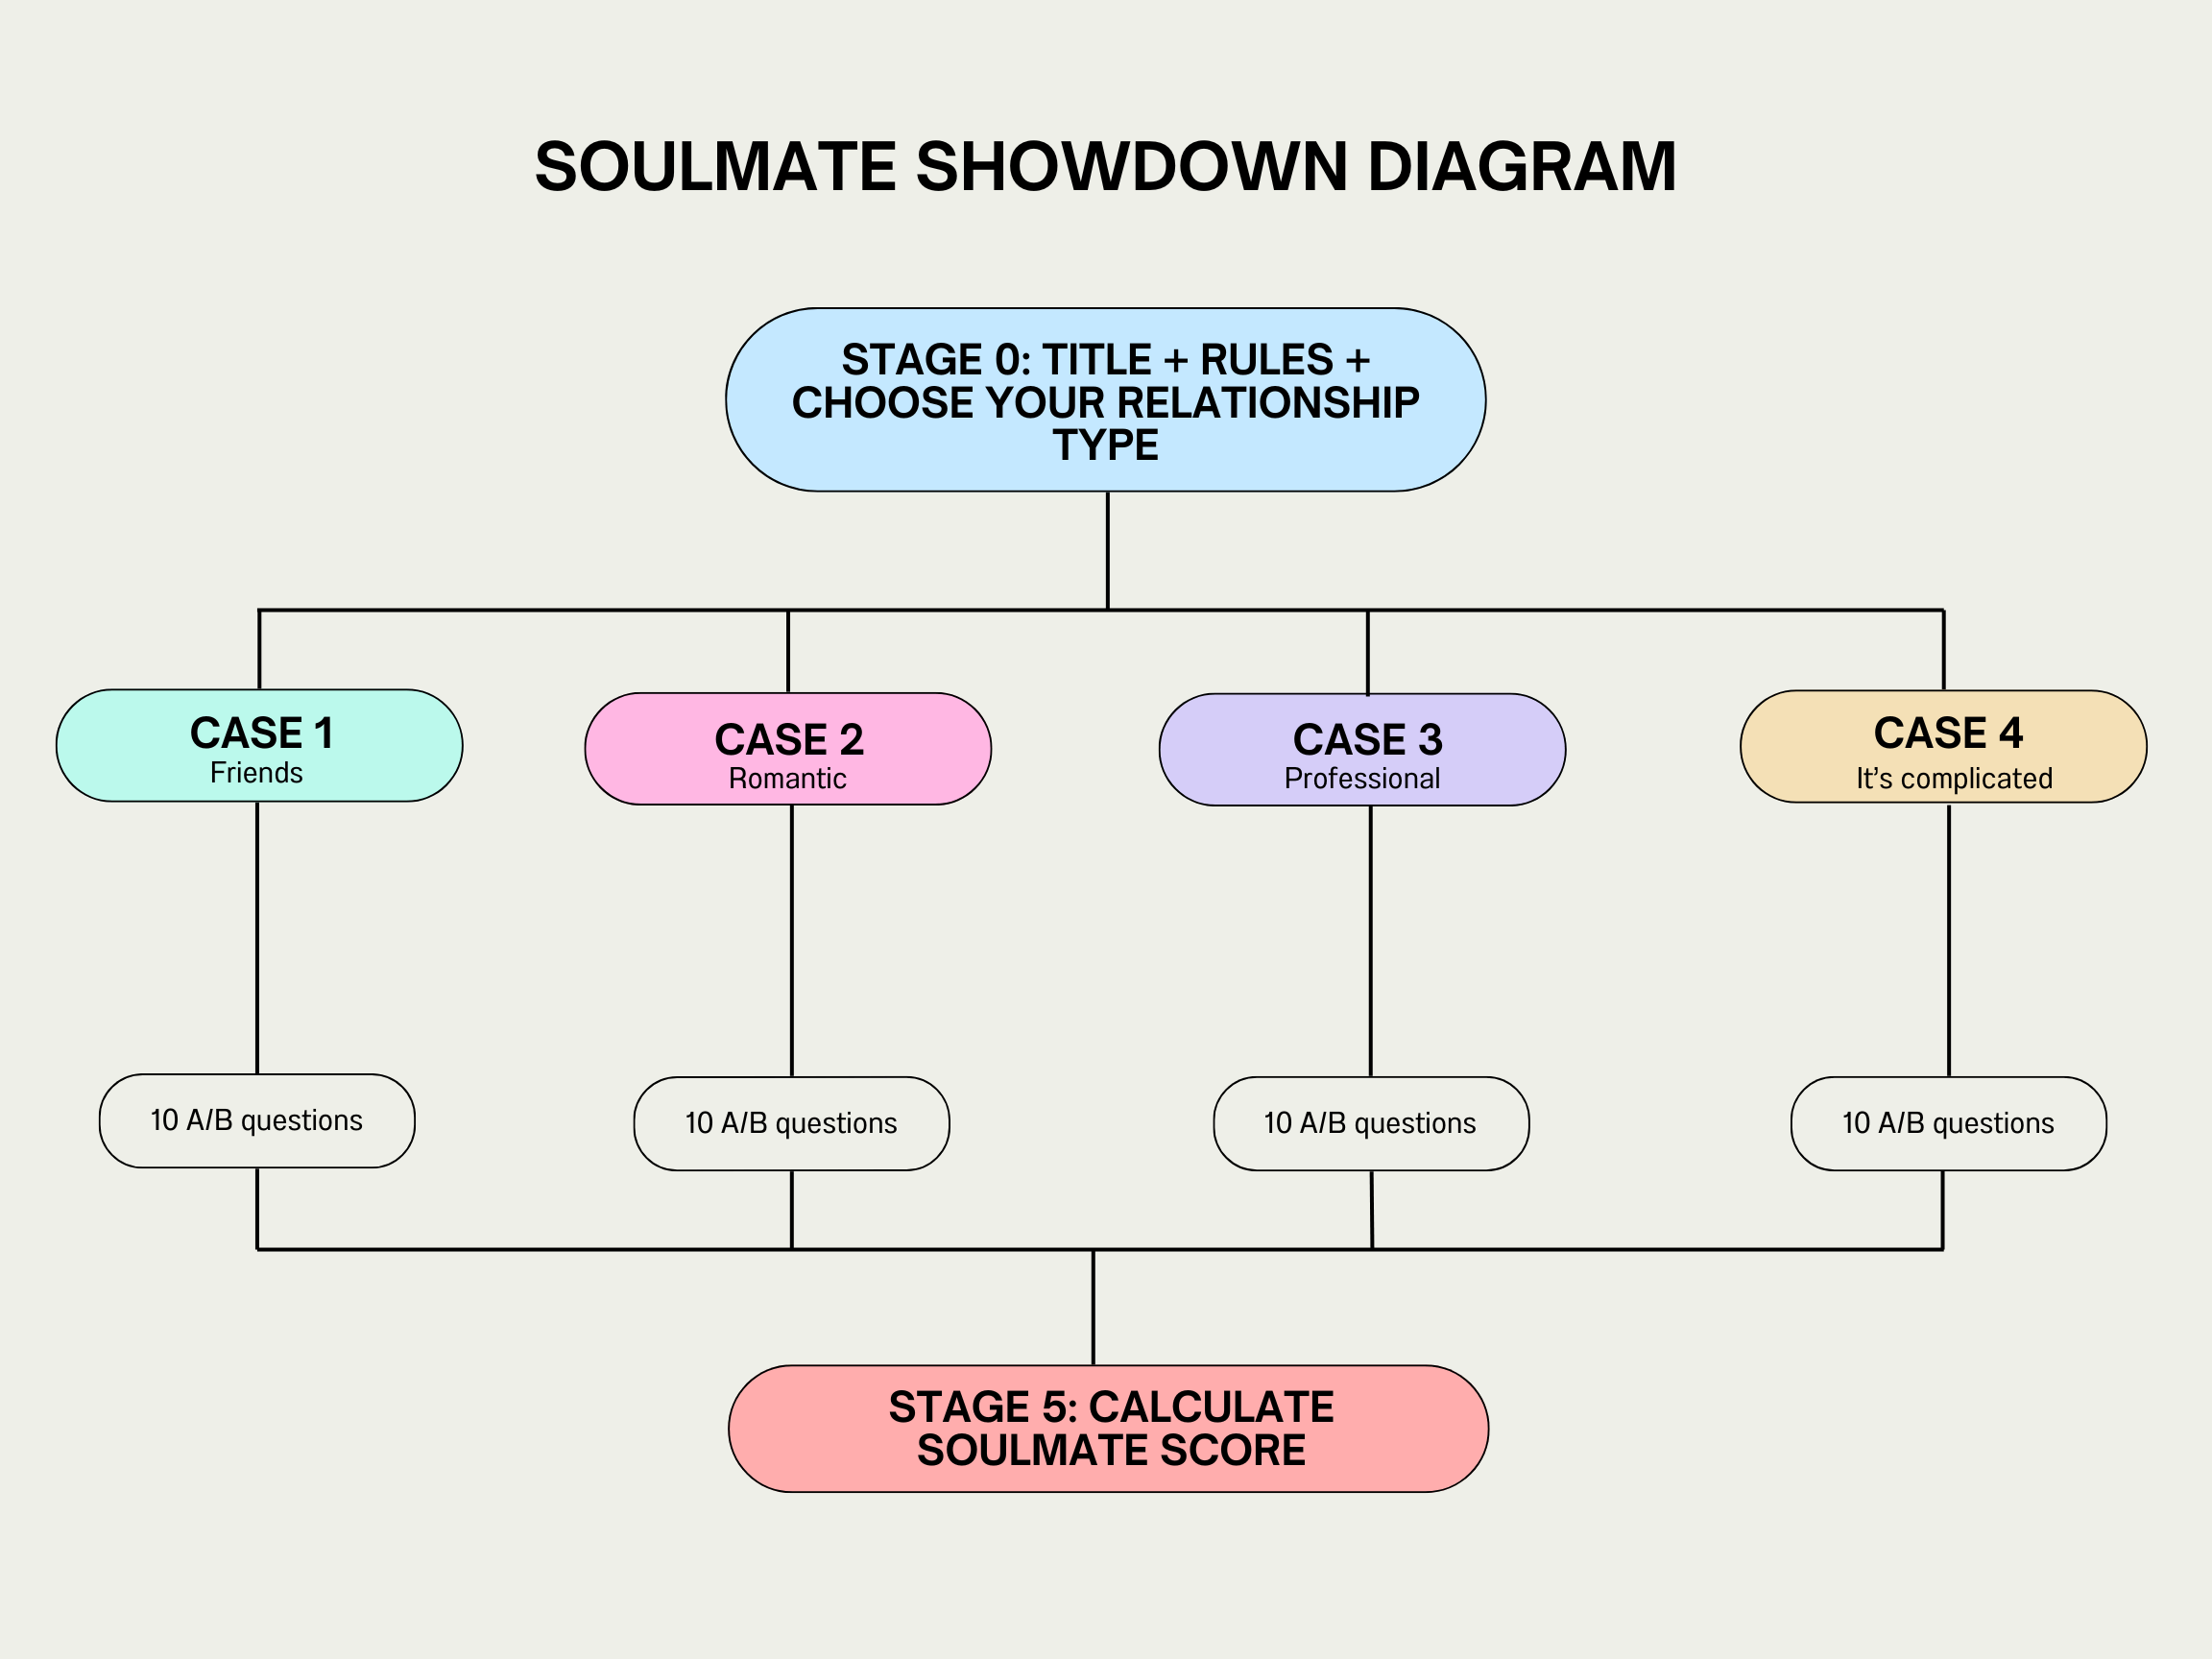
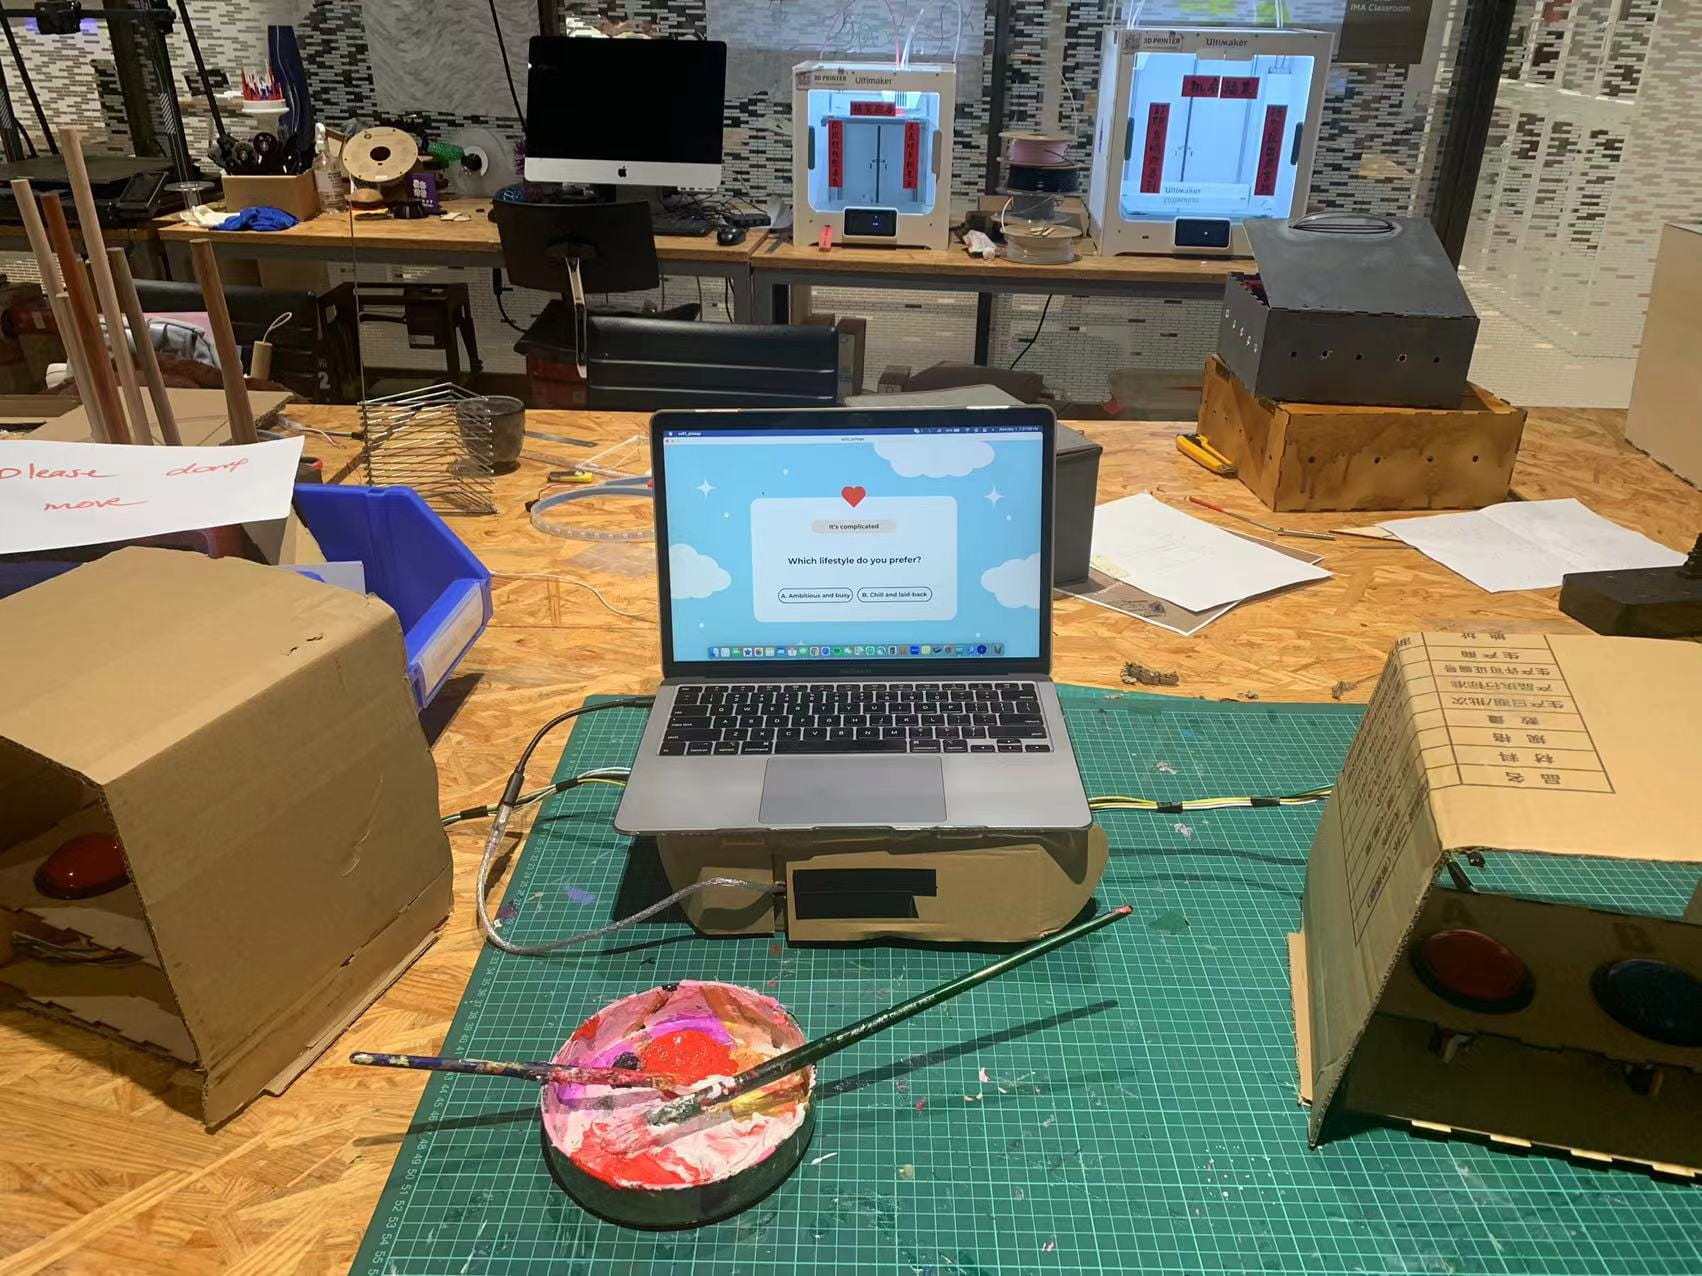
The code was very difficult to put together and I received lots of help from friends, fellows, and professors, as most of my programming happened on Processing, which I am not as familiar with compared to Arduino since we’ve been using that for longer. The general logic of the code, inspired by the code from my midterm project, is separated into various stages: stage 0 is the title page/introduction, rules, and relationship status choices; after choosing what relationship status the two partners are, the game will be directed to one of the four cases; case 1 is for friends, case 2 is for romantic partners, case 3 is for professional peers, and case 4 is for complicated relationships that don’t quite have a label; after all ten questions are answered, the game will jump to stage 5, the final stage, where the program will calculate how many questions partners 1 and 2 answered the same and provide a Soulmate Score, ranking from lowest to highest, 1-5. It was quite tricky working with the images, buttons, and many stages as the buttons would send signals from Arduino to Processing very fast, and there were nearly 60 images and six stages in total.
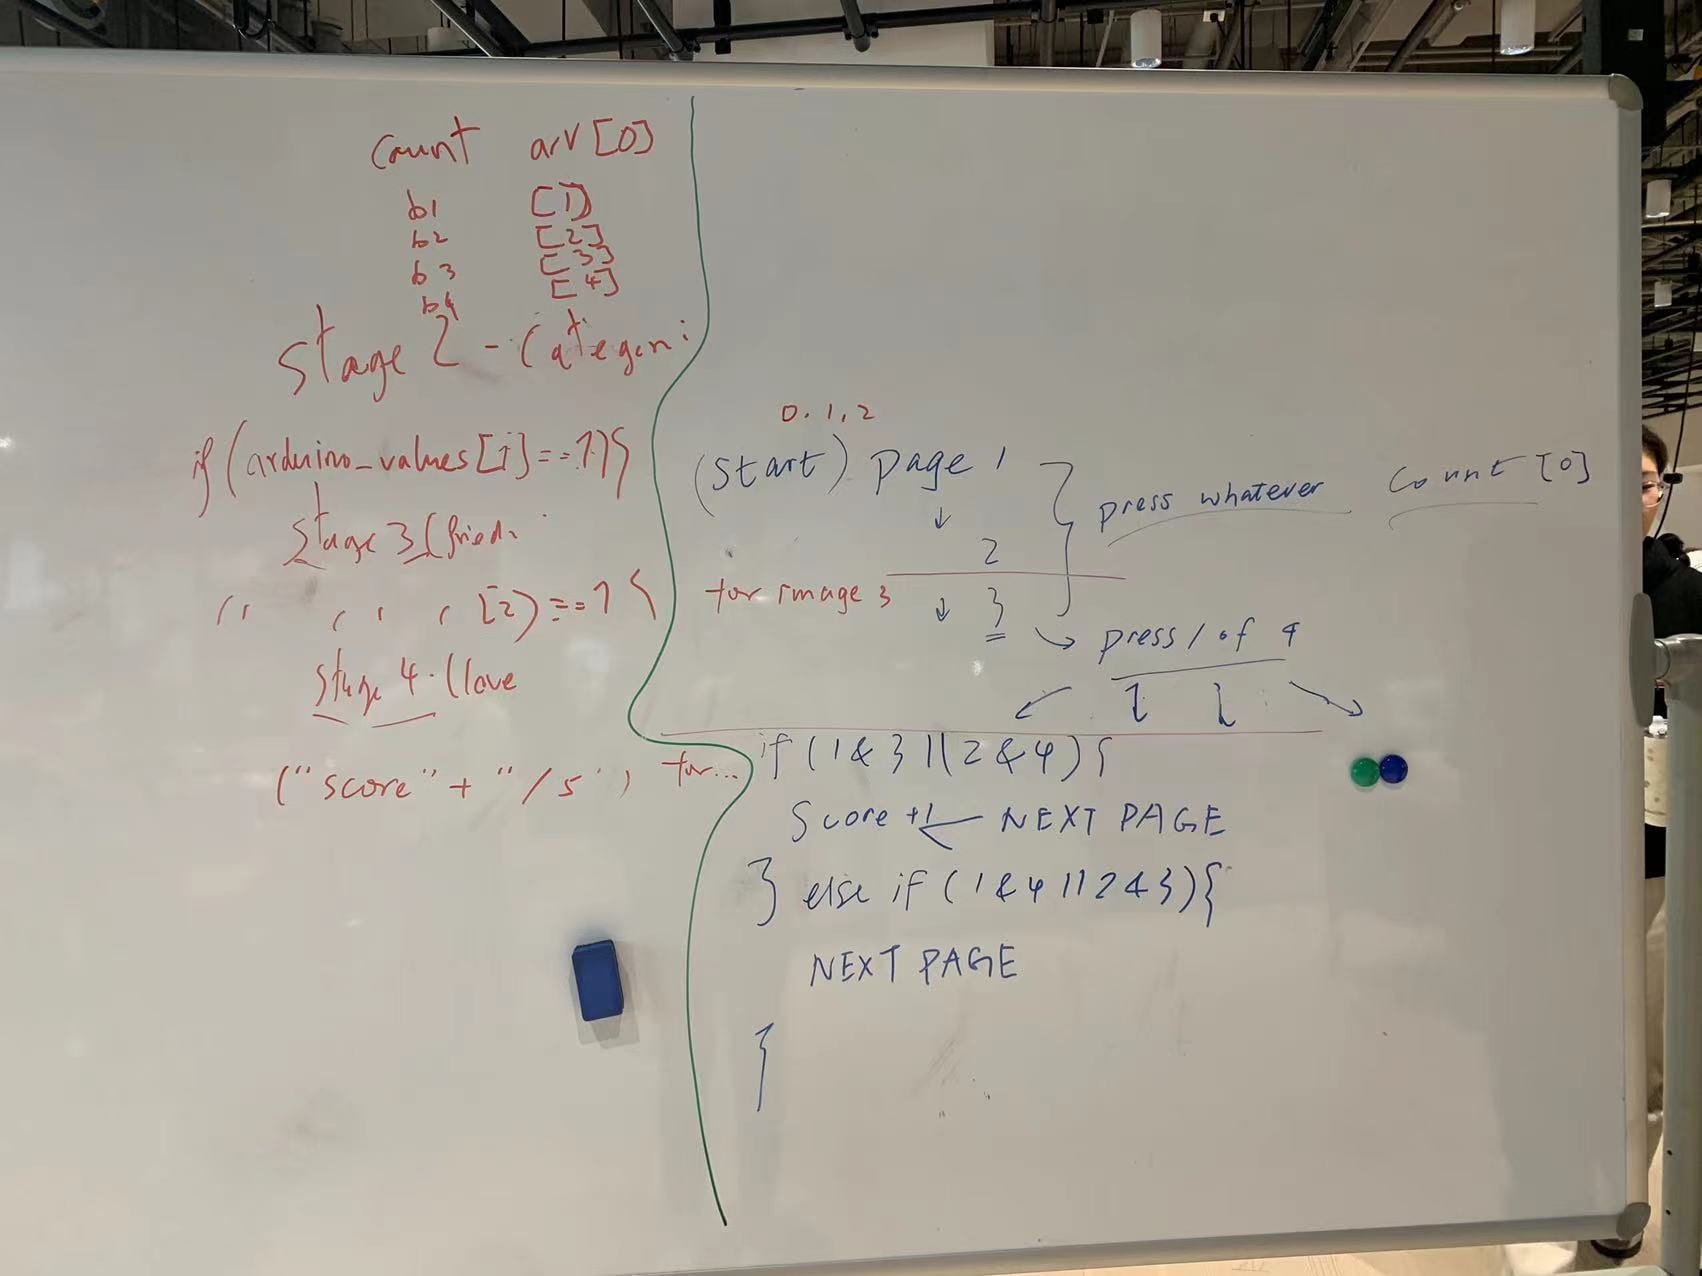
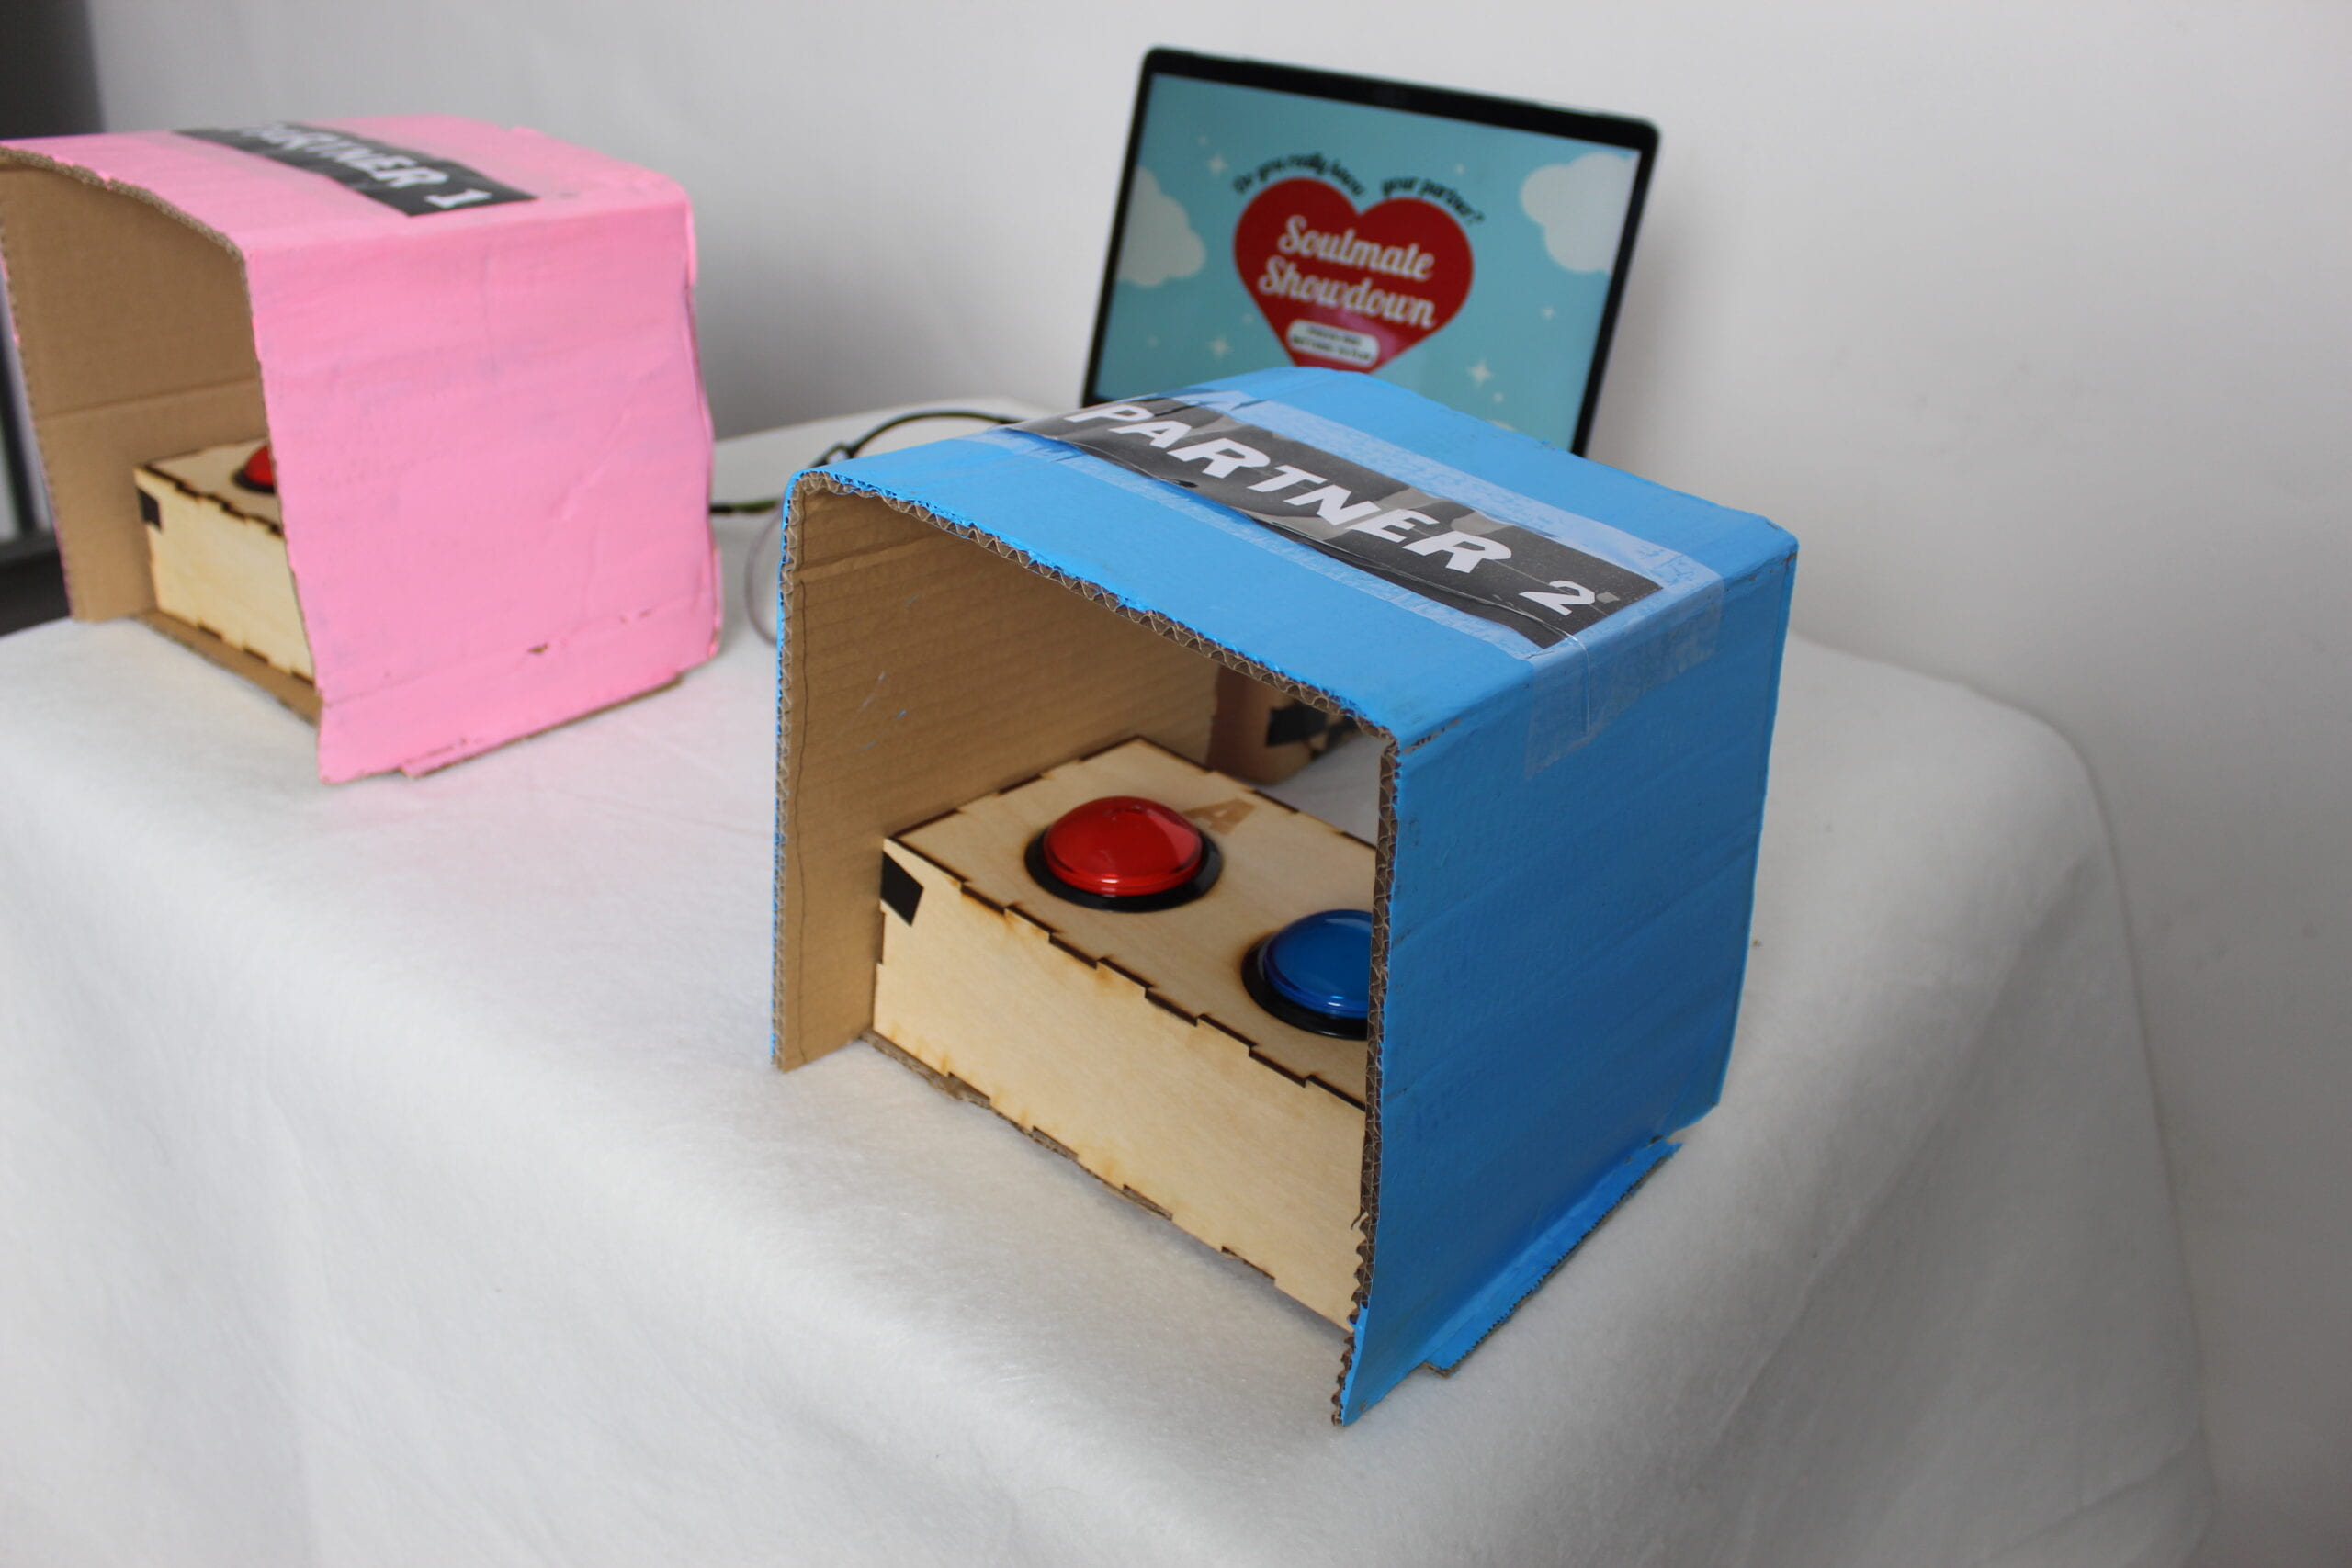
Finally, after many, many times of trial and error and asking for help from professionals, the code ran smoothly and the game was pretty fun to play with. I added some finishing touches to better adhere to my initial goal of making this seem like a gameshow and dramatizing the entire project. I created two cardboard covers/booths to cover up the two partners’ buttons, preventing the players from seeing what the other player chooses. I also taped all of the wires together while putting all the extra wires, Arduino, and breadboard into a cardboard box that would also act as a laptop stand, so that everything looked neat and pleasing to the eye. Lastly, I searched for some gameshow music and sound effects to play in the background. Throughout the entire game, the background song that loops is “The Game Show Theme Music” by Waderman – Royalty Free Music, and at the final stage where the score is revealed, the sound effect is called “Audience Clapping Sound Effects (no copyright)” by Renante Tabas (both found on Youtube).

Conclusions
The goal of this project was to create a lighthearted game to bring people closer to one another, no matter what the relationship is between them. I believe that my project is almost there in achieving this goal. One of the pieces of advice that I received from my presentation is to have a final reveal of both partners’ answers alongside a copy of the questions, which I think is a great idea so that the partners can have a further discussion afterward and discover more about each other. Unfortunately, I did not have enough time to add this feature and was also a bit scared to mess up the code which took professors very long to debug. If given the chance, I would reveal the answers of the partners after every question on the screen or create a sort of receipt printer that prints out the questions along with both partners’ choices to give to the players.
Luckily, my expectations match with how the users actually interacted with my project as my project was pretty direct in interactions. My project results align with my definition of interaction as users are sending a signal from their buttons to the computer and receiving signals back, with an additional benefit of interaction and communication between the two players. From the setbacks and challenges that I faced while building this project, I learned that patience is ultimately the biggest contributor to any project, especially IMA-related projects, as there are so many bugs and tiny things that seem minimal but ultimately affect the entire project. I had lots of fun creating this project as this is a topic that I am interested in and I see that my users have been very intrigued with the game as well. After the project had been built and successfully interacted with by others, it felt rewarding and a bit heartwarming to see the code run smoothly and the laughter and discussions that arose between the players.
Final Arduino code:
const int buttonPin1 = 2;  // button 1
const int buttonPin2 = 6;  // button 2
const int buttonPin3 = 3;  // button 3
const int buttonPin4 = 4;  // button 4
const int ledPin1 = 13;    // led 1
const int ledPin2 = 12;    // led 2
const int ledPin3 = 11;    // led 3
const int ledPin4 = 9;    // led 4
int buttonState1;          // variable for reading the pushbutton status
int buttonState2;          // variable for reading the pushbutton status
int buttonState3;          // variable for reading the pushbutton status
int buttonState4;          // variable for reading the pushbutton status

int prebuttonState1;
int prebuttonState2;
int prebuttonState3;
int prebuttonState4;

int count = -2;
bool count_recorded = false;

void setup() {
  Serial.begin(9600);
  // initialize the LED pin as an output:
  pinMode(ledPin1, OUTPUT);
  // initialize the pushbutton pin as an input:
  pinMode(buttonPin1, INPUT_PULLUP);  //PULLUP to get rid of 10k resistor
  // initialize the LED pin as an output:
  pinMode(ledPin2, OUTPUT);
  // initialize the pushbutton pin as an input:
  pinMode(buttonPin2, INPUT_PULLUP);  //PULLUP to get rid of 10k resistor
    // initialize the LED pin as an output:
  pinMode(ledPin3, OUTPUT);
  // initialize the pushbutton pin as an input:
  pinMode(buttonPin3, INPUT_PULLUP);  //PULLUP to get rid of 10k resistor
  // initialize the LED pin as an output:
  pinMode(ledPin4, OUTPUT);
  // initialize the pushbutton pin as an input:
  pinMode(buttonPin4, INPUT_PULLUP);  //PULLUP to get rid of 10k resistor
}

void loop() {
  // read the state of the pushbutton value:
  buttonState1 = digitalRead(buttonPin1);
  buttonState2 = digitalRead(buttonPin2);
  buttonState3 = digitalRead(buttonPin3);
  buttonState4 = digitalRead(buttonPin4);

if (buttonState1 == HIGH && prebuttonState1 == LOW) {
    // turn LED on:
    digitalWrite(ledPin1, LOW);
    count += 1;
    prebuttonState1 = HIGH;

  } else if (buttonState1 == LOW) {
    // turn LED off:
    digitalWrite(ledPin1, HIGH);
    prebuttonState1 = LOW;
  }
  if (buttonState2 == HIGH && prebuttonState2 == LOW) {
    // turn LED on:
    digitalWrite(ledPin2, LOW);
    count += 1;
    prebuttonState2 = HIGH;
  } else if (buttonState2 == LOW) {
    // turn LED off:
    digitalWrite(ledPin2, HIGH);
    prebuttonState2 = LOW;
  }
  if (buttonState3 == HIGH && prebuttonState3 == LOW) {
    // turn LED on:
    digitalWrite(ledPin3, LOW);
    count += 1;
    prebuttonState3 = HIGH;
  } else if (buttonState3 == LOW) {
    // turn LED off:
    digitalWrite(ledPin3, HIGH);
    prebuttonState3 = LOW;
  }
  if (buttonState4 == HIGH && prebuttonState4 == LOW) {
    // turn LED on:
    digitalWrite(ledPin4, LOW);
    count += 1;
    prebuttonState4 = HIGH;
  } else if (buttonState4 == LOW) {
    // turn LED off:
    digitalWrite(ledPin4, HIGH);
    prebuttonState4 = LOW;
  }

  Serial.print(buttonState1);
  Serial.print(",");  // put comma between sensor values
  Serial.print(buttonState2);
  Serial.print(",");  // put comma between sensor values
  Serial.print(buttonState3);
  Serial.print(",");  // put comma between sensor values
  Serial.print(buttonState4);
  Serial.println();

  delay(10);
}
Final Processing code:
import processing.sound.*;
// declare a SoundFile object
SoundFile sound1;
SoundFile sound2;

import processing.serial.*;

Serial serialPort;

int NUM_OF_VALUES_FROM_ARDUINO = 4;  /* CHANGE THIS ACCORDING TO YOUR PROJECT */

/* This array stores values from Arduino */
int arduino_values[] = new int[NUM_OF_VALUES_FROM_ARDUINO];

int imageNum = 0;
int stage;
String fileName;

PImage[] images = new PImage[70];
PImage tImage;
int p1 = 0;
int p2 = 0;

int prev0;
int prev1;
int prev2;
int prev3;

int counter = 0;

int frameCounter = 0;

void setup() {
  size(1440, 900);

  // create the instance, load its data from a file
  sound1 = new SoundFile(this, "Gameshow.mp3");
  // play the sound on loop
  sound1.loop();
  sound2 = new SoundFile(this, "Clap.mp3");

  printArray(Serial.list());
  // put the name of the serial port your Arduino is connected
  // to in the line below - this should be the same as you're
  // using in the "Port" menu in the Arduino IDE
  serialPort = new Serial(this, "/dev/cu.usbmodem14201", 9600);

  for (int i = 0; i < images.length; i ++) {
    int j = i + 1;
    fileName = j + ".png";
    println(fileName);
    tImage = loadImage(fileName);
    images[i] = tImage;
  }

  prev0=1;
  prev1=1;
  prev2=1;
  prev3=1;
  //fullScreen();  // Make the sketch go full screen
}

void draw() { //stage 0
  getSerialData();
  //println("STAGE:", stage, "COUNTER:", counter);
  image(images[imageNum], 0, 0, 1440, 900);
  switch(stage) {
  case 0:
    //if (arduino_values[0] == 1 && prev == 0) {
    //  prev0 = 1;
    //}
    if (imageNum == 2) {
      if (arduino_values[0] == 0 && prev0 == 1) {
        imageNum = 3;
        stage = 1;
        imageNum++;
        prev0 = arduino_values[0];
      } else if (arduino_values[1] == 0 && prev1 == 1) {
        imageNum = 14;
        stage = 2;
        imageNum++;
        prev1 = arduino_values[1];
      } else if (arduino_values[2] == 0 & prev2 == 1) {
        imageNum = 25;
        stage = 3;
        imageNum++;
        prev2 = arduino_values[2];
      } else if (arduino_values[3] == 0 && prev3== 1) {
        imageNum = 36;
        stage = 4;
        imageNum++;
        prev3 = arduino_values[3];
      }
      prev0 = arduino_values[0];
      prev1 = arduino_values[1];
      prev2 = arduino_values[2];
      prev3 = arduino_values[3];
    } else {
      if (arduino_values[0] == 0 && prev0 == 1) {
        imageNum++;
      }
      prev0 = arduino_values[0];
    }
    break;

  case 1:
    if (p1 == 0 && arduino_values[0] == 0 && prev0 == 1) {
      p1 = 1;
      prev0 = arduino_values[0];
    }
    if (p1 == 0 && arduino_values[1] == 0 && prev1 == 1) {
      p1 = 2;
      prev1 = arduino_values[1];
    }
    if (p2 == 0 && arduino_values[2] == 0 && prev2 == 1) {
      p2 = 1;
      prev2 = arduino_values[2];
    }
    if (p2 == 0 && arduino_values[3] == 0 && prev3 == 1) {
      p2 = 2;
      prev3 = arduino_values[3];
    }

    prev0 = arduino_values[0];
    prev1 = arduino_values[1];
    prev2 = arduino_values[2];
    prev3 = arduino_values[3];

    if (p1 == p2 && p1 != 0) {
      counter++;
      imageNum++;
      delay(500);
      if (imageNum == 13) {
        stage = 5;
        imageNum = 47;
        sound1.stop();
        sound2.play();
      }
      p1 = 0;
      p2 = 0;
    }
    if (p1 != p2 && p1 != 0 && p2 != 0) {
      imageNum++;
      delay(500);
      if (imageNum == 13) {
        stage = 5;
        imageNum = 47;
      }
      p1 = 0;
      p2 = 0;
    }
    break;

  case 2:
    if (p1 == 0 && arduino_values[0] == 0 && prev0 == 1) {
      p1 = 1;
      prev0 = arduino_values[0];
    }
    if (p1 == 0 && arduino_values[1] == 0 && prev1 == 1) {
      p1 = 2;
      prev1 = arduino_values[1];
    }
    if (p2 == 0 && arduino_values[2] == 0 && prev2 == 1) {
      p2 = 1;
      prev2 = arduino_values[2];
    }
    if (p2 == 0 && arduino_values[3] == 0 && prev3 == 1) {
      p2 = 2;
      prev3 = arduino_values[3];
    }

    prev0 = arduino_values[0];
    prev1 = arduino_values[1];
    prev2 = arduino_values[2];
    prev3 = arduino_values[3];
    if (p1 == p2 && p1 != 0) {
      counter++;
      imageNum++;
      delay(500);
      if (imageNum == 24) {
        stage = 5;
        imageNum = 47;
      }
      p1 = 0;
      p2 = 0;
    }
    if (p1 != p2 && p1 != 0 && p2 != 0) {
      imageNum++;
      delay(500);
      if (imageNum == 24) {
        stage = 5;
        imageNum = 47;
      }
      p1 = 0;
      p2 = 0;
    }
    break;

  case 3:
    if (p1 == 0 && arduino_values[0] == 0 && prev0 == 1) {
      p1 = 1;
      prev0 = arduino_values[0];
    }
    if (p1 == 0 && arduino_values[1] == 0 && prev1 == 1) {
      p1 = 2;
      prev1 = arduino_values[1];
    }
    if (p2 == 0 && arduino_values[2] == 0 && prev2 == 1) {
      p2 = 1;
      prev2 = arduino_values[2];
    }
    if (p2 == 0 && arduino_values[3] == 0 && prev3 == 1) {
      p2 = 2;
      prev3 = arduino_values[3];
    }

    prev0 = arduino_values[0];
    prev1 = arduino_values[1];
    prev2 = arduino_values[2];
    prev3 = arduino_values[3];
    if (p1 == p2 && p1 != 0) {
      counter++;
      imageNum++;
      delay(500);
      if (imageNum == 35) {
        stage = 5;
        imageNum = 47;
      }
      p1 = 0;
      p2 = 0;
    }

    if (p1 != p2 && p1 != 0 && p2 != 0) {
      imageNum++;
      delay(500);
      if (imageNum == 35) {
        stage = 5;
        imageNum = 47;
      }
      p1 = 0;
      p2 = 0;
    }
    break;

  case 4:
    if (p1 == 0 && arduino_values[0] == 0 && prev0 == 1) {
      p1 = 1;
      prev0 = arduino_values[0];
    }
    if (p1 == 0 && arduino_values[1] == 0 && prev1 == 1) {
      p1 = 2;
      prev1 = arduino_values[1];
    }
    if (p2 == 0 && arduino_values[2] == 0 && prev2 == 1) {
      p2 = 1;
      prev2 = arduino_values[2];
    }
    if (p2 == 0 && arduino_values[3] == 0 && prev3 == 1) {
      p2 = 2;
      prev3 = arduino_values[3];
    }
    prev0 = arduino_values[0];
    prev1 = arduino_values[1];
    prev2 = arduino_values[2];
    prev3 = arduino_values[3];
    if (p1 == p2 && p1 != 0) {
      counter++;
      imageNum++;
      delay(500);
      if (imageNum == 46) {
        stage = 5;
        imageNum = 47;
      }
      p1 = 0;
      p2 = 0;
    }
    if (p1 != p2 && p1 != 0 && p2 != 0) {
      imageNum++;
      delay(500);
      if (imageNum == 46) {
        stage = 5;
        imageNum = 47;
      }
      p1 = 0;
      p2 = 0;
    }
    break;

  case 5:
    frameCounter = (frameCounter + 1) % 60;

    if (frameCounter == 1) {
      imageNum++;
    }

    if (imageNum == 56) {
      imageNum = 56 + counter / 2;
      if (sound1.isPlaying() == true) {
        sound1.stop();
        sound2.play();
      }
      stage = 6;
    }
  }
  image(images[imageNum], 0, 0, 1440, 900);
}

void getSerialData() {
  while (serialPort.available() > 0) {
    String in = serialPort.readStringUntil( 10 );  // 10 = '\n'  Linefeed in ASCII
    if (in != null) {
      print("From Arduino: " + in);
      String[] serialInArray = split(trim(in), ",");
      if (serialInArray.length == NUM_OF_VALUES_FROM_ARDUINO) {
        for (int i=0; i<serialInArray.length; i++) {
          arduino_values[i] = int(serialInArray[i]);
        }
      }
    }
  }
}
Disassembly
