A Journey to Hogwarts
Creator: Sara He, Zhixuan Gu
Instructor: Andy Garcia
CONTEXT AND SIGNIFICANCE
In the group project research, I defined the term interaction as a process in which two individuals can actively respond to each other’s actions through conversation(involving listening, thinking, and speaking) and is facilitated through specific media. This impacted me to pursue a more multi-sensory user experience, conveying it through different parts of my own project. I was also inspired by other amazing works of interactive diorama, learning more about how to set a scene and what we can build with cardboard.When it comes to the idea of our project, I got inspiration from the Marauder’s Map in the Harry Potter story. I think Marauder’s Map is an interactive tool encompassing different reactions to its user. So after discussion, my partner and I decided to make an interactive diorama, which was a 3D version of the Marauder’s Map with the focus on the Hogwarts Castle. As for re-creation, besides bringing the project from 2D to 3D, we also added different kinds of sensors to achieve multi-sensory interaction. We really hope that this project can evoke other Harry Potter’s fans’ memories of this splendid and magical world.
Draft: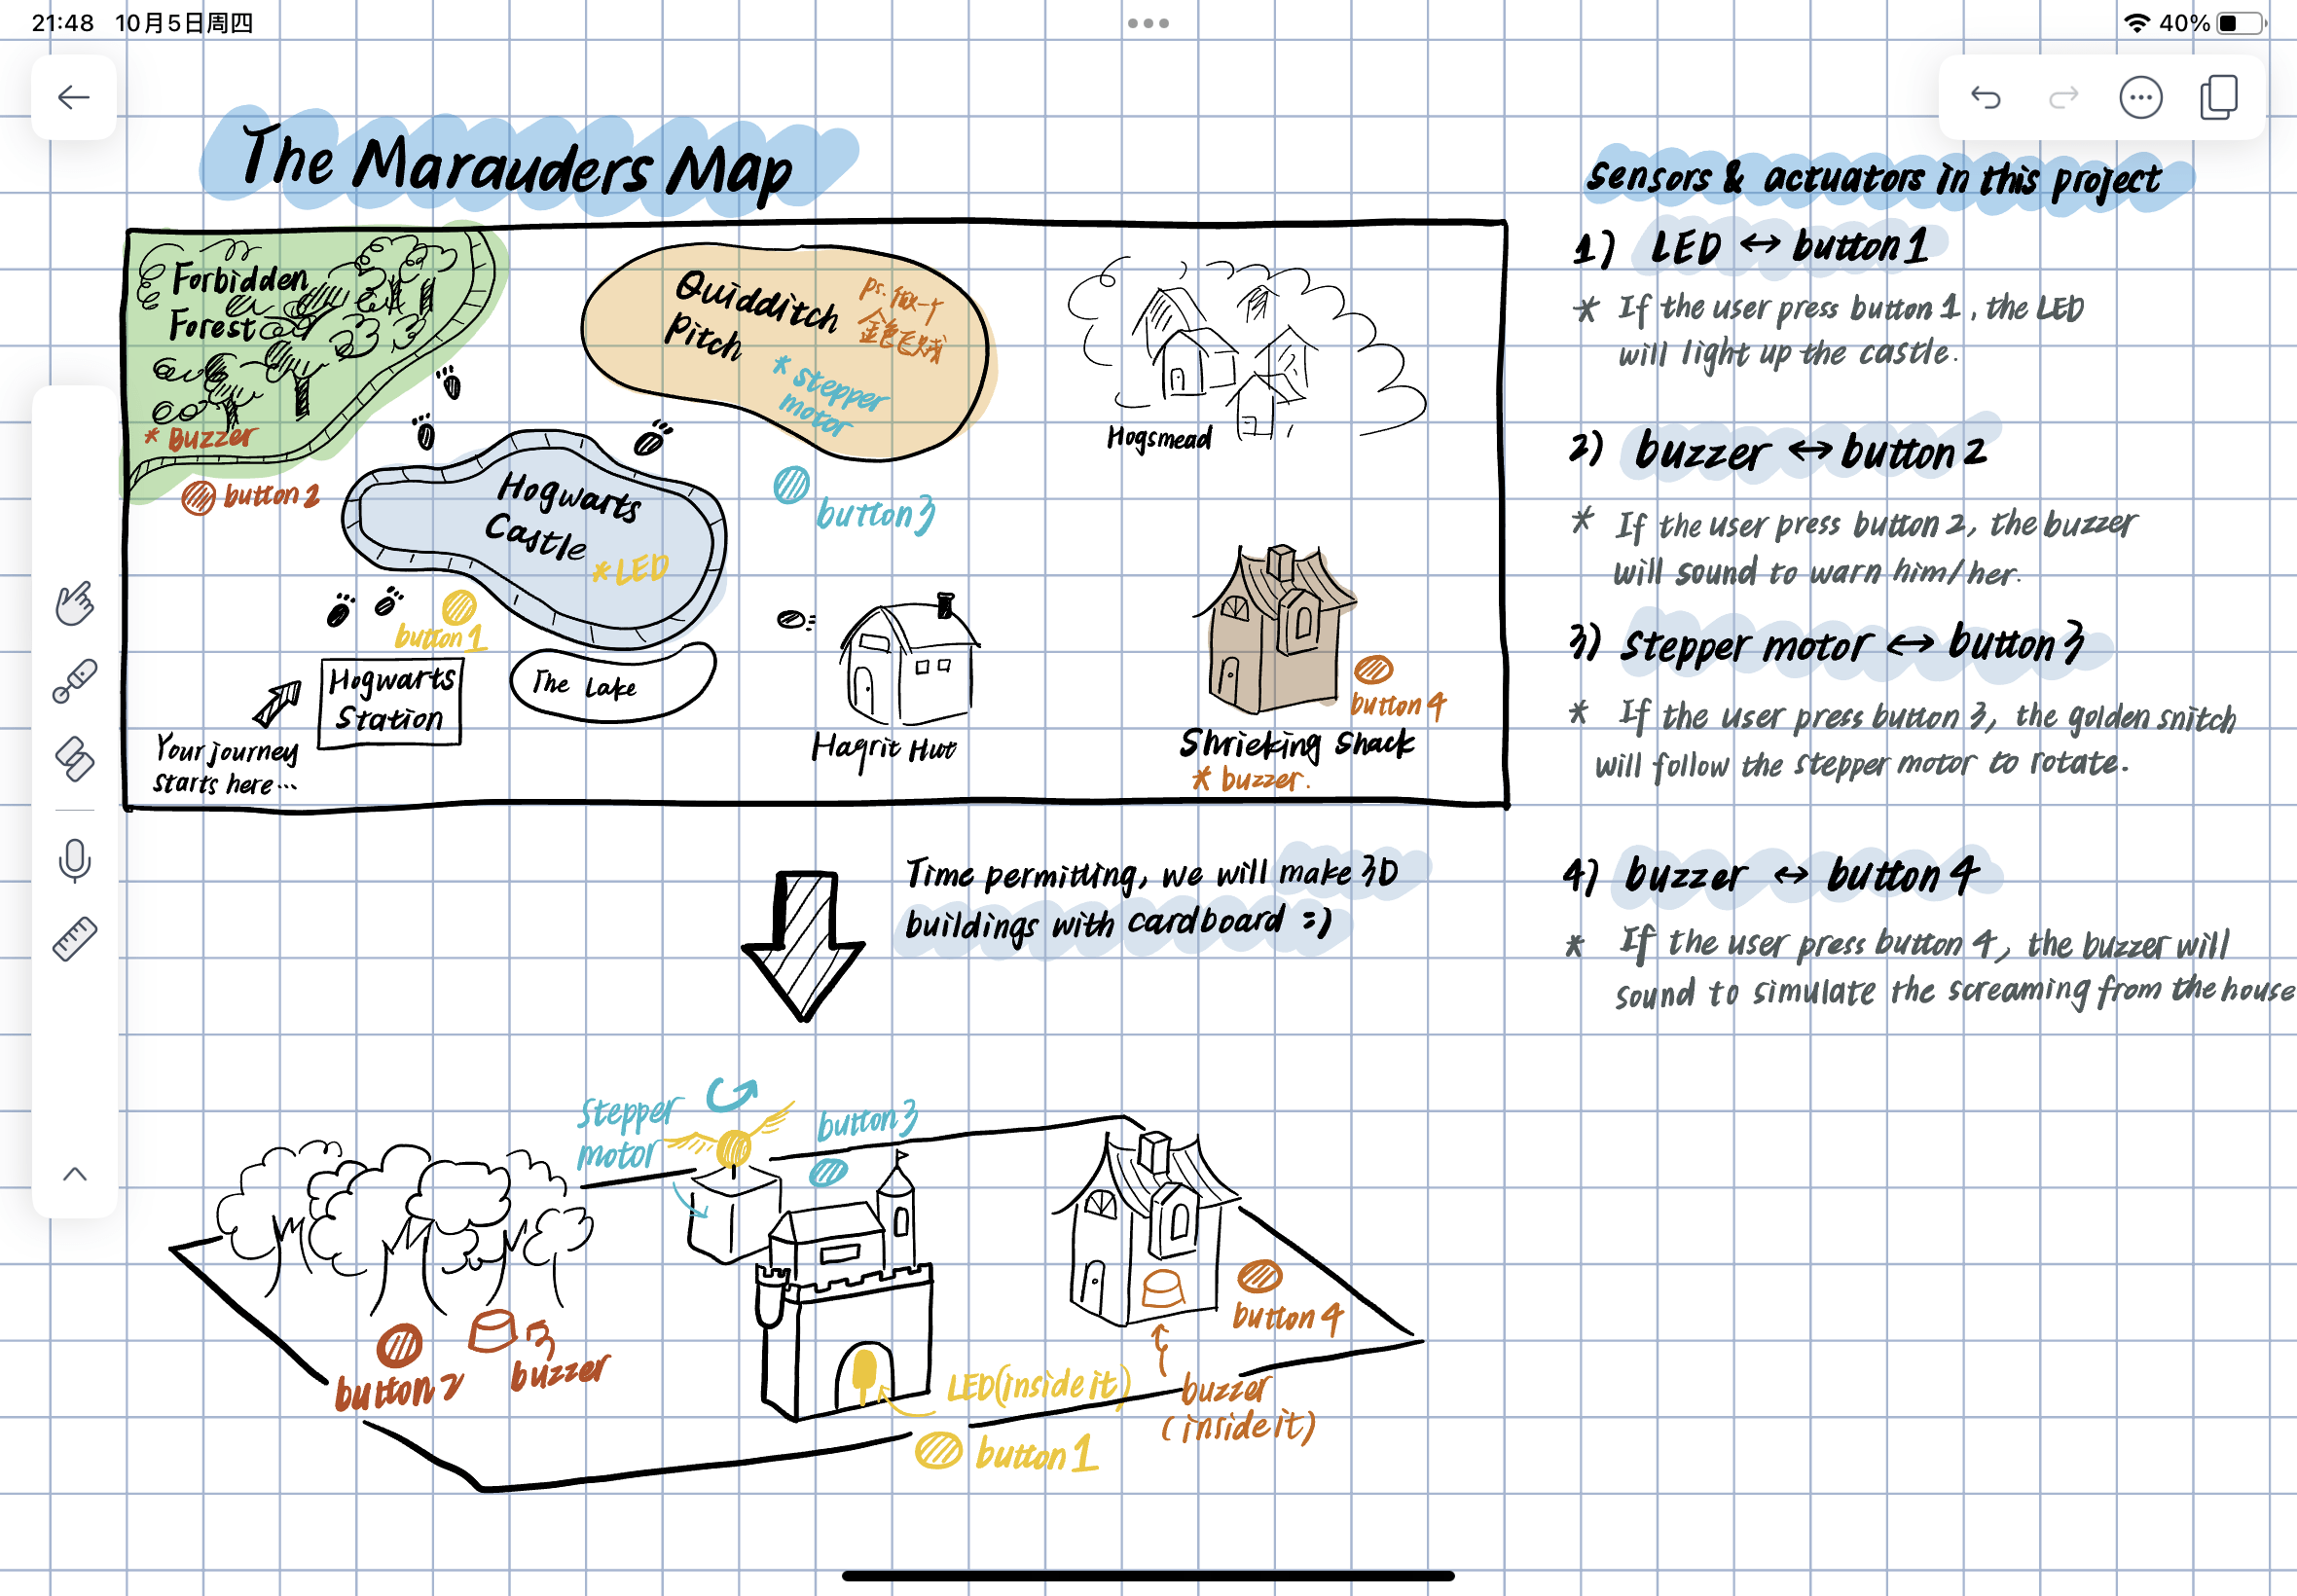
CONCEPTION AND DESIGN
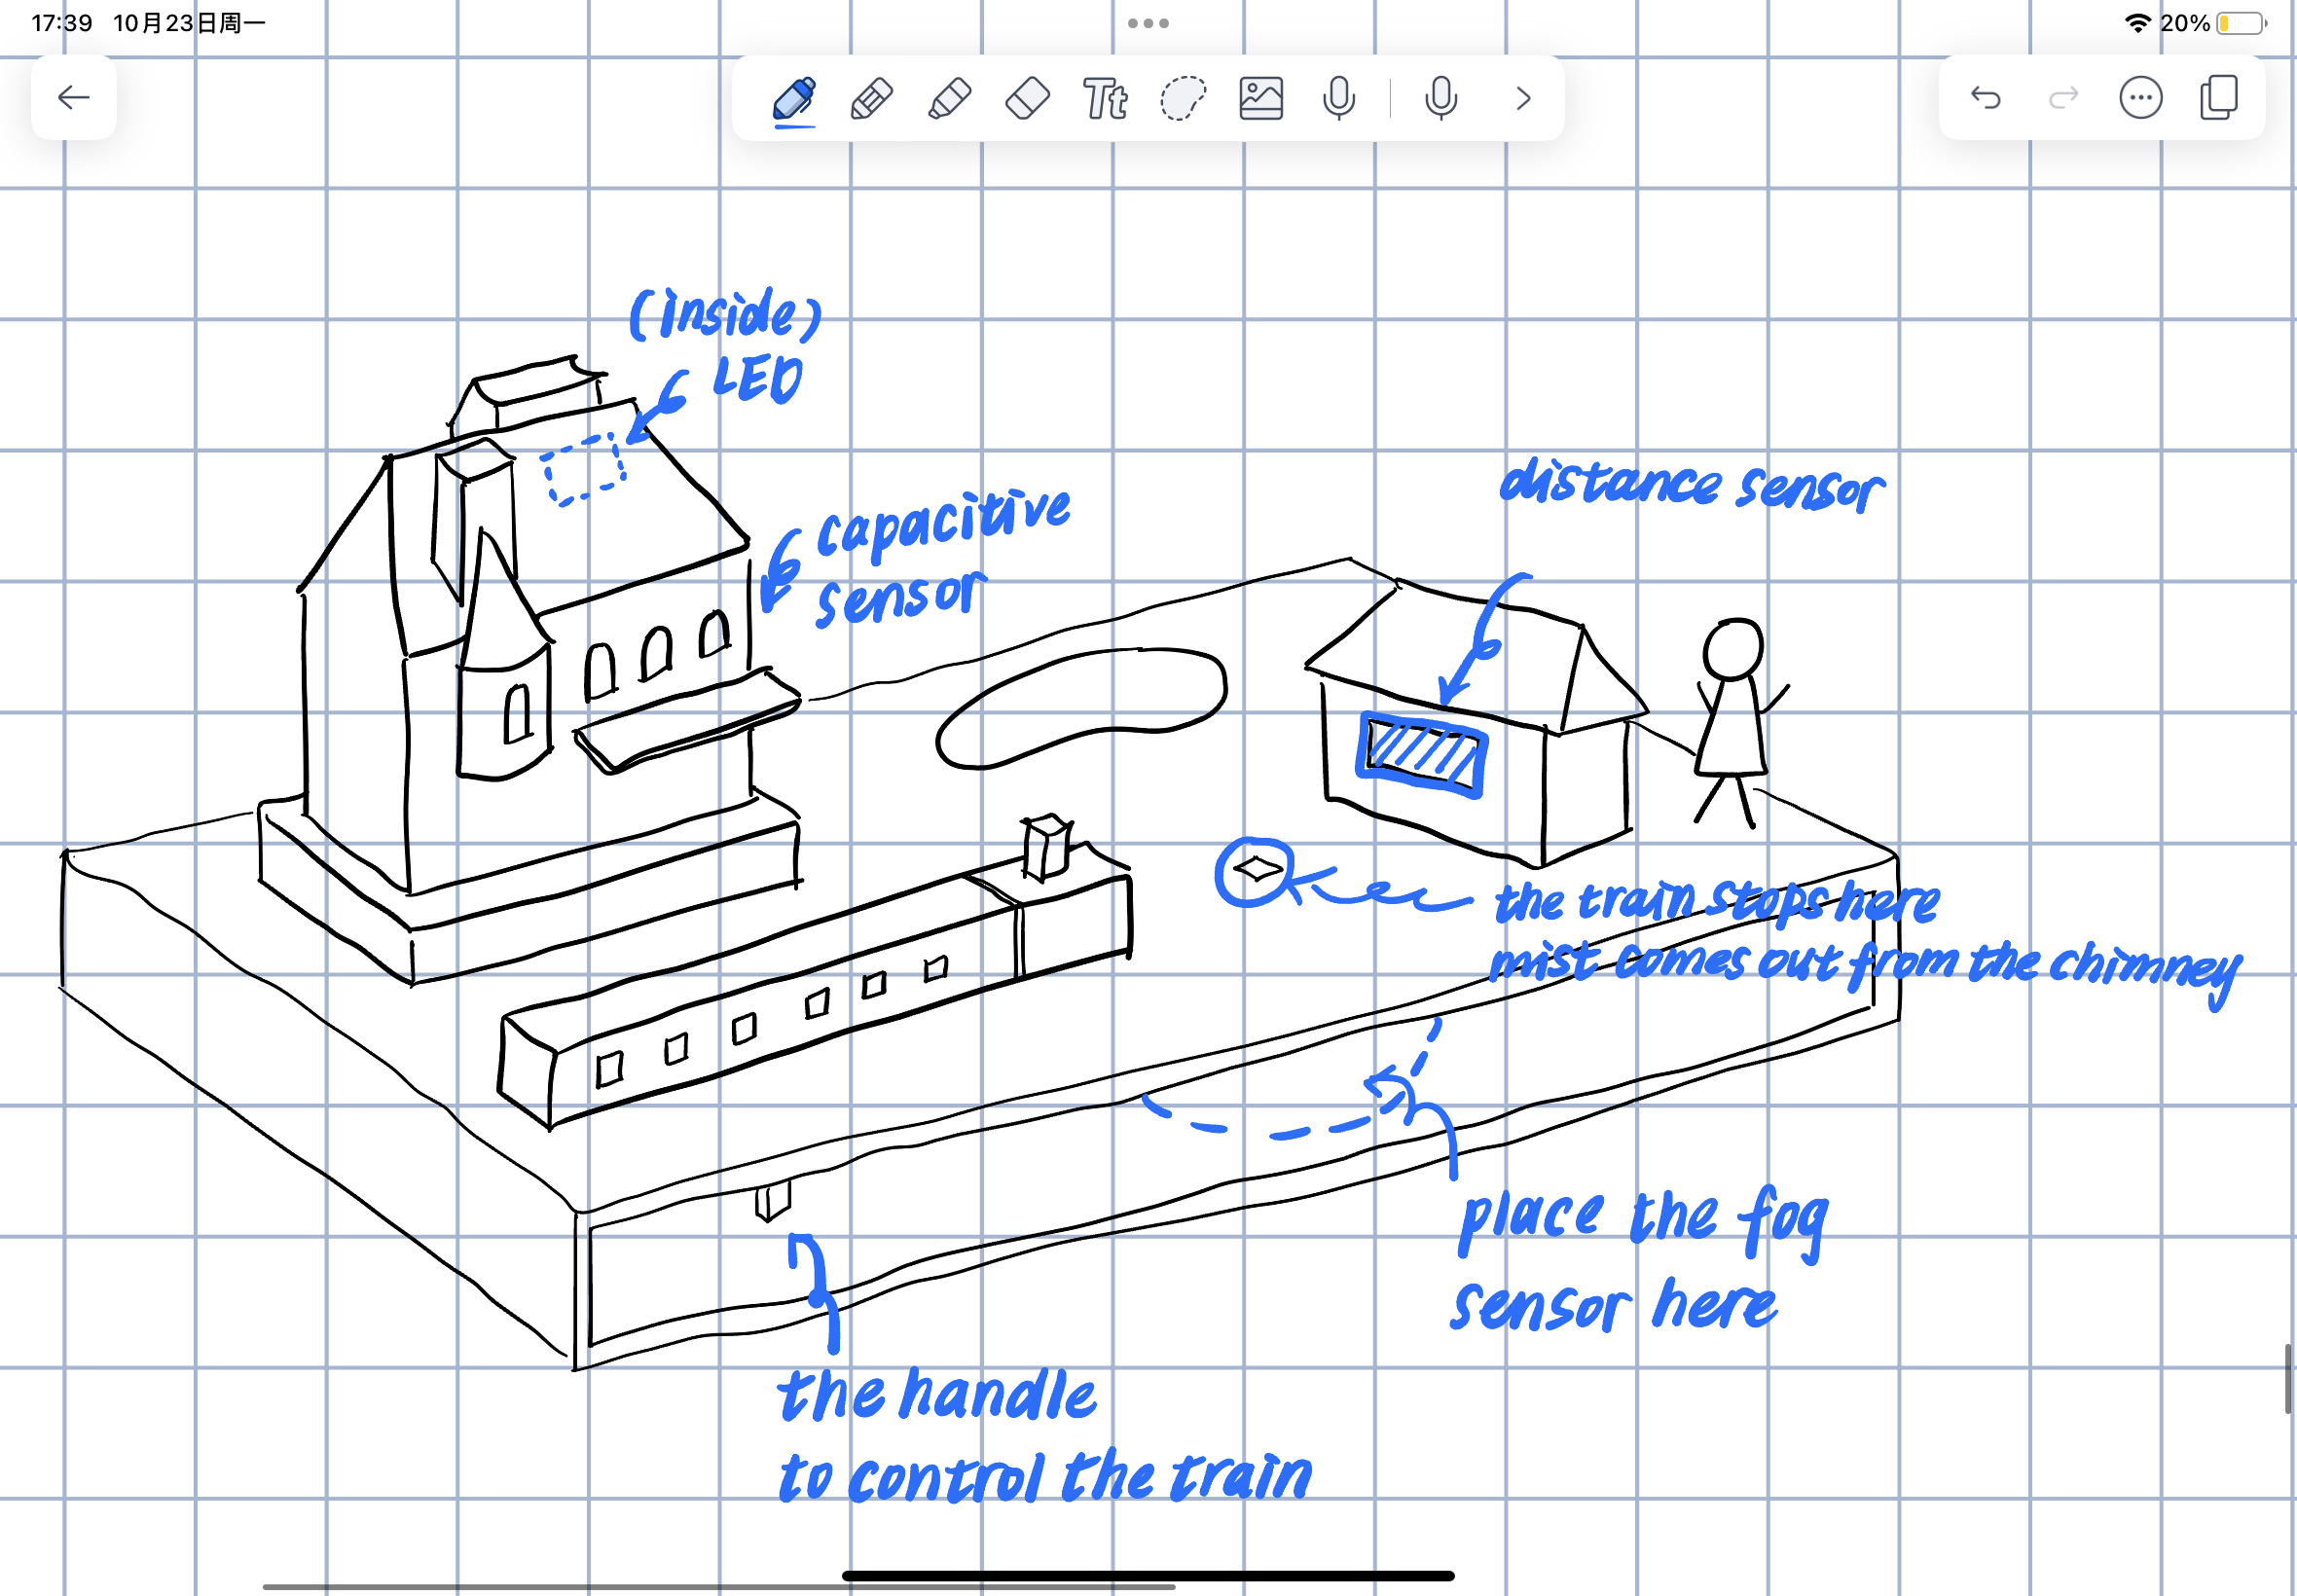
We designed many details based on user experience and reaction. Take the capacitive sensor on the “door” as an example, it turns the LED on when it’s touched. The users, however, might not realize that they need to touch it. So we cut the tin foil smaller and designed it as the “handle” of the door, prompting the users to touch it so as to achieve the desired result. As for our design, we mainly used cardboard to build the objects and painted them because these were the materials that we were provided with and also useful for prototyping buildings. Some tiny landscape materials(we bought it online) were added for decoration as well.
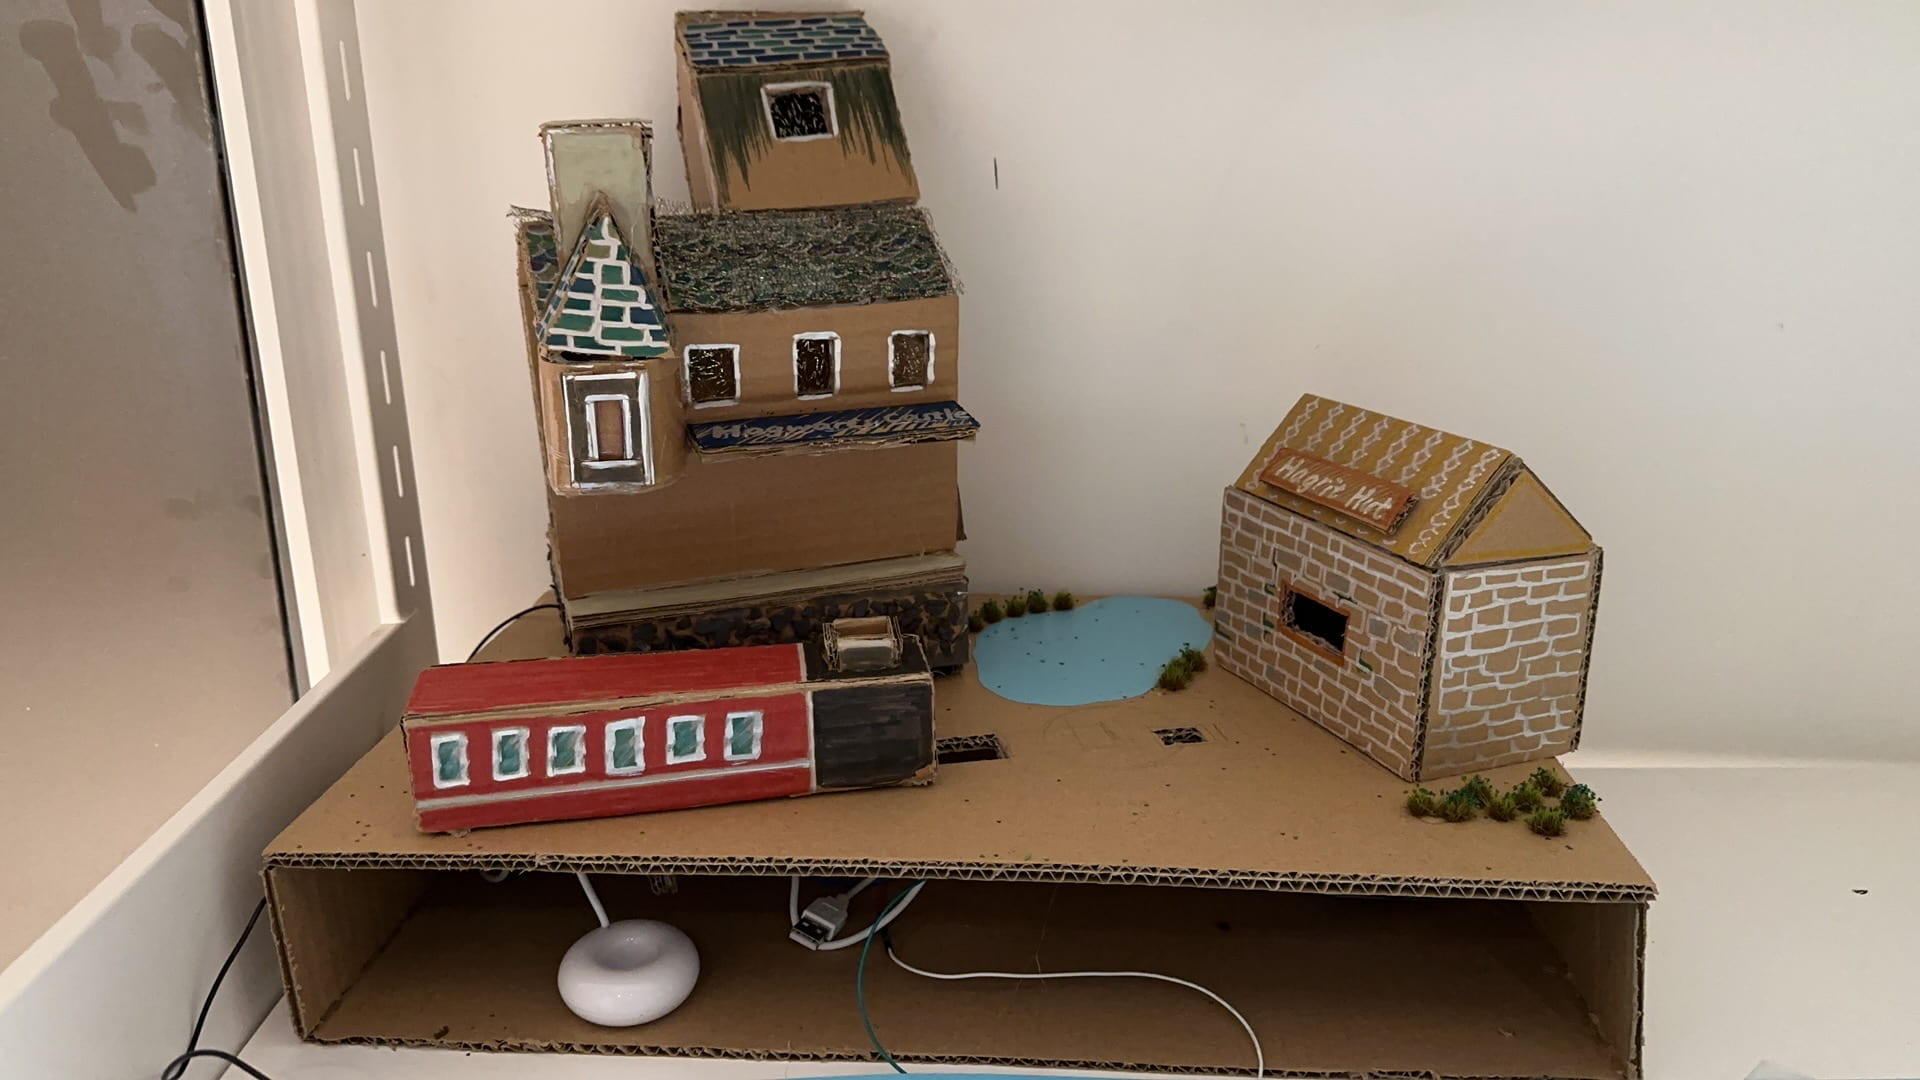
Final design:
FABRICATION AND PRODUCTION
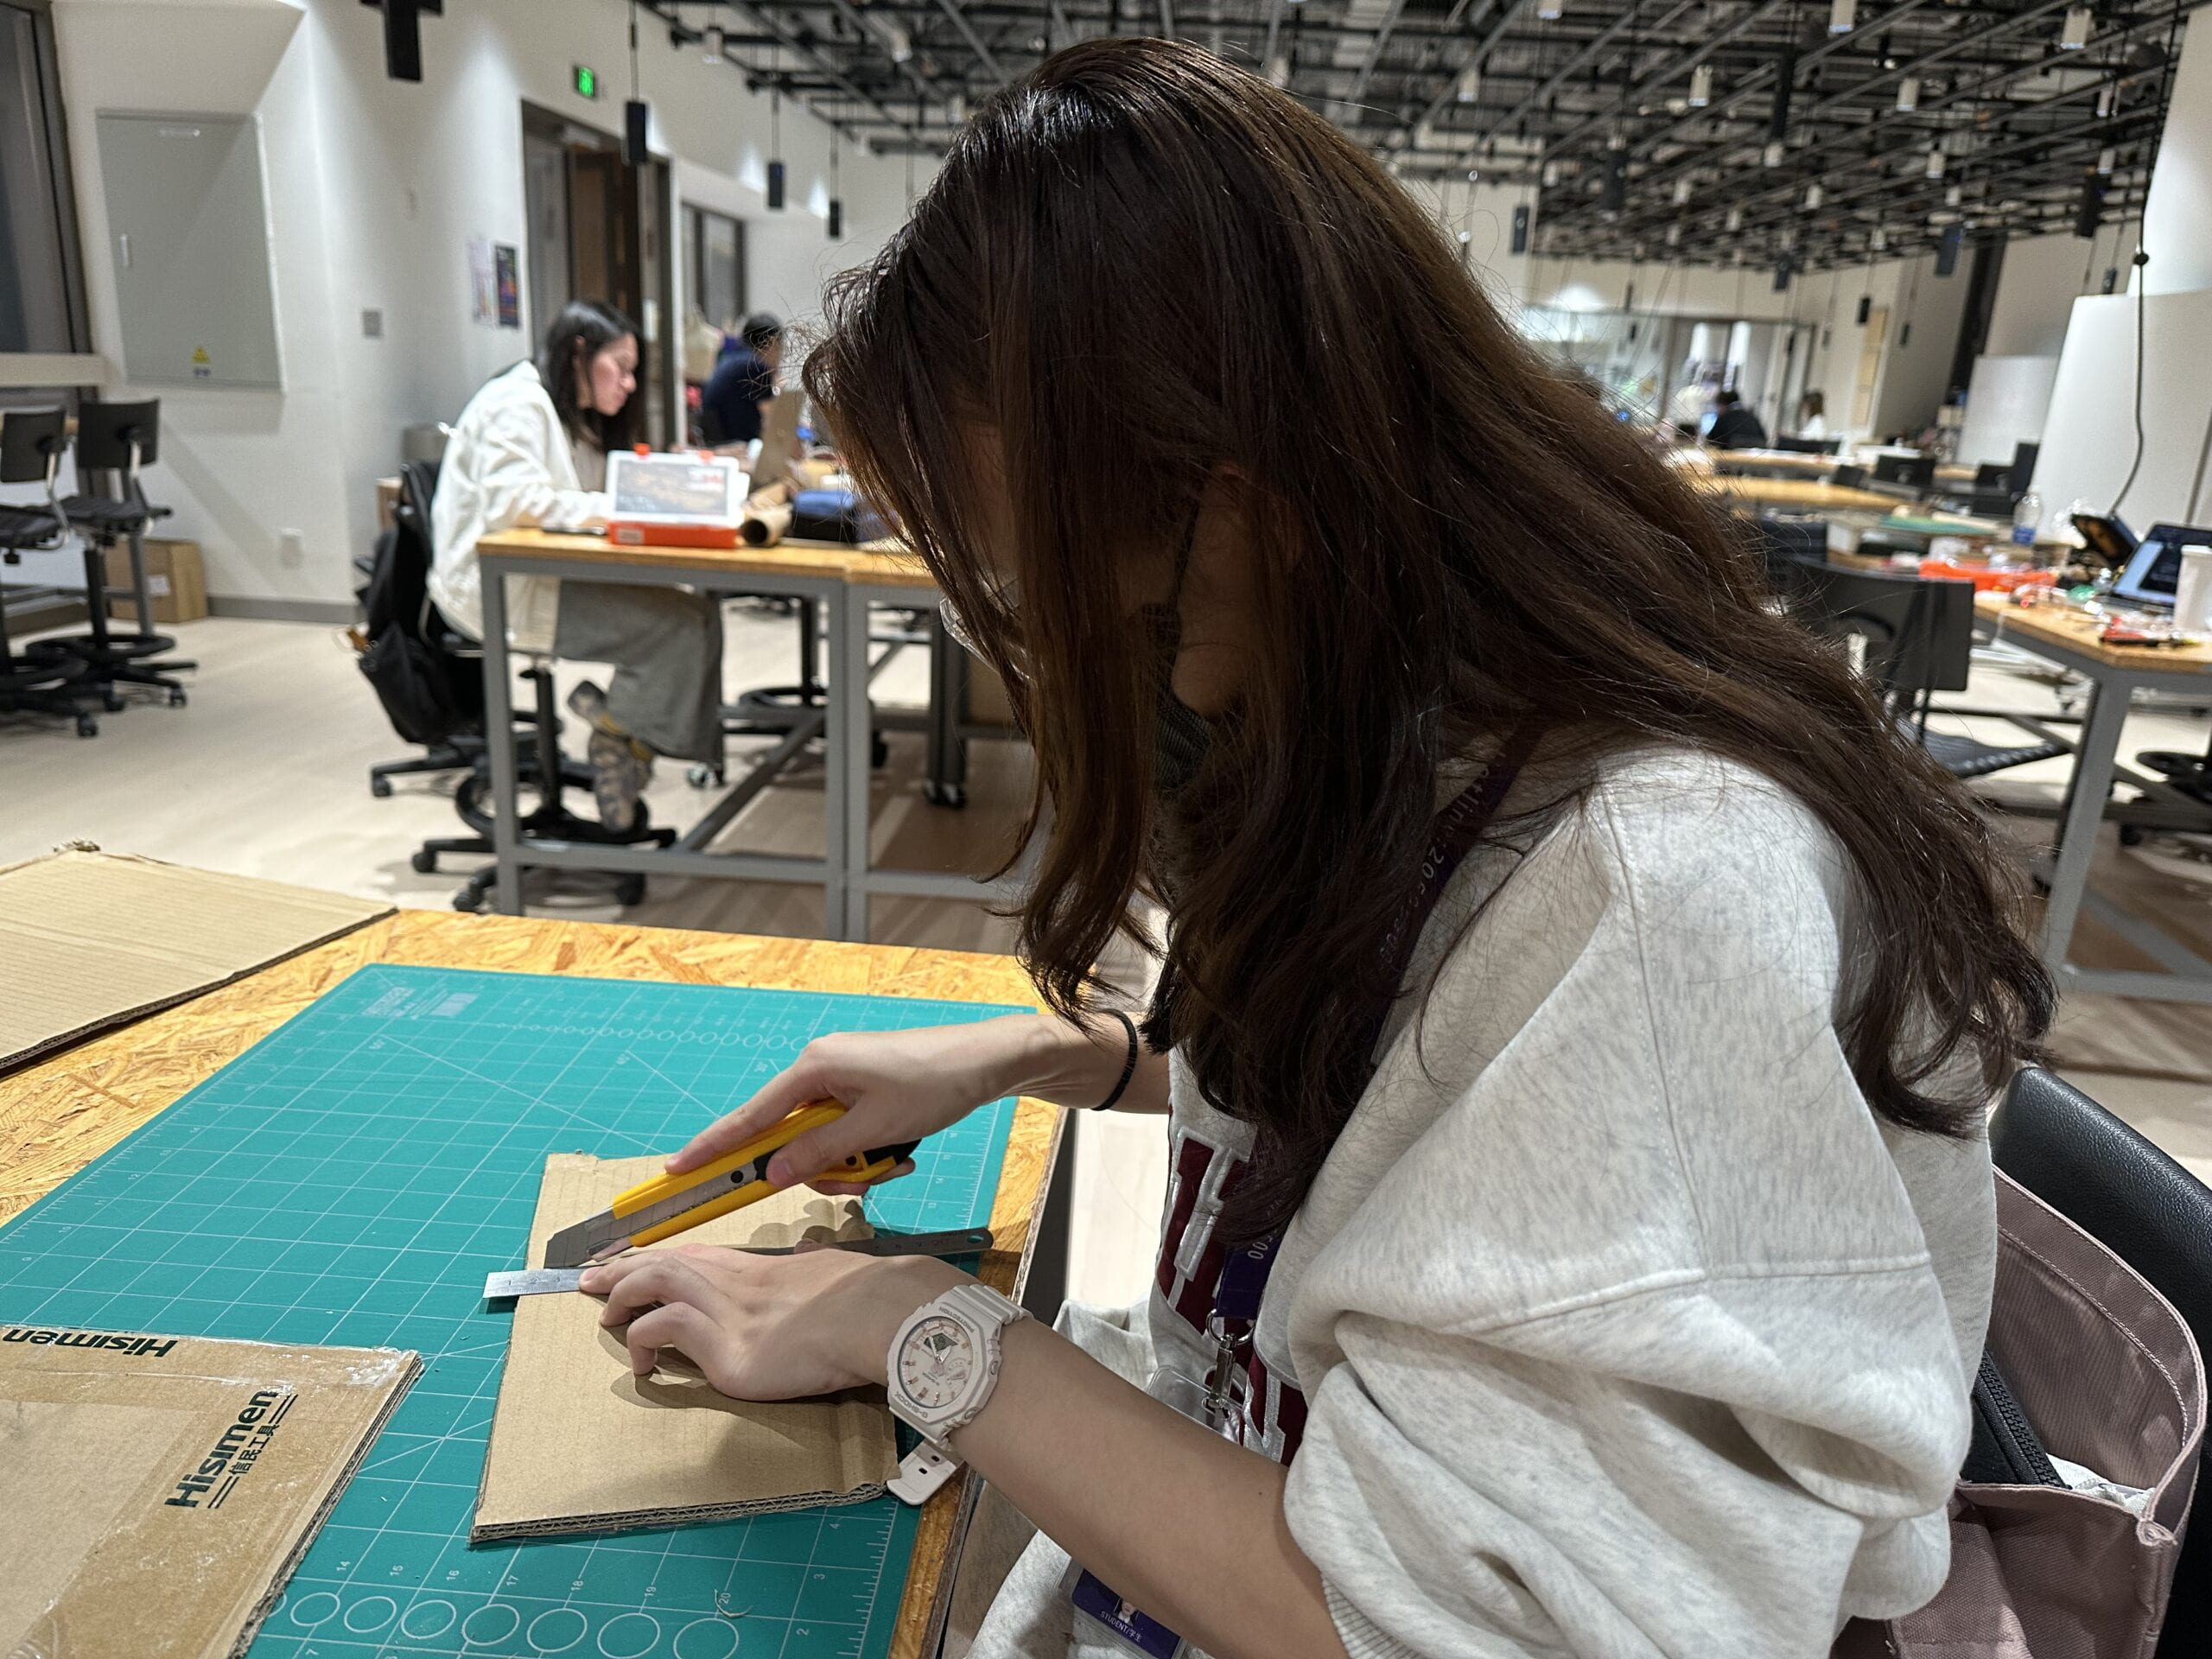
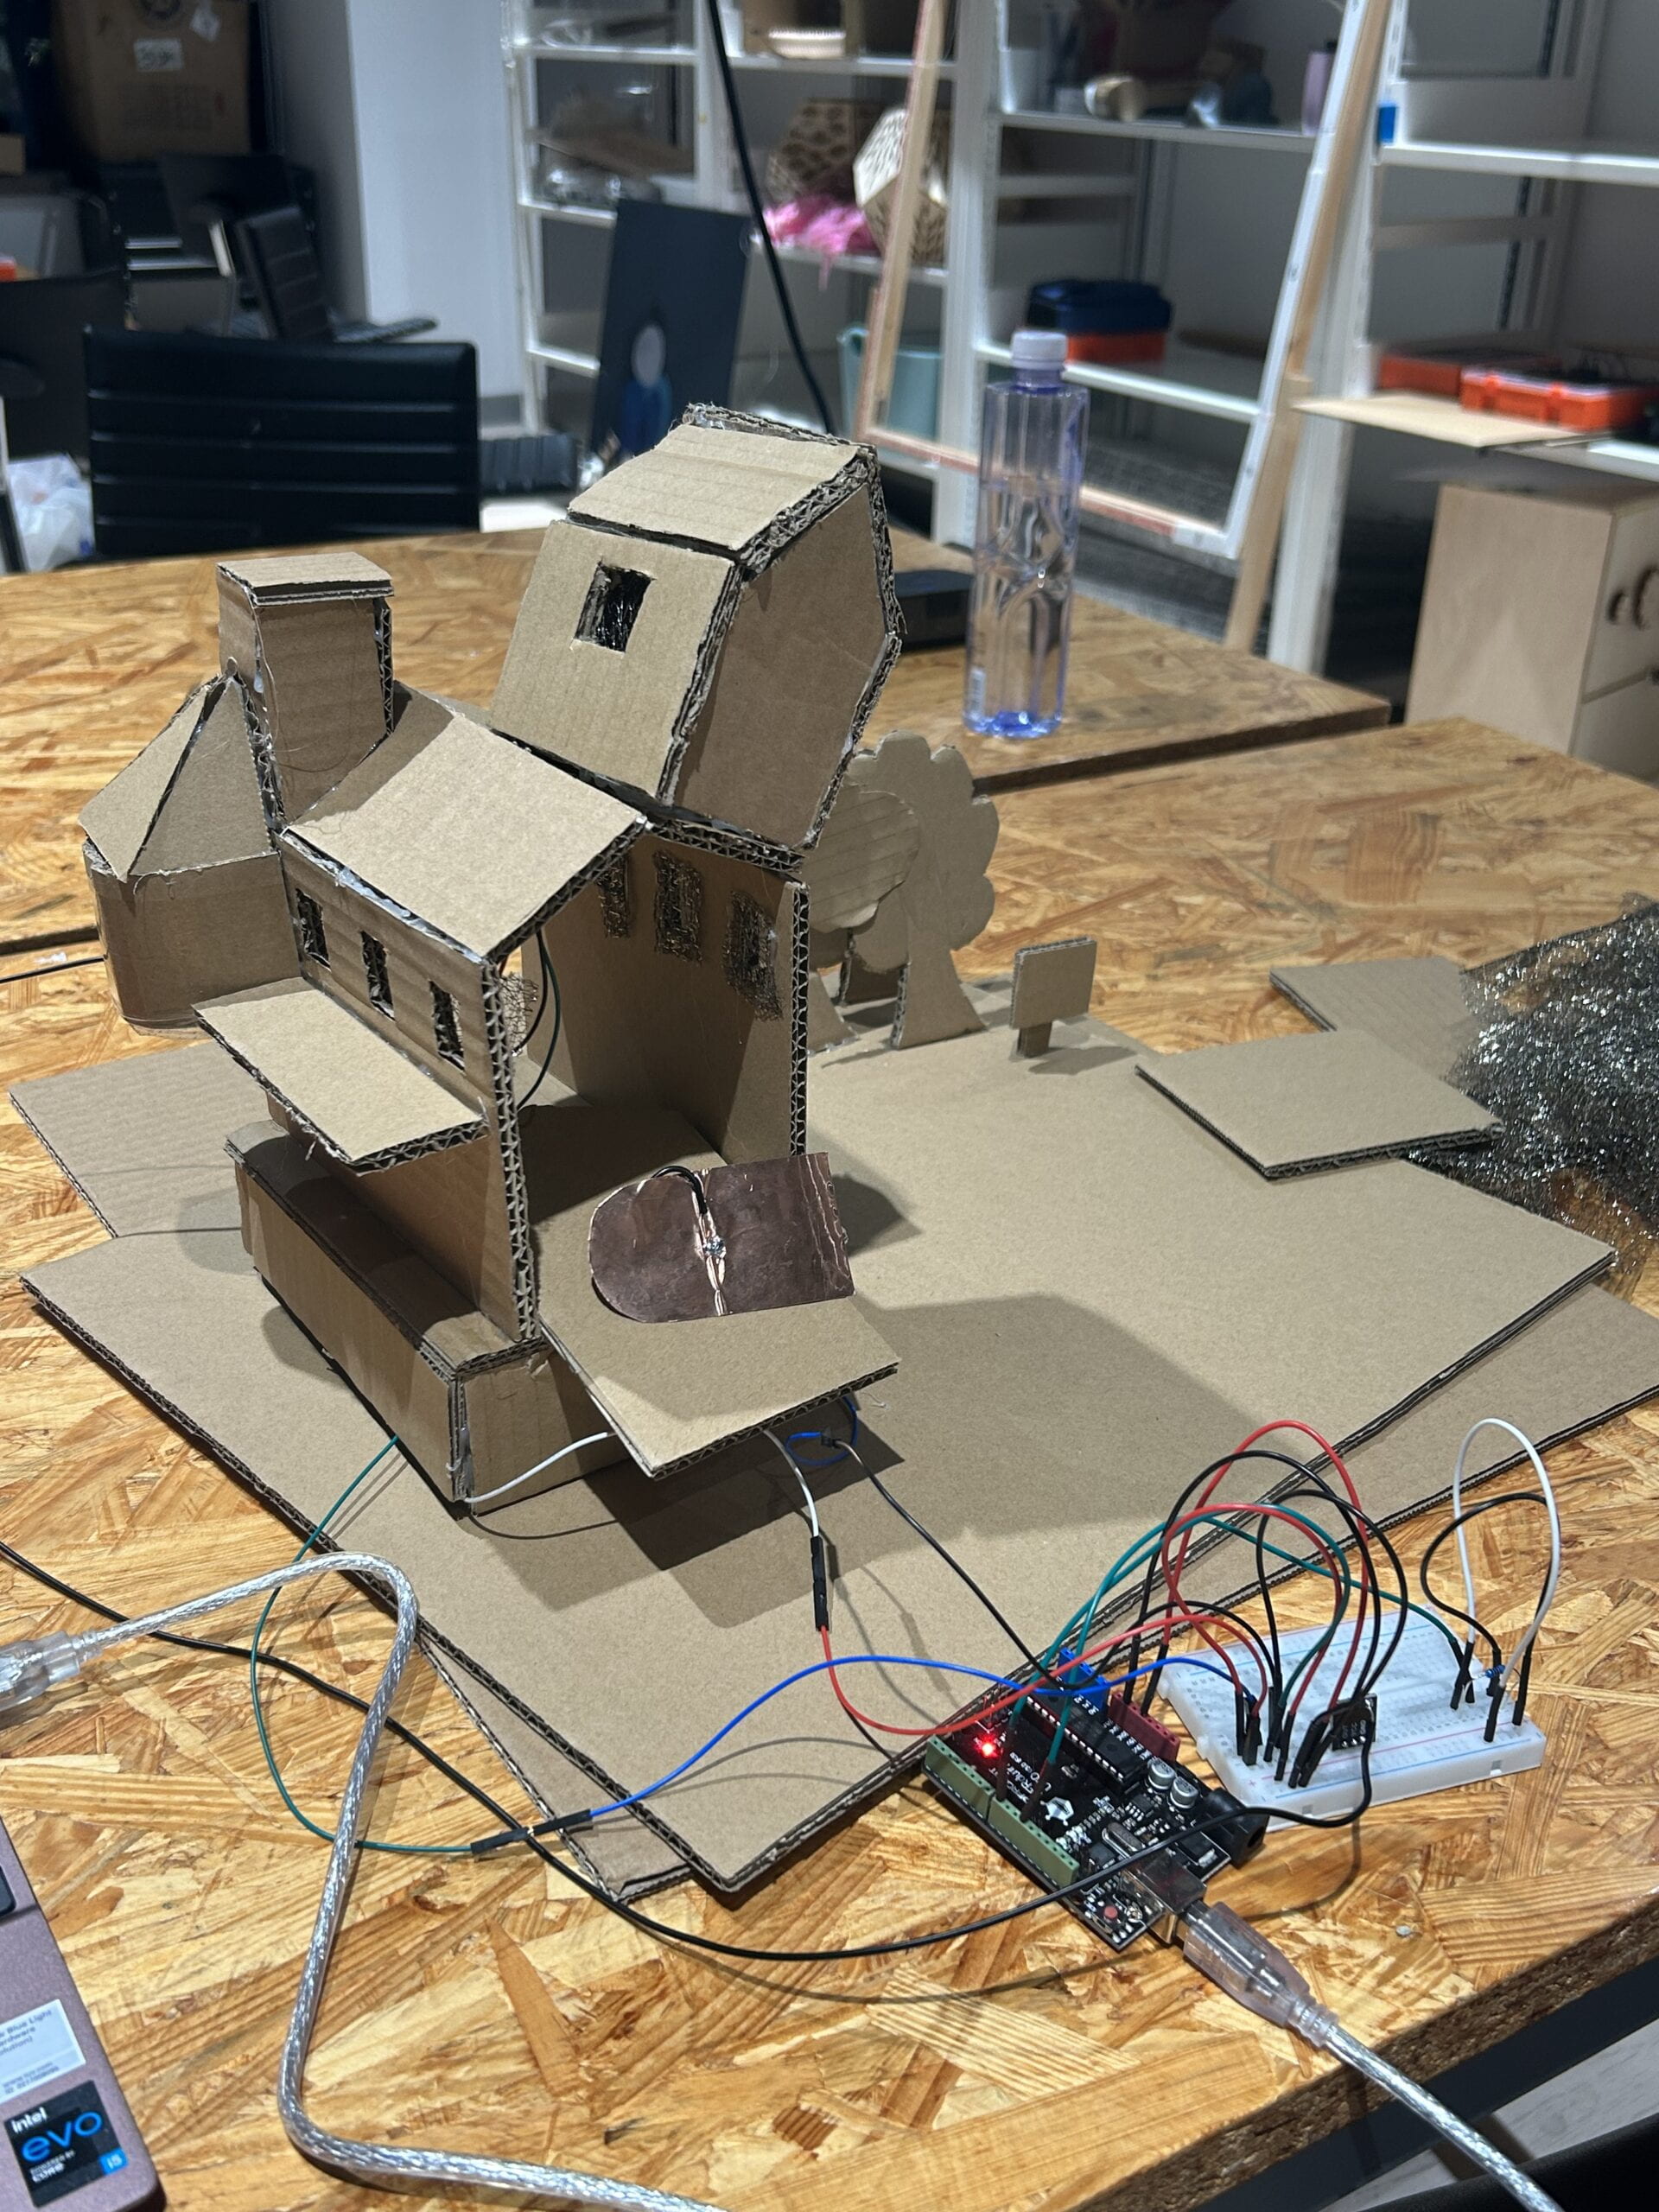
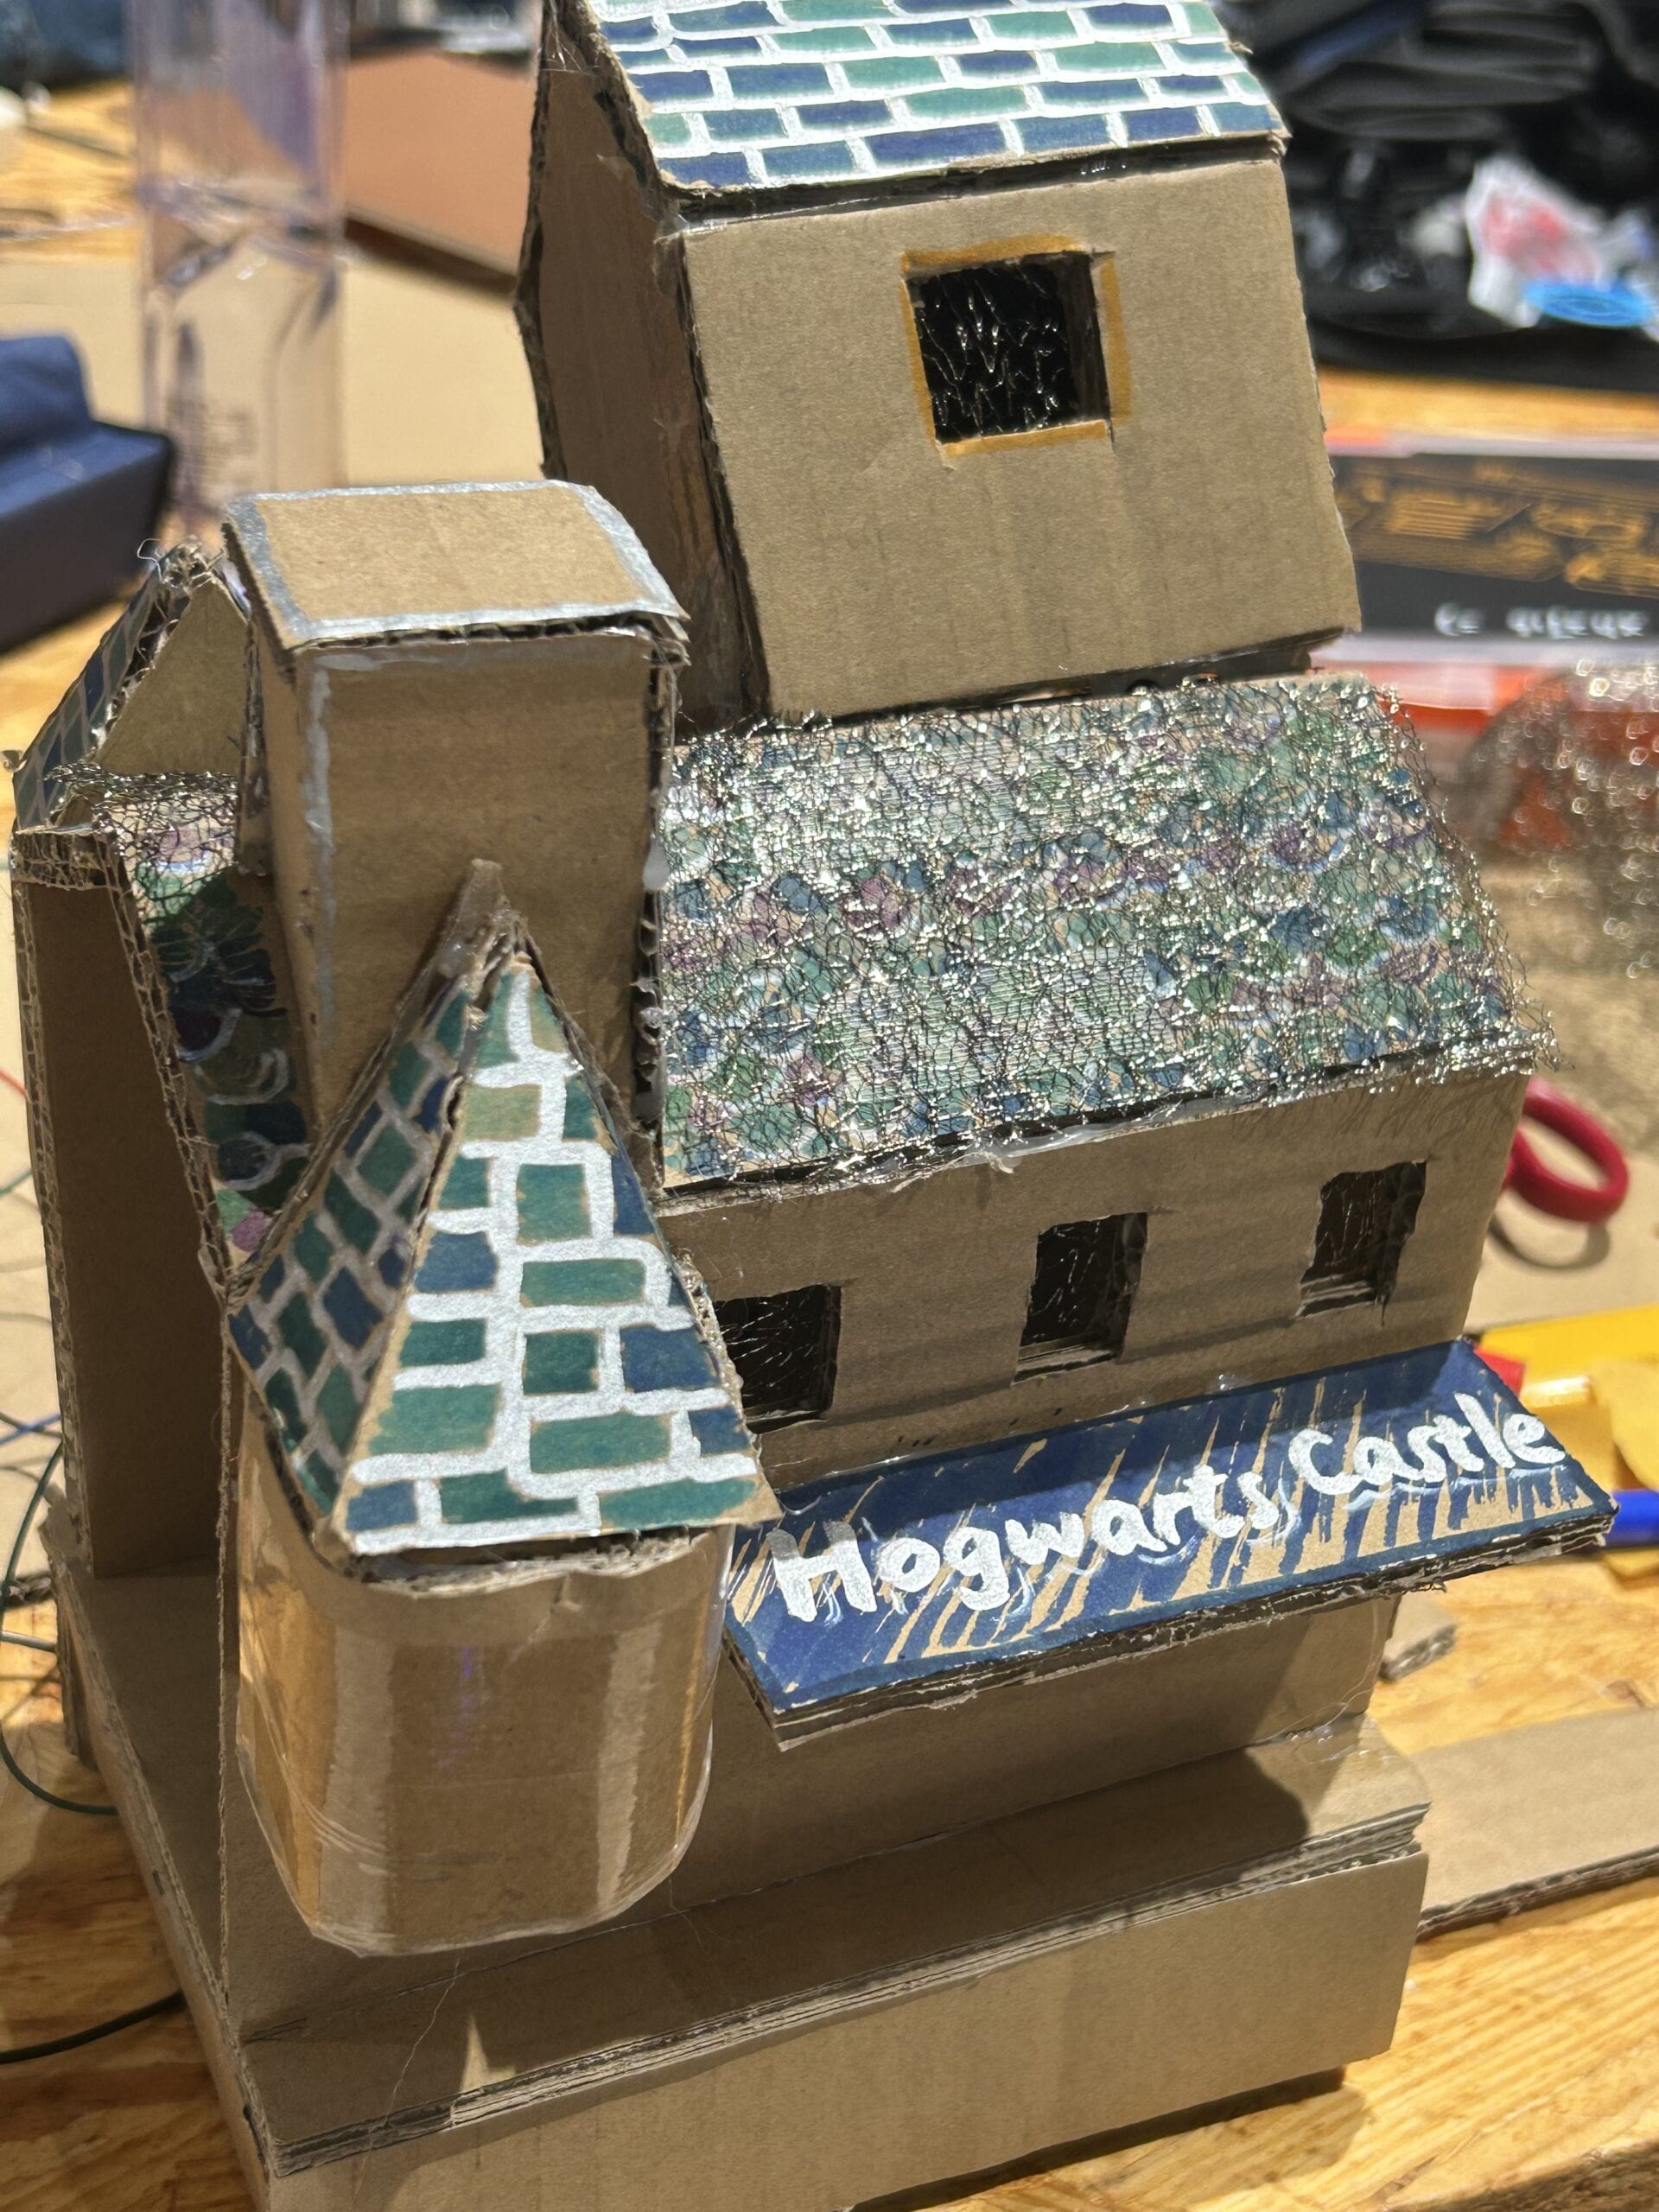
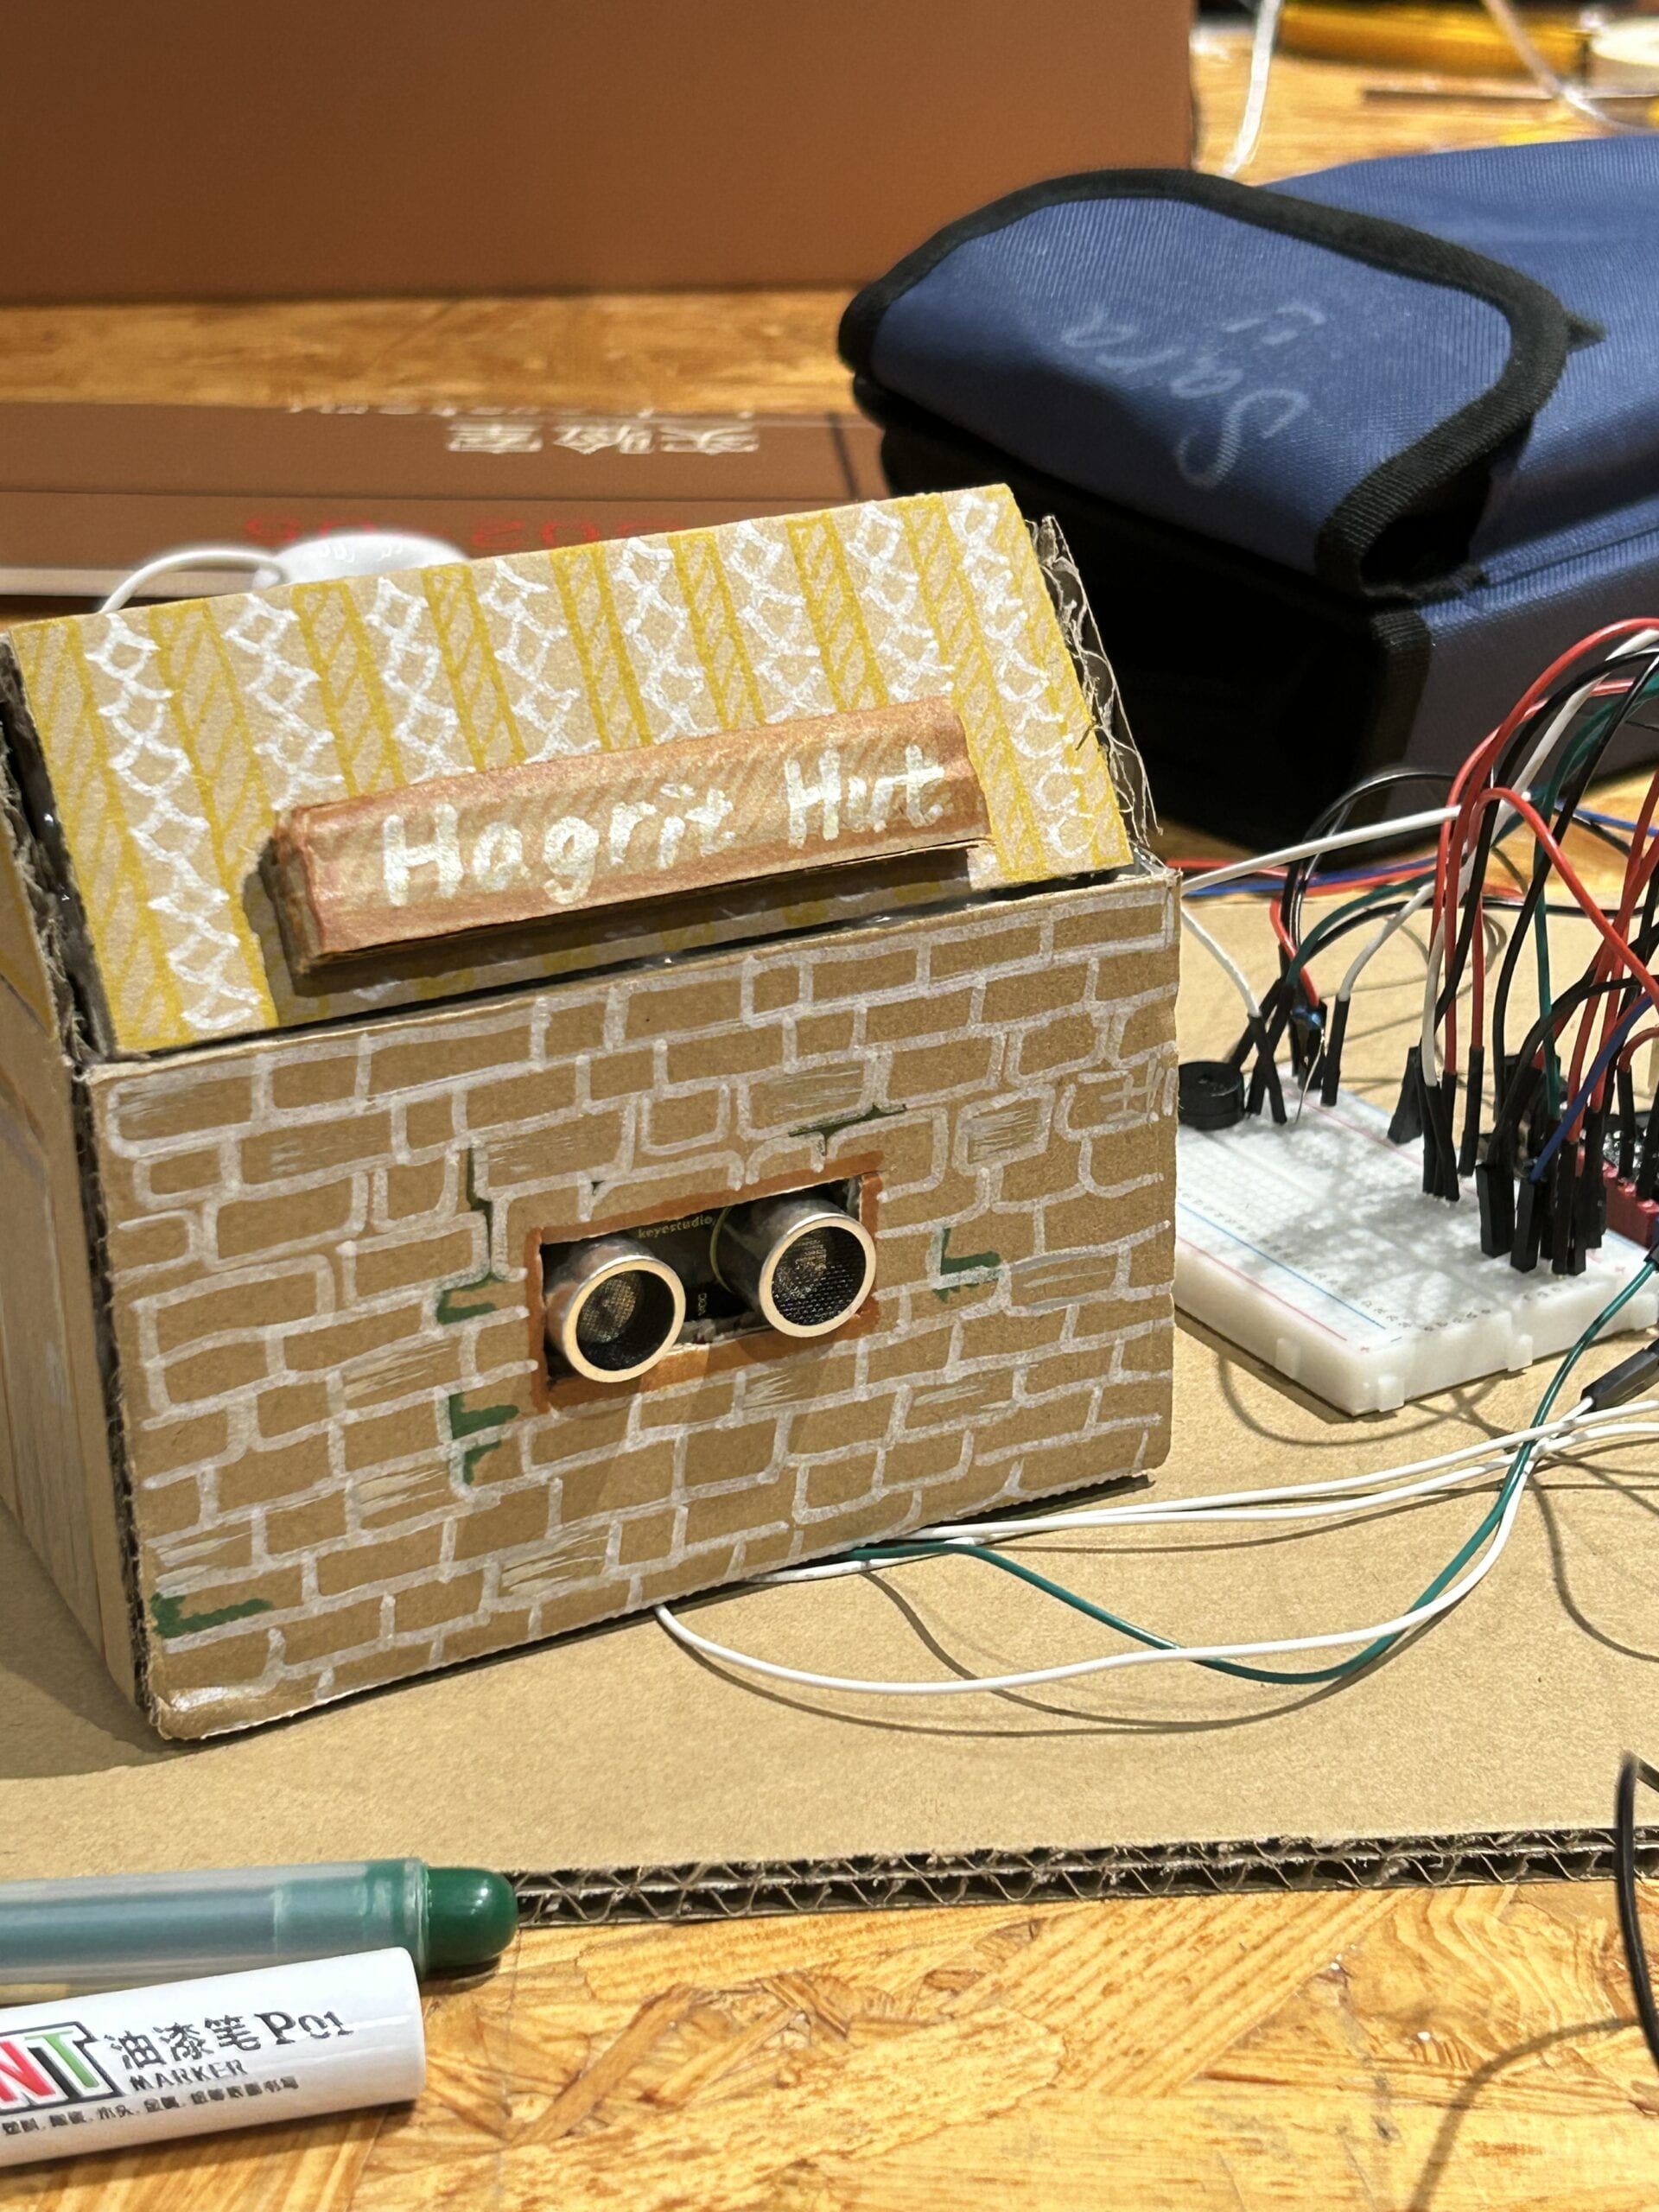
We first made the buildings with cardboard, then taped the LED inside the castle, set a specific distance range in the code and added the code of Harry Potter’s theme song to it so that the distance could trigger the melody. We encountered some problems with coding during the making process. Our fog sensors and buzzer supposed to work at the same time but they didn’t. We tried to figure out and correct the mistake of the code, placing the “fog sensor” part before the “buzzer” part. Another problem was that we didn’t know how to integrate the fog sensor into the scene. In the User Testing Session, users provided us with some useful suggestions and pointed out some problems(eg. The sensors were so obvious that the users could not immerse themselves in the scene). After that, we cut the tin foil smaller to improve its connection and give users clearer hints. A train was added to let the mist come out from its chimney. Moreover, we made a base to place the Arduino Uno and the breadboard. It turned out that these adaptations based on users’ feedback greatly improved the outlook of our project and made the use of sensors more flexible and reasonable. Our project was based on my idea of the Marauder’s Map and I kept popping up new ideas for revision and adjustment. During the whole process, I designed the outlook of the castle, hut and train and was responsible for all the sketching. Together, my partner and I finished the cardboard prototyping, painting and coding.
Making process:
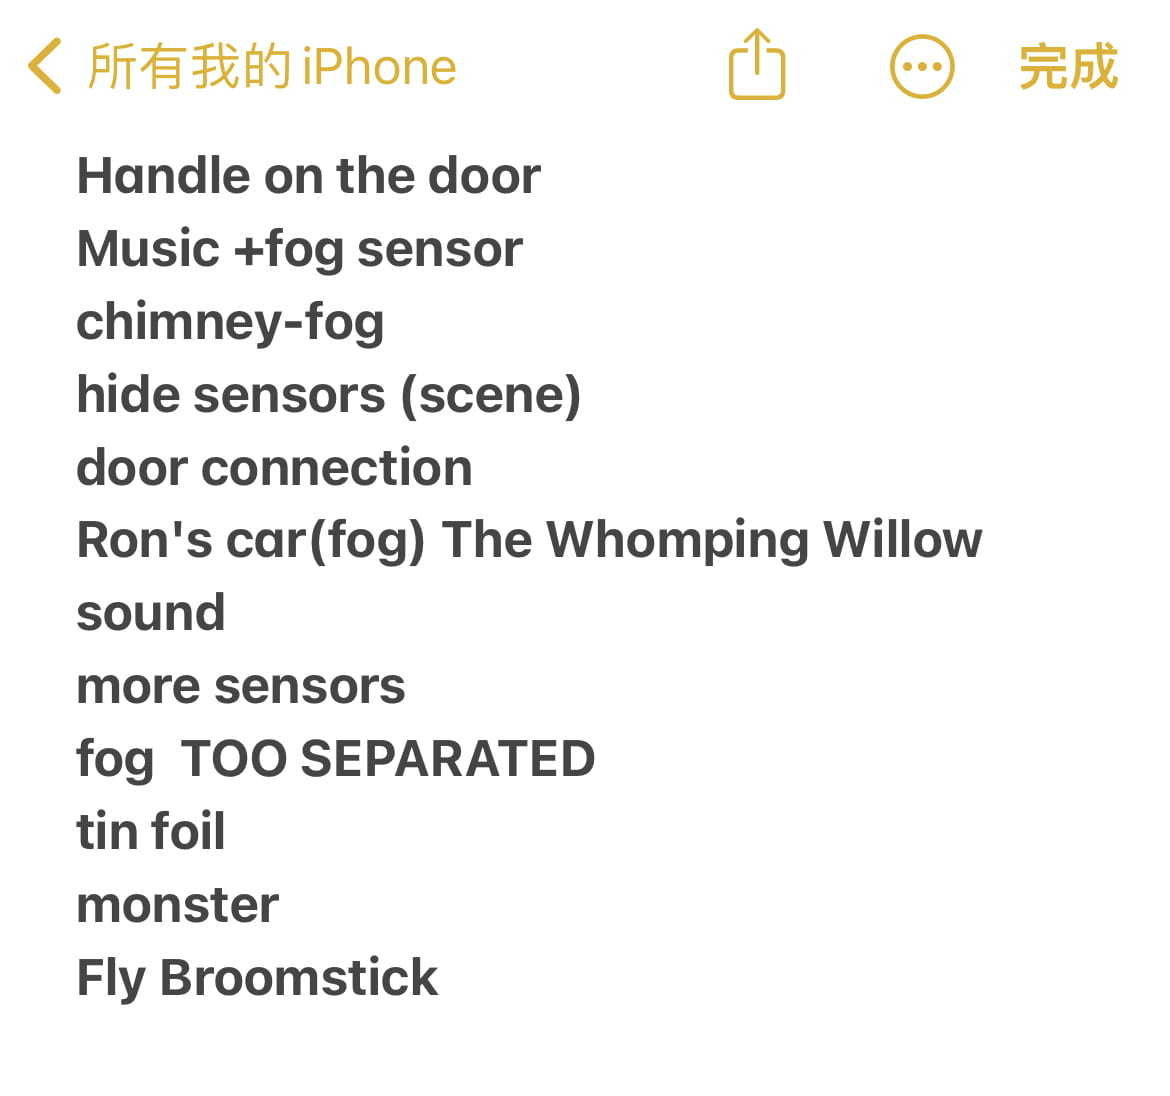
My note of user test:
Improving the project after the User Testing Session:
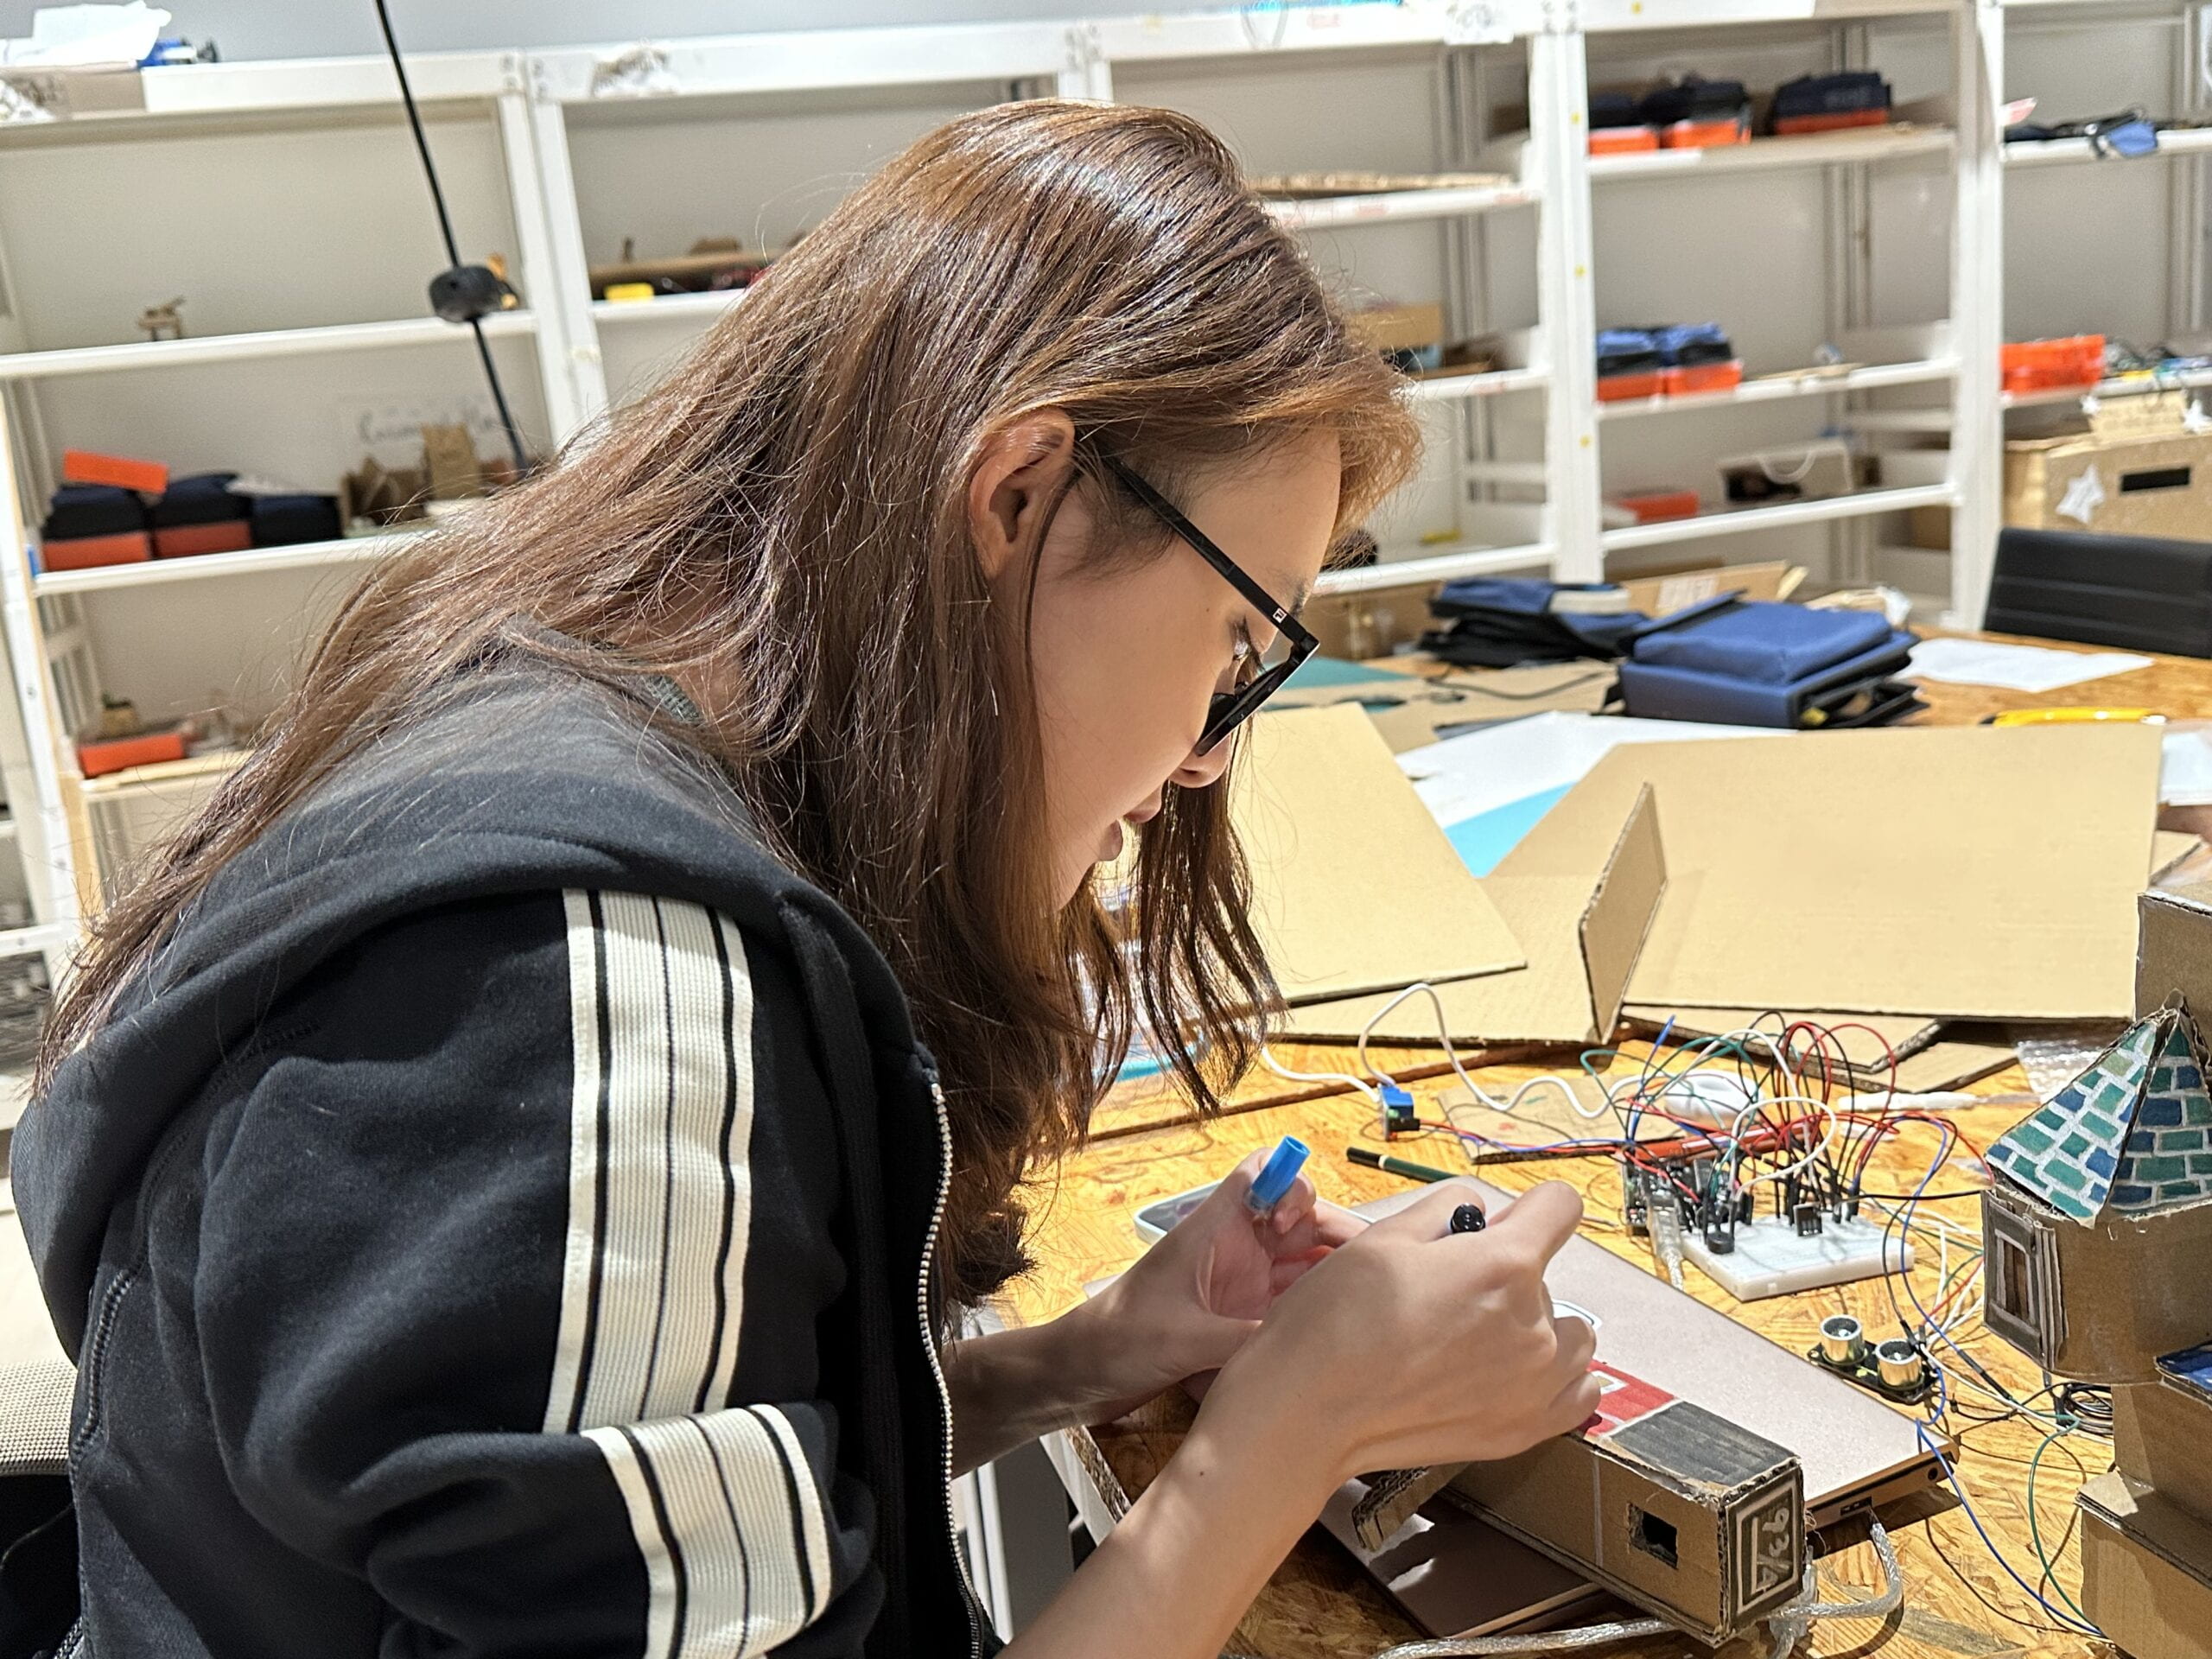
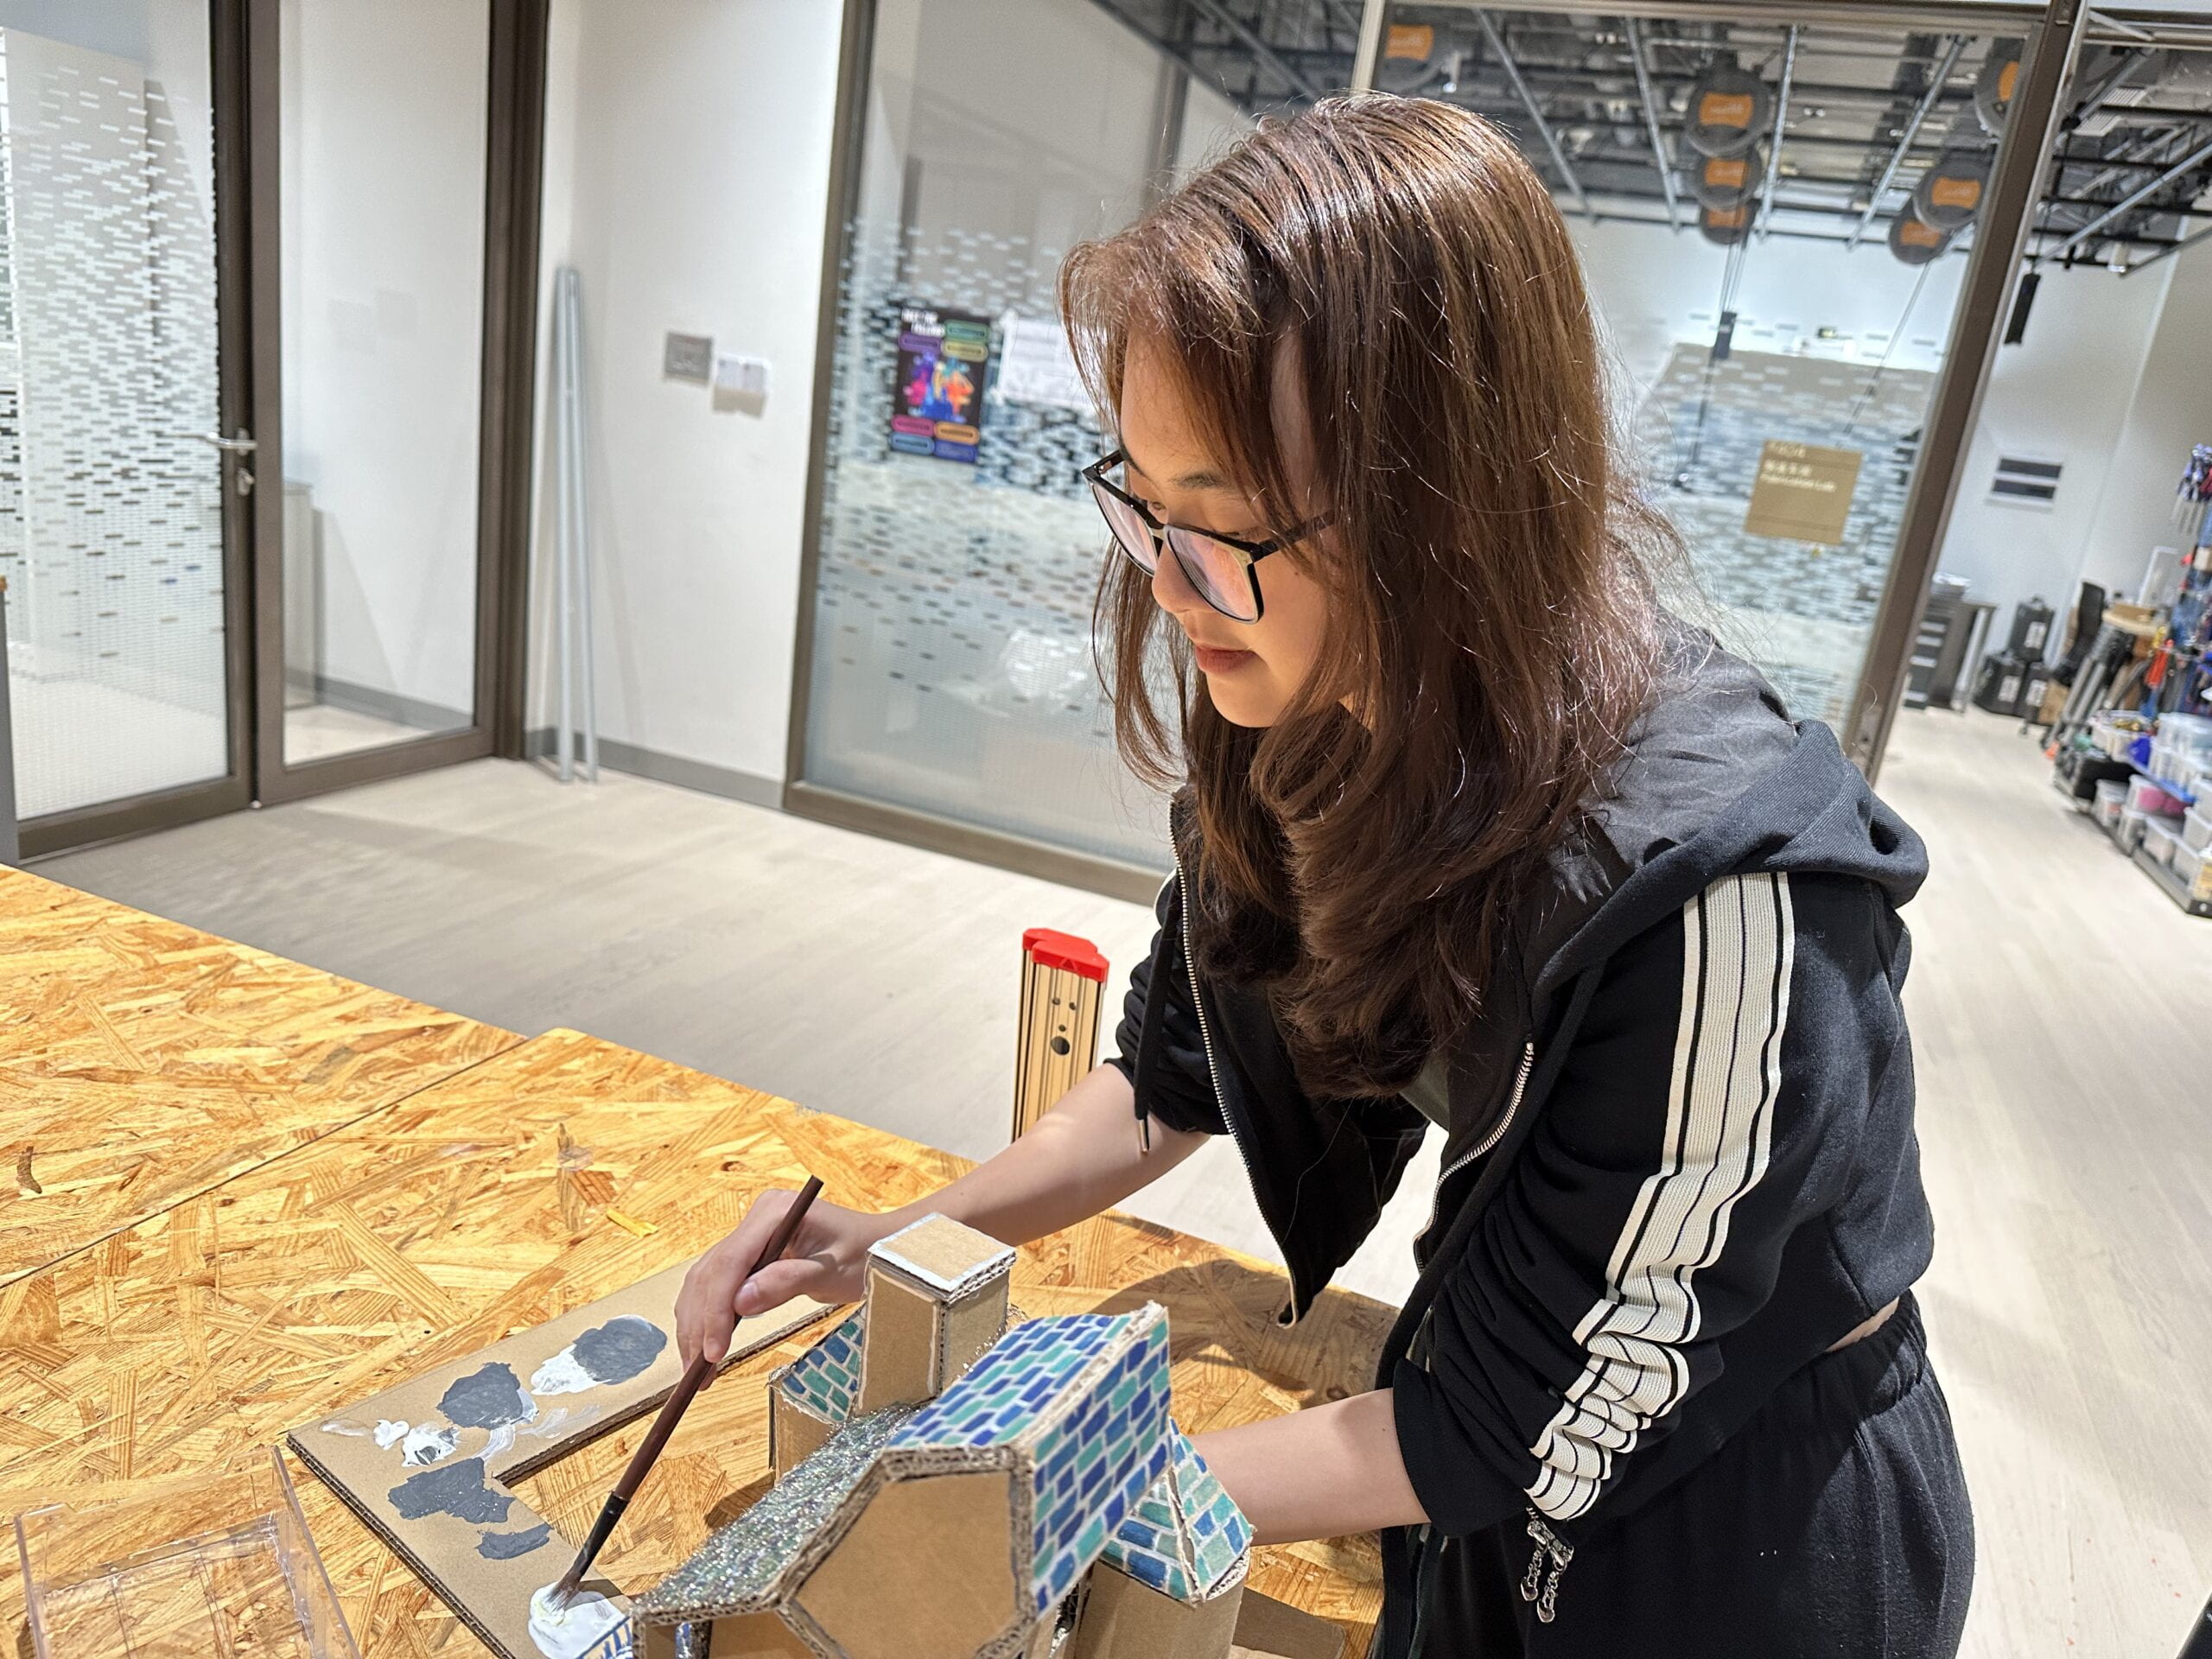
code:
/*
Hedwig's theme - Harry Potter
Connect a piezo buzzer or speaker to pin 11 or select a new pin.
More songs available at https://github.com/robsoncouto/arduino-songs
Robson Couto, 2019
*/
#define NOTE_B0 31
#define NOTE_C1 33
#define NOTE_CS1 35
#define NOTE_D1 37
#define NOTE_DS1 39
#define NOTE_E1 41
#define NOTE_F1 44
#define NOTE_FS1 46
#define NOTE_G1 49
#define NOTE_GS1 52
#define NOTE_A1 55
#define NOTE_AS1 58
#define NOTE_B1 62
#define NOTE_C2 65
#define NOTE_CS2 69
#define NOTE_D2 73
#define NOTE_DS2 78
#define NOTE_E2 82
#define NOTE_F2 87
#define NOTE_FS2 93
#define NOTE_G2 98
#define NOTE_GS2 104
#define NOTE_A2 110
#define NOTE_AS2 117
#define NOTE_B2 123
#define NOTE_C3 131
#define NOTE_CS3 139
#define NOTE_D3 147
#define NOTE_DS3 156
#define NOTE_E3 165
#define NOTE_F3 175
#define NOTE_FS3 185
#define NOTE_G3 196
#define NOTE_GS3 208
#define NOTE_A3 220
#define NOTE_AS3 233
#define NOTE_B3 247
#define NOTE_C4 262
#define NOTE_CS4 277
#define NOTE_D4 294
#define NOTE_DS4 311
#define NOTE_E4 330
#define NOTE_F4 349
#define NOTE_FS4 370
#define NOTE_G4 392
#define NOTE_GS4 415
#define NOTE_A4 440
#define NOTE_AS4 466
#define NOTE_B4 494
#define NOTE_C5 523
#define NOTE_CS5 554
#define NOTE_D5 587
#define NOTE_DS5 622
#define NOTE_E5 659
#define NOTE_F5 698
#define NOTE_FS5 740
#define NOTE_G5 784
#define NOTE_GS5 831
#define NOTE_A5 880
#define NOTE_AS5 932
#define NOTE_B5 988
#define NOTE_C6 1047
#define NOTE_CS6 1109
#define NOTE_D6 1175
#define NOTE_DS6 1245
#define NOTE_E6 1319
#define NOTE_F6 1397
#define NOTE_FS6 1480
#define NOTE_G6 1568
#define NOTE_GS6 1661
#define NOTE_A6 1760
#define NOTE_AS6 1865
#define NOTE_B6 1976
#define NOTE_C7 2093
#define NOTE_CS7 2217
#define NOTE_D7 2349
#define NOTE_DS7 2489
#define NOTE_E7 2637
#define NOTE_F7 2794
#define NOTE_FS7 2960
#define NOTE_G7 3136
#define NOTE_GS7 3322
#define NOTE_A7 3520
#define NOTE_AS7 3729
#define NOTE_B7 3951
#define NOTE_C8 4186
#define NOTE_CS8 4435
#define NOTE_D8 4699
#define NOTE_DS8 4978
#define REST 0
// change this to make the song slower or faster
int tempo = 180;
// change this to whichever pin you want to use
int buzzer = 11;
// notes of the moledy followed by the duration.
// a 4 means a quarter note, 8 an eighteenth , 16 sixteenth, so on
// !!negative numbers are used to represent dotted notes,
// so -4 means a dotted quarter note, that is, a quarter plus an eighteenth!!
int melody[] = {
// Hedwig's theme fromn the Harry Potter Movies
// Socre from https://musescore.com/user/3811306/scores/4906610
REST,
2,
NOTE_D4,
4,
NOTE_G4,
-4,
NOTE_AS4,
8,
NOTE_A4,
4,
NOTE_G4,
2,
NOTE_D5,
4,
NOTE_C5,
-2,
NOTE_A4,
-2,
NOTE_G4,
-4,
NOTE_AS4,
8,
NOTE_A4,
4,
NOTE_F4,
2,
NOTE_GS4,
4,
NOTE_D4,
-1,
NOTE_D4,
4,
NOTE_G4,
-4,
NOTE_AS4,
8,
NOTE_A4,
4, //10
NOTE_G4,
2,
NOTE_D5,
4,
NOTE_F5,
2,
NOTE_E5,
4,
NOTE_DS5,
2,
NOTE_B4,
4,
NOTE_DS5,
-4,
NOTE_D5,
8,
NOTE_CS5,
4,
NOTE_CS4,
2,
NOTE_B4,
4,
NOTE_G4,
-1,
NOTE_AS4,
4,
NOTE_D5,
2,
NOTE_AS4,
4, //18
NOTE_D5,
2,
NOTE_AS4,
4,
NOTE_DS5,
2,
NOTE_D5,
4,
NOTE_CS5,
2,
NOTE_A4,
4,
NOTE_AS4,
-4,
NOTE_D5,
8,
NOTE_CS5,
4,
NOTE_CS4,
2,
NOTE_D4,
4,
NOTE_D5,
-1,
REST,
4,
NOTE_AS4,
4,
NOTE_D5,
2,
NOTE_AS4,
4, //26
NOTE_D5,
2,
NOTE_AS4,
4,
NOTE_F5,
2,
NOTE_E5,
4,
NOTE_DS5,
2,
NOTE_B4,
4,
NOTE_DS5,
-4,
NOTE_D5,
8,
NOTE_CS5,
4,
NOTE_CS4,
2,
NOTE_AS4,
4,
NOTE_G4,
-1,
};
// sizeof gives the number of bytes, each int value is composed of two bytes (16 bits)
// there are two values per note (pitch and duration), so for each note there are four bytes
int notes = sizeof(melody) / sizeof(melody[0]) / 2;
// this calculates the duration of a whole note in ms (60s/tempo)*4 beats
int wholenote = (60000 * 4) / tempo;
int divider = 0, noteDuration = 0;
int SENSOR_PIN = 2; // door
int sensorVal; // door state
int ledPin = 8;
bool playing = false;
const int trigPin = 9;
const int echoPin = 10;
// defines variables
long duration;
int distance;
void setup() {
// initialize serial communication at 9600 bits per second:
Serial.begin(9600);
// make the digital sensor's pin an input:
pinMode(SENSOR_PIN, INPUT);
pinMode(ledPin, OUTPUT);
pinMode(trigPin, OUTPUT); // Sets the trigPin as an Output
pinMode(echoPin, INPUT); // Sets the echoPin as an Input
// initialize digital pin LED_BUILTIN as an output.
pinMode(12, OUTPUT);
}
void loop() {
// Clears the trigPin
digitalWrite(trigPin, LOW);
delayMicroseconds(2);
// Sets the trigPin on HIGH state for 10 micro seconds
digitalWrite(trigPin, HIGH);
delayMicroseconds(10);
digitalWrite(trigPin, LOW);
// Reads the echoPin, returns the sound wave travel time in microseconds
duration = pulseIn(echoPin, HIGH);
// Calculating the distance
distance = duration * 0.034 / 2;
// Prints the distance on the Serial Monitor
Serial.print("Distance: ");
Serial.println(distance);
if (distance > 5 && distance < 8 && playing == false) {
digitalWrite(12, HIGH); // turn the LED on (HIGH is the voltage level)
// iterate over the notes of the melody.
// Remember, the array is twice the number of notes (notes + durations)
for (int thisNote = 0; thisNote < notes * 2; thisNote = thisNote + 2) {
// calculates the duration of each note
divider = melody[thisNote + 1];
if (divider > 0) {
// regular note, just proceed
noteDuration = (wholenote) / divider;
} else if (divider < 0) {
// dotted notes are represented with negative durations!!
noteDuration = (wholenote) / abs(divider);
noteDuration *= 1.5; // increases the duration in half for dotted notes
}
// we only play the note for 90% of the duration, leaving 10% as a pause
tone(buzzer, melody[thisNote], noteDuration * 0.9);
// Wait for the specief duration before playing the next note.
delay(noteDuration);
// stop the waveform generation before the next note.
noTone(buzzer);
playing = true;
}
digitalWrite(12, LOW); // turn the LED off by making the voltage LOW
delay(1000); // wait for a second
}
// read the input pin:
sensorVal = digitalRead(SENSOR_PIN);
// print out the state of the button:
Serial.println(sensorVal);
if (sensorVal == 1) {
digitalWrite(ledPin, HIGH);
} else if (sensorVal == 0) {
digitalWrite(ledPin, LOW);
}
// no need to repeat the melody.
}
The code of the theme song was adapted from the tutorial found here:
*https://github.com/robsoncouto/arduino-songs/blob/master/harrypotter/harrypotter.ino
CONCLUSIONS
Aiming at bringing people to the magical world, our project allowed users to have visual and auditory experiences in an interactive way to explore the scene, which is aligned with my definition of interaction. Audience interacted with the project by holding the handle to move the train so the distance sensor could detect and trigger the fog sensor and the buzzer. They could also light up the castle by touching the tin foil connected with the capacitive sensor. If time permits, we really wish to make our work larger to include other sites in Hogwarts. For example, we can make a Quidditch pitch that enables users to compete with each other in a certain way. I also deem that we can put more relevant elements into our project to make the interaction more immersive. For instance, we can let the users control the broomsticks while exploring the scene.
Overall, through twists and turns, we finally finished our first project using Arduino. What I learnt from the whole process were not only skills on prototyping and coding, but more importantly, I also learnt to deal with heavy pressure, accept my lack of experience and then revise my design over and over again to make it better. My partner and I are both beginners and we faced lots of setbacks. Though sometimes these setbacks made me pretty upset, I’m so proud that we did our best to solve these challenges and I believe that I will be more experienced and have more confidence next time.
performance video:
REFERENCES
YouTube. (2018). Rainforest Diorama With An Arduino Pulse. Retrieved October 23, 2023, from https://www.youtube.com/watch?v=udZhTKEG2CA&ab_channel=S.Merrill.
YouTube. (2013). Interactive Halloween Diorama. Retrieved October 23, 2023, from https://www.youtube.com/watch?v=Mu_eyvMjwmw&ab_channel=epicfantasy.
SELF Design Studio. (2016). Interactive Diorama. YouTube. Retrieved October 23, 2023, from https://www.youtube.com/watch?v=N7B3CROTMP8&ab_channel=SELFDesignStudio.
anywood. (2018, October 26). the magical possibilities of cardboard and behind the scenes in the mouse diorama. anywood. October 23, 2023, https://www.annwoodhandmade.com/the-magical-possibilities-of-cardboard-and-behind-the-scenes-in-the-mouse-diorama/