Therapy on Clouds-Sarah- Prof. Rodolfo Cossovich
Conception and Design
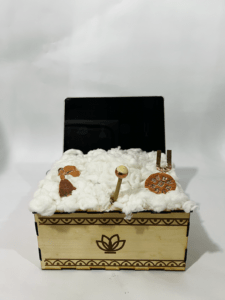
Our project, Therapy on Clouds, is a spiritual, therapeutic, and instrumental installation that integrates four soothing instruments onto one appliance while it visualizes each instrument’s tone with warm lights beneath the cotton clouds and the shimmer of the instrument’s symbols on the screen. The four instruments on the installation include temple block, tibetan bell, tongue drum, and the tuning fork; in which the temple block(wooden fish) and tibetan bell come with a religious background as buddhist meditation instruments. The engagement of the user with our project begins with the user picking up the mallet(wooden stick) placed in the center of the installation. Then, the user lightly hits the “instruments” buried on the clouds with the mallet, listens to the music of each instrument and at the same time, the user views the the shimmering warm lights underneath the clouds and the rippling symbol of the instruments on the screen. After exploring the tone of each instruments and experiencing the sense of relaxation, the user may continue the interaction or their meditation with the installation by continuously hitting the instruments that they find most suitable for them (especially the temple block, which is an meditation instrument that is meant to be hit continuously with a constant tempo).
In coming up with our project’s concept, we are inspired by a recently popular app called “wooden fish”. The app was frequently used by many schoolmates for de-stressing from the upcoming finals, besides, the posts about them using the app is commonly seen on the social media platforms. So, we decided to structure our project around the therapeutic, religious, and musical theme. I formed the idea of music visualization form my previous preparatory research on a project named “Play Me Light Me” directed by Kaleidoscale Marcom. The project is consisted with a public piano that can light up and modify the surrounding environment with the effects of colorful LED lights in motion. Keeping that in mind, we included Neopixel strip as one of the means to visualize our sounds.
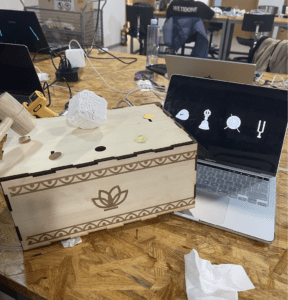
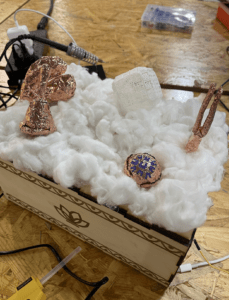
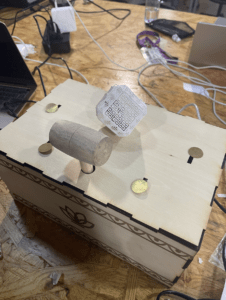 My partner, Smile and I gone through many versions of design and small details of this project during the fabrication and production process. Our final version of the project is a wooden box decorated in religious pattern and a lily logo printed in the center. On the top of the box, we created four holes for each of our instruments and an addition hole at the center for the placement of the mallet so that the mallet will be the first thing that the user will pay attention to at the beginning of the interaction. Cottons are used to cover the surface of the box to create a heaven-like scene, reduce the noise from hitting, and most importantly, it soften the shine of Neopixel which in a degree, decomposes a more relaxing presentation and experience for the users. At first during the user testing, we placed the monitor that display the visuals beside the instrumental box, and cover the Neopixel with a hollow 3D printed lampshade. Later, we combined the screen with the box so that the user only has to look in one direction and focus on a single appliance. We received numerous useful comments from our fellow classmates and professors. Out of all the suggestions, we took a few of them into account: choose a warmer color for the Neopixel, find a way to soften the lights, find a different placement of the monitor, use a different sensor, use a smaller mallet (for a smaller force while hitting the instrument), and find a way to reduce the noise that appears when the user directly hit the wooden box using the mallet. The only components that remains the same after the user testing are the design of the wooden box, the picture of the instruments, and the sound file of the instruments.
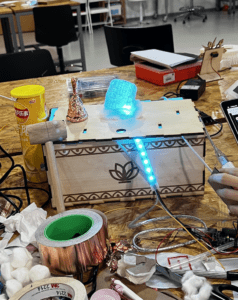
Few of the Different Versions of our Project:
Fabrication and Production
Sensors and Circuit:
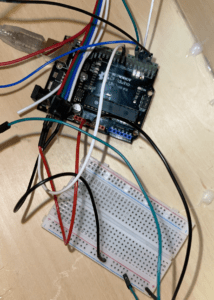
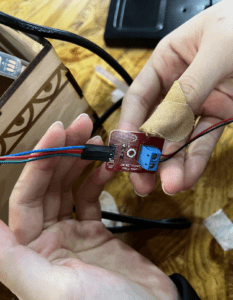
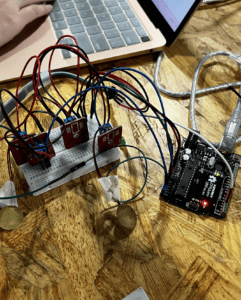
My partner and I built the circuit using the wires, vibration sensors, and a NeoPixel strip after we have our basic concepts on our project and the frame of coding on Processing. We want the sensors to give a straight and direct response when we hit it with our hands or the mallet (the sound of an instrument should be played). The building process for the circuit went fast and smoothly as always.
After the user testing session, we changed our sensor form vibration sensor to copper tape because the vibration sensors didn’t work as smoothly as we thought, and they gave long delayed response with some unstable errors. Moreover, it is too fragile and hard to place it on the installation in a proper way. Another option of sensor is the touch sensor, it works as well and fast as copper tape.
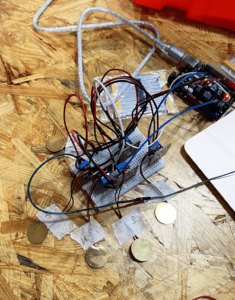
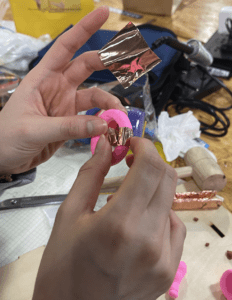
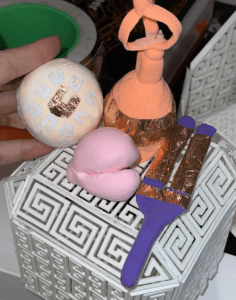
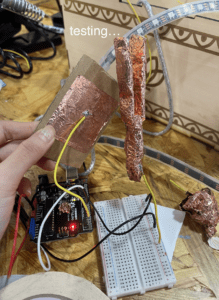 We tested the copper tape using the cardboard on the new circuit that we quickly built, and it works much better than the vibration sensor, so we started to find ways to apply the copper tape onto the installation for an appealing presentation that can keep the function of the sensor as smooth as possible. In doing so, we started off experimenting with sticking the copper tape on the molds that we made by shaping the clay to look like the instruments. It worked for the shapes of some instruments, however with the bumpy surface and layers of copper tapes, the sensor no longer gave direct and accurate responses. Therefore, instead of risking with 3D models, we ended up with 2D cardboards in the shape of the instruments.
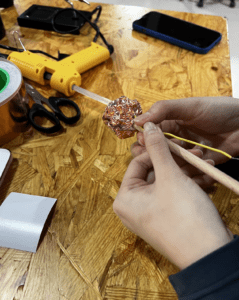
We initially applied the copper tape on the entire surface of the mallet, however the surface of the product turned out to be too bumpy.
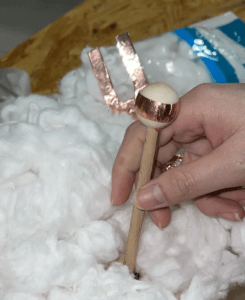
We used this version of mallet instead. It has a smooth surface, which makes it a lot easier for the sensor to detect.
Digital Fabrication:
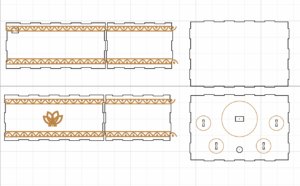
We designed our box on the website, cuttle.xyz. Like shown in the picture on the left, the box is bounded with an ancient-like pattern, and at the center is the lily logo that represents wellness and peace (also commonly seen in buddhist arts).
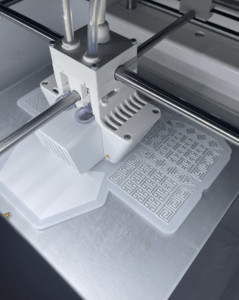
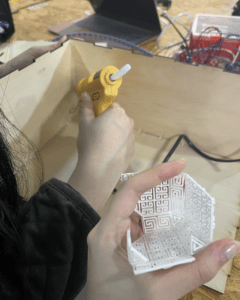
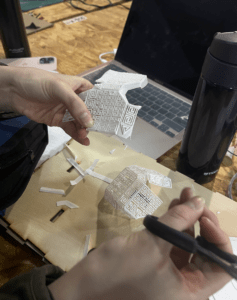
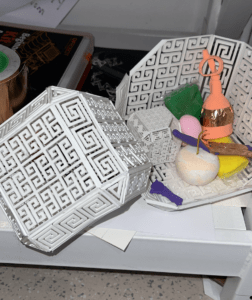
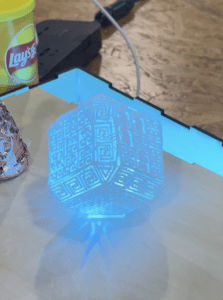
We 3D printed the lampshade to cover the NeoPixel strip. However, we later rejected the idea of including it as a part of our project as it covered the monitor that display the digital instruments, and it failed to soften the brightness of the NeoPixels, which can impact the relaxing experience that we want the users to have. Instead of the lampshade, we used the cottons to cover up the NeoPixels.
Writing the Code:
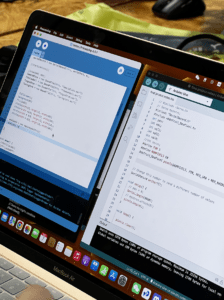
Out of the all the production steps, coding is the most challenging and time consuming part of the project. We rewrote the code for many times, and there are always one or two problems that follows each version of codes on both Arduino and Processing. To waste the least time as possible, Smile and I decided to split up our jobs, where she was mainly responsible for finding solutions for the error in code(she put great effort in it), and I was responsible for shaping the clay, applying the copper tape, and cutting the cardboards in shapes of the instruments. Other times, we worked together and helped each other on confusing steps.
The biggest problems we have with the code is the delay in response of the system and the Processing playing the sound file more times than it should be playing (especially when we add the code of the NeoPixels). Fortunately before our final presentation, Prof. Rudi helped us to modify our code and simplify the Arduino code so that the system can process the code easier.
Remaining Visual Design and Decoration:

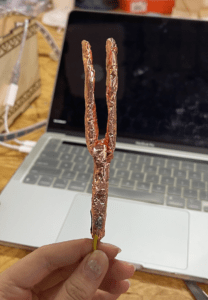
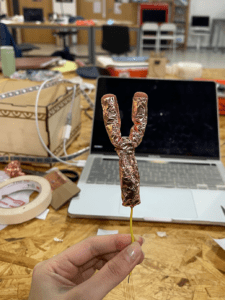
We found the photos of the music instruments on the internet, edited them into black and white, and imported them to the processing. For the music visualization, we added different warm shaded colors of light for each instrument and made the instruments to shake each time the sensor is triggered. Using the photos as the reference, I drew the instruments on the cardboards, cut them down and sticked copper tape on them. Then, both of us soldered the wire on each pieces.
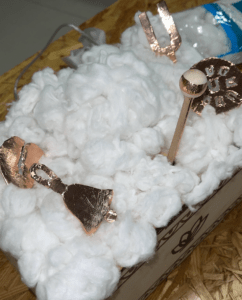
We finished the production process with the last step of sticking the cottons on the box and using it to cover the NeoPixel.
Conclusion
Overall, the goal of our project is to provide a relaxing and therapeutic experience to the user through soothing sounds of the religious instruments and music visualization. Based on the positive comments and user’s reaction, we can say that our project achieved the goal. During the interaction, the user tapped one instrument at a time using the mallet, listened to the sound, viewed the animation on the screen, and he went back to continuously tap the temple block to further enjoy its sound. Our project aligns with my definition of interaction from a few aspects. First, after grabbing the mallet, the user doesn’t need any instructions from the presenter to interact with installation. Second, the user is able to have a deep and meaningful engagement with our project when he/she focuses their attention in listening and exploring the instruments and the response of the installation. Third, our project creates a continuous loop of the fundamental steps of interaction between the installation and user: listen, process, and respond. If I had more time, I would like to improve my project by reducing the delayed response and making the NeoPixels to slowly fade instead of making quick flashes, which can make the user experience more calming and chill. From all the setbacks and failures, I learned that we should not give up on our idea too easily. We can always try out different methods, use different tools, and seek help from others when we are stuck at certain point. Just keep trying!
Annex
Final Product Video:
Our Presentation:
Arduino Code:
#include "SerialRecord.h"
#include

#define PIN 8
#define NUMPIXELS 60
Adafruit_NeoPixel pixels(NUMPIXELS, PIN, NEO_GRB + NEO_KHZ800);

#define BUTTON_PIN1 2
#define BUTTON_PIN2 3
#define BUTTON_PIN3 4
#define BUTTON_PIN4 5
int state1 = 0;
int state2 = 0;
int state3 = 0;
int state4 = 0;

SerialRecord writer(4);

void setup() {
  Serial.begin(9600);
  pinMode(BUTTON_PIN1, INPUT_PULLUP);
  pinMode(BUTTON_PIN2, INPUT_PULLUP);
  pinMode(BUTTON_PIN3, INPUT_PULLUP);
  pinMode(BUTTON_PIN4, INPUT_PULLUP);
  pixels.begin();
}

void loop() {

  byte buttonState1 = digitalRead(BUTTON_PIN1);
  byte buttonState2 = digitalRead(BUTTON_PIN2);
  byte buttonState3 = digitalRead(BUTTON_PIN3);
  byte buttonState4 = digitalRead(BUTTON_PIN4);

  //TempleBlock
  if (buttonState1 == LOW) {
    writer[0] = 1;
    writer.send();
    state1 = 1;
  } else {
    writer[0] = 0;
    writer.send();
    state1 = 0;
  }
  //TibetanBell
  if (buttonState2 == LOW) {
    writer[1] = 1;
    writer.send();
    state2 = 1;
  } else {
    writer[1] = 0;
    writer.send();
    state2 = 0;
  }
  //Drum
  if (buttonState3 == LOW) {
    writer[2] = 1;
    state3 = 1;
    writer.send();
  } else {
    writer[2] = 0;
    writer.send();
    state3 = 0;
  }
  //Fork
  if (buttonState4 == LOW) {
    writer[3] = 1;
    writer.send();
    state4 = 1;
  } else {
    writer[3] = 0;
    writer.send();
    state4 = 0;
  }


  if (state1 == 1) {
    for (int i = 0; i <= NUMPIXELS; i++) {  // For each pixel...
      pixels.setPixelColor(i, pixels.Color(255, 240, 200));
      pixels.show();
    }
    state1 = 0;
  } else if (state1 == 0) {
    for (int i = 0; i <= NUMPIXELS; i++) {  // For each pixel...
      pixels.setPixelColor(i, pixels.Color(0, 0, 0));
      pixels.show();  // Send the updated pixel colors to the hardware.
    }
    state1 = -1;
  }

  if (state2 == 1) {
    for (int i = 0; i <= NUMPIXELS; i++) {  // For each pixel...
      pixels.setPixelColor(i, pixels.Color(240, 180, 130));
      pixels.show();
    }
    state2 = 0;
  } else if (state2 == 0) {
    for (int i = 0; i <= NUMPIXELS; i++) {  // For each pixel...
      pixels.setPixelColor(i, pixels.Color(0, 0, 0));
      pixels.show();  // Send the updated pixel colors to the hardware.
    }
    state2 = -1;
  }

  if (state3 == 1) {
    for (int i = 0; i <= NUMPIXELS; i++) {  // For each pixel...
      pixels.setPixelColor(i, pixels.Color(204, 213, 174));
      pixels.show();
    }
    state3 = 0;
  } else if (state3 == 0) {
    for (int i = 0; i <= NUMPIXELS; i++) {  // For each pixel...
      pixels.setPixelColor(i, pixels.Color(0, 0, 0));
      pixels.show();  // Send the updated pixel colors to the hardware.
    }
    state3 = -1;
  }

  if (state4 == 1) {
    for (int i = 0; i <= NUMPIXELS; i++) {  // For each pixel...
      pixels.setPixelColor(i, pixels.Color(247, 147, 76));
      pixels.show();
    }
    state4 = 0;
  } else if (state4 == 0) {
    for (int i = 0; i <= NUMPIXELS; i++) {  // For each pixel...
      pixels.setPixelColor(i, pixels.Color(0, 0, 0));
      pixels.show();  // Send the updated pixel colors to the hardware.
    }
    state4 = -1;
  }


  delay(20);
}
Processing Code:
import processing.sound.*;
import processing.serial.*;
import osteele.processing.SerialRecord.*;

Serial serialPort;
SerialRecord serialRecord;

SoundFile TempleBlock;
SoundFile TibetanBell;
SoundFile TongueDrum;
SoundFile TuningFork;

Amplitude analysis;
Amplitude analysis2;
Amplitude analysis3;
Amplitude analysis4;

PImage block;
PImage bell;
PImage drum;
PImage fork;

int value1;
int value2;
int value3;
int value4;

boolean play = true;

void setup() {
  String serialPortName = SerialUtils.findArduinoPort();
  serialPort = new Serial(this, serialPortName, 9600);

  serialRecord = new SerialRecord(this, serialPort, 4);

  TempleBlock = new SoundFile(this, "TempleBlock.wav");
  block = loadImage("templeblock.png");

  TibetanBell = new SoundFile(this, "TibetanBell.wav");
  bell = loadImage("TibetanBell.jpeg");

  TongueDrum = new SoundFile(this, "TongueDrum.wav");
  drum = loadImage("TongueDrum.jpeg");

  TuningFork = new SoundFile(this, "TuningFork.wav");
  fork = loadImage("TuningFork.png");

  analysis = new Amplitude(this);
  analysis.input(TempleBlock);

  analysis2 = new Amplitude(this);
  analysis2.input(TibetanBell);

  analysis3 = new Amplitude(this);
  analysis3.input(TongueDrum);

  analysis4 = new Amplitude(this);
  analysis4.input(TuningFork);

  fullScreen();
  background(0);

  imageMode(CENTER);
}

void draw() {
  background(0);
  serialRecord.read();

  value1 = serialRecord.values[0];
  value2 = serialRecord.values[1];
  value3 = serialRecord.values[2];
  value4 = serialRecord.values[3];

  if (value1 != 0 && TempleBlock.isPlaying() == false) {
    TempleBlock.play();
  } else {
    push();
    translate(width/6, height/2);
    scale(1-analysis.analyze());
    tint(255, 30);
    image(block, 0, 0, 250, 250);
    pop();
    if (TempleBlock.isPlaying() == true) {
      push();
      translate(width/6, height/2);
      scale(1-analysis.analyze());
      tint(204, 213, 174);
      image(block, 0, 0, 250, 250);
      pop();
    }
  }
  //BELL
  if (value2 != 0 && TibetanBell.isPlaying() == false) {
    TibetanBell.play();
  } else {
    push();
    translate(width * 1.9/5, height/2);
    scale(1-analysis2.analyze());
    tint(255, 30);
    image(bell, 0, 0, 250, 250);
    pop();
    if (TibetanBell.isPlaying() == true) {
      push();
      translate(width * 1.9/5, height/2);
      scale(1-analysis2.analyze());
      tint(233, 237, 201);
      image(bell, 0, 0, 250, 250);
      pop();
    }
  }
  //Drum
  if (value3 != 0 && TongueDrum.isPlaying() == false) {
    TongueDrum.play();
  } else {
    push();
    translate(width * 3.1/5, height/2);
    scale(1-analysis3.analyze());
    tint(255, 30);
    image(drum, 0, 0, 300, 300);
    pop();
    if (TongueDrum.isPlaying() == true) {
      push();
      translate(width * 3.1/5, height/2);
      scale(1-analysis3.analyze());
      tint(254, 250, 224);
      image(drum, 0, 0, 300, 300);
      pop();
    }
  }
    //Fork
  if (value4 != 0 && TuningFork.isPlaying() == false) {
    TuningFork.play();
  } else {
    push();
    translate(width * 4.2/5, height/2);
    scale(1-analysis4.analyze());
    tint(255, 30);
    image(fork, 0, 0, 230, 230);
    pop();
    if (TuningFork.isPlaying() == true) {
      push();
      translate(width * 4.2/5, height/2);
      scale(1-analysis4.analyze());
      tint(250, 237, 205);
      image(fork, 0, 0, 230, 230);
      pop();
    }
  }
}
Our Random hard-works:
Reference
“Free Sound.” Freesound, https://www.freesound.org/browse/. Accessed 10 December 2022.