Recitation8
Task 1
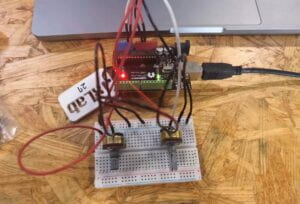
Since we have those examples, so the basic procedures went well. I connected the circuit, used analog read code to test it, and then used the example code and made some adaptions to complete the task.However, I do encounter two problems, the first is that when trying to draw the lines, there is only one point, later with professor’s help, I discovered that it’s because I put the background code in the “void draw” session, which will set the background every time the code runs, thus covering the previous dots. The second problem is that the point showing the statistics read is changing between two points even though I didn’t adjust the potentiometer. After some testing, I think one of the potentiometers is broken, after using the circuit of others(which is the same with mine). The problem is settled.
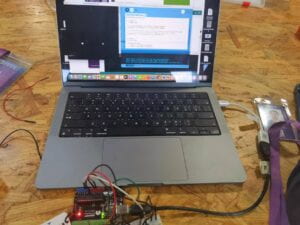
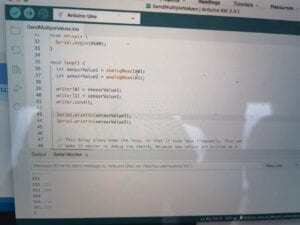
I forgot to shot a video, here’s the photos.and the code


#include "SerialRecord.h"

// Change this number to send a different number of values
SerialRecord writer(2);

void setup() {
  Serial.begin(9600);
}

void loop() {
  int sensorValue1 = analogRead(A0);
  int sensorValue2 = analogRead(A1);

  writer[0] = sensorValue1;
  writer[1] = sensorValue2;
  writer.send();

  //Serial.println(sensorValue1);
  //Serial.println(sensorValue2);


  // This delay slows down the loop, so that it runs less frequently. This can
  // make it easier to debug the sketch, because new values are printed at a
  // slower rate.
  delay(10);
}


import processing.serial.*;
import osteele.processing.SerialRecord.*;

Serial serialPort;
SerialRecord serialRecord;
float px;
float py;

void setup() {
  size(500, 500);

  String serialPortName = SerialUtils.findArduinoPort();
  serialPort = new Serial(this, serialPortName, 9600);
  background(102);
  // If the Arduino sketch sends a different number of values, modify the number
  // `2` on the next line to match the number of values that it sends.
  serialRecord = new SerialRecord(this, serialPort, 2);
}

void draw() {


  serialRecord.read();
  int value1 = serialRecord.values[0];
  int value2 = serialRecord.values[1];

  float x = map(value1, 0, 1024, 0, width);
  float y = map(value2, 0, 1024, 0, height);
  stroke(255);
  line(x, y, px, py);
  px=x;
  py=y;
}
Task 2
As we don’t have enough materials, so I teamed up with Hanwen and Leon.
We worked on the code together using Leon’s computer as I was familiar with the code of servos and Hanwen and Leon worked together to make the ball bouncing . During the whole process, the servos keeps on moving randomly at first, which is because our code involves sending massage to Arduino all the time. With Professor Gottfried’s advice, we changed the code to let it only send some message when the ball reaches the margin, then it went quite well.
The following are the code and the videos.
#include
#include "SerialRecord.h"
SerialRecord reader(1);
Servo myservo;
Servo myservo2;
int value;
void setup() {
  // put your setup code here, to run once:
  Serial.begin(115200);
  myservo.attach(8);
  myservo2.attach(7);
}

void loop() {
  // put your main code here, to run repeatedly:
  if (reader.read()){
  value=reader[0];
  if (value==0){
    myservo.write(100);
    delay(250);
    myservo.write(0);
  } else if (value==1){
    myservo2.write(100);
    delay(250);
    myservo2.write(0);
  }
}
}
import processing.serial.*;
import osteele.processing.SerialRecord.*;
Serial serialPort;
SerialRecord serialRecord;
int x;
int add=10;
void setup(){
  fullScreen();
  String serialPortName = SerialUtils.findArduinoPort();
  serialPort = new Serial(this, serialPortName, 115200);
  serialRecord = new SerialRecord(this, serialPort,1);
}

void draw(){
  background(0);
  fill(255);
  stroke(0);
  circle(x,height/2,50);
  if (x>=width){
    add=-add;
    serialRecord.values[0]=0;
    serialRecord.send();
  } else if (x<0){
    add=-add;
    serialRecord.values[0]=1;
    serialRecord.send();
  }
  x=x+add;

}
Leave a Reply