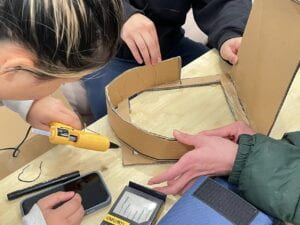
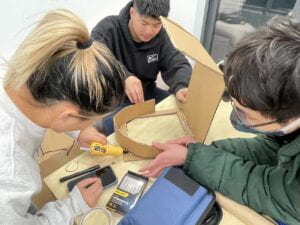
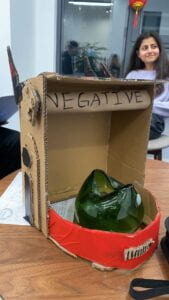
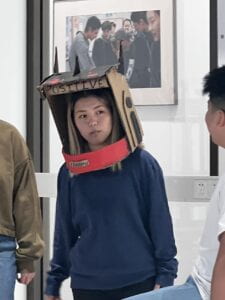
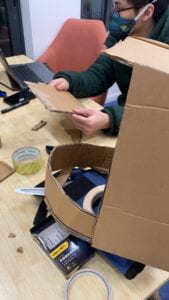
Tired To Go is a portable sleeping box designed to provide an immersive and customizable sleep experience. It expands upon the idea of full-body sleep pods by incorporating relaxing music and lights, as well as adjustable slides and button for sound and lighting options. The project is aimed at helping people who struggle with sleep by creating a comfortable and soothing environment that can be used anywhere. It helps people who need a break from their environment.
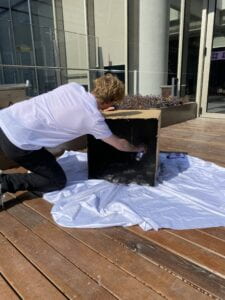
The project involves designing and building a portable sleep box with comfortable pillows and fluff for relaxation. The roof of the box will be made of puff balls with neo pixels underneath, which will respond to audio and glow purple to create a soothing environment. The box has a slide on the side to control the echo of the sound. We also added a push button inside a plushie so that it can control the environment every time you press it. There is a sensor inside the sleeping pod which senses when you put your head inside the sensor. Every time you put your head inside the box the sensor starts the whole thing of music and lights and when you leave the box, the music and lights stop.The idea for Tired To Go was inspired by existing full-body sleep pods, but with a focus on creating a more immersive and customizable experience.
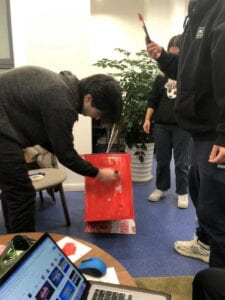
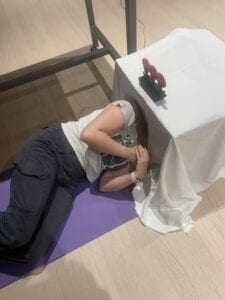
Before the User Testing day, we accidentally lost our code so we stayed up till 2am at the campus to fix our code. I was stressed because none of the new codes we made worked and the User Testing was the next day. I went early in the morning to ask Professor Andy for help and he was able to help me add music, light, and buttons to the project. During User Testing, we put the box on the table so that people can lay on them. The most feedback we got was that we should out the box on the floor with a mat so that people can actually sleep on them. Because of that feedback my partner and I decided to put the box on the floor with a yoga mat so that people could get the full user experience. The User Testing day was hectic but helpful. There was a lot of stress and coding leading up to it but after we figured out our code and feedbacks, we were able to make a better sleep pod.
During the day of finals presentation, we got lots of helpful feedback and reactions from the class and professors. Because we put the box on the table during user testing day, our buttons and slide was only equip for when people lay in the box in a sitting position. The feedback that we got was that we should make the button longer or make the box longer so that people would not struggle when they are trying to change the environment or echo. I noticed that people really enjoyed the sleep pod because after class the professors and a few students also wanted to experience the feeling. They gave good reactions like laughing and nodding. I believe this project was a success even with all the trouble shootings we had to overcome.
As someone that never gets sleep because of classes, this sleep pod is very appealing to me. I love the concept we came up with because it is a way for the user to enjoy the interaction with the project rather than having to interact frequently. It gave the users a sense of relaxation and healing in some way. I believe we achieved the previous goal we intended. We wanted to give the users a way to enjoy and relax and it did just that. Many people told us that they would actually use it in real life so I think we achieved our goal.The project aligns with my definition of interaction by incorporating intuitive and personalized controls. People will be able to interact with the product. If we had more time there are many ways we could improve our project. We would add another slide that would change the brightness of the light. We would also add more songs so there would be different genres of music for people to enjoy. We would also make the box longer so it could fit the whole body. By making the box longer, people wouldn’t have to struggle when they are changing the environment or echo. The take away I have from this project was that, yes, we did have lots of setbacks but we were able to overcome it. Professor Andy said something in class about how sometimes there are setbacks and failures but to not give up.Overall I really enjoyed this class and project. I learned a lot about coding and working with Arduino and processing.
Below is the link to our pictures and codes :
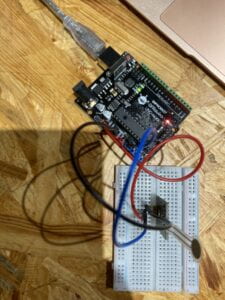
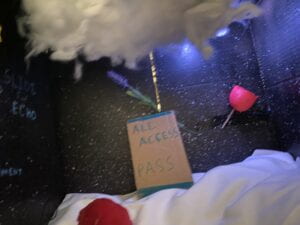
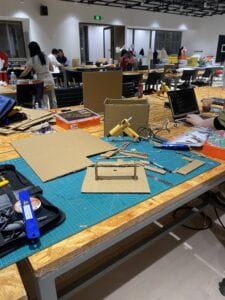
Google photos : https://drive.google.com/drive/folders/1kxRjNKIblLAoK3_gwAj2RePgYF81z14V?usp=sharing
Arduino code :
/**
* This Arduino sketch receives pixel data from Processing in a very
* efficient way (as “binary data”) and sends it to a NeoPixel strip
* You’ll need to have the FastLED library installed, and a NeoPixel
* strip connected to pin 3.
* IMA at NYU Shanghai, Spring 2023
*/
#include
#define NUM_LEDS 60 // How many LEDs in your strip?
#define DATA_PIN 3 // Which pin is connected to the strip’s DIN?
const int pingPin = 11; // Trigger Pin of Ultrasonic Sensor
const int echoPin = 10; // Echo Pin of Ultrasonic Sensor
CRGB leds[NUM_LEDS];
int next_led = 0; // 0..NUM_LEDS-1
byte next_col = 0; // 0..2
byte next_rgb[3]; // temporary storage for next color
int slider = A0;
int slideMin = 14; // Minimum slide sensor value
int slideMax = 1018; // Maximum slide sensor value
int slideValue; // Slide sensor value
int dis;
int button = 2;
int buttonVal;
void setup() {
Serial.begin(115200);
pinMode(button, INPUT);
FastLED.addLeds(leds, NUM_LEDS);
FastLED.setBrightness(50); // external 5V needed for full brightness
leds[0] = CRGB::Red;
FastLED.show();
delay(1000);
leds[0] = CRGB::Black;
FastLED.show();
}
void loop() {
long duration, inches, cm;
pinMode(pingPin, OUTPUT);
digitalWrite(pingPin, LOW);
delayMicroseconds(2);
digitalWrite(pingPin, HIGH);
delayMicroseconds(10);
digitalWrite(pingPin, LOW);
pinMode(echoPin, INPUT);
duration = pulseIn(echoPin, HIGH);
inches = microsecondsToInches(duration);
cm = microsecondsToCentimeters(duration);
buttonVal = digitalRead(button);
slideValue = analogRead(slider);
//int speed = map(slideValue, slideMin, slideMax, 0.2, 2);
Serial.print(slideValue);
Serial.print(“,”);
Serial.print(buttonVal);
Serial.print(“,”);
Serial.print(cm);
Serial.println();
while (Serial.available()) {
char in = Serial.read();
if (in & 0x80) {
// synchronization: now comes the first color of the first LED
next_led = 0;
next_col = 0;
}
if (next_led < NUM_LEDS) {
next_rgb[next_col] = in << 1;
next_col++;
if (next_col == 3) {
leds[next_led] = CRGB(next_rgb[0], next_rgb[1], next_rgb[2]);
next_led++;
next_col = 0;
}
}
if (next_led == NUM_LEDS) {
FastLED.show();
next_led++;
}
}
}
long microsecondsToInches(long microseconds) {
return microseconds / 74 / 2;
}
long microsecondsToCentimeters(long microseconds) {
return microseconds / 29 / 2;
}
Processing code :
import processing.serial.*;
import processing.sound.*;
Serial serialPort;
int NUM_OF_VALUES_FROM_ARDUINO = 3; /* CHANGE THIS ACCORDING TO YOUR PROJECT */
/* This array stores values from Arduino */
int arduino_values[] = new int[NUM_OF_VALUES_FROM_ARDUINO];
SoundFile sound;
SoundFile sound2;
Amplitude analysis;
float button;
float prevButton ;
float ds;
int gameMode = 0;
int closeCount = 0;
int NUM_LEDS = 60; // How many LEDs in your strip?
color[] leds = new color[NUM_LEDS]; // array of one color for each pixel
void setup() {
size(900, 600);
frameRate(30);
printArray(Serial.list());
// put the name of the serial port your Arduino is connected
// to in the line below – this should be the same as you're
// using in the "Port" menu in the Arduino IDE
serialPort = new Serial(this, "/dev/tty.usbmodem101", 115200);
println("Loading mp3…");
sound = new SoundFile(this, "Thunder.mp3");
sound2 = new SoundFile(this, "Waves.mp3");
analysis = new Amplitude(this);
// use the soundfile as the input for the analysis
//analysis.input(sound);
}
void draw() {
background(0);
getSerialData();
// to demonstrate how to control the Neopixel strips from Processing,
// this will draw a simple progress bar – in sync with the playback
// you want to build on that, but come up with your very own audio
// visualization
float speed = map(arduino_values[0], 14, 1000, 0.2, 5);
sound.rate(speed);
//println(arduino_values[0]);
button = arduino_values[1];
ds = arduino_values[2];
if(ds = 35 ){
closeCount = closeCount +1;
}
if(closeCount >= 50){
gameMode = 0;
closeCount = 0;
}
if(gameMode == 0){
sound.stop();
for (int i=0; i < 60; i++) {
leds[i] = color(0, 0, 0);
}
sendColors();
}
if(gameMode == 1){
if (button != prevButton && button == 1 && sound.isPlaying() == true) {
sound.stop();
sound2.play();
analysis.input(sound2);
} else if (button != prevButton && button == 1 && sound2.isPlaying() == true) {
sound2.stop();
sound.play();
}
prevButton = button;
float volume = analysis.analyze();
float lights = map(volume, 0, 1, 0, 60);
for (int i=0; i < 60; i++) {
leds[i] = color(0, 0, 0);
}
if(sound.isPlaying() == true){
//for (int i=0; i < lights; i++) {
// leds[i] = color(255, 255, 255);
//}
}
if(sound2.isPlaying() == true){
for (int i=0; i = 0.7) {
// leds[0] = color(255, 0, 0);
//} else {
// leds[i] = color(#FF4603);
//}
}
}else{
for (int i=0; i 5 && sound.position() < 7) {
// for (int i=0; i < NUM_LEDS; i++) {
// leds[i] = lerpColor(color(255, 0, 0), color(0, 0, 255), map(sound.position(), 5, 7, 0, 1));
// }
//}
sendColors();
}
// float progress = sound.position() / sound.duration();
// find out where we are in the song (0.0-1.0)
//for (int i=0; i < NUM_LEDS; i++) { // loop through each pixel in the strip
// if (i < progress * NUM_LEDS) { // based on where we are in the song
// leds[i] = color(255, 0, 0); // turn a pixel to red
// } else {
// leds[i] = color(0, 0, 0); // or to black
// }
//}
//for (int i=0; i < NUM_LEDS; i++) { // loop through each pixel in the strip
// if (i < progress * NUM_LEDS) { // based on where we are in the song
// leds[i] = color(255, 0, 0); // turn a pixel to red
// } else {
// leds[i] = color(0, 0, 0); // or to black
// }
//}
// this shows how to make something different happen at a certain
// time in the song (5 and 7 are seconds)
// send the array of colors to Arduino
}
// the helper function below sends the colors
// in the "leds" array to a connected Arduino
// running the "neopixel_binary_arduino" sketch
void sendColors() {
byte[] out = new byte[NUM_LEDS*3];
for (int i=0; i > 1);
if (i == 0) {
out[0] |= 1 <> 1);
out[i*3+2] = (byte)(floor(blue(leds[i])) >> 1);
}
serialPort.write(out);
}
void getSerialData() {
while (serialPort.available() > 0) {
String in = serialPort.readStringUntil( 10 ); // 10 = ‘\n’ Linefeed in ASCII
if (in != null) {
print(“From Arduino: ” + in);
String[] serialInArray = split(trim(in), “,”);
if (serialInArray.length == NUM_OF_VALUES_FROM_ARDUINO) {
for (int i=0; i<serialInArray.length; i++) {
arduino_values[i] = int(serialInArray[i]);
}
}
}
}
}

