Tired To Go

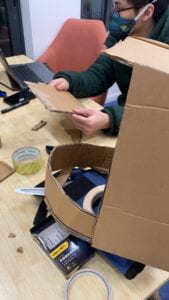
Tired To Go is a portable sleeping box designed to provide an immersive and customizable sleep experience. It expands upon the idea of full-body sleep pods by incorporating relaxing music and lights, as well as adjustable slides and button for sound and lighting options. The project is aimed at helping people who struggle with sleep by creating a comfortable and soothing environment that can be used anywhere. It helps people who need a break from their environment.

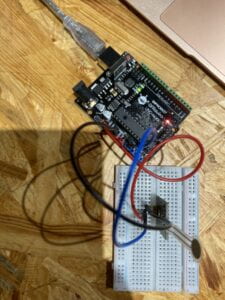
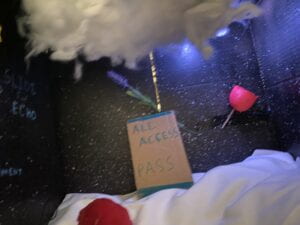
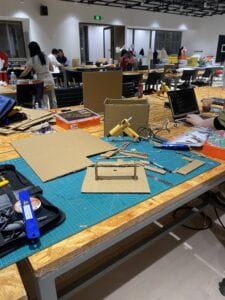
The project involves designing and building a portable sleep box with comfortable pillows and fluff for relaxation. The roof of the box will be made of puff balls with neo pixels underneath, which will respond to audio and glow purple to create a soothing environment. The box has a slide on the side to control the echo of the sound. We also added a push button inside a plushie so that it can control the environment every time you press it. There is a sensor inside the sleeping pod which senses when you put your head inside the sensor. Every time you put your head inside the box the sensor starts the whole thing of music and lights and when you leave the box, the music and lights stop.The idea for Tired To Go was inspired by existing full-body sleep pods, but with a focus on creating a more immersive and customizable experience.

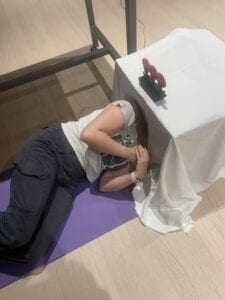
Before the User Testing day, we accidentally lost our code so we stayed up till 2am at the campus to fix our code. I was stressed because none of the new codes we made worked and the User Testing was the next day. I went early in the morning to ask Professor Andy for help and he was able to help me add music, light, and buttons to the project. During User Testing, we put the box on the table so that people can lay on them. The most feedback we got was that we should out the box on the floor with a mat so that people can actually sleep on them. Because of that feedback my partner and I decided to put the box on the floor with a yoga mat so that people could get the full user experience. The User Testing day was hectic but helpful. There was a lot of stress and coding leading up to it but after we figured out our code and feedbacks, we were able to make a better sleep pod.

During the day of finals presentation, we got lots of helpful feedback and reactions from the class and professors. Because we put the box on the table during user testing day, our buttons and slide was only equip for when people lay in the box in a sitting position. The feedback that we got was that we should make the button longer or make the box longer so that people would not struggle when they are trying to change the environment or echo. I noticed that people really enjoyed the sleep pod because after class the professors and a few students also wanted to experience the feeling. They gave good reactions like laughing and nodding. I believe this project was a success even with all the trouble shootings we had to overcome.

As someone that never gets sleep because of classes, this sleep pod is very appealing to me. I love the concept we came up with because it is a way for the user to enjoy the interaction with the project rather than having to interact frequently. It gave the users a sense of relaxation and healing in some way. I believe we achieved the previous goal we intended. We wanted to give the users a way to enjoy and relax and it did just that. Many people told us that they would actually use it in real life so I think we achieved our goal.The project aligns with my definition of interaction by incorporating intuitive and personalized controls. People will be able to interact with the product. If we had more time there are many ways we could improve our project. We would add another slide that would change the brightness of the light. We would also add more songs so there would be different genres of music for people to enjoy. We would also make the box longer so it could fit the whole body. By making the box longer, people wouldn’t have to struggle when they are changing the environment or echo. The take away I have from this project was that, yes, we did have lots of setbacks but we were able to overcome it. Professor Andy said something in class about how sometimes there are setbacks and failures but to not give up.Overall I really enjoyed this class and project. I learned a lot about coding and working with Arduino and processing.

Below is the link to our pictures and codes :
Google photos : https://drive.google.com/drive/folders/1kxRjNKIblLAoK3_gwAj2RePgYF81z14V?usp=sharing

Arduino code :
/**

* This Arduino sketch receives pixel data from Processing in a very

* efficient way (as “binary data”) and sends it to a NeoPixel strip

* You’ll need to have the FastLED library installed, and a NeoPixel

* strip connected to pin 3.

* IMA at NYU Shanghai, Spring 2023

*/

#include
#define NUM_LEDS 60 // How many LEDs in your strip?
#define DATA_PIN 3 // Which pin is connected to the strip’s DIN?

const int pingPin = 11; // Trigger Pin of Ultrasonic Sensor
const int echoPin = 10; // Echo Pin of Ultrasonic Sensor

CRGB leds[NUM_LEDS];

int next_led = 0; // 0..NUM_LEDS-1
byte next_col = 0; // 0..2
byte next_rgb[3]; // temporary storage for next color

int slider = A0;
int slideMin = 14; // Minimum slide sensor value
int slideMax = 1018; // Maximum slide sensor value
int slideValue; // Slide sensor value
int dis;

int button = 2;
int buttonVal;

void setup() {

Serial.begin(115200);
pinMode(button, INPUT);

FastLED.addLeds(leds, NUM_LEDS);

FastLED.setBrightness(50); // external 5V needed for full brightness

leds[0] = CRGB::Red;

FastLED.show();

delay(1000);

leds[0] = CRGB::Black;

FastLED.show();
}

void loop() {

long duration, inches, cm;
pinMode(pingPin, OUTPUT);
digitalWrite(pingPin, LOW);
delayMicroseconds(2);
digitalWrite(pingPin, HIGH);
delayMicroseconds(10);
digitalWrite(pingPin, LOW);
pinMode(echoPin, INPUT);
duration = pulseIn(echoPin, HIGH);
inches = microsecondsToInches(duration);
cm = microsecondsToCentimeters(duration);
buttonVal = digitalRead(button);
slideValue = analogRead(slider);
//int speed = map(slideValue, slideMin, slideMax, 0.2, 2);

Serial.print(slideValue);
Serial.print(“,”);
Serial.print(buttonVal);
Serial.print(“,”);
Serial.print(cm);
Serial.println();

while (Serial.available()) {
char in = Serial.read();
if (in & 0x80) {

// synchronization: now comes the first color of the first LED

next_led = 0;

next_col = 0;
}

if (next_led < NUM_LEDS) {

next_rgb[next_col] = in << 1;

next_col++;

if (next_col == 3) {

leds[next_led] = CRGB(next_rgb[0], next_rgb[1], next_rgb[2]);

next_led++;

next_col = 0;
}
}

if (next_led == NUM_LEDS) {

FastLED.show();

next_led++;
}
}
}
long microsecondsToInches(long microseconds) {
return microseconds / 74 / 2;
}

long microsecondsToCentimeters(long microseconds) {
return microseconds / 29 / 2;
}

Processing code :
import processing.serial.*;
import processing.sound.*;

Serial serialPort;
int NUM_OF_VALUES_FROM_ARDUINO = 3; /* CHANGE THIS ACCORDING TO YOUR PROJECT */

/* This array stores values from Arduino */
int arduino_values[] = new int[NUM_OF_VALUES_FROM_ARDUINO];

SoundFile sound;
SoundFile sound2;

Amplitude analysis;

float button;
float prevButton ;
float ds;
int gameMode = 0;
int closeCount = 0;
int NUM_LEDS = 60; // How many LEDs in your strip?
color[] leds = new color[NUM_LEDS]; // array of one color for each pixel

void setup() {
size(900, 600);
frameRate(30);

printArray(Serial.list());
// put the name of the serial port your Arduino is connected
// to in the line below – this should be the same as you're
// using in the "Port" menu in the Arduino IDE
serialPort = new Serial(this, "/dev/tty.usbmodem101", 115200);

println("Loading mp3…");
sound = new SoundFile(this, "Thunder.mp3");

sound2 = new SoundFile(this, "Waves.mp3");

analysis = new Amplitude(this);
// use the soundfile as the input for the analysis
//analysis.input(sound);
}

void draw() {
background(0);

getSerialData();
// to demonstrate how to control the Neopixel strips from Processing,
// this will draw a simple progress bar – in sync with the playback
// you want to build on that, but come up with your very own audio
// visualization

float speed = map(arduino_values[0], 14, 1000, 0.2, 5);
sound.rate(speed);
//println(arduino_values[0]);

button = arduino_values[1];
ds = arduino_values[2];
if(ds = 35 ){
closeCount = closeCount +1;

}
if(closeCount >= 50){
gameMode = 0;
closeCount = 0;

}
if(gameMode == 0){
sound.stop();
for (int i=0; i < 60; i++) {
leds[i] = color(0, 0, 0);
}

sendColors();
}

if(gameMode == 1){

if (button != prevButton && button == 1 && sound.isPlaying() == true) {
sound.stop();
sound2.play();
analysis.input(sound2);
} else if (button != prevButton && button == 1 && sound2.isPlaying() == true) {
sound2.stop();
sound.play();
}
prevButton = button;
float volume = analysis.analyze();

float lights = map(volume, 0, 1, 0, 60);

for (int i=0; i < 60; i++) {
leds[i] = color(0, 0, 0);
}
if(sound.isPlaying() == true){
//for (int i=0; i < lights; i++) {
// leds[i] = color(255, 255, 255);
//}
}
if(sound2.isPlaying() == true){
for (int i=0; i = 0.7) {
// leds[0] = color(255, 0, 0);
//} else {
// leds[i] = color(#FF4603);
//}
}
}else{
for (int i=0; i 5 && sound.position() < 7) {
// for (int i=0; i < NUM_LEDS; i++) {
// leds[i] = lerpColor(color(255, 0, 0), color(0, 0, 255), map(sound.position(), 5, 7, 0, 1));
// }

//}

sendColors();
}

// float progress = sound.position() / sound.duration();
// find out where we are in the song (0.0-1.0)

//for (int i=0; i < NUM_LEDS; i++) { // loop through each pixel in the strip
// if (i < progress * NUM_LEDS) { // based on where we are in the song
// leds[i] = color(255, 0, 0); // turn a pixel to red
// } else {
// leds[i] = color(0, 0, 0); // or to black
// }
//}
//for (int i=0; i < NUM_LEDS; i++) { // loop through each pixel in the strip
// if (i < progress * NUM_LEDS) { // based on where we are in the song
// leds[i] = color(255, 0, 0); // turn a pixel to red
// } else {
// leds[i] = color(0, 0, 0); // or to black
// }
//}

// this shows how to make something different happen at a certain
// time in the song (5 and 7 are seconds)

// send the array of colors to Arduino
}

// the helper function below sends the colors
// in the "leds" array to a connected Arduino
// running the "neopixel_binary_arduino" sketch

void sendColors() {
byte[] out = new byte[NUM_LEDS*3];
for (int i=0; i > 1);
if (i == 0) {
out[0] |= 1 <> 1);
out[i*3+2] = (byte)(floor(blue(leds[i])) >> 1);
}
serialPort.write(out);
}

void getSerialData() {
while (serialPort.available() > 0) {
String in = serialPort.readStringUntil( 10 ); // 10 = ‘\n’ Linefeed in ASCII
if (in != null) {
print(“From Arduino: ” + in);
String[] serialInArray = split(trim(in), “,”);
if (serialInArray.length == NUM_OF_VALUES_FROM_ARDUINO) {
for (int i=0; i<serialInArray.length; i++) {
arduino_values[i] = int(serialInArray[i]);
}
}
}
}
}

BeccaBox- Rebecca Sui- Professor Andy Garcia

BeccaBox

As an avid music listener, I was inspired to make a boombox.  I really like how in the 90s, people carried boomboxes with them and played music out loud for everyone to enjoy.  Music is all around us like when we shower, when we cook, when we workout, people listen to music. Even in elevators, there are elevator music.  This being said, music is around us everywhere we go with anything we do. That is how I got my inspiration to make music through boombox for my midterm project. During previous research and readings, I saw how people were able to interact with the equipment and they enjoyed it. So because of that, I wanted to create something that people can interact with, that is simple, and enjoyable. This Beccabox is targeted to audiences who enjoy listening to music and aren’t afraid to bring back the boombox trend.  Boombox has been something that has been around since the  90s to forever but now it is not that trendy anymore. Fashionistas are all bringing back the 90s trend and themes so bringing back the boombox would be a classic move and fun way for people to enjoy. I call it the BeccaBox because my nickname is Becca and box because, well, boombox.  I want to make sure all the users get the best satisfaction with this equipment.

During my process, I wanted to make a sound box that was easy for people to use without instructions. The only thing they had to do was push the button to change music or change volume by turning the other button left and right. It is a boombox that is for everyone to easily use. I use button, wires, mp3 player + SD card, loud speaker, Arduino, and potentiometer + led light.  I used these materials because it was the easiest way to input music into the code. Andy helped me with getting the materials because I didn’t know what I needed at first. They were best suited for my project because the button is for changing the music, the potentiometer is for changing the volume, the mp3 and SD card is so that I can store music in there, the loud speaker is so that people can hear the music, and the wires and Arduino is to connect the whole thing together. We were also given boxes to create our products. 

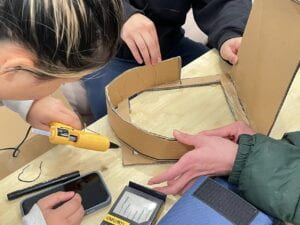
Making the product was very easy. I had to cut out cardboard boxes and make them look like a boombox. I enjoyed this part and painting it so it didn’t look boring. The hardest and must crucial part of the project is the coding. If there is no coding, then the boombox is created for nothing. My friend Jaidyn helped me code the button part because I was stuck after trying to figure out how to play the mp3 with coding. She was able to get the button to work with the mp3 so whenever someone pressed the button, the music changes from the code. After that the other obstacle I had to overcome was coding the potentiometer. I was able to work the potentiometer but it didn’t connect with the loudspeaker. I asked one of the fellows and professor to help me. After trying to figure out the code for at least 20 minutes, we realized it was because of the button code that messed up the volume code.  After figuring out all the codes, we had a user testing. During user testing, people enjoyed my design and product but the main feedback I got was that the button was a hassle because sometimes if you do not click it long it won’t play music. Before the final product showcase, I worked on the button and tried to set it right so that it will be easier for people to press it.  I didn’t have a partner because there wasn’t anyone left to partner with but I was able to code and design my product with the help of my friends, fellow, and professors. They helped me along every step of the way so that I wouldn’t be stressed out. 

The goal of my project is to create a machine , boombox, that everyone can enjoy easily. I wanted something people would find fun and everyday use. For me, interaction means interacting with anyone and anything. My product align with that because people are able to interact with the boombox by pressing the button or changing the volume. They were able to interact with other people beside them if they were listening to the music together. People will be able to talk about the music and make connections through the music playing from the boombox. The audience during the final showcase were able to interact with my product and listen to music together just like how I imagined. They laughed at the song choices but they liked it. The take away I have from this is that music does bring people together. People were smiling and laughing from my music and it brought laughter. That was exactly what I wanted. 

Below is my code :

#include <Arduino.h>
#include <SoftwareSerial.h>
#include “DYPlayerArduino.h”
const int buttonPin = 2; // the number of the pushbutton pin
const int ledPin = 9;
int sensorPin = A0;
int sensorValue = 0;
int buttonState = 0;
int sensorMin = 150;
int sensorMax =1023;
int val;
int prevVal;
boolean buzzing = false;
SoftwareSerial SoftSerial(10, 11); //RX and TX from Arduino
DY::Player player(&SoftSerial); //should connect them to io0 and io1
void setup() {
pinMode(ledPin, OUTPUT);
// initialize the pushbutton pin as an input:
pinMode(buttonPin, INPUT);
Serial.begin(9600);
Serial.println(“Starting the Player…”);
player.begin();
player.setPlayingDevice(DY::Device::Sd); //SD card, USB storage volume is
player.setVolume(30); // 30 is 100% of Volume; with 15 you get 50% Volume
// player.setCycleMode(DY::PlayMode::Repeat); // Play all and repeat.
player.play();
// player.next();
}
void loop() {
buttonState = digitalRead(buttonPin);
sensorValue = analogRead(sensorPin);
analogWrite(ledPin,sensorValue/4);
delay(10);
int myVolume = map(sensorValue, 0, 1023, 0, 30);
player.setVolume(myVolume);
 
// sensorValue = map(sensorValue, sensorMin, sensorMax, 0, 255);
// sensorValue = constrain (sensorValue,0,255);
// // analogWrite(ledPin, sensorValue/4);
// Serial.println(sensorValue);
// delay(10);
// Serial.println(prevVal);
// Serial.print(” “);
// Serial.println()
// check if the pushbutton is pressed. If it is, the buttonState is HIGH:
if (prevVal == LOW && buttonState == HIGH) {
player.next();
}
// Print the number of the sound that is playing.
// Serial.print(“Playing Device: “);
// Serial.println((int16_t)player.checkPlayState()); //if you receive -1, it’s fail
// // Print the number of the sound that is playing.
// Serial.print(“Playing sound: “);
// Serial.println((int16_t)player.getPlayingSound());
// delay(500);
prevVal = buttonState;
delay(10);
}


Links to the pictures :

https://drive.google.com/drive/folders/1rVEG4LPADm-PrMCs9aBozFQud8kaUW-A?usp=sharing

My first Interaction Lab Blog

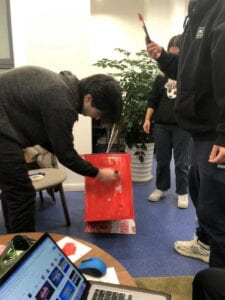
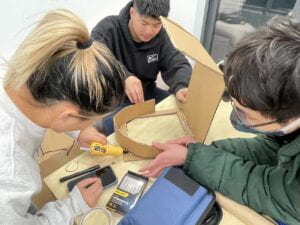
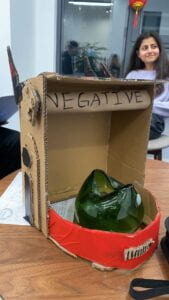
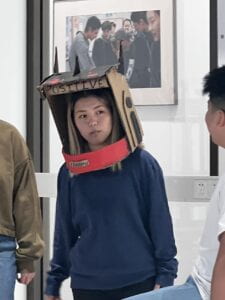
Welcome to my first Interaction lab blog. In my group there were 6 of us. None of us have ever had a conversation before this class but because of this group project we became closer. For this project, we looked at The Plague by Yan Leisheng. In the short story, there was a virus that was passed around and when I read that my automatic thought was that they need a virus protection. On Monday the 20th, my group zoom called and talked about our ideas. Victor brought in a good idea that we should make a helmet that can tell if you or the people around you have the virus or not. We then came up with the idea that we will make a helmet that has an AI built in so that that AI can tell you the results.  From this, we met the next day to make the product. It was a very fun experience because when we all first met in person, it was awkward. Like I said, we haven’t had a full conversation in person before so it made the experience exhilarating. While making the product, we had a brain fart because we didn’t know how we will make it interactive but we then realized we could drill a hole and make something that will change to negative or positive depending on you or the people around you. Lucas was really good with coming up with designs fo the product. Hansa, Rita, and I worked on painting the products, Victor did the heavy duty and brought his cardboard box, and IIan made his cardboard tv. We worked on the product for 3 hours that day. The night before the performance, we met up again because we didn’t know we had to come up with a skit. We decided to go with family based skit. During pandemics, families stick together and look out for each other so we thought that it would be nice to reinterpret that. Lucas was the friend, IIan the broadcaster, Victor the dad, Hansa the AI, Rita the mom, and I the child. We had a really fun time creating the skit because our imaginations and artist side came out. I came up with most of the story line because creating stories is something that is interesting to me. On Friday, we did the presentation and it went exactly how we wanted it to go. One of the professor pointed out the family part which was good because that was something our project focused on. Looking at our design, I believe it is a good product people can use. The product is successful because it protected the kid from her friend who had the virus. In real life, it will also protect people. What we should have done better was come up with another device that can project you from the virus. Other groups also did something that had to do with helmet so it wasn’t really original and innovative. But in all, making the product and performing was very fun.

Below is the script of the play;

[Father watching the news]

Newscaster: Breaking news! Suddenly we have discovered that there is a new virus on the loose. It has been reported that there are 350 cases in the city and is rapidly spreading. Please wear the hazmat suits provided by the government so you don’t get infected by the virus. There have also been reports of these hazmat suits tearing and not protecting people from the virus. So, watch out for your families.

Father: Oh no, I got to do something about this! [starts to build the helmet]

Mother: Honey, what are you doing? You are making a mess. If you want to do something, go change the light bulbs.

Father: I am creating a helmet to protect us from the virus.

Mother: It’s not necessary, we have survived for this long, we don’t need extra protection.

Father: We do, trust me!

Child: Can we see how the helmet looks like?

Father: It’s not finished yet.

Child: Ok we will come back later to see it.

[after a few seconds]

Child: Can we see now, is it ready?

Father: Yes, this is the helmet [holds up helmet]. It comes with an AI device to detect if the people around you are positive or negative, and it will protect you. The design is family friendly!

Child: So is mom going to wear it?

Mother: Oh no!

Child: I don’t want to wear it.

Father: No, you have to wear it to school.

Child: They are going to make fun of me.

Father: I don’t care, you have to!

Child [wears helmet and goes to school]

Child: Hi friend!

Friend: Hi, what are you wearing?

Child: I am wearing a helmet that my dad made but I don’t know what it is. I guess it detects the virus.

Friend: It looks ugly.

Child: Yeah it does but I guess it works. What are you up to today? We are 13 years old so we have classes.

Friend: Yeah.

Child: So do you want to play the hand clap game?

Friend: Sure!

Child and Friend [before Child even touches her friends hands…]

AI device: Beep, Beep, Beep, Warning, Warning!

Child: Oh no, you have the virus.

Friend: What, no I don’t!

Child: Stay away from me! I am going home!

[At home, father watches the news]

Newscaster: Breaking news! A child has just died! So watch out, these suits are not protective and the virus is very deadly.

Child: Dad, guess what! My friend died today, he had the virus.

Father: I just saw it on the news!

Child: My helmet worked, it detected it and I ran back home.

Father: Oh, good. See, I told you all!

Below is the building process and the final result. 

I love using superglue IIan working on the tv

Us working hard to get the best product This is the basic design of our prodcut My friend took this picture of me during presentation and it was very funny When we first started

Hello world!

Welcome to Web Publishing @ NYU. This is your first post. Edit or delete it, then start creating your site!

Online help is available via the Web Publishing Knowledge Site (wp.nyu.edu/knowledge) and the ServiceLink knowledge base (www.nyu.edu/servicelink). Through ServiceLink, you can find step-by-step instructions, as well as tutorials.

Digital Accessibility

As content creators who create and publish text, images, video, and audio, you must adhere to the NYU Website Accessibility Policy (https://www.nyu.edu/digitalaccessibility/policy) when creating and publishing digital content.

Web Publishing-specific Digital Accessibility Best Practices and examples of how to ensure your content are compliant are available at https://wp.nyu.edu/digitalaccessibility

If you have additional questions, contact the IT Service Desk for assistance. Support is available 24/7/365. For more details, visit www.nyu.edu/it/servicedesk.