Reflections on the intelligent envrionment

I want to begin with the intelligent environment exactly means. In class, we first made a comparison between intelligence and automation. In general, automation is related to the ability of something to operate automatically, or without force from the outside environment. Intelligence, is certainly different from automation since it usually can perceive the outside environment and reaction to changes in the environment. However, personally, I don’t think an intelligent environment is completely irrelevant to automation, because to perceive and react, there must be considerable calculation and/or coordination between different components, and such calculation and/or coordination should be able to operate automatically.

Contextual awareness and Cybernetics are also indispensable for an intelligent enviornment. Contextual awareness refers to being aware of ( or understanding) the context so that the system can react to certain signals. After understansding the context, with the knowledge of cynernetics, the system is able to make feedback and finally do the reaction. It is also possible to produce feedback based on the existing feedback, to complete second-order (mabe also possibly to have multi-order?) cybernetics.

From a personal perspective, I think an intelligent environment should also provide a qualified user experience, especially when utilizing an intelligent environment in artwork or use it in daily life. In an artwork, an intelligent environment should enhance the interacting process, providing the experiences that best fit the aim of the artwork, and help the audience to better understand it. In daily life, it is important to help people live in a more effective, convenient, or in general,  smarter ligestyle. 

Concluding from the above paragraphs, I think an ideal intelligent environment that I would like to approach should be like this: (1) It is smart enough to understand the user’s situation and react automatically, quickly and precisely according to the user’s needs; (2) It can improve the user’s experience and provide a real enjoyable experience.

Final Project – Step 5: Final Blog Post

A. Feel the forest – Yongxin(Phoebe) Li – Rodolfo Cossovich

B. CONCEPTION AND DESIGN:

I had decided to do something about forests as I started doing my project. I always think forests is full of knowledge and interest and make people feel a kind of the beauty of nature. However, since everyday we are living in the modern cities we seldom feel it (especially now we are in the lockdown!!), so I want to mimic some parts of the experience of people in the forest. Generally speaking, I put some inputs and outputs in a box and played some videos about different situations in the forest. When playing the video, I use my computer to share screen with my phone, and out the phone in the box, so people can see the image of forest directly in the box, which is more immersive than touching some sensors on the desk but staring at the computer screen in front of the participant.

The whole interaction process was like this: when the participants first open the lid of the box, they will see a piece of video showing the sunny days in the forest, this video will show the surrounding: sunlights, big trees, etc. Meanwhile, the computer will play the sound of birds in the forest, to make the interaction more immersive. But this is just a transition video. There is a leaf in the box, which is actually a steam sensor. Participants can touch the sensor. As they first touch the sensor, the video zoom in to show the image of many leaves, and sunlight shines through them. When participants holding and touching the leaves, they will see the leaves in the video moving because wind is blowing, and hearing the sound of wind blow through the leaves ( as well as the birds’ sound, this one is always played as long as the weather is good); when they release the leaf they move of leaves in the video stop and so does the sound of wind. At this stage, if participants want to stop the interaction, they can close the lid and the screen will become black and the sound will stop. However, if participants keep interacting for a very long time, the weather in the screen will become bad. A video about leaves washing by the rain will be played, as well as the sound of rains and thunders. It is a storm. Meanwhile, in the box, there will be a LED blinking, and a vibration output vibrating when there is  thunder in the sound. I designed to make the LED keep blinking because I think this can make the atmosphere more like a storm weather. The box is small and portable, maybe participants use it in a very bright room it is hard to feel immersive in the bad weather. However, the LED is blue, I think it will add some blue color and shadows to the participants’ visual areas, or at least it can create a nervous atmosphere. Also, participants can feel the vibration if they touch the box, or at least they can hear the sound made by the vibration. During this process, participants cannot interaction by touching the sensor, nor can they close the lid to stop the sensor. Because I want to mimic the experience in the forest and in the forest when there is a storm, we human beings’ power is very small and can do few things. Participants only need to wait and the storm(video+sound) will stop automatically.

I actually learnt a lot from the first project in my preparatory research. In that project, participants can do different things to trigger different effect. By decomposing it, I think it use different input to trigger different outputs, so I did this in my project as well. When participants open the lid, the light sensor will trigger the transition part, when they touch the leaf, the steam sensor will trigger the wind, when they close the lid, the interaction stop. Also, both that project and mine create a continuous but various interaction process. Participants will get different experience when they participating different part, however, of curse, they are highly recommend to participate the whole process. 

What help me make great adaptation and improvement was actually not the user testing session, but my conversation with professor Rudi. He recommended me to use my phone to play the video and it is really a good idea. 

C. FABRICATION AND PRODUCTION:

Firstly, I made a lot of efforts on the code. At first, when I was trying to make the processing play the video when I touching the sensor, I only use one if logic. It was like:

if(sensorVlues[0] == 1){
  video.read();
  sound.play();
}

However, it does not work well. Then I changed my strategy. I used more if logic and add boolean variables. So it was like: 

  if (sensorValues[0] > 15 && playbirds == false) {//light sensor
    playbirds = true;
    birds.loop();
    stop = false;
  }
  if (sensorValues[0] < 15 && playbirds == true) {
    playbirds = false;
    birds.stop();
    stop = true;
  }

And this time it worked well.

I also tried a lot to make the weather changing part work well. At first, it either change too early or do not change, so I added many conditions and used a lot of variables to confine, and finally it worked. It was like: 

  if (millis() >= 25000 && raintime < 40.0 && raintime >= 0 && stop == false && playrain == false) {
    wind.stop();
    windsound.stop();
    birds.stop();
    playrain = true;
    badweather.loop();
  }
  //print(playrain);
  if (playrain == true) {
    if (rain.available()) {
      rain.read();
    }
    processing_values[0] = 1;
  }
  image(rain, 0, 0);
  if (volume > 0.5) {
    processing_values[1] = 1;
  } else {
    processing_values[1] = 0;
  }
  image(rain, 0, 0);

To make the storm stoped automatically, I also learned to set the time the video played as a variable. I use float raintime = rain.time();, so when I want the process stop, I only need to write:

  if (raintime > 40.0) {
    playrain = false;
    processing_values[0] = 0;
    badweather.stop();

As for the circuit part, what spent me most efforts was selecting the sensor. At first, my design about the leaf was to blow the leaf, but I did not have the sensor that can sense wind. I tried all the sensors in the kits but none of them are satisfactory, then I thought of using touching instead of blowing. So my criteria was: (1)when I touch, the value change considerably; (2) when I keep touching, the value keep relatively stable; (3) when I release, the value change back to the original one; (4) it is small and easy to hide; (5) it allow certain errors; (6) it does not affect by the light, since I use light to realize other interaction. So, finally, steam sensor is the only one that satisfied my criteria.

D. CONCLUSIONS:

My goal is to mimic the experience of human in the forests and to create a whole process of various interactions. Additionally, I want to make a balance between the interactivity and level of immersive experience. I think my project achieve these goals. What is a pity was that at first I want to create a fake book and when participants open the book they can begin the interaction process but due to the limitation of materials I finally use a box instead of a book, and I think it to some extent degrade the interactivity of my project. Moreover, as professor Marcela’s words, it will be more immersive and interactive is I embed my phone a layer of box instead of simply put it on it.

E. TECHNICAL DOCUMENTATION:

Code:

Processing

import processing.serial.*;
import processing.sound.*;
import processing.video.*;

Movie forest;
Movie wind;
Movie rain;

SoundFile birds;
SoundFile windsound;
SoundFile badweather;
Amplitude analysis;

boolean playbirds = false;
boolean playwind = false;
boolean playrain = false;
boolean stop = false;


int NUM_OF_VALUES_FROM_PROCESSING = 2;  /** YOU MUST CHANGE THIS ACCORDING TO YOUR PROJECT **/
int NUM_OF_VALUES_FROM_ARDUINO = 2;  /** YOU MUST CHANGE THIS ACCORDING TO YOUR PROJECT **/

Serial myPort;
String myString;

int processing_values[]; /** this array stores values you might want to send to Arduino **/
int sensorValues[];      /** this array stores values from Arduino **/

void setup() {
  //fullScreen();
  size(800, 800);
  background(0);
  forest = new Movie(this, "forest2.mp4");
  wind = new Movie(this, "leaves.mp4");
  forest.play();
  wind.loop();
  wind.volume(0);
  rain = new Movie(this, "rain.mp4");
  rain.loop();
  birds = new SoundFile(this, "birds.mp3");
  windsound = new SoundFile(this, "wind.mp3");
  badweather = new SoundFile(this, "badweather.mp3");
  analysis = new Amplitude(this);
  analysis.input(badweather);
  setupSerial();
}


void draw() {
  //println(analysis.analyze());
  // varibles used in draw loop
  float volume = analysis.analyze();
  float raintime = rain.time();
print(stop);

  //receive the values from Arduino
  getSerialData();
  //use the values from arduino
  //beginning forest
  if (sensorValues[0] > 15 && playbirds == false) {//light sensor
    playbirds = true;
    birds.loop();
    stop = false;
  }
  if (sensorValues[0] < 15 && playbirds == true) {
    playbirds = false;
    birds.stop();
    stop = true;
  }
  //print(playbirds);
  if (playbirds == true) {
    if (forest.available()) {
      forest.read();
    }
  }
  image(forest, 0, 0);
  //touching leaves and wind blowing
  if (sensorValues[1] > 100 && playwind == false) {//steam sensor
    playwind = true;
    windsound.loop();
  }
  if (sensorValues[1] < 100) {
    playwind = false;
    windsound.stop();
  }
  //print(playwind);
  if (playwind == true) {
    if (wind.available()) {
      wind.read();
    }
  }
  image(wind, 0, 0);

  // give values to the variables you want to send here
  //if the participant hold it for too long period, the weather goes bad
  //println(millis());
  if (millis() >= 25000 && raintime < 40.0 && raintime >= 0 && stop == false && playrain == false) {
    wind.stop();
    windsound.stop();
    birds.stop();
    playrain = true;
    badweather.loop();
  }
  //print(playrain);
  if (playrain == true) {
    if (rain.available()) {
      rain.read();
    }
    processing_values[0] = 1;
  }
  image(rain, 0, 0);
  if (volume > 0.5) {
    processing_values[1] = 1;
  } else {
    processing_values[1] = 0;
  }
  image(rain, 0, 0);
  //bad weather stops automatically after 10s
  //print(raintime);
  if (raintime > 40.0) {
    playrain = false;
    processing_values[0] = 0;
    badweather.stop();
    //rain.stop();

  }
if(stop == true && millis() < 25000){
  print("black");
  fill(0);
  rect(0, 0, 2000, 2000);
}
if(stop == true && raintime > 40.0){
  print("black");
  fill(0);
  rect(0, 0, 2000, 2000);
}
  // send the values to Arduino.
  sendSerialData();
}


void setupSerial() {
  printArray(Serial.list());
  myPort = new Serial(this, Serial.list()[2], 9600);
  myPort.clear();
  // Throw out the first reading,
  // in case we started reading in the middle of a string from the sender.
  myString = myPort.readStringUntil( 10 );  // 10 = '\n'  Linefeed in ASCII
  myString = null;

  processing_values = new int[NUM_OF_VALUES_FROM_PROCESSING];
  sensorValues = new int[NUM_OF_VALUES_FROM_ARDUINO];
}

void getSerialData() {
  while (myPort.available() > 0) {
    myString = myPort.readStringUntil( 10 ); // 10 = '\n'  Linefeed in ASCII
    if (myString != null) {
      print("from arduino: "+ myString);
      String[] serialInArray = split(trim(myString), ",");
      if (serialInArray.length == NUM_OF_VALUES_FROM_ARDUINO) {
        for (int i=0; i<serialInArray.length; i++) {
          sensorValues[i] = int(serialInArray[i]);
        }
      }
    }
  }
}

void sendSerialData() {
  String data = "";
  for (int i=0; i<processing_values.length; i++) {
    data += processing_values[i];
    //if i is less than the index number of the last element in the values array
    if (i < processing_values.length-1) {
      data += ","; // add splitter character "," between each values element
    }
    //if it is the last element in the values array
    else {
      data += "\n"; // add the end of data character "n"
    }
  }
  //write to Arduino
  myPort.write(data);
  print("to arduino: "+ data); // this prints to the console the values going to arduino
}

Arduino

// IMA NYU Shanghai
// Interaction Lab
//This example is to send multiple values from Processing to Arduino and Arduino to Processing.

#define NUM_OF_VALUES_FROM_PROCESSING 1    /** YOU MUST CHANGE THIS ACCORDING TO YOUR PROJECT **/
#define ZD 3
#define LED 13

/** DO NOT REMOVE THESE **/
int tempValue = 0;
int valueIndex = 0;

/* This is the array of values storing the data from Processing. */
int processing_values[NUM_OF_VALUES_FROM_PROCESSING];

void setup() {
  Serial.begin(9600);
  pinMode(3, OUTPUT);
  pinMode(LED, OUTPUT);
  // this block of code is an example of an LED, a DC motor, and a button
  /*
    pinMode(13, OUTPUT);
    pinMode(9, OUTPUT);
    pinMode(2, INPUT);
  */
  //end example
}

void loop() {

  // to receive a value from Processing
  getSerialData();

  // add your code here
  // use elements in the values array
  //and print values to send to Processing

  // this is an example:
  /*
    //example of using received values and turning on an LED
    if (processing_values[0] == 1) {
    digitalWrite(13, HIGH);
    } else {
    digitalWrite(13, LOW);
    }
    analogWrite(9, processing_values[1]);
    // too fast communication might cause some latency in Processing
    // this delay resolves the issue.
    delay(10);
    //end of example of using received values


    //example of sending the values to Processing
    int sensor1 = analogRead(A0); // a potentiometer
    int sensor2 = digitalRead(2); // the button

    // send the values keeping this format
    Serial.print(sensor1);
    Serial.print(",");  // put comma between sensor values
    Serial.print(sensor2);
    Serial.println(); // add linefeed after sending the last sensor value
    // end of example sending values
  */
  // end of example

  if (processing_values[0] == 1) {
    digitalWrite(LED, HIGH);
    delay(100);
  }
  if (processing_values[0] == 0) {
    digitalWrite(LED, LOW);
    delay(100);
  }
  if (processing_values[1] == 1) {
    analogWrite(ZD, 200);
    delay(50);
  }
  if (processing_values[1] == 0) {
    analogWrite(ZD, 0);
    delay(0);
  }
//Serial.println(LED);
  // to send values to Processing assign the values you want to send
  int sensor1 = analogRead(A0);
  int sensor2 = analogRead(A1);
  // send the values keeping this format
  Serial.print(sensor1);
  Serial.print(",");  // put comma between sensor values
  Serial.print(sensor2);
//  //  Serial.print(",");  // put comma between sensor values
//  //  Serial.print(sensor3);
  Serial.println(); // add linefeed after sending the last sensor value

  // too fast communication might cause some latency in Processing
  // this delay resolves the issue.
  delay(100);

  // end of example sending values

}

//receive serial data from Processing
void getSerialData() {
  while (Serial.available()) {
    char c = Serial.read();
    //switch - case checks the value of the variable in the switch function
    //in this case, the char c, then runs one of the cases that fit the value of the variable
    //for more information, visit the reference page: https://www.arduino.cc/en/Reference/SwitchCase
    switch (c) {
      //if the char c from Processing is a number between 0 and 9
      case '0'...'9':
        //save the value of char c to tempValue
        //but simultaneously rearrange the existing values saved in tempValue
        //for the digits received through char c to remain coherent
        //if this does not make sense and would like to know more, send an email to me!
        tempValue = tempValue * 10 + c - '0';
        break;
      //if the char c from Processing is a comma
      //indicating that the following values of char c is for the next element in the values array
      case ',':
        processing_values[valueIndex] = tempValue;
        //reset tempValue value
        tempValue = 0;
        //increment valuesIndex by 1
        valueIndex++;
        break;
      //if the char c from Processing is character 'n'
      //which signals that it is the end of data
      case '\n':
        //save the tempValue
        //this will b the last element in the values array
        processing_values[valueIndex] = tempValue;
        //reset tempValue and valueIndex values
        //to clear out the values array for the next round of readings from Processing
        tempValue = 0;
        valueIndex = 0;
        break;
    }
  }
}
 

Recitation 10: Image & Video

Part 1: Media controller

Code

Arduino

// IMA NYU Shanghai
// Interaction Lab
// For sending multiple values from Arduino to Processing


void setup() {
  Serial.begin(9600);
}

void loop() {
  // to send values to Processing assign the values you want to send
  //this is an example
  int sensor1 = analogRead(A0);
//  int sensor2 = analogRead(A1);
//  int sensor3 = analogRead(A2);

  // send the values keeping this format
  Serial.print(sensor1);
//  Serial.print(",");  // put comma between sensor values
//  Serial.print(sensor2);
//  Serial.print(",");  // put comma between sensor values
//  Serial.print(sensor3);
  Serial.println(); // add linefeed after sending the last sensor value

  // too fast communication might cause some latency in Processing
  // this delay resolves the issue.
  delay(100);

  // end of example sending values
}

Processing

// IMA NYU Shanghai
// Interaction Lab
// For receiving multiple values from Arduino to Processing

/*
 * Based on the readStringUntil() example by Tom Igoe
 * https://processing.org/reference/libraries/serial/Serial_readStringUntil_.html
 */

import processing.serial.*;
import processing.video.*;

int NUM_OF_VALUES_FROM_ARDUINO = 1;   /** YOU MUST CHANGE THIS ACCORDING TO YOUR PROJECT **/
int sensorValues[];      /** this array stores values from Arduino **/

String myString = null;
Serial myPort;
Movie myMovie;

void setup() {
  size(1280, 720);
 myMovie = new Movie(this, "shuimu.mp4");
  myMovie.play();
  setupSerial();
}

void draw() {
  getSerialData();
  printArray(sensorValues);
 if (myMovie.available()) {
    myMovie.read();
  }
  float m = map(sensorValues[0], 0, 1023, 0, 255);
  tint(m, 255, 255); 
  image(myMovie, 0, 0);
}
  
  // use the values like this!
  // sensorValues[0] 

  // add your code

  //


void setupSerial() {
  printArray(Serial.list());
  myPort = new Serial(this, Serial.list()[ 2 ], 9600);
  // WARNING!
  // You will definitely get an error here.
  // Change the PORT_INDEX to 0 and try running it again.
  // And then, check the list of the ports,
  // find the port "/dev/cu.usbmodem----" or "/dev/tty.usbmodem----" 
  // and replace PORT_INDEX above with the index number of the port.

  myPort.clear();
  // Throw out the first reading,
  // in case we started reading in the middle of a string from the sender.
  myString = myPort.readStringUntil( 10 );  // 10 = '\n'  Linefeed in ASCII
  myString = null;

  sensorValues = new int[NUM_OF_VALUES_FROM_ARDUINO];
}

void getSerialData() {
  while (myPort.available() > 0) {
    myString = myPort.readStringUntil( 10 ); // 10 = '\n'  Linefeed in ASCII
    if (myString != null) {
      String[] serialInArray = split(trim(myString), ",");
      if (serialInArray.length == NUM_OF_VALUES_FROM_ARDUINO) {
        for (int i=0; i<serialInArray.length; i++) {
          sensorValues[i] = int(serialInArray[i]);
        }
      }
    }
  }
}

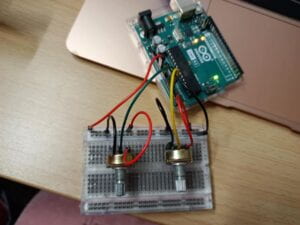
Making/writing details In this exercise, I wanted to use a potentiometer to make the control tint of the video. For the circuit, I only needed to build a simple circuit of potentiometer, which I found I could finished quite easily after the exercises in this semester. The code was based on the example of serial communication, movie_class, and movie_tint. The serial communication went well. However, one problem was that when I run the program I could only hear the sound but could not see any image. With the help of Skye I checked the code and found that I had two Mymovie.play(), one in the setup loop and one in the draw loop. I changed the former to Mymovie.read(), and it finally worked well.

Pat 2: Musical Instrument

Code

import processing.video.*;
String[] cameras = Capture.list();
Capture cam;

import processing.sound.*;
SinOsc sine;
Env env;
float attackTime = 0.001;
float sustainTime = 0.004;
float sustainLevel = 0.3;
float releaseTime = 0.4;

int s = 20;
float r, pr; 
void setup() {
  size(640, 480);
  printArray(cameras);
  cam = new Capture(this, cameras[0]);
  cam.start();

  sine = new SinOsc(this);
  env  = new Env(this);
}

void draw() {
  if (cam.available()) {
    cam.read();
  }
  
   color c = cam.get(width/2, height/2);
  r = red(c);
    float difference = abs(r-pr);
    
  for (int x=0; x<width; x=x+s) {
    for (int y=0; y<height; y=y+s) {
        // get the pixel color
    color p = cam.get(x, y); 
    // draw a circle with the color
     //int size = int( random(1, 20));
       fill(p);
       noStroke();
      rect(x, y, s, s);
    }
  }

if (difference>10) {
    sine.play();
    sine.freq(map(r, 0, 255, 100, 800));
    env.play(sine, attackTime, sustainTime, sustainLevel, releaseTime);
  }
  
  //image(cam, 0, 0);
  //sine.play();
    pr=r;
}

Making/Writing details: I wrote the code based on the capture example, but added the codes for pixels, SinOsc, Envelop, etc. Thanks to the earlier recitation exercise, I wrote the nested for loop successfully. But I did face two problems. The first one was that I did not know how to restore the previous variable values, so I did some research on Google and tried according to some examples. Luckily, I made it finally. Another problem was that since I used the capture example, it showed very clear images instead of pixels at first. After checking the code, I deleted the line “image(cam, 0, 0);”, and finally it worked well.

Recitation 9 – Sound in Processing

Exercise 1:  Virtual Music Launchpad

Code:

import processing.sound.*;

// declare a SoundFile object
SoundFile crashbreak;
SoundFile kickcrash;
SoundFile pollyunilead1;
SoundFile plunkysynthloop;
boolean a = false;
boolean f = false;
boolean j = false;
boolean l = false;

void setup() {
  size(640, 480);
  // create the object and load a file into it
  crashbreak = new SoundFile(this, "crashbreak2rideout.wav");
  kickcrash = new SoundFile(this, "kickcrash.wav");
  pollyunilead1 = new SoundFile(this, "pollyunilead1.wav");
  plunkysynthloop = new SoundFile(this, "plunkysynthloop.wav");
}

void draw() {
  background(0);
  rect(80, 50, 220, 160);
  rect(340, 50, 220, 160);
  rect(80, 270, 220, 160);
  rect(340, 270, 220, 160);
  println(a);
}

void keyPressed() {
  switch(key) {
  case 'a':
    crashbreak.play();
    break;

  case 'f':
    kickcrash.play();
    break;
  case 'j':
    pollyunilead1.play();
    break;
  case 'l':
    plunkysynthloop.play();
    break;
  }
}

Exercise 2:  Haptic Sound Wearable

Code:

At first, I didn’t know how to use Amplitude analysis to analyze the sound in the computer. After trying, I found it quite easy: all I need was to change “AudioIn” to “SoundFlie” and change “microphone” to “sound”.

Arduino:

// IMA NYU Shanghai
// Interaction Lab

/**
  This example is to send multiple values from Processing to Arduino.
  You can find the Processing example file in the same folder which works with this Arduino file.
 **/

#define NUM_OF_VALUES_FROM_PROCESSING 3    /** YOU MUST CHANGE THIS ACCORDING TO YOUR PROJECT **/
#define ZD 3

/** DO NOT REMOVE THESE **/
int tempValue = 0;
int valueIndex = 0;

/* This is the array of values storing the data from Processing. */
int processing_values[NUM_OF_VALUES_FROM_PROCESSING];


void setup() {
  Serial.begin(9600);
  pinMode(3, OUTPUT);
}

void loop() {
  getSerialData();

  // add your code here using elements in the values array

  //this is an example connecting a buzzer to pin 8
  /*
    if (processing_values[0] == 1) {
      //turn on an LED when the mouse is pressed
      digitalWrite(13, HIGH);
      // map values from mouseX to frequency from (0 - 500 pixels)
      //to the output pitch range (120 - 1500Hz)
      int f = map(processing_values[1], 0, 500, 120, 1500);
      // map values from mouseY to frequency from (0 - 500 pixels)
      //to the output duration range (10 - 2000 milliseconds)
      int d = map(processing_values[2], 0, 500, 10, 2000);
      // play the pitch:
      tone(8, processing_values[1], processing_values[2]);
      delay(1);        // delay in between reads for stability
    } else {
      digitalWrite(13, LOW);
    }
  */
  //end of example
  if (processing_values[0] == 1) {
    analogWrite(ZD, 200);
    delay(100);
  }
    if (processing_values[0] == 0) {
      analogWrite(ZD, 0);
      delay(0);
    }
  }


//receive serial data from Processing
void getSerialData() {
  while (Serial.available()) {
    char c = Serial.read();
    //switch - case checks the value of the variable in the switch function
    //in this case, the char c, then runs one of the cases that fit the value of the variable
    //for more information, visit the reference page: https://www.arduino.cc/en/Reference/SwitchCase
    switch (c) {
      //if the char c from Processing is a number between 0 and 9
      case '0'...'9':
        //save the value of char c to tempValue
        //but simultaneously rearrange the existing values saved in tempValue
        //for the digits received through char c to remain coherent
        //if this does not make sense and would like to know more, send an email to me!
        tempValue = tempValue * 10 + c - '0';
        break;
      //if the char c from Processing is a comma
      //indicating that the following values of char c is for the next element in the values array
      case ',':
        processing_values[valueIndex] = tempValue;
        //reset tempValue value
        tempValue = 0;
        //increment valuesIndex by 1
        valueIndex++;
        break;
      //if the char c from Processing is character 'n'
      //which signals that it is the end of data
      case '\n':
        //save the tempValue
        //this will b the last element in the values array
        processing_values[valueIndex] = tempValue;
        //reset tempValue and valueIndex values
        //to clear out the values array for the next round of readings from Processing
        tempValue = 0;
        valueIndex = 0;
        break;
    }
  }
}
Processing:

// IMA NYU Shanghai
// Interaction Lab

/**
 * This example is to send multiple values from Processing to Arduino.
 * You can find the arduino example file in the same folder which works with this Processing file.
 **/

import processing.serial.*;
import processing.sound.*;
SoundFile sound;
Amplitude analysis;


int NUM_OF_VALUES_FROM_PROCESSING = 1;  /** YOU MUST CHANGE THIS ACCORDING TO YOUR PROJECT **/
int processing_values[] = new int[NUM_OF_VALUES_FROM_PROCESSING]; /** this array stores values you might want to send to Arduino **/

Serial myPort;
String myString;


void setup() {
  size(500, 500);
  background(0);
  setupSerial();
  sound = new SoundFile(this, "Lost On The Freeway.mp3");
  sound.loop();
  analysis = new Amplitude(this);
   analysis.input(sound);
}

void draw() {
 
 println(analysis.analyze());
  background(0);
  
  // analyze the audio for its volume level
  float volume = analysis.analyze();
  // map the volume value to a useful scale
  float diameter = map(volume, 0, 1, 0, width);
  // draw a circle based on the microphone amplitude (volume)
  circle(width/2, height/2, diameter); 

  if (volume > 0.5) {
    processing_values[0] = 1;
  } else {
    processing_values[0] = 0;
  }


// give values to the variables you want to send here
//change the code according to your project
//for example:
/*
    if (mousePressed) {
 processing_values[0] = 1;
 } else {
 processing_values[0] = 0;
 }
 processing_values[1] = mouseX;
 processing_values[2] = mouseY;
 */
//end of example

// send the values to Arduino.
sendSerialData();

}


void setupSerial() {
  printArray(Serial.list());
  myPort = new Serial(this, Serial.list()[2], 9600);
  // WARNING!
  // You will definitely get an error here.
  // Change the PORT_INDEX to 0 and try running it again.
  // And then, check the list of the ports,
  // find the port "/dev/cu.usbmodem----" or "/dev/tty.usbmodem----"
  // and replace PORT_INDEX above with the index number of the port.

  myPort.clear();
  // Throw out the first reading,
  // in case we started reading in the middle of a string from the sender.
  myString = myPort.readStringUntil( 10 );  // 10 = '\n'  Linefeed in ASCII
  myString = null;
}

void sendSerialData() {
  String data = "";
  for (int i=0; i<processing_values.length; i++) {
    data += processing_values[i];
    //if i is less than the index number of the last element in the values array
    if (i < processing_values.length-1) {
      data += ","; // add splitter character "," between each values element
    }
    //if it is the last element in the values array
    else {
      data += "\n"; // add the end of data character linefeed "\n"
    }
  }
  //write to Arduino
  myPort.write(data);
  print(data); // this prints to the console the values going to arduino
}

Homework:  Voice controlled puppet

After the practicing in exercise 2, everything went quite well.

Code

import processing.sound.*;

// declare an AudioIn object
AudioIn microphone;
// declare an Amplitude analysis object to detect the volume of sounds
Amplitude analysis;

void setup() {
   size(800, 800);
  // create the AudioIn object and select the mic as the input stream
  microphone = new AudioIn(this, 0);
  // start the mic input without routing it to the speakers
  microphone.start();
  // create the Amplitude analysis object
  analysis = new Amplitude(this);
  // use the microphone as the input for the analysis
  analysis.input(microphone);
}      

void draw() {
  println(analysis.analyze());
  background(165, 247, 175); 
 fill(63, 170, 250);
 ellipse(mouseX, mouseY, 400, 300);
 translate(mouseX, mouseY);
 fill(0);
 circle(-70, -50, 20);
  circle(70, -50, 20);
  
  // analyze the audio for its volume level
  float volume = analysis.analyze();
  // map the volume value to a useful scale
  float diameter = map(volume, 0, 1, 0, width/2);
  // draw a circle based on the microphone amplitude (volume)
  //circle(width/2, height/2, diameter); 
   fill(225, 147, 149);
 circle(0,60, 50+diameter);
}


Final Project-Step 3: Essay

A. PROJECT TITLE:

Feel the Forest

B. PROJECT STATEMENT OF PURPOSE:

The main project will focus on the relationship between humans and the forest. Forests provide people with important natural resources and aesthetic experiences. People’s experiences in the forests, from an aesthetic perspective, remind people of the civilization and the wild, the cities and the village, the power and intelligence of the natural world, etc. However, people living in modern cities usually focus on many social issues but forgot the importance and beauty of forests.  So I want to use my project to make people feel the power of forests and to remind people of the relationship between humans and nature.

C. PROJECT PLAN :

The project will try to make an immersive forest environment to mimic the experience in the forests. 

D. CONTEXT AND SIGNIFICANCE:

I first got my idea from a poetry by Wordsworth “Come, hear the woodland linnet, How sweet his music! on my life, There’s more of wisdom in it”, so at first I want to make the sound of forests, such as the sound of the wind, and so maybe I can combine the sound with the image of the forests. And I thought of the projects I researched during the first step, in which I am impressed by. the various kinds of interactions and the continuously interactive process. Moreover, since a keyword of my project is “feel”, I wanted to make it more immersive. The immersive experience may be a significant point of my projects, and I will try to combine immersive experience and interactive experience. The project is mainly focus on people living in modern cities. As discussed above, I want it to remind people the importance of forests and to feel their beauty. 

Recitation 8: Serial Communication

Exercise 1: Make a Processing Etch-A-Sketch

I first connect the circuit and run the Arduino Code, which went very well. Then, I tried to connect my Arduino with Processing. During this part, I met two difficulties. And a bid problem I met here was that I didn’t know how to restore the previous value of the variables. I searched for this question on the internet and learned that I could declare another variable and use this one to restore the previous value. The specific part in my code was to declare float xp and float yp, and let xp = x and yp = y at the end of the loop.

codes

Arduino code

/*
  AnalogReadSerial

  Reads an analog input on pin 0, prints the result to the Serial Monitor.
  Graphical representation is available using Serial Plotter (Tools > Serial Plotter menu).
  Attach the center pin of a potentiometer to pin A0, and the outside pins to +5V and ground.

  This example code is in the public domain.

  https://www.arduino.cc/en/Tutorial/BuiltInExamples/AnalogReadSerial
*/

// the setup routine runs once when you press reset:
void setup() {
  // initialize serial communication at 9600 bits per second:
  Serial.begin(9600);
}

// the loop routine runs over and over again forever:
void loop() {
  // read the input on analog pin 0:
  int sensorValue1 = analogRead(A0);
  int sensorValue2 = analogRead(A1);
  // print out the value you read:
  Serial.print(sensorValue1);
  Serial.print(",");
  Serial.print(sensorValue2);
Serial.println();   
  delay(100);        // delay in between reads for stability
}

Processing code

import processing.serial.*;
int NUM_OF_VALUES_FROM_ARDUINO = 2;   /** YOU MUST CHANGE THIS ACCORDING TO YOUR PROJECT **/
int sensorValues[];      /** this array stores values from Arduino **/
String myString = null;
Serial myPort;

 float xp;
float yp;
void setup() {
 
  setupSerial(); 
  size(800, 800);
  background(255);
}
void setupSerial() {
  printArray(Serial.list());
  myPort = new Serial(this, Serial.list()[2], 9600);

  myPort.clear();
  // Throw out the first reading,
  // in case we started reading in the middle of a string from the sender.
  myString = myPort.readStringUntil( 10 );  // 10 = '\n'  Linefeed in ASCII
  myString = null;

  sensorValues = new int[NUM_OF_VALUES_FROM_ARDUINO];
}
void draw() {
  getSerialData();
  printArray(sensorValues);
  
float x = map(sensorValues[0], 0, 1023, 0, 800);
float y = map(sensorValues[1], 0, 1023, 0, 800);
 line(x, y, xp, yp);
  
  xp = x;
  yp = y;
}

void getSerialData() {
  while (myPort.available() > 0) {
    myString = myPort.readStringUntil( 10 ); // 10 = '\n'  Linefeed in ASCII
    if (myString != null) {
      String[] serialInArray = split(trim(myString), ",");
      if (serialInArray.length == NUM_OF_VALUES_FROM_ARDUINO) {
        for (int i=0; i<serialInArray.length; i++) {
          sensorValues[i] = int(serialInArray[i]);
        }
      }
    }
  }
}

video&photo

Exercise 2:

I first wrote the code in processing. At first, in the void draw loop, to make the ball bounce, my code was like this:

if (x > width - 50 | x < 50 ){
  xs = -xs;
  processing_values[0] = 1;
}else{
processing_values[0] = 0;

Then I connected the Arduino. Since I only had one servo and this servo should only move when the ball reached either the left side or the right side of the screen. However, according to the above code, the servo moved when the ball reached both side, so I changed the code to this:

if (x > width - 50 ){
  xs = -xs;
  processing_values[0] = 1;
}else if ( x < 50){
  xs = -xs;
processing_values[0] = 0;
}else{
  processing_values[0] = 0;
}

Finally, it worked quite well.

Codes

Processing code

// IMA NYU Shanghai
// Interaction Lab

/**
 * This example is to send multiple values from Processing to Arduino.
 * You can find the arduino example file in the same folder which works with this Processing file.
 **/

import processing.serial.*;

int NUM_OF_VALUES_FROM_PROCESSING = 3;  /** YOU MUST CHANGE THIS ACCORDING TO YOUR PROJECT **/
int processing_values[] = new int[NUM_OF_VALUES_FROM_PROCESSING]; /** this array stores values you might want to send to Arduino **/
int x = 50;
int xs = 7;
Serial myPort;
String myString;


void setup() {
  //size(1000, 1000);
  fullScreen();
  background(0);
  setupSerial();
}

void draw() {
  background(0);
fill(255);
x = x + xs;
circle(x, height/2, 100);

if (x > width - 50 ){
  xs = -xs;
  processing_values[0] = 1;
}else if ( x < 50){
  xs = -xs;
processing_values[0] = 0;
}else{
  processing_values[0] = 0;
}
println(x);
  // send the values to Arduino.
  sendSerialData();

}

void setupSerial() {
  printArray(Serial.list());
  myPort = new Serial(this, Serial.list()[2], 9600);
  // WARNING!
  // You will definitely get an error here.
  // Change the PORT_INDEX to 0 and try running it again.
  // And then, check the list of the ports,
  // find the port "/dev/cu.usbmodem----" or "/dev/tty.usbmodem----" 
  // and replace PORT_INDEX above with the index number of the port.

  myPort.clear();
  // Throw out the first reading,
  // in case we started reading in the middle of a string from the sender.
  myString = myPort.readStringUntil( 10 );  // 10 = '\n'  Linefeed in ASCII
  myString = null;

}

void sendSerialData() {
  String data = "";
  for (int i=0; i<processing_values.length; i++) {
    data += processing_values[i];
    //if i is less than the index number of the last element in the values array
    if (i < processing_values.length-1) {
      data += ","; // add splitter character "," between each values element
    } 
    //if it is the last element in the values array
    else {
      data += "\n"; // add the end of data character linefeed "\n"
    }
    
  }
  //write to Arduino
  myPort.write(data);
  print(data); // this prints to the console the values going to arduino 
  
}

Arduino code

// IMA NYU Shanghai
// Interaction Lab

/**
  This example is to send multiple values from Processing to Arduino.
  You can find the Processing example file in the same folder which works with this Arduino file.
 **/

#define NUM_OF_VALUES_FROM_PROCESSING 3    /** YOU MUST CHANGE THIS ACCORDING TO YOUR PROJECT **/


/** DO NOT REMOVE THESE **/
int tempValue = 0;
int valueIndex = 0;

/* This is the array of values storing the data from Processing. */
int processing_values[NUM_OF_VALUES_FROM_PROCESSING];
#include<Servo.h>
Servo Myservo;

void setup() {
  Serial.begin(9600);
  //  pinMode(13, OUTPUT);
  Myservo.attach(10);
}

void loop() {
  getSerialData();

  // add your code here using elements in the values array


  if (processing_values[0] == 1) {
    //turn on an LED when the mouse is pressed
    Myservo.write(90);
    delay(1000);
     Serial.println("servo moves 90");
  } else {
    Myservo.write(0);
     Serial.println("servo moves 0");
  }

}
//receive serial data from Processing
void getSerialData() {
  while (Serial.available()) {
    char c = Serial.read();
    //switch - case checks the value of the variable in the switch function
    //in this case, the char c, then runs one of the cases that fit the value of the variable
    //for more information, visit the reference page: https://www.arduino.cc/en/Reference/SwitchCase
    switch (c) {
      //if the char c from Processing is a number between 0 and 9
      case '0'...'9':
        //save the value of char c to tempValue
        //but simultaneously rearrange the existing values saved in tempValue
        //for the digits received through char c to remain coherent
        //if this does not make sense and would like to know more, send an email to me!
        tempValue = tempValue * 10 + c - '0';
        break;
      //if the char c from Processing is a comma
      //indicating that the following values of char c is for the next element in the values array
      case ',':
        processing_values[valueIndex] = tempValue;
        //reset tempValue value
        tempValue = 0;
        //increment valuesIndex by 1
        valueIndex++;
        break;
      //if the char c from Processing is character 'n'
      //which signals that it is the end of data
      case '\n':
        //save the tempValue
        //this will b the last element in the values array
        processing_values[valueIndex] = tempValue;
        //reset tempValue and valueIndex values
        //to clear out the values array for the next round of readings from Processing
        tempValue = 0;
        valueIndex = 0;
        break;
    }
  }
}
Video

Homework

Step1

Step2

// IMA NYU Shanghai
// Interaction Lab
// For receiving multiple values from Arduino to Processing

/*
 * Based on the readStringUntil() example by Tom Igoe
 * https://processing.org/reference/libraries/serial/Serial_readStringUntil_.html
 */

import processing.serial.*;


int NUM_OF_VALUES_FROM_ARDUINO = 2;   /** YOU MUST CHANGE THIS ACCORDING TO YOUR PROJECT **/
int sensorValues[];      /** this array stores values from Arduino **/

String myString = null;
Serial myPort;

void setup() {
  size(600, 600);
  background(0);
  setupSerial();
}

void draw() {
  getSerialData();
  printArray(sensorValues);
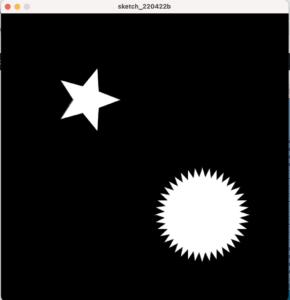
star(width*0.3, height*0.3, 30, 70, 5); 
star(width*0.7, height*0.7, 80, 100, 40);
  // use the values like this!
  // sensorValues[0] 

  // add your code

  //
}
void star(float x, float y, float radius1, float radius2, int npoints) {
  float angle = TWO_PI / npoints;
  float halfAngle = angle/2.0;
  beginShape();
  for (float a = 0; a < TWO_PI; a += angle) {
    float sx = x + cos(a) * radius2;
    float sy = y + sin(a) * radius2;
    vertex(sx, sy);
    sx = x + cos(a+halfAngle) * radius1;
    sy = y + sin(a+halfAngle) * radius1;
    vertex(sx, sy);
  }
  endShape(CLOSE);
}

void setupSerial() {
  printArray(Serial.list());
  myPort = new Serial(this, Serial.list()[ 2 ], 9600);
  // WARNING!
  // You will definitely get an error here.
  // Change the PORT_INDEX to 0 and try running it again.
  // And then, check the list of the ports,
  // find the port "/dev/cu.usbmodem----" or "/dev/tty.usbmodem----" 
  // and replace PORT_INDEX above with the index number of the port.

  myPort.clear();
  // Throw out the first reading,
  // in case we started reading in the middle of a string from the sender.
  myString = myPort.readStringUntil( 10 );  // 10 = '\n'  Linefeed in ASCII
  myString = null;

  sensorValues = new int[NUM_OF_VALUES_FROM_ARDUINO];
}

void getSerialData() {
  while (myPort.available() > 0) {
    myString = myPort.readStringUntil( 10 ); // 10 = '\n'  Linefeed in ASCII
    if (myString != null) {
      String[] serialInArray = split(trim(myString), ",");
      if (serialInArray.length == NUM_OF_VALUES_FROM_ARDUINO) {
        for (int i=0; i<serialInArray.length; i++) {
          sensorValues[i] = int(serialInArray[i]);
        }
      }
    }
  }
}

Step3

Final Project-Step 2: Project Proposal

Proposal 1

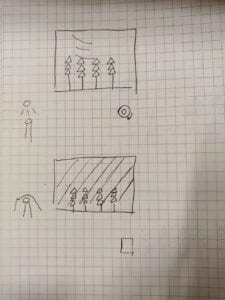
A. Project title: Feeling the Forests

B. Project statement of purpose:

Forests are an important part of the earth. Outside the human society, it presents the great power of the natural world. There are special sceneries of plants, animals, streams, and variable weather conditions in the forests. Forests provide with people unique aesthetic experiences and thoughts about life, the world, and human beings ourselves. In nowadays society, we live in the cities and focus on many social issues, which makes us sometimes ignore the beauty of nature. I want to use this project to let people feel the forest, to feel the power of nature.

With images of forests shown by processing, the participants can stand in front of an “operating table” and use some sensors to change the environment in the forest. For example, they can use a potentiometer to control the wind, and the trees will swing when there are winds. There is also a light sensor, when the light is covered it becomes night. The forest will become dark and there will be some animals, I want to use some output to show this though I haven’t decided which output equipment I’m going to use.

C. Drawings and sketches


Proposal 2

A. Project title: Competing

B. Project statement of purpose:

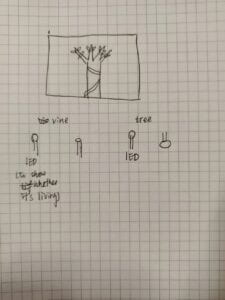
This project is also about forests. To be more specific, it is about a special phenomenon in the rainforest: Strangling. Forest is quiet and harmonious as someone may think, on the contrary, it is full of competition. Some vines climb on some big and high trees to get more sunlight. Strangler figs suck up the nutrients from their’ victims, causing them to die eventually. 

The project needs two participants. One represents the power of vines, and the other represents the original tree. “Vines” should try to cover the light sensor from being lit by the light, and the “tree” should fight against by adding forces to a force sensitive resistor.

C. Drawings and sketches


Proposal 3

A. Project title: A room with nowhere to hide/unescapable room

B. Project statement of purpose:

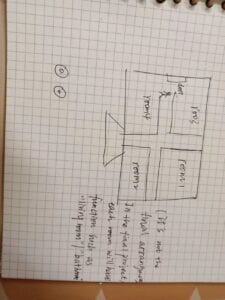
In nowadays society, surveillance cameras are almost everywhere, but what about our privacy? The project will have a storyline: a person went back to his/her room but found he/she was under surveillance. He/she wanted to hide but only to find that no matter where he/she went he/she would be noticed and informed that he/she was under surveillance. The room will be sketched in processing and the participants can control the person’s position with two potentiometers/ultrasonic sensors. After trying twice, he/she could leave the room by standing in front of the door and pressing a button (to open the door), however, once he/she left the room a buzzer would buzz very sharply, and the only way to make it stop buzzing was to return the room. I want to use this project to make people think about the relationship between surveillance and privacy.

C. Drawings and sketches:

Final Project-PREPARATORY RESEARCH AND ANALYSIS

First project

Shan

This is a project that connects the meanings of hand fan and mountain, whose Chinese names are both “shan”. It contains the interaction between the audience movements and the images in the animation and the movements of the hand fan. I think it provides can successful interaction experience for the following reason:

The combination of interactions: It is not a simply action-reaction interaction, but a series of interactions as a whole interactive process. For example, the first time the audience wave the arm, the hand fans close, and the image changes, but the interactive process does not end, the audience can continuously wave the arm and new changes are happening in the image.

The multiple kinds of reactions: If divide one interaction into action and reaction, the reaction from the installation to the participants’ movements is various. For example, the images change in different ways, and both the image and the hand fan react.

The conversations between different subjects: not only the audience can interact with the installation, but the images of mountains/bamboo forests can also converse with the form of the hand fans.

Other factors that contribute to excellent experience: In the article ” Art, Interaction and Engagement”, the author mentions some examples that “was time-based and certainly involved interaction, but the interaction was essentially quite simple”. Therefore, I think to make a successful interaction experience, not only the complexity of interaction, but other factors can also be taken into consideration. As for this project, the concept of the whole project that combining hand fans and mountains to present Chinese traditional culture is very novel, and the animation is very beautiful, etc.


Second Project

In to the Wind

This is a project that can switch the participant’s breath to the wind, and make the wind visible by making bubbles. It is also a continuous and fluent interactive process. Participants can observe the bubbles they make and adjust them as they want. 


Recitation 7: Functions and Arrays

Part 1

屏幕录制2022-04-13 下午4.55.23

void setup() {
  size(800, 800);
}
void draw() {
  int a = millis()/1000;
  if (a%2==0) {
    background(178, 247, 252);
  } else {
    background(150, 232, 150);
  }  

  for (int i = 50; i < 800; i+=100) {
    for (int j = 50; j < 800; j+=100) {
      noStroke();
      if (a%2==0) {
        fill(255, 203, 232);
      } else {
        fill(255, 251, 118);
      }
      ellipse(i, j, 100, 20);
      ellipse(i, j, 20, 100);
      fill(255);
      circle(i, j, 18);
    }
  }
}

Part 2

step1

屏幕录制2022-04-13 下午8.54.45

//local variable
int n = 10;
float[] x = new float[n];
float[] y = new float[n];
float[] c = new float[n*n];

void setup() {

  size(800, 800);
  for (int i = 0; i < n; i++) {
    for (int j = 0; j < n; j++) { //nested loop
      //Fill the arrays with values for the positions and colors
      x[i] = 100*i + 50;
      y[j] = 100*j + 50;
      c[i+n*j] = random(0, 255);
    }
  }
}


void draw() {
  int a = millis()/1000;
  if (a%2==0) {
    background(178, c[0], 252);
  } else {
    background(c[0], 247, 150);
  }

  for (int i = 0; i < n; i++) {
    for (int j = 0; j < n; j++) {

    
      noStroke();
      if (a%2==0) {
        fill(c[i+n*j], c[i+n*j], 232);
      } else {
        fill(255, 251, c[i+n*j]);
      }
      ellipse(x[i], y[j], 100, 20);
      ellipse(x[i], y[j], 20, 100);
      fill(255);
      circle(x[i], y[j], 18);


    }
  }
}

step2

屏幕录制2022-04-13 下午8.50.52

//local variable
int n = 10;
float[] x = new float[n];
float[] y = new float[n];
float[] c = new float[n*n];

void setup() {

  size(800, 800);
  for (int i = 0; i < n; i++) {
    for (int j = 0; j < n; j++) { //nested loop
      //Fill the arrays with values for the positions and colors
      x[i] = 100*i + 50;
      y[j] = 100*j + 50;
      c[i+n*j] = random(0, 255);
    }
  }
}


void draw() {
  int a = millis()/1000;
  if (a%2==0) {
    background(178, c[0], 252);
  } else {
    background(c[0], 247, 150);
  }

  for (int i = 0; i < n; i++) {
    for (int j = 0; j < n; j++) {

      pushMatrix(); //store the new coordinate system
      translate(x[i], y[j]);
      rotate(frameCount/400.0);

      noStroke();
      if (a%2==0) {
        fill(c[i+n*j], c[i+n*j], 232);
      } else {
        fill(255, 251, c[i+n*j]);
      }
      ellipse(0, 0, 100, 20);
      ellipse(0, 0, 20, 100);
      fill(255);
      circle(0, 0, 18);

      popMatrix(); //restore the coordinate system
    }
  }
}

questions

  • Q1: In the reading “Art, Interaction and Engagement” by Ernest Edmonds, he identifies four situations in an interactive artwork: ‘Static’, ‘Dynamic-Passive’, ‘Dynamic-Interactive’ and ‘Dynamic-Interactive(Varying)’. From the exercise you did today which situations do you identify in every part you executed? Explain.

I think both of the parts were dynamic-passive. In part one, the color of the graphic could change according to the time change. And in part two, not only does the color change, but the combination of ellipses and circles also rotates around their center. However, none of them can be influenced by the audience.

  • Q2: What is the benefit of using arrays? How might you use arrays in a potential project?

I think arrays can store a lot of variables. With the help of for loop, it can present a series of variables that fit certain regulations. Even if there is no for loop, it can also present some variables that have something in common. And I think there are at least two advantages that are easy to find but very helpful. Firstly, it can save space and make the code look clearer, which may help avoid some mistakes. Secondly, it can function as a kind of mark, so it can be used to represent things that have something in common. For example, if there are two different graphics in the same project and each of them should use many different variables, maybe we can set an array []A and use A[0], A[1] as variables in the first graphic and set array []B and use B[0], B[1] as variables in the second graphic.

And these two advantages are also two ways that I may use arrays. I can use it to present a lot of variables, or I may use it to classify the variables. 

Recitation 6: Animating an Interactive Poster

Recitation:

屏幕录制2022-04-08 下午8.33.41

int x = 120;
float scale;

void setup(){
  size(1024, 768);
}

void draw(){
  background(29, 43, 113);
  fill(x);
  rect(200, 380, 120, 100);
  rect(180, 500, 160, 200);
  rect(230, 700, 25, 68);
  rect(270, 700, 25, 68);
  rect(340,540, 40, 25);
  rect(380, 515, 25, 50);
  rect(155, 540, 25, 90);
  rect(255, 480 , 10,20);
  triangle(390, 515, 387, 500, 413, 510);
  line(387, 498, 380, 393);
  line(413, 508, 535, 480);
  
pushMatrix();
translate(390, 515);
beginShape();
fill(255, 247, 0);
float m = millis()/10;
  vertex(-2, -15);
  vertex(23, -5);
  vertex(1.45*m, -0.35*m);
  vertex(-0.10*m, -1.22*m);
 endShape();
popMatrix();


 textSize(128);
fill(0);
text("I  M  A", 480, 250); 
fill(0);
textSize(30);
text("Spring of 2022 End-of-Semester ", 450, 290);
fill(0);
textSize(128);
text("S H O W", 430, 400);

  textSize(25);
fill(225);
text("Location: 8th floor", 650, 550);
textSize(25);
text("Day: Friday May 13", 650,580);
textSize(25);
text("Time: 6pm to 8pm", 650,610);
  
}

Homework:

屏幕录制2022-04-08 下午9.51.04

int x = 120;
float scale;
int r = int (random(0, 255)); 
int g = int (random(0, 255));   
int b = int (random(0, 255)); 
void setup(){
  size(1024, 768);
}

void draw(){
  background(29, 43, 113);
  fill(x);
  rect(200, 380, 120, 100);
  rect(180, 500, 160, 200);
  rect(230, 700, 25, 68);
  rect(270, 700, 25, 68);
  rect(340,540, 40, 25);
  rect(380, 515, 25, 50);
  rect(155, 540, 25, 90);
  rect(255, 480 , 10,20);
  triangle(390, 515, 387, 500, 413, 510);
  line(387, 498, 380, 393);
  line(413, 508, 535, 480);
  
pushMatrix();
translate(390, 515);
beginShape();
fill(255, 247, 0);


if(keyPressed){
  fill(r,g,b);
}
float m = millis()/10;
  vertex(-2, -15);
  vertex(23, -5);
  vertex(1.45*m, -0.35*m);
  vertex(-0.10*m, -1.22*m);
 endShape();
popMatrix();
 textSize(128);
fill(0);
text("I  M  A", 480, 250); 
fill(0);
textSize(30);
text("Spring of 2022 End-of-Semester ", 450, 290);
fill(0);
textSize(128);
text("S H O W", 430, 400);

  textSize(25);
fill(225);
text("Location: 8th floor", 650, 550);
textSize(25);
text("Day: Friday May 13", 650,580);
textSize(25);
text("Time: 6pm to 8pm", 650,610);

}

What I learned from the exercise:

I had a deep memory about the order the computer read my code. Though I had a basic knowledge about the recitation, I didn’t really know what it meant exactly. However, when I was writing the code, there are different colors for different graphics, and if the order is wrong, the graphic could not be filled with the color I wanted. I do understand what the order mean and memory it now.

The second thing I learned is to draw the shape I wanted with shapeBegin() and shapeEnd(). I can use these two functions at the beginning and the end, and use vertex() to decide some fixed points and the computer will connect the points to make it a graphic.

Also, I tried to translate to change the origin point of the coordinate system.