Looking back on my previous research project, the Group Project, I wouldn’t say that it impacted my work on this project. What I liked about this project compared to the previous one was that I could choose my partner, unlike the group project where our groups were made for us by the instructors. What specifically triggered my idea of interaction and how I applied it to our project was using flex sensors in class. We had a lesson on these sensors and how to flex them to create an output; the output we focused on was a sound coming from our buzzers. What’s unique about this project is that it essentially acts as a musical instrument that is 100% interactive through your hands, and all it uses is some wires and buzzers.
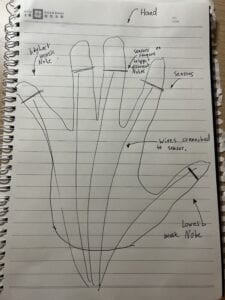
Our initial design was to build a single hand that used tilt sensors that went moved would create a sound from a buzzer. After consultation with an instructor, we switched to flex sensors. We did our project very user-friendly, and the whole point was the users interacted with it. We made the rings on the fingers connect to our flex sensors and then used tape and wiring to attach the flex sensor rings to this platform that is used as a handle that the user would put on their hand. We had to make decisions for the hand size based on various factors. During the design and measurement process, we had classmates try on our hand, and we had to figure out the perfect measurement would make it seem like a “fits all sizes” hand. To make this hand, we used Flex sensors, black electrical tape to hold things together, Arduino board, M/M wires, M/F wires to make the project easier to move, cardboard for the structure, and hot glue for added support.
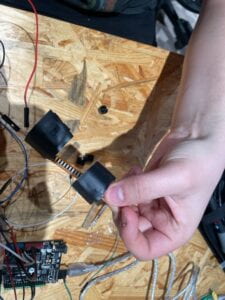
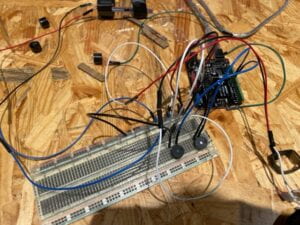
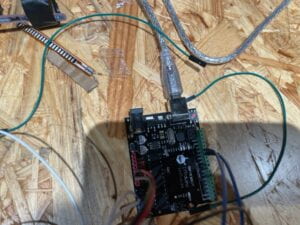
We originally started off with a sketch that included a hand, wires sort of taped to the hand, and a tilt sensor on each finger. As previously mentioned, we were advised to switch from a tilt sensor to a flex sensor when building it. We then changed it from a sensor on all five fingers to only three fingers, thumb, pointer, and middle finger. We only did three fingers because an instructor said that our breadboard and Arduino wouldn’t be able to process five buzzers at once, so we switched to the maximum allowed, which was three. During the building process, my partner and I decided that he’ll work on the code and ill work on the physical project. He specializes in code, and I work better on projects, making our building process very simple. When user testing came around, we had our hand built and ready for testing. The main issues we came across were 1. Users didn’t know how to put their hand on it, 2. It wasn’t friendly towards people with smaller hands, 3. Extend the wires so that you have more maneuverability.
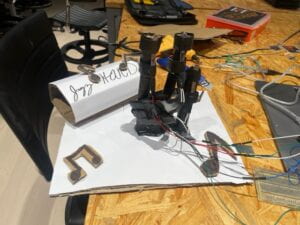
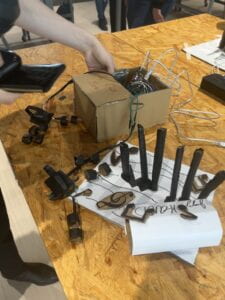
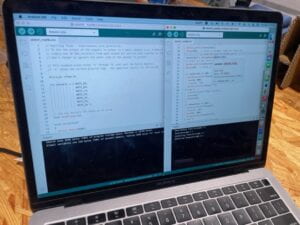
We took all of these suggestions and implemented them in our project. They made our project 10 times more efficient and effective. Our biggest addition to the project was making another hand, hence the name Jazz Hands. We made a mirror image of the first hand and used all of the suggestions in the second build.
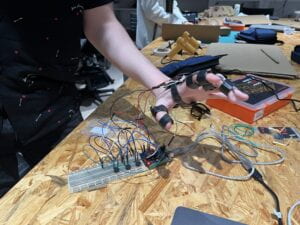
The original goal of this project was to be able to make music by moving your hands. Our project’s goals directly aligned with our definition of interaction because by creating an input which in our case is moving your hands/fingers, you create an output which is the notes coming from the buzzer. My audience interacted with our project exactly as intended. They moved their fingers and every time they did it, a note played from the buzzer. They were able to create simple melodies and tunes. I think a major improvement we could have made was to make the buzzers louder or find something similar to the buzzer that could amplify the sound. Our biggest takeaway from this project is to keep testing over and over and ask our users for suggestions that could make our project better. Our biggest improvements came from user suggestions and this made our end project better and stronger.
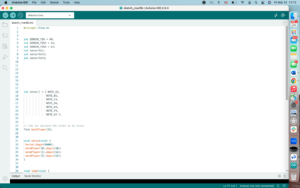
Additional material
#include

int SENSOR_PIN = A0;
int SENSOR_PIN2 = A1;
int SENSOR_PIN3 = A2;
int sensorVal;
int sensorVal2;
int sensorVal3;

int notes[] = { NOTE_A3,
NOTE_B3,
NOTE_C4,
NOTE_D4,
NOTE_E4,
NOTE_F4,
NOTE_G4 };

// You can declare the tones as an array
Tone notePlayer[3];

void setup(void) {
Serial.begin(9600);
notePlayer[0].begin(10);
notePlayer[1].begin(11);
notePlayer[2].begin(12);
}

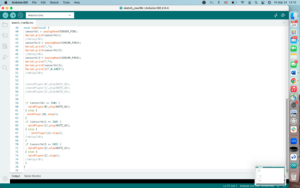
void loop(void) {
sensorVal = analogRead(SENSOR_PIN);
Serial.print(sensorVal);
//delay(20);
sensorVal2 = analogRead(SENSOR_PIN2);
Serial.print(",");
Serial.print(sensorVal2);
//delay(20);
sensorVal3 = analogRead(SENSOR_PIN3);
Serial.print(",");
Serial.print(sensorVal3);
Serial.println(",0,1023");
//delay(20);

//notePlayer[0].play(NOTE_B4);
//notePlayer[1].play(NOTE_A3);
//notePlayer[2].play(NOTE_E4);

if (sensorVal >= 250) {
notePlayer[0].play(NOTE_B4);
} else {
notePlayer[0].stop();
}
if (sensorVal2 >= 250) {
notePlayer[1].play(NOTE_A3);
} else {
notePlayer[1].stop();
//delay(20);
}
if (sensorVal3 <= 245) {
notePlayer[2].play(NOTE_E4);
} else {
notePlayer[2].stop();
//delay(20);
}
}