The Process of Building the Circuits
CIRCUIT 1: DOORBELL
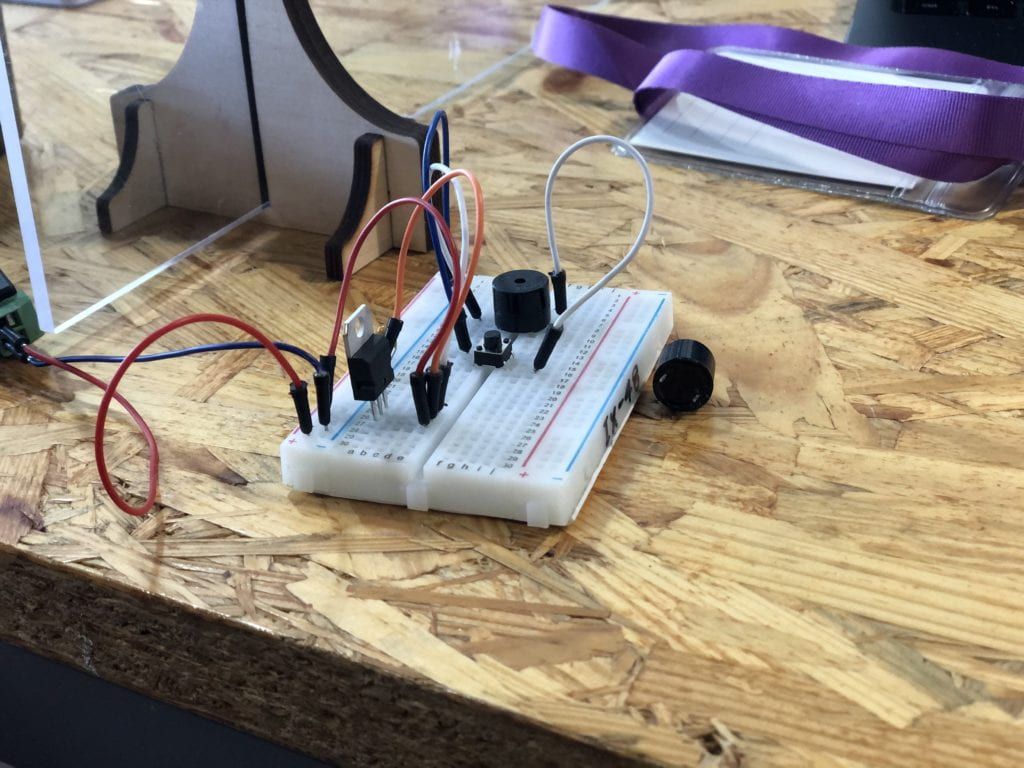
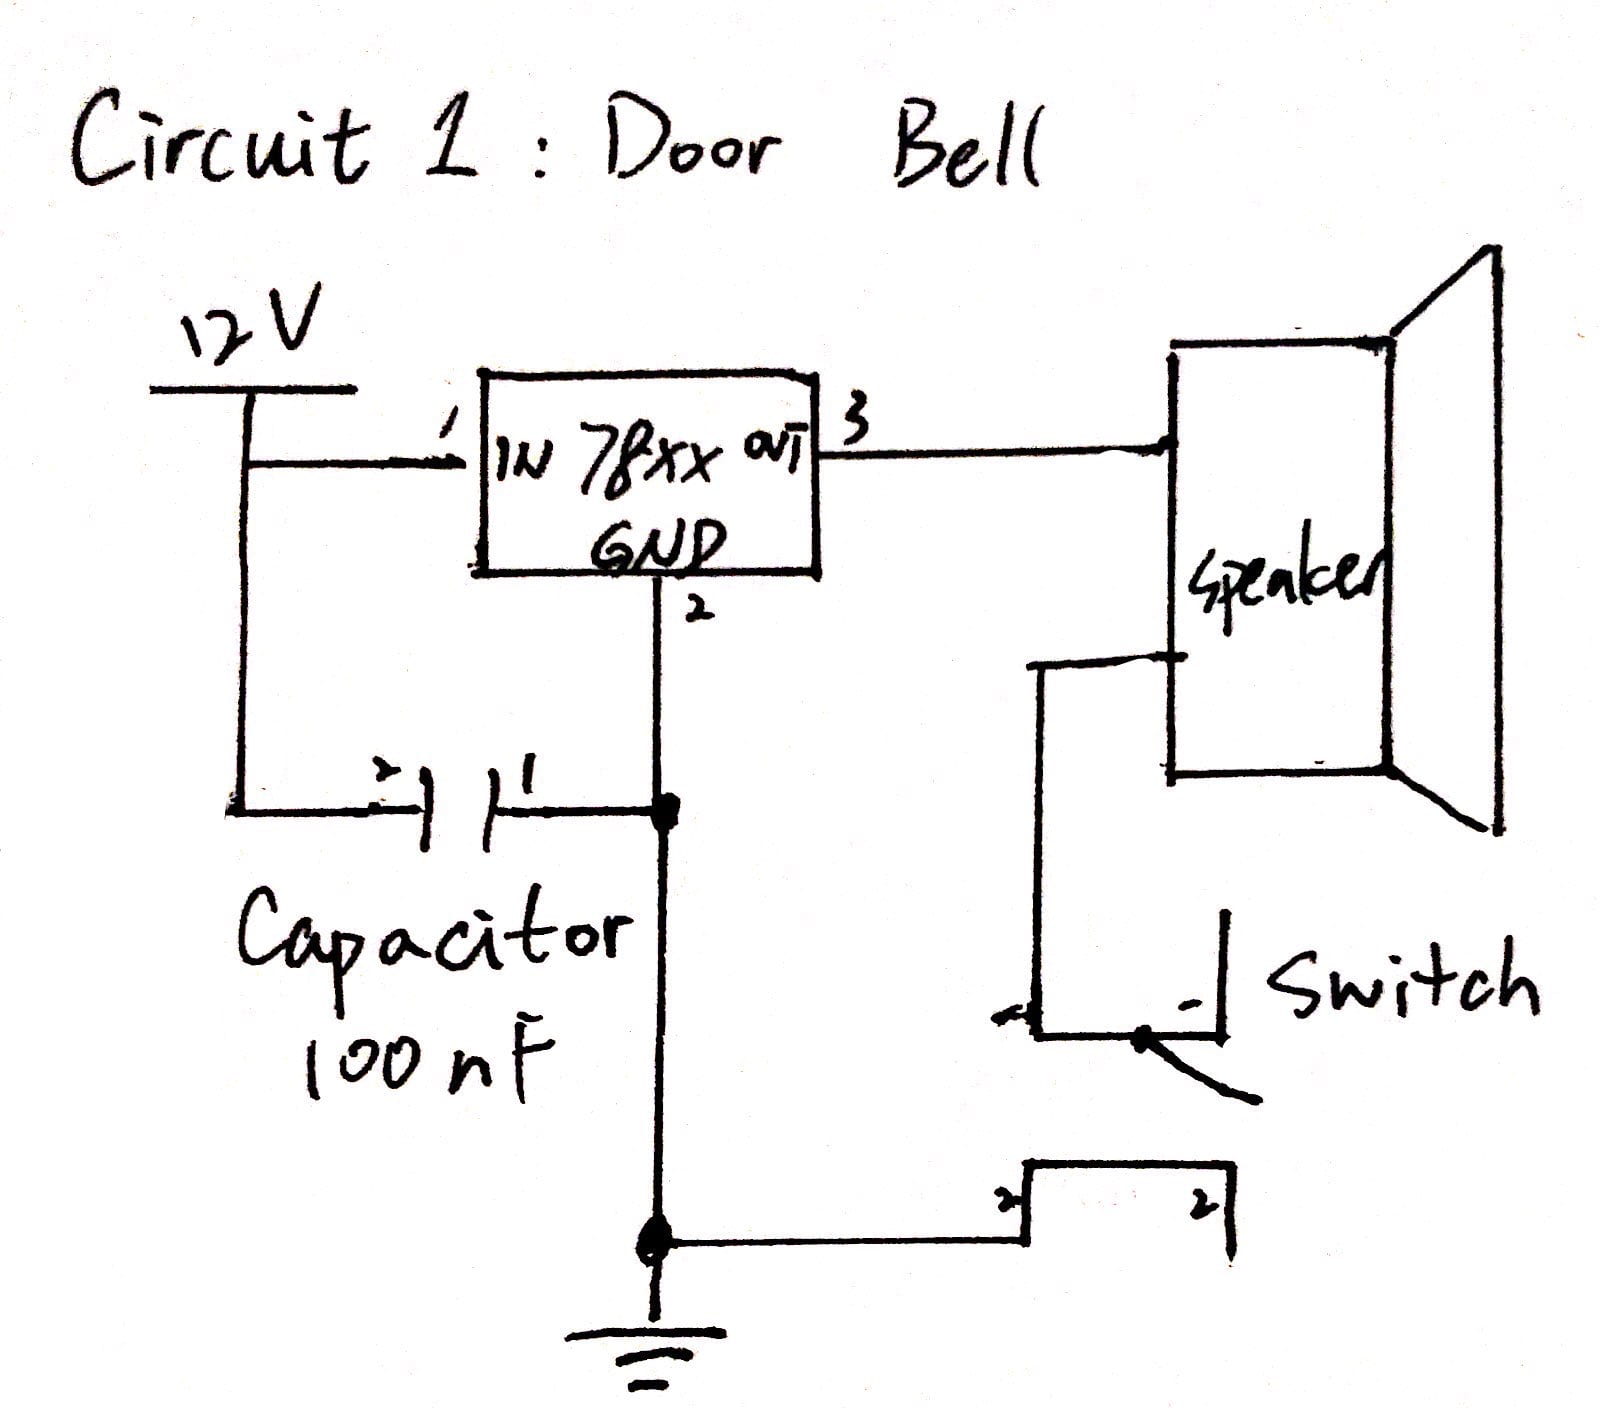
By trying for completing this circuit three times, my partner and I finally made it work well. In this circuit, we used many components. Breadboard and wires were necessary components in this circuit in order to connect each component together. There’s also a voltage regulator that is a system designed to automatically maintain a constant voltage level. The capacitor also played an important role in this circuit, which stores electricity while current is flowing into them, then release the energy when the incoming current is removed. The switch in this circuit is a control that can be used to interrupt the flow of current through a circuit. The most crucial part of this circuit was the speaker that would utter the sound of “bi” while the circuit was connected. As you can see, we’ve failed twice while making this circuit. At first, although we’ve taken the lecture before we still had no idea how to connect each component together to make them work well. So, we went to the instructor for help. With the help of the instructor, we finally truly understood how to the rule of connection. But after we finished the circuit, when we turned on the switch, we found that the circuit still didn’t work. After double-checking, we couldn’t find any problems, therefore, we turned to the instructor again. Trying several times with the instructor, we finally found that the voltage regulator and speaker we’ve got were actually broken. Ultimately, we succeeded in getting the circuit to work the third time.
CIRCUIT 2: LAMP
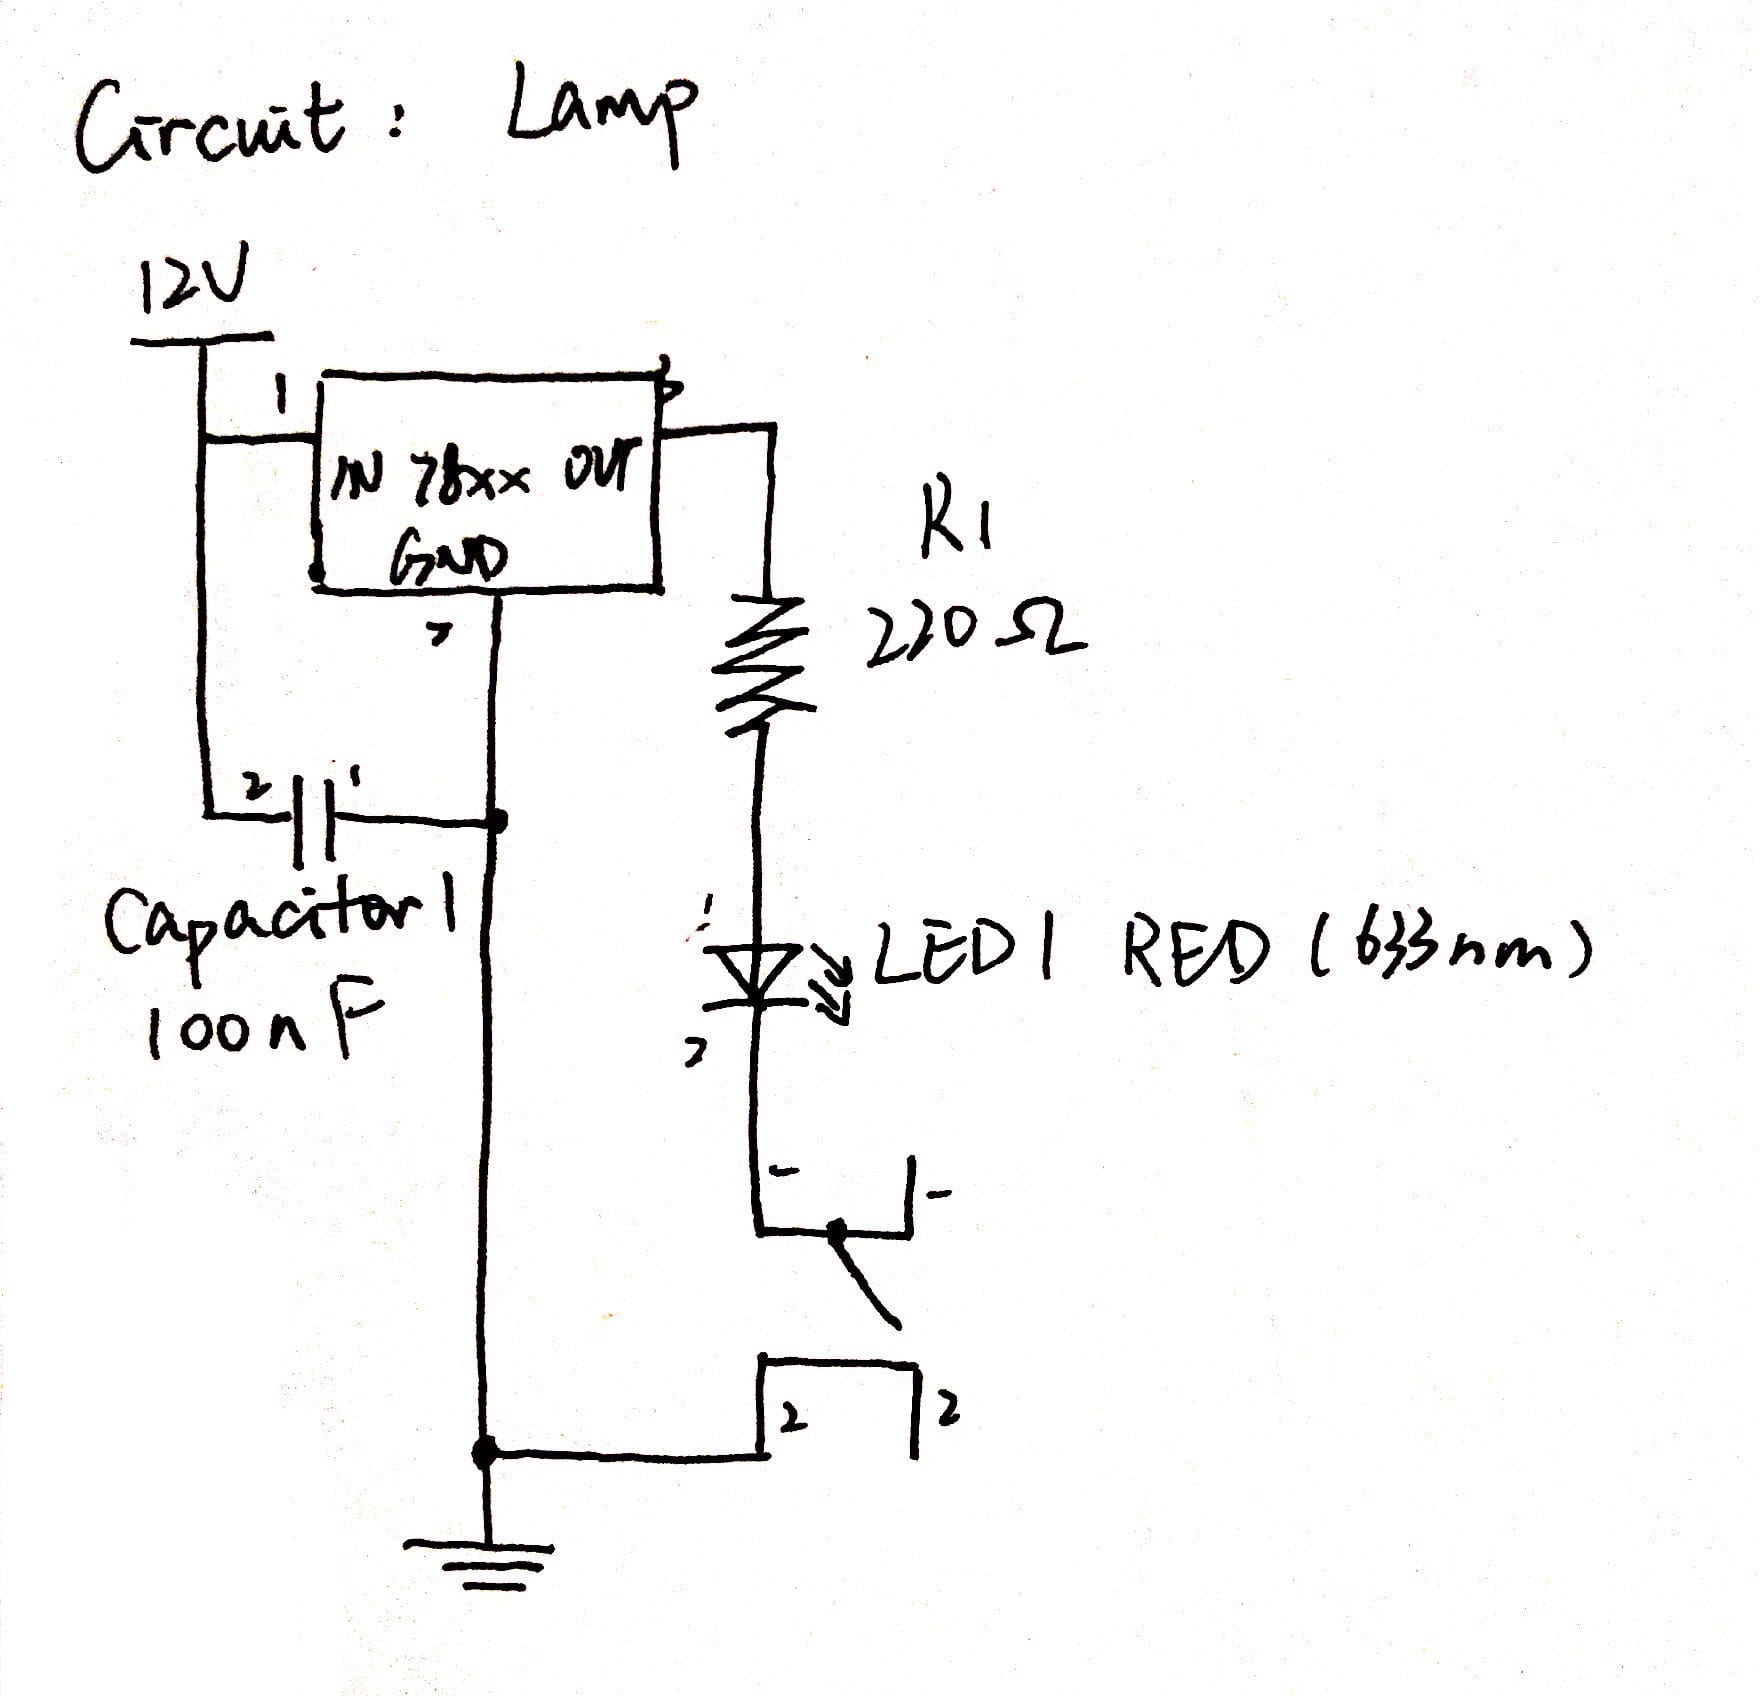
For this circuit, we’ve tried two times to let it work well. In this circuit, we’ve used mostly the same component in the former circuit except for the speaker. Instead, we used a 220Ω resistor and a LED. The 220Ω resistor resists the flow of electricity and controls the flow of current. LED is a little light that will emit light when the current goes through. As mentioned before, we failed at first. When we turned on the switch, we found there’s nothing changed. Therefore, we made a double check and found that we actually put both plugs of the power on the positive side, which meant that the circuit was short-circuited. And after we dealt with this problem, the circuit went well.
CIRCUIT 3: DIMMABLE LAMP
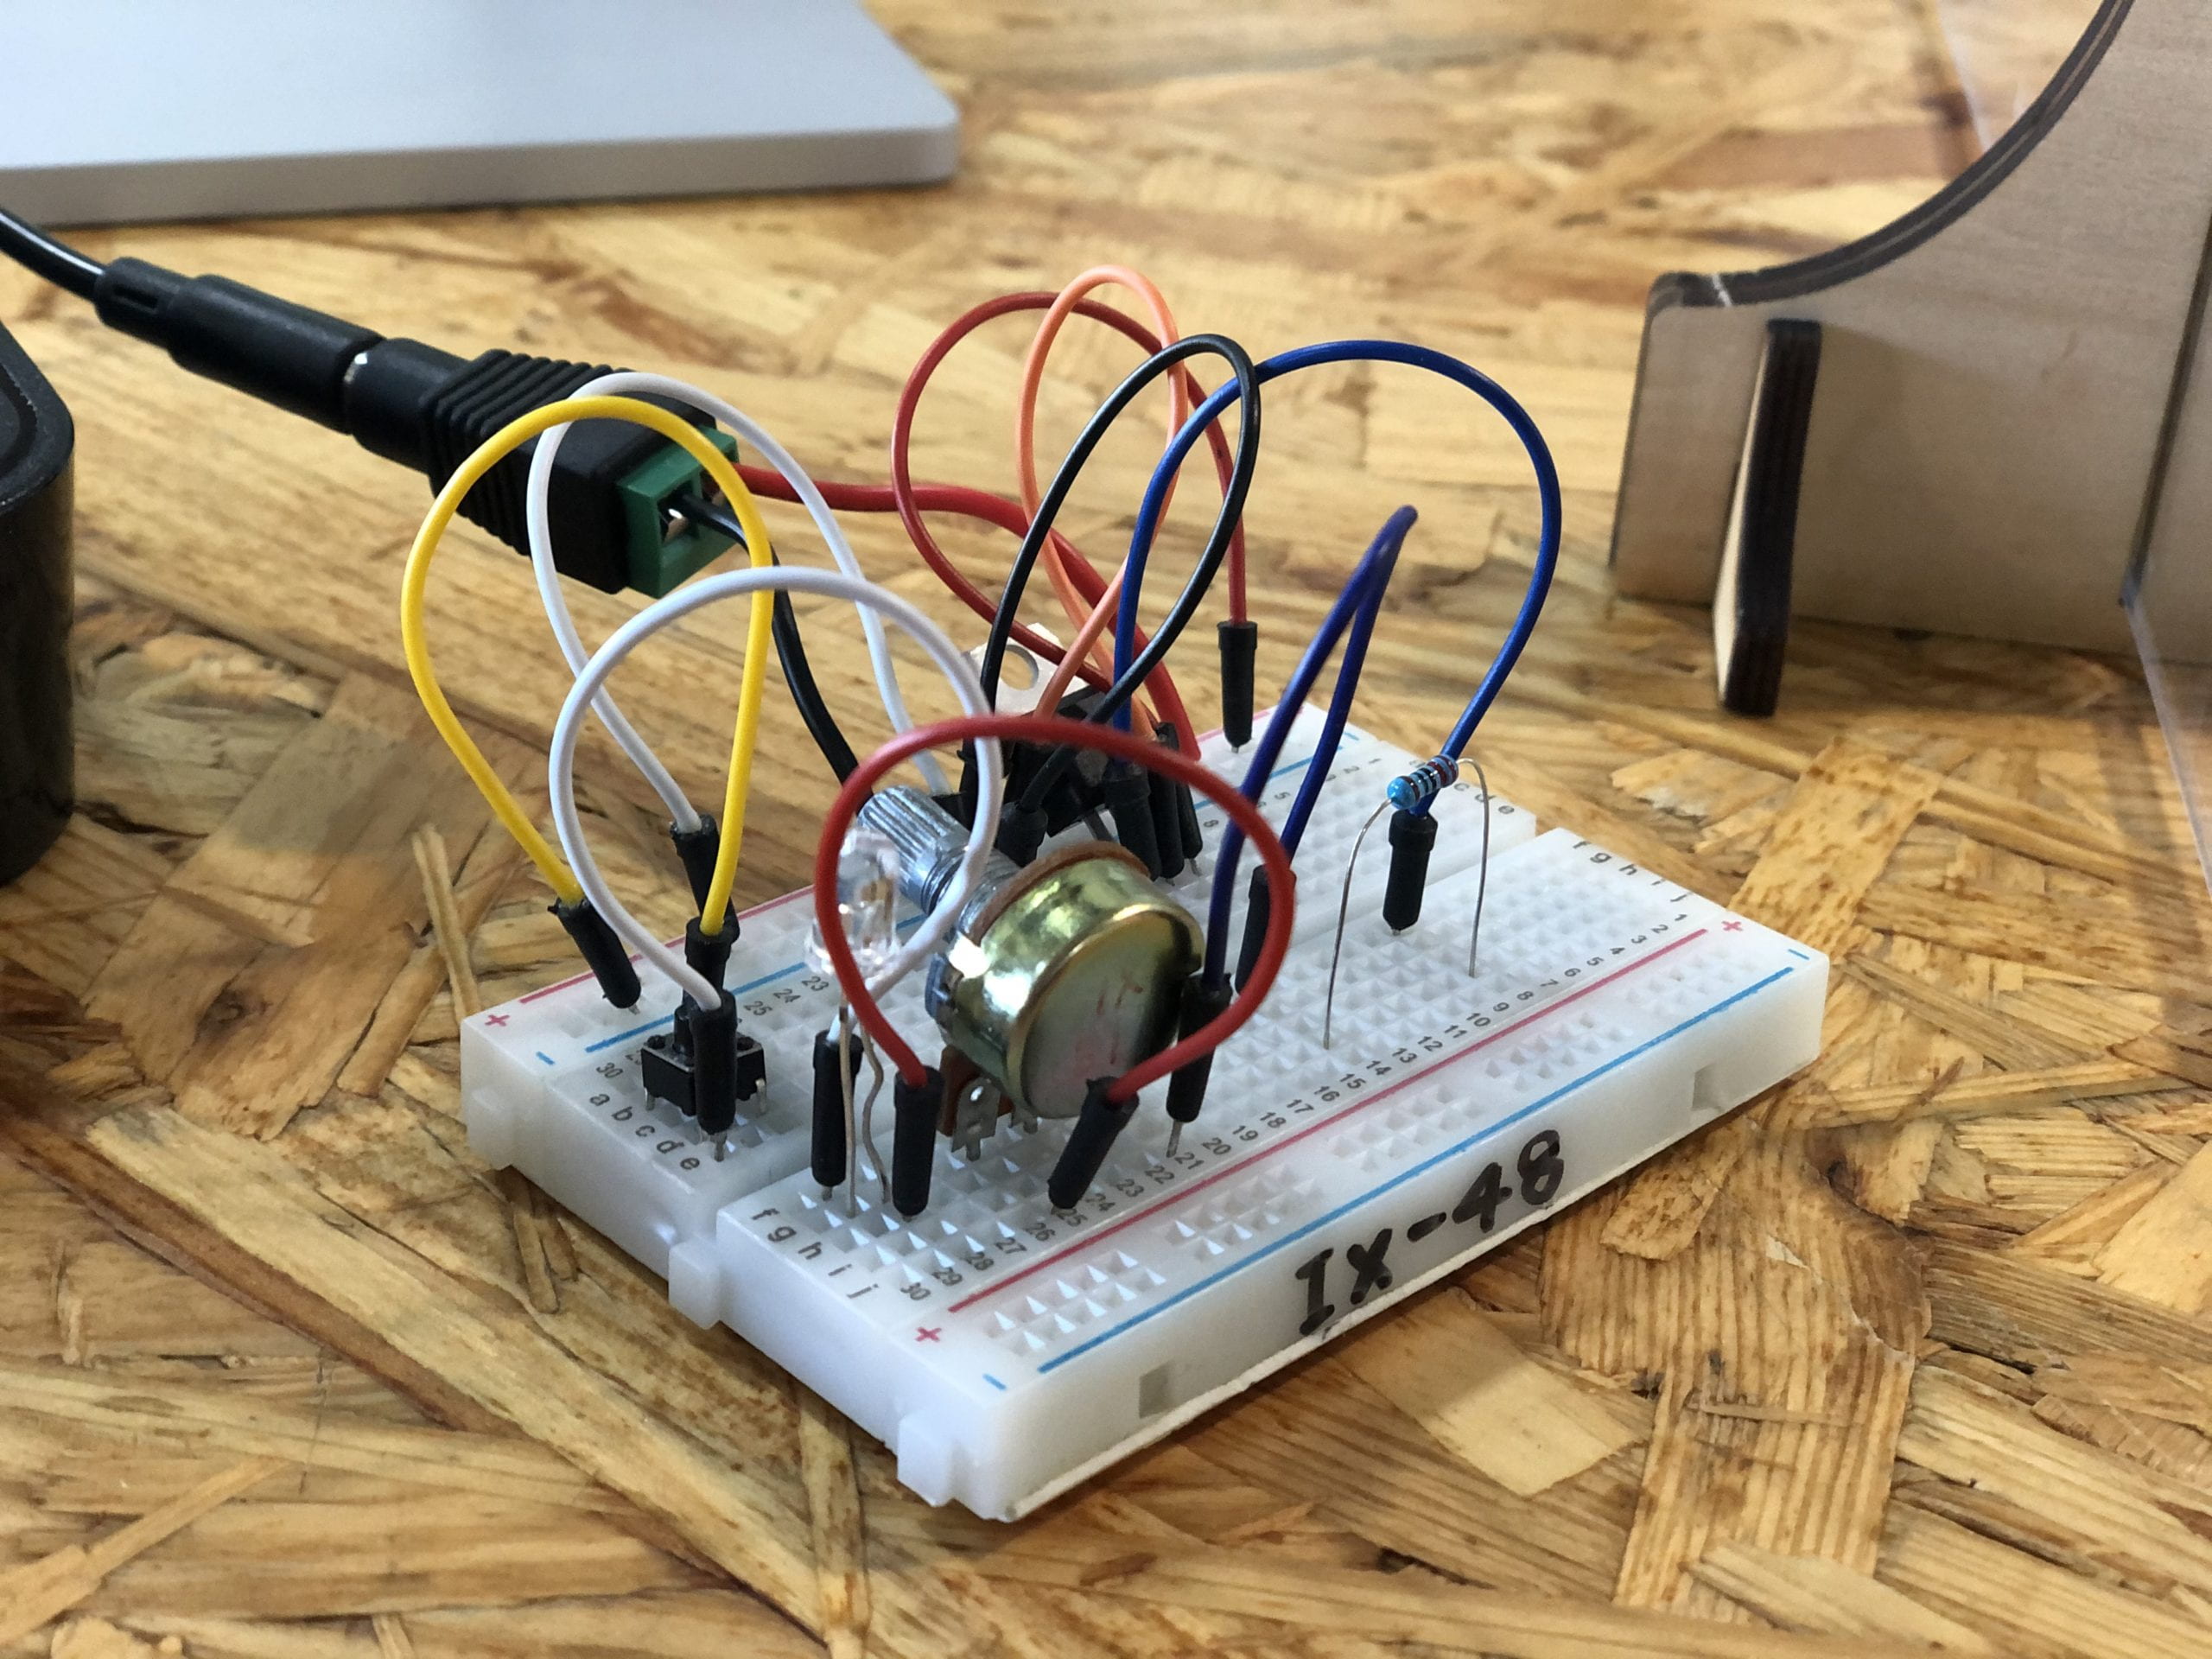
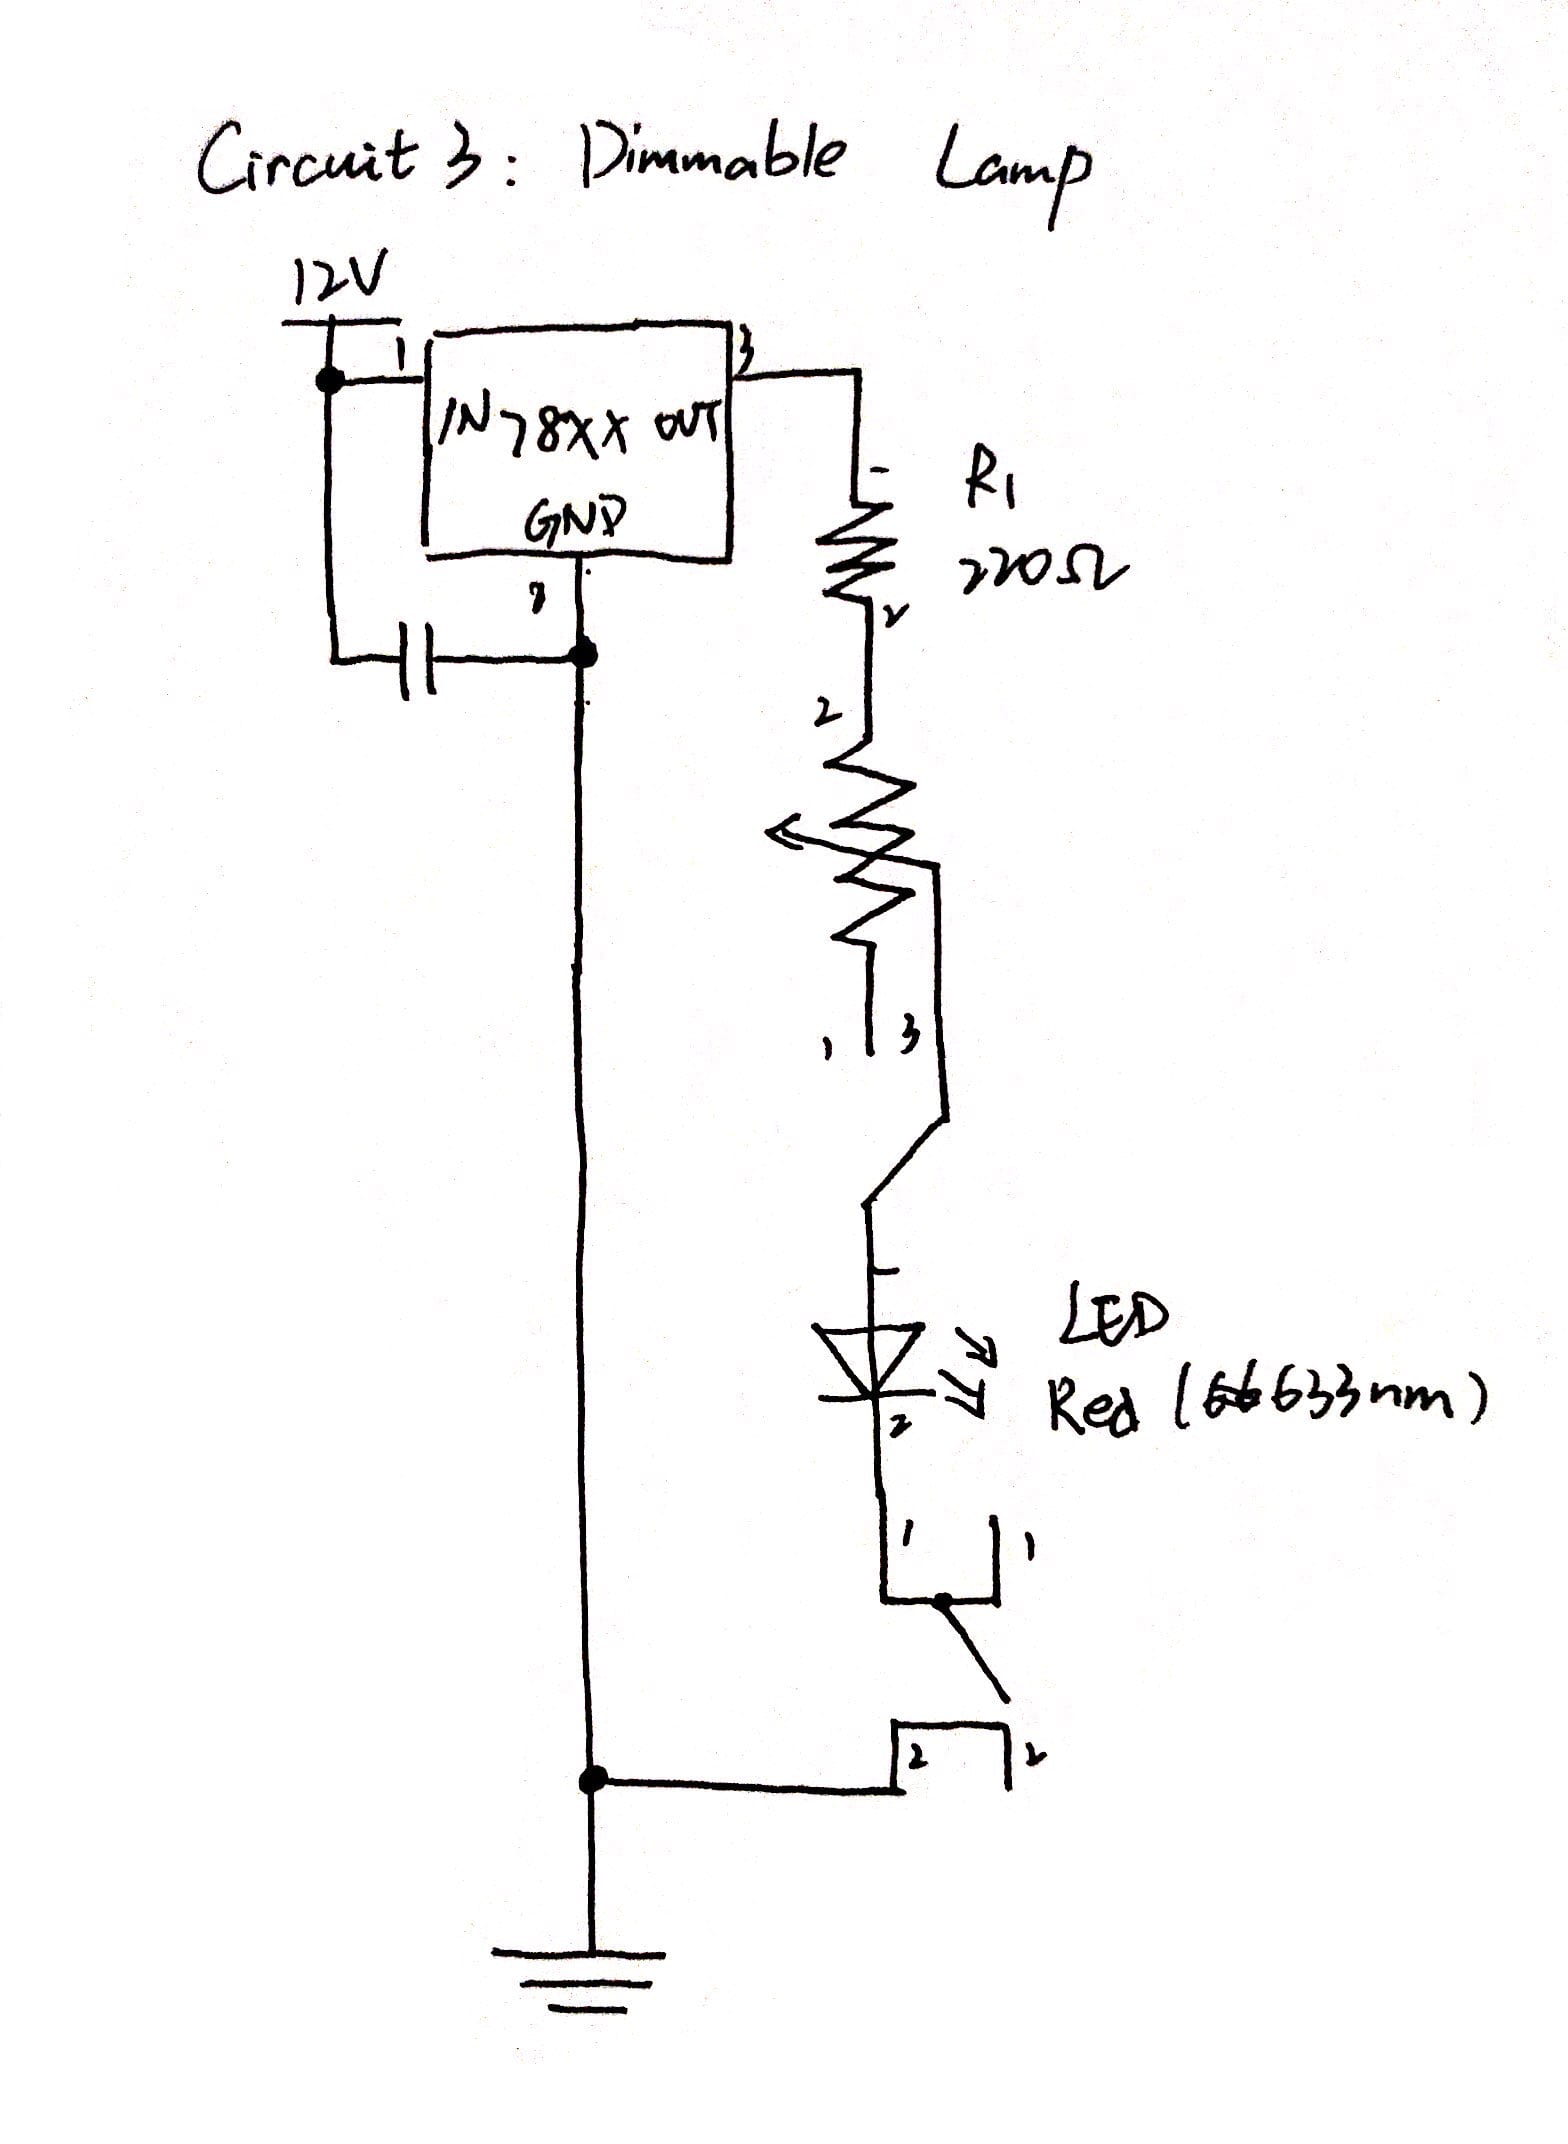
This is the best circuit we’ve done among the three circuits that we had to finish in the recitation. We succeeded all at once. In this circuit, we also used a breadboard, wires, a voltage regulator, a capacitor, a switch, a 220Ω resistor and a LED that work just like what I’ve mentioned before. Besides, we used a variable resistor that can vary the amount of resistance.
Questions
- In my opinion, the circuits I built on Friday concluded interaction. According to the article “The Art of Interactive Design”, we can find that “If we want to get academic, I suppose we could replace listen, think, and speak with input, process, and output, but that’s so gauchely techie”, which means that interaction is the course of “input, process, and output”. As far as I’m concerned, my action of connecting the circuit with the power is one form of “input”. When I turned on the switch, the circuit actually experienced a form of “process”. And finally, when the LED or the speaker worked, they were making their “output”. Furthermore, in this article, it says that “here’s a key point about the interactive process: There are two actors, not one”. In my view, the circuit and I have met this requirement.
- After watching the video of “Zack Lieberman’s video”, I think that Interactive Design is a kind of concept, and Physical Computing is the tool to realize that concept. And after this process, the final work, the actual performance of Interactive Art will be done. Though the three artifacts all can display this idea, I want to choose the third artifact mentioned by Zack Lieberman in his video, because, in my opinion, it’s the most typical and impressive one. The third artifact is EyeWriter. With the help of software, a kind of physical computing, Tony Quan could express his concept, his interactive design, and turned it into reality, completing his final interactive art.
