Final Project Reflection
By Xiaoyi Cai Date: 5/19/2021
I. BRIEF INTRODUCTION
Project Name: “Drink Water!!”
Designers: Mia & Amber
Instructor: Eric
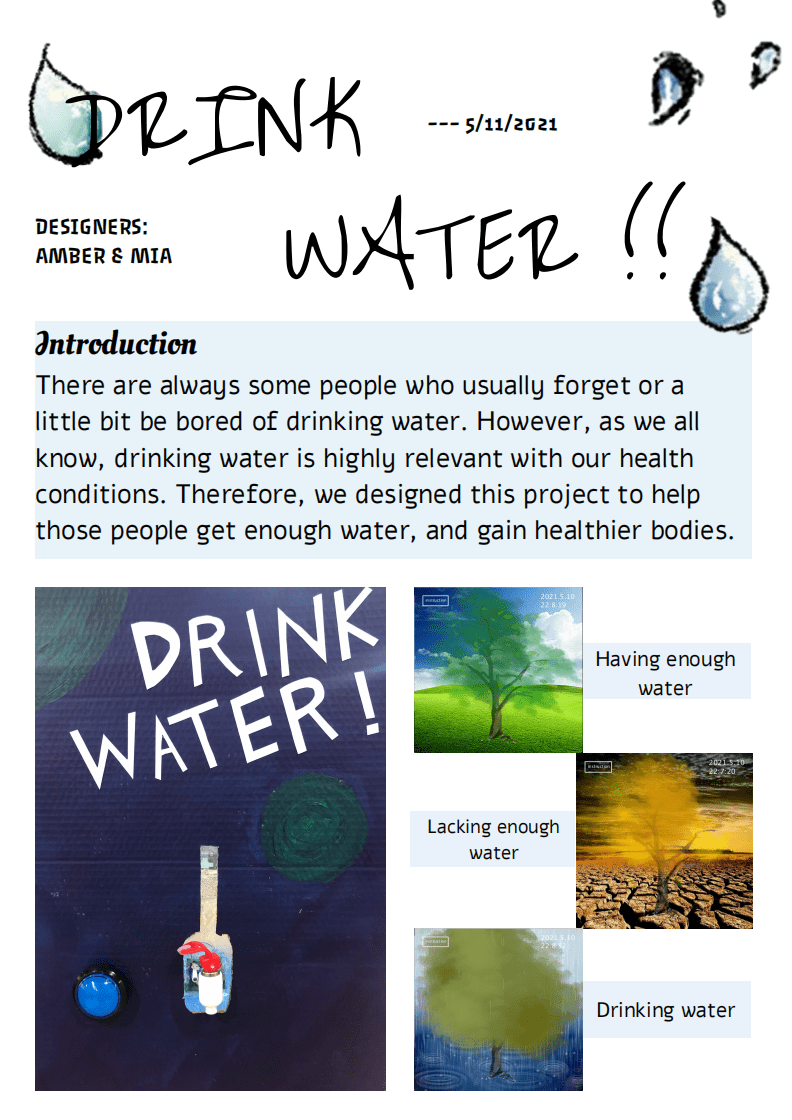
Poster—
II. CONCEPTION AND DESIGN
Here’s the video of how our project works:
In current society, many people are so busy that always forget to drink water, which will do great harm to their bodies. Unfortunately, Amber and I also belong to this kind of group. Therefore, we decided to design a project that can push people to get enough water (8 cups of water, about 2000ml) in order to keep better conditions for their bodies.
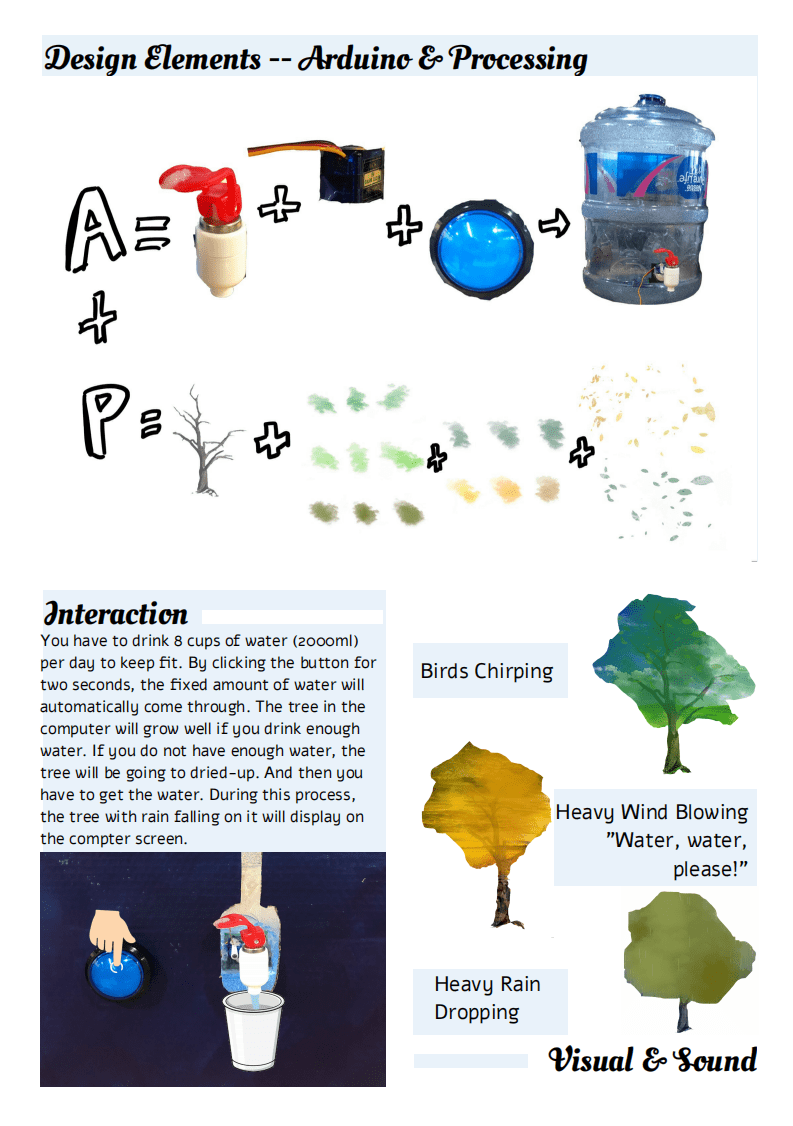
In this project, there are two main parts: the physical part, the visual, and the sound part. In the physical part where most of the interaction happens, we designed a water bucket that can water automatically. We used a button, a tap, and a micro servo to make the function of automation come true. After clicking the button, the servo will rotate, bringing the effect of pressing the tap for 25 seconds (about 250ml). Then, the water will come through. Also, every time when the tap is pressed, the computer will record that the user has drunk one cup of water. Actually, this idea of having this automatic water bucket came from Eric. We really appreciated that he could inspire us to make our project more interactive.
Then, it comes to the visual and sound parts. In our project, the users will receive vocal reminding every two hours to drink water (no reminding from 10 pm to 6 am) and the data would refresh every day. Here are all the effects.
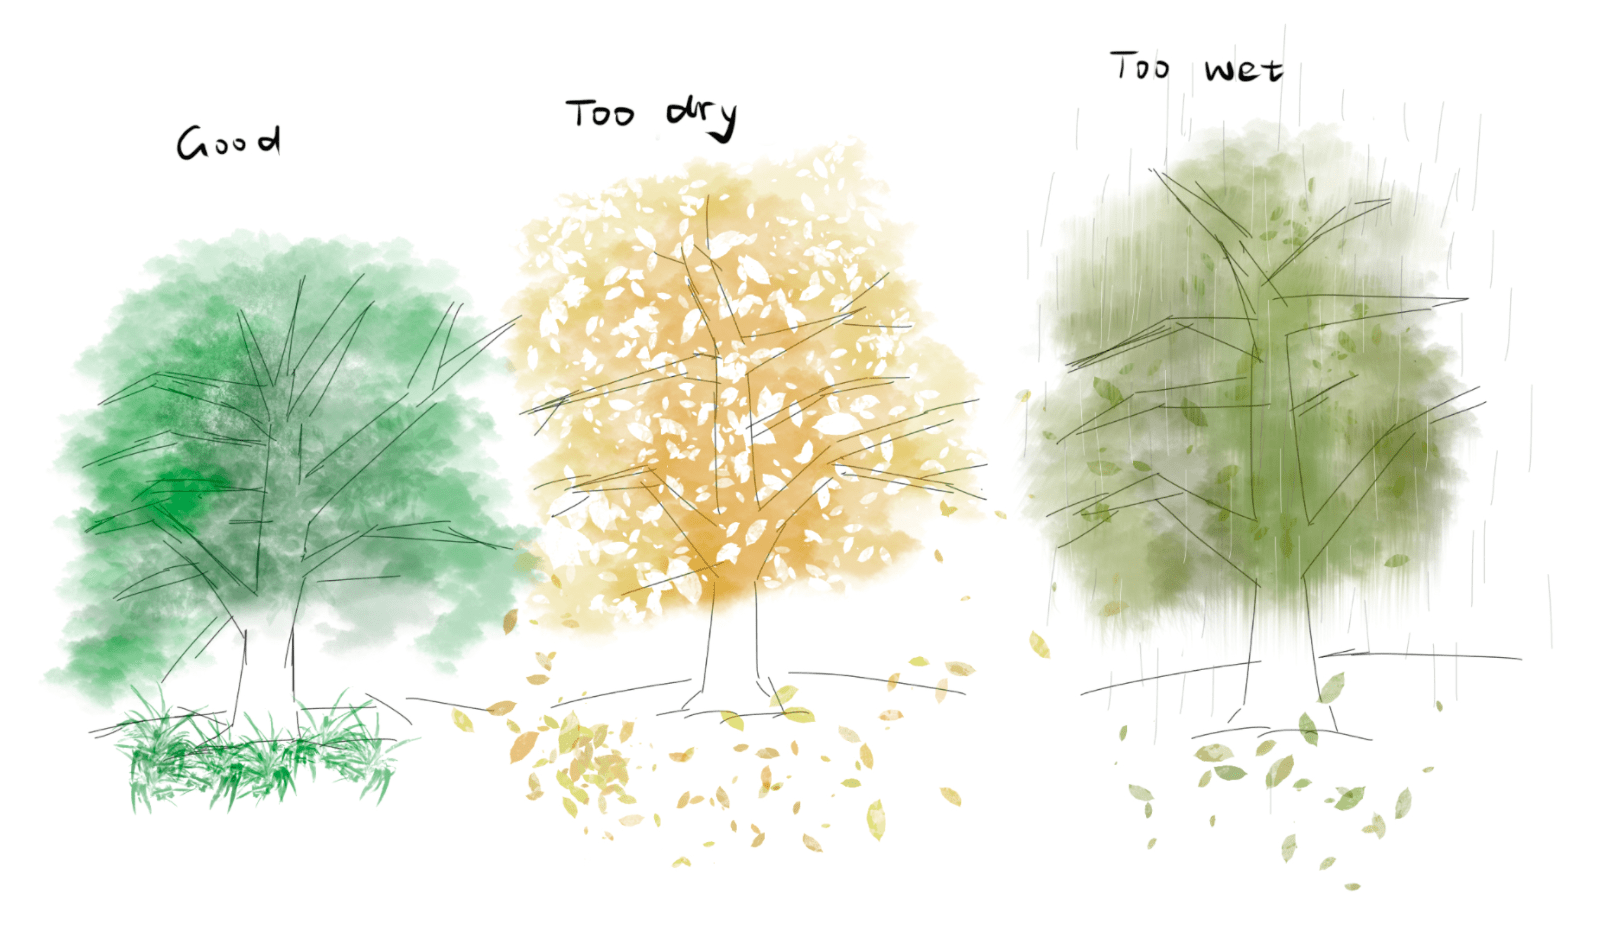
When the user gets enough water, the yellow tree will become greener and greener.
Here’s the effect when the user drinks water:
The reminder:
User test has helped us a lot to refine this project. According to the advice from one fellow, we made the change of the pictures smoother. In other words, the change of the tree picture will not be abrupt, which can display the process that if the user drinks more water, the tree on the screen will become greener. Furthermore, we made a change to the pictures of the raining tree. At first, in our original plan, the picture of a raining tree will appear when people drink too much water. However, during the user test, one student comment that it was a little bit weird. Therefore, we change the timing of it. Also, this change can also help us to make the transformation of the pictures smoother.
Moreover, during the user test, many students suggested that we should make more decorations for our project.
Here’s our decoration:
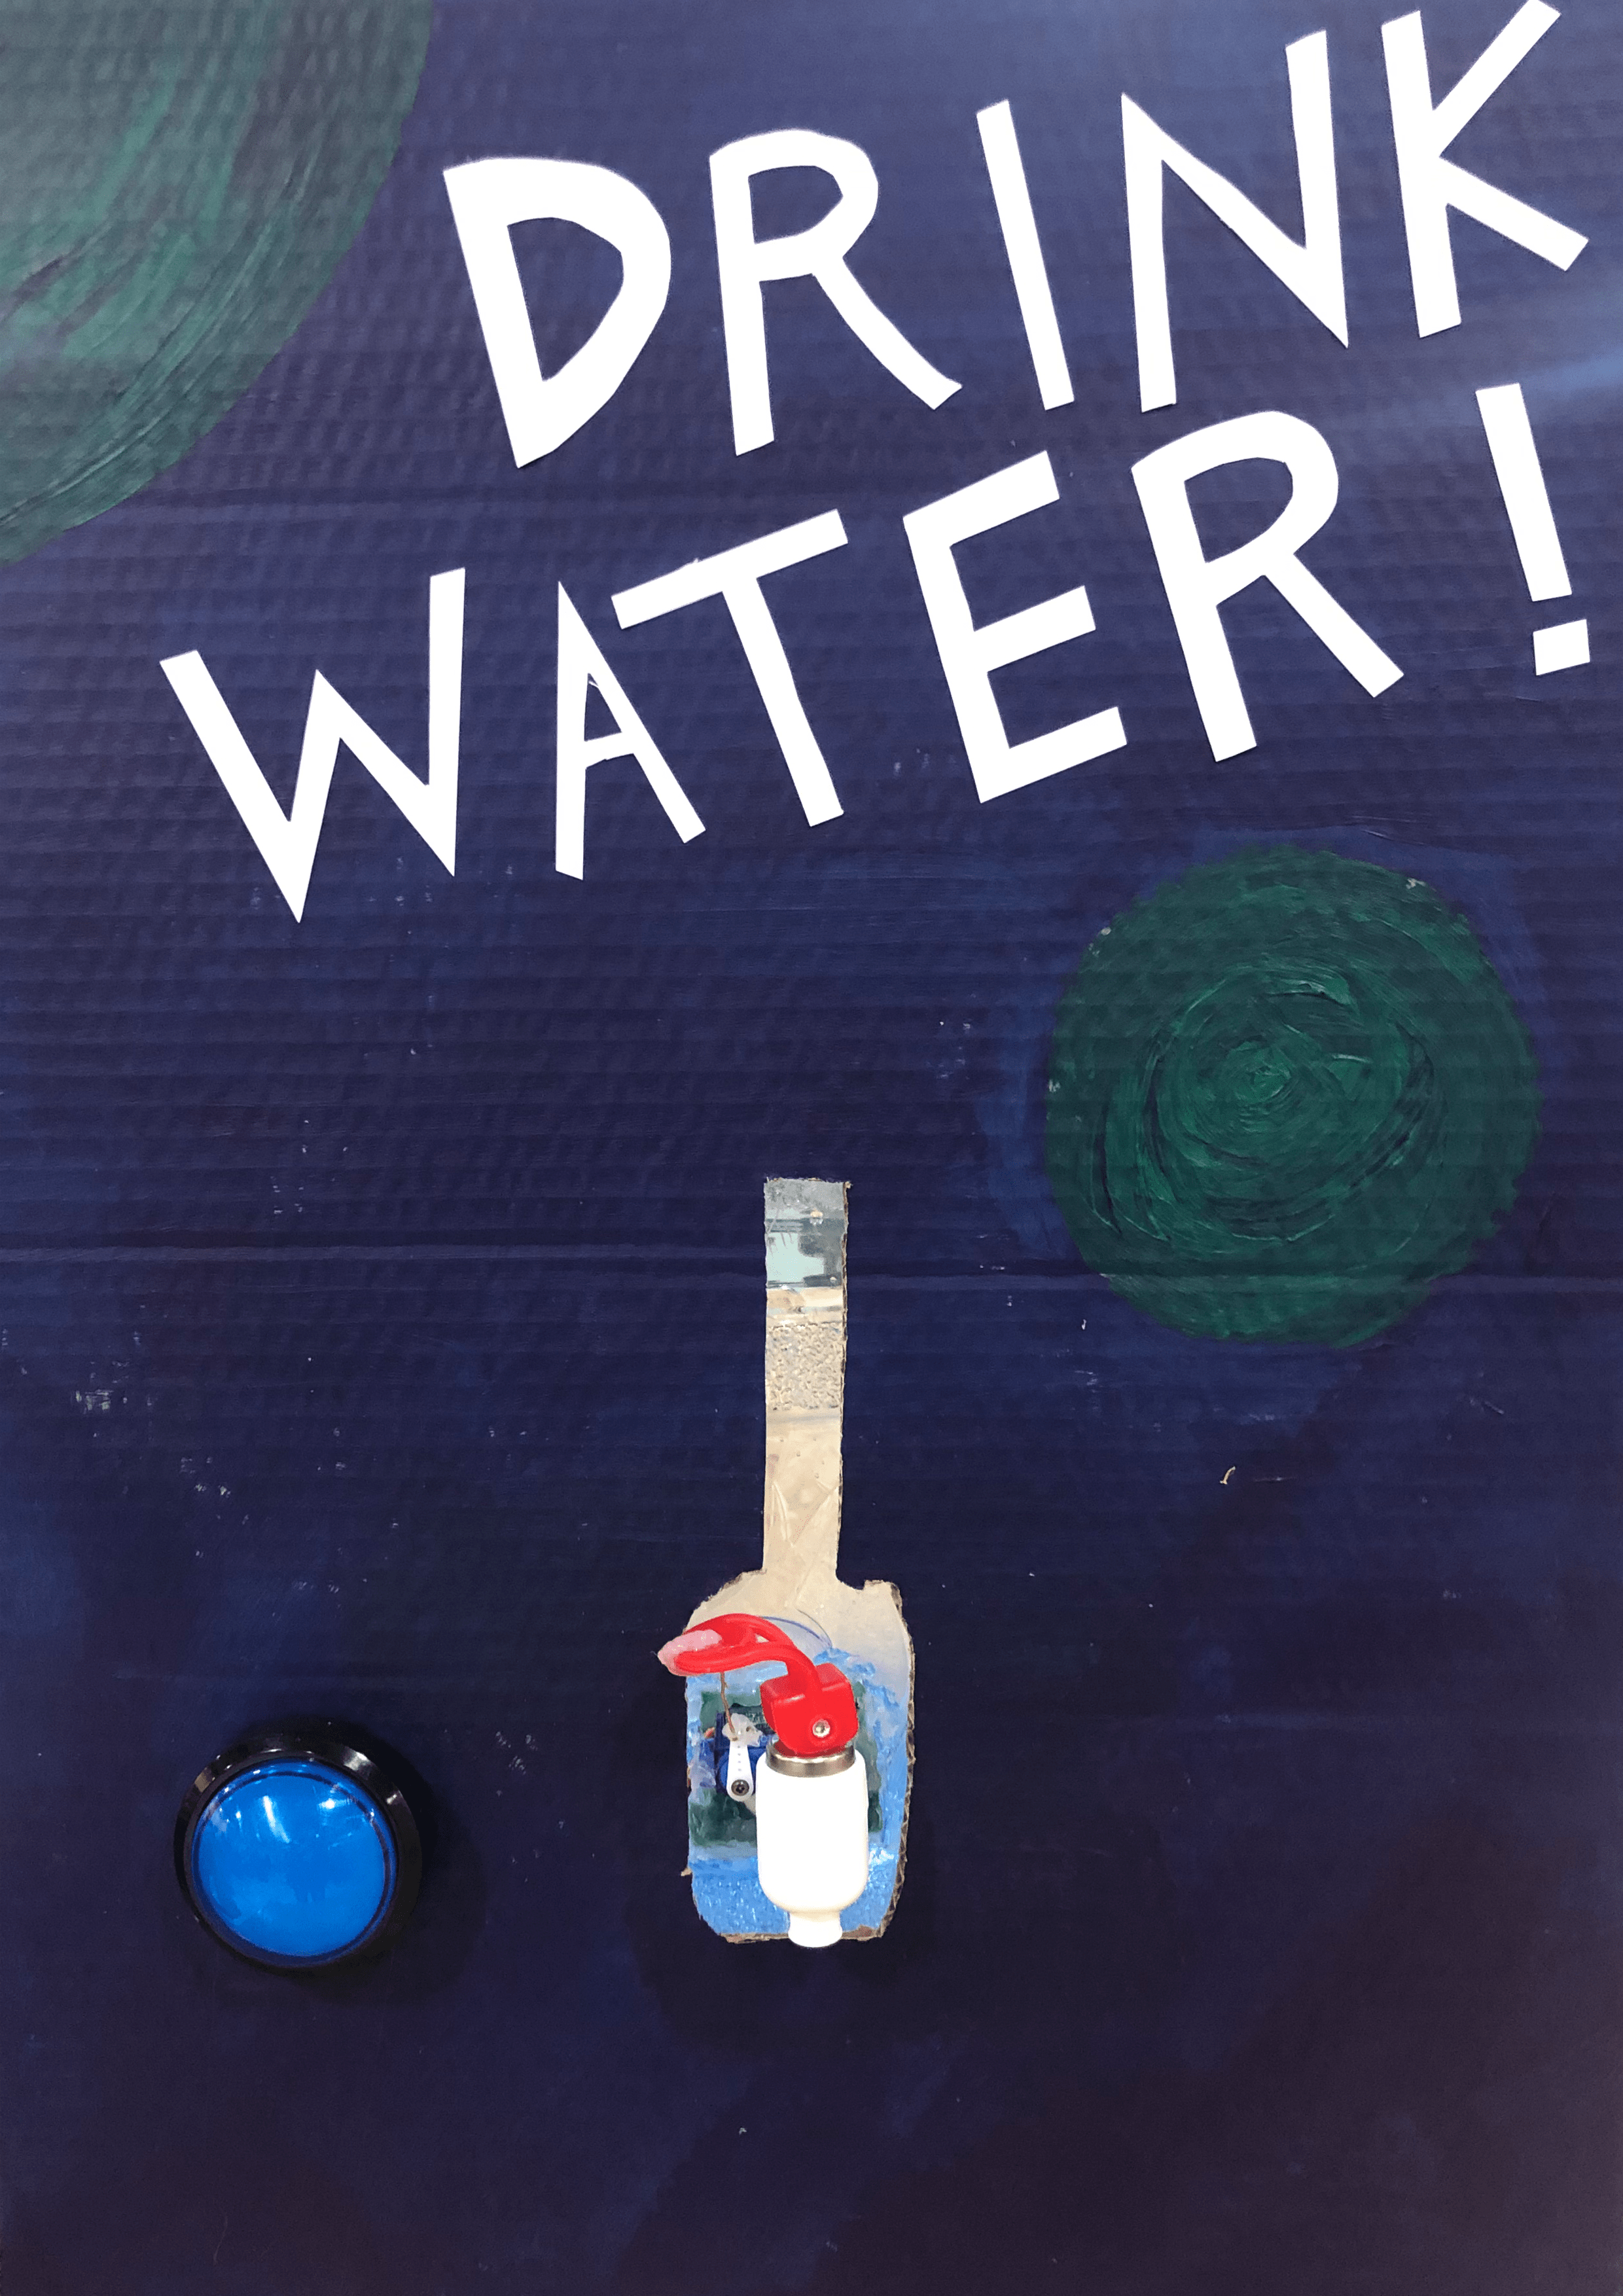
Another piece of advice during the user test is to change the position of the tap to the bottle cap. However, after deep consideration, we found it would lead to a great waste of water. Therefore, at last, we still use our original plan.
III. FABRICATION AND PRODUCTION
In our project, we originally thought that processing will be the hardest part. However, to our surprise, the most difficult part appeared in the physical part — “automatic tap”. During the process of making the physical part, we faced a series of problems.
At first, we wanted to use the water bucket with medium size. However, after the test, we found the thickness of it was too thin, which could not support our predicted function. Therefore, we decided to choose the bigger one with a thicker bucket wall. But, it will still cause some little problems. For example, because of its large size, every time we did the test will waste much water, and it was also difficult for us to move and preserve it.
As for the way to let it water automatically, we also had many discussions. According to Eric’s advice, he suggested that we could use the solenoid valve to turn our idea come true. However, there’s no solenoid valve in our equipment room. Also, after doing some research, we found it’s too difficult for us to manage it, and it also had the problem of stability. Therefore, we changed to other ideas. Then, we tried to use the combination of the water pipe and clamp. But, considering the clamps on the market are too tight, and they have too many uncertainty factors. So, we vetoed the decision. At last, we decided to use a water tap to automatically help us fulfill the function of watering. (The water tap was bought from Taobao, and was assembled by ourselves)
To attach our water tap to the water bucket, we decided to drill a hole in the wall of the bucket. However, the biggest drilling bit in the kit could not drill a big enough hole for our water tap, so we use another bit based on Andy’s advice.
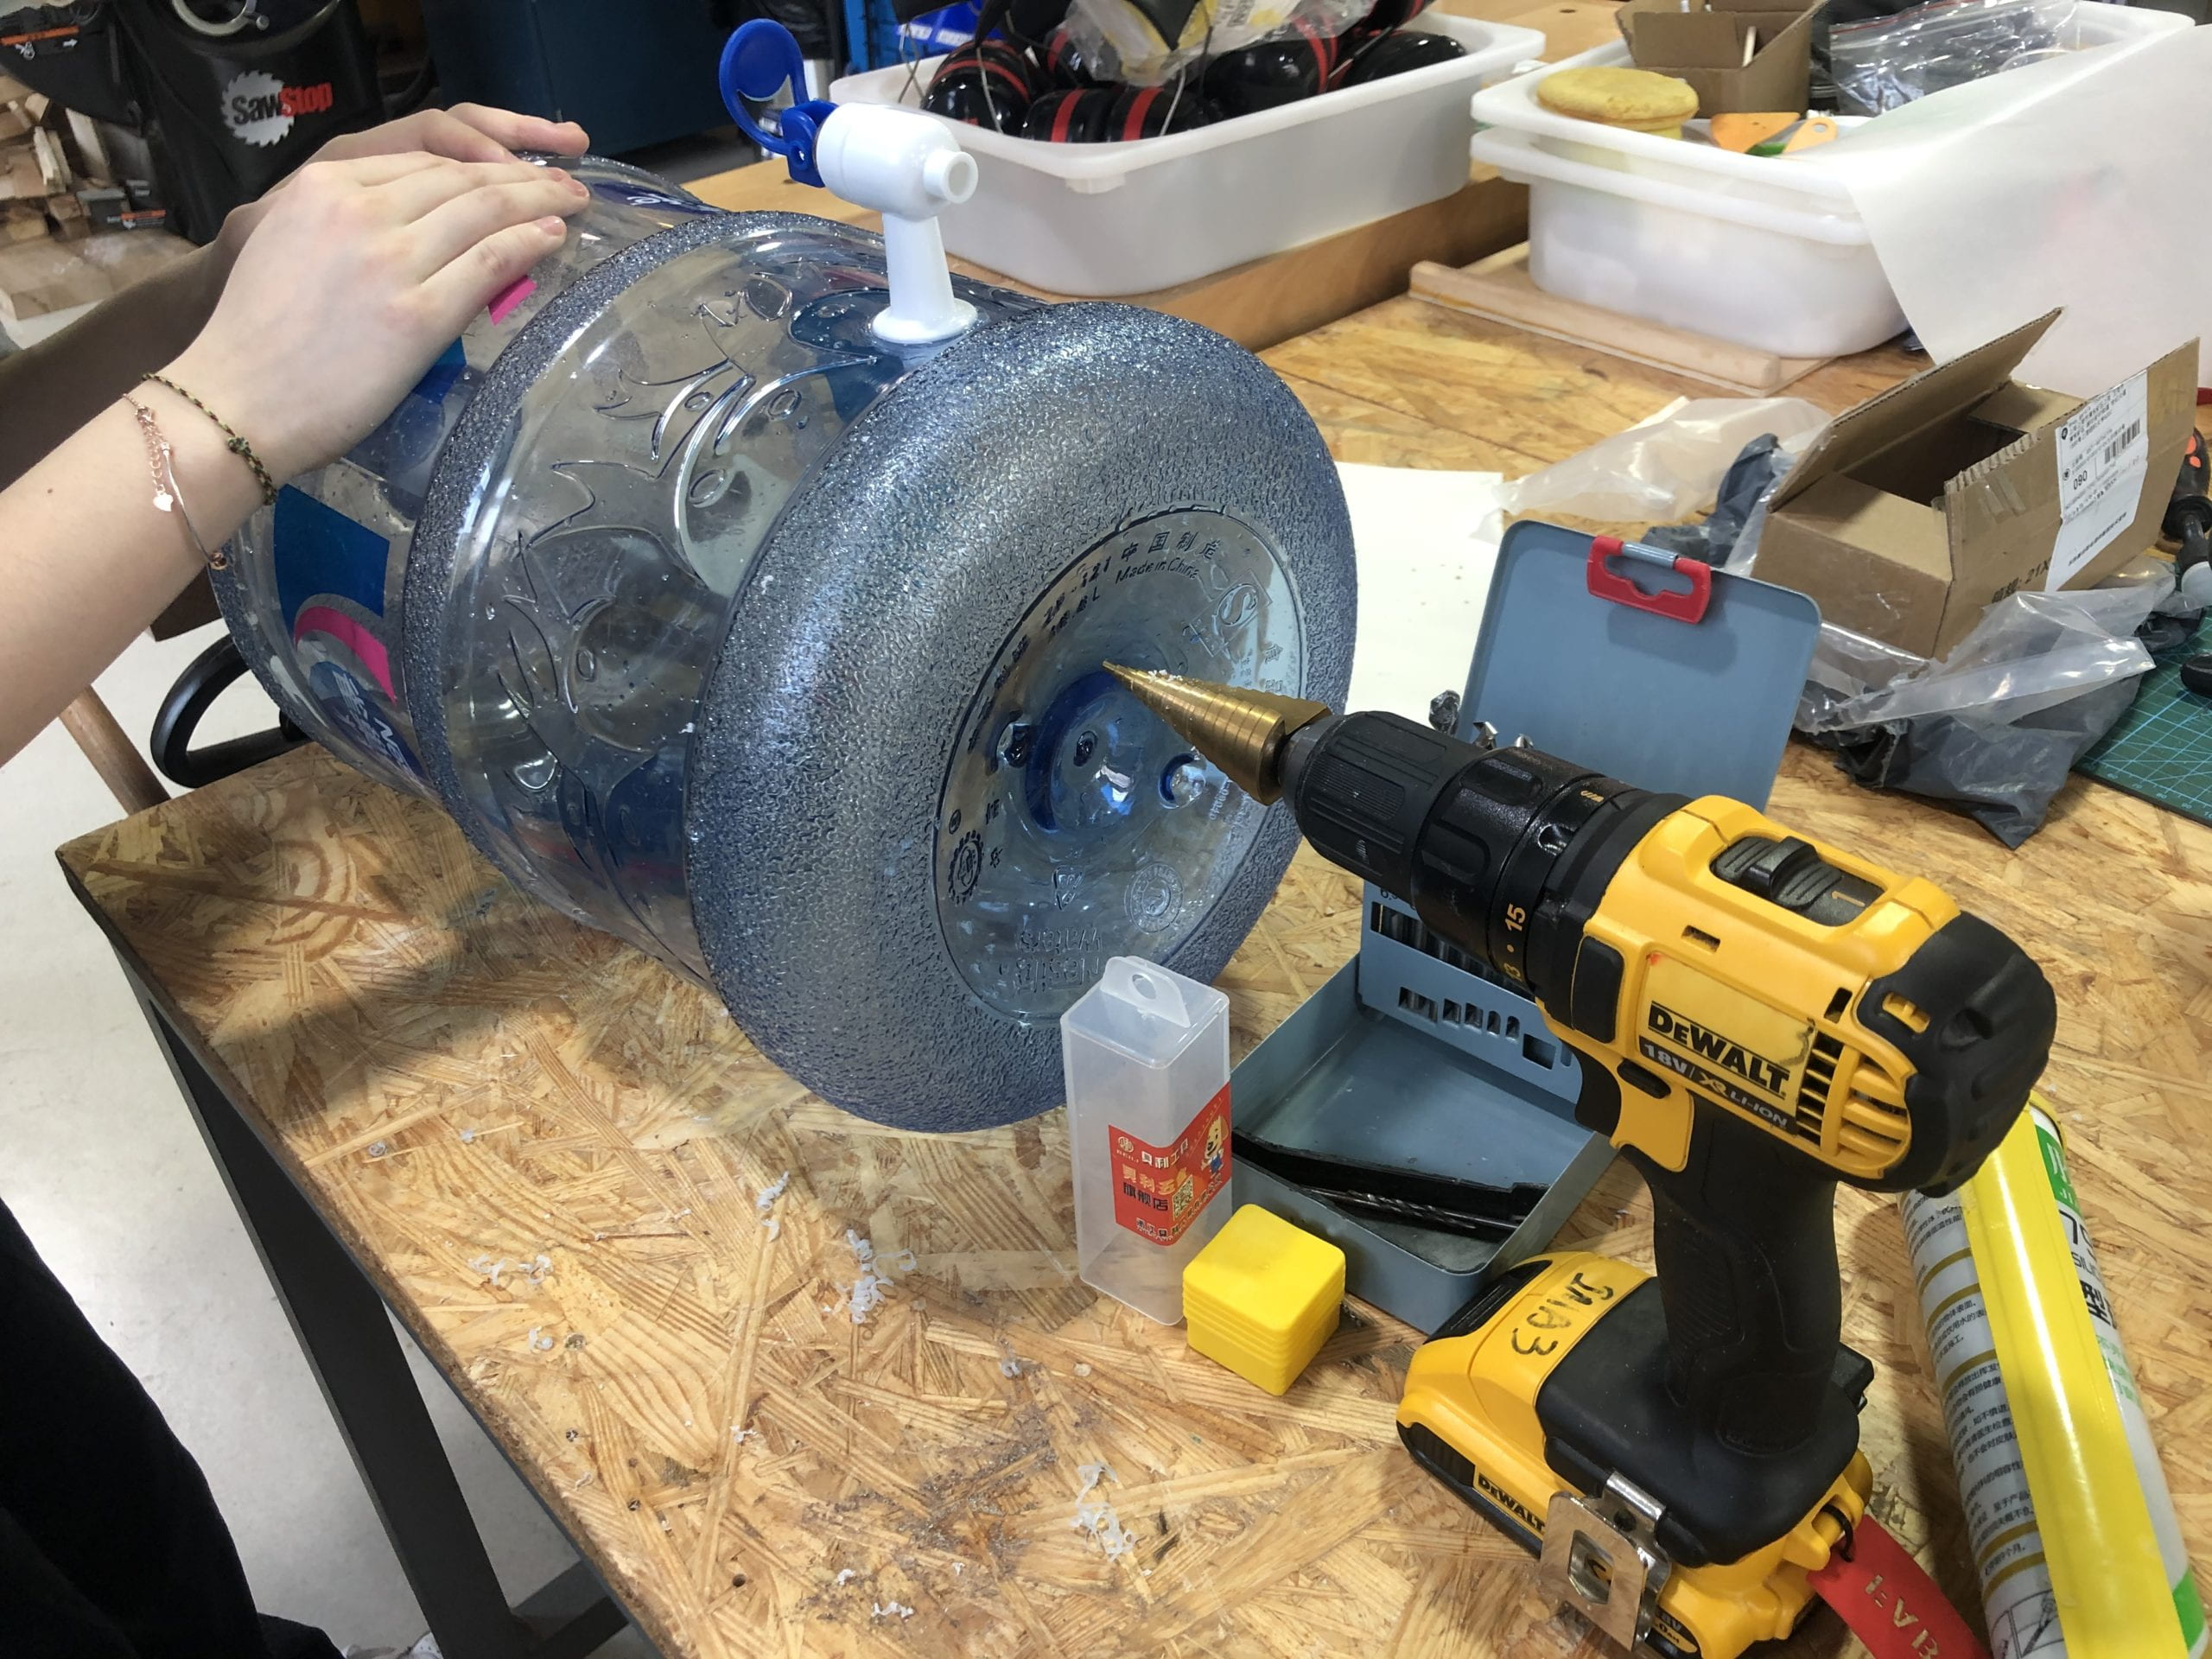
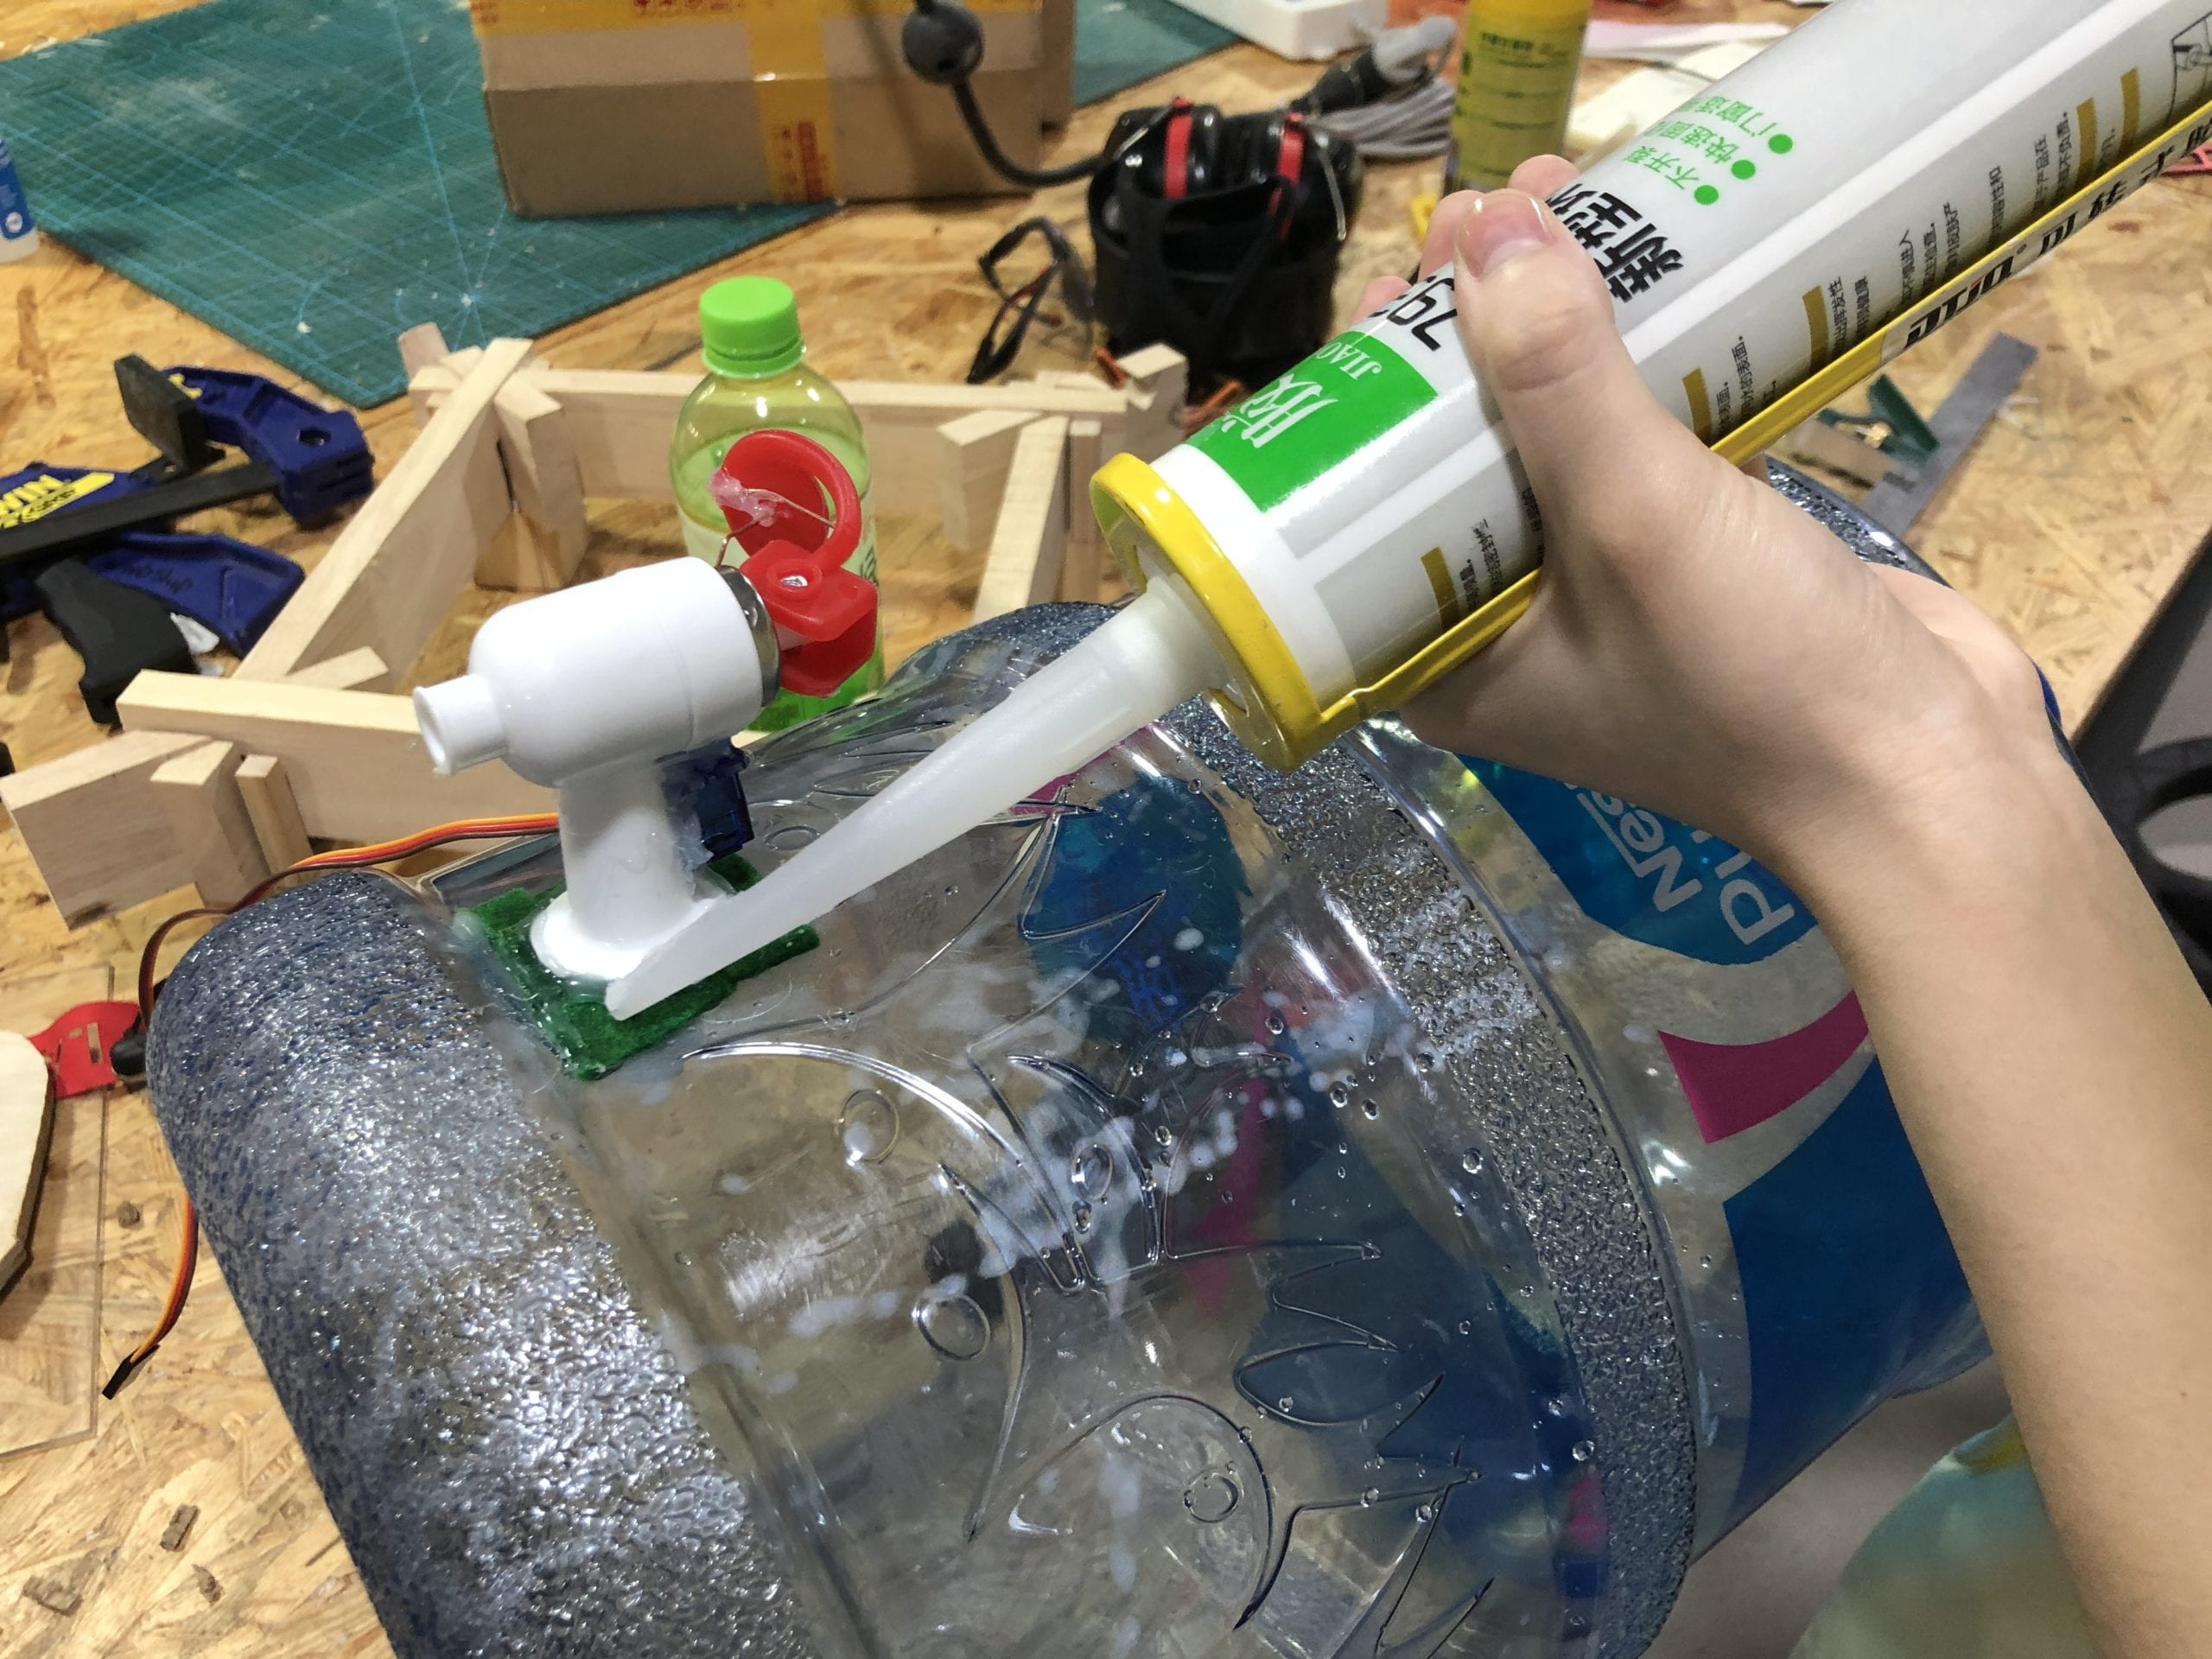
It’s too hard for us to control the size of the hole that could fit the size of the water tap. Therefore, unfortunately, we drilled a hole that was too big for the water tap, which led to great problems for us. We tried to use water-proof glue to glue the tap onto the bottle, but after a long time of waiting for this glue to dry, the material of the bucket didn’t make the glue stick well. Therefore, we added some cloth and hot glue to firstly made it stable for the tap to attach to the bucket’s wall. In this way, the water tap would not fall down when pressing, but it would cause the problem of leaking from the cloth. So, we covered some water-proof glue on top of the cloth and it finally stopped leaking. (We’re really sorry for its leaking again during the presentation. It’s maybe caused by the test we made before the presentation, which caused the problem that the cloth could not attach to the bucket wall well. And after the presentation, we added more water-proof glue on the cloth in order to fix this problem.)
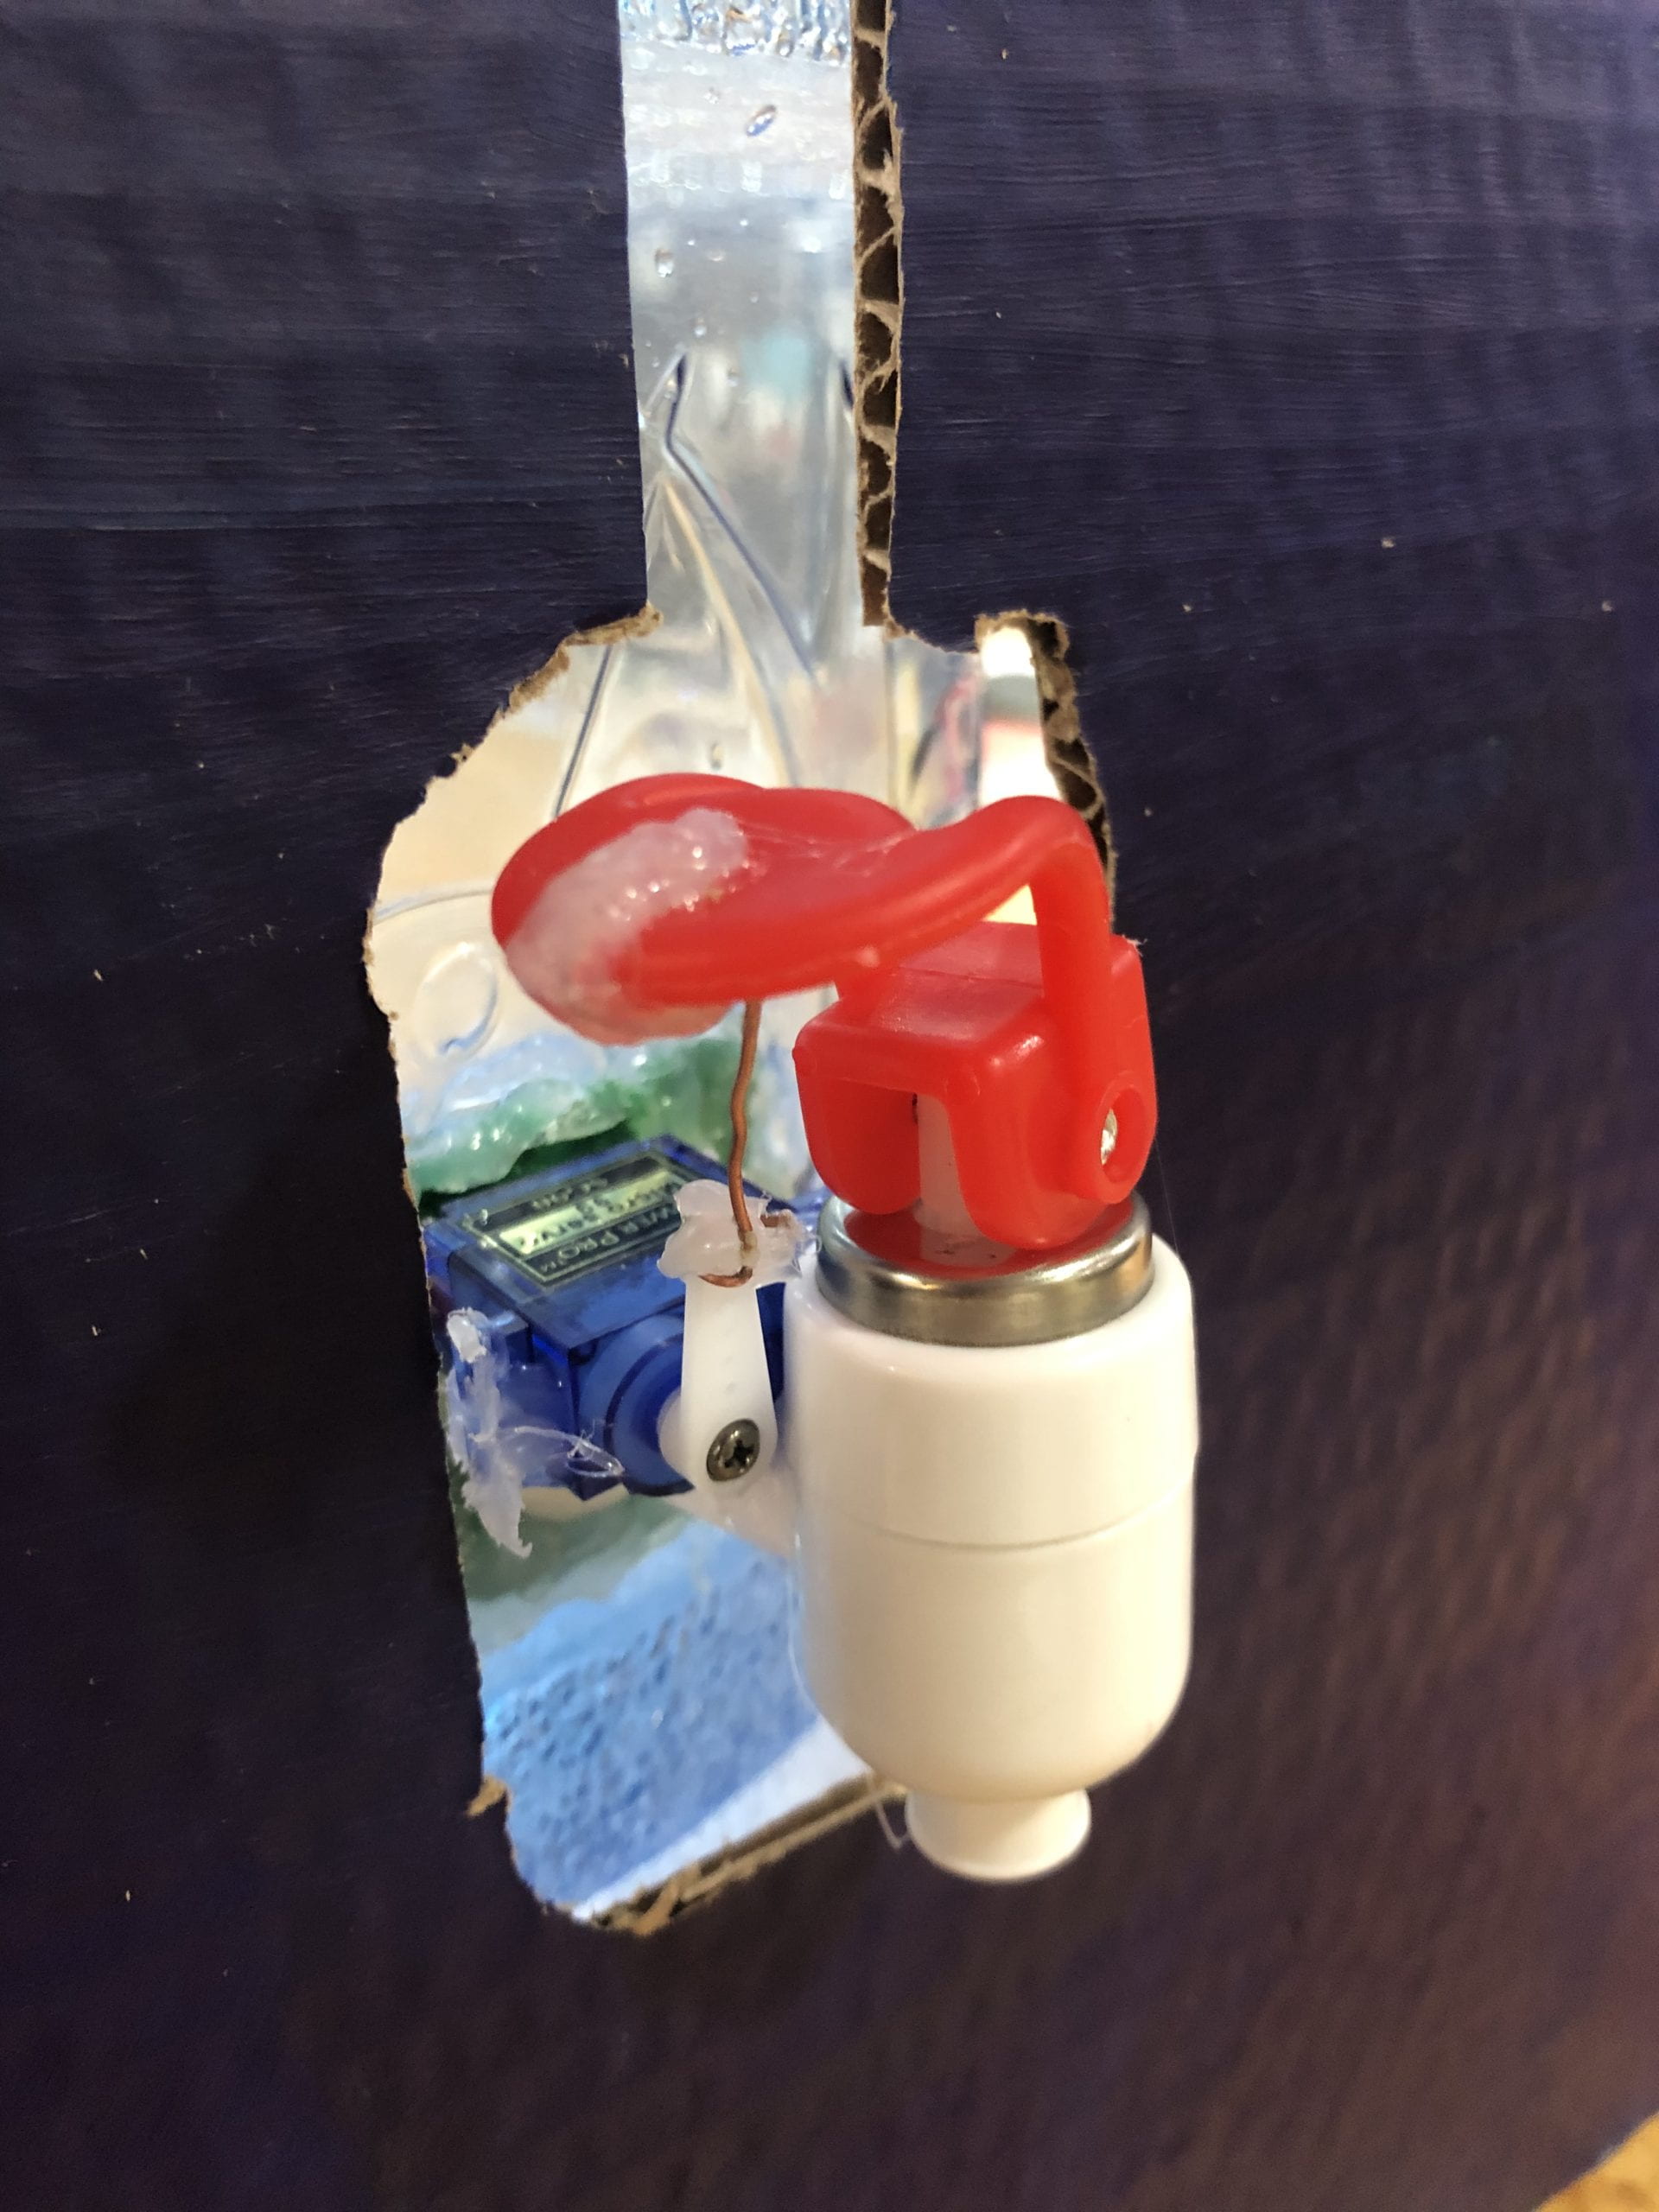
Pressing the tap is also a really big problem for us. At first, the servo was placed above the tap. In our original prediction, the servo can drag the tap up, and the water will come through then. However, after several trials, we found that it’s actually hard to realize. Therefore, I suggested placing the servo below the tap, which is easier to push the water out, because pressing the button needs less effort than dragging it up. (We’re also very sorry that this function appeared some faults during the presentation. After the examination of the whole project, we found that this problem was caused by the problem that the water pressure is too small. And after adding more water, and setting a bigger angle of the servo, the water could come out again.)
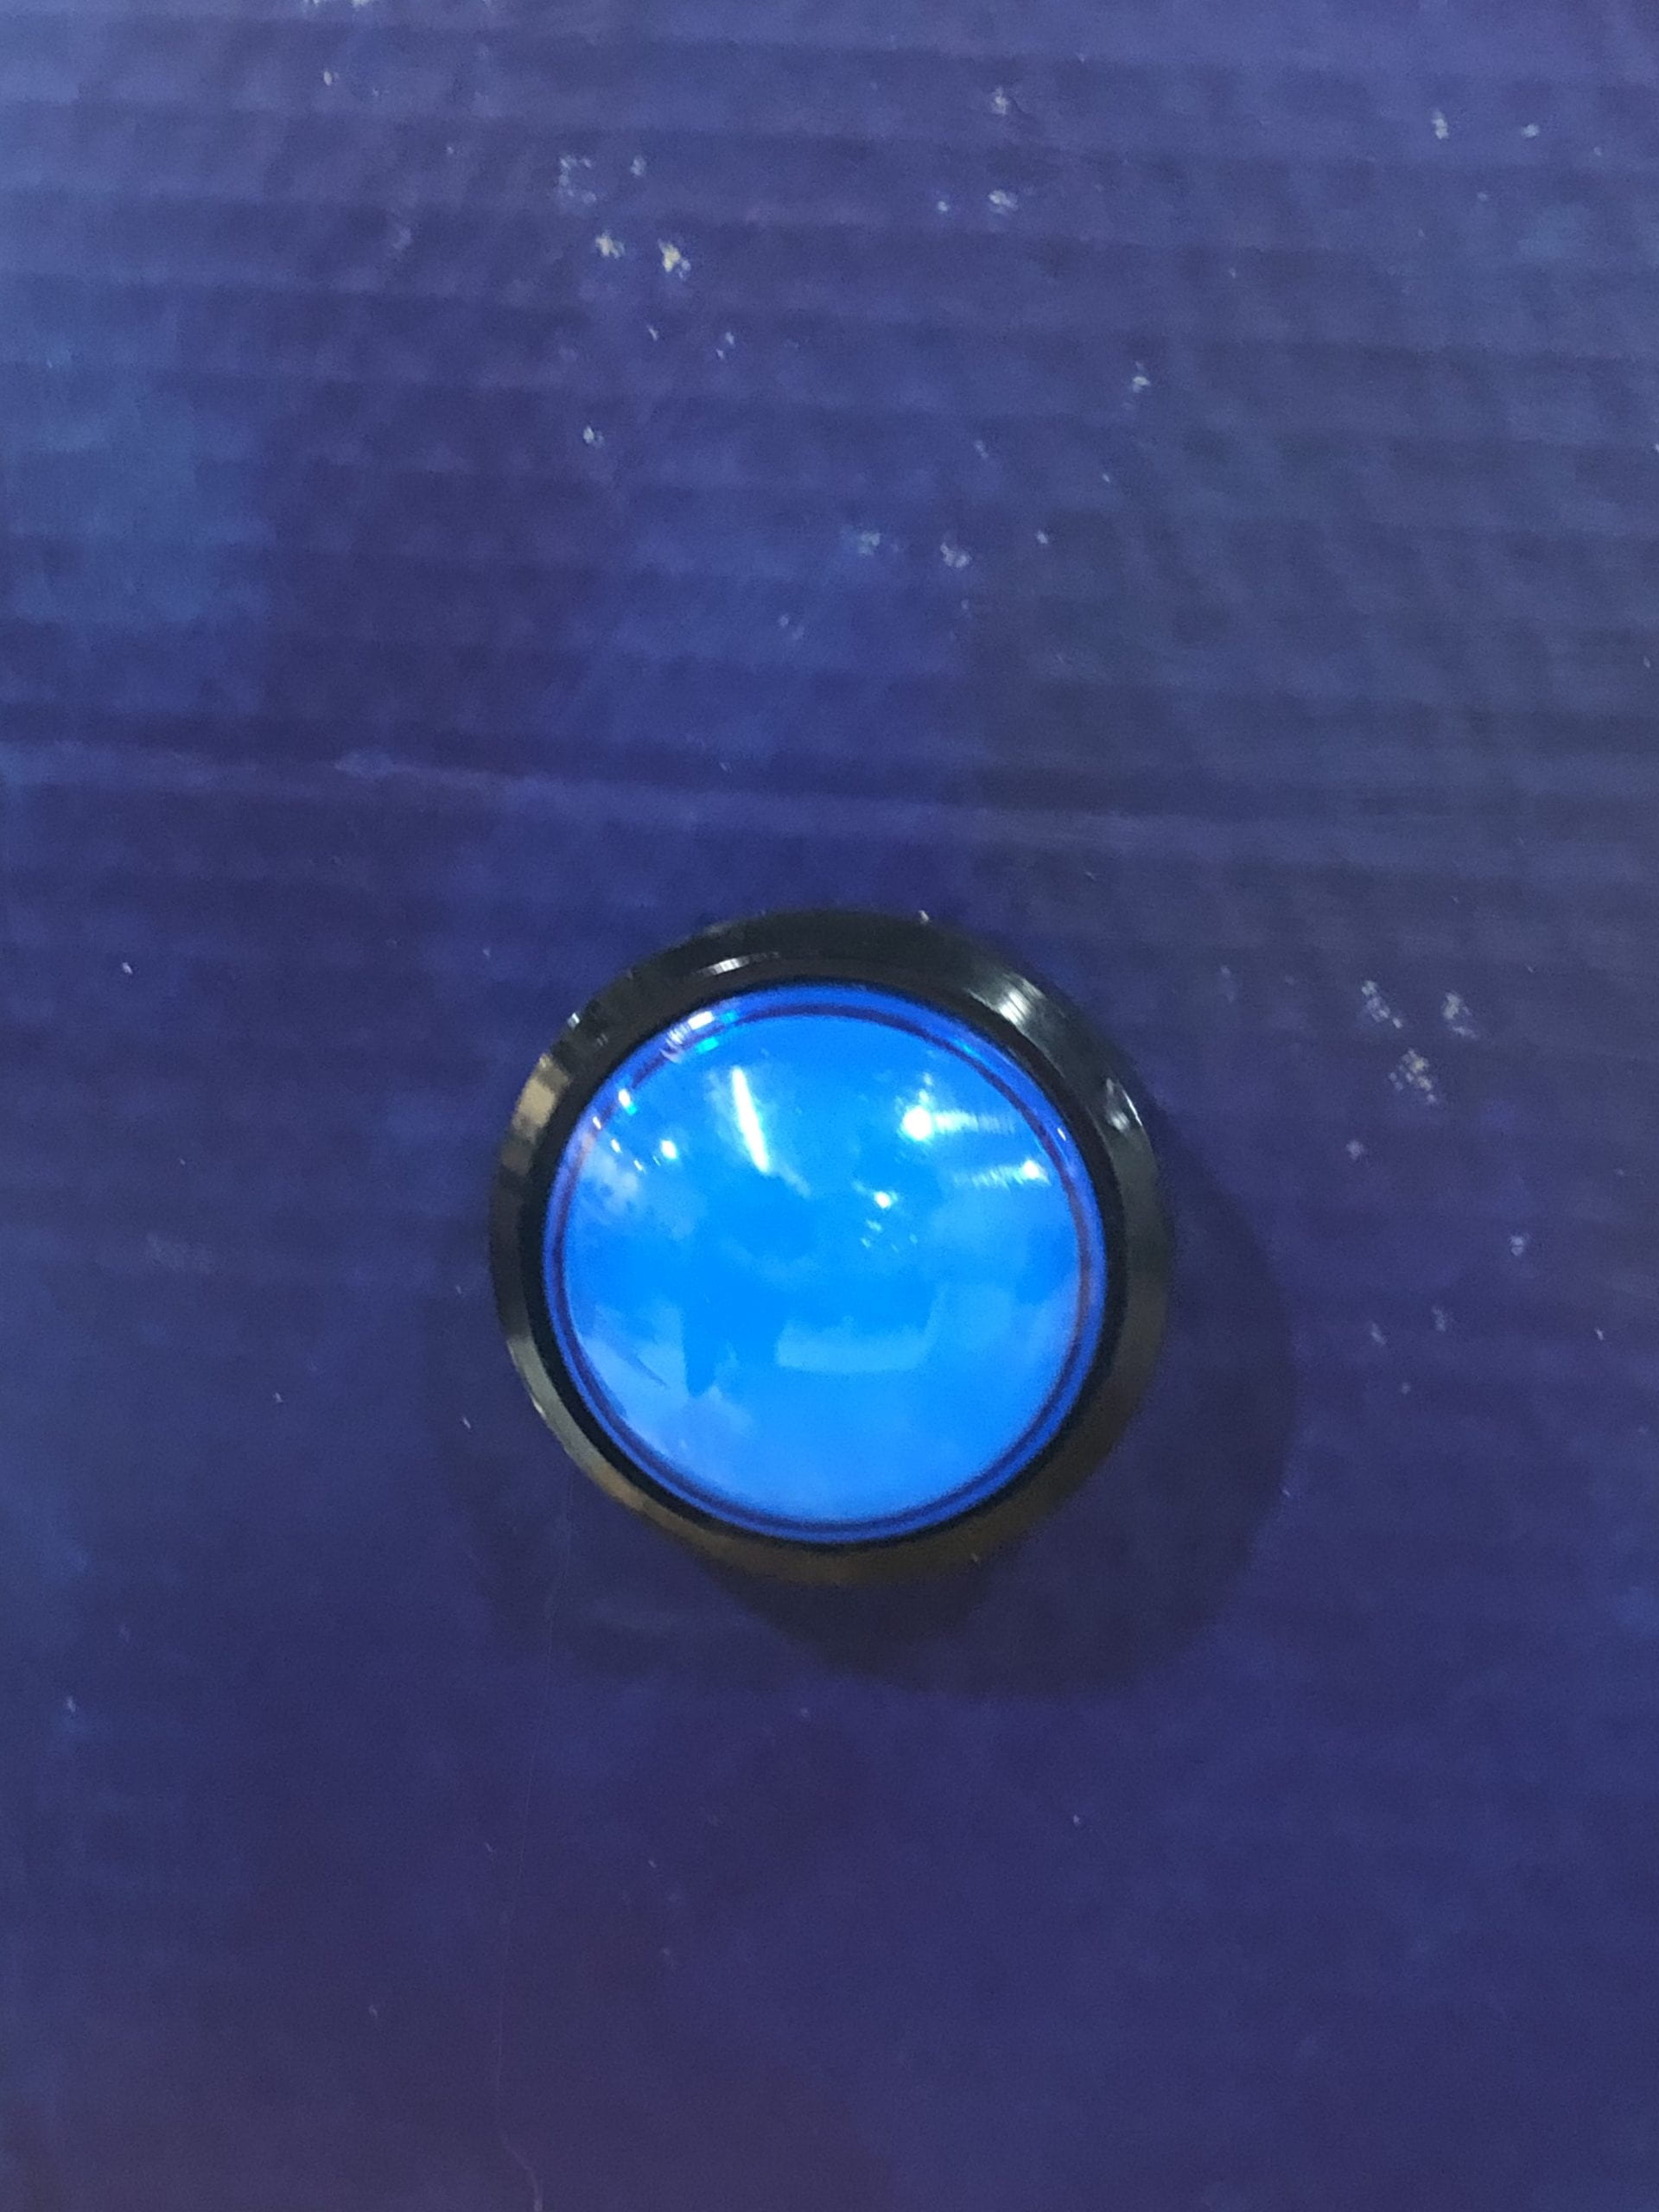
As for the trigger of the effect of watering automatically, at first, we wanted to use the distance sensor. However, when we tried it many times, we found that the distance sensor could not work well due to some interruption so that the water would come out even though there was no cup under the tap. So we just used a button instead.
This was our sketch:
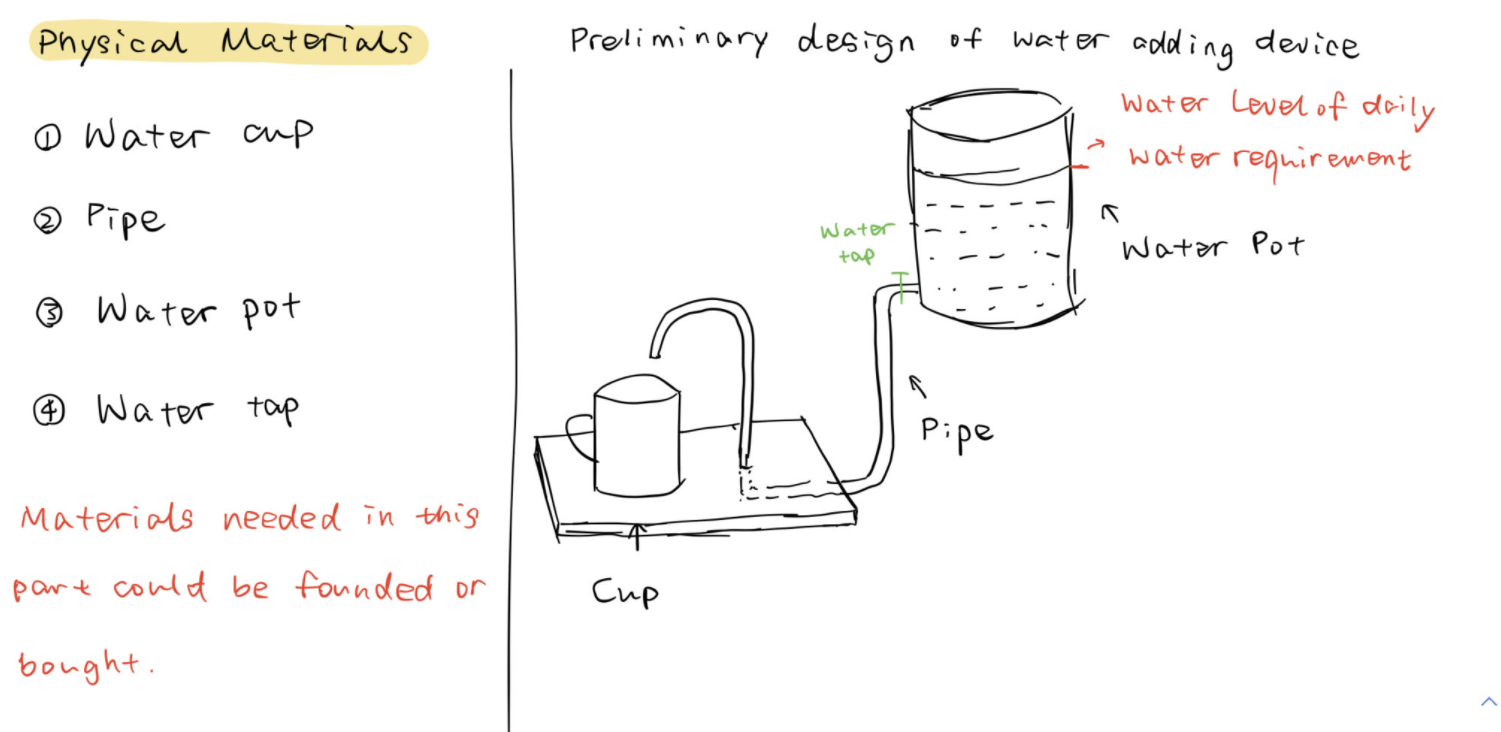
During the process of making this project, Amber and I took part in nearly every step together. We brainstormed the main concept and worked on the physical parts together. Though we spent almost every time during this process, we also had some different focuses. Amber was mainly responsible for Processing, and I would provide some advice during the process. Also, I was responsible for all the preparation, decoration, and poster making. It was really a good experience of cooperation with Amber, which enabled me to learn a lot, such as thinking angels.
IV. CONCLUSIONS
The goal of our project is to push people to get enough water every day in order to keep a good body condition. In my opinion, our project has achieved our expected goal relatively well. By using vivid visual and sound effects, our project can attract the user to get enough water for their bodies. Also, as the user drinks water, the tree on the screen also changes differently. According to my definition of interaction, the interaction that happens between at least two objects should leave different kinds of effects with the different operations. Therefore, our project quite matched with my definition of interaction.
As for improvement, inspired by the comment on the presentation, we can load the program on the computer, and attach a screen to the water bottle part so it looks more real and is more convenient for users. Moreover, as we drew the leaves of the tree one by one, therefore, we can add more effect on the transition of the picture changes to make it smoother, instead of just blurring the picture.
There’re two big failures in the presentation. The first one is leaking. After the presentation, we figured out the reasons for this problem. Because of previous tests, the tap actually did not attach to the bucket wall well. However, if we could make a hole of the right size for the first time, this kind of problem would not exist anymore.
Also, another problem was the failure to water automatically. Because we wanted to show more effects of our project, we set up a relatively short time to press the tap. However, it was because of this act that the water could not run out automatically. Moreover, on the presentation, we have not put enough water to make sure enough water pressure.
I think I have learned a lot from this project. The things that I’ve learned not only focus on the knowledge of coding and other techniques but also the way of thinking. In the process of making this project, I greatly felt the importance of standing at the point of the users to design our projects. Moreover, I also found the necessity to never give up on trials of our projects, which can help us to make our projects better.
V. TECHNICAL DOCUMENTATION
Arduino—
#include <Servo.h>

Servo myservo;
#define NUM_OF_VALUES_FROM_PROCESSING 2

int tempValue = 0;
int valueIndex = 0;

int values[NUM_OF_VALUES_FROM_PROCESSING];
boolean check = false;
int startButton, state;
int pre_state = 0;
int sensor1 = 0;
int sensor2;

void setup() {
  Serial.begin(9600);
  myservo.attach(9);
  myservo.write(90);
}

void loop() {
  getSerialData();
  Serial.println(analogRead(A1));
  Check();
  if (values[0] == 1) {
    sensor1 = 0;
  }

  Serial.print(sensor1);
  Serial.print(",");
  Serial.print(sensor2);
  Serial.println();
}

void Check() {
  startButton = analogRead(A1);
  if (startButton > 1000) {
    state = 1;
  } else {
    state = 0;
  }

  if (state == 1 && !state == pre_state) {
    check = true;
    myservo.write(290);
    sensor1 = sensor1 + 1;
    sensor2 = 1;
  } else {
    check = false;
    delay(25000);
    myservo.write(90);
    sensor2 = 0;
  }

  pre_state = state;
}

void getSerialData() {
  while (Serial.available()) {
    char c = Serial.read();

    switch (c) {

      case '0'...'9':

        tempValue = tempValue * 10 + c - '0';
        break;
      case ',':
        values[valueIndex] = tempValue;
        tempValue = 0;
        valueIndex++;
        break;
      case '\n':
        values[valueIndex] = tempValue;
        tempValue = 0;
        valueIndex = 0;
        break;
    }
  }
}
Processing—
import processing.serial.*;
import processing.sound.*;

int NUM_OF_VALUES_FROM_PROCESSING = 2;
int NUM_OF_VALUES_FROM_ARDUINO = 2;

Serial myPort;
String myString;

int values[];
int sensorValues[];
PImage tree, gleaf1, gleaf2, gleaf3, gleaf4;
PImage yleaf1, yleaf2, yleaf3, yleaf4, yleaf5, yleaf6;
PImage wleaf1, wleaf2, wleaf3;
PImage sbg, dbg, rbg;
PImage ins;
SoundFile rain;
SoundFile notice;
boolean check1 = true;
int x = 0;
int time = 1;
char letter;
int y1 = 204,
  y2 = 120,
  y3 = 213;
float a1, a2, a3;
boolean check = true;
int nb=750;
int maxDrops =1000;
int minDrops=500;
int h, h1;
int []posX;
int []posY;
int []spd;
int []len;
int []a;
float []b;
int []px;
int []py;
float []scl;
int pre_d = day();
int pre_h = hour();
boolean playSound = true;

void setup() {
  size(500, 500);
  setupSerial();
  tree = loadImage("tree.png");
  gleaf1 = loadImage("gleaf1.png");
  gleaf2 = loadImage("gleaf2.png");
  gleaf3 = loadImage("gleaf3.png");
  gleaf4 = loadImage("gleaf4.png");
  yleaf1 = loadImage("yleaf1.png");
  yleaf2 = loadImage("yleaf2.png");
  yleaf3 = loadImage("yleaf3.png");
  yleaf4 = loadImage("yleaf4.png");
  yleaf5 = loadImage("yleaf5.png");
  yleaf6 = loadImage("yleaf6.png");
  wleaf1 = loadImage("wleaf1.png");
  wleaf2 = loadImage("wleaf2.png");
  wleaf3 = loadImage("wleaf3.png");
  sbg = loadImage("sbg.jpeg");
  dbg = loadImage("dbg.jpeg");
  rbg = loadImage("rbg.jpg");
  ins = loadImage("instruction.png");
  rain =  new SoundFile(this, "raining1.mp3");
  notice = new SoundFile(this,"notice.mp3");

  //generating rain drops
  posX = new int[50];
  posY = new int[50];
  spd = new int[50];
  len = new int[50];

  //generating ripples
  scl = new float[50];
  a = new int[50];
  b = new float[50];
  px = new int[50];
  py = new int[50];

  for (int i=0; i<50; i++) {
    posX[i] = int(random(0, width));
    posY[i] = int(random(-50, 0));
    spd[i] = int(random(8, 15));
    len[i] = int(random(10, 40));
    scl[i] = random(1, 1.5);
    a[i] = int(random(10, 20));
    b[i] = a[i]/2;
    px[i] = int(random(0, width));
    py[i] = int(random(400, 500));
  }
}


void draw() {

  //get yyyy/mm/dd/hh/mm/ss
  int d = day();
  int m = month();
  int y = year();
  int h = hour();
  int ms = minute();
  int s = second();

  getSerialData();
  background(255);
  imageMode(CENTER);
  x = x+time;
  if (x > 3 || x<-3) {
    time = -time;
  }

  //receive the times of users' getting water from Arduino
  if (sensorValues[1] == 0) {
    print(sensorValues[0]);
    if (sensorValues[0] == 0) {
      letter = 'A';
    }
    if (sensorValues[0] == 1) {
      letter = 'B';
    }
    if (sensorValues[0] == 2) {
      letter = 'C';
    }
    if (sensorValues[0] == 3) {
      letter = 'D';
    }
    if (sensorValues[0] == 4) {
      letter = 'E';
    }
    if (sensorValues[0] == 5) {
      letter = 'F';
    }
    if (sensorValues[0] == 6) {
      letter = 'G';
    }
    if (sensorValues[0] >= 7) {
      letter = 'H';
    }
    print(sensorValues[0]);
  } else {
    letter = 'I'; //When the button is pressed, last for 25s
  }

  //show different scenes for different cases
  switch(letter) {
  case'A':
    push();
    tint(255, map(1, 1, 8, 255, 0));
    image(dbg, width/2, height/2, width, height);
    image(tree, width/2, height/2, 500, 500);
    yLeaf();
    pop();
    break;

  case'B':
    push();
    tint(255, map(2, 1, 8, 255, 0));
    image(dbg, width/2, height/2, width, height);
    image(tree, width/2, height/2, 500, 500);
    yLeaf();
    pop();

    push();
    tint(255, map(2, 1, 8, 0, 255));
    image(sbg, width/2, height/2, width, height);
    image(tree, width/2, height/2, 500, 500);
    gLeaf();
    pop();
    break;

  case'C':
    push();
    tint(255, map(3, 1, 8, 255, 0));
    image(dbg, width/2, height/2, width, height);
    image(tree, width/2, height/2, 500, 500);
    yLeaf();
    pop();

    push();
    tint(255, map(3, 1, 8, 0, 255));
    image(sbg, width/2, height/2, width, height);
    image(tree, width/2, height/2, 500, 500);
    gLeaf();
    pop();
    break;

  case'D':
    push();
    tint(255, map(4, 1, 8, 255, 0));
    image(dbg, width/2, height/2, width, height);
    image(tree, width/2, height/2, 500, 500);
    yLeaf();
    pop();

    push();
    tint(255, map(4, 1, 8, 0, 255));
    image(sbg, width/2, height/2, width, height);
    image(tree, width/2, height/2, 500, 500);
    gLeaf();
    pop();
    break;

  case'E':
    push();
    tint(255, map(5, 1, 8, 255, 0));
    image(dbg, width/2, height/2, width, height);
    image(tree, width/2, height/2, 500, 500);
    yLeaf();
    pop();

    push();
    tint(255, map(5, 1, 8, 0, 255));
    image(sbg, width/2, height/2, width, height);
    image(tree, width/2, height/2, 500, 500);
    gLeaf();
    pop();
    break;

  case'F':
    push();
    tint(255, map(6, 1, 8, 255, 0));
    image(dbg, width/2, height/2, width, height);
    image(tree, width/2, height/2, 500, 500);
    yLeaf();
    pop();

    push();
    tint(255, map(6, 1, 8, 0, 255));
    image(sbg, width/2, height/2, width, height);
    image(tree, width/2, height/2, 500, 500);
    gLeaf();
    pop();
    break;

  case'G':
    push();
    tint(255, map(7, 1, 8, 255, 0));
    image(dbg, width/2, height/2, width, height);
    image(tree, width/2, height/2, 500, 500);
    yLeaf();
    pop();

    push();
    tint(255, map(7, 1, 8, 0, 255));
    image(sbg, width/2, height/2, width, height);
    image(tree, width/2, height/2, 500, 500);
    gLeaf();
    pop();
    break;

  case'H':
    push();
    tint(255, map(8, 1, 8, 255, 0));
    image(dbg, width/2, height/2, width, height);
    image(tree, width/2, height/2, 500, 500);
    yLeaf();
    pop();

    push();
    tint(255, map(8, 1, 8, 0, 255));
    image(sbg, width/2, height/2, width, height);
    image(tree, width/2, height/2, 500, 500);
    gLeaf();
    pop();
    break;

  case'I':
    show_wleaf();
    if(playSound == true) {
      rain.play();
      playSound = false;
    }else {
      playSound = true;
    }
    break;
  }
  push();
  textSize(20);
  text(y+"."+m+"."+d, 375, 35);
  text(h+":"+ms+":"+s, 375, 60);
  pop();
  noFill();
  strokeWeight(2);
  stroke(255);
  rect(25, 25, 75, 30);
  textSize(12);
  text("instruction", 33, 43);
  sendSerialData();

  //instruction button
  if (mouseX>25 && mouseX<100 && mouseY>25 && mouseY<55) {
    image(ins, width/2, height/2, 500, 500);
  }

  //timer for voice remider (no reminder from 10pm to 6am)
  if((h-pre_h == 2 || h-pre_h <0) && h>6 && h<22){
    pre_h = h;
    notice.play();
  }

  //update the data when a new day comes
  if(!(d-pre_d ==0)){
    values[0] = 1;
    pre_d = d;
  }else{
    values[0] = 0;
  }
}

void gLeaf() {
  push();
  //tint(255,alpha);
  image(gleaf1, 215+x, 41);
  image(gleaf1, 133, 127);
  image(gleaf1, 132, 224);
  image(gleaf1, 271+x, 195);
  image(gleaf1, 400, 219);
  image(gleaf1, 347, 312);
  image(gleaf1, 309+x, 297);
  image(gleaf1, 190, 257);
  image(gleaf1, 236+x, 161);
  image(gleaf1, 229, 80);
  image(gleaf1, 306, 123);
  image(gleaf1, 149, 288);
  image(gleaf3, 190, 257);
  image(gleaf3, 236, 161);
  image(gleaf3, 229+x, 80);
  image(gleaf4, 234, 152, 306, 306);
  image(gleaf4, 305+x, 261, 306, 306);
  pop();
}

void yLeaf() {
  push();
  //tint(255,alpha);
  image(yleaf1, 131, 126);
  image(yleaf1, 342, 217);
  image(yleaf1, 220, 97);
  image(yleaf1, 136, 227);
  image(yleaf2, 190, 257);
  image(yleaf2, 236, 161);
  image(yleaf2, 229, 80);
  image(yleaf3, 234, 152, 306, 306);
  //image(yleaf3,305,261,306,306);
  a1 = map(500-y1, 0, 296, 0, 255);
  a2 = map(500-y2, 0, 380, 0, 255);
  a3 = map(500-y3, 0, 287, 0, 255);
  //effect of falling leaves
  push();
  tint(255, a1);
  image(yleaf4, 147+x, y1, 130, 130);
  image(yleaf4, 276-x, y1, 130, 130);
  tint(255, a2);
  image(yleaf5, 347+x, y2, 130, 130);
  image(yleaf5, 256+x*0.2, y2, 130, 130);
  tint(255, a3);
  image(yleaf6, 300+x, y3, 130, 130);
  image(yleaf6, 120-x*0.5, y3, 130, 130);
  pop();
  if (y1<height) {
    y1 += 6;
  } else {
    y1 = 204;
  }
  if (y2<height) {
    y2 += 4;
  } else {
    y2 = 120;
  }
  if (y3<height) {
    y3 += 5;
  } else {
    y3 = 213;
  }
  pop();
}

void wLeaf() {
  image(wleaf3, 234, 152, 306, 306);
  image(wleaf3, 305, 261, 306, 306);
  image(wleaf2, 215, 41);
  image(wleaf2, 133, 127);
  image(wleaf2, 132, 224);
  image(wleaf2, 271, 195);
  image(wleaf2, 400, 219);
  image(wleaf2, 347, 312);
  image(wleaf2, 309, 297);
  image(wleaf2, 190, 257);
  image(wleaf2, 236, 161);
  image(wleaf1, 306, 123);
  image(wleaf1, 229, 80);
  image(wleaf1, 149, 288);
  image(wleaf1, 190, 257);
  image(wleaf1, 236, 161);
  image(wleaf1, 229, 80);
}

void show_wleaf() {
  int trans = 255;
  if (check == true) {
    push();
    tint(255, trans);
    image(rbg, width/2, height/2, width, height);
    image(tree, width/2, height/2, 500, 500);
    wLeaf();

    //effect of rain
    for (int i=0; i<50; i++) {
      strokeWeight(0.3);
      stroke(255, map(constrain(posY[i], 400, 500), 400, 500, 255, 0));
      line(posX[i], posY[i], posX[i], posY[i]+len[i]);
      posY[i] = posY[i] + spd[i];
      if (posY[i] >= 500) {
        posY[i] = 0;
      }

      push();
      shapeMode(CENTER);
      noFill();
      stroke(255, map(scl[i], 1, 2, 255, 0));
      ellipse(px[i], py[i], a[i]*scl[i], b[i]*scl[i]);
      scl[i] = scl[i]+0.03;
      if (scl[i]>=2) {
        scl[i] = 1;
      }
      pop();
    }
    trans = trans-1;
    if (trans == 0) {
      check = false;
    }
    pop();
  }
}

void setupSerial() {
  printArray(Serial.list());
  myPort = new Serial(this, Serial.list()[3], 9600);
  myPort.clear();
  // Throw out the first reading,
  // in case we started reading in the middle of a string from the sender.
  myString = myPort.readStringUntil( 10 );  // 10 = '\n'  Linefeed in ASCII
  myString = null;

  values = new int[NUM_OF_VALUES_FROM_PROCESSING];
  sensorValues = new int[NUM_OF_VALUES_FROM_ARDUINO];
}

void getSerialData() {
  while (myPort.available() > 0) {
    myString = myPort.readStringUntil( 10 ); // 10 = '\n'  Linefeed in ASCII
    if (myString != null) {
      print("from arduino: "+ myString);
      String[] serialInArray = split(trim(myString), ",");
      if (serialInArray.length == NUM_OF_VALUES_FROM_ARDUINO) {
        for (int i=0; i<serialInArray.length; i++) {
          sensorValues[i] = int(serialInArray[i]);
        }
      }
    }
  }
}

void sendSerialData() {
  String data = "";
  for (int i=0; i<values.length; i++) {
    data += values[i];
    //if i is less than the index number of the last element in the values array
    if (i < values.length-1) {
      data += ","; // add splitter character "," between each values element
    }
    //if it is the last element in the values array
    else {
      data += "\n"; // add the end of data character "n"
    }
  }
  //write to Arduino
  myPort.write(data);
  print("to arduino: "+ data); // this prints to the console the values going to arduino
}
Here’s the circuit:

Here are the elements we used in the Processing:

