- FANtabulous-Maggie Wang-Gottfried Haider
- Chinese fans have a rich cultural history and connotations, yet they face challenges due to traditional static display methods, and fan culture requires more dynamic and engaging expressions. Our project aims to enable intriguing interactions between the audience and the scene, creating a multi-sensory immersive experience through Chinese fans. Through various interactions, such as flapping, patting, and dividing, participants can use a fan as an interactive prop to experience the fusion and harmony between the fan and traditional culture. We want to make a project that requires interaction between the fan and the projection so that the audience could experience the charm of Chinese fan culture. We intend to construct a projection screen and place several sensors behind it. The movements of the fan will affect how the projection appears on the screen when the hidden sensors detect the movements and send signals to processing which controls the images. Users mainly use the fan for patting and fanning( to make the butterflies move or split a rock), both of which are conventional fan movements. In order to complete our task, we used processing to create various projection scenes and placed sensors behind the screen. The topic of this project is Chinese fan culture, which was inspired by the preparatory research we did. There was a project we found about Chinese oil-paper umbrellas.
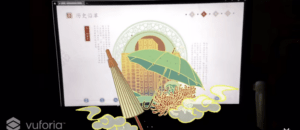
It’s an interactive project that introduces new and innovative ways to engage with traditional Chinese oil-paper umbrellas, such as incorporating technology, interactivity, and modern design elements. In that project, they make use of the AR and VR technology to give users immersive experiences using Chinese oil-paper umbrellas and experience the beauty and cultural heritage behind them. Similarly, we can use Arduino and Processing to achieve a similar effect. Users can get their hands on the Chinese fans and experience by making different movements. The idea of using the projection and moving the fan in front of the screen also comes from the Interactive Light Painting- Pu Gong Ying Tu (Dandelion Painting) project. In this project, there’s a fabric with the image of dandelions on it. The sensors an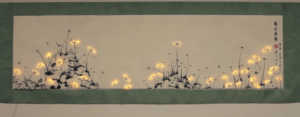 d LEDs are behind the fabric. It uses the distance sensor, when the person is close enough and exhales on the dandelion, the white LEDs, which represent the white tops, will fly away. This gives us the inspiration to use the fan to affect the images on the screen. In our project, the users can engage with the fan and experience the process in several ways, including flapping, patting, and dividing. By controlling the fan by moving it in different ways, the user can send the message to the installation. And the installation can reply back to the user by the change of the image. So there’s communication between the user and the machine. During the user test session, we were given the feedback that the instruction wasn’t clear and we had to explain to the users what they should do with the fan. Another problem was that the sensors weren’t that sensitive. Also, we added some sound effects but since it was too noisy on the scene the users can’t hear much sound.
Based on this feedback, we made some adaptations. To start with, we added instructions by putting text beside the related image. When the user starts fanning and the sensor detects it, the text will change, indicating the validity of the fanning. We also added a bar to indicate the quantity of wind produced. For the problem with the sound, we borrowed a speaker to create a more immersive environment. Taking the suggestion that we could make some decorations for the frame, we stuck flowers on the wooden frame to fit the painting. 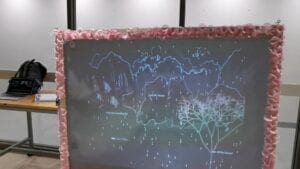 We also kept adjusting the data of the sensor to make them more precise. These turned out to be effective adaptations.
- The first important fabrication step was making the frame. We sought help from Andy with the wooden frame.
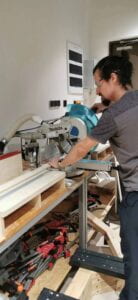 Andy helped us cut the board into the desired size,
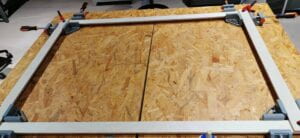 and we glued them together.
 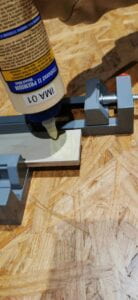 Then we attached the fabric to the frame. Then the major step is to attach the sensor to the frame. This was ideally easy, but it turned out to be really hard. We spent a lot of time figuring out how to attach the flex sensor so that it can detect the movement of the fabric. We had a perfect image in mind, but the reality was not the same. At first, we tried to directly stick the sensor on the fabric, but the change of data in the serial monitor wasn’t obvious enough. We tried to place it under the stick, but it still didn’t work well.
 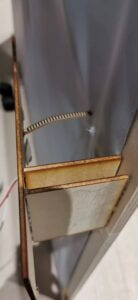 We thought about changing to another sensor if this couldn’t work out. But finally, we decided to stick to the flex sensor. We came up with the idea to use the board to stabilize the sensor. I made use of the board left for the popcorn session. We first stuck the sensor to the board and stuck the boards together. The other end of the sensor was stuck to the fabric. The result turned out to be very good.
 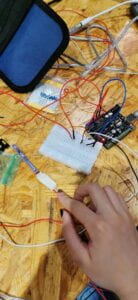 Besides the flex sensor, we also used the distance sensor and the vibration sensor. We used them in a similar way.
 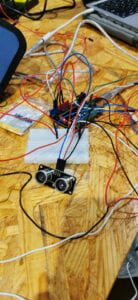 I placed the distance sensor in the middle of the stick. And we measured the data when we put our hands in the middle of the stone. We widened the range to reach a better effect.
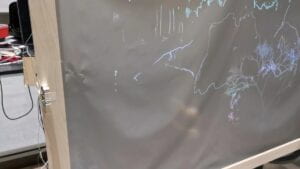 For the vibration sensor, I discovered that clicking it would make a huge difference. So we simply stuck it on the fabric. To make the function more obvious to the user, we print the image of the snowflake and stuck it on the fabric.
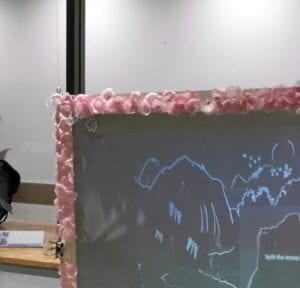 We also added the text “Hit it” next to the snowflake. However, from the presentation, I can see that the text is too small for the users to notice. We still had to explain how to use our project to the users. There were many ways for us to draw the paintings on processing. But we decided to use what we learned in class. The butterfly is a video.
 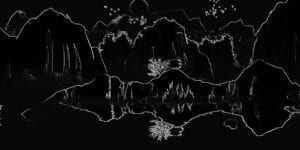 And the splitting stone is a photo covered by two photos. And the tree and the snow are coded. We managed to reach a relatively good visual effect in the simplest way. For this project, an important decision we made is to free the fan and add everything, including the sensors and actuators to the screen. This was because we hoped the users to feel like they were actually fanning. If there would be cables and noticeable sensors on the fan, it would ruin the kind of feeling we were trying to create. The goal was to combine the sensors with the screen. And the users won’t feel like they needed to activate the sensor, instead, they could use the fan to manipulate the image on the screen. We want to reach the effect that the users cannot tell how we make it happen and how they manipulate the image. The result turned out to be rather successful. Besides these, another major problem we faced was how we could stabilize the screen. Thanks to Gohai’s advice, with his help, we hung the screen on the sticks using the fishing line.
 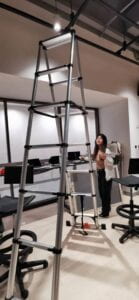 One drawback of it was that we would not be able to move our project anywhere else. It took us a long time to place it in the right position. Moreover, the placement of the projector was also tricky. It was hard to decide on a specific spot. And we needed to keep changing it to have a fuller projection. Our cables were lifted in the air, and they fell apart easily. We couldn’t place them on the table. In order to fix it, I taped all the cables. One thing I learned from the other group was that I could braid all the cables. I also used hot glue to glue the breadboard because the cables attached to it also fell apart easily. I also learned this from the other group.
 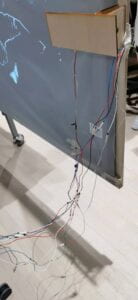 For the original design, we only had two sensors, the flex sensor, and the distance sensor. We were sure to use the flex sensor. Because this was the best way we could think of to create the effect of fanning. But we weren’t sure about the other sensors. One problem with the flex sensor was that it detects the movement of the whole fabric. If we fan, the data it collects on the different parts of the fabric is similar. So we couldn’t use it to control all the different parts of the painting. Therefore, we had to use other sensors to make more interaction. We thought about the distance sensor, the light sensor, and the laser sensor. We found that the distance sensor was perfect for the action of splitting the stone. We also want to add another sensor to reach another effect. The light sensor wasn’t a good choice since we were using projection. We decided to use the vibration sensor at the last minute. It was effective, but it also had problems. It was separated from the other two sensors and did not have strong connections. So even if we had instructions, the user still wasn’t sure how to make it snow. It might be better if we could think of more ways to get different data from simply fanning different parts of the fabric.
D. The original goal is to make a project that creates interaction between the fan, which represents the user, and the projection, which represents the computer so that the audience could experience the charm of Chinese fan culture. I think we managed to reach the stated goal. Our projection is beautiful in my eyes. The audience used the fan in different ways to trigger the various effects on the screen. When people fan, the leaves fall down and the butterflies fly up. When they place the fan between the stone, the stone split. When they click the snowflake, it snows. The audience can communicate with the screen. The audience can get the meaning of the movements, and the screen can provide timely feedback. One improvement we could make is to make the stone splitting more obvious. We could create a prompt or a scenario for the audience. The stone part could be glowing, and the user needs to split it to see what’s inside.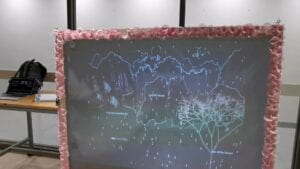
We could also make better use of the text to guide the user to finish different steps, instead of making them do so randomly. In this way, the interaction can be more organized. This can make the audience feel more like completing a mission. What we should keep perfecting is the preciseness of the sensor and its response speed. There are still ways to think about to make the interaction more fluent. What’s more, we could think about how to stick to the fanning action, which is the most basic action of the fan, and create interaction based only on that so that the other parts won’t be separated. The audience can accomplish all the effects by fanning different areas of the screen. In this way, the project makes more sense and is more easy to understand. The creation process was very difficult and time-consuming. But one takeaway is that I didn’t think that we managed to accomplish this project in such a limited time. This matches our ideal image for this project. In our midterm project, our first plan was not practical so we had to move to plan b. But for this final project, it was lucky that our first decision worked out well. I integrated the knowledge I learned throughout the semester to complete this project. It’s important because our idea of combining Arduino and Processing was successful. We used Processing for the images and the sound effects. And we come up with an innovative way to use the fan to control the sensors. What’s most important is that we explore the Chinese traditional culture and integrate it into our own project.
E.
Processing:
import processing.video.*;
import processing.serial.*;
import processing.sound.*;
PImage photo1;
PImage photo2;
PImage photo3;
Serial serialPort;
SoundFile sound;
SoundFile rock;
SoundFile leafsound;
int NUM_OF_VALUES_FROM_ARDUINO = 3;
int arduino_values[] = new int[NUM_OF_VALUES_FROM_ARDUINO];
float startTime;
int prev_values[] = new int[NUM_OF_VALUES_FROM_ARDUINO];
float dropX, dropY;
float x=0;
int y=0;
int z=0;
int dropCount = 200;
int dropFrame = 0;
Movie myMovie;
color dropColor = color(255);
ArrayList<Branch> branches = new ArrayList<Branch>();
ArrayList<Leaf> leaves = new ArrayList<Leaf>();
int maxLevel = 9;
Drop[] drops = new Drop[dropCount];
int dropState = 0; // 0 not raining 1 raining
void setup() {
size(1200, 1000);
background(0);
//sound = new SoundFile(this, “bgm2.mp3”);
//sound.amp(0.3);
//sound.loop();
rock = new SoundFile(this, “stonespilt.mp3”);
leafsound = new SoundFile(this, “leafsound.mp3”);
photo1 = loadImage(“mountain.png”);
photo2 = loadImage(“stone1.png”);
photo3 = loadImage(“stone2.png”);
printArray(Serial.list());
serialPort = new Serial(this, “/dev/cu.usbmodem1101”, 9600);
myMovie = new Movie(this, “butterfly.mp4”);
myMovie.loop();
colorMode(HSB, 100);
generateNewTree();
for (int i = 0; i < drops.length; i++) {
drops[i] = new Drop(random(width), random(-200, -50));
}
}
void draw() {
background(0);
getSerialData();
//pushMatrix();
translate(width, 0);
scale(-1, 1);
if (myMovie.available()) {
myMovie.read();
image(photo1, 0, 100, 1200, 600);
image(photo2, 400-y, 280, 300, 400);
image(photo3, 650+y, 280, 300, 400);
image(myMovie, 50, 500+z*5, 80, 80);
image(myMovie, 150, 500+z*5, 130, 130);
image(myMovie, 100, 400+z*5, 115, 115);
if (arduino_values[0]<120) {
z=-125+arduino_values[0];
}
if (arduino_values[0] < 120 && leafsound.isPlaying() == false) {
leafsound.play();
}
if (arduino_values[1]>55 && prev_values[1] >= 50 && arduino_values[1]<70 &&rock.isPlaying() == false) {
y=200;
rock.play();
startTime=millis();
}
if (millis()-startTime>=4000) {
y=0;
}
for (int i = 0; i < branches.size(); i++) {
Branch branch = branches.get(i);
branch.move();
branch.display();
}
for (int i = leaves.size()-1; i > -1; i–) {
Leaf leaf = leaves.get(i);
leaf.move();
leaf.display();
leaf.destroyIfOutBounds();
}
}
if (arduino_values[0]<120) {
for (Leaf leaf : leaves) {
PVector explosion = new PVector(leaf.pos.x, leaf.pos.y);
explosion.normalize();
explosion.setMag(0.01);
leaf.applyForce(explosion);
leaf.dynamic = true;
}
// copy the current values into the previous values
// so that next time in draw() we have access to them
for (int i=0; i < NUM_OF_VALUES_FROM_ARDUINO; i++) {
prev_values[i] = arduino_values[i];
}
}
if (arduino_values[2]>30 && dropState == 1 ) {
dropState = 0;
}
if (arduino_values[2]>30 && dropState == 0) {
dropState = 1;
}
if ( dropState ==1 ) {
for (int i = 0; i < drops.length; i++) {
drops[i].display();
drops[i].update();
}
dropFrame = dropFrame + 1;
}
if (dropFrame == 300) {
dropFrame = 0;
dropState = 0;
}
//popMatrix();
pushMatrix();
fill(255, 0, 255);
textSize(30);
text(“Explore the 3 triggers in this picture!”, 10, 50);
rect(200, 800, (138-arduino_values[0])*2, 10);
noFill();
stroke(255, 0, 255);
rect(200, 800, (138-70)*2, 10);
//textSize(20);
//text(“Wind Strength”, 860, 910);
if (arduino_values[0]<120) {
textSize(20);
//fill(129,99,99);
text(“They are flying!”, 140, 600);
text(“They are falling!”, 1000, 840);
} else {
textSize(20);
text(“Help the butterflies fly!”, 140, 600);
text(“Fan off the leaves!”, 1000, 840);
}
if (arduino_values[1]>60 && prev_values[1] >= 50 && arduino_values[1]<70) {
//text(“Good job!”, 500, 450)
} else {
text(“Spilt the stone!”, 500+x, 450+x);
x=random(-3, 3);
}
popMatrix();
}
void generateNewTree() {
branches.clear();
leaves.clear();
float rootLength = 150;
branches.add(new Branch(width/1.2, height, width/1.2, height-rootLength, 0, null));
subDivide(branches.get(0));
}
void subDivide(Branch branch) {
ArrayList<Branch> newBranches = new ArrayList<Branch>();
int newBranchCount = (int)random(1, 4);
switch(newBranchCount) {
case 2:
newBranches.add(branch.newBranch(random(-45.0, -10.0), 0.8));
newBranches.add(branch.newBranch(random(10.0, 45.0), 0.8));
break;
case 3:
newBranches.add(branch.newBranch(random(-45.0, -15.0), 0.7));
newBranches.add(branch.newBranch(random(-10.0, 10.0), 0.8));
newBranches.add(branch.newBranch(random(15.0, 45.0), 0.7));
break;
default:
newBranches.add(branch.newBranch(random(-45.0, 45.0), 0.75));
break;
}
for (Branch newBranch : newBranches) {
branches.add(newBranch);
if (newBranch.level < maxLevel) {
subDivide(newBranch);
} else {
float offset = 5.0;
for (int i = 0; i < 5; i++) {
leaves.add(new Leaf(newBranch.end.x+random(-offset, offset), newBranch.end.y+random(-offset, offset), newBranch));
}
}
}
}
class Branch {
PVector start;
PVector end;
PVector vel = new PVector(0, 0);
PVector acc = new PVector(0, 0);
PVector restPos;
int level;
Branch parent = null;
float restLength;
Branch(float _x1, float _y1, float _x2, float _y2, int _level, Branch _parent) {
this.start = new PVector(_x1, _y1);
this.end = new PVector(_x2, _y2);
this.level = _level;
this.restLength = dist(_x1, _y1, _x2, _y2);
this.restPos = new PVector(_x2, _y2);
this.parent = _parent;
}
void display() {
stroke(10, 30, 20+this.level*4);
strokeWeight(maxLevel-this.level+1);
if (this.parent != null) {
line(this.parent.end.x, this.parent.end.y, this.end.x, this.end.y);
} else {
line(this.start.x, this.start.y, this.end.x, this.end.y);
}
}
Branch newBranch(float angle, float mult) {
PVector direction = new PVector(this.end.x, this.end.y);
direction.sub(this.start);
float branchLength = direction.mag();
float worldAngle = degrees(atan2(direction.x, direction.y))+angle;
direction.x = sin(radians(worldAngle));
direction.y = cos(radians(worldAngle));
direction.normalize();
direction.mult(branchLength*mult);
PVector newEnd = new PVector(this.end.x, this.end.y);
newEnd.add(direction);
return new Branch(this.end.x, this.end.y, newEnd.x, newEnd.y, this.level+1, this);
}
void sim() {
PVector airDrag = new PVector(this.vel.x, this.vel.y);
float dragMagnitude = airDrag.mag();
airDrag.normalize();
airDrag.mult(-1);
airDrag.mult(0.05*dragMagnitude*dragMagnitude);
PVector spring = new PVector(this.end.x, this.end.y);
spring.sub(this.restPos);
float stretchedLength = dist(this.restPos.x, this.restPos.y, this.end.x, this.end.y);
spring.normalize();
float elasticMult = map(this.level, 0, maxLevel, 0.1, 0.2);
spring.mult(-elasticMult*stretchedLength);
}
void move() {
this.sim();
this.vel.mult(0.95);
if (this.vel.mag() < 0.05) {
this.vel.mult(0);
}
this.vel.add(this.acc);
this.end.add(this.vel);
this.acc.mult(0);
}
}
class Leaf {
PVector pos;
PVector originalPos;
PVector vel = new PVector(0, 0);
PVector acc = new PVector(0, 0);
float diameter;
float opacity;
float hue;
float sat;
PVector offset;
boolean dynamic = false;
Branch parent;
Leaf(float _x, float _y, Branch _parent) {
this.pos = new PVector(_x, _y);
this.originalPos = new PVector(_x, _y);
this.parent = _parent;
this.offset = new PVector(_parent.restPos.x-this.pos.x, _parent.restPos.y-this.pos.y);
if (leaves.size() % 5 == 0) {
this.hue = 2;
} else {
this.hue = random(75.0, 95.0);
this.sat = 50;
}
}
void display() {
noStroke();
fill(this.hue, 40, 100, 40);
ellipse(this.pos.x, this.pos.y, 5, 5);
}
void bounds() {
if (! this.dynamic) {
return;
}
float ground = height-this.diameter*0.5;
if (this.pos.y > height || this.pos.x > width || this.pos.y < 0 || this.pos.x < 0) {
this.vel.y = 0;
//this.vel.x *= 0.95;
this.vel.x = 0;
this.acc.x = 0;
this.acc.y = 0;
//this.pos.y = ground;
this.pos = this.originalPos;
this.dynamic = false;
}
}
void applyForce(PVector force) {
this.acc.add(force);
}
void move() {
if (this.dynamic) {
PVector gravity = new PVector(0, 0.005);
this.applyForce(gravity);
this.vel.add(this.acc);
this.pos.add(this.vel);
this.acc.mult(0);
this.bounds();
} else {
this.pos.x = this.parent.end.x+this.offset.x;
this.pos.y = this.parent.end.y+this.offset.y;
}
}
void destroyIfOutBounds() {
if (this.dynamic) {
if (this.pos.x < 0 || this.pos.x > width) {
leaves.remove(this);
}
}
}
}
float distSquared(float x1, float y1, float x2, float y2) {
return (x2-x1)*(x2-x1) + (y2-y1)*(y2-y1);
}
class Drop {
float x, y, ySpeed;
Drop(float x_, float y_) {
x = x_;
y = y_;
ySpeed = random(5, 15);
}
void display() {
noStroke();
fill(dropColor);
ellipse(x, y, 5, 10);
}
void update() {
y += ySpeed;
// If the raindrop reaches the bottom of the screen, reset its position
if (y > height) {
y = random(-200, -50);
x = random(width);
}
}
}
void getSerialData() {
while (serialPort.available() > 0) {
String in = serialPort.readStringUntil( 10 ); // 10 = ‘\n’ Linefeed in ASCII
if (in != null) {
print(“From Arduino: ” + in);
String[] serialInArray = split(trim(in), “,”);
if (serialInArray.length == NUM_OF_VALUES_FROM_ARDUINO) {
for (int i=0; i<serialInArray.length; i++) {
arduino_values[i] = int(serialInArray[i]);
}
}
}
}
}
Arduino:
const int flexPin = A0;
const int trigPin = A2;
const int echoPin = A1;
long duration;
int distance;
int flexValue;
void setup() {
Serial.begin(9600);
pinMode(trigPin, OUTPUT);
pinMode(echoPin, INPUT);
}
void loop() {
delay(20);
// digitalWrite(trigPin, LOW);
// delayMicroseconds(2);
// digitalWrite(trigPin, HIGH);
// delayMicroseconds(10);
// digitalWrite(trigPin, LOW);
// duration = pulseIn(echoPin, HIGH);
// distance = duration * 0.034 / 2;
// Serial.println(distance);
// delay(50);
// int flexValue= analogRead(A0);
// int distence= analogRead(A1);
flexValue = analogRead(flexPin);
delay(200);
digitalWrite(trigPin, LOW);
delayMicroseconds(2);
digitalWrite(trigPin, HIGH);
delayMicroseconds(10);
digitalWrite(trigPin, LOW);
duration = pulseIn(echoPin, HIGH);
distance = duration * 0.034 / 2;
int val;
val=analogRead(3);
Serial.print(flexValue);
Serial.print(‘,’);
Serial.print(distance);
Serial.print(‘,’);
Serial.println(val,DEC);
delay(50);
}
picture reference:
Tree code reference: https://blog.csdn.net/weixin_38937890/article/details/95176710
Video references:https://www.bilibili.com/video/BV1t3411g7PT/?spm_id_from=333.880.my_history.page.clickhttps://www.bilibili.com/video/BV1GW41157FV/?spm_id_from=333.880.my_history.page.click&vd_source=f866fba9037e3c6bb5c31a3be8244b62
 Title
Title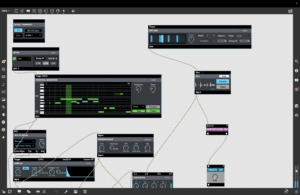
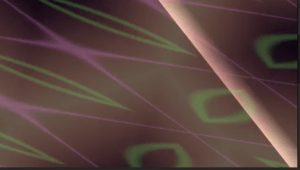
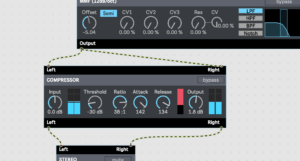
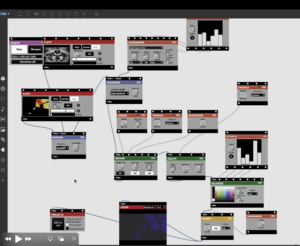
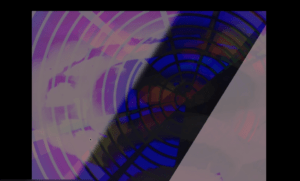
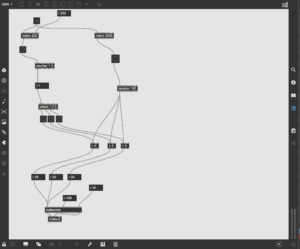
 There were many patterns I could choose from and I tried out every one of them. I finally chose the polygonal-like pattern as the background visual. I control the zoom range and rotation of this background visual so that it moves and floats with the noisy sound. I added KARPLUS and GIGAVERB to give the piano notes a stronger oscillation and reverb. To generate the videos, I tried using different Mix-composite modules like LUMAKEYR. It combines 2 videos using lumakeying, but the output turned out to be too complex. I decided to use EASEMAPPER to generate the diamond-like pattern. The data goes into zoom and rotation angle. So when each piano note triggers, the diamonds rotate once. Therefore, we can see the trigger of the piano notes from the movement of the patterns. And the patterns keep changing with the input data. To color the patterns, I tried different modules like POSTERIZR, COLORIZR, etc. I intended the change the color of both patterns corresponding to the beat of the music and the frequency of the audio. But this didn’t really work well.
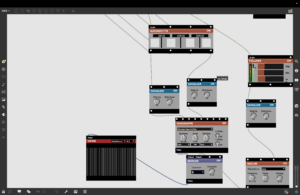
 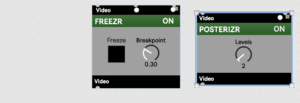 I found that using MAPPR to change the color of these patterns corresponding to the piano notes has a better effect. I hope to change the color once the note hits. However, the effect was not what I expected. So I eventually used the TWIDDLR module to change the color. But in the final output, the lines weren’t actually changing color.
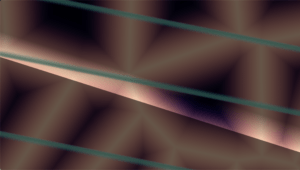 Another aspect I considered was the pattern to represent the notes. I originally used the straight-line pattern, but then I found it would be in conflict with the other line pattern generated. So I changed it to diamond-like patterns so that the change in music could be viewed more obviously.
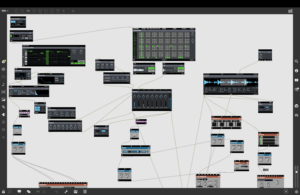
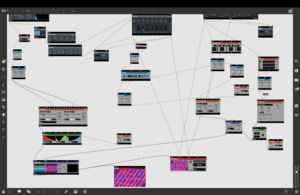
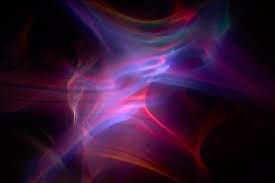
 In this film and all the other films Norman produced, we can get the idea that “he used film as an alternative tool of expression and a canvas to express flowing movement and rhythm” (Russell). He’s really managing to draw the movements of art.
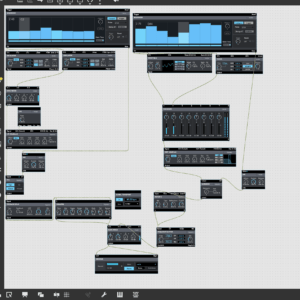
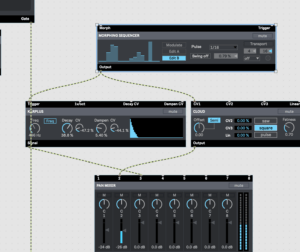
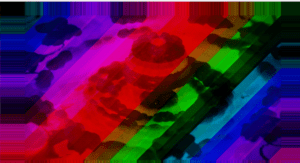

 many, like POSTERIZR. This module is useful for creating interactive patterns, so it doesn’t fit in best with the output I wished to create.
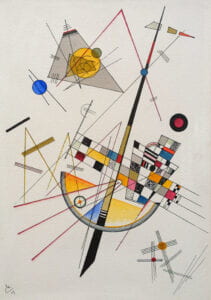
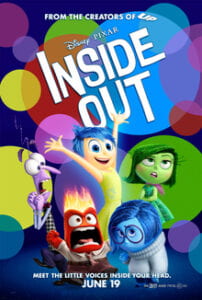 The movie Inside Out is also an example of synesthesia. In the movie, the five emotions become human figures and they differ in color. Disgust is green, Anger is red, Joy is orange, Sadness is blue and Fear is purple. From my perspective, the filmmaker’s decision on the color of the five emotional characters is related to synesthesia. When people are happy, they may think of warm colors like yellow or orange, which is the color of Joy, and vice versa. When people see warm colors like yellow or orange, their spirits may lift up. When we say the word blue, it doesn’t only mean the color, but it also contains the meaning of sadness. So in the movie, the colors and the emotions are related. This reminds me of the synesthetic perceptions of color mentioned in the reading (419). Though different in meaning, there is a connection between the letters, colors, brightness, etc.


 We also kept adjusting the data of the sensor to make them more precise. These turned out to be effective adaptations.
 Andy helped us cut the board into the desired size,
 and we glued them together.
  Then we attached the fabric to the frame.
  We thought about changing to another sensor if this couldn’t work out. But finally, we decided to stick to the flex sensor. We came up with the idea to use the board to stabilize the sensor. I made use of the board left for the popcorn session. We first stuck the sensor to the board and stuck the boards together. The other end of the sensor was stuck to the fabric. The result turned out to be very good.
  Besides the flex sensor, we also used the distance sensor and the vibration sensor. We used them in a similar way.
  I placed the distance sensor in the middle of the stick. And we measured the data when we put our hands in the middle of the stone. We widened the range to reach a better effect.
 For the vibration sensor, I discovered that clicking it would make a huge difference. So we simply stuck it on the fabric. To make the function more obvious to the user, we print the image of the snowflake and stuck it on the fabric.
 We also added the text “Hit it” next to the snowflake. However, from the presentation, I can see that the text is too small for the users to notice. We still had to explain how to use our project to the users. There were many ways for us to draw the paintings on processing. But we decided to use what we learned in class. The butterfly is a video.
  And the splitting stone is a photo covered by two photos. And the tree and the snow are coded. We managed to reach a relatively good visual effect in the simplest way. For this project, an important decision we made is to free the fan and add everything, including the sensors and
  One drawback of it was that we would not be able to move our project anywhere else. It took us a long time to place it in the right position. Moreover, the placement of the projector was also tricky. It was hard to decide on a specific spot. And we needed to keep changing it to have a fuller projection. Our cables were lifted in the air, and they fell apart easily. We couldn’t place them on the table. In order to fix it, I taped all the cables. One thing I learned from the other group was that I could braid all the cables. I also used hot glue to glue the breadboard because the cables attached to it also fell apart easily. I also learned this from the other group.


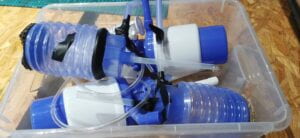 However, we couldn’t get it to work. I came up with the idea of using water bottles and straws to squeeze the water in and out. We first tried round bottles but they make too much noise. Then we decided to use quadrate water bottles. They’re easier to squeeze. We spent a lot of time trying out the right bottle, drilling holes, and stabling the tubes and the bottles together.
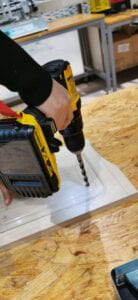
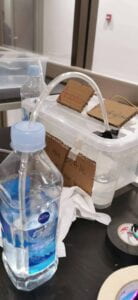 But Gohai suggested we should put on paintings or photos to demonstrate them more clearly.
 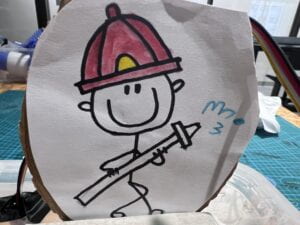 The adaptations we made were effective. Users know what they should do regardless of our explanations. Despite the fabrication, we also jointly work on the code and electronics. It took us a lot of time to get the code right.
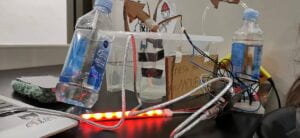 Our idea wasn’t easy to accomplish. One thing I learned from the setbacks is to accept the fact that our anticipation may not work out and we need to move to plan b. We decided to explore the messiest element when it comes to electric devices-water. Fortunately, we didn’t screw up. It was fantastic that we can use sensors and electronic devices to detect water.