A. UFO Fight – Luna & Michelle – Prof. Andy
B. Context and Significance
To me, interaction always means fun, immersive, and unique experiences.
I think how unique one interactive design is to its different players decides the degree of its interactivity.
Random, unpredictable, and personal should always be the key feature of an interactive design.
Our targeted audience is us, the naive college students who want to release pressure and just have fun.
C. Conception and Design
a. Conception
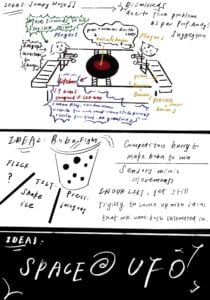
Finally, we decided to develop our idea based on the idea of “SPACE FIGHT” come up with by Michelle.
b. Design and Mechanism
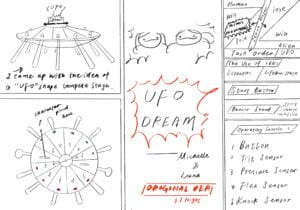
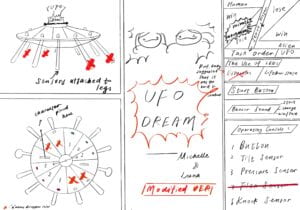
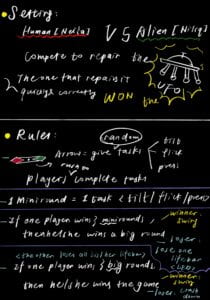
c. Interaction between UFO and players:
Arrow and buzzer sound (Servo and Buzzer) – Give random order to players.
Players – Complete tasks accordingly.
Sensors – detect if players fulfill the task correctly, sending signals to the computer.
Computer – take counts, decide who wins, and give orders to servos to move.
Life bar (LEDs) – receive orders from the computer. (On/ Off)
Players – know whether they win or lose based on the life bar, the movements of characters that are attached to the servo, and the sound made by the buzzer.
d. Why UFO? Why cardboard?
Why UFO? – We both love the Space theme.
Why cardboard? – We only have them and we know how to use them. We can also use wood, but we were not familiar with it. So we used cardboard, which is easy to cut and not that fragile.
D. Fabrication and Production
I did most of the outfit and circuit part of this project.
a. Circuit Baby
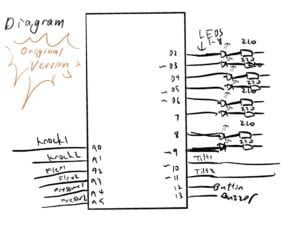
This is the original diagram drawn by Michelle based on what she was going to code. I started to build the circuit accordingly.
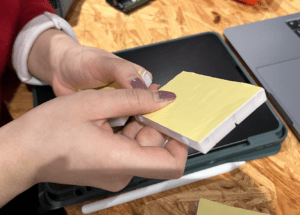
We connected the two breadboards since I could foresee that our circuit was going to take many places.
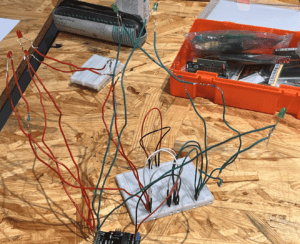
It was just the beginning. And the circuit had been as flourishing as the grass in spring.
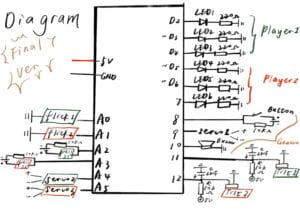
I changed and modified the diagram a little bit. Since we decided to remove 2 sensors and we needed some pins for our servos. This is basically the final version of our diagram.
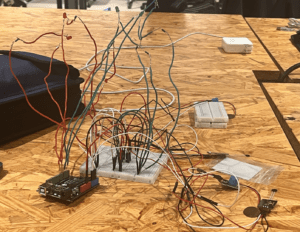
Building……
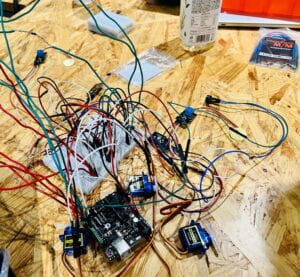
Finally done with countless wires and electrical components. It looks pretty messy. But I have to say, it’s indeed tidy and organized. No errors and mistakes.
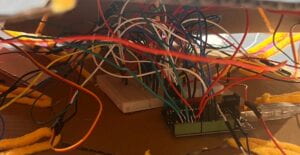
We sent it into the cardboard.
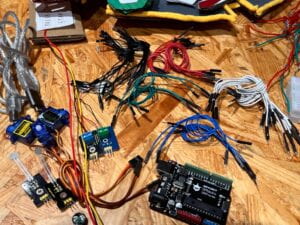
After our project was done. We disassembled them. Again, super tidy and organized.
I borrowed wires from other friends with the concern of colors.
Also, I tried to find and cut wires from the wire board in the studio. The classifications between strand wires and solid wires were wrong there.
It was never easy to be an engineer…
b. Code Baby
This baby was basically raised by Michelle. I helped part of it with my math knowledge in the angle part.
- Project:
- Pitches. h:
c. Cardboard Baby
- Main Body
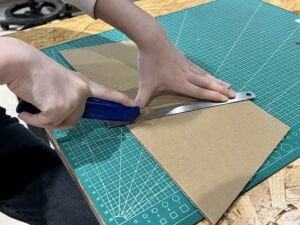
I first cut 2 octagonal cardboards, 16 t-shaped cardboards, and 8 triangular cardboards to make the cabin of the UFO.

The upper part looks like an egg tart indeed with the yellow yarn on the edge of the cardboard.
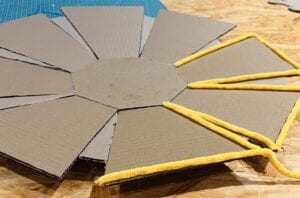
I initially used the yellow yarn to make the upper-part cardboards join together better as they were a bit out of shape from each other when I cut them. However, it was indeed not of much use in this aspect, but it helped our UFO to be more bright and eye-catching. Such that we decided to use the hot glue gun to attach it to the bottom part of the cabin as well.
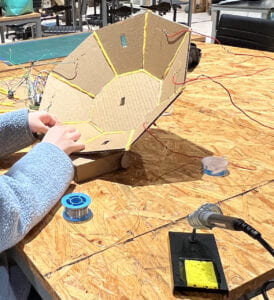
After double checking the circuit didn’t have any mistake with the code, we decided to attach the “circuit baby” to the cabin. I poked out the holes in the cardboard to insert servos after figuring out the angle and direction that determined how servos worked. Also, I attached the LEDs to the cardboard after re-ironing them to the wires and the resisters with the soldering iron.
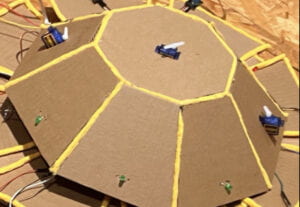
Many accidents happened here and later. I would explain later in this blog. Please wait and see ;D
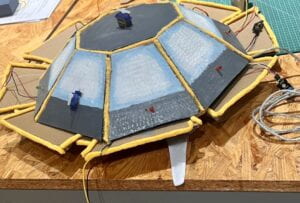
Then we started to color the cabin. Michelle suggested that we can mimic some windows with white and blue. And the main body should be gray. And we did accordingly.
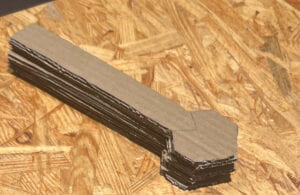
At the same time, I cut down 8 “legs”. (We only needed 6 indeed, but the extra 2 were quite essential to us since some modifications were made when we poked holes to attach sensors to the legs.)
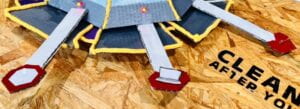
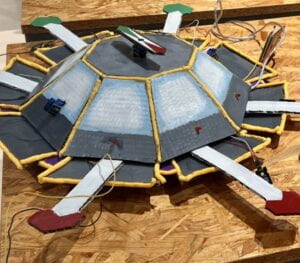 We divided the legs into 2 sets. One set was colored green and the other side was colored red to represent different players.
Later we attached the sensors to the legs. (Seen in the “instruction” part.)
- Neila and Niliq
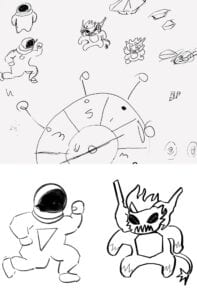
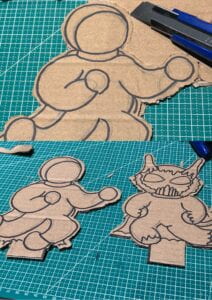
The scratch of Nelia and Niliq on paper was drawn by Michelle during her break ( escape away from her code baby).
Then I moved them to the Procreate to my pad, drew them on the cardboard, and cut them out.
After many try on Procreate, we decided to color them like this.
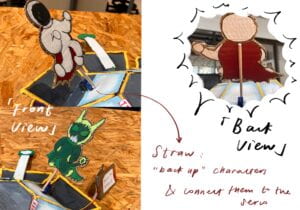
Their cloaks are the same color as the LEDs of the sides they represent.
I attached them to the straws and attached straws to the servo arms with hot glue.
I hoped they wouldn’t be too shaky. But they turned out to be kind of shaky. To reduce the shake, we also changed the code to reduce the range of the angle. We didn’t have any other better ways though. TT
- Arrow
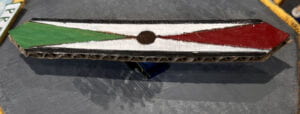 I cut and colored this arrow. Red and green represent different sides and were easy for players on each side to get the order from it.
- Instructions
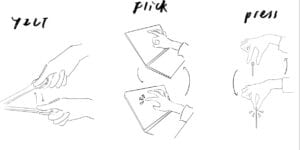
We decided to place some instructions on “windows” to make the players clear about what they should do to repair the UFO (Complete the task). Here were my scratches on Procreate.
The instruction of “TILT” was to mimic Wrench.
The instruction of “FLICK” was to mimic waking up the dead computer.
The instruction of “PRESS” was to mimic debugging and triggering.

Maybe our instruction was not clear enough such that many users tended to knock on windows instead of operating on the console (legs) equipped with sensors.
d. Accidents
- Small accident (Not a big deal) – Hands in color
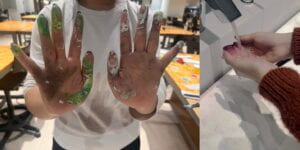
Michelle’s hands turned green because of the green legs. My hands turned purple (pink after I washed them) because of the fingerprint on the small triangles cardboards on the UFO.
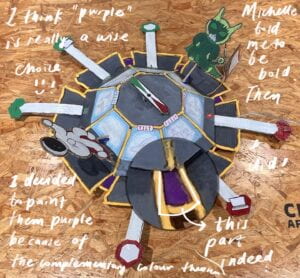
I do love this purple color and I think it matches the UFO well. However, I mean, gains will lose anyways.
- Big losses (Long time torturing) – Body Counts
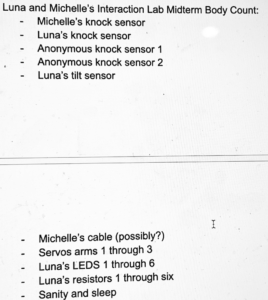
The knock sensors (Flick sensors) were super fragile. We had to iron them again and again.
Also, the connection between LEDs and resisters and wires was not so good. LEDs would sometimes fade away because of the shaking of the UFO. Thus we had to reinforce them again and again.
Maybe it was because my solder-ironing ability was too bad. TT
The wires that connected to the button also left the breadboard once because of the drag. Luckily, it finally went back to its position.
We had to fix and build and fix along our way. And to fix wires and components under the cabin was never easy work at midnights.

e. User test
Since we were not fully prepared during the user test. The advice given by our peers was basically what we were going to do next (like paint the UFO, reinforce the sensors, etc.)
We accepted Prof. Gottfried’s suggestion and used a pedestal display in our final presentation since it would be easier for players to move.
E. Conclusions
a. Videos (Remember to play with sound : D)
-
- Pure Play Version:
-
- Instruction Version:
-
- Easter Egg – Amazing Grace:
b. Thoughts:
Overall, I’m quite proud of what we spent days and nights to build.
It’s interesting and interactive. We don’t know what’s going to happen next. We can’t predict orders. Every game is random and unique. We didn’t tell players how many times they should tilt/ flick/ press. They had to try and do as best as they can.
If given more time and more experience, I might wish to try to construct it with wood and would try to reinforce the LEDs and resisters better. Also, I’ll probably try to undertake some coding tasks since we do have to code in this class.
Finally, great thanks to Michelle, who is the greatest mother of her code baby and explained her baby to me with patience. Great thanks to our friend Amelia Shao, who helped with our code and offered us emotional support when we were alone in the studio at midnight. Great thanks to LA Kevin, Sylvia, and Zhiyang for helping us with our code. Great thanks to Professor Andy and Gottfried for lending us electrical components, and tools and helping us a lot with the code.

Forgot to note❗️:
Neila = not an Alien = Human = Astronaut = Red side
Niliq = not Qilin = Alian = Green side
Credits here: Michelle
Really love their names!!!