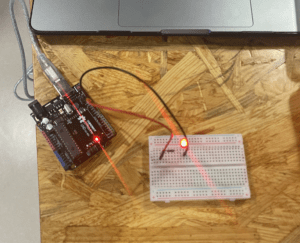
The first circuit I built was the same exact circuit I created in the first recitation class. There was a wire going from positive to a 220 Ohm resistor, then to the LED, and then from the LED to the ground. The only difference was instead of making the LED “blink” I made it “fade” by using a pre-made Arduino script—the light instead of turning on and off slowly brightened and dimmed.
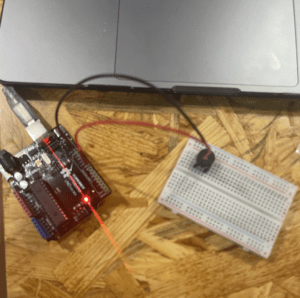
The second circuit was similar to the first one I created but I used a buzzer instead of an LED. The positive wire went to the buzzer and then the negative wire went to ground. Again, I used a pre-written script from Arduino called “toneMelody”. This script has the buzzer make a seven-note jingle.
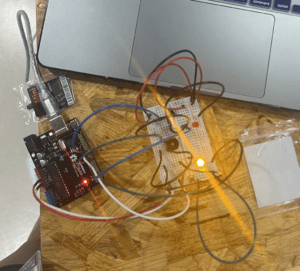
The last circuit was by far the most complicated circuit I have had to make in this class. It wasn’t difficult per se but all the components crowded onto the breadboard making it impossible to see.
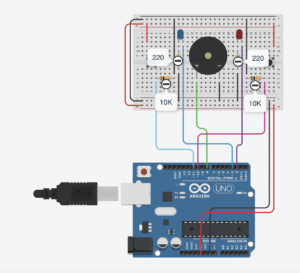
Following the diagram above, I started placing the components in one by one. I started with the basics, positive and negative wires. Then I moved left to right inserting the resistors, LED’s, buttons, and buzzer. When I was finally done I pressed upload and… nothing. I slowly and carefully looked at each wire placement and saw nothing until the last wire. I realized I forgot to connect the right button to positive. It is quite frightening how one wrong wire can make your whole circuit not work. Once I fixed that wire though, everything was fine. I had my friend play the game with me a few times until I got sick of losing.
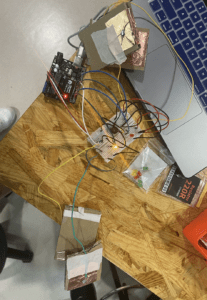
Looking at the clock I realized I had a tiny bit more time to make adjustments. I replaced the button with the paddles we made in the first recitation. I placed the first wire below the first red vertical wire on the left and the second above the first resistor on the left. For the second paddle, I placed the first wire under the red vertical wire all the way to the right and the second above the resistor all the way to the right. then when the paddles touched the circuit would act the same as if the button was pressed.
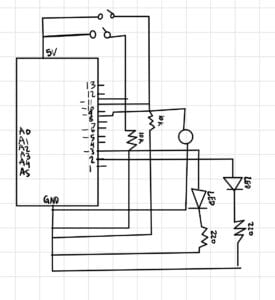
Schematic for circuit 3:

Question 1: Propose another kind of creative button you could use in Circuit 3 to make the game more interactive. Read and use some material from the Physical Computing, Introduction Chapter (p. xvii – p. xxix) to explain why this button would make this game more interactive.
Another way to make this game more interactive would be to replace the button with a scale/ pressure plate. Instead of just using your finger, one would have to jump really fast in order to win. The Physical Computing Introduction Chapter states that interaction can be broken down into three steps: listening, thinking, and speaking also known as the input, processing, and output. Because of this, I think that adding a scale/pressure plate would make this project more interactive because users would have to think about the right technique in order to win. For example, jumping high might be impressive but one would lose from the time it took on the way down. Jumping low might work but if your toes don’t make it off the scale the computer wouldn’t count it. Because people will have to figure out the perfect technique, I think this would be a much more interactive experience than pressing a button mindlessly.
Question 2: Why did we use a 10 kOhm resistor with each push button? (Psssst… Go back to your slides for this answer)
We use a 10k Ohm resistor before each push button because when the button is not being pressed, it still needs to be connected to ground to make the circuit 0 ohms or there will be a short circuit. The resistor is there also so that when the button is pressed down, the 5v doesn’t damage the button.
Question 3: In the book Getting Started with Arduino there is a clear description about the “Arduino Way” in chapter 2. Find a project that you find interesting that can be used as an example for these kind of projects. Cite it in adequate manner, include a picture, and explain the reasons that you chose it.
I am choosing Mark Rober’s Exploding Glitter Bomb project because throughout his innovation process he tinkers, he patches, and he creates prototypes. Mark Rober has dedicated four years now to creating a glitter bomb package to deter thieves from stealing packages off people’s porches. Because of this, the exploding glitter bomb is on its fourth version showing that Mark Rober embraces prototyping and creating different iterations to his project. In his fourth version, he patches by connecting pistons (to pop the top of the package off exposing the glitter bomb), servo motors (to continually spray the fart bomb sent), and four phones to get a 360 view of the thief. Though out this process he tinkers making little changes to be sure that everything works perfectly before he leaves the package out for an unsuspecting thief.
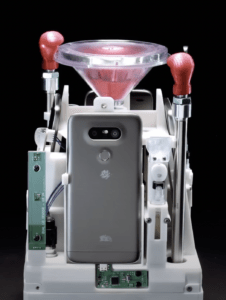
Works cited:
Onemeeeliondollars, director. YouTube, YouTube, 13 Dec. 2021, https://www.youtube.com/watch?v=3c584TGG7jQ. Accessed 25 Sept. 2022.
Leave a Reply