This was my first Interaction lab class.
In it there was a focus on physical computing which by definition is, building interactive physical systems by the use of software and hardware that can sense and respond to the analog world. The reason I think we learnt this is because we are expanding and exploring different ways in which humans and computers can interact and that opens our minds to new ideas.
The main focus was electricity in which we received a brief explanation of what it is and key terminology we have to know to understand it. Like Volts, Current and Ohms.
In the beginning of the practical starts off with collecting a variety of materials so that we are able to build a circuit. The first step was broken down into tasks. The first task was a simple circuit that involved using a switch to turn on a buzzer. My partner and I found this a bit challenging because we did not know how the Breadboard worked so it was difficult translating the image onto the actual circuit. We eventually did figure this out when the learning assistant helped us. For future reference I now know that the negative and positive terminals are on the opposing sides of the breadboard. The complete circuit is shown below.
The second and third step were a bit more challenging. In the second task there was an addition of a 220 ohm resistor and an LED light. We also came across difficulty here again because we were confusing the positive and negative ends of the LED. It also became very confusing because there were many cables and it was distracting. After receiving help from our instructor we learnt that it is much easier to build the circuit if you break it down into chunks. This helped and we were able to see how each component worked individually. For example when we pressed the switch the buzzer would make a noise and the LED would blink.
The third part for me was especially interesting because there was an addition of a variable resistor. The variable resistor fed fed current to a LED and by controlling the resistor is altered the brightness of the LED. this was especially interesting because through it we were able to truly see and experience the flow of electricity.
Overall we were able to work with understanding how electricity travels from positive to negative.
Task 2.
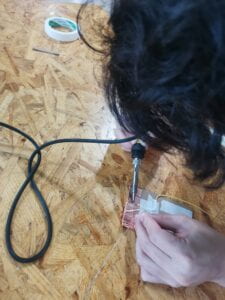
In task 2 we learnt how to solder. Soldering is the process of joining components to make a circuit. We used a soldering iron to apply solder to our DIY switch. This process was fairly easy and straight forward for my partner and I. However it is important to mention that you have to heat up the materials for the process to work.

Task 3
We connected the switch to our circuit and we took a crash course on morse code. This was fun to do but I’m pretty sure our message wasn’t clear, its pretty hard to learn a whole language in 10mins. We did have a great time making morse code music however.
Response to Questions.
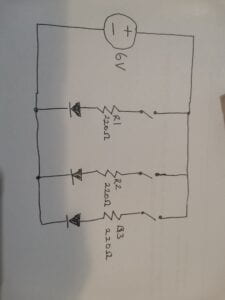
1.The Function of R1 was to limit the amount of current that flows through the LED. This is done to avoid damaging the component as every LED has a limit.
2.
3. After the reading I do think that there is interactivity in the circuit we built because it has a switch and a variable resistor. With these we were able to use our fingers to control the conditions of the circuit. For both my partner and I, we think the the interactivity was quite low level as it did spark interest in the beginning but that slowly began to fade away. As stated in the reading that for there to be good interactivity speaking, thinking and listening has to work well all together; One cannot be prominent than the other. The circuit does get more interesting when it gets more complicated though.
4. By looking at some of Zack Lieberman’s work, we can see that Interaction design and Physical computing is supposed to work seamlessly to create Interactive Art. According to him, states that you shouldn’t have to know that physical computing or technology is being used in order to create the art. An example was the project he did of drawing with the eyes. The artist was previously a tagger and he created art, but due to paralysis he could no longer do it. When Zack developed the technology it was as if the guy was able to paint again with no problems. That is how these two elements can be added together to create Interactive art.
