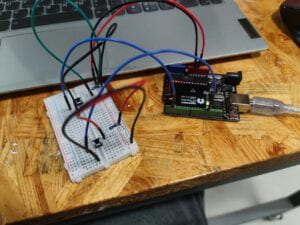
In this week’s recitaton, I had to work individually to build a controller of media using Arduino and Processing.
I first chose a video by Cheng CJ on https://www.pexels.com/, because it has the perfect length for my demonstration. I wanted to use two buttons to control the video. One for pause, the other for fast forward. When one of the button was pressed, its status changes from 0 to 1. Based on this, the code in processing will decide whether to pause(go fast forward) or not.

Something went wrong when I was building the circuit and the state of button didn’t change. I consult a IMA fellow and she changed the resistor’s position.
#include "SerialRecord.h"

// Change this number to send a different number of values
SerialRecord writer(2);
void setup() {
  Serial.begin(9600);
  pinMode(2,INPUT);
  pinMode(13,INPUT);
}

void loop() {
  int sensorValue1 = digitalRead(2);
  int sensorValue2=digitalRead(13);
  writer[0]=sensorValue1;
  writer[1] = sensorValue2;
  writer.send();

  // This delay slows down the loop, so that it runs less frequently. This can
  // make it easier to debug the sketch, because new values are printed at a
  // slower rate.
  delay(10);
}
In Arduino, I only use digitalRead to record the status of button and then send it to Processing.
import processing.video.*;
import processing.serial.*;
import osteele.processing.SerialRecord.*;
Serial serialPort;
SerialRecord serialRecord;
Movie myMovie;
int pvalue1;
int state1=1;
void setup() {
  size(600,600);
  myMovie = new Movie(this, "city.mp4");
  myMovie.loop();
  String serialPortName = SerialUtils.findArduinoPort();
  serialPort = new Serial(this, serialPortName, 9600);
  serialRecord = new SerialRecord(this, serialPort,2);
}

void draw() {
  serialRecord.read();
  int value1 = serialRecord.values[0];
  int value2 = serialRecord.values[1];
  println(value1,value2,state1);
  if (myMovie.available()) {
    myMovie.read();
  }
  if (value1 != pvalue1){

  if (value1==1 && state1%2==1){
    myMovie.pause();
    state1=state1+1;
  } else if (value1==1 && state1%2==0){
    myMovie.play();
    state1=state1+1;
  }
  }
  pvalue1=value1;
  if (value2==1){
    myMovie.speed(2.0);
  } else{
    myMovie.speed(1.0);
  }
  image(myMovie, 0, 0,width, height);
}
As for the Processing part, the main problem is that every time I press the button, the variable state1 will add up for multiple times, so I cannot pause the video when pressed only once and continue when pressed again. So professor suggested I define a new variable for keeping the previous state and change the if condition outside, so that it only increase when it is different from the previous state.
The trick I mentioned above is certainly useful, but I nearly forgot it until professor reminded me. There are many more tricks to make coding easier, and all of those come from making mistakes again and again.