Task #1: Test the NeoPixel
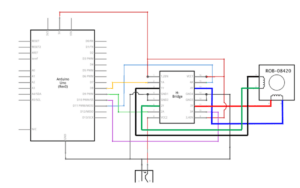
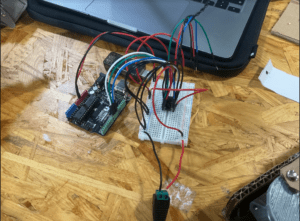
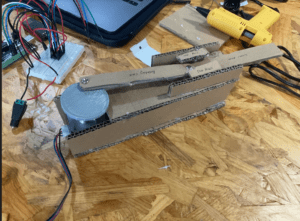
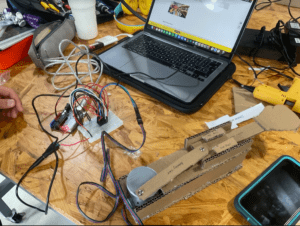
The task for this recitation was for us to use the Neopixels in order to visualize music. For task 1 I followed the schematic provided and wired it accordingly. The libraries were already installed from previous classes, so I skipped step 2. However, I ran into a problem, because Arduino IDE decided to open into an old code, and the library couldn’t be found. To solve this problem I closed IDE and restarted it. For step 3 I went into the FastLed library, and used the blinking example. Pictures of task 1 can be found below.
Schematic connection:
Blinking LED test:
Task #2: Use your computer to light up NeoPixels
For the 1st step of task 2, the serial record library was already installed from previous classes, the use of it is to allow communication between Arduino, and processing. For step 2, I clicked the link that directed me into the GitHub page, and I copy pasted the code into IDE. The code allowed to modify individual led strips so I put the following into the serial monitor ” 5, 255,0,0″ This made the 6th led light up red. This verified the code was running properly. For step 3, I copy pasted the code provided, and ran it in processing. The processing code allowed to turn the LEDs on when you slid the mouse across it.
Fifth LED light up:
Arduino, and processing code:
Mouse sliding through:
Task #3: Add Music!
The first thing I did for task 3 was to download the sketch for the amplitude analyzer. The following I did was to start combining the previous processing sketch, with the one I just downloaded. The final code can be found below. I asked Gottfried for help in modifying the code, and he suggested adding a second array that would track which LED’s have already been triggered, and turn them off. So you could visualize the music better. I also multiplied the volume by 50, so the effect was more centered. The song I chose was “Thousand bad times” by Post Malone, but I needed to convert it into an MP3 file, and the websites that offered it seemed very sketchy. So Gottfried helped me by converting it for me. I added the file into the data folder, and ran the program. The video can be seen below. Overall, this was a very interesting recitation, and it provided some insight into my final project.
Amplitude analyzer program:
Combining the 2 Sketches:
Final code:
import processing.sound.*;
import processing.serial.*;
import osteele.processing.SerialRecord.*;

Serial serialPort;
SerialRecord serialRecord;
SoundFile sample;
Amplitude analysis;

int W;         //width of the tiles
int NUM = 60;  //amount of pixels
int[] r = new int[NUM]; //red of each tile
int[] g = new int[NUM]; //red of each tile
int[] b = new int[NUM]; //red of each tile
int lastN;


void setup() {
  size(640, 480);
  W = width/NUM;
  // load and play a sound file in a loop
  sample = new SoundFile(this, "thousand.mp3");
  sample.loop();

  // create the Amplitude analysis object
  analysis = new Amplitude(this);
  // analyze the playing sound file
  analysis.input(sample);


  String serialPortName = SerialUtils.findArduinoPort();
  serialPort = new Serial(this, serialPortName, 9600);
  serialRecord = new SerialRecord(this, serialPort, 4);
  serialRecord.logToCanvas(false);
  rectMode(CENTER);
}

void draw() {

  println(analysis.analyze());
  background(125, 255, 125);
  noStroke();
  fill(255, 0, 150);


  for (int i=0; i<NUM; i ++) {
    fill(r[i], g[i], b[i]);
    rect(i * W + W/2, height/2, 10, 10);
  }


  // analyze the audio for its volume level
  float volume = analysis.analyze();

  // volume is a number between 0.0 and 1.0
  // map the volume value to a useful scale
  float diameter = map(volume, 0, 1, 0, width);
  // draw a circle based on the microphone amplitude (volume)
  circle(width/2, height/2, diameter);


  // if (mousePressed == true) {
  int n = floor(constrain(volume*50, 0, NUM-1));

  r[n] = floor(random(255));
  g[n] = floor(random(255));
  b[n] = floor(random(255));

  serialRecord.values[0] = lastN;     // which pixel we change (0-59)
  serialRecord.values[1] = 0;  // how much red (0-255)
  serialRecord.values[2] = 0;  // how much green (0-255)
  serialRecord.values[3] = 0;  // how much blue (0-255)
  serialRecord.send();            // send it!

  serialRecord.values[0] = n;     // which pixel we change (0-59)
  serialRecord.values[1] = r[n];  // how much red (0-255)
  serialRecord.values[2] = g[n];  // how much green (0-255)
  serialRecord.values[3] = b[n];  // how much blue (0-255)
  serialRecord.send();            // send it!

  lastN = n;
  //  }


}
Final Video:
