Spring 2024 Interaction Lab Final Project

Geo-Dash:Jump – Keigan Carpenter- Professor Rodolfo Cossovich

A. CONCEPTION AND DESIGN:

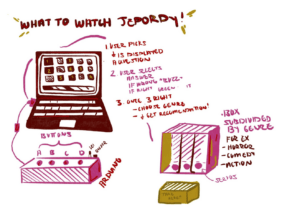
In our initial stages, we started with 3 preliminary ideas: 
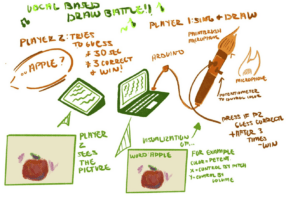
 

We ended up going with our last idea of re-creating  “Geometry Dash” with an interactive component. “Geometry Dash” is a popular mobile game where players would usually tap on the phone screen which would cause the square character to jump (to avoid obstacles and progress through the levels). Another function was a rocket where players would hold the screen to make the rocket move up and release the screen to make the rocket drop. I have attached a screenshot from the game for reference. 
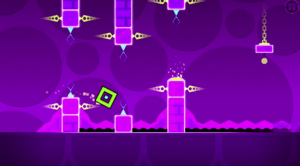
Photo: Ollie Toms

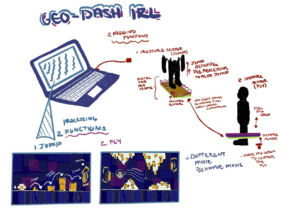
The initial idea for the interactive component was that the players could make the square jump by physically jumping and activating a sensor. We had the idea of a hula-hoop object that would act as a “physical rocket” for the rocket function. Moving this up and down (a distance sensor is recording that) would correspond to moving the rocket up and down. Overall, the goal was to re-imagine this classic/nostalgic game into something interactive. The functions paired with the visualizations/music were planned to be enjoyed by a diverse audience. 

In the design process, we decided to narrow the physical functions down to the jump function only. After talking to Professor Rudi about the idea, we thought it would be too complicated for the user to switch positions, so we focused on this user-specific task and complicated it further within the code. After we decided on the design and got the green light, we started prototyping. 

B. FABRICATION AND PRODUCTION:

First, to begin prototyping I focused on wiring a button and running Arduino code to ensure the Arduino was reading values sent by the button. During this time Shauna was working on a process sketch that was supposed to be a square, essentially, that would react to the button and make it jump. 
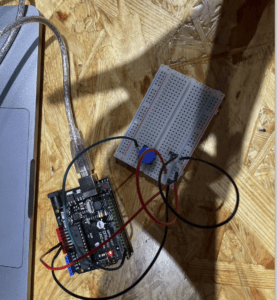
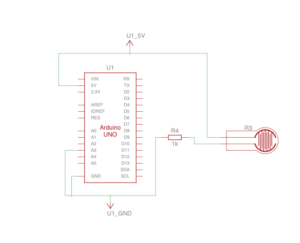
After completing aspects of the processing code (via adapting codes from various sources and help from the instructors, Fellows, and LAs :), we had our prototype. Without changing the wiring (The Tinkercad is in the appendix) I switched out the button for a vibration sensor. I placed the sensor between a piece of cardboard and 3mm wood. This initial test was successful (in the sense that the square was reacting to the sensor).

At this stage, the main struggle was getting the integration between Arduino to Processing to run more smoothly. Also since we did not have much coding experience before this class, there was a large learning curve in terms of the processing code. 

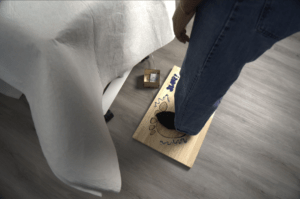
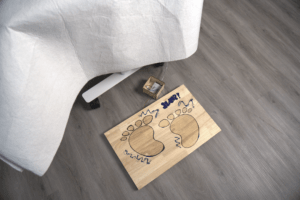
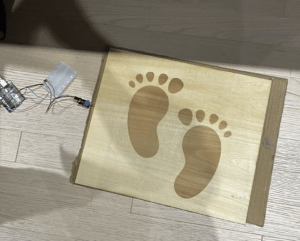
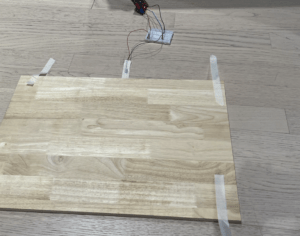
While we continued developing the processing sketch, I began to laser-cut/engrave the jump pad users would stand on when playing the game. This part was very smooth. I engraved footprints on a 3mm piece of wood that I attached to a piece of cardboard. I placed the sensor in between the cardboard and the wood. 

At this point, we also decided that instead of the square moving to avoid the object, the square would stay still and the object would be to avoid some objects.
The video below shows me testing the project the day before user testing. The main criticisms we received during user testing were regarding the processing sketch. For example, the sporadic directionality of the squares was a big concern considering the array we used created so many squares that it was impossible to avoid gaining points. There were other points about the circle and the logic of the point system. 

In terms of the physical interaction, many people commented that getting to jump was entertaining however they said the game was too difficult. Also, the jump had a massive delay and you did not have to use both feet to jump on the pad. Since the sensor was situated on one side, it ended up working more smoothly when users would use one foot to stomp rather than jump.

While Shauna worked on fixing the processing code, I worked on fixing the sensor issue. To make sure that the user had to use both feet and jump to activate the sensor, we switched sensors from the vibration sensor to the force sensor. 

However, since the force sensor was extremely sensitive we ended up making an entirely new board. This board was thicker and the sensor was attached to the bottom via the previous board. However, there was a lot of trial and error here to make sure that the sensor was working accordingly. Once we adjusted the code to the force sensor (going from digital to analog, so having to read a range of values instead of on), that was all we had left on the physical interaction side. 
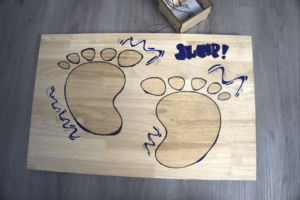
Afterward, I laser-cut a box to put the breadboard/Arduino in. Also, I assembled the sensor underneath the new pad I was able to use markers and design the board with cartoonish/graffiti-type style illustrations. 

At this point, I also re-drew the background of the visualization and added the rest of the music. 
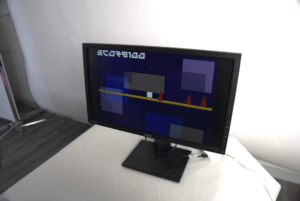
Here is a video of me testing the game before the final presentation after we added and refined the processing code and music. The only thing missing at this point was adding the “floor” for the square. Another point is we ended up changing the directionality of the objects, turning them into red triangles to signal danger, and reversing the points system (so you lose points when you hit the triangles). 

This is a screen recording of what is being displayed on the monitor. At this point, we had not changed the code range for detecting the object, so the player could not move and not lose points. 

Here are the codes that we used for the project: 

Arduino code:

void setup() {
  Serial.begin(9600);
}

void loop() {
  // to send values to Processing assign the values you want to send
  // this is an example:
  int sensor0 = digitalRead(A3);


  // send the values keeping this format
  Serial.print(sensor0);
  Serial.println("");  // put comma between sensor values


  // too fast communication might cause some latency in Processing
  // this delay resolves the issue
  delay(20);

  // end of example sending values
} 
  • Processing Code for the visualization:
// global variables (top of sketch)
float[] xs = new float[10];
float[] ys = new float[10];
float[] sizes = new float[10];
color[] colors = new color[10];
float[] xspeeds = new float[10];
float[] yspeeds = new float[10];

player p1;
int obstacles;
PImage img;
PFont FONT;

import processing.serial.*;
import processing.sound.*;

//declare a SoundFile object
SoundFile sound;
SoundFile sound2;

Serial serialPort;
int NUM_OF_VALUES_FROM_ARDUINO = 1;  /* CHANGE THIS ACCORDING TO YOUR PROJECT */
/* This array stores values from Arduino */
int arduino_values[] = new int[NUM_OF_VALUES_FROM_ARDUINO];

void setup() {
  fullScreen();
  //size(800, 400); this was used to check the gameplay without having it run full screen so we could still see the processing values
  p1 = new player (width/2, height/2, 100, 100);

  sound = new SoundFile(this, "baseafterbase.mp3");
  // play the sound on loop
  sound.loop();

  sound2 = new SoundFile(this, "lost.mp3");


  img=loadImage("FinBackresize.jpg");


  FONT = createFont("GameFont.ttf", 100);

  printArray(Serial.list());
  // put the name of the serial port your Arduino is connected
  // to in the line below - this should be the same as you're
  // using in the "Port" menu in the Arduino IDE
  serialPort = new Serial(this, "COM10", 9600);

  for (int i=0; i < 3; i=i+1) {
    xs[i] = random(width);
    //ys[i] = random(height);
    ys[i] = random(600, 650);
    sizes[i] = random(50, 100);
    colors[i] = color(255, 0, 0);
    xspeeds[i] = (9);
    //yspeeds[i] = random(1, 5);
  }
}

void draw() {
  // receive the values from Arduino
  getSerialData();

  // use the values like this:
  float x = map(arduino_values[0], 0, 1023, 0, width);
  float y = map(arduino_values[0], 0, 1023, 0, height);


  if (arduino_values[0] == 1) {
    p1.isJumping = true;
  }


  // the helper function below receives the values from Arduino
  // in the "arduino_values" array from a connected Arduino
  // running the "serial_AtoP_arduino" sketch
  // (You won't need to change this code.)

  image(img, 0, 0);

  //background (42);


  noStroke();
  for (int i=0; i < 3; i=i+1) {
    fill(colors[i]);
    //circle(xs[i], ys[i], sizes[i]);
    triangle(xs[i], ys[i], (xs[i]-50), (ys[i] +200), (xs[i] + 50), (ys[i] + 200));
    xs[i] = xs[i] - xspeeds[i];
    //ys[i] = ys[i] + yspeeds[i];
    //println("ys[i] " + ys[i]);
    // check right edge
    if (xs[i] < 0) {
      xs[i] = width;
    }
    // check bottom edge
    if (ys[i] > height) {
      ys[i] = 0;
    }

    fill (255);
    /*this part of the code was adapted from Chris Whitmire Lessons. Getting a Player to Move Left and Right in Processing. 2022. YouTube, https://www.youtube.com/watch?v=jgr31WIYWdk.
     and Chris Whitmire Lessons. Getting a Player to Jump in Processing. 2022. YouTube, https://www.youtube.com/watch?v=8uCXGcWK4BA.
     */

    p1.render();
    p1.jumping();
    p1.falling();
    p1.JumpStop();
    p1.land();

    // when player comes into constact with an obstacle
    if (dist(p1.x, p1.y, xs[i], ys[i]) < sizes[i]) {
      println("hit by " + i);
      obstacles -=1;
      println(obstacles);
    }
    textSize(100);
    fill(255);
    textFont(FONT);
    text("score" + (obstacles+100), 20, 120);
  }
  if (obstacles <= -100) {
    for (int i=0; i < 3; i=i+1) {
      xs[i] = 0;
      tint(255, 0, 0);
      sound.amp(0);
      sound2.play();
      //image(img, 0, 0);
      textSize(100);
      fill(255);
      textFont(FONT);
      text("GAME OVER", 560, 370);
    }
  }
}


void getSerialData() {
  while (serialPort.available() > 0) {
    String in = serialPort.readStringUntil( 10 );  // 10 = '\n'  Linefeed in ASCII
    if (in != null) {
      //print("From Arduino: " + in);
      String[] serialInArray = split(trim(in), ",");
      if (serialInArray.length == NUM_OF_VALUES_FROM_ARDUINO) {
        for (int i=0; i<serialInArray.length; i++) {
          arduino_values[i] = int(serialInArray[i]);
        }
      }
    }
  }
}

  • This is the Processing code for the player 
class player {
  /*this part of the code was adapted from Chris Whitmire Lessons. Getting a Player to Move Left and Right in Processing. 2022. YouTube, https://www.youtube.com/watch?v=jgr31WIYWdk.
   and Chris Whitmire Lessons. Getting a Player to Jump in Processing. 2022. YouTube, https://www.youtube.com/watch?v=8uCXGcWK4BA.
   */
  int x;
  int y;

  int w;
  int h;

  boolean isMovingLeft;
  boolean isMovingRight;

  boolean isJumping;
  boolean isFalling;

  int speed;

  int jumpHeight; //distance you can jump up
  int topOfJump; //y value of top of jump

  int obstacles;


  //constructor
  player(int startingX, int startingY, int startingW, int startingH) {
    x= startingX;
    y= startingY;
    w = startingW;
    h= startingH;


    isMovingLeft = false;
    isMovingRight = false;

    isJumping = false;
    isFalling = false;

    speed = 7;

    jumpHeight = 500;
    topOfJump = y- jumpHeight;
  }
  //functions
  void render() {
    rectMode (CENTER);
    rect(x, y, w, h);
    fill (255, 204, 255);
  }


  void jumping () {
    if (isJumping == true) {
      y-=speed;
    }
  }

  void falling() {
    if (isFalling == true) {
      y+= speed;
    }
  }

  void JumpStop() {
    if (y<= topOfJump) {
      isJumping = false; // stop jumping upward
      isFalling = true; //start falling downward
    }
  }

  void land () {
    if (y>= height/2) {
      isFalling = false; //stop falling
      y = height/2; // snap player to middle of screen
    }
  }
}


C. CONCLUSIONS:

In my view, I thought we accomplished our goal of re-imagining this nostalgic game by integrating interactive components. During the process, we went through many different variations of what physical components we would have or coding elements we wanted to include. However, I think that we ended up settling on a variation that was not too easy for the user but was also not too difficult. The main challenges that we encountered were complexities with the code and getting information from the sensor to Arduino, which then is reflected in the processing sketch. The main limitations that we faced were our abilities in terms of processing. 

Additionally, the audience interacted/reacted well with the project. During its infant stages, there were some errors (on the physical and coding side) the audience did express some confusion. But, as we began to tweak the code and switch out the sensor, I was satisfied with our project as users seemed to be enjoying themselves. Overall, I really enjoyed working on this project, especially in comparison to the mid-term project. I thought we were more comfortable with our working process and timelines that we were comfortable with. Moreover, I also realized the benefits of moving interactions from just the hands to the whole body so it generated many ideas for me. 

D. DISASSEMBLY:

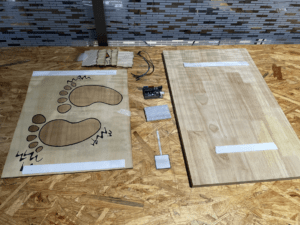
Here is a photo of our disassembly: 
E. APPENDIX

Tinkercad wiring:
More photos:
F. CITATIONS

(code-specific citations have been left in the form of comments, but the audio file credits are listed here) 

Freak Gamer. (2016, April 28). Game Over Sound Effects High Quality [Youtube]. https://www.youtube.com/watch?v=bug1b0fQS8Y
Geometry Dash Music. (2020, June 29). DJVI – Base After Base [Youtube]. https://www.youtube.com/watch?v=Z8_Na43X10o&list=PLnaJlq-zKc0WUXhwhSowwJdpe1fZumJzd&index=7
Toms, O. (2019, June 26). Have you played… Geometry Dash? Rock Paper Shotgun. https://www.rockpapershotgun.com/have-you-played-geometry-dash

Spring 2024 Interaction Lab Midterm Project

Fish Food- Keigan Carpenter- Professor Rodolfo Cossovich

1. CONTEXT AND SIGNIFICANCE  

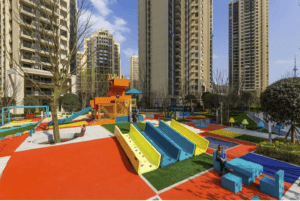
A previously-analyzed project that left an impact on me was “PIXELAND”.”PIXELAND” is a multifunctional and brightly decorated space in Minyang, China open to public use that features different types of outdoor equipment for people to interact with (100architects, 2018). 

Photo Credits: Amey Kandalgaonkar

What stands out to me about this project is the variety of interactions available to the user (via the different squares) and the idea of helping to serve communities in an entertaining yet fulfilling way. While this space presents objects for the user to interact with, it also maintain a certain amount of freedom for the user to explore and appropriate the space for themselves. In this sense I find this project to be emblematic of my definition of interaction. 

The project presented below draws inspiration from “PIXELAND” in two main ways. Firstly, I was interested in creating a project that imitated a natural environment. Public projects that anyone can interact with are something I have always been interested in and while our project is on a smaller scale I wanted to attempt to embody this idea of the interaction taking place in a larger context. Secondly, I wanted to create a project where the user maintains a certain level of freedom to use the object as they please. Again, while this is limited in scale I wanted the user to maintain as much control and freedom as possible in order to spectate the differences in usage among users. 

2. CONCEPTION AND DESIGN

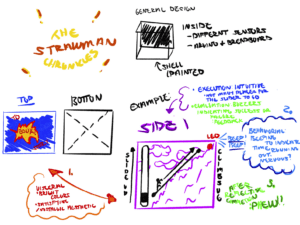
We shuffled through many ideas as we decided on what we wanted to build for this project. In the beginning, we started thinking about creating a game in which users could interact with different sensors. However, this idea did not get very far as it lacked a conceptual basis as well as well as any practical means to achieve our goal. This was my first sketch:

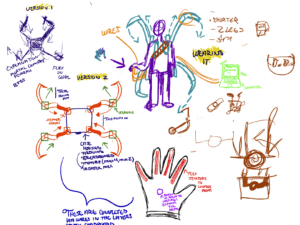
We then decided that we wanted to head in a different direction and thought it would be interesting to approach interaction by building a wearable. Taking inspiration from characters such as “Iron Spider” from Spiderman and “D’Vorah” from Mortal Combat, we wanted to try building an attachment that the user could wear like a backpack that would have arms (similar to that of an insect) that could extend and perform a function.

However, we quickly realized after we discussed it with our Professor and Kevin (shout out to Kevin for being so helpful) that building something this large would not only be physically challenging but also lacked any conceptual basis. Here is my sketch for this idea:

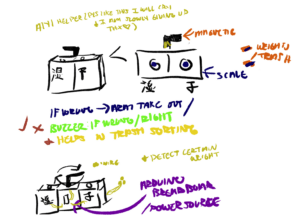
After scrapping this idea rather than starting with the physical concept we started with our interests and areas of our life we thought could be improved. As an environmental studies major and a person who was not familiar with trash sorting before moving to Shanghai, one of my first thoughts was how to clarify the trash sorting process. This led Shauna and me to the idea of building a trash can that could help you sort your trash via sensors detecting materials being placed in the right/wrong bin and an arm that would move the trash to its correct bin.

This idea, while it has some conceptual underpinning, was not necessarily feasible considering we were not able to use sensors to detect the different materials and had a very minimal sense of interactivity. We ultimately decided that we wanted to continue with the idea of some form of arm and environmental theme, we had to think of something else. Here is my sketch:

At this point, we were frustrated. After receiving feedback on our previous ideas we were going nowhere. We decided to start at square one and think back on our personal experiences. I then had the idea of building a pond where the user could interact with a “rock truck” which would carry ‘coal’ from the mine to the pond which would pollute the pond, in a game-like style. By adding coal to a pond, doing this would slowly pollute the pond, and fish within the pond would stop swimming. 

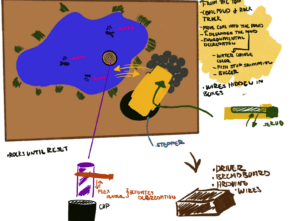
While this is a negative concept, it reflects my personal experiences growing up near a pond just like this in my hometown, Plainfield, Ohio. This idea ended up sticking because it contained a conceptual foundation and aspects of our interests while also incorporating interactive components. The idea was essentially a mechanism that users could control (the rock truck) coupled with receiving feedback via interacting with a sensor (the infrared sensor that controlled the fish). Here is the final sketch: 

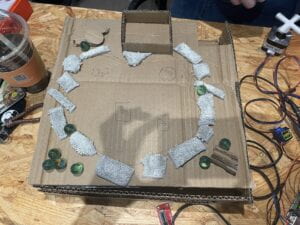
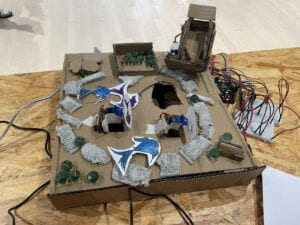
Needless to say, I spent a lot of time in procreate. While the drawing practice was enjoyable we were glad to have settled on an idea that was both meaningful and interactive. On the materials side of things, the structure and rock truck were constructed out of cardboard. Other than the stones surrounding the pond that were made out of a cut-up Muji mop and our ‘coal’ marbles, all of the other decorations were made out of paper. Like most things in life, it was all held together using hot glue and tape. 

3.FABRICATION AND PRODUCTION

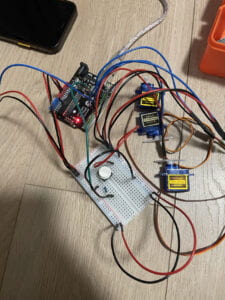
We thought this project would be most approachable by going one section at a time. The first section we started with was the sensor and the fish. The original idea was to have 3 fish (servos in disguise) that would be swimming and as the ‘coal’ fell into the pond it would make contact with a flex sensor. As the ‘coal’ kept hitting the flex sensor the fish would slowly stop moving. In our pilot attempts, since we did not have a flex sensor we built this with a button instead. 

Later down the line due to power issues, we narrowed it down to two servo fish and after some helpful advice from Professor Rudi we decided to use infrared sensors to detect the marbles rather than a flex sensor. 

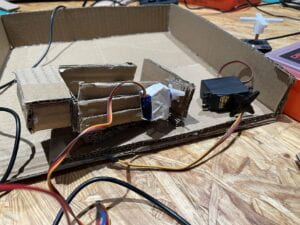
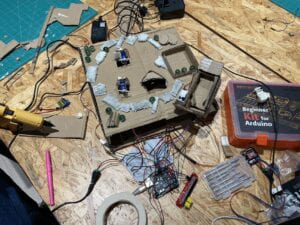
While Shauna worked on writing the code for that section, I got to work on constructing the box as well as the rock truck for section 2. The original idea for this cardboard rock truck was to attack it to a servo, however, we decided that since it was not detrimental for it to be able to spin 360 degrees, using a slightly more powerful servo would be more appropriate and convenient. At this point, I also added a piece of cardboard along the end of the rock truck bed that the user could open and close to allow the coal to come out of the truck and attached the infrared sensor. 

Since we (primarily Shauna while I was cutting cardboard and then me for a random 3 hours) were still struggling with the code and how to effectively use the infrared sensor. I began to decorate and assemble the pond, while also sketching out where I wanted to place the fish as well as the hole that the user would be trying to get the “coal.” into. 

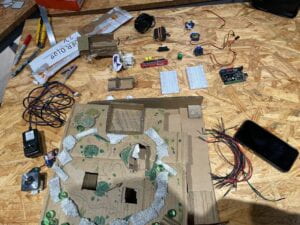
After that, it was time to attach our mechanisms to the top of the box as we originally wanted the inside to conceal the wiring. The task was now to place two servo fish on the point, the servo that controlled the truck at various points while not being detected by the infrared sensor that also sat inside the box (this remained our biggest challenge throughout the entire project).  Then we conducted our first run-through of the project!

During user testing, we received a plethora of useful and helpful feedback to improve our project. The most significant point of improvement we received was the contradictory nature between the intention of the project and the actual feelings people had when interacting with it. The issue was that the project intended to carry a negative theme that brought awareness to issues such as pollution and general environmental degradation, however, in practice users reported that interacting with the project left them feeling positive. 

From my understanding, the ability to control the rock truck in a game-like manner (via the two controls) stimulated a positive feeling and not enough negative feedback in the project to indicate the negative sentiment. As we discussed the results of user testing we decided that since the mechanism was central to the project, rather than working against it to make the user feel negative, we could pivot to a more positive theme that aligns with the user’s feelings. 

As a result, we changed the theme from harming the fish to feeding the fish! Instead of ‘coal’ these marbles were considered ‘fish food’, and the fish would speed up when the marbles were placed into the pond rather than slow down. Making these changes required minimal changes to the physical design, but did require a slight re-work of the code. Below is a picture of the final project and our final code. 

When it comes to the code used for our project, it was a struggle as neither of us had any coding experience before this class. We are very grateful for the guidance and feedback we received from Professor Rudi as well as the IMA fellows Kevin and Shengli : ) 

#include 
Servo fish1;
Servo fish2;
Servo fish3;
Servo trucktilt;
Servo truck1;

int pos = 10;
int inc = 1;

int val;
int prevVal;
int IRsensorVal;
int coal = 0;
int count;
long startTime;
int standButton = 11;


int counter = 0;


#include 
const int RECV_PIN = 7;
IRrecv irrecv(RECV_PIN);
decode_results results;


void setup() {
  // put your setup code here, to run once:
  Serial.begin(9600);
  fish1.attach(8);       //this is the servo for fish1
  fish2.attach(9);       //this is the servo for fish2
  trucktilt.attach(10);  //this is the servo for the opening mechanism of the truck
  truck1.attach(3);      //this is the servo for the truck
  Serial.println("feed the fish");
}


void loop() {
  val = analogRead(A0);
  val = map(val, 0, 1023, 0, 180);
  //Serial.println(val);

  truck1.write(val);

  //when the button is pressed the cardboard on the truck lifts
  standButton = digitalRead(11);
  if (standButton == HIGH) {
    trucktilt.write(180);
    //when the button is not pressed the cardboard on the truck falls
  } else {
    trucktilt.write(55);
  }

  /**
*The IR sensor reads the marbles and counts them
*Kevin helped with this part
*/
  IRsensorVal = analogRead(A1);
  if (IRsensorVal > 200) {
    count++;
    Serial.println(count);
  }

  if (millis() % 10 < 8) {
    if (pos < 10 || pos > 90) {
      inc *= -1;
    }

    if (count > 5) {
      pos += inc;
      fish1.write(pos);
    }
    if (count > 10) {
      pos += inc;
      fish2.write(pos);
    }
  }
  if (IRsensorVal > 150) {
    val = HIGH;
  } else {
    val = LOW;
  }

  if (prevVal == LOW && val == HIGH) {
    coal++;
    Serial.print("one more rock: ");
    Serial.println(coal);
    // startTime = millis();
  }
  prevVal = val;
  delay(5);
} 

4.CONCLUSIONS

At the beginning of this process, the goal of this project was just to build something entertaining. While I would say we achieved that, I would also say that it was very challenging. I would say that this project aligns with my definition of interaction to a certain degree. There are interactive components integrated into the design such as the controls the user is given and the sensors that react to their movements, however, the interaction is limited in scope. Ultimately, I was satisfied with the way people interacted with our project and was glad that in the end, we were able to make something that people could enjoy. 

If I had more time to improve the project I would consider adding more elements that gave more feedback to the user. For example, as the user is inputting marbles into the pond, they are unaware of the amount they have put in already or the amount needed to make the fish move. If given more time, I think it would be beneficial to use either music or LED lights to act as positive reinforcement for users to continue playing the game. Additionally, during user testing, Kevin gave an interesting suggestion on how to mechanize the rock truck to carry all of the marbles rather than having the user load them manually. I think this would have elevated the project and would be something I would consider adding. 

The most significant thing I have learned from this project is the ability to be patient and adaptable. When approaching a task that requires you to take a concept from just an idea to reality there are going to be things that do not go as planned. For me, the main issue was staying patient and trusting in the process regardless of the mishaps we encountered. In a literal sense, many aspects of this process whether it be wiring, coding, or building can be very tedious and frustrating at times. In all, this project was very different than what we are used to doing, but I found the process enjoyable nonetheless. 

5. DISASSEMBLY:

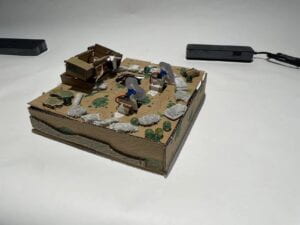
Here is a photo from our disassembly : ) 

  • APPENDIX
  • CITATIONS
100architects. (2018, December 26). PIXELAND. https://100architects.com/project/pixeland/