Circuit1: Fade
This circuit is simple and I met few difficulties when building it. However, an LED, I guess, was burnt due to the missing of a resistor.
The brightness of the LED changes regularly.
Circuit2: toneMelody
The building of the circuit is successful at first try and music can be heard.
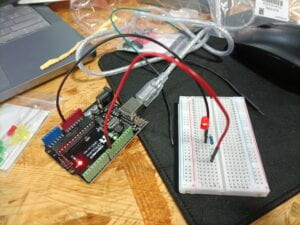
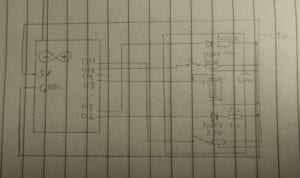
Circuit3: Speed Game
My partner and I met a lot of difficulties when building this circuit, since there were too many wires and they were all curled up in a terrible shape. It really made you dizzy to tell where a wire was going. But finally we made it after careful comparison with the layout diagram and times of checks. We also used wires with more colors so that it was easier to distinguish them. The player score of the game could be found on the serial monitor as expected.
Questions Area
Question 1: Propose another kind of creative button you could use in Circuit 3 to make the game more interactive. Read and use some material from the Physical Computing, Introduction Chapter (p. xvii – p. xxix) to explain why this button would make this game more interactive.
I suppose that we can add a button that can control the music played for winner. You can add another one or more pieces of musics into the program and each time you press the button before the game starts, the system chooses different music randomly. The interesting thing is that music is played randomly and this adds fun of surprise to the game. It seems more interactive because the computer also takes part in designing the game.
Question 2: Why did we use a 10 kOhm resistor with each push button? (Psssst… Go back to your slides for this answer)
I think the electrical level of the button is easily affected when it’s not working, and a resistor restricts the current, so that it can ensure the electrical level of the digital pin is not too high even when the button is no pressed and thus protect the system from potential damage.
Question 3: In the book Getting Started with Arduino there is a clear description about the “Arduino Way” in chapter 2. Find a project that you find interesting that can be used as an example for these kind of projects. Cite it in adequate manner, include a picture, and explain the reasons that you chose it.
I find this project interesting:
Hacking Toys
Hacking Toys Toys are a fantastic source of cheap technology to hack and reuse, as evidenced by the practise of circuit bending mentioned earlier. With the current influx of thousands of very cheap high-tech toys from China, you can build quick ideas with a few noisy cats and a couple of light swords.
Banzi, Massimo, and Michael Shiloh. Getting Started with Arduino : The Open Source Electronics Prototyping Platform, Maker Media, Incorported, 2014. ProQuest Ebook Central, http://ebookcentral.proquest.com/lib/nyulibrary-ebooks/detail.action?docID=1887986.
In this project, the electric potential of the used toys can be pumped out. Maybe some components inside can be connected to Arduino to make a difference. You can put the resources into full use. It’s not only expanding the work materials. It’s reducing waste and environmental-friendly too. Moreover, toys usually look friendly. They’re more attracting to most people than merely cold machines, which can make your work more interactive.