
Prototyping Blog Documentation Week 12
For this week, we have been making the final touches on our CAD models and testing them.
As stated in the previous week, the goal is to adjust, print out, and test the locking mechanism so that it will be able to lock as intended without sanding.
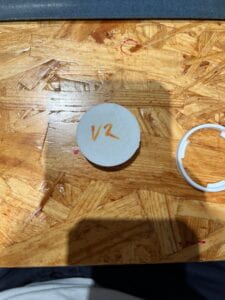
This part of the locking mechanism labeled V2 in the picture below worked effectively when locking with V1 of the other part of the locking mechanism (which is the one that is part of the opening of the tube storage), also seen in the below picture.
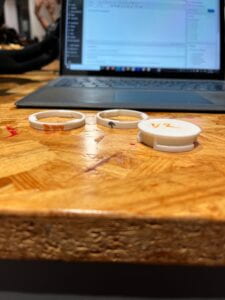
Now it was a matter of making a tube locking mechanism that would be the right fit and secure for the V2 part. So far two more versions were printed, which had the little notches be sunk in by 0.2 and 0.4 mm respectively, but neither were able to rotate into the V2 labelled lock mechanism. You can see them in the picture below.
I have already adjusted the tube locking mechanism to be sunk in by 0.6mm, which should be able to fit with the V2 labelled lock mechanism and is now awaiting printing and testing. Once that is done, the full storage tube system that we have been working on the entire semester will be ready to print and be installed onto the bike!