Mini Project #4: Imaginary Creature


https://editor.p5js.org/gabyjuhala/sketches/4oG92GJh5

Description:

What I decided to code for this weeks mini project is my dog Paxi, although we were meant to code an imaginary creature I felt paxi fit this description because of how unique looking he is. Aside from just coding a very cartoonesque version of the picture to the left, which is of Paxi, I decided to make his legs move back and forth so in a way, it looks like he is walking or running, depending on the frame rate.

Video of Paxi in motion! 

Development and Technical Implementation: 

– Coding :

The main coding snipet I struggled with was Paxi’s ears. At first I tried to mirror the triangle so that I would later be able to make the ears rotate on Paxi’s head but I realized after a lot of trial and error that it wouldn’t look the way I envisioned in my head so I decided to make his body and legs be the moving parts instead. I still was not able to code the ears to be mirrored so I had to individually code triangles and then move their coordinates so that they would sit on the correct spot on Paxi’s head.

Reflection:

This project incorporated a lot of the code pieces we have learned so far all into one project so it was certainly a good learning experience to figure out how to make the pieces fit together to create a working code. I also really enjoyed coding my dog and bringing an image of him to life.

Mini Project #3 – Generative Art

https://editor.p5js.org/gabyjuhala/collections/O1andx7Ev

IMG_5495

Description and Concept:

For this weeks project I thought the best approach would be to do three different sketches and tweak smaller snipets of code within them, to change the visual overall, rather than just make nine separate codes. I found it very interesting to see how one small line could completely change the way the code was carried out and looked. 

Development and Technical Implementation:

Something that I struggled with was really understanding the need to define variables later on in your code, after establishing them. For example, when wanting a code to draw in rainbow order using rgb I had a difficult time remembering to not just say stroke(r,g,b) or fill(r,g,b) but also go on to define what each of the three variables means and from where to where each one is to be coded. The other challenge I faced was with knowing when and where to use push(); and pop(); in order for the codes to actually work in the manner they are supposed to. I found that I would insert them into my code and they would either make the code not run at all or they just wouldn’t have an effect at all, so I didn’t really use these two as much as I would’ve liked to.

I definitely got inspiration from both the codes we did in class as a group and the codes shown to us by the LA’s and Fellows, specifically Sam’s. The code she showed us on Friday’s recitation was one that I found very interesting and visually satisfying so I took inspiration from that for my third set of 3 code modifications.

Reflection:

The main lesson I took from this project was that it is very easy to make drastic changes to how a code looks by just changing one or two small things in the sequence. I was aware of this prior but this project really brought the concept full circle and I was able to see how this concept comes into play through my own work and code. I also learned that it is okay to restart completely if something isn’t working well and that sometimes starting over can be more beneficial than trying to just fix the one specific part.


Mini Project #2 – Interactive Drawing

https://editor.p5js.org/gabyjuhala/sketches/4zgAZJHaV

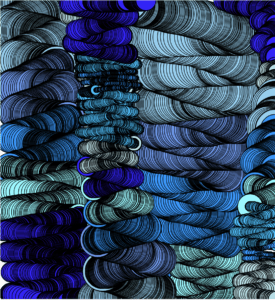
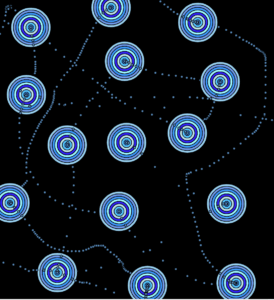
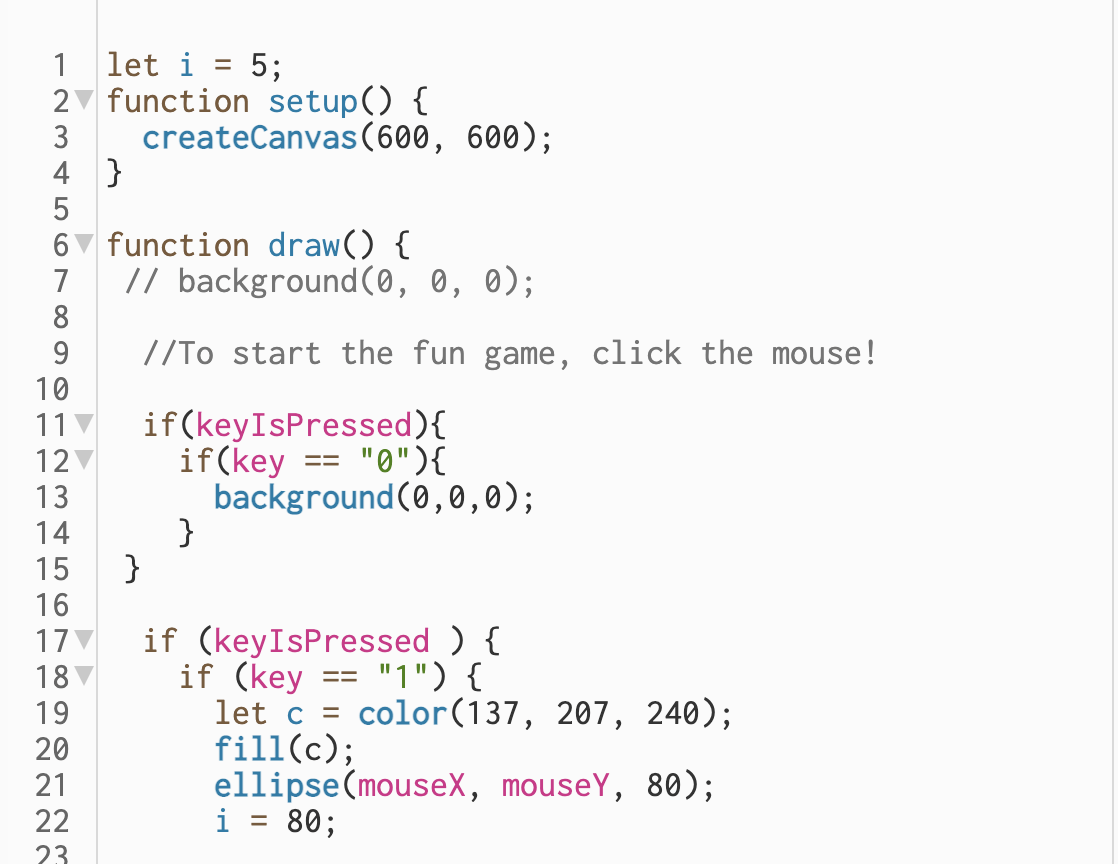
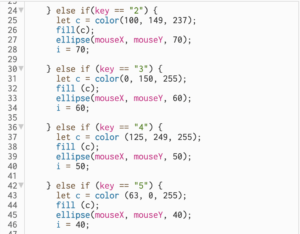
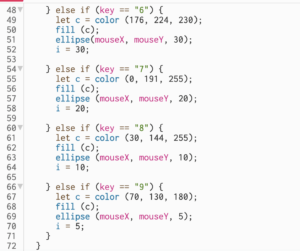
The top two pictures are screenshots of some of the drawings I created with my program and the bottom three pictures are some screenshots of my code.

The portion of the code that I struggled with the most was making it so that the color as well as the size of my ellipses would change and remain changed after pressing a specific key. To fix this I coded with a variable let i = 5 and then I was able to changed the value for i throughout each color change and the size was able to change and remain consistent. The other part I had an issue with but I was not ultimately to fix, was having to click the keypad before you’re able to change any of the colors or sizes. 

What I learned from this project was how tedious the process is when it comes to changing such small things such as size and color on such a small scale. I also learned just how creative you can get with coding a variety of different art forms, getting to create different pieces of art with code that I wrote was very gratifying and it was a fun process to see how my work came together.

Mini Project #1- Drawing With Code

https://editor.p5js.org/gabyjuhala/sketches/2pLXb7iQD

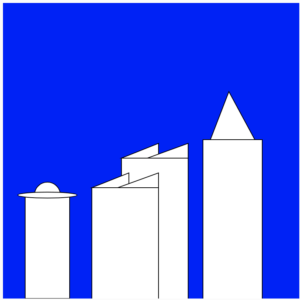
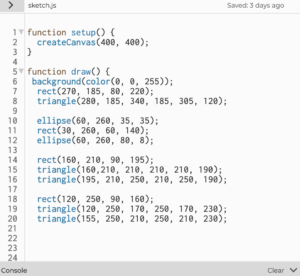
What I chose to code was a sketch of a picture I took of the view from the Jinqiao tower 3 dorms. This is a view I’m very used to seeing and I always thought that the architecture of the buildings in the photo were very interesting and almost unique in the way that it’s a small group of buildings, significantly taller than any other buildings around them.

Work Process:

My work process for this first mini-project consisted of trial and error. I would choose which shapes needed to be used and go to the p5js reference site to find the correct code and explanation of coordinates. I would then approximate the location of where I wanted the shape to be placed and edit my code accordingly. I chose which shapes to use based mainly on the ones learned in the prior class since they had already been explained in detail. I decided to do this to solidify my grasp of how to code the basics and to help familiarize myself with the javascript language. Due to the fact that the shapes we have so far learned how to code are relatively simple I tried to play around with layering to try and match some of the more intricate shapes that the buildings in my sketch had. I used layered triangles to match that of the angled rooftop of one of the buildings and a stretched out ellipse to show the almost dome-like shape seen at the top of one of the other buildings. Aside from layering I definitely moved a lot of the base shapes around to make sure that the sizing and overall perspective of the code was appearing similar to that of my sketch.


Reflection:

Having never coded before, this was certainly a more arduous process. I definitely learned a lot just from the very basic codes we have learned and how to implement them to create art. I also realized very quickly that there is a steep learning curve when it comes to coding, it was a very tedious process to approximate one input and test it only to find out it’s a bit off of where you wanted it to be. After coding this mini project I think that my grasp of the basics has definitely improved but I do think that it will take me a while to get past the trial and error stage of changing around single digits to being able to have a clear image of what numbers represent what.

Reading #1 Chance Imagery

  • Summer Desire by Oscar Dominguez:
  1. Use oil paints
  2. Paint a gradient background darker on the top, lighter near the middle of the canvas (almost white), this gradient should be starting at a colour similar to that of sand.
  3. The foreground should be dark brown and appear to look like cracked asphalt.
  4. The mid ground consists of a stone table, the colour of sandstone. On the very right side of the sandstone table there are two feminine figures who appear to be almost melting into the sandstone, they are the same colour as it just with added depth from shading. 
  5. In the middle of the canvas there are two more masculine figures both with a strong physique. The one in front should appear to be sitting, leaned a bit over towards the right, with fabrics of pink and red draped over the leg. The first figure also has its hands dunked into a bucket to the right of it that appears to be painted to look like the body of a violin.
  6. The second masculine figure is standing behind the first one, with only about a quarter of its body exposed, appearing to be nude and leaning into the first figure. The second figure’s right hand extends behind the head of the first figure and is shaped like a person laying down with a blanket draped over them, in a shape that almost resembles the wing of an angel. Its left arm is extended back towards the left.
  7. Both the heads of the figures are vases and the second figure’s head is pouring water into the first figure’s head. Both figures have a deep caramel skin tone and have pronounced muscles. 
  8. The final aspect of the piece is the sign that the second figure appears to be holding, propped up with its left hand behind them. The sign extends from the ground up to the second figure’s hand and is a cream colour. There are two silhouettes of male faces from a side profile. One is facing right and is located at the top left of the sign and the other is facing left and is placed on the lower right corner of the sign.


  • The cadavre exquis or exquisite corpse technique is described as a collaborative effort from a group of people to create a piece. The way in which this technique worked was by folding the paper to be drawn on, into several sections and each person only drew their corresponding section of the larger image and so forth. The previous person however would fold the paper in a way that their work couldn’t be seen by the next person and so on. This idea of unbiased collaboration could translate very smoothly into usage with interactive computer programs. Techniques similar to this could be used to connect people all across the globe and help people from different cultures intermingle with one another.
  • I disagree with the idea that art should reflect the wider cultural environment of the time it is produced. This isn’t to say that it can’t reflect those things or that it shouldn’t but I believe that art, for many people, is a means of escaping or almost therapy in a way. I know for me at least, art is a way for me to express myself or my emotions without having to say them or write them and those personal ideas aren’t necessarily always going to be reflective of current world issues or larger context. Art should just be reflective of whatever the artist wants it to be reflective of.
  • Inspired by the text, design your own methodology to produce a truly random number. This should be a series of steps or questions that you can execute/conduct/perform at any time. Consider how to avoid bias of your own mind/location/time of day etc. Include a minimum of three algorithmic steps; for each, explain how it mitigates bias.
    Example: Step 1: throw a dart at a calendar of 2020 Step 2: throw a dart at a world map. Step 3: on the internet find the temperature in celsius on that day (step 1) in that location (step 2). Explain your methodology in your blogpost.
  1. Open a book to a random page and jot down the page number

This mitigates bias because at any given day a person could have any random book with them, it could be a textbook, a personal read, a religious text, etc. there is no specific limitation to page numbers or any clear patterns of repetition.

  1. As soon as you open the book to the random page, place your finger on a random spot on the page and count which word number on the page it is and jot it down.

This mitigates bias because if done correctly, there will be no thought towards which spot on the page one points at, it is fully up to chance.

  1. Lastly, count how many letters the word you chose from the previous step has and jot the number down and that is the fully random number.

This mitigates bias because once again it is fully up to chance, there is no way to predict how long or short the word one randomly points at will be so it will produce a random number.