For this week’s recitation, we used a tilt switch to build a wearable workout sensor.
Materials
- 1 * Arduino Uno
- 1 * USB A to B cable
- 1 * breadboard
- 1 * tilt switch
- 1 * 10k ohm resistor
- A handful of M/F, M/M, and F/F cables
- 2 long wires (about 1.8 m)
- 1 capacitor 0.1 uF (confirm size)
Step 1: Prepare tilt sensor
Task #1: Solder the sensor to two long wires.
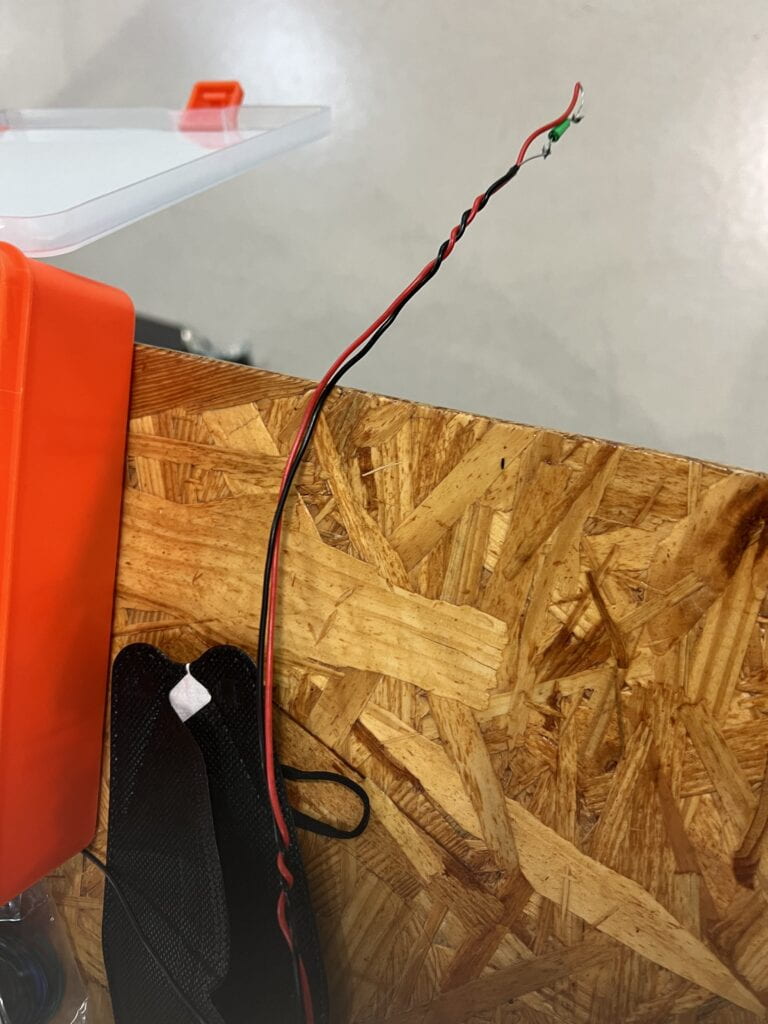
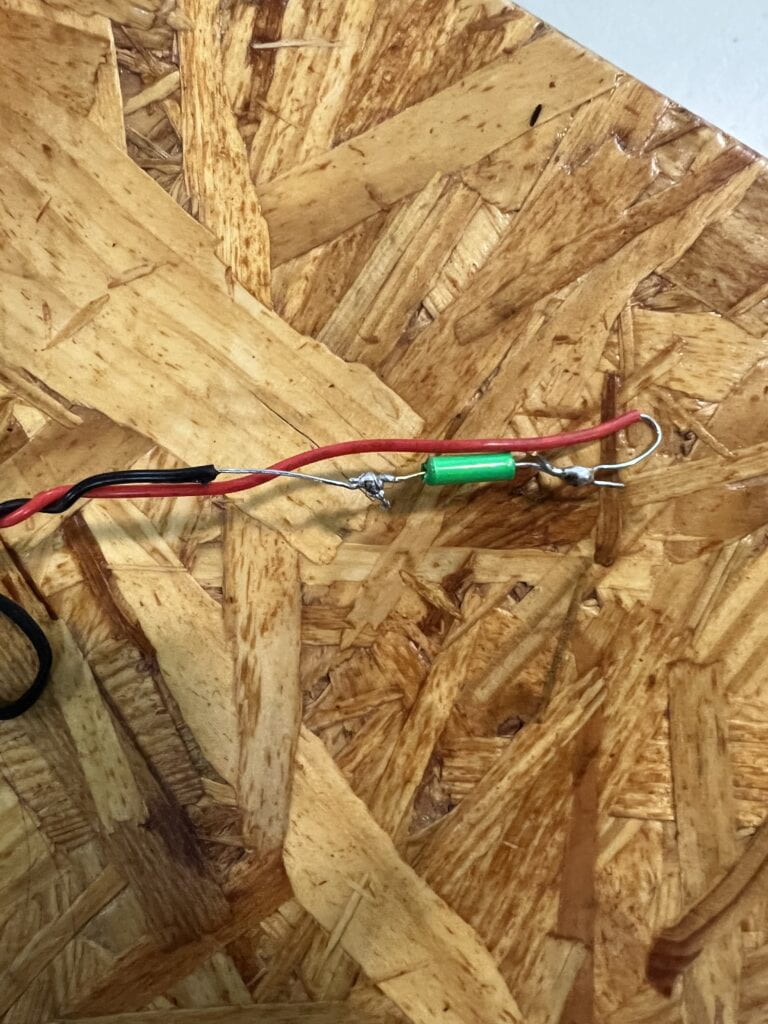
Task #2: Connect the tilt sensor cables to your Arduino using a capacitor as the circuit below:
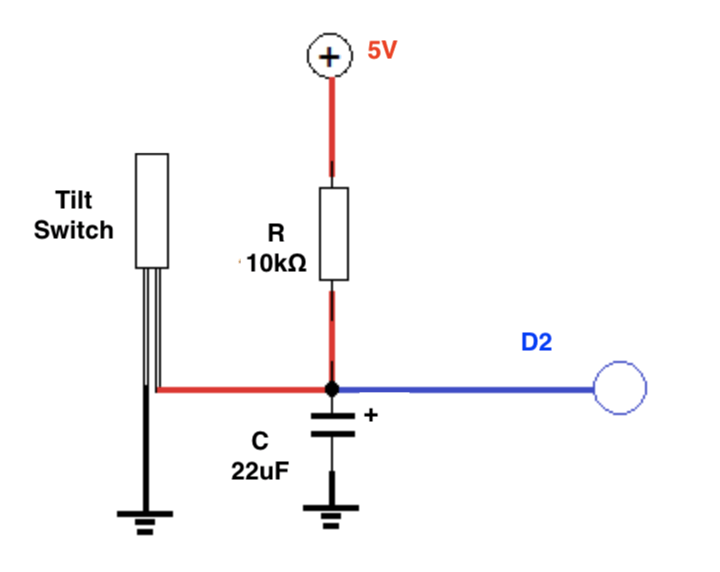
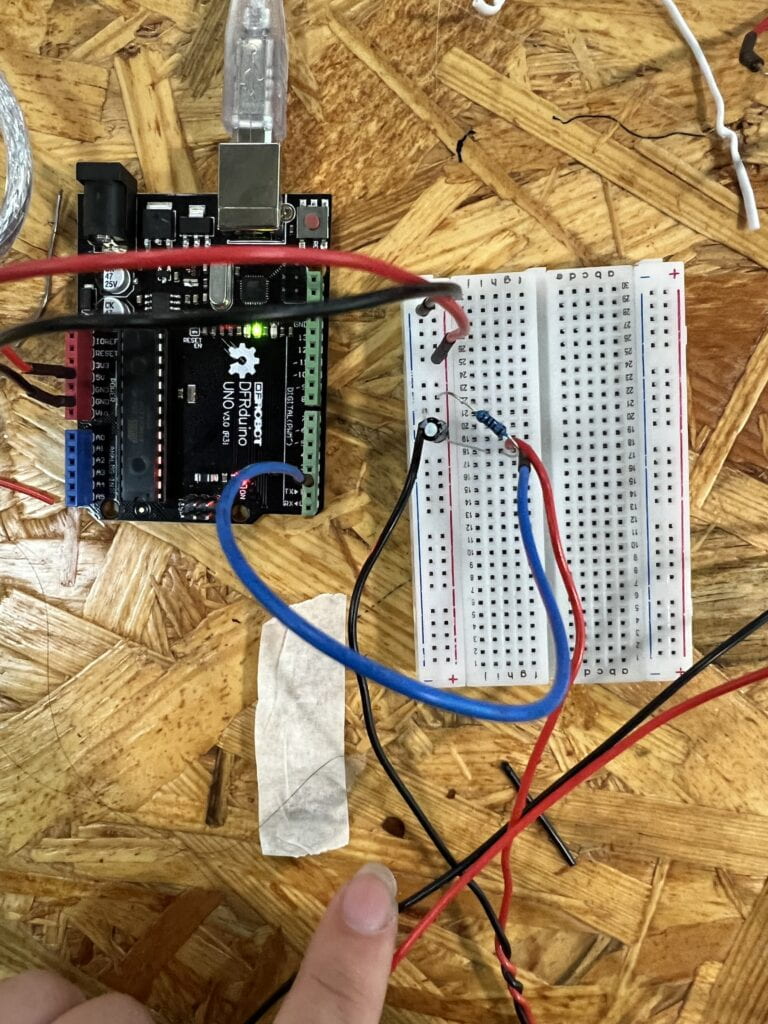
Originally connected the switch directly to power, but it should be connected through the resistor and then capacitor.
Task #3: Program your Arduino with the following sketch. Confirm that you get an input from your tilt sensor on the the Serial Monitor to check whether it is working correctly.
int SENSOR_PIN = 2;
int tiltVal;

void setup() {
  pinMode(SENSOR_PIN, INPUT);    // Set sensor pin as an INP
  Serial.begin(9600);
}

void loop() {
  // read the state of the sensor
  tiltVal = digitalRead(SENSOR_PIN);
  Serial.println(tiltVal);
  delay(10);
}
Step 2: Refine the code
Task #1: Upload the following sketch to only print 1 when the tilt sensor changes from 0 to 1, and 0 when from 1 to 0. For example, the code we used before might have printed 0 0 0 0 1 1 1 1 0 0 0 0 1 1 1 as you move the sensor between upright and upside-down, but now your code should print 0 1 0 1.
int SENSOR_PIN = 2;
int tiltVal;
int prevTiltVal;

void setup() {
  pinMode(SENSOR_PIN, INPUT); // Set sensor pin as an INPUT pin
  Serial.begin(9600);
}

void loop() {
  // read the state of the sensor
  tiltVal = digitalRead(SENSOR_PIN);
  // if the tilt sensor value changed, print the new value
  if (tiltVal != prevTiltVal) {
    Serial.println(tiltVal);
    prevTiltVal = tiltVal;
  }
  delay(10);
}
Step 3: Wear the sensor
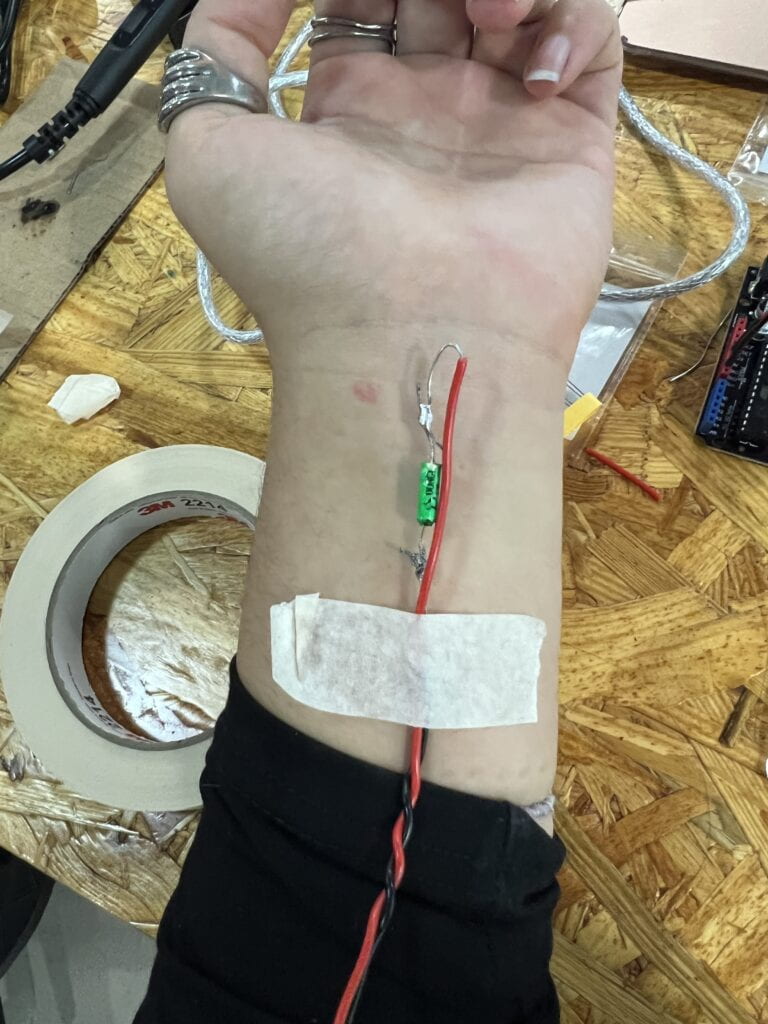
Step 4: Bicep curl workout
Task #1: Add a conditional to your sketch so that it shows a message on the Serial Monitor ONLY when a full biceps curl has been completed. Remember to switch from the Serial Plotter to the Serial Monitor. You can comment existing lines of code with //.
- Identify the proper section in your code where you can add code when transitions happen.
- Add a conditional that has the criteria so that you only detect transitions LOW to HIGH, showing only when the user has raised their arm completely.
int SENSOR_PIN = 2;
int tiltVal;
int prevTiltVal;

void setup() {
  pinMode(SENSOR_PIN, INPUT); // Set sensor pin as an INPUT pin
  Serial.begin(9600);
}

void loop() {
  // read the state of the sensor
  tiltVal = digitalRead(SENSOR_PIN);
  // if the tilt sensor value changed, print the new value
  if (tiltVal != prevTiltVal) {
    if (tiltVal == 1) {
    Serial.println(tiltVal);}
    prevTiltVal = tiltVal;
  }
  delay(10);
}
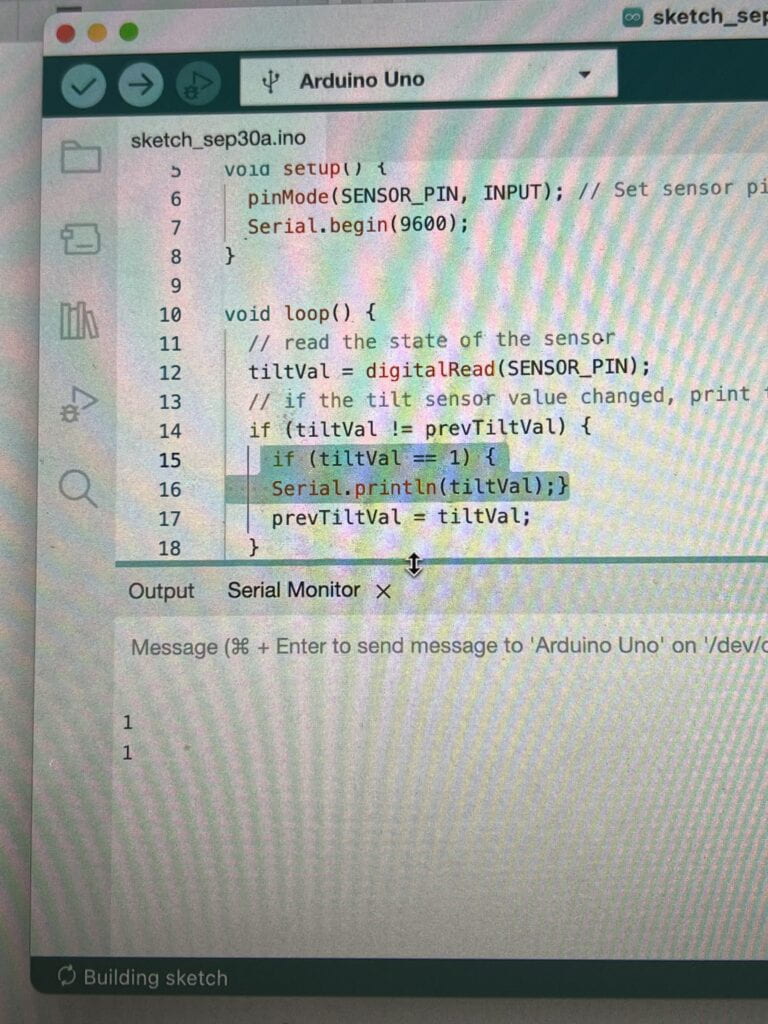
I didn’t know what a conditional was, one of the LAs helped me understand it. A conditional is an “if” statement. I also referenced this resource.
Task #2: Count the curls, adding one to its value every time that the user does a complete bicep curl. You should:
- Declare a global variable.
- Add one to its total every time that a LOW to HIGH transition has happened.
- Modify the Serial.print and Serial.println instructions so that the value of this new variable is shown on the Serial Monitor.
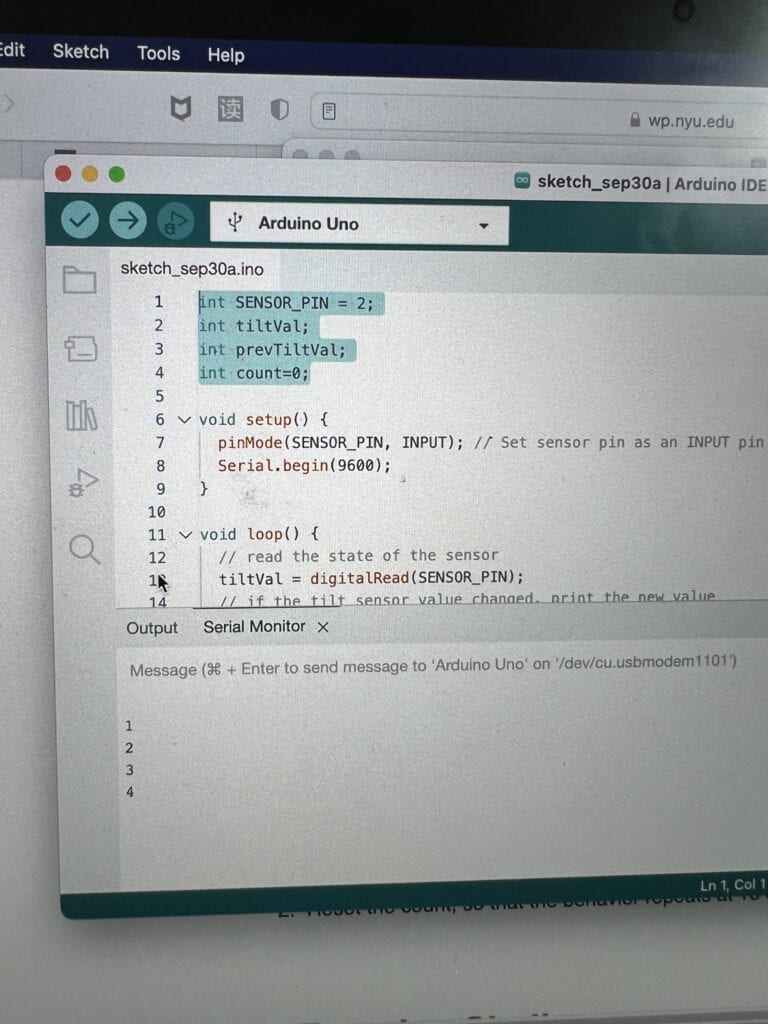
I also wasn’t sure about the global variable. One of the LAs helped me with this too.
Task #3: Set a limit to the variable you are using to count the curls, so that the final code has the following behavior.:
- When the total reaches 8, Print “Yay, you’ve done one set of curls”. Hint: you will need another conditional
- Reset the count, so that the behavior repeats at 16 curls, 24, etc.
int SENSOR_PIN = 2;
int tiltVal;
int prevTiltVal;
int count=0;

void setup() {
  pinMode(SENSOR_PIN, INPUT); // Set sensor pin as an INPUT pin
  Serial.begin(9600);
}

void loop() {
  // read the state of the sensor
  tiltVal = digitalRead(SENSOR_PIN);
  // if the tilt sensor value changed, print the new value
  if (tiltVal != prevTiltVal) {
    if (tiltVal == 1) {
    count=count+1;
    Serial.println(count);
    }
    if (count == 8) {
      Serial.print ("Yay, youve done one set of curls!");
    }
    prevTiltVal = tiltVal;
  }
  delay(10);
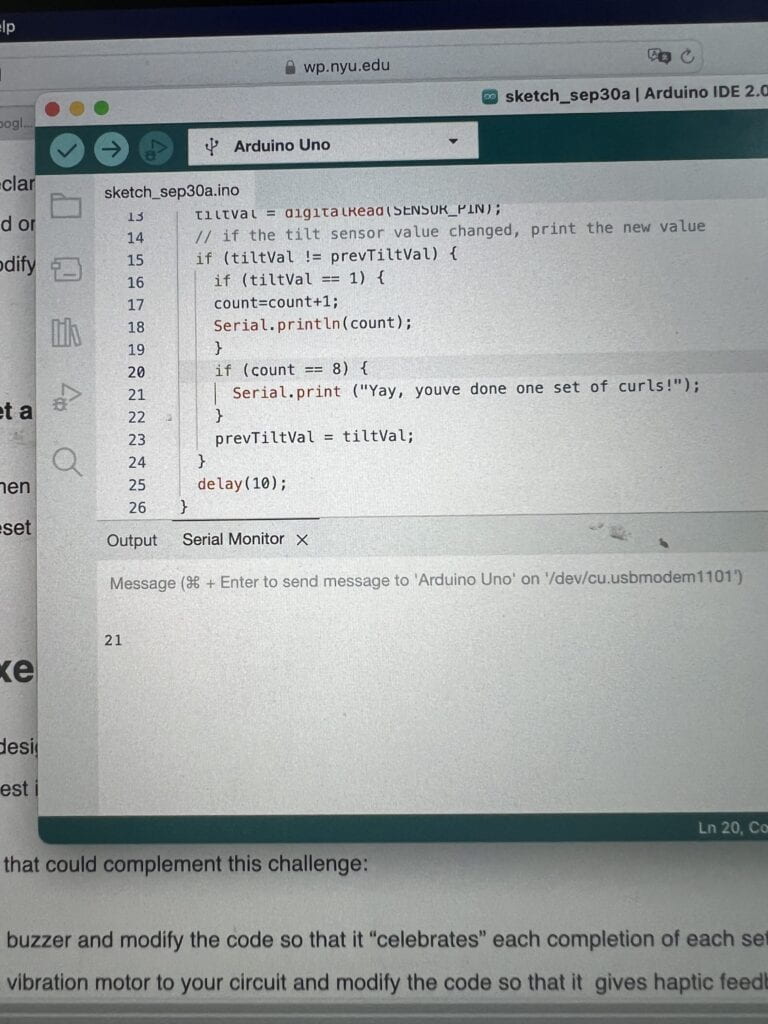
I originally had line 20 as “if tiltval== 8”, but it should be “if count=8.”
Step 5: Exercise challenge
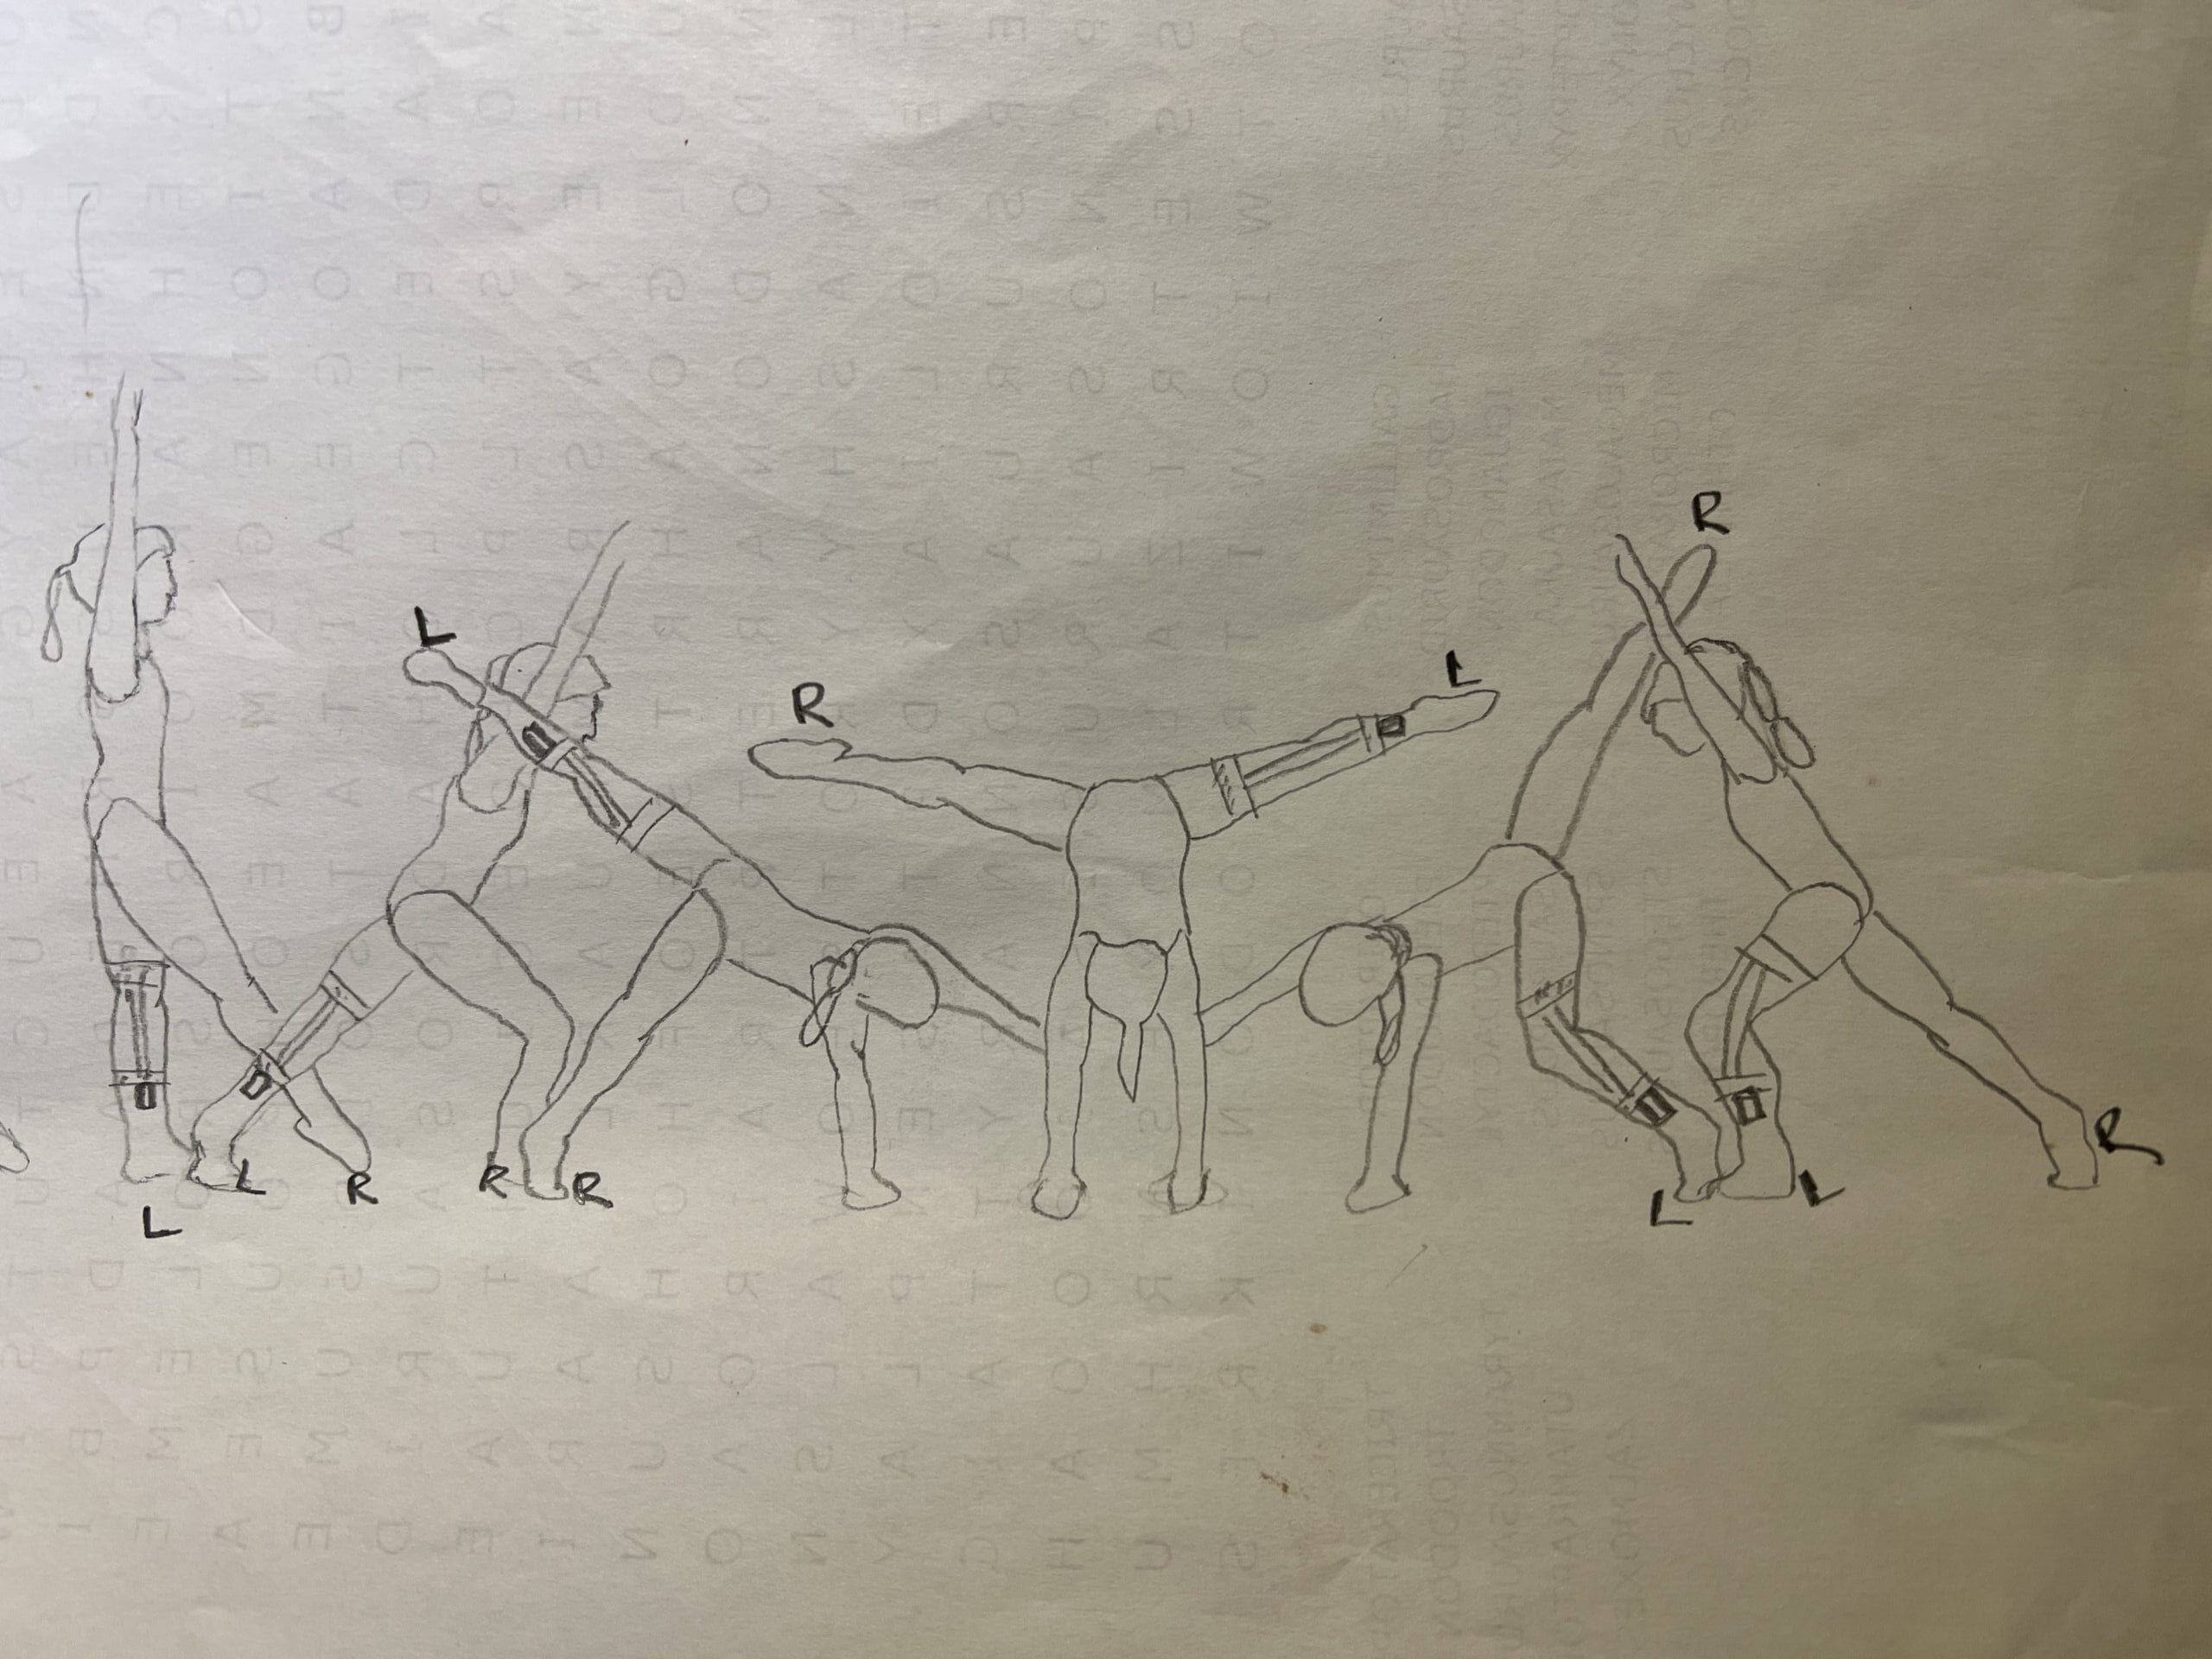
I did not get to this step during recitation, but I’d be curious how the sensor would work if someone were to do a cartwheel. I’m not sure about my theory that the sensor’s tilt angle where it transitions from HIGH to LOW is 180 degrees (vertical angle), and I feel like this movement would be a good way to test that, as a cartwheel involves the body going from a neutral state, to inverted, and back to neutral. You could work with each stage of the cartwheel, ex seeing if the output value changes at the slight angle change from the first to second drawing (standing to lunge), or whether you want to count a full cartwheel. I feel like this is also a good way to use it in a real-world scenario, as this one movement can challenge our design of the sensor, and whether it is accurate enough to deal with the human body’s full range of motion–standing, lunging, flexing, contorting, as well as speed and dynamics.

Documentation
- Record a short video of yourself doing step 4 (bicep curls) and 5 (challenge) while showing the Serial monitor/plotter in action. –>See above videos.
2. Embed your code into your blog as shown with the example codes in this recitation, NOT by taking a screenshot of it. –> See above code.
3. Draw your own illustration sketches that showcase how a person would use this interactive training device.–> see above illustration.
4. Reflect on your experiments, explaining the notes you took, and adding photos, and/or screen shots to document what tests you have tried and what you have learned from them. As a guidance, use the following questions:
-
-
-
-
- At what angle of tilt does it transition between HIGH and LOW?
-
-
- Responding for step 1 and 2: as shown in the video, the number on serial monitor wouldn’t change between 0 and 1 until the sensor reached a vertical (180 degrees) position.
- Responding for step 4: the sensor seemed to be more sensitive (?) when I wore it. It would curiously change values when I was at the top of the bicep curl (fist drawn towards my body, sensor at 180 degrees) and at the bottom of a curl (fist away from my body, sensor lying more or less horizontal on my arm).
-
-
- What else did you notice about its behavior?
- Sometimes the sensor didn’t behave exactly how I wanted it to or expected it to. Like what I mentioned above, for example it might count up before I was done with a full arm movement.
- What if you rotate the limb that has the sensor attached to it?
-
- I’m not sure about this, because based on the above it seems like the sensor counts a value when it goes from (vertical-vertical aka flips over) and (vertical-horizontal). I think if you had it taped horizontally to your arm, and you rotated it inwards so that it goes from horizontal-horizontal (flips over like vertical-vertical), it might also work. I think it’s more likely that the output value will not change though.
-
- What if you shake it?
- The output value would keep fluctuating.
- What if you hold the wires several centimeters away and tilt it?
- Do you think it can be used by any user?
- I think with a little fine-tuning it could be useful for those who like to stay fit and those who want to add more fun and interactivity to staying active.
- At what angle of tilt does it transition between HIGH and LOW?
-
-
-

