Instruction: https://wp.nyu.edu/shanghai-ima-interaction-lab/recitation-8-serial-communication-2/
The recitation asked us to make two design which required commnucation between Arduino and Processing using Serial.
The first project asked us to use two potentiometers’ value to draw picture on Processing. I built the circuit and wrote the Arduino code which can get value of potentiometers and send the value in serial using serialrecord library and tested:
 #include "SerialRecord.h"

SerialRecord writer(2);

void setup() {
  // put your setup code here, to run once:
  Serial.begin(9600);
}

void loop() {
  // put your main code here, to run repeatedly:
  int value1 = analogRead(A0);
  int value2 = analogRead(A1);
  // Serial.println(value1,value2);
  writer[0] = value1;
  writer[1] = value2;
  writer.send();
  delay(20);
}
Then I wrote a Processing code, which would receive value from serial and draw a circle on the screen accordingly. I changed one of the potentiometer to the same type as the other, because I thought that their had equal functions and it was better to keep them the same.
I moved the background() line to setup(), so that the previous circles would leave on the screen and I can draw.
It shows that if I move to fast, the track will become discrete. I read the instruction and found that I need to record the previous value and change the circle to line.
import processing.serial.*;
import osteele.processing.SerialRecord.*;

Serial serialPort;
SerialRecord serialRecord;

float prevx = 0;
float prevy = 0;
float x = 0;
float y = 0;

void setup() {
  size(600, 600);

  String serialPortName = SerialUtils.findArduinoPort();
  serialPort = new Serial(this, serialPortName, 9600);
  serialRecord = new SerialRecord(this, serialPort, 2);
  //int value1 = serialRecord.get(0);
  //int value2 = serialRecord.get(1);
  ////text(str(value1)+str(value2),50,50,50,50);
  //prevy = map(value1, 0, 1024, 0, height);
  //prevx = map(value2, 0, 1024, 0, width);
}

void draw() {
  //background(255);

  int value1 = serialRecord.get(0);
  int value2 = serialRecord.get(1);
  //text(str(value1)+str(value2),50,50,50,50);
  y = map(value1, 0, 1024, 0, height);
  x = map(value2, 0, 1024, 0, width);

  serialRecord.read();
  fill(0);
  line(prevx,prevy,x,y);
  prevx = x;
  prevy = y;
}
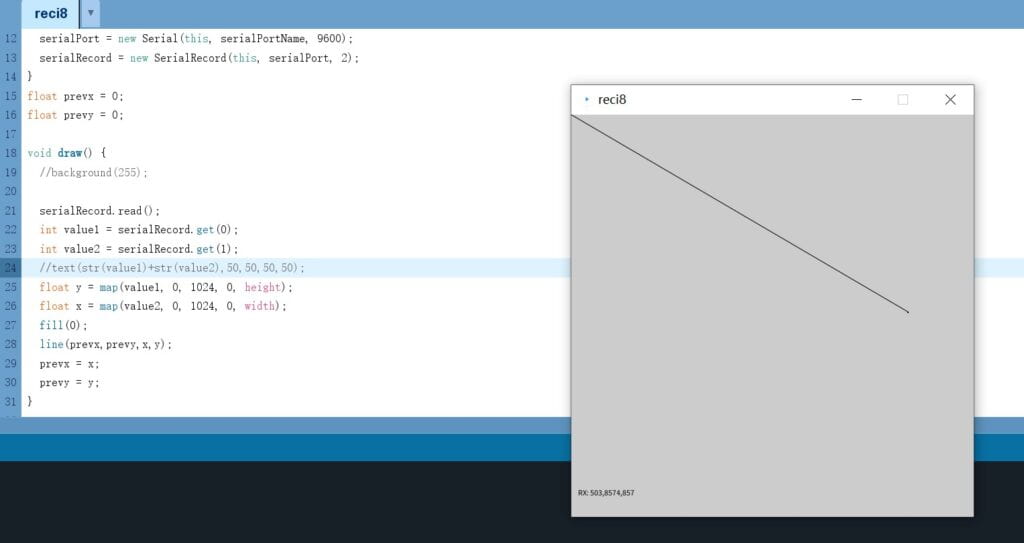
I found a problem which I could not solve. The Processing will firstly draw a long line when setting up, I thought this was because the previous value and current value varied a lot and the program will draw a very long line.

One solution I tried was to initiate the prevalue at the setup(),
  //int value1 = serialRecord.get(0);
  //int value2 = serialRecord.get(1);
  ////text(str(value1)+str(value2),50,50,50,50);
  //prevy = map(value1, 0, 1024, 0, height);
  //prevx = map(value2, 0, 1024, 0, width);
The line still remained on the screen. The codes didn’t work. So I commented them. I thought that I had to do some research on Serial itself especially when Processing is setting up. The back plan I found was to move the potentiometers to the minimum before starting the machine.
The second task asked us to work in pair to make an art effect which looked like the Arduino’s physical servo played with the Processing. I worked with Andy and devided our works. Andy did the processing part and I did the Arduino part together with circuit.
#include "SerialRecord.h"
SerialRecord reader(1);
Servo Andy1;
Servo Andy2;
int d = 1000;
void setup() {
  // put your setup code here, to run once:
  Serial.begin(9600);
  Andy1.attach(9);
  Andy2.attach(10);
}
void loop() {
  // put your main code here, to run repeatedly:
  reader.read();
  // Serial.println(value1,value2);
  if(reader[0]==0){
    Andy1.write(60);
    // delay(d);
    Andy1.write(120);
    // delay(d);
  }else if(reader[0]==1){
    Andy2.write(60);
    // delay(d);
    Andy2.write(120);
    // delay(d);
  }
}
Unfortunately, even though I named the servo instance as “Andy1” and “Andy2”, our code could not work. The servos cannot response to the signal sent from processing. We asked an LA and she told us another code. We found that there’re two codes for communication, one uses serialread library, the other does not. Since the class was near the end. We ended up there.
After class, Andy went on the process and sent me a video. He changed my code and it worked.
Here are his codes:
#include
Servo myservo1;
Servo myservo0;
int pos = 0;

void setup() {
  Serial.begin(9600);
  myservo0.attach(9);
  myservo1.attach(10);
}

void loop() {
  if (Serial.available() > 0) {
    char in = Serial.read();
    if (in == 'L') {
      myservo0.write(120);
      myservo1.write(120);
    }
    if (in == 'R') {
      myservo1.write(60);
      myservo0.write(180);
    }
  }
}
processing:
import processing.serial.*;
Serial serialPort;

float x = 200;
float speedX = 21;

void setup()
{
  fullScreen();
  serialPort = new Serial(this, "COM8", 9600);
}

void draw() {
  background(0);
  x = x + speedX;
  if (x >= width-100) {
    serialPort.write('L');
    speedX = speedX * -1;
  }
  if (x <= 100) {
    serialPort.write('R');
    speedX = speedX * -1;
  }
  ellipse(x, height/2, 200, 200);
}
Leave a Reply