Instruction : https://wp.nyu.edu/shanghai-ima-interaction-lab/recitation-7-neopixel-music-visualizer/
I built the circuit just as what we did in the lecture and My led could not blink after the sample code uploaded. I asked an LA and it worked.
Then I downloaded the SerialRecord liberary and the Arduino Sample code. After reading the code and the instruction, I understood that the board will receive four parameters from the Serial and change the LED’s state accordingly. So I can change the LED if I input the data correctly in Serial.
Then I downloaded the SerialRecorder library in the processing and the sample code. It will detects the position of mouse and changed the color of LEDs accordingly. It informed the way to use codeto control the LED.
Then I downloaded the third sample code which analyzed the volume of a piece of music. The circle’s diameter will change according to the volume of music and change the colors ramdomly. SO I added the code from the second code and uploaded to the Arduino. (forgot to record the video)
Each time only one LED would change, so I wanted to make it clearer. I designed that the numbers of consecutive shining LEDs from 0 to n would change according to the amplitude of the music. I found that the state of an LED will remain the same if there is no new message targeting this LED sended from the Serial. If I wanted to change all the LEDs from 0 to the place I want, I had to send messages to all the LEDs in each round.
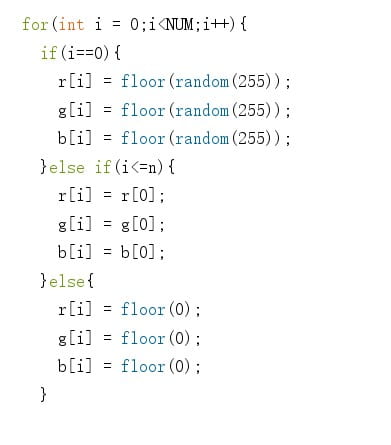
My first design was change all the to-shine LED in random color and mute the LED out of range, using for-loop. The first problem I found was that the LEDs took some time to shine up respectively, which was the problem I was solving all through my fabrication. The second problem was that it didn’t have good art effect. So I changed the code and it would generate the color only once in each round. It could unify the effect and I hoped it could save the time for generating random colors. 
I also made the rectangles on the screen larger and removed the circle. The final effect looked like this:
We can see that there is still vary long delay so it can hardly reflect the music. I don’t know how to solve it, but it reminds me that if I want to do project concerning sound visualization, I have to put the delay in consideration and do some research on it.
import processing.sound.*;
import processing.serial.*;
import osteele.processing.SerialRecord.*;
SoundFile sample;
Amplitude analysis;

Serial serialPort;
SerialRecord serialRecord;

int W;         //width of the tiles
int NUM = 60;  //amount of pixels
int[] r = new int[NUM]; //red of each tile
int[] g = new int[NUM]; //red of each tile
int[] b = new int[NUM]; //red of each tile

void setup() {
  size(900, 600);

  // load and play a sound file in a loop
  sample = new SoundFile(this, "bgm.mp3");
  sample.loop();

  // create the Amplitude analysis object
  analysis = new Amplitude(this);
  // analyze the playing sound file
  analysis.input(sample);
  W = width/NUM;
  String serialPortName = SerialUtils.findArduinoPort();
  serialPort = new Serial(this, serialPortName, 9600);
  serialRecord = new SerialRecord(this, serialPort, 4);
  serialRecord.logToCanvas(false);
  rectMode(CENTER);
}

void draw() {
 long t = millis()%3000;
 if (t < 1500) { background(155); } else if ((t>=1500) && t<3000) {
   background(255);
 } else {
   background(55);
 }
  println(analysis.analyze());
  noStroke();
  fill(255, 0, 150);

  // analyze the audio for its volume level
  float volume = analysis.analyze();

  // volume is a number between 0.0 and 1.0
  // map the volume value to a useful scale
  float diameter = map(volume, 0, 1, 0, width);
  // draw a circle based on the microphone amplitude (volume)
//  circle(width/2, height/2, diameter);

  for (int i=0; i<NUM; i ++) {
    fill(r[i], g[i], b[i]);
    rect(i * W + W/2, height/2, 20, 40);
  }
    int n = floor(constrain(diameter/W , 0, NUM-1));

    for(int i = 0;i<NUM;i++){
      if(i==0){
        r[i] = floor(random(255));
        g[i] = floor(random(255));
        b[i] = floor(random(255));
      }else if(i<=n){
        r[i] = r[0];
        g[i] = g[0];
        b[i] = b[0];
      }else{
        r[i] = floor(0);
        g[i] = floor(0);
        b[i] = floor(0);
      }

      serialRecord.values[0] = i;     // which pixel we change (0-59)
      serialRecord.values[1] = r[i];  // how much red (0-255)
      serialRecord.values[2] = g[i];  // how much green (0-255)
      serialRecord.values[3] = b[i];  // how much blue (0-255)
      serialRecord.send();            // send it!
    }

}
Leave a Reply