Instruction:https://wp.nyu.edu/shanghai-ima-interaction-lab/recitation-2-arduino-basics-2/
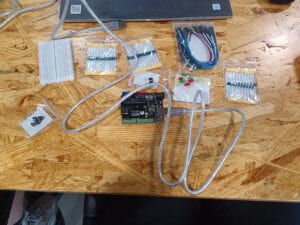
Task0: Preparation:
Task1: Fading:
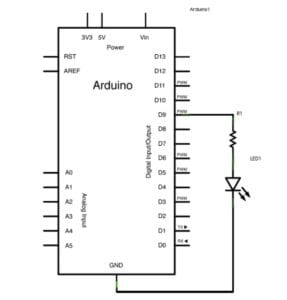
The task is not difficult. I built the circuit and find code in the example. The code uses an iterator of a for loop to control the illuminance of the LED.

Task2: toneMelody

The task is to create a circuit which can play a piece of melody. It is not difficult. Following the instructions, I built the circuit and upload the code I found in the example. I moved the code in the setup() to the loop(), so it can play the music again and again.
Task3: Speed Game
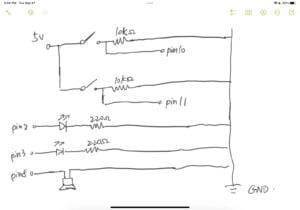
The last task asked us to create a game using arduino which two players compete on who can click the button faster. The circuit looks complex, so my teemmates Andy and I divided the circuit into two similar parts. We used Andy’s Arduino to build the circuit so we wouldn’t run into mess when we collect the components.
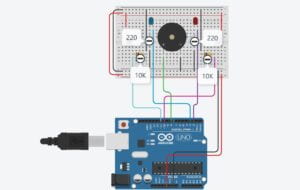
We followed the instruction very carefully and paid very attention to the positive and negetive connection. Luckily, Our first build works correctly.
After reading the code, we realized that the correct game flow is waiting for the serial manager print start and we start to click the button. Later, we change the winning detector from “10” to “1”, so the game was to compete who can respond more quickly when the serial manager signals.
Question1: I would like to connect the button to a disk. The button will be pressed each time the disk rotate a turn. In Tom Igoe’s book Physical Computing, he shows a mismatching of human body and how electronic devices, like computer, recognize human, “…their perspective is as alien to ours as this poor creature’s. It can’t walk, dance, or jump; it can’t sing or scream. It can’t make grand sweeping gestures. And it has only one direction in which to look.” (xix) I want to improve the interactivity of this little game by allowing more parts of human body to engage in the activity. With the help of a disk, the button can be placed on a running machine, skipping rope, bicycle, etc. Players can compete other ability rather than merely the speed of pressing the button.
Question2: From Arduino’s documentation, I find clue to answer why we have to connect a 10k resistor in the circuit, “If you disconnect the digital I/O pin from everything, the LED may blink erratically. This is because the input is “floating” – that is, it will randomly return either HIGH or LOW. That’s why you need a pull-up or pull-down resistor in the circuit.” (https://docs.arduino.cc/built-in-examples/digital/Button) We need a high ohm resistor to keep the voltage approximately to 0 ohm. Otherwise the digital signal is not stable.
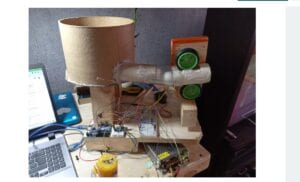
Question3: Ping Pong Robot, by hbolanos2001. (https://create.arduino.cc/projecthub/hbolanos2001/ping-pong-robot-v1-diy-009b15?ref=platform&ref_id=424_trending___&offset=13) He used cardboard and arduino electronic devices to create a machine that can automatically shot ping pong balls. He aligns to the Arduino Way because he used meterials close to our life, using cardboard to create the frame of the machine. I chose it because I built a similar machine using lego bricks before.
Leave a Reply