Task1 build circuits
instructions:https://wp.nyu.edu/shanghai-ima-interaction-lab/recitation-1-electronics-soldering-3/
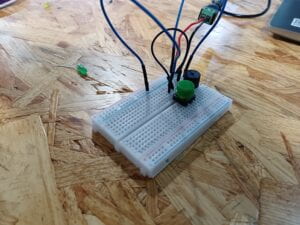
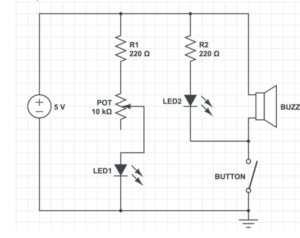
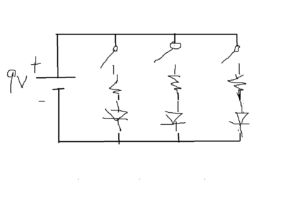
the first step is to build some circuits according to the diagrams.
the breadboard seems too small, so we did the steps alternately. My peers Andy did steps 1,3, and I did step 2.
step1 went smoothly. The only difficult part is that we forgot the direction of the switch. When Andy set the switch to the board, the buzzer buzzed immediately. Then we changed the direction, together with accorded wires’ positions because the switch is 3 by 4 large.

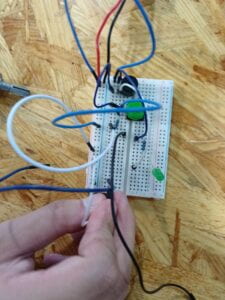
I did step 2. One thing I spent some time doing is checking the direction of the current. LED can only light up when the long leg is connected to the positive side and the short leg is connected to the negative side. Since the diagrams are very similar and what I need to do is to add another flow to Andy’s work, I first had to figure out how he had connected each part. This reminds me that we can use specific colors of wire to connect different parts, which may constitute a pattern convenient for later improvement on the circuit. For example, we may use black wires to represent lower potential and red wires to represent higher potential.
Another problem I met is that I got a broken LED (again). We came up with two possible causes: the LED is broken or we failed to connect the LED with the breadboard. To exclude the latter reason, we disconnected the wires that will connect the LED from the board and attached them to the LED directly. The LED didn’t work, which showed that the problem wasn’t caused by the breadboard. We changed another LED and the circuit functioned.
The last step is to add a variable resistor to the circuit. We found that the middle leg is for the controller and everything became the same.
mechanism:

The button controls the Buzz and LED2 at the same time. With the button pressed, the buzz will ring and LED2 will light.
The POT controls the current of the branch and the voltage between LED1, which will affect the luminance of LED1.
R1 and R2 functions to protect the LEDs, so the LEDs become more durable.
Task2: soldering
I don’t have soldering experience before, and Andy performed much better than I did.
First, we turned on the heater so that the soldering head could be hot enough when we use it.
Second, we used tape to fix the wire and metal piece on the board. One thing worth attention to is that we need to bend the wire so that when we pull the wire, the force will be distorted, and increase the durability of the switch.
Third, we started to solder the metal. I attached some tin to the soldering head and rubbed the head. It looked shiny. Next, I should have heated the wire, which I forgot, otherwise the tin would solidify very fast and the tin string stuck to the wire later. Then I put the soldering head, the wire, and the tin together and pushed the tin. The soldering was done.
Task 3
Andy and I attached our board together to make a switch and replaced the switch on the breadboard with it. We didn’t practice much on the Mose message since it was too noisy.
Answers
Q1: the resister R1 functions as a protection to the LED, so there won’t be too much current going through the LED.
Q2:
Q3: I think the interactivity included in our circuits is that the LED and the buzzer will react when we press the switch. By hearing the sound, we can press it orderly to constitute a message. The combination of the two reactions forms interactivity. I think the interactivity is at a low degree because of these reasons: 1) It mostly includes sound and touch, while the other senses take small roles in it. 2)It’s hard to say that the circuit is thinking 3) the simple form of output limits its creativity of interactivity.
Q4: It’s hard to define art. So how to use technology and the physical environment to create an artistic experience is what I looking for in IMA major. Lieberman’s project inspires me that a way to create art is to make emotions. He mentions the “open mouth phenomenon” and the eye writer helped the paralyzed artist take a breath. The cold machine and robust coding finally evoke humans’ warmest emotional reactions. These projects also expend humans’ creativity in designed ways.
Leave a Reply